Email Investigations and Holds
Once you are done on-boarding the eDiscovery portal, you will be able to access all the features that the portal provides to manage your organization's data. Additionally, you can now also customize the portal settings apart from enabling/disabling users and creating new retention policies.
Investigation
An Investigation or a case is a legal probe against certain email communications or documents. When there is a legal case or a probe or an investigation pertaining to email communication, the organization needs to retain all the related emails until that investigation is completed/ closed. Zoho Mail groups the Investigations under three categories:
- Open - Investigations in progress
- Closed - Completed investigations
- Trashed - Investigations deleted by the admins

The eDiscovery administrator creates a new Investigation to manage the entire investigation cycle. Sometimes the Investigation can be required for the purpose of internal investigation also.
Create Investigation in Zoho Mail
Follow the below instructions to create a new email investigation:
- Log in to Zoho Mail Admin Console and select eDiscovery on the left pane.
- Navigate to the Investigations section to view or create investigations.
- Click the Create Investigation button.

- Provide the Investigation name and a detailed description.
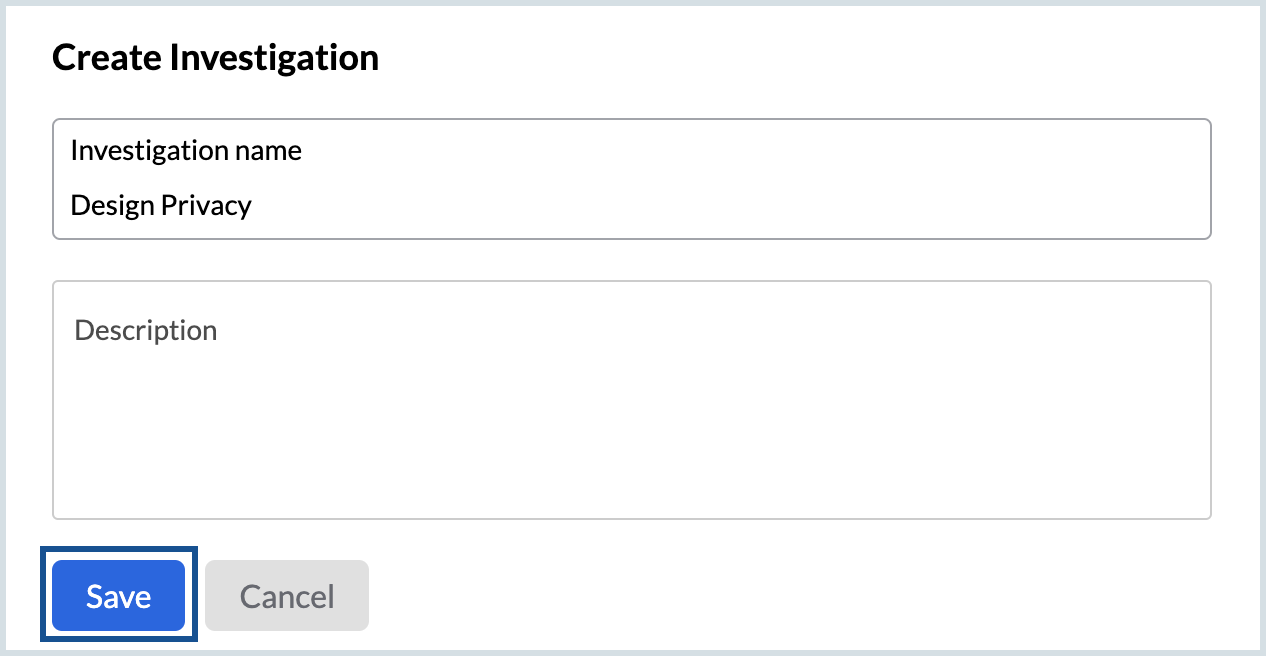
- Click Save. The investigation gets created.


You can now do the following actions in the Investigation you created:
- Search - Search archived emails based on specific criteria. You can save any number of searches to create Holds or export emails.
- Hold - Create one or more holds based on different conditions, as required for the investigation. The emails that are placed on Hold via investigations will not be deleted even after the expiry of the retention period defined by default or custom retention policy.
- Export - Use this tab to export the emails which fall under a saved search or a hold.
- Tags - Create tags to group emails based on the requirements of the investigation.
- Audit logs - The activities performed by admins in a particular investigation can be viewed under the Audit logs tab of that investigation.
Searches
Administrators can create multiple searches based on different conditions. It allows admins to reuse the same set of conditions and create Holds as per their requirements. Follow the best practices to search an email in eDiscovery as given below:
Best practices for email investigations
- Before you create a Hold, list down the criteria required for the particular investigation.
- Based on the various criteria, create different search conditions.
- If required, share the saved search and In case you need to get this reviewed by legal or compliance or admin teams, you can get it reviewed before you create a Hold.
To create a search, follow these steps:
- Log in to Zoho Mail Admin Console and select eDiscovery on the left pane.
- Navigate to the Investigations section and create a new investigation or select an existing one.
- From the Searches tab, choose Mail in the All Services drop-down and click New Search.

- Make sure that Mail is selected in the Service name drop-down.
- Enter a name for the search in the Saved search name field.
- Select the desired account type:
- All accounts - All user accounts and shared mailboxes will be included.
- Specific user accounts - Admins can search for emails in one or more user mailboxes by entering their addresses in the User mailboxes field.
- Specific shared mailboxes - Admins can perform a search in a specific shared mailbox alone by entering its address in the Shared mailboxes field.
- Select the start and end dates for the search or choose a preset range from the drop-down.
- If you have any Tags created, select the appropriate tag for this search.
In the Condition query field, select the conditions with which you'd like to perform the search and enter the search key respective to the condition.
Note:
You can perform a search with multiple conditions, in which case the results returned will match all of the conditions that you have set for the search. In other words, an AND search will be performed. Refer to the tips to search section for more details.
- If required, select Include spam emails and Only deleted emails checkboxes.
- You can either Preview results or click Save search.


Tips to search archived email
- If you choose the To condition and enter the search key times.com, then choose the Cc condition and enter the search key technews.com, and finally pick the Has attachment condition, the results returned will be emails that have attachments and have been sent to times.com, Cc'd to technews.com. The emails that match all three of the entered conditions will be returned as results of this search.
- To search for an exact phrase, enter the search key in double-quotes. For example, if you choose the condition Contains and enter the search key as "media information", only the emails that contain the exact words 'media information', in that exact sequence will be returned as results. In case there are emails with the words 'information media', those will not be returned as results.
- If you want to search for emails that have words beginning with specific terms, add an * (asterisk) to the end of those terms. For example, if you want to search for emails that contain words beginning with the term gat, choose the parameter and enter the search key as gat*.
Administrators can Export the data matching the search criteria by clicking the Export search results button. On clicking the button, the action will be triggered and gets listed under the Exports tab along with its current status. Once the status shows completed, you can download the file in ZIP or PST format. To know more about the actions, refer to Exports.
Holds
A Hold retains the email that is required for the investigation, based on a specific set of conditions. Once a Hold is created, the emails that are part of the Hold will be retained until the Hold exists. The steps to create a Hold are as follows:
- Log in to Zoho Mail Admin Console and select eDiscovery on the left pane.
- Select Investigations and open to the desired investigation for which you wish to create a Hold.
- From the Holds tab, choose Mail in the All Services drop-down and click New Hold.

- Make sure that Mail is selected in the Service name drop-down.
- Specify the Hold name and choose the appropriate options for the hold.
- All accounts / Specific user accounts / Specific shared mailboxes
- Include spam emails, Only deleted emails
- Select the start and end dates or choose a preset range from the drop-down.
- Add tags if required
- Select one or more condition queries
- Select Include spam emails and Only deleted emails checkboxes
- Click Preview results or Save hold.


Administrators can Export the data matching the hold criteria by clicking Export hold results. On clicking the button, the action will be triggered and gets listed under the Exports tab along with its current status. Once the status shows completed, you can download the file in ZIP or PST format. To know more about the actions, refer to Exports.
View / Download an email (EML format)
You can view or download emails either from a saved search or from a Hold. To view or download the content of the emails, follow the below steps:
- Log in to Zoho Mail Admin Console and select eDiscovery on the left pane.
- Navigate to a saved search or a hold.
- From the Searches tab, provide the Conditional query to filter the emails and click on Preview results to view all the emails that match the query.
- Select the email you want to view from the list.
Download an email in EML format
- Click Show Original in the top right corner to view the original message.

- Options to Download full Content or Copy to clipboard / Show full content are available on top of the message.
- Click on Download full Content to export an email in .eml format.


Exports
The results of a Hold or a Save Search can be exported by the administrator, whenever required. These exports will be listed under the Exports tab with their current status. To quickly export a saved search or hold, navigate to the corresponding tab, hover over the search/hold and click the export icon. Provide a name and password for the export, select the export file type and click Ok. The export gets scheduled.
To create a new export, follow these steps:
- Log in to Zoho Mail Admin Console and select eDiscovery on the left pane.
- Navigate to Investigations and open an existing investigation.
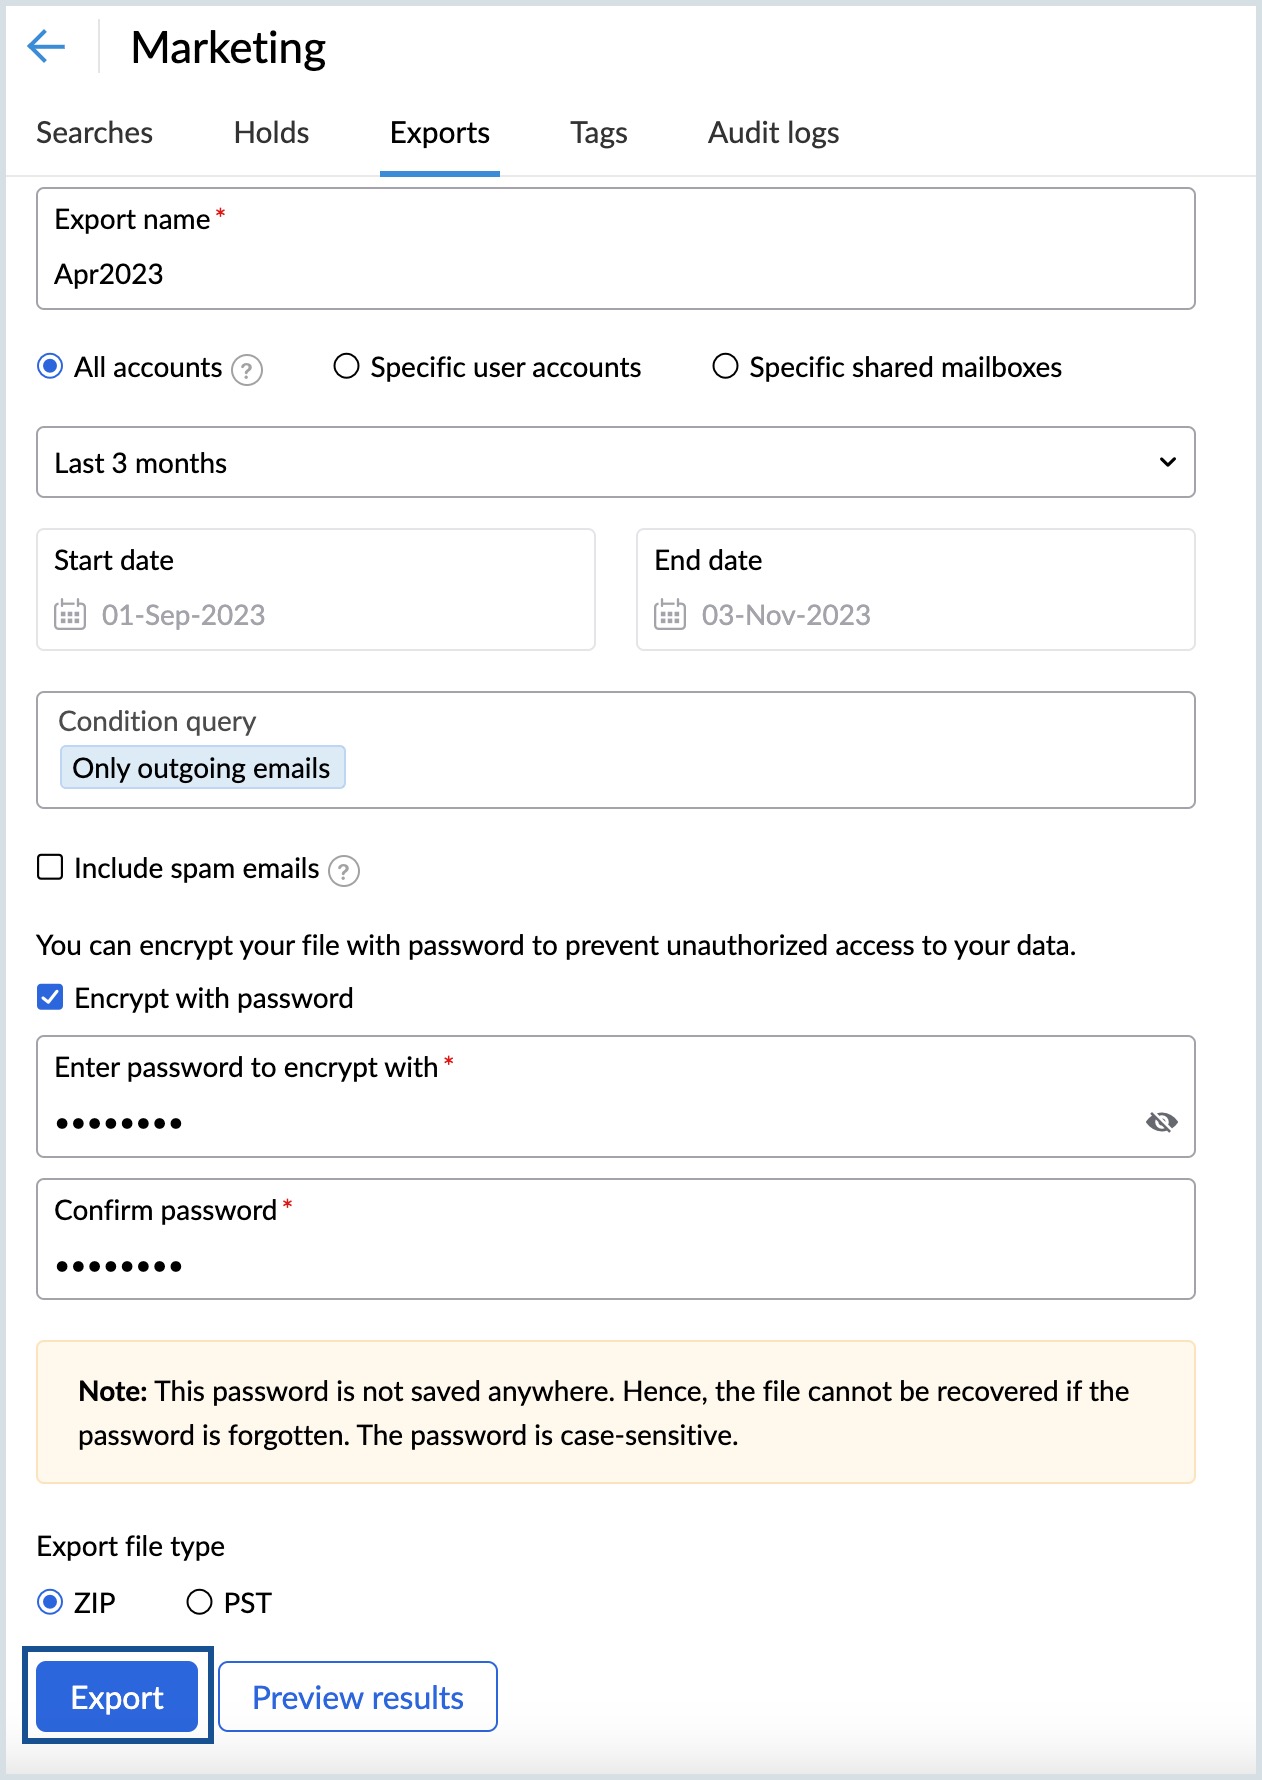
- Select the Exports tab, choose Mail in the All Services drop-down and click New Export.

- Make sure that Mail is selected in the Service name drop-down.
- Enter a name for the export and select the desired account type:
- All accounts - All user accounts and shared mailboxes will be exported.
- Specific user accounts - Admins can export one or more user mailboxes by adding the users in the User mailboxes field.
- Specific shared mailboxes - Admins can export a particular shared mailbox by adding its address in the Shared mailboxes field.
- Choose a preset range from the drop-down or select Custom range.
- Select the start and end dates for the export if you chose custom range.
- Add one or more Condition queries as per your requirement.
- If required, select the Include spam emails checkbox.
- Encrypt with password to prevent unauthorized access to your data.
- Select ZIP or PST and click Export.
- Click Ok in the confirmation dialog that appears.
- Click the export to see a preview of the export details.


The export process may take some time depending on the file size. The export will be cleaned up once in 90 days, hence download the export once the status shows completed.
Tags
In a specific investigation, you can choose to tag emails from the search preview or the hold preview. To create a tag and apply it to an email, follow the instructions below:
- Log in to Zoho Mail Admin Console and select eDiscovery on the left pane.
- Navigate to the Investigations section, and select the relevant investigation.
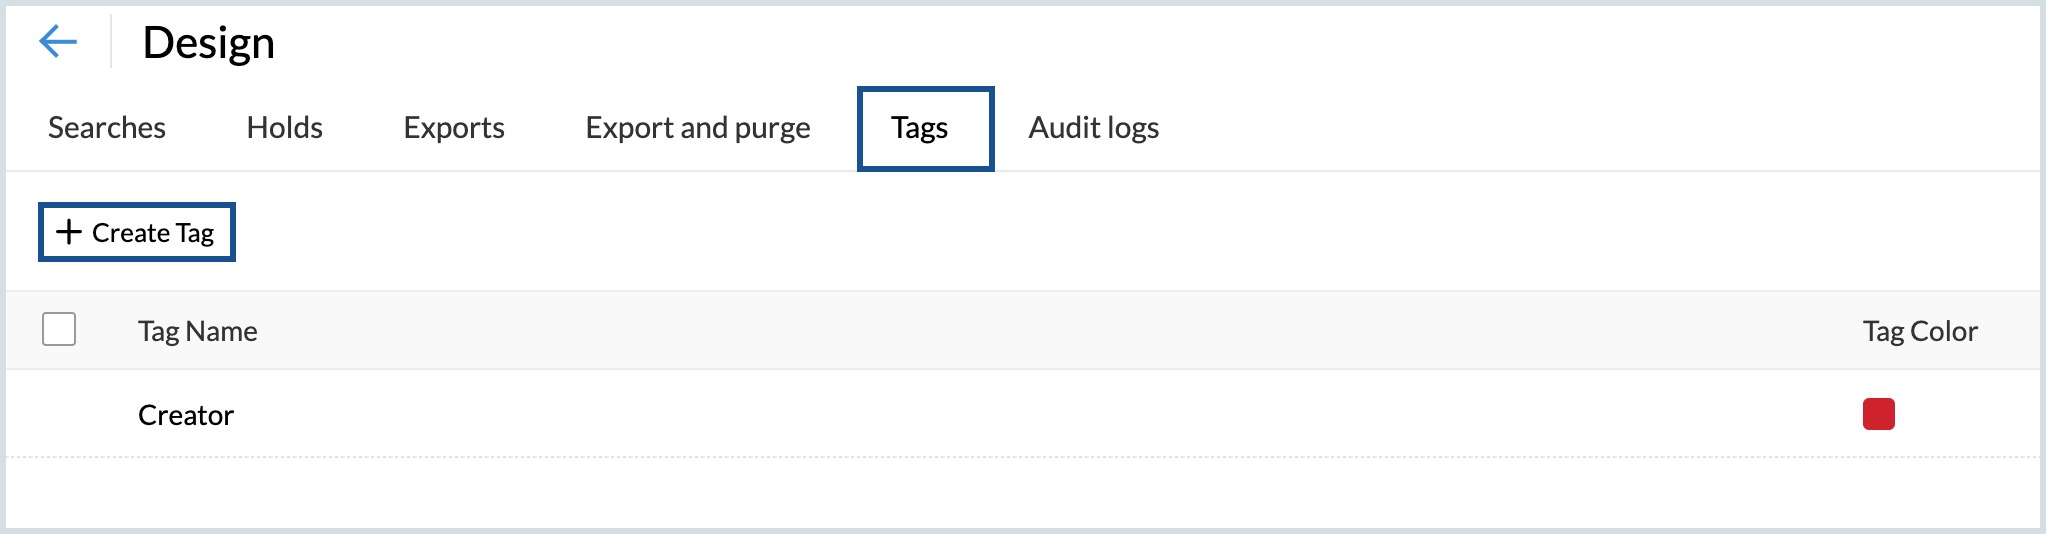
- Select the Tags tab.
- Click Create Tag, enter a tag name, pick a color, and click Save.
- Alternatively, select a saved search or a hold from the Searches or Holds tab.
- Click the Preview Results option.
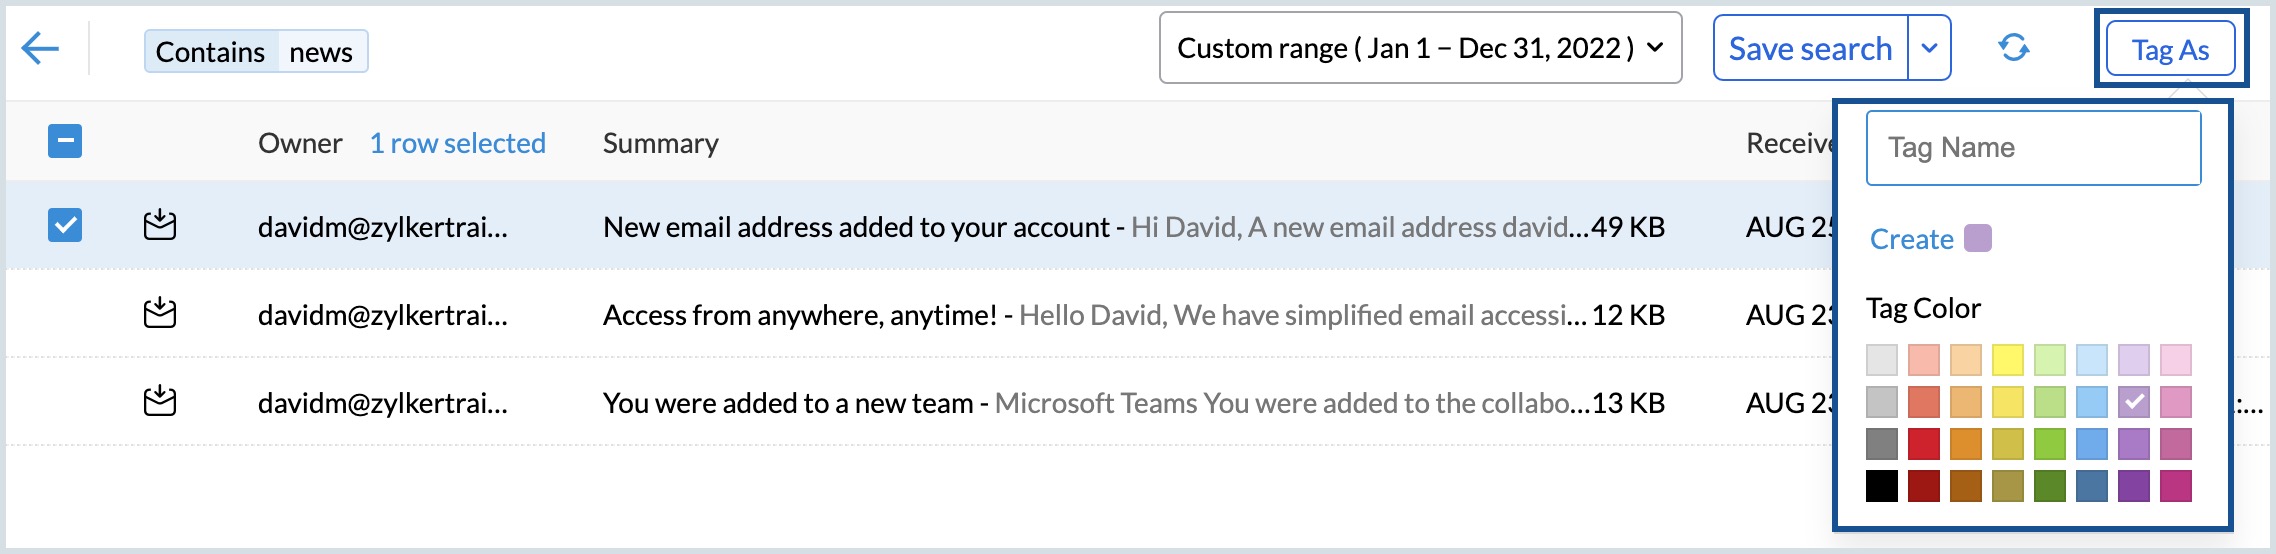
- Select the checkboxes across the emails that you want to tag.
- Select the Tag As option and choose the relevant tag.
- These tagged emails can also be viewed from the Tags section. Click on a particular tag and all the emails associated with that tag will be listed.


Audit logs for an investigation
Once you have created an investigation, you can also view all the related activity in the Audit logs tab, inside that particular investigation.
Steps to view the audit logs related to a particular investigation
- Log in to Zoho Mail Admin Console and select eDiscovery on the left pane.
- Select Investigations and open the relevant investigation.
- Navigate to the Audit logs tab.
- Select Mail in the Service name section.
- Enter the start and end dates.
- If required, choose the user accounts for whom you would like to view the activity.
- Select the checkboxes across the actions that you would like to retain. You can choose to narrow down your search by unchecking the irrelevant checkboxes.
- Select all actions
- Investigations
- Saved search
- Holds
- Exports
- Search
- Tags
- Audits
- Select the Preview audit option to view the activity or click the Download audit option to save the activity to your machine.


Note:
The audit logs shown here are limited to activities related to the selected investigation. To view or download logs for all eDiscovery activities, use the Audit Logs section available separately.