Setting up eDiscovery and Retention
Organizations which use emails as their primary mode of communication for their business should be cautious about accidental data loss and regulatory compliance laws. Zoho Mail's eDiscovery portal allows admins to retain emails and recover them at any point in time.
Note:
eDiscovery will be available only for organizations that are part of the Zoho WorkPlace Professional and Mail Premium plans. For details reach out to support@zohomail.com.
Understanding storage and archival
Zoho Mail uses two distinct storage systems for emails:
User mailbox storage: This contains all active emails across Inbox, Sent Items, and custom folders. Emails remain here until the user deletes them, and they count toward mailbox storage limits.
Archive storage: When users delete emails from their mailbox, these emails move to archive storage rather than being permanently removed. Archived emails are then subject to the organization's retention policy, which determines how long they're kept before permanent deletion.
eDiscovery storage capacity is calculated based on archived emails specifically. However, when you perform an eDiscovery search, it retrieves results from both active mailboxes and archived emails, giving you complete visibility across all stored email data.
Steps to enable eDiscovery
Follow the below instructions to setup eDiscovery for your organization:
- Log in to your Admin account at https://ediscovery.zoho.com.
- Alternatively, you can log in to Zoho Mail Admin Console and select eDiscovery on the left pane. The eDiscovery portal welcomes you with a small intro to email retention and eDiscovery.

- Enable eDiscovery for Mail, Cliq and WorkDrive and click Next. A pop-up message confirms that you have successfully enabled eDiscovery for your organization.


Defining retention policy
Almost every governmental regulation requires "records" to be captured, managed, retained for specific periods of time, and made available to the governmental agency when asked. These records can include hard copy content, email, voicemail, instant messages, and social media.
The considerations for establishing and maintaining your organization’s retention policy remain the same; they are: business needs, legal requirements, organizational culture, approaches to retention policies, litigation holds, automation, and implementation.
These retention policies extends to Mail, Cliq, and WorkDrive based on your organization's subscription. Explore the details below:
- Default retention policy for Mail
- Default retention policy for Cliq
- Default retention policy for WorkDrive
Note:
The data that is older than the mentioned retention period, in Mail, Cliq, and WorkDrive, will be removed as per their respective cleanup policy. However, data that are on Hold, or Investigation will be retained even after the expiration of retention period. It will be removed only after the corresponding Hold/Investigation is closed.
Default retention policy for Mail
The retention policy for Mail determines the period for which the emails of all users in the organization would be retained. When you configure the retention period, it applies from the date the email was first received in the user's mailbox. You can configure this when enabling eDiscovery. The policy can be set for your organization by your Administrator while enabling eDiscovery. You can either define a specific number of days as the retention period or choose ‘Retain forever’, based on your requirements.
Note:
- Emails in archive storage are subjected to the retention policy.
- By default, the retention period is 365 days.
- The retention period cannot exceed 10,000 days.
How retention works in Mail?
Emails remain available in the user mailbox until they are deleted by the user. Once removed from the mailbox, the email is retained for the remainder of the configured retention period, calculated from the date the email was originally received.
For example, if an email remains in a user’s mailbox for three years and the configured retention period is seven years, the email is retained for an additional four years after deletion. After the retention period expires, the email is permanently removed.
Default retention policy for Cliq
Retention policies for Cliq determine how long data like files, messages in DMs, personal, team, org, external channels, and group chats are retained in eDiscovery. Data that is older than the default retention period will be removed permanently as per the cleanup policy.
You can choose the retention period in days, or select Retain forever.
Note:
- The retention period cannot exceed 10,000 days.
- Data will be deleted seven days after the retention date expires.
Default retention policy for WorkDrive
Data Retention Policy allows you to retain files and folders for up to a certain period (such as 30 days), then automatically delete them afterwards. With the default retention policies in WorkDrive, you can define the period for which your organization's files and folders needs to be retained in eDiscovery portal by default.
Note:
- The retention range for WorkDrive is set between 7 to 2500 days.
- The retained data will be permanently removed once the retention period expires.
Steps to define a retention policy
- Once you enable eDiscovery, the next step is to choose the Default retention period. The default retention policy determines the period for which the users' data would be retained.
- Select the retention period for Mail, Cliq and WorkDrive based on your organization's requirements. You can either define a specific number of days or choose Retain forever.
- Click Next.

Note:
Default Retention Period for Mail and Cliq can be overwritten by Custom Retention Policies which allow for certain data of specific users or a certain type of data to be retained for a different retention period for a specific need. Refer Customizing retention policy for more details.
Selecting user accounts
Once you define the retention period, you must select the users for whom email retention should begin.
Steps to enable user accounts for eDiscovery

- Enter a user's name in the search bar to select specific users to enable retention.
- Alternatively, select the checkbox on the header and click on Select all users to enable retention for all the user accounts.
- Click the Retention drop-down.
- Select Enable retention and click Finish.
Once you enable retention, deleted emails from these user accounts will be moved to archive storage and retained based on the defined retention period. The sync to the eDiscovery portal may take a while, after which you will be able to search, view, and export emails.
Customizing retention policy
Based on your organization's requirements, you can configure different retention policies for emails and chat conversations. By clicking on the Retention tab, admins can view the set default retention policy and the list of custom retention policies. Organizations that are part of the Zoho Workplace plan will be able to configure separate retention policies for Mail and Cliq data. Navigate to the corresponding sections to learn more:
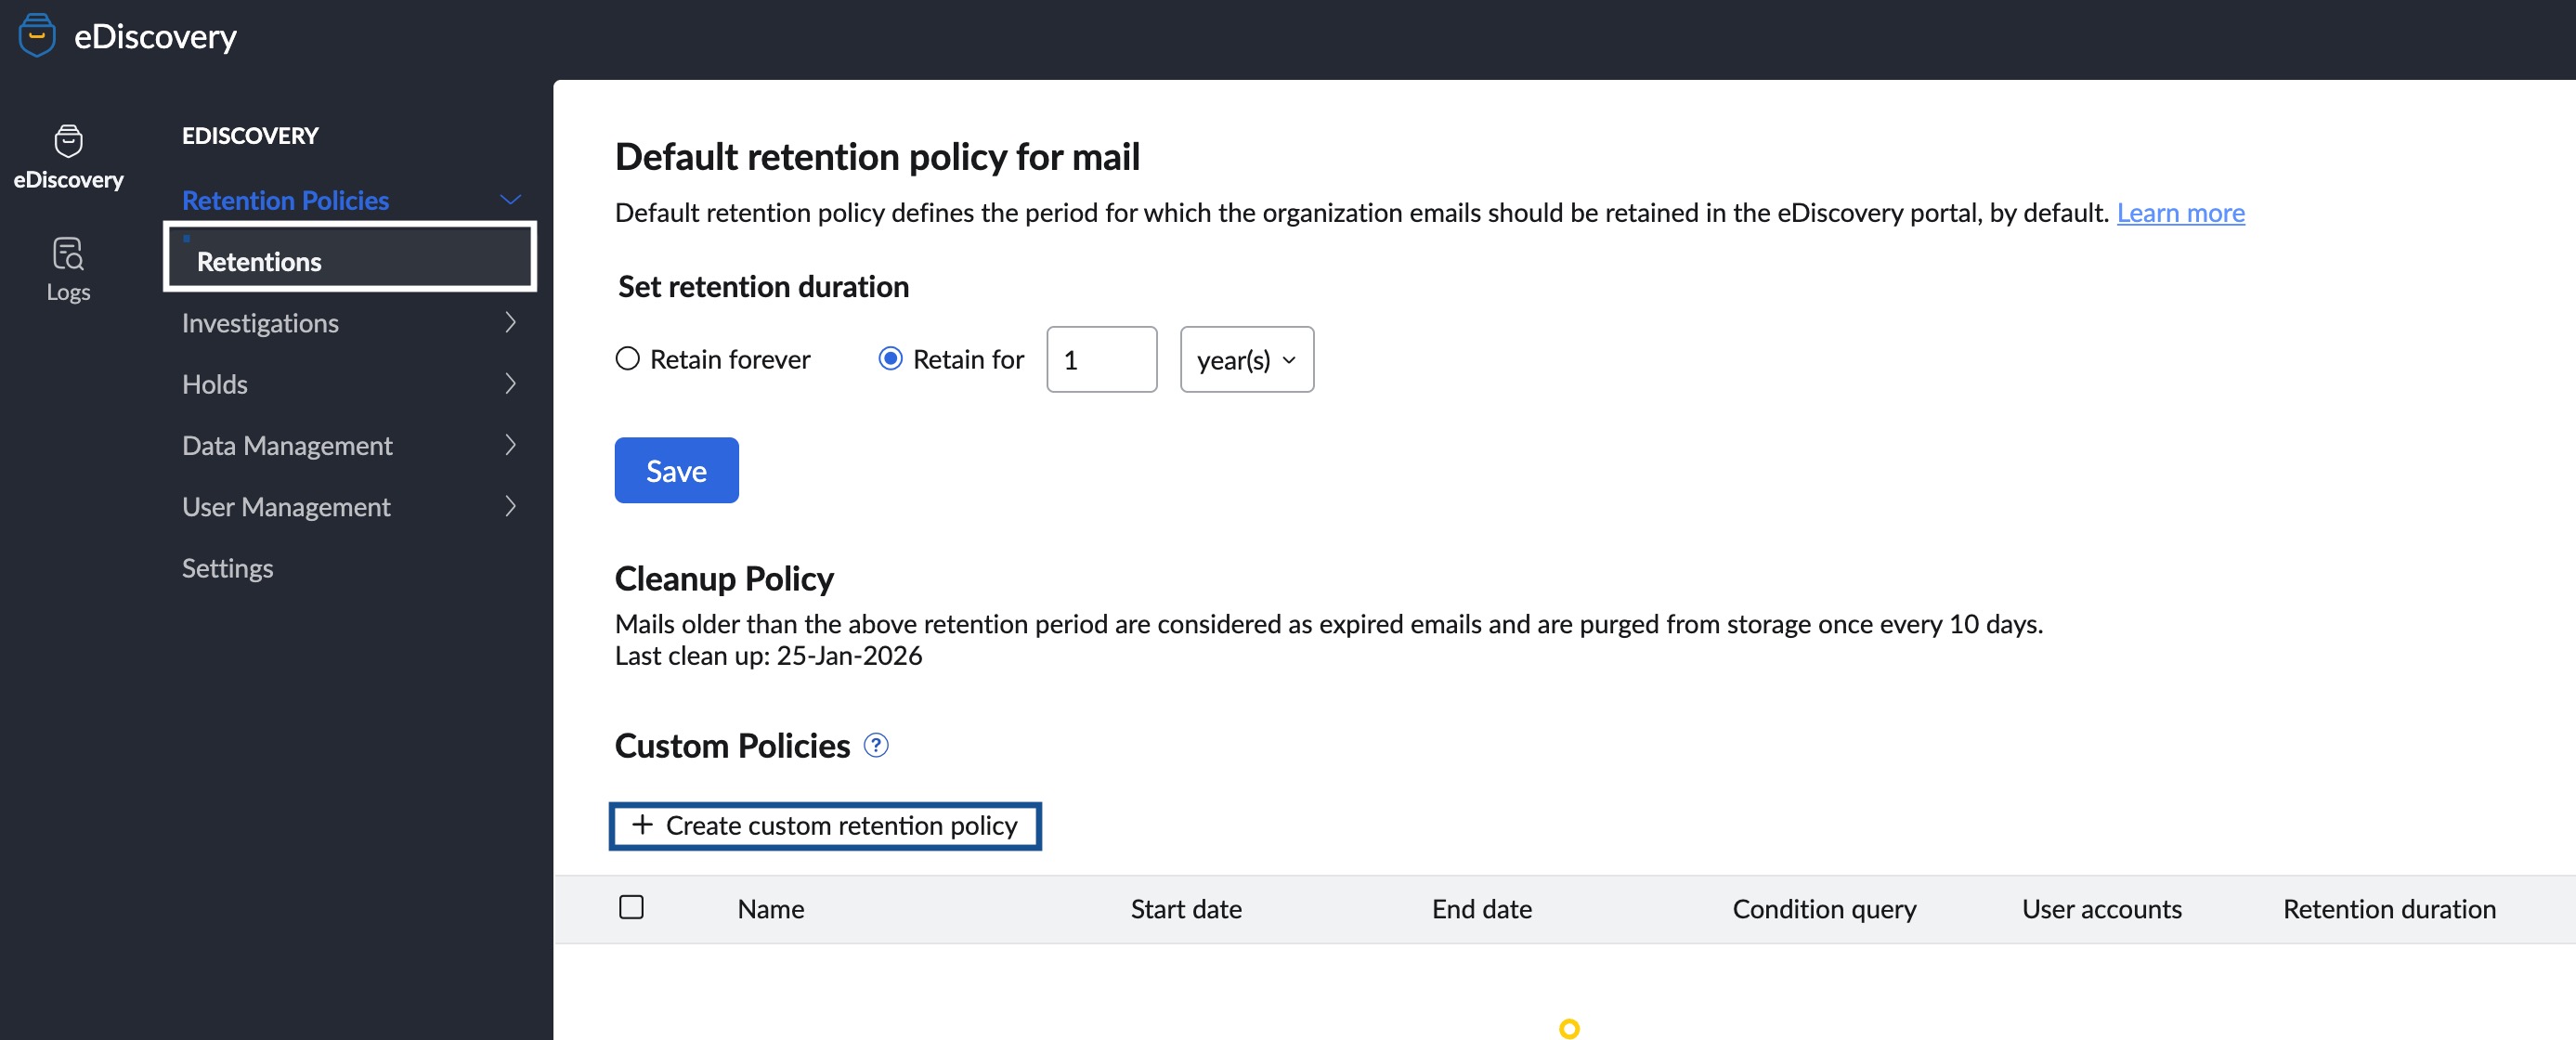
Custom retention policy for emails
Below the default retention policy, you will find an option to create a new custom retention policy. In case there are any special or custom requirements that need certain emails, based on custodians or certain conditional criteria, to be retained for a different period of time, the administrators can define custom retention policies. Custom retention policies can be defined based on various parameters.
Note:
Emails that are beyond the set retention period will be automatically cleaned up or purged, once in every 10 days.
To define new custom policies, follow the below steps:
- Log in to Zoho Mail Admin Console and select eDiscovery on the left pane.
- Navigate to Retention Policies.
- Click Retentions.
- Click the Create custom retention policy button and provide a Name for the custom policy.
- Select the desired mailbox category:
- All user accounts - All user accounts and shared mailboxes will be included.
- Specific user accounts - Admin can select one or more user mailboxes in the User mailboxes field.
- Specific shared mailboxes - Admin can select one or more shared mailboxes in the Shared mailboxes field.
- Select the start and end dates.
- In the Search here, provide the conditions based on which you want to define the custom policy for email retention from the granular options provided:
- Contains - contains text/ email address in the entire email
- Subject - subject contains the selected term
- Content - email content contains
- From - from email address contains
- To - To email address contains
- Cc - Cc email address contains
- Bcc - Bcc email address contains
- Reply To - Reply to email address contains
- Has attachment - Only the emails with attachment
- Attachment name - Attachment content contains
- Attachment content - Attachment content contains
- Only outgoing emails - Include only outgoing emails
- Select Email Type base on your need:
- All
- Sent
- Received
- Select whether you want to retain the emails marked as spam.
- Choose Only deleted emails to retain only the emails deleted from the mailbox that match the entered condition query.
- Choose Retain forever or enter the number of days to retain the emails that match the conditions.
- Click Preview results to check whether the condition query provides the expected results.

- Click Save to save the custom retention policy.


You can create and save multiple retention policies for different purposes. Mostly each custom retention policy will differ based on periods of retention and the conditions required for retention.
Note:
When an email matches multiple custom retention policies, emails are always retained as required by the retention policy with the longest retention period. Email that are on hold are retained till the hold is removed.
Cliq custom retention policy
There can be situations where you are required to retain a certain set of Cliq messages for a different duration as per the unique requirements of your organization. Custom retention policies for Cliq conversations can be configured based on various parameters. The custom retention policy will take precedence over the default retention policy for those messages that satisfy a custom policy.
Note:
Deleted messages which are expired beyond the retention period will be automatically cleaned up or purged, once a week.
To define new custom policies, follow the below steps:
- Log in to Zoho Mail Admin Console and select eDiscovery on the left pane.
- Navigate to the Cliq tab under Retention.
- Click the Create custom retention policy button and provide a Name for the custom policy.

- Select one or more condition queries from the available list:
- File name
- File type
- Link
- Content
- Select the preferred Chat type to be retained as per the custom policy:
- Direct message - The personal chat messages within the organization.
- Group chat - Filters group chats within the organization.
- Private channel - Search messages shared in personal channels.
- Organization channel - Conversations in channels used across the organization get saved.
- External channel - Conversations in channels which include external members (users outside the organization).
- Team channel - Conversations within the team channels get saved.
- Chat thread - Filters the inline chat threads in all conversations.
- Bot - Filters only the chat messages initiated by bots.
- Entity chat - Includes chat messages initiated from other Zoho apps.
- If required, select Only messages with files and Only messages with links checkboxes.
- Enter the desired retention period or choose Retain forever.
- Click Preview results or Save.


The chat messages that match the filter conditions will be retained as per the custom retention period.