WHMCS用Zoho Mailタブ
WHMCS用Zoho Mailタブは、Zoho Mail認証パートナー/リセラーがWHMCSシステムを使用してZoho Mailアカウントを設定するのに役立ちます。顧客は、リセラーが用意した機能から該当する仕様を選び、Zoho Mailサービスを購入できます。
パートナーとしての登録
Zoho Mailには、Zohoとのパートナーシップの機能が用意されています。パートナーは、Zoho Mailパートナー用管理画面を使用して、顧客組織がドメインを用いたメールアカウントを設定し、使用できるように支援できます。パートナー用管理画面は、パートナーが複数の顧客組織を管理するのに役立ちます。
Zoho Mailのパートナーになるには、パートナー登録ページに移動します。パートナー登録フォームの各項目に関連する詳細情報を入力し、[Submit](送信する)をクリックします。
WHMCS用Zoho Mailタブのインストール方法
- Zoho Mail Provisioningタブは、WHMCSマーケットプレイスからダウンロードできます。
- 「zoho_mail」という名前のzipファイルがダウンロードされます。ファイルをパソコンで解凍し、その「zoho_mail」フォルダーをWHMCSインストールディレクトリ内の[/modules/servers]ディレクトリにアップロードします。
WHMCS用Zoho Mailのメールタブの設定
商品の設定
- WHMCSアカウントにログインし、WHMCSの管理者画面に移動します。
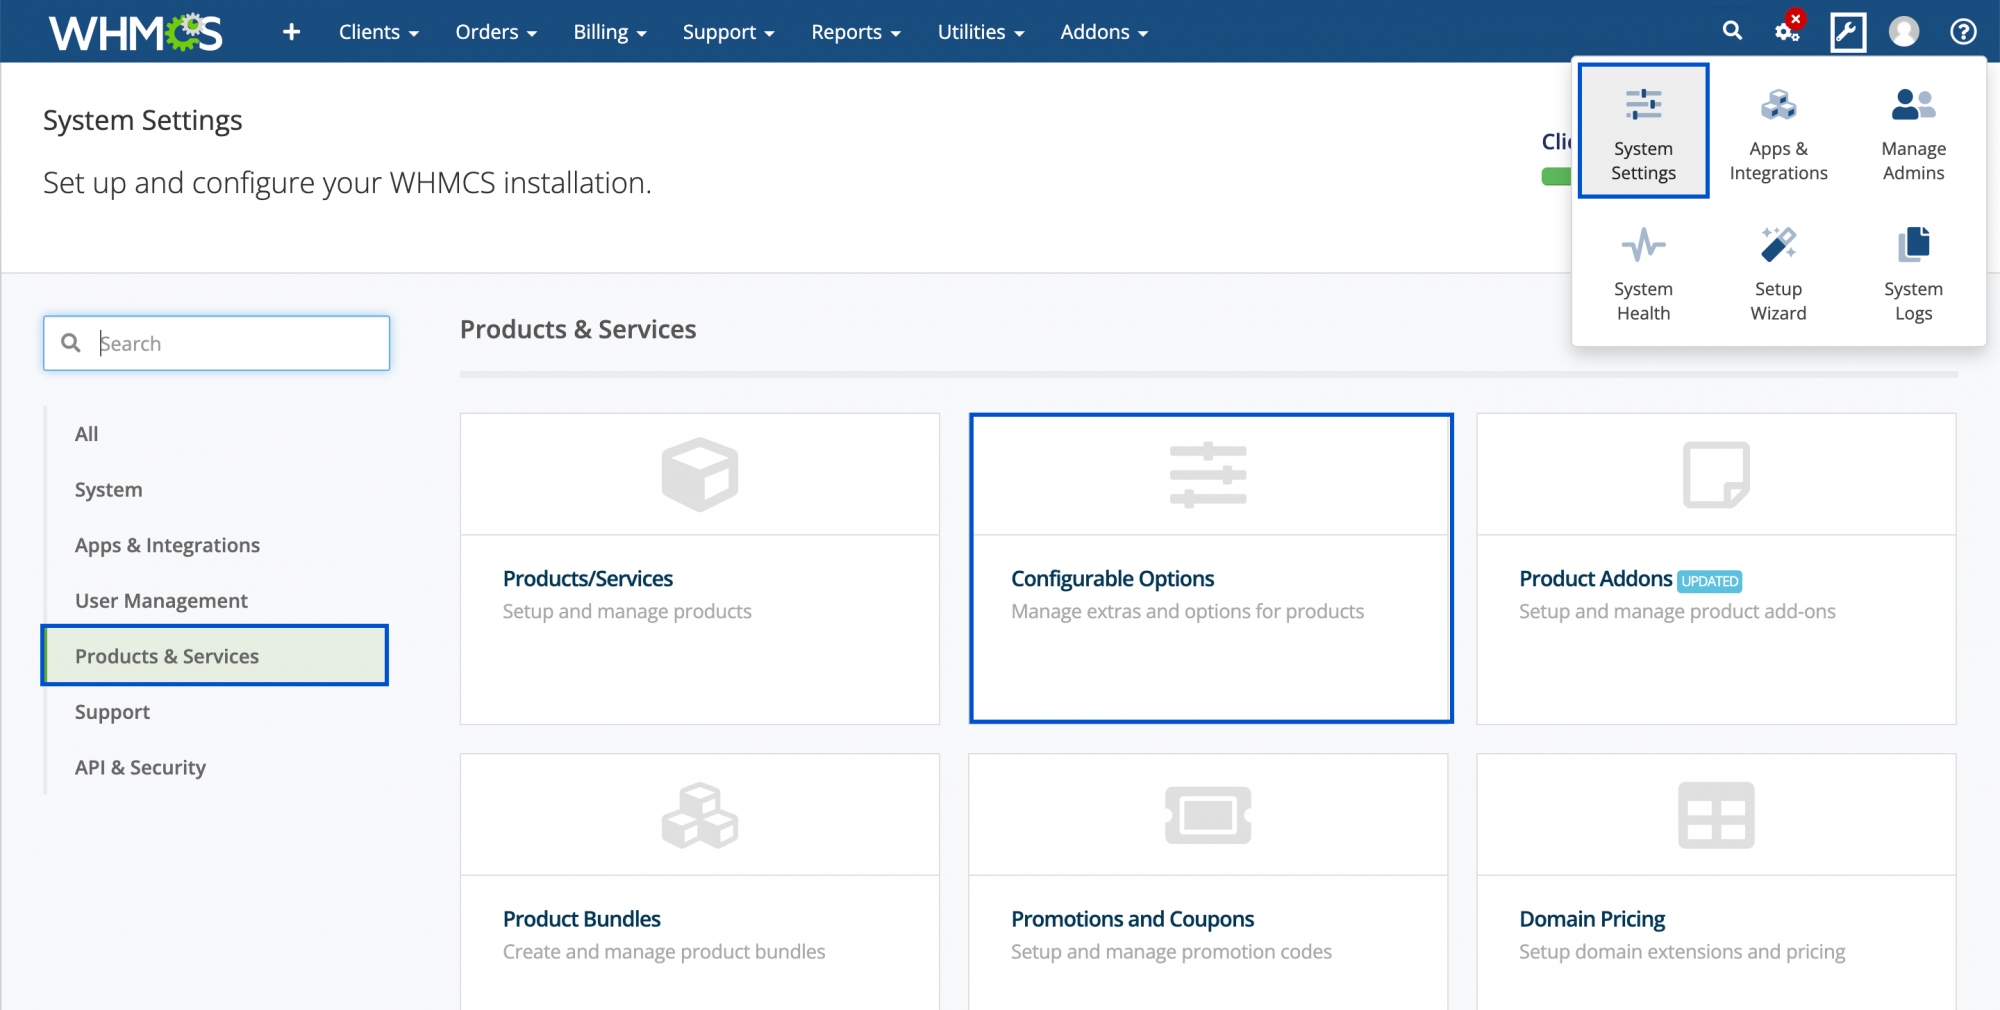
- メールホスティング商品用の新しいグループを作成するには、画面右上の[Setup](設定)アイコンをクリックし、[System Settings](システム設定)を選択します。次に、画面左側の[Products and Services](商品とサービス)に移動します。また、既存のグループを使用すると、Zoho Mailタブに新しい商品を作成することもできます。
- [Products/Services](商品/サービス)カードをクリックし、[Admin Password](管理者パスワード)を入力します。
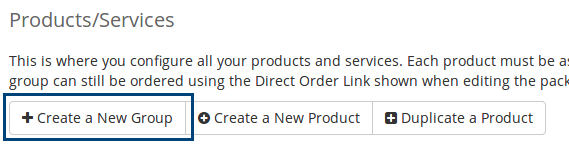
- [Create a New Group](新しいグループを作成する)をクリックします。
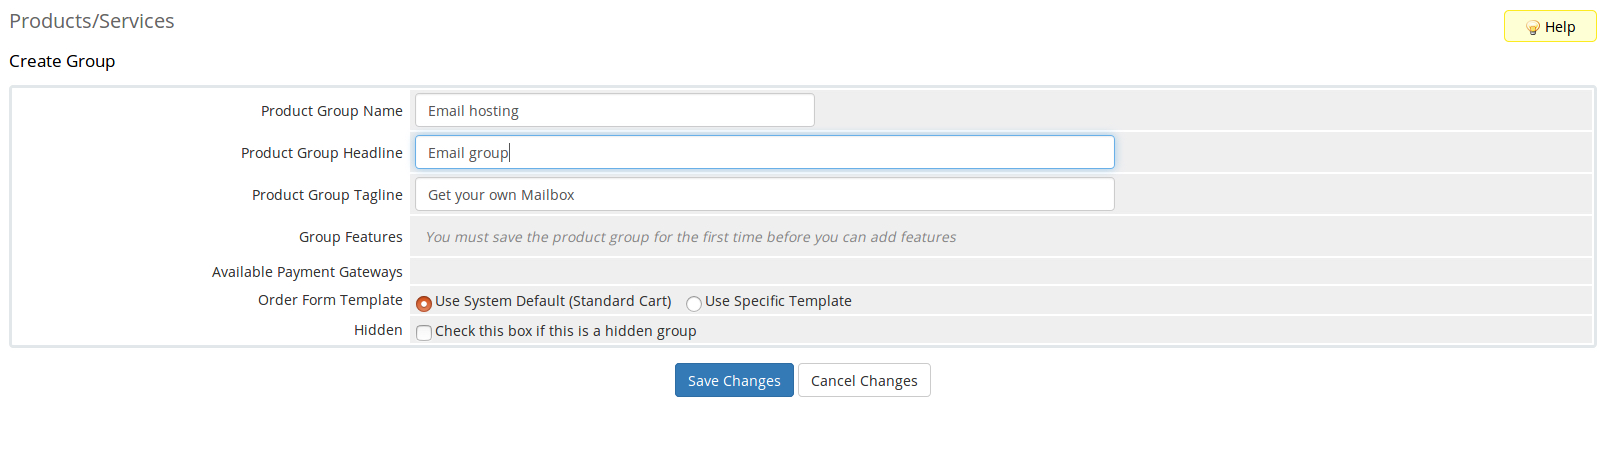
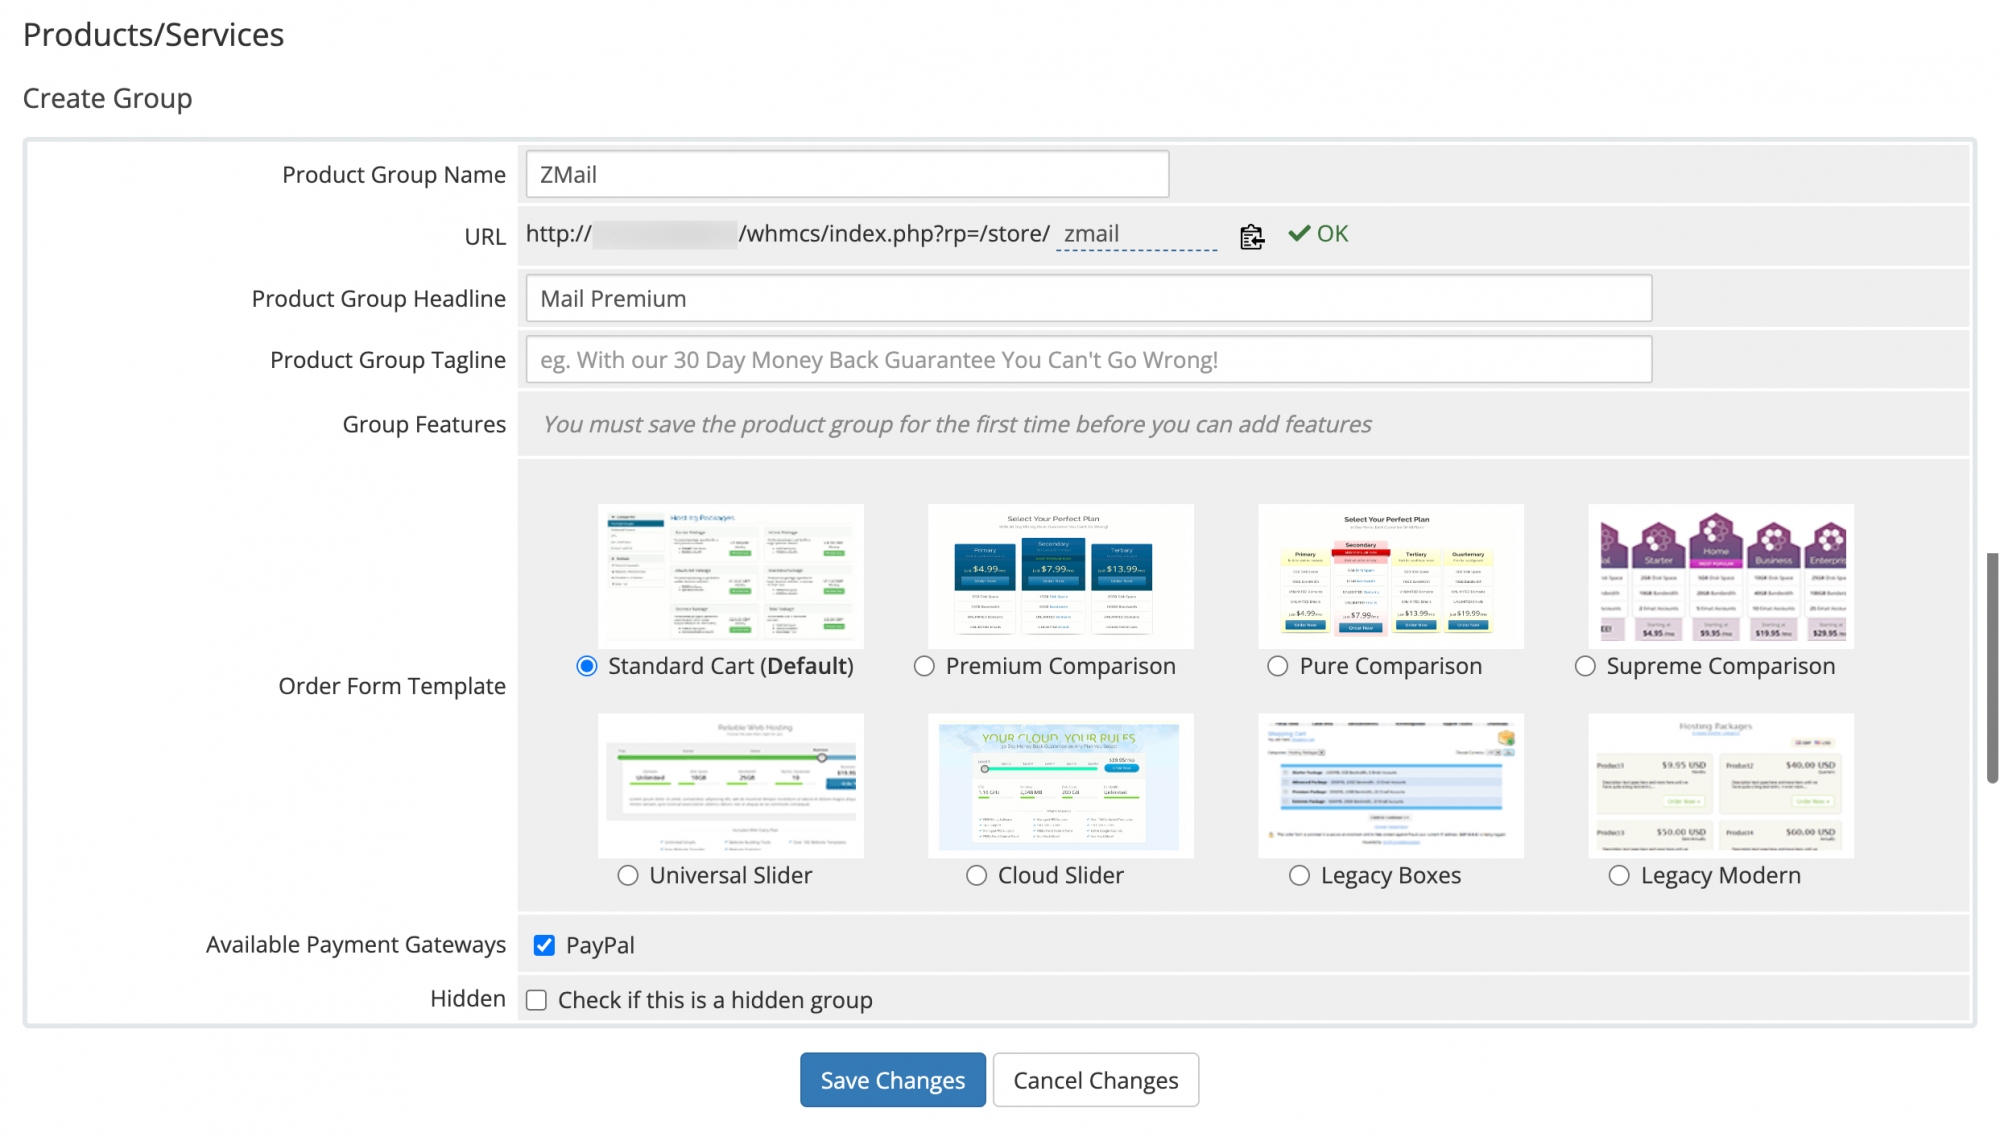
- [Product Group Name](商品グループ名)、[Headline](見出し)、[tagline](キャッチフレーズ)の各項目に入力します。[Save Changes](変更を保存する)をクリックして、入力した詳細を含むグループを作成します。
- 次の手順では、Zoho Mailタブに作成されたグループ内に商品を作成します。[Create a New Product](新しい商品を作成する)をクリックします。
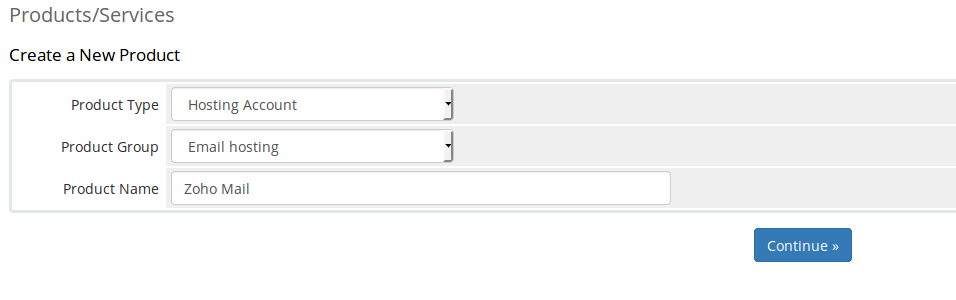
- 各ドロップダウンから[Product Type](商品の種類)と[Product Group](商品のグループ)を選択します。[Product Name](商品名)に目的の商品名を入力します。[Module](タブ)のドロップダウンから、[Zoho Mail]を選択します。
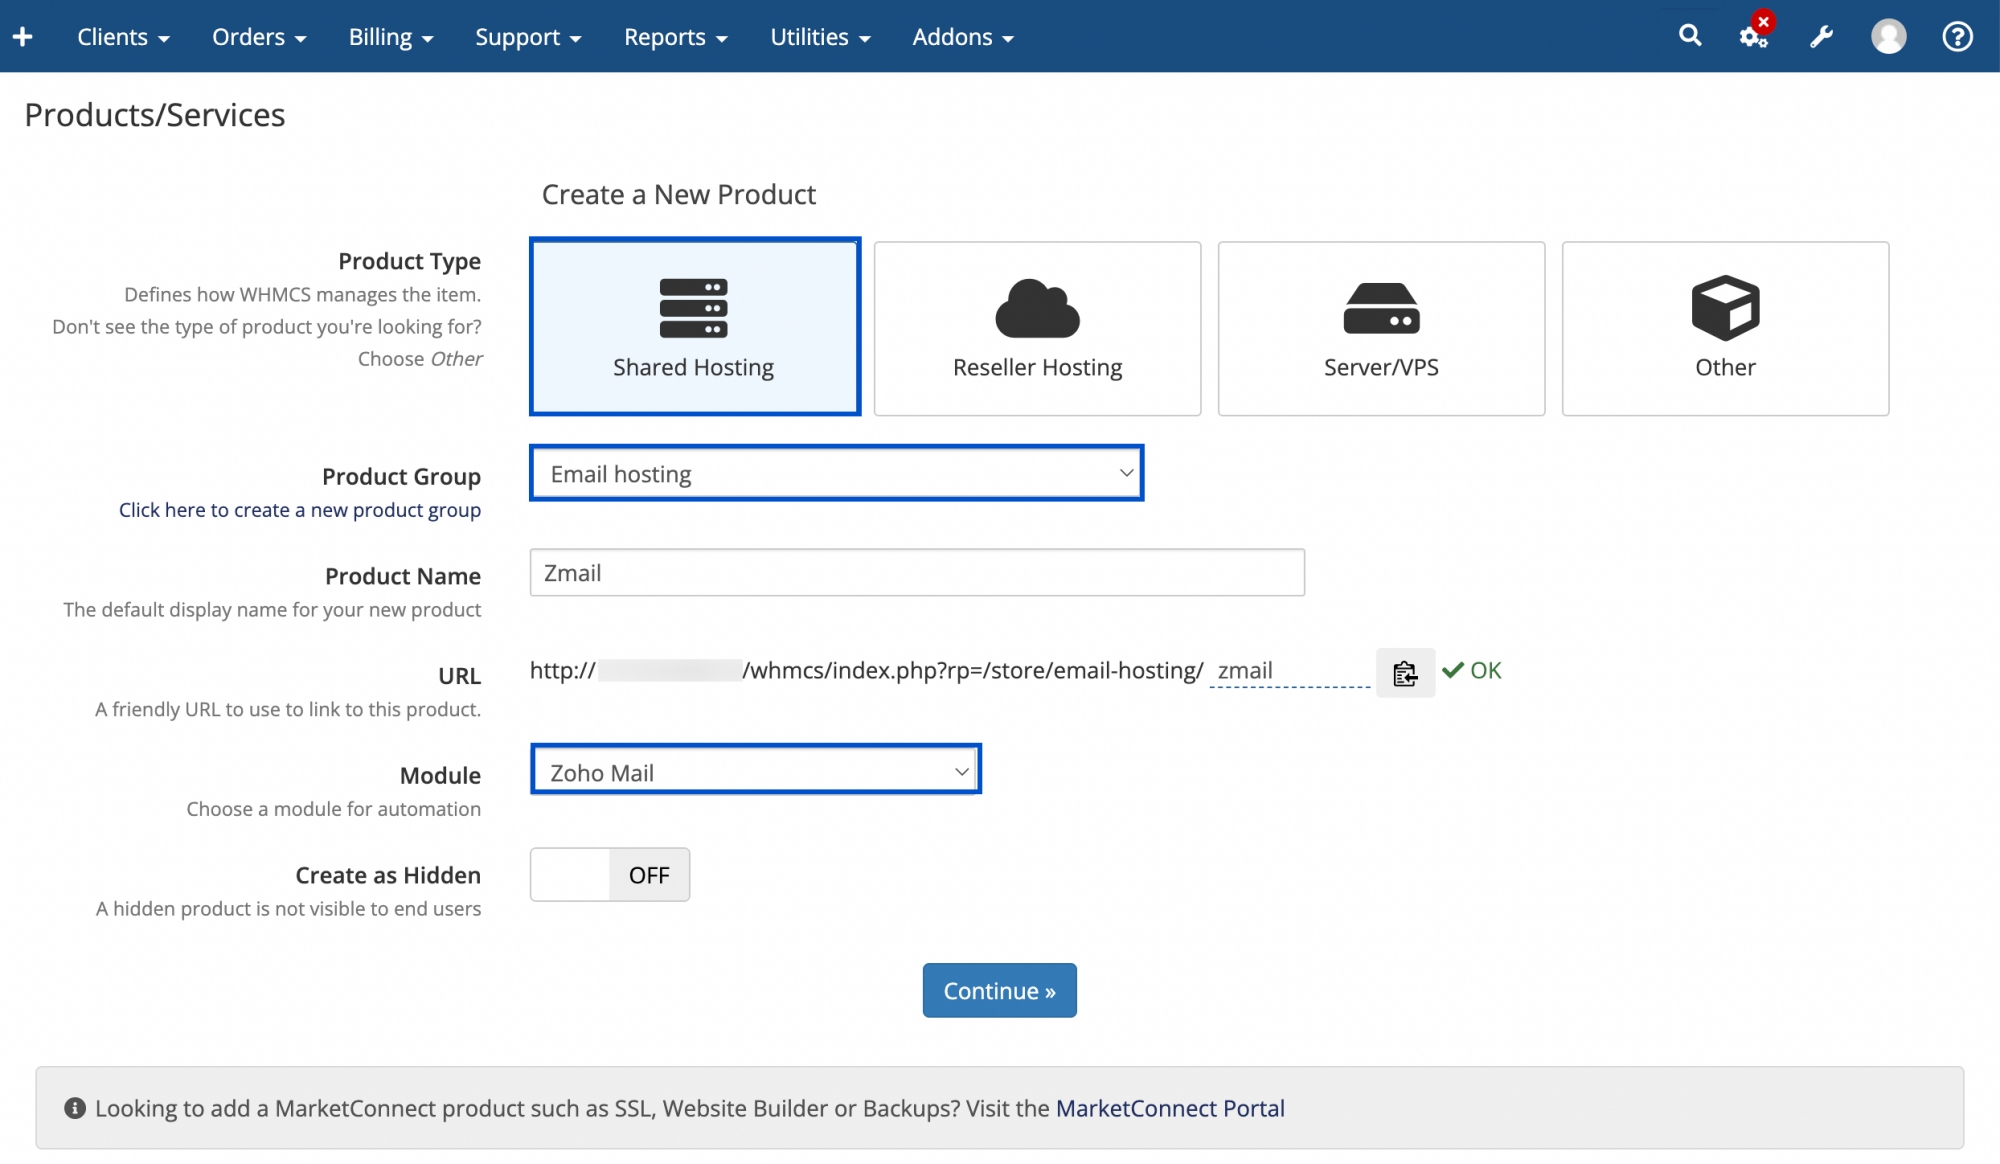
- [Continue](続行)をクリックします。
- [Edit Product](商品を編集する)画面が開きます。[Details](詳細)タブで、[Product Description](商品の説明)を入力します。
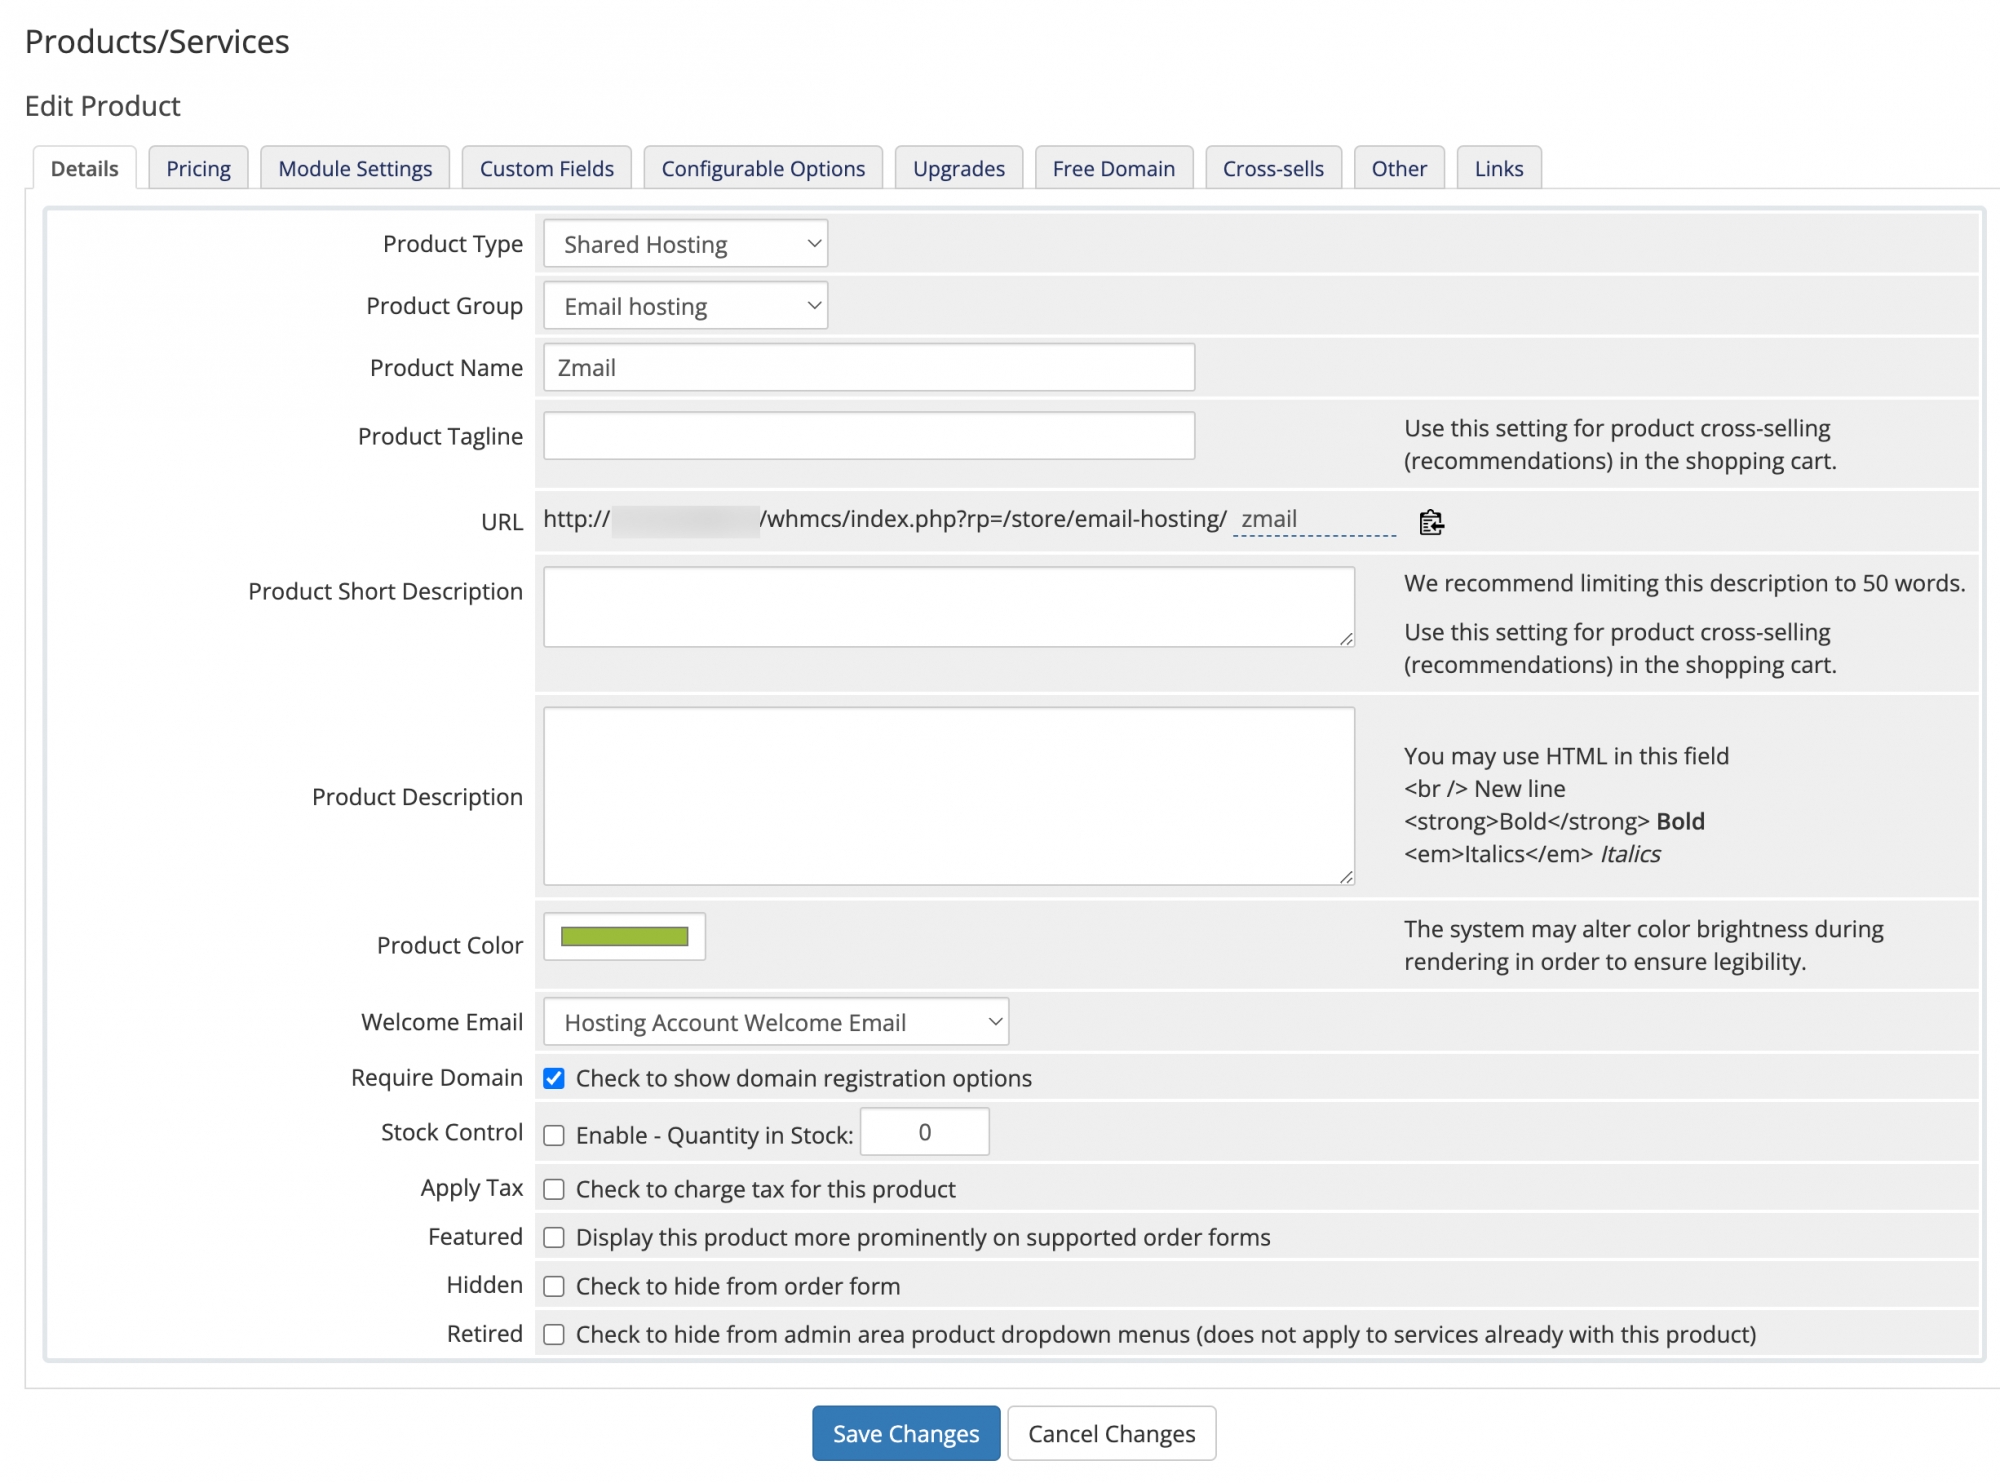
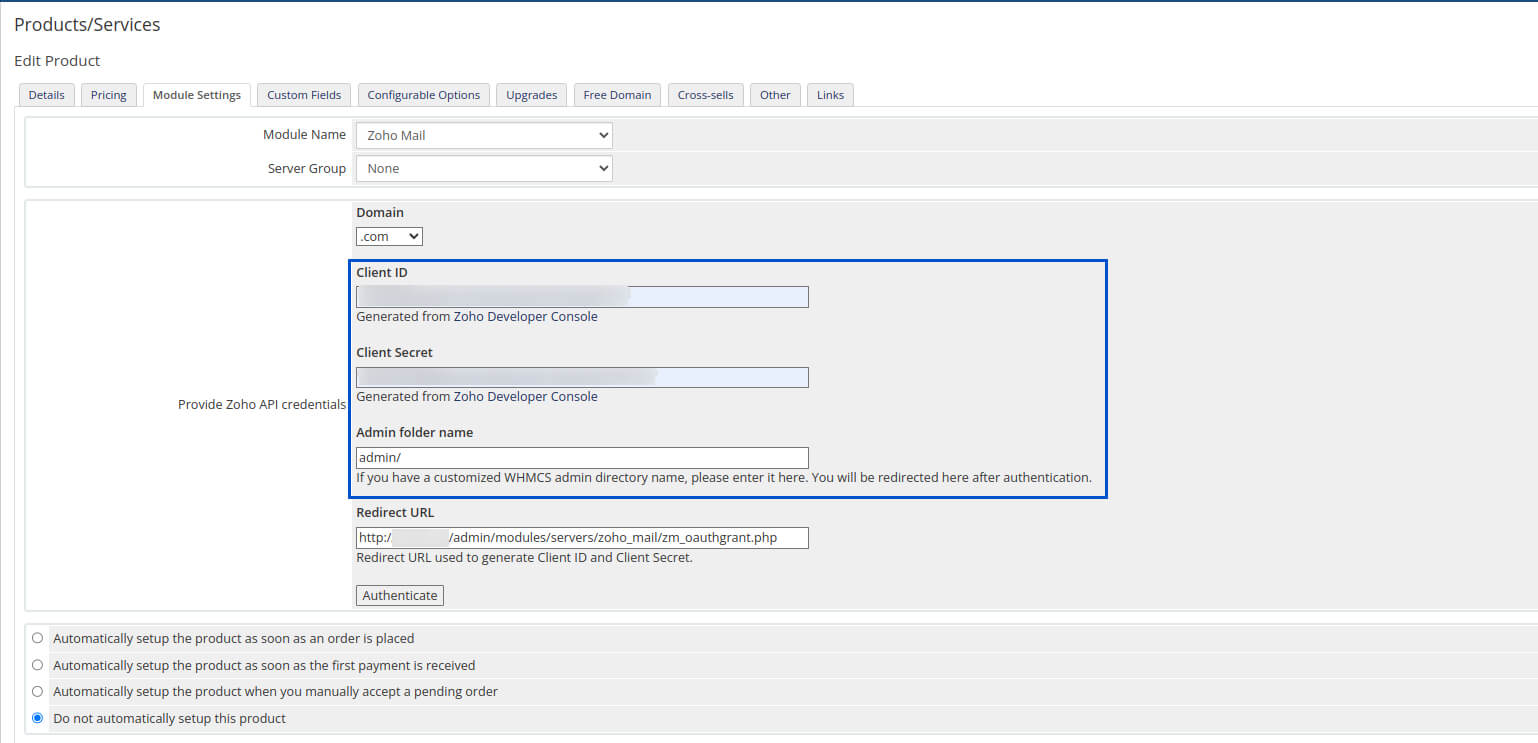
- [Edit Product](商品を編集する)画面の[Module Settings](タブの設定)タブを開きます。
- [Provide Zoho API credentials](Zoho API認証情報を入力する)項目には、[Zoho API Console](Zoho API用管理画面)から取得したクライアントIDとクライアントシークレットを入力する必要があります。

- IDとシークレットを取得するには、[Redirect URL](移動先URL)項目に移動し、移動先URLをコピーします。
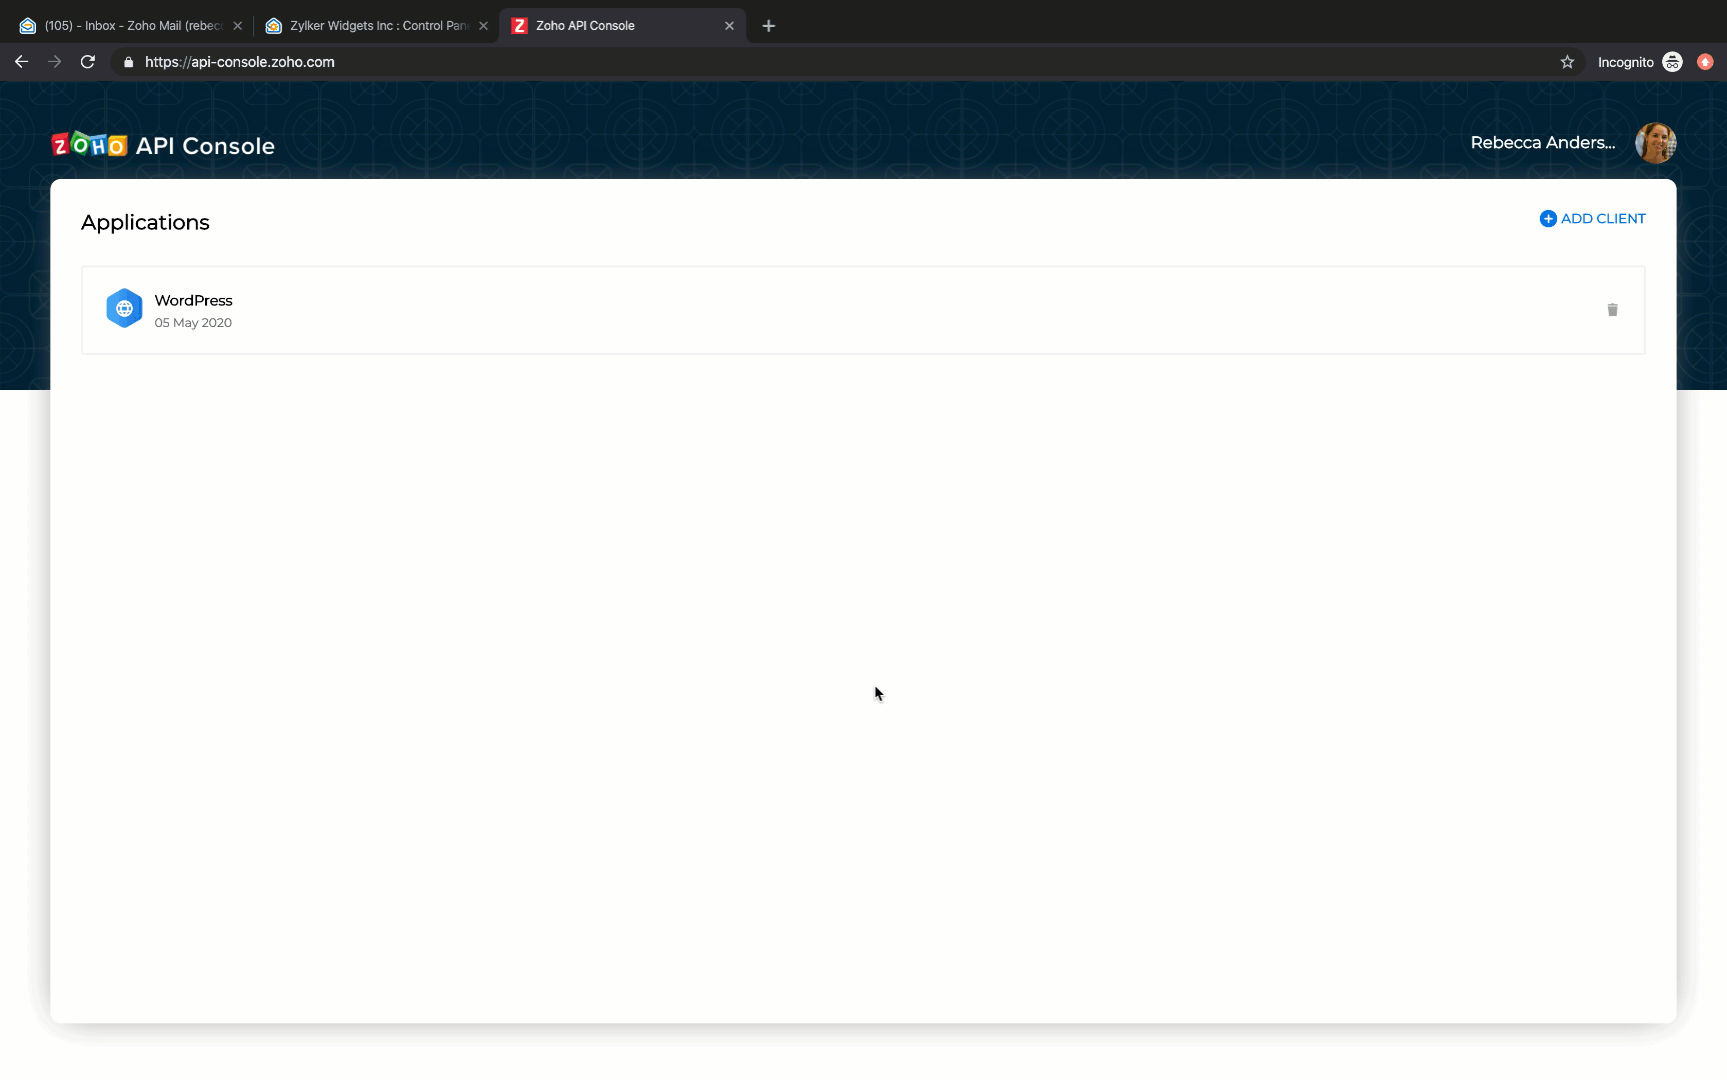
- Zoho Mailアカウントにログインし、Zoho API用管理画面に移動します。
- [Add Client ID](クライアントIDを追加する)をクリックして、新しいクライアントIDとクライアントシークレットを作成し、Zoho Mail APIにアクセスします。
- 適切な[Client Name](クライアント名)、[Client Domain](クライアントのドメイン)、WHMCS管理者領域からコピーした[Redirect URL](移動先URL)を入力します。
- [Create](作成する)をクリックして、クライアントIDとクライアントシークレットを取得します。
- WHMCS管理者領域の[Module Settings](タブ設定)タブに移動してプロセスを完了します。
- [Module Settings](タブ設定)画面の[Client ID](クライアントID)、[Client Secret](クライアントシークレット)の該当する項目に取得したクライアントIDとクライアントシークレットを入力します。ドロップダウンから[domain region](ドメイン領域)を選択します。
- 認証後に移動する管理フォルダー名を指定します。
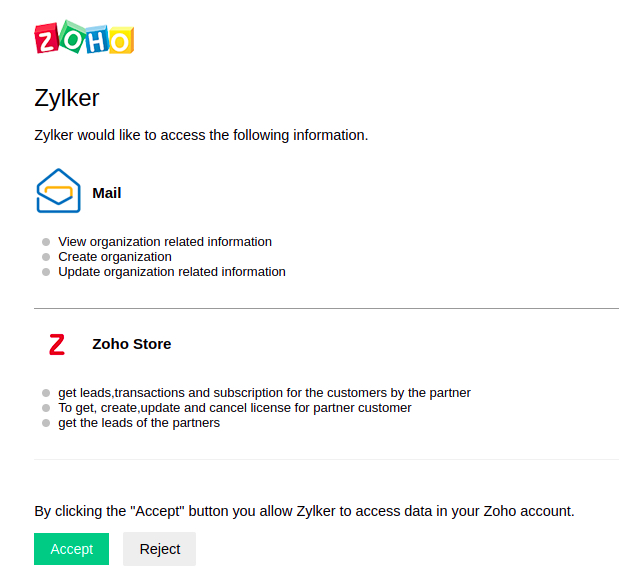
- [Authenticate](認証する)をクリックします。
- Zohoアカウントのデータへのアクセス許可を求める同意画面が表示されます。[Accept](承認する)をクリックします。
- 認証が成功したメッセージと顧客の一覧が表示されます。[Save Changes](変更を保存する)をクリックします。
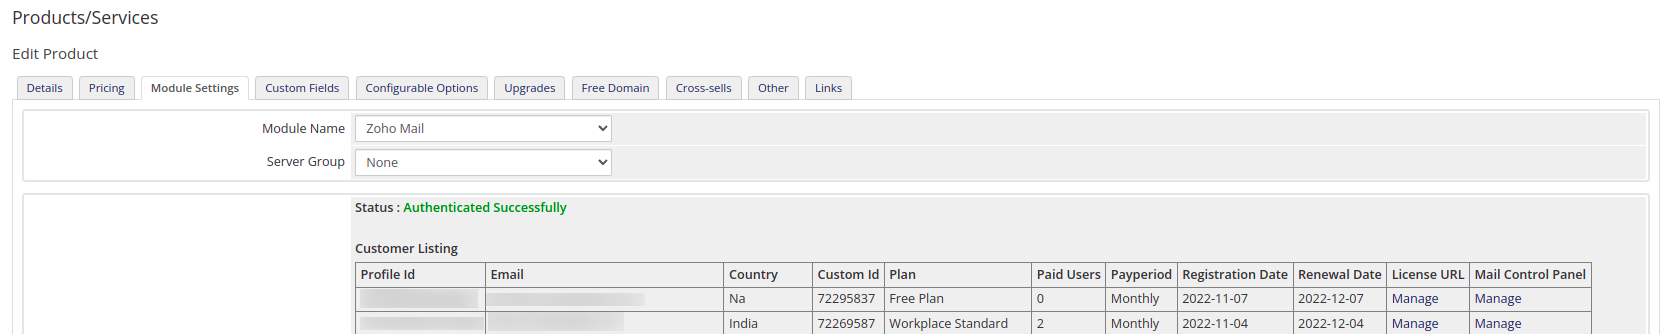


顧客の一覧に記載されているURLを使用すると、顧客ライセンスおよびメール管理画面を管理することができます。
設定可能な機能
設定可能な機能により、Zoho Mailサービスのカスタマイズの機能を顧客に設定できます。
- 設定可能な機能をグループに割り当てるには、[Setup](設定)→[Products & Services](商品/サービス)→[Configurable Options](設定可能な機能)の順に選択します。
- [Create a New Group](新しいグループを作成する)をクリックします。

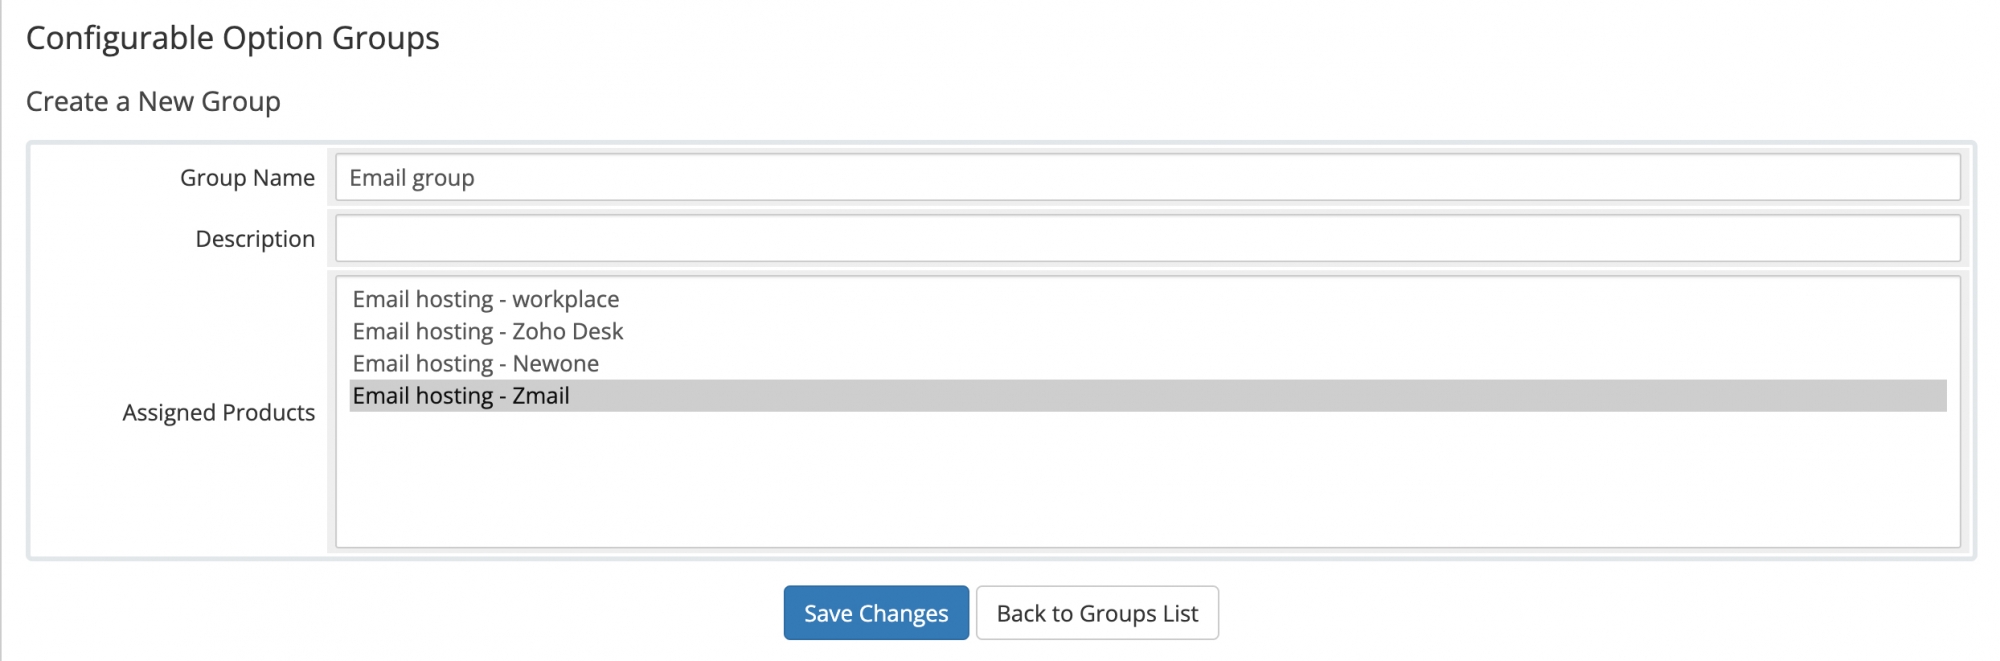
- [Group Name](グループ名)と[Description](グループの説明)を入力します。[Assigned Products](割り当て済み商品)セクションで、新しく作成したZoho Mail商品を選択し、[Save Changes](変更を保存する)をクリックします。
- [Add New Configuration Option](新しい設定機能を追加する)ボタンをクリックします。WHMCSの[Configurable Option](設定可能な機能)画面が開きます。

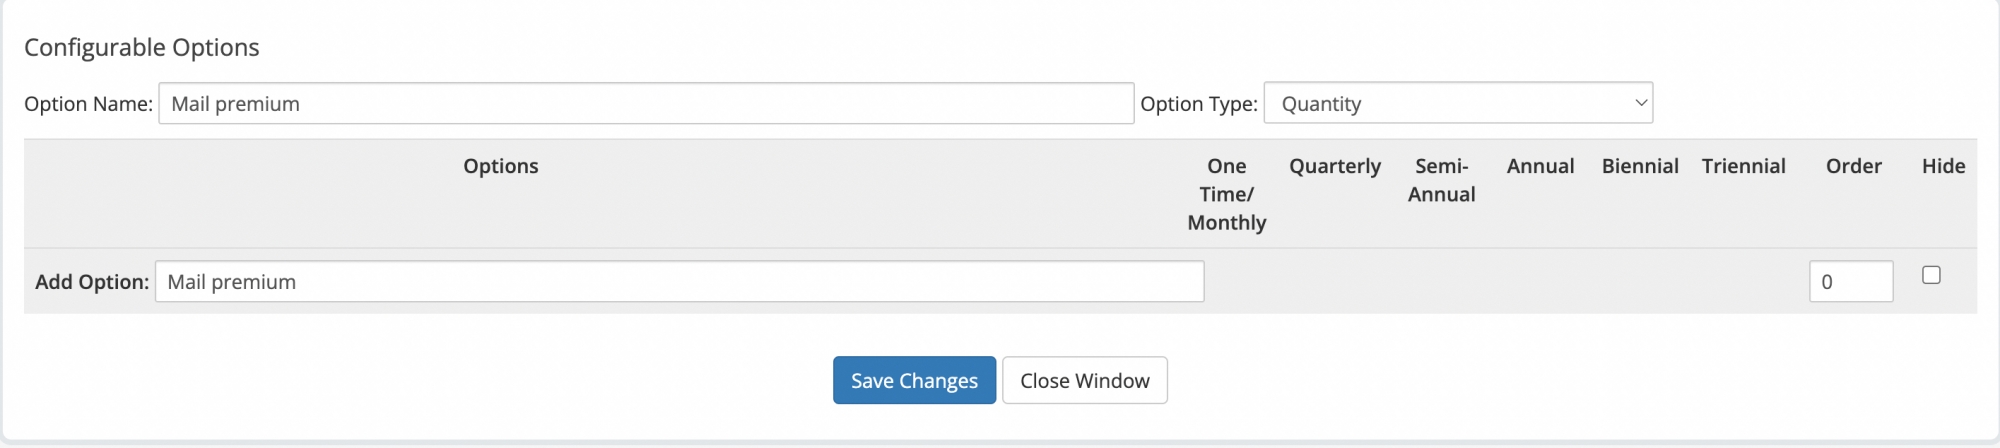
- 設定可能な機能:プラン名
- [Option Name](機能名)項目にプラン名を入力し、ドロップダウンメニューから[Option Type](機能の種類)として数量を選択します。[Save Changes](変更を保存する)をクリックし、メールアカウントの[Minimum](最小数量)と[Maximum quantity](最大数量)を設定します。数量を無制限にする場合は最大値に「0」を設定します。
- [Add Option](選択肢を追加する)項目に「Mailbox」と入力し、[Save Changes](変更を保存する)をクリックします。
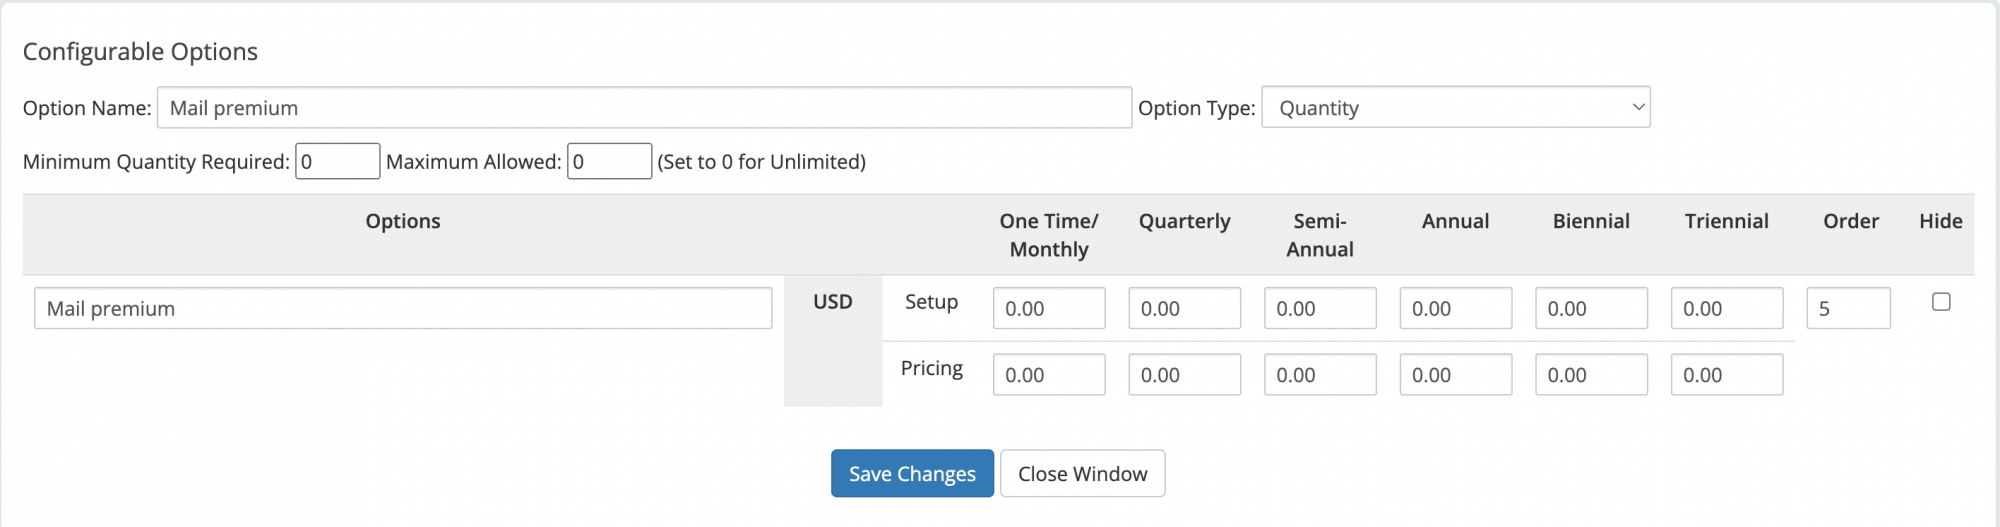
- 支払い頻度に基づいて該当する[Setup](設定)と[Pricing](価格)を入力し、[Save Changes](変更を保存する)をクリックします。
- 設定可能なメールアカウントの件数の機能が設定されました。
- WHMCSの管理画面の[Configurable Options](設定可能な機能)ページに戻るには、[Close Window](画面を閉じる)をクリックします。
- 設定済みの設定可能機能が両方とも[Configurable Option Groups](設定可能な機能のグループ)ページに一覧表示されていることを確認し、[Save Changes](変更を保存する)をクリックします。[Back to Groups List](グループの一覧に戻る)をクリックします。


Zoho Mailメールのタブが、WHMCS用管理画面にインストールされます。
メモ:
これは、設定時の推奨方法です。要件が変化した場合は、それに応じて設定できます。
顧客の注文の承認
顧客は該当するメールアカウントの件数とプランの種類でZoho Mailサービスを購入できるようになりました。顧客がZoho Mailのサービスを購入すると、保留中の注文を承認して、購入手続きを完了させる必要があります。
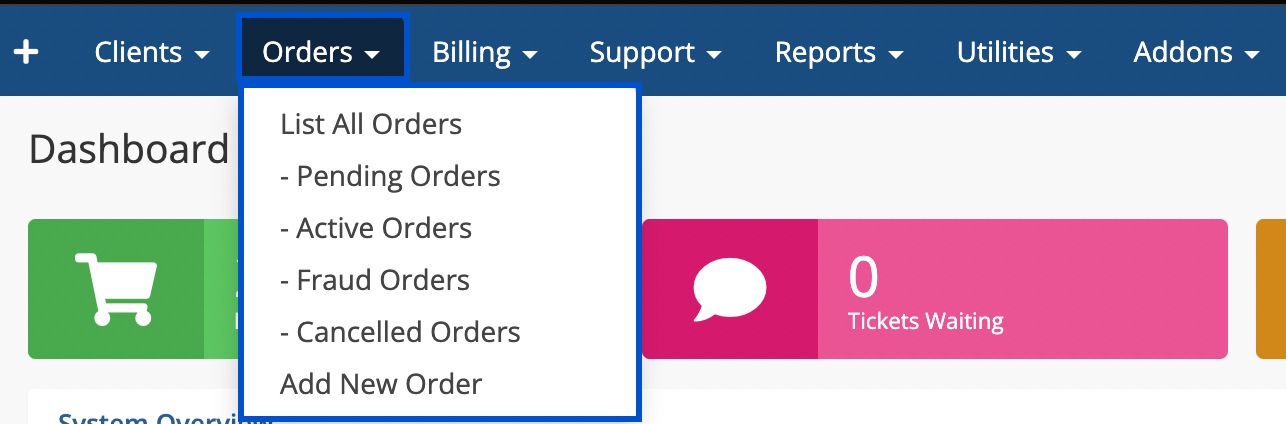
- WHMCS用管理画面で、上部メニューの[Order](注文)→[List All Orders](すべての注文の一覧を表示する)をクリックします。
- すべての保留中の注文は、[Manage Orders](注文の管理)ページに表示されます。承認する必要がある注文の[Client Name](クライアント名)をクリックします。

- [Client profile](クライアントの権限)が開きます。[Products/ Services](商品/サービス)タブをクリックします。
- [Module Commands](タブのコマンド)項目内の[Create Account](アカウントを作成する)ボタンをクリックします。
- [Module Command Confirmation](タブのコマンドの確認)ダイアログが表示されます。[Yes](はい)をクリックします。
- [Module Command Success](タブのコマンドが完了しました)のメッセージが表示され、ドメインのメールアカウントが作成されたことが表示されます。[Client Domain](クライエントのドメイン)、[Super Admin](特権管理者)、[ZOID]、[Domain Verification](ドメインの認証)の各項目が自動で入力されます。
- この認証処理の完了後、[Status](ステータス)項目のドロップダウンから[Active](有効)を選択して注文を承認します。[Save Changes](変更を保存する)をクリックします。
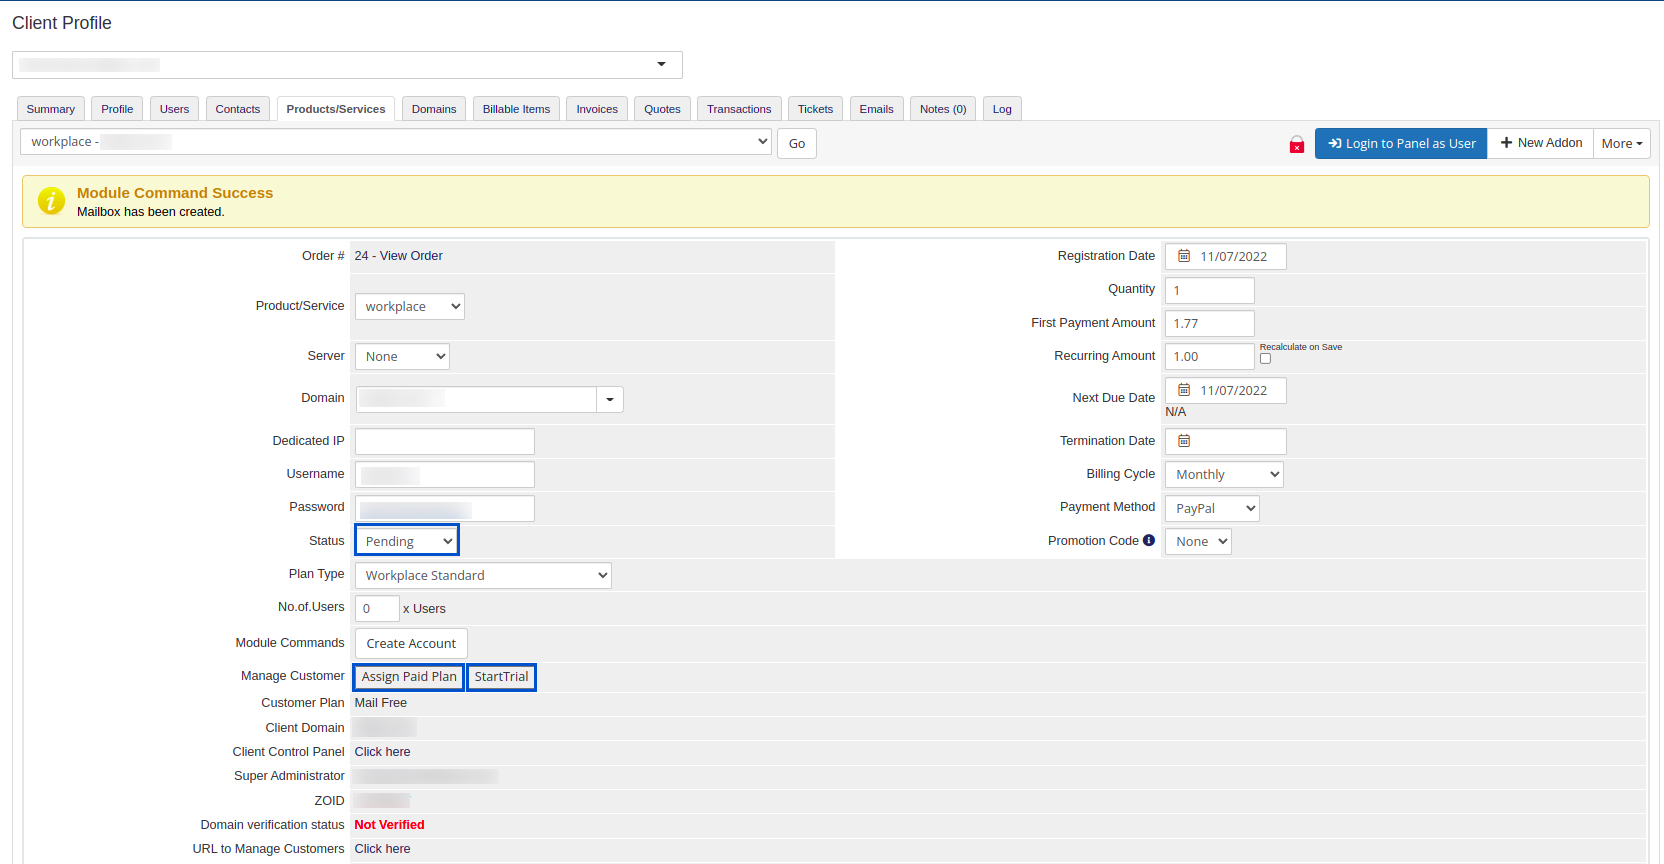
- [Manage Customers](顧客を管理する)項目にあるボタンを使用すると、有料プラン/試用プランを割り当てることもできます。


メモ:
割り当てられたクライアントプランを確認し、[Client Control Panel](クライアント用管理画面)項目の[Click here](こちらをクリックしてください)のリンクを使用すると、Zoho Mailパートナー用管理画面に移動することもできます。ここから顧客の認証処理を実行できます。
顧客が行った注文が有効化されます。クライアントエリアの[Manage Products](商品の管理)ページから、Zoho Mail管理画面およびメールアカウントにアクセスできます。