OAuth 2.0 Authentication Process
To access the Zoho IoT REST APIs, authentication is performed using an OAuth Client. An OAuth Client in Zoho represents an application that requests access to Zoho’s APIs on behalf of a user, acting as a secure intermediary between your application and Zoho’s authorization servers.
Zoho REST APIs use the OAuth 2.0 protocol, an industry-standard framework that allows third-party applications to obtain delegated access to protected data without requiring users to share their credentials each time. This ensures secure, token-based access while maintaining user privacy.
Refer to the Zoho OAuth Documentation for detailed information on OAuth authentication and how it works across Zoho services.
Note: OAuth 2.0 is the standard authentication mechanism used across all Zoho services to access APIs securely. It enables applications to obtain authorized access to Zoho resources without requiring users to repeatedly share their credentials.
Zoho IoT Data Centers
Data protection and privacy laws in multiple countries state that user data can only be stored in data centers located on that country's soil. In compliance, Zoho has set up data centers in multiple countries for storing Zoho IoTs data. Using the below domain references, you can make further API calls to the server URL corresponding to the concerned user's location.
Zoho IoT Data Center at various locations and its domains.
| Data Center | Domain | Base API URI |
| United States | .com | https://accounts.zoho.com/ |
| Europe | .eu | https://accounts.zoho.eu/ |
| India | .in | https://accounts.zoho.in/ |
| Saudi Arabia | .sa | https://accounts.zoho.sa/ |
| Australia | .au | https://accounts.zoho.com.au/ |
| Canada | .ca | https://accounts.zohocloud.ca/ |
Note: Replace your location's Base API URI when accessing Zoho Account's developer console using https://api-console.zoho.com
In all other references in the document, if your Base API URI is different from in as given in the samples urls, use your own Base API URI (.com, .eu, .sa, ca, or .au) instead of in.
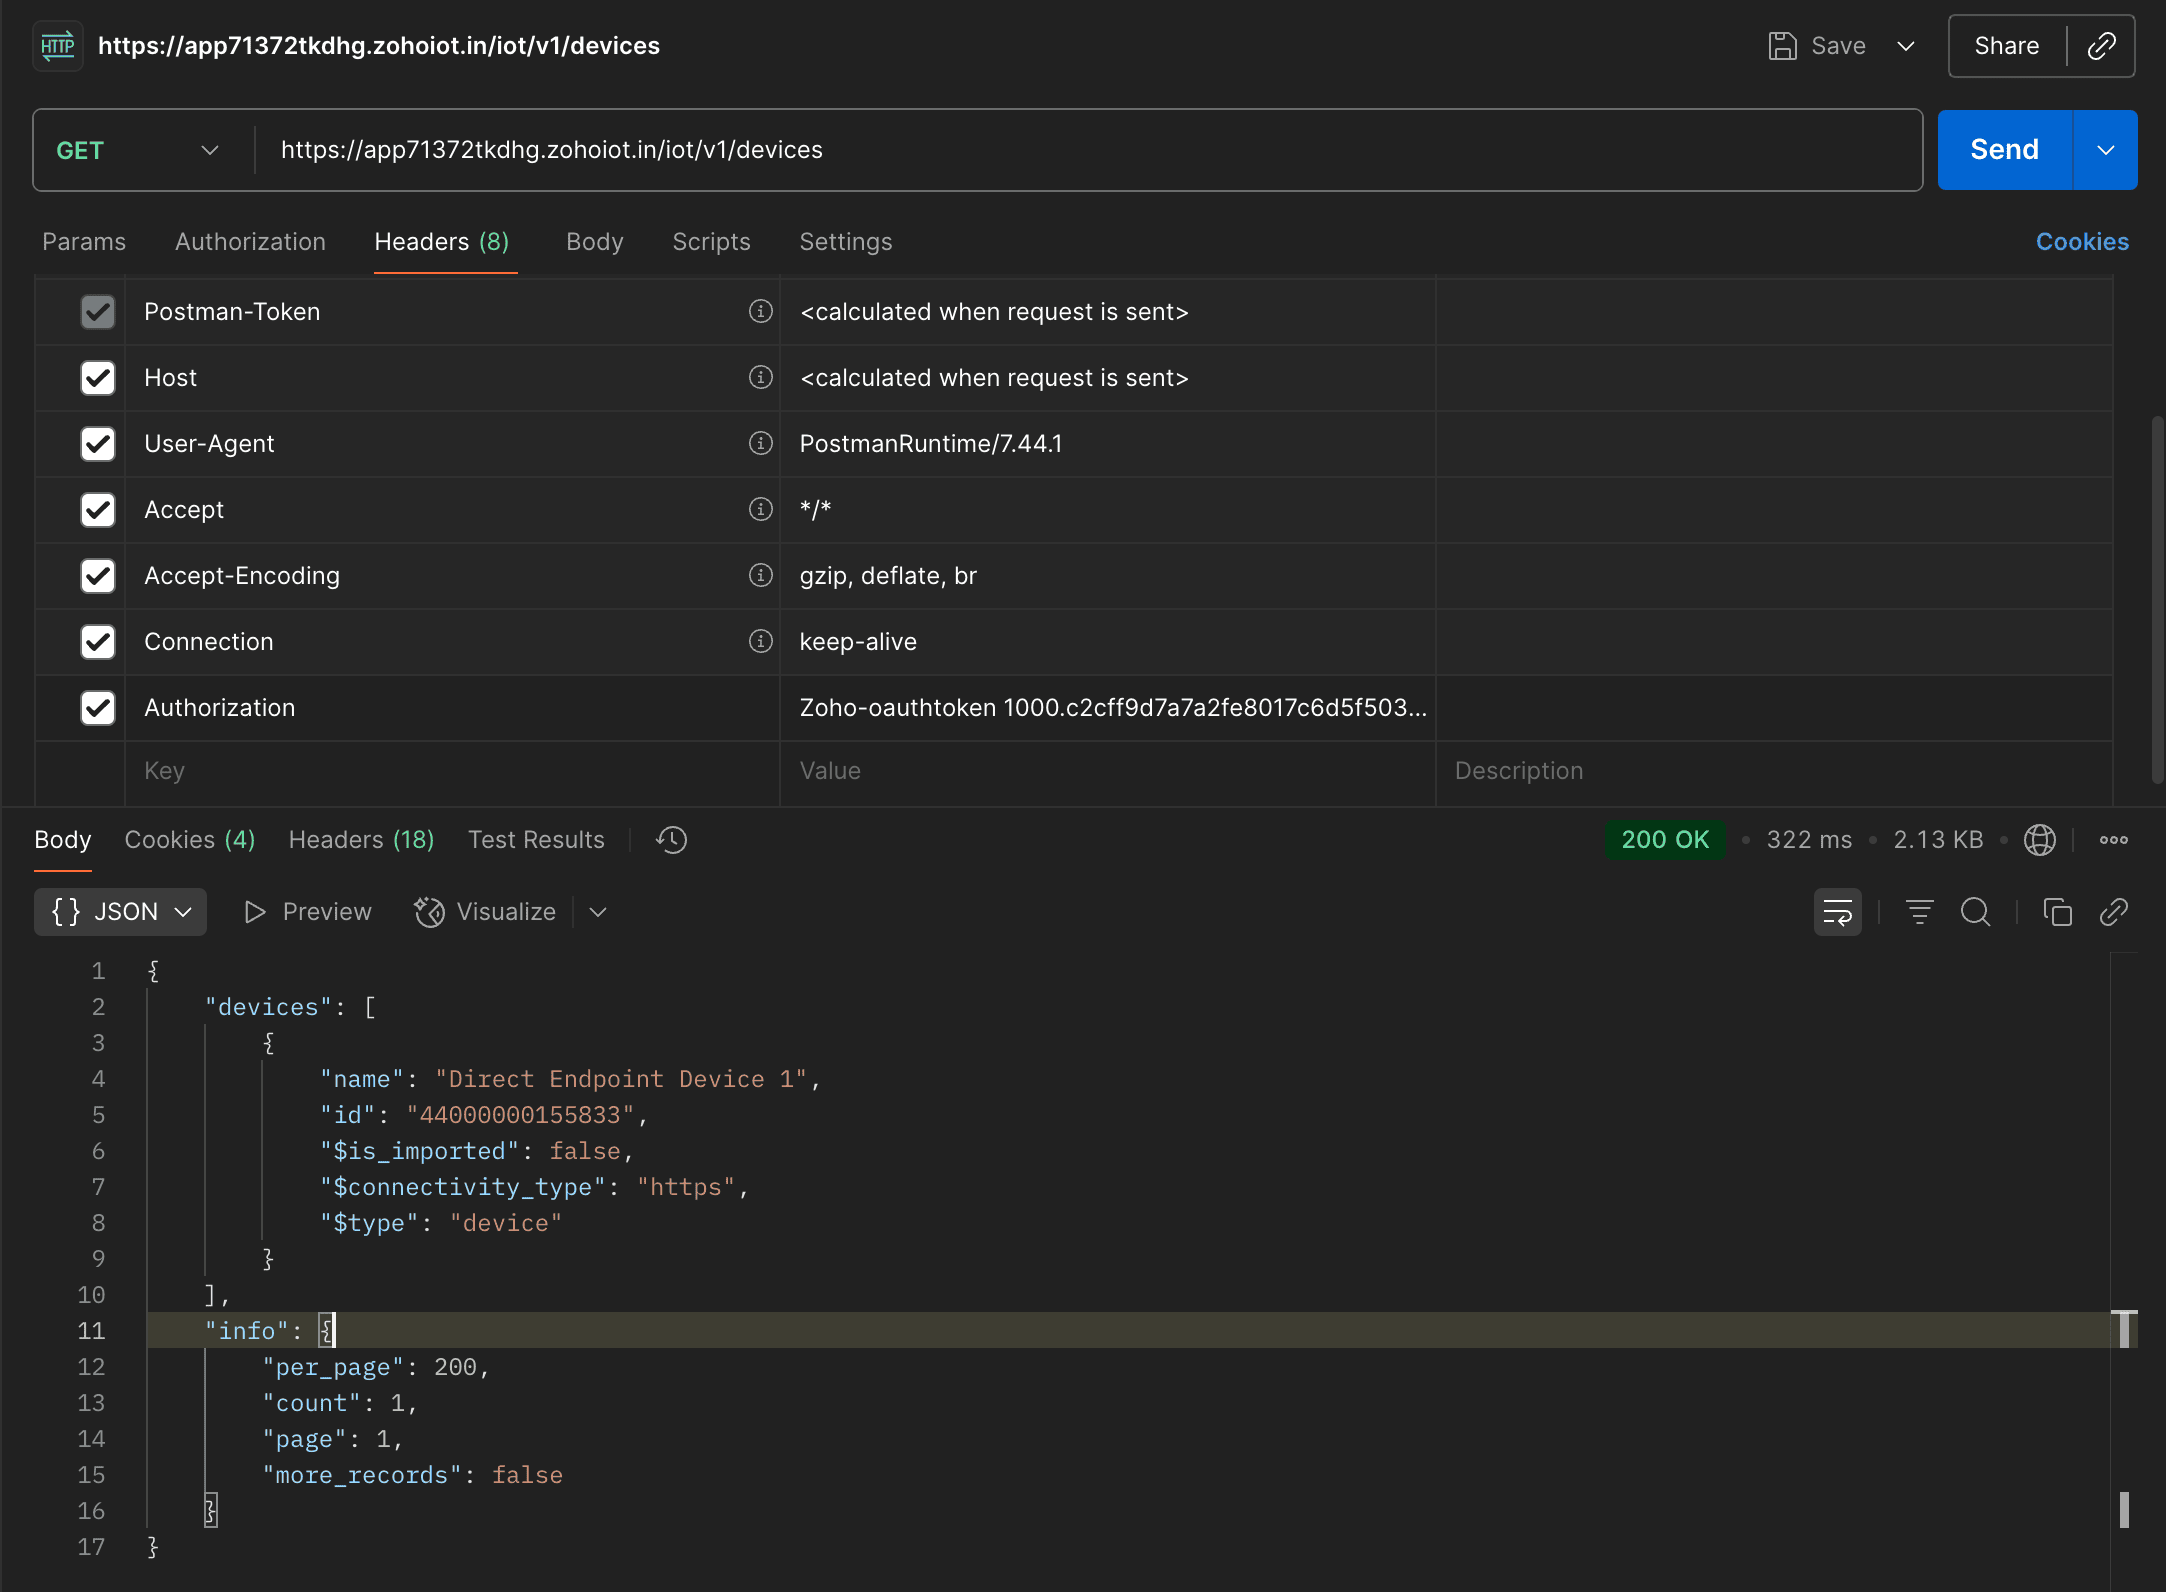
Sample API Call: Accessing IoT APIs Using Access Token in Postman
In the below sample implementation on generating Access Token we have used the scope ZohoIOT.modules.devices.ALL. Using this access_token, you can access the device information available in the application.
- Header name should be Authorization
- Header value should be Zoho-authtoken {access_token}