

How to setup Razorpay?
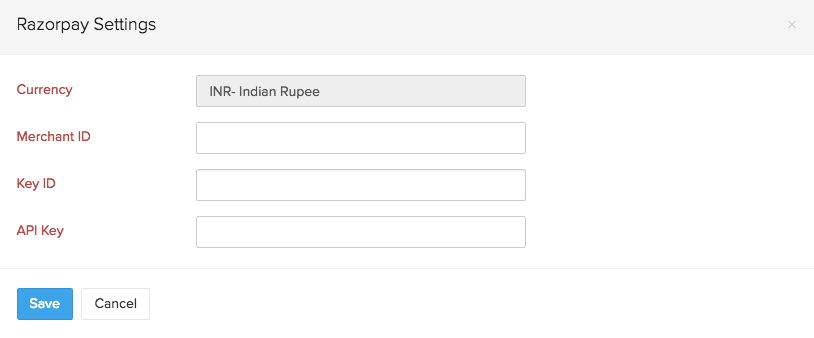
To set up Razorpay, click the Gear icon > Integrations > Online Payments. Click on the Setup Now button under Razorpay and enter the information required and click on Save. As of now, Razorpay is supported only for organizations with India as their country.
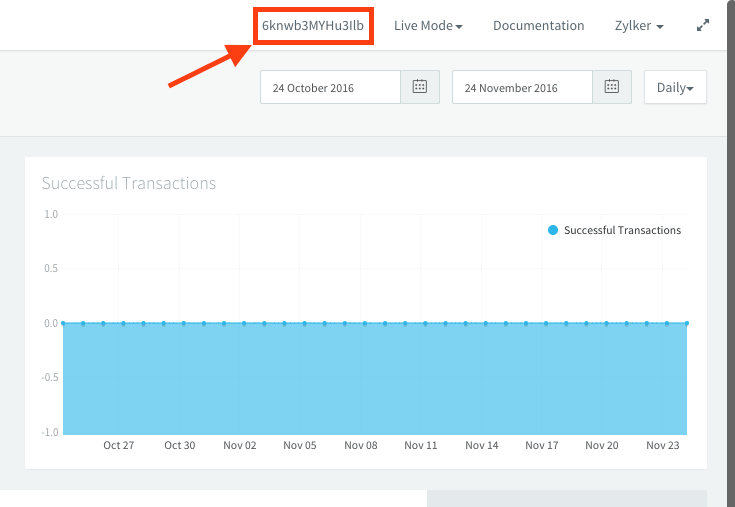
To get Merchant ID,
- Login to your Razorpay account and verify that you’re in Live Mode.
- Next, your Merchant ID will be displayed at the top.
To get Key ID,
- Login to your Razorpay account and verify that you’re in Live Mode.
- If you’ve already generated the API Keys, you can find your Key ID under API Keys tab at the bottom-left of the dashboard.
- If you haven’t generated the API Keys yet, click on the Generate Live Key button to get your Key ID and API Key (Key Secret).
To get API Key aka Key Secret,
The API Key aka Key Secret will be displayed only once when you first generate your Api keys. So, it cannot be retrieved unless you saved them.
If you didn’t save your API Key, then the only way left is to regenerate the Api Keys by clicking on the Regenerate Live Key button under the Api Keys tab and the API key and Key ID (Key Secret) will be displayed on a pop-up. If you regenerate your Api Keys make sure to use the newly generated Key ID and API Key while integrating with Zoho Subscriptions.
So, with that said, if you haven’t generated the API Keys yet, click on the Generate Live Key under button under API Keys tab at the bottom-left of the dashboard to get your Key ID and API Key (Key Secret).
Note:* It is advised to save your API Key and Key ID (Key Secret) by downloading them because Key ID will not be displayed again anywhere inside the Razorpay account.
 Yes
No
Yes
No
Thank you for your feedback!