

Custom Domain Mapping
This feature lets your customers access the Customer Portal with a custom domain name.
Scenario: Patricia runs a company named Zylker and her website’s domain name is https
- Mapping Your Custom Domain to Zoho Invoice
- Certificate Installation
- Disabling Your Custom Domain
- Deleting and Changing Your Custom Domain
Mapping Your Custom Domain to Zoho Invoice
Prerequisites:
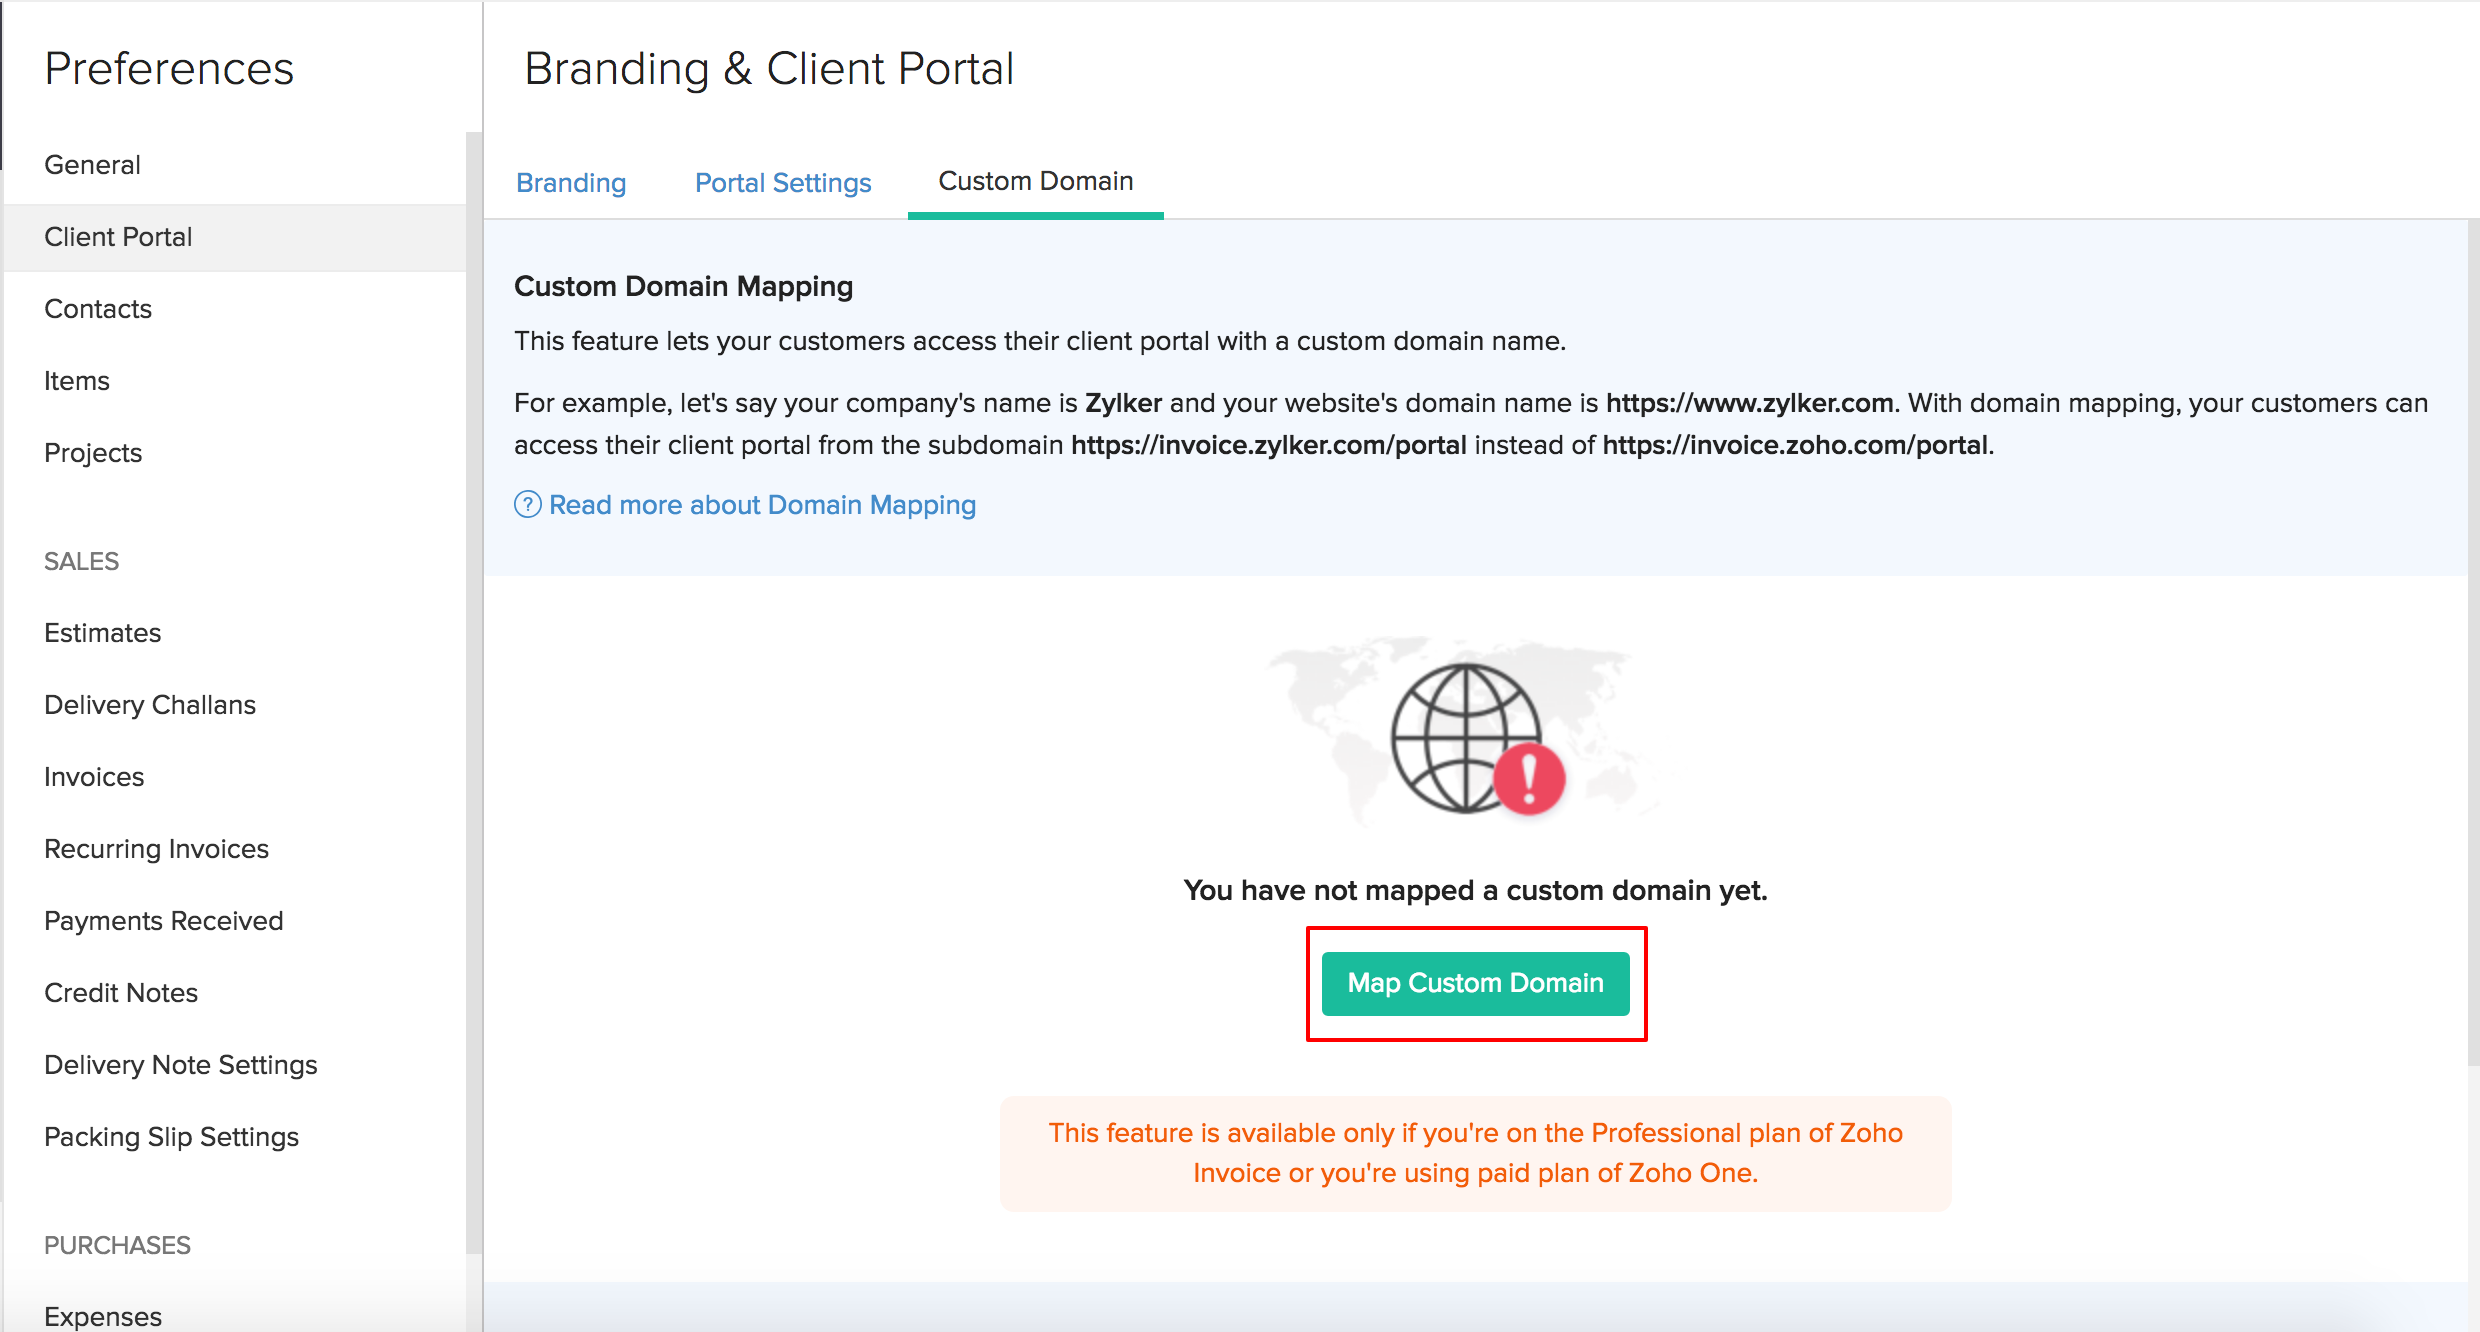
- A Professional plan of Zoho Invoice / A paid plan of Zoho Finance Plus / A paid plan of Zoho One.
- A domain that is owned by you.
To map a custom domain name, you have to add a CNAME record in your domain name provider’s website (e.g. GoDaddy) and then verify your domain name in Zoho Invoice. To do this:
- Go to Settings > Preferences > Customer Portal > Custom Domain.
- Click the Map Custom Domain button.
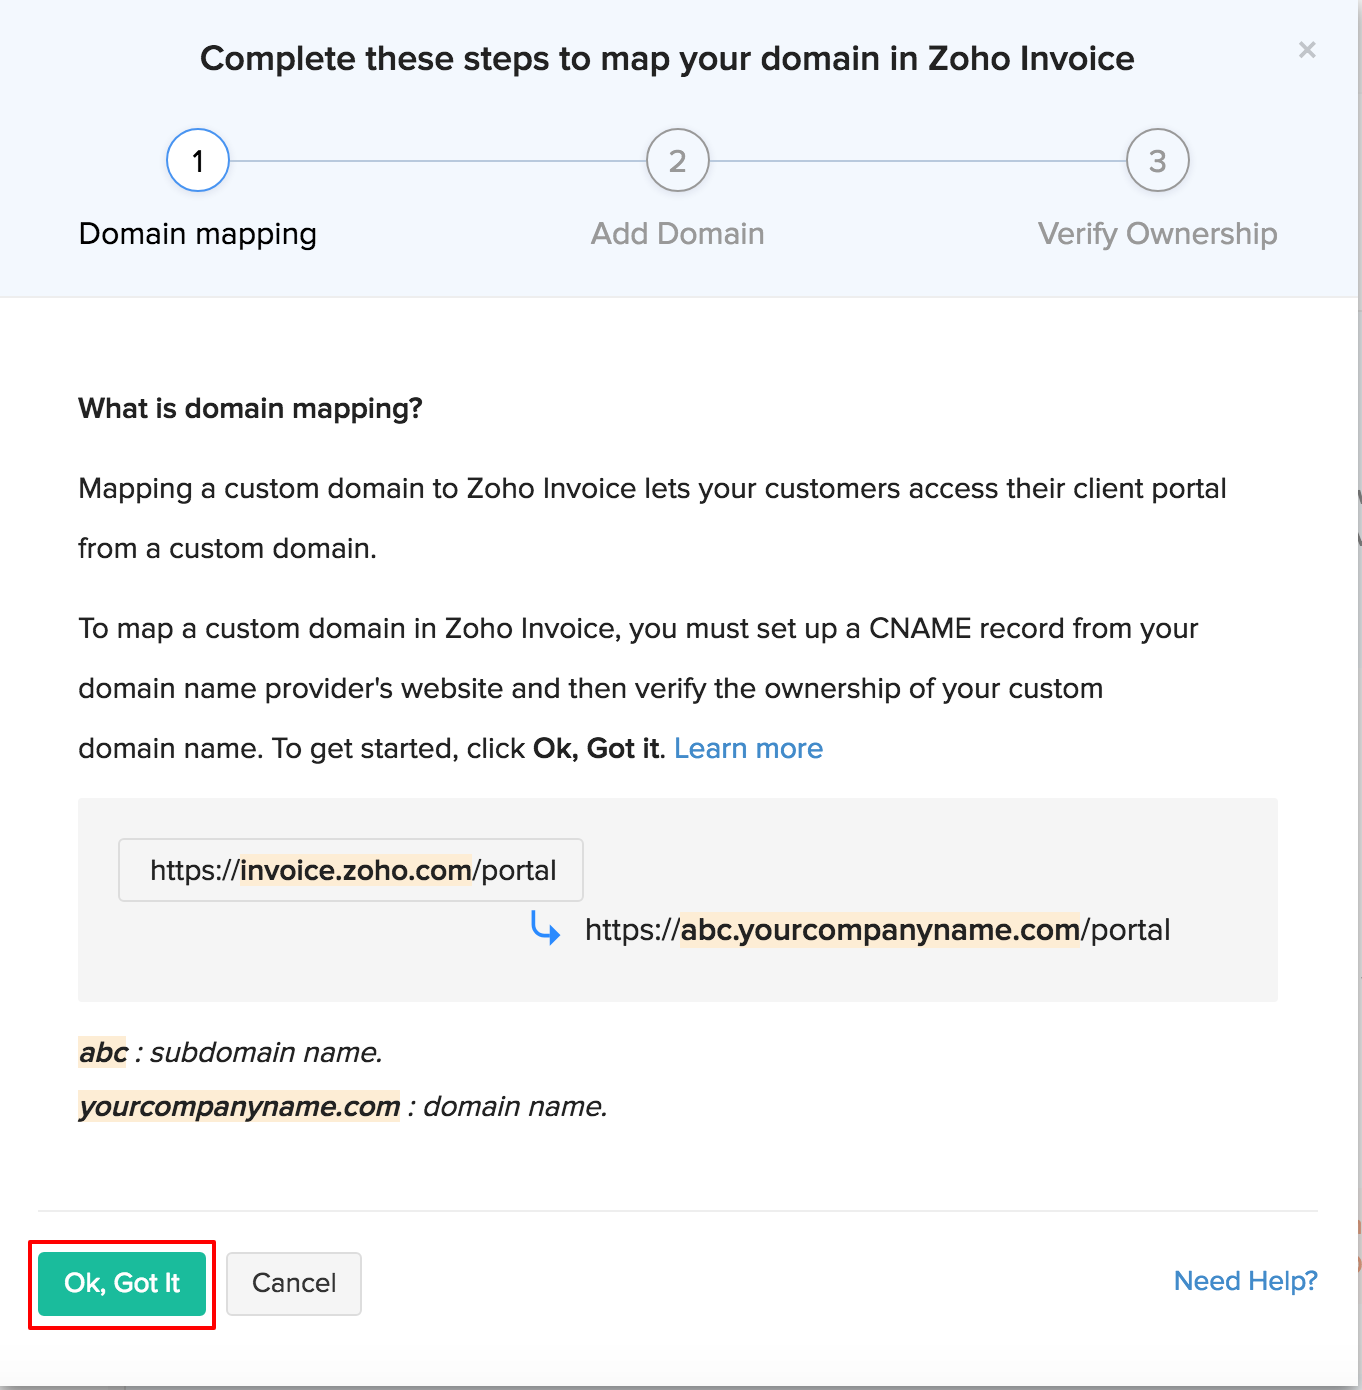
Insight: A CNAME record is used to map one domain to another.
- Read through the description about custom domain mapping and then click Ok, Got It.
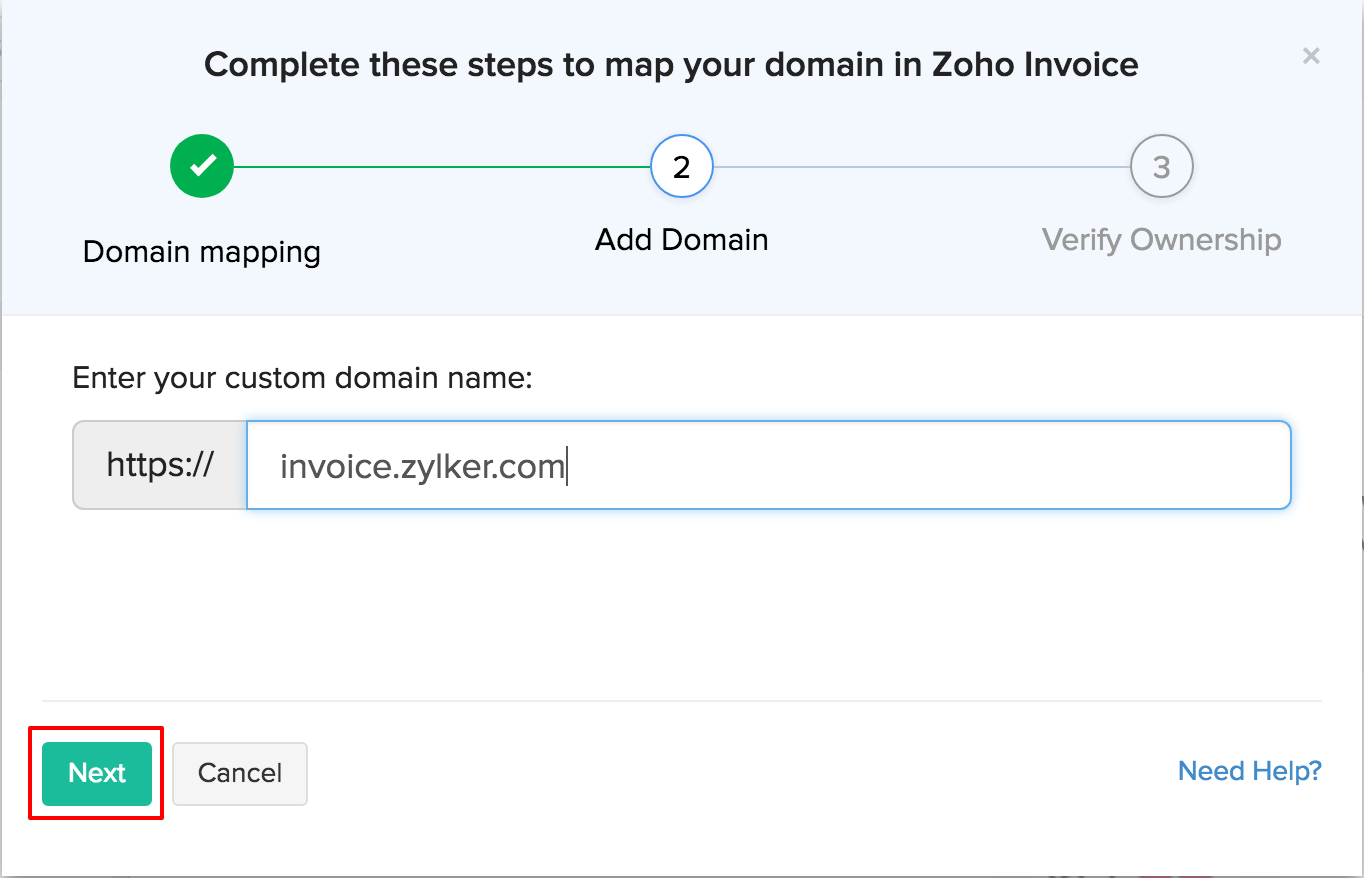
- Enter the name of your custom domain (e.g. billing.zylker.com) and click Next.
- Go to your domain name provider’s website and navigate to the DNS (Domain Name System) settings page.
- Add a CNAME record with the CNAME (provided by Zoho Invoice) and your host name.
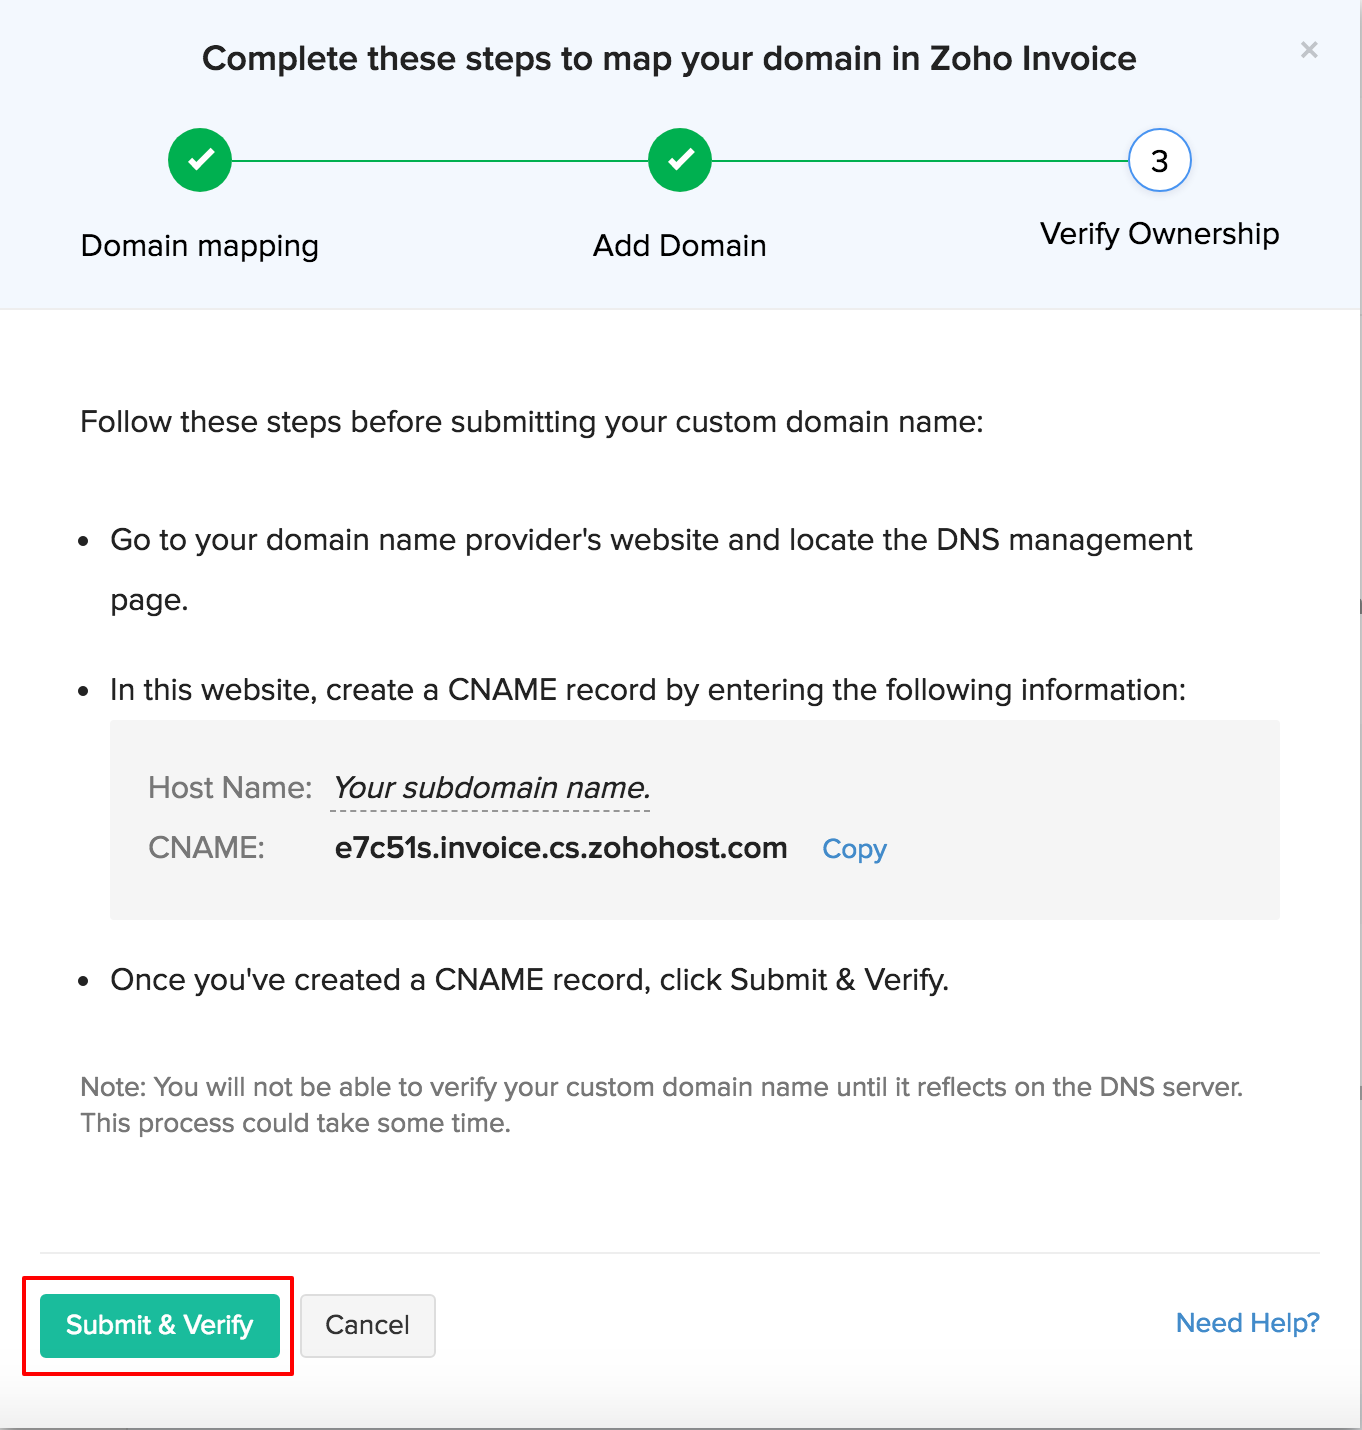
Insight: The host name is usually your subdomain name. i.e, if your custom domain name is billing.zylker.com, your domain name is zylker.com and your subdomain name would be billing.
- Click Submit & Verify.
You won’t be able to proceed until we verify that your CNAME record reflects on the DNS server. However, a newly created CNAME record could take a while to reflect on the DNS server. This depends on your domain name provider’s TTL (Time to Live) settings. You can contact your domain name provider’s support if you need further assistance with adding a CNAME record.
Note: When you set up a custom domain, your domain name will be shared with Zoho Creator.
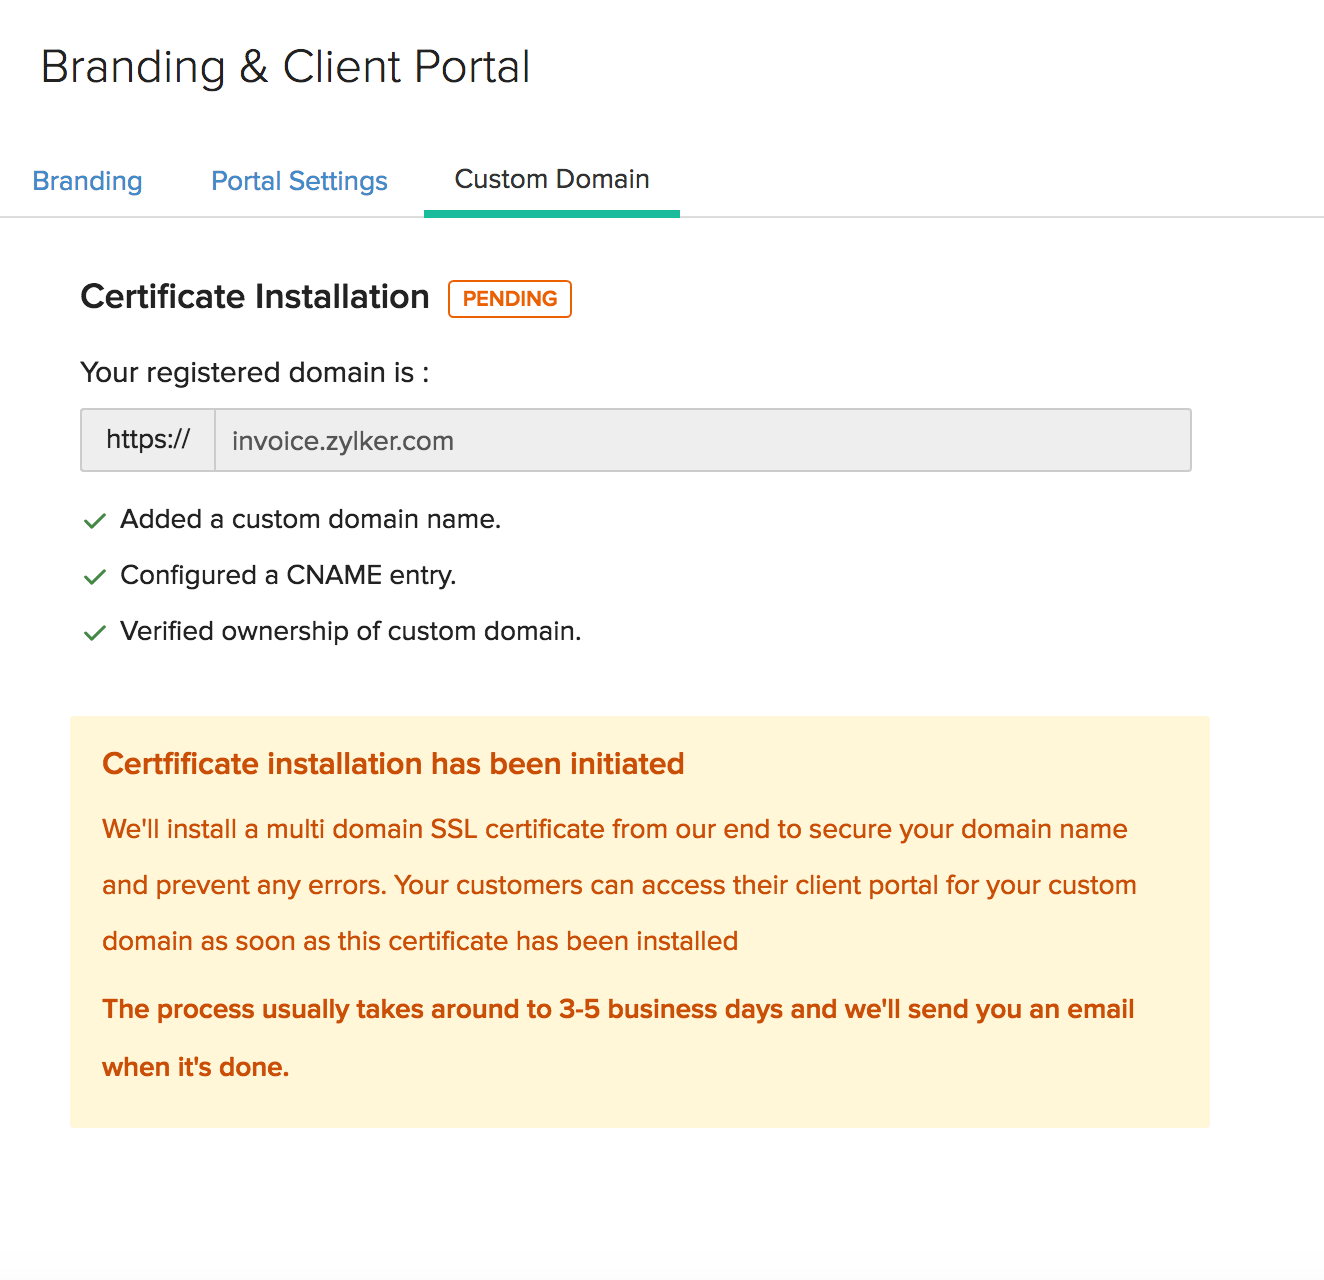
Certificate Installation
SSL certificates help create a secure connection between a web server and a user’s web browser. Having an SSL certificate installed for your custom domain will prevent access errors for your customers.
As soon as your domain name is verified, we’ll start installing a multi-domain SSL certificate for your custom domain. This usually takes around 3-5 business days. Once this is done, you can access Zoho Invoice with your custom domain name. You’ll be notified by email when the SSL certificate has been installed.
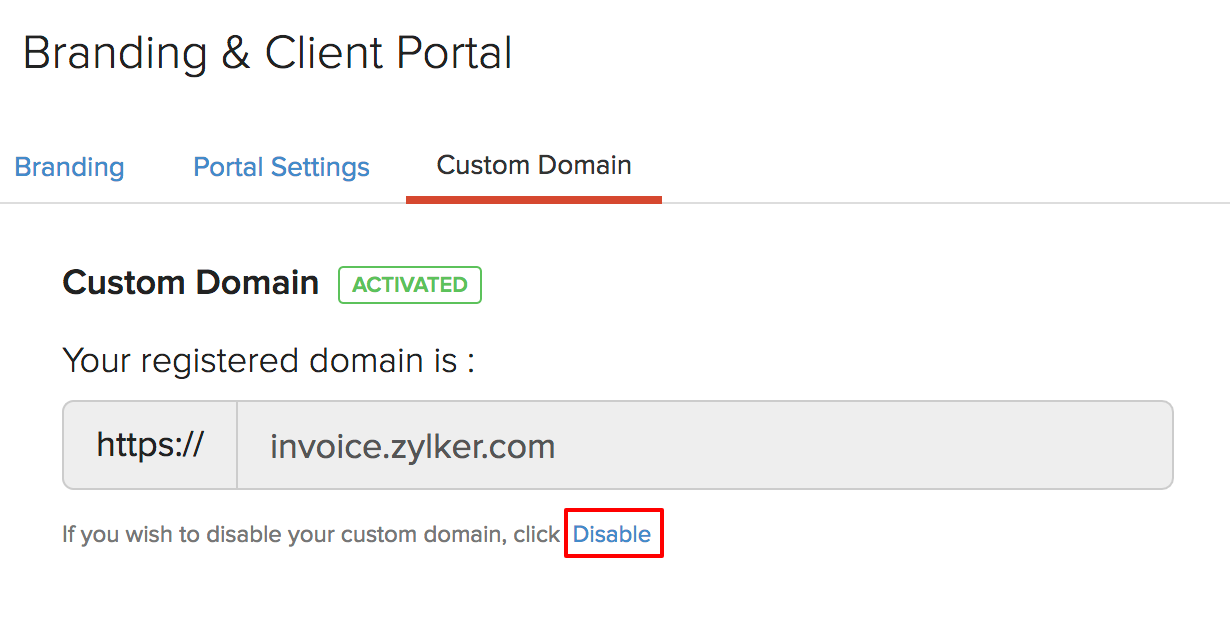
Disabling Your Custom Domain
You can choose to disable your custom domain temporarily. This can be done with ease:
- Go to Settings > Preferences > Customer Portal > Custom Domain.
- Click Disable.
- Read through the pop-up that appears and then mark the Yes, I want to disable my custom domain box.
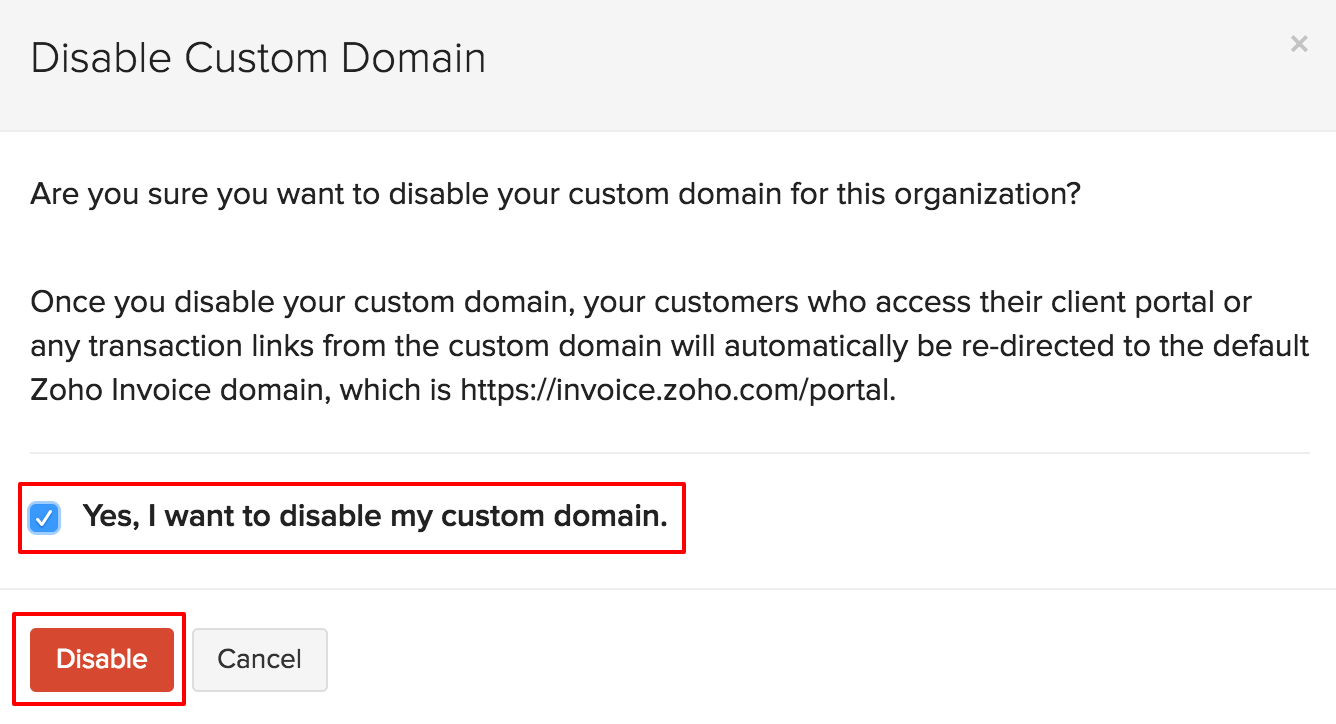
- Click the Disable button.
Now, your custom domain will be disabled instantly and your customers will have to access their customer portal from the default domain, which is https://invoice.zoho.com/portal. Any links sent from the custom domain will be redirected to the default Zoho Invoice domain.
Note: A disabled custom domain can be reverted easily by clicking the Re-enable button.
Deleting and Changing Your Custom Domain
You can delete your custom domain mapping from Zoho Invoice if you want to switch back to the default Zoho Invoice domain permanently. Deleting your custom domain mapping is also necessary if you want to map the Customer Portal with a different domain name and start the domain mapping process again for the new domain.
Prerequisites:
- Your custom domain must be disabled.
- The CNAME record must be deleted from your domain name provider’s website.
To delete your custom domain mapping:
- Go to Settings > Preferences > Customer Portal > Custom Domain.
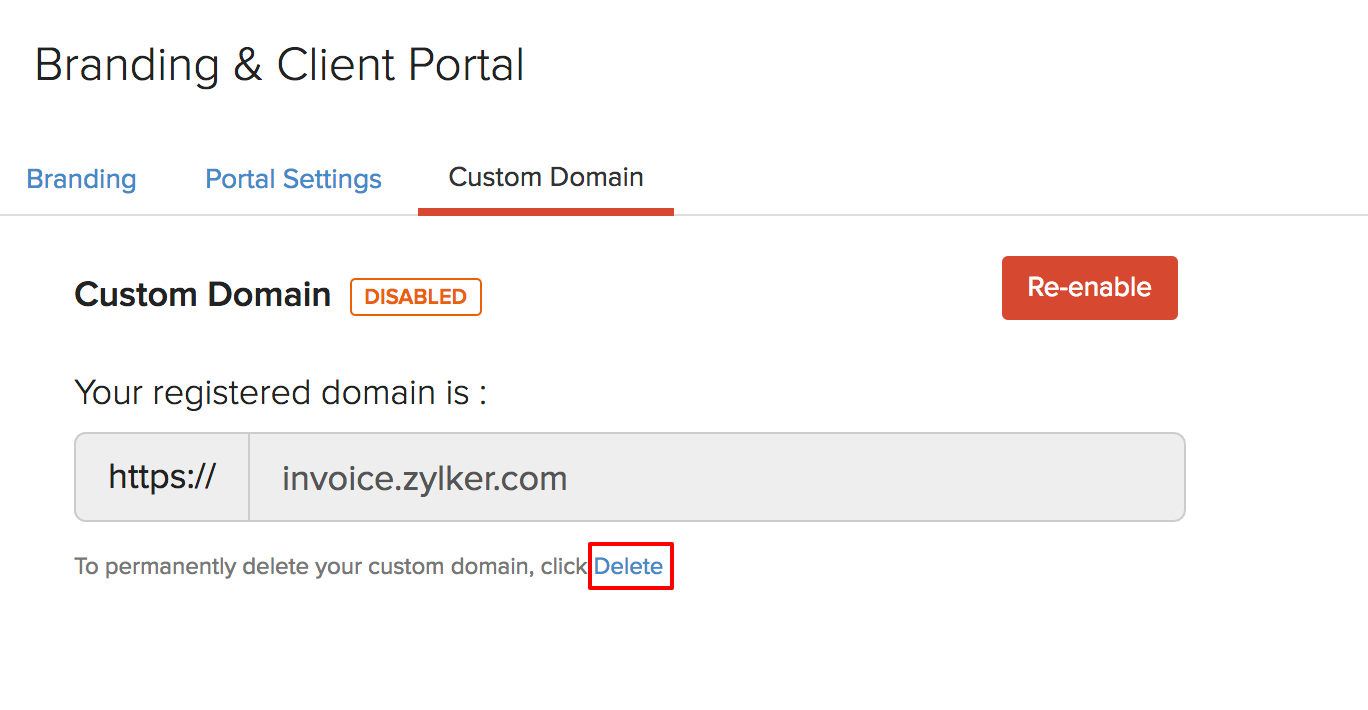
- Click the Delete button.
- Read through the pop-up and then check the Yes, I want to delete my custom domain permanently box.
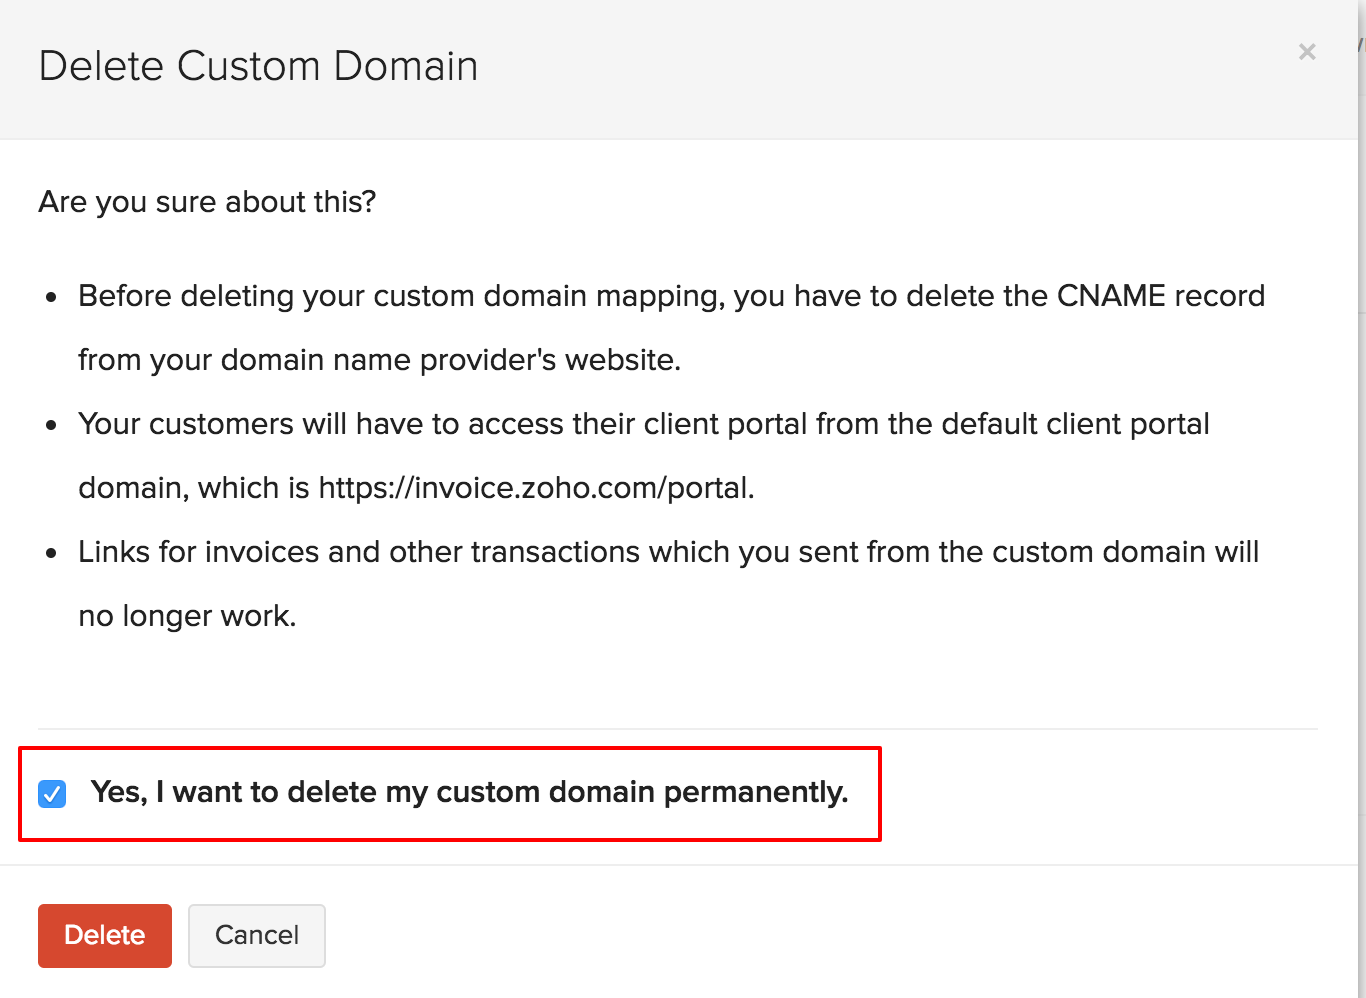
- Click Delete.
Now, your custom domain mapping will be deleted permanently.
Warning: Your customers will no longer be able to access the Customer Portal with your custom domain name and will have to use the default Zoho Invoice domain, which is https://invoice.zoho.com/portal. Any transaction links sent from the custom domain will not work and will not be redirected either.
Once you’ve deleted your custom domain, you can start the mapping process again and associate it with a different domain name, if you wish to do so.
Pro Tip: If you’re not able to access Zoho Invoice using your custom domain, you can use this link to launch the app. Read More
 Yes
No
Yes
No
Thank you for your feedback!