## Zoho Invoice — Product, features, payments, integrations, solutions, and help Index
Access the complete documentation index at:
https://www.zoho.com/invoice/llms.txt
Use this file to discover all available documentation pages before proceeding.
# Create Widget
There might be times where you have to access a service or feature that is not available in Zoho Invoice. In such cases, you can create a widget and embed it in the app.
### Set up Runtime Environment
To create a widget you’ll first have to set up a runtime environment. Here’s how:
* Install **node.js** If you’ve already installed node.js, you can go to the next step.
**Insight:** Zoho Invoice supports node.js versions 7.1.0 and above. You can test it by running the **node -v** command in your terminal.
* Install the **ZET** (Zoho Extension Toolkit) globally by running this command in your terminal:
```sh
npm install -g zoho-extension-toolkit
```
**Notes:** Install version greater 0.23.15
**Insight:** The -g command in the above code denotes global installation. This allows you to run ZET commands from anywhere on your machine.
### Build Widget
Once you have set up the runtime environment successfully, you can start building your widget. Here’s how:
* Run **zet init** in your terminal.
* Choose **Zoho Invoice** from the list of services.
* Specify the service you are embedding. Let’s say, you want to embed the _Hello World_ widget.
* A project template directory comprising of all the necessary folders, dependency node packages, and files will be created automatically.
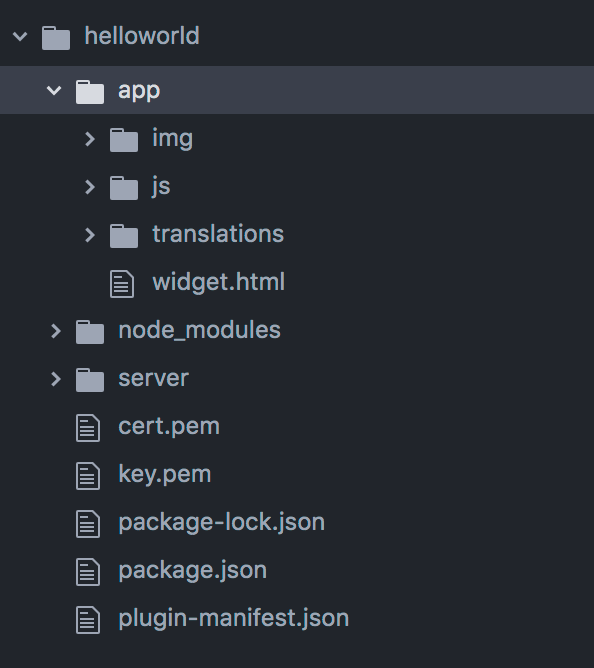
A widget will be created.
**Insight:** Run cd \[widget name\] in the terminal, to navigate to the current path of the widget’s directory. In that, the plugin-manifest.json contains meta information about the widget. You can configure the widget details, location, used connections, etc.
### Configure Widget
Once you’ve created the widget, you can configure it in Zoho Invoice using a few parameters. Here’s how you can configure the Hello World widget in the sidebar of the customer creation page:.
* Edit the **plugin-manifest.json** file based on the html file path and location as per your needs.
* The **location** indicates, where the widget will be displayed. In this case, the location will be the custom creation sidebar (**customer.creation.sidebar**).
* The **url** will be the html file path which is loaded initially. In this **/app/widget.html** is used.
* The **logo** will be an image file path which is used for the widget logo. In this **/app/img/logo.png** is used.
```json
{
"locale": [
"en"
],
"service": "FINANCE",
"modules": {
"widgets": [
{
"location": "customer.creation.sidebar",
"name": "Hello World",
"url": "/app/widget.html",
"logo": "/app/img/logo.png"
}
]
},
"config": [],
"usedConnections": []
}
```
* Here’s a html snippet of the _Hello World_ widget:
```html
Hello World
Welcome to zoho finance widgets.
```
Here, **[https://js.zohostatic.com/zohofinance/v1/zf\_sdk.js](https://js.zohostatic.com/zohofinance/v1/zf_sdk.js)** is the SDK URL. It contains the global object **ZFAPPS**. It’ll help you communicate with the Zoho Finance products.
To make the global object work, you’ll have to initialise it once the iframe has been loaded. Inside the initialisation block ZFAPPS’s **get API** has been used to get the user name from Zoho Finance applications.
### Test Widget
Once the widget is created, you can test it on your local machine. To test:
* Run **zet run** command in your terminal.
* Access this URL in your browser to know whether the widget runs on the local server: https://127.0.0.1:5000/plugin-manifest.json
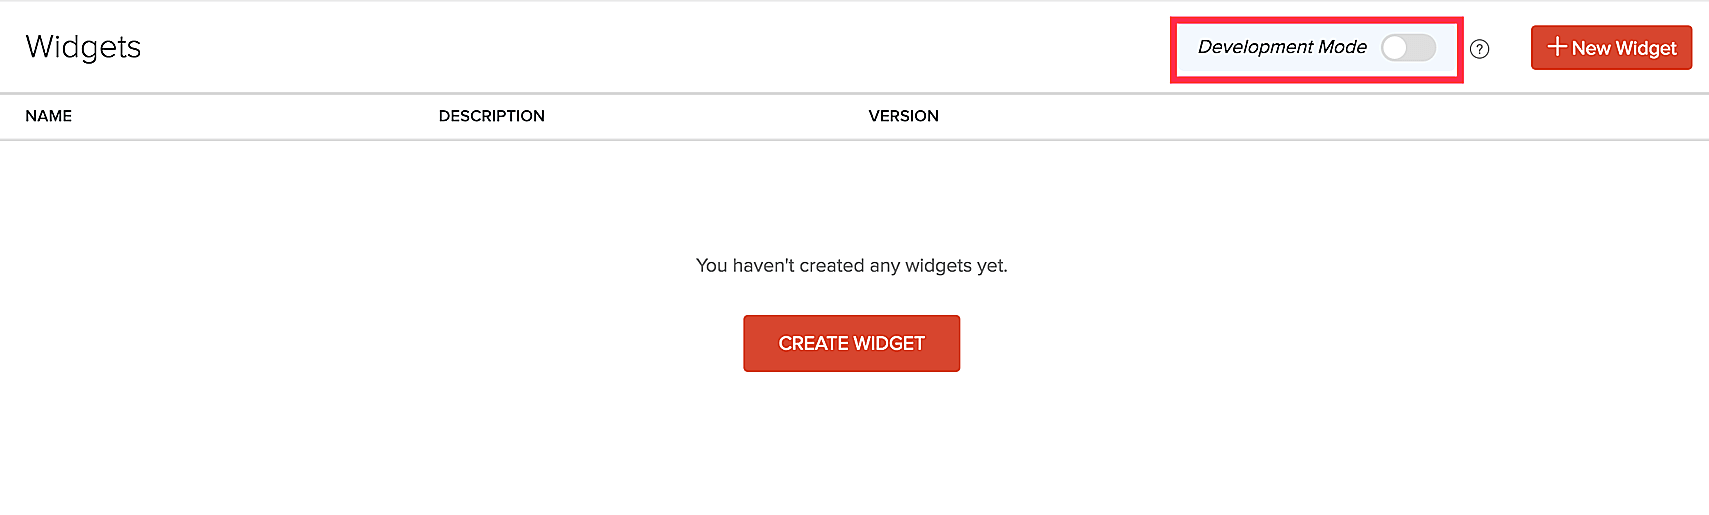
Next, you’ll have to switch to developer mode to test the widget. Here’s how:
* Go to your **Zoho Invoice** organisation and navigate to **Settings**.
* Go to **Developer Space** and select **Widgets**.
* Toggle the button to enable **Developer Mode**.
**Warning:**When Developer Mode is enabled, the other widgets installed in Zoho Invoice will become inactive (invisible). Once it is disabled, the installed widgets will be active again.
Navigate to the location where the widget has been configured and refresh the window to render the widget. The Hello World widget that has been created will be displayed on the right sidebar of the customer creation page.
If you want to revert to normal mode, toggle the button and turn it off.
### Validate Widget
Once you’ve tested the widget, the next step is to validate it. Here’s how:
* Run **zet validate** in the terminal to check if the guidelines specified in the plugin-manifest.json file are met.
Once the validation is successful, you can start packing the widget files. If not, make the necessary changes and run the command again.
### Pack Widget
To upload a widget to the Zoho Marketplace, you’ll have to pack it first. Not all the files of your project directory are required while uploading. To zip the essential files and folders like app and plugin-manifest.json Executing **zet pack**.
**Notes:** zip will be generated under your\_project/dist (SampleWidget/dist/SampleWidget.zip)
### Upload Widget
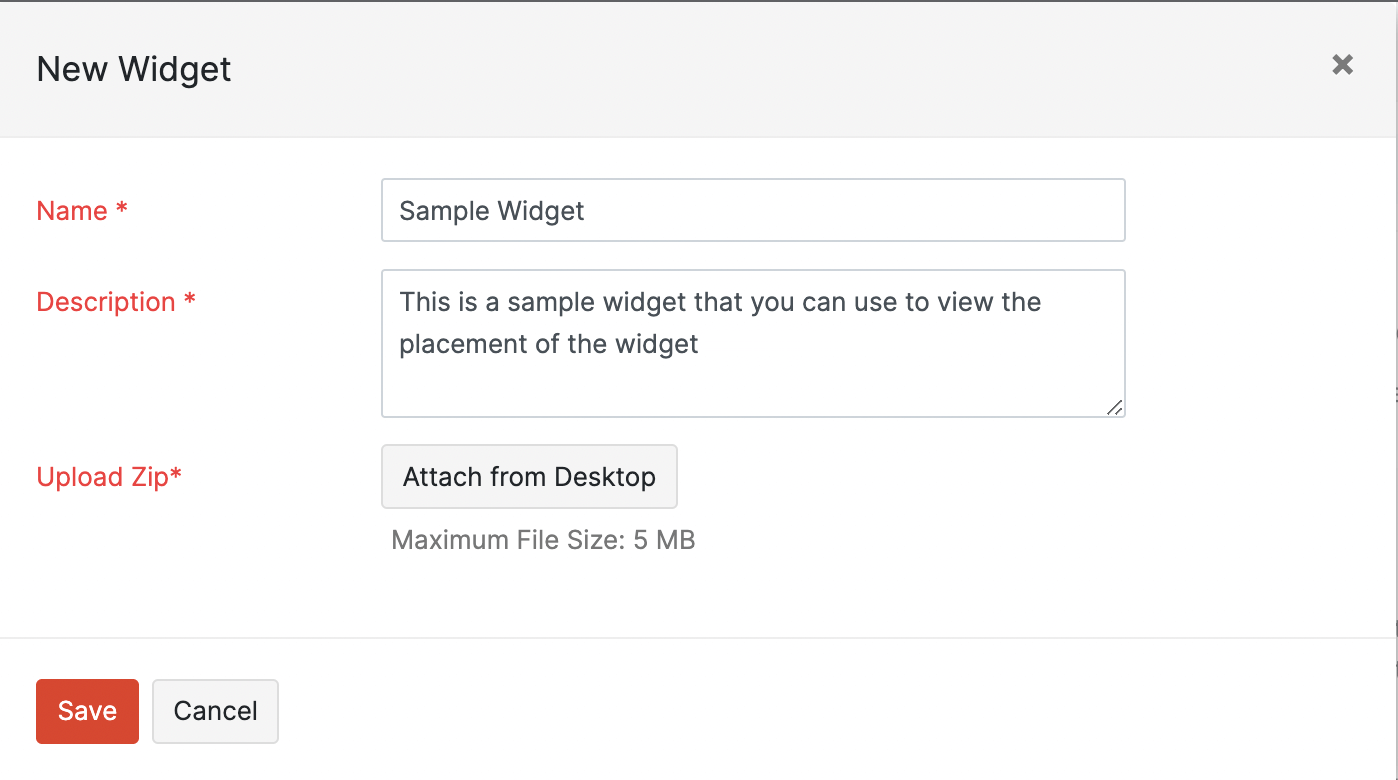
Once the zip is ready, you can upload the widget to Zoho Invoice so that other users in your organisation can use that widget as well. Here’s how you can upload your widget:
* Navigate to **Settings**, then go to **Developer Space** and click **Widgets**.
* Click the **\+ New Widget**.
* Give a name and description for your widget and upload the zip file which was generated by **zet pack**.
* Now, you can access the widgets in the specified locations.
**Notes:** Please ensure that the zip should not contain empty files, and the zip name should not contain numbers or special characters.