
Inventory Adjustments
How To Video
Quantity Adjustment
A quantity adjustment is made when the recorded stock does not match the actual available stock in your warehouse for reasons outside the normal business such as theft, damaged goods, data entry error, write-off, donation etc. In Zoho Inventory, you’ll be able to record stock adjustments for basic inventory-tracked items as well as those which are serial and batch-tracked.
Note: You can only adjust stock for inventory-tracked items.
To record a quantity adjustment in Zoho Inventory:
Go to the Inventory Adjustments module under Inventory from the left sidebar.
Click the + New button on the top right corner of the page.
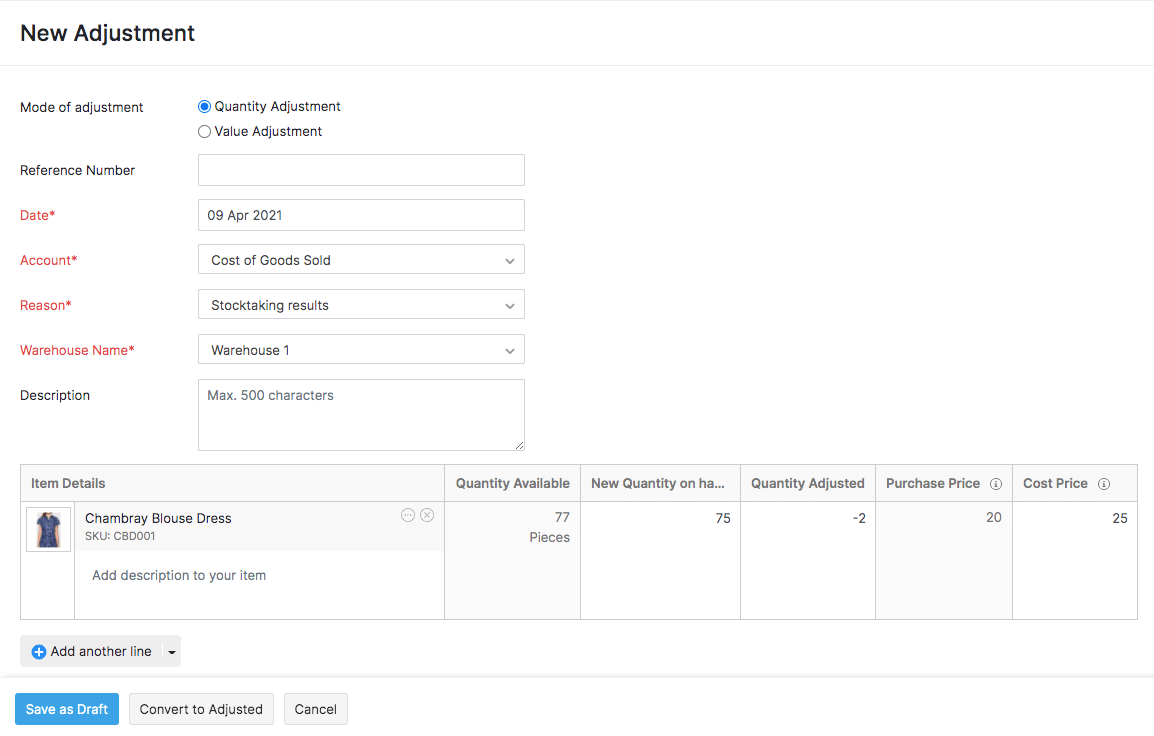
In the New Adjustment page, select Quantity Adjustment as your mode of adjustment.
Choose the account in which you want this adjustment to be reflected. For example, you can track your loss of items due to theft, damage etc., under a separate account so that you get clear-cut information in your reports.
Select a reason for making this adjustment. If your reason isn’t listed in the drop down, then you can add or remove the reasons.
Choose a warehouse in which the stock adjustment should be reflected.
Select the items whose stock you want to adjust in the item details section.
Enter the new available quantity or the adjusted quantity. Based on the value entered in one field, the other field gets auto-calculated.
Under the Cost Price column, enter the purchase value of the adjusted stock. If you have previously adjusted the cost price of the item, it will be displayed as a suggestion.
Click Save as Draft or Convert to Adjusted to successfully adjust stock. This adjustment will be reflected in the respective items’ details page and in the FIFO Cost Lot Tracking report.
You can also adjust the quantity or value of a single item. To do so:
Go to the Items module under Items from the left sidebar.
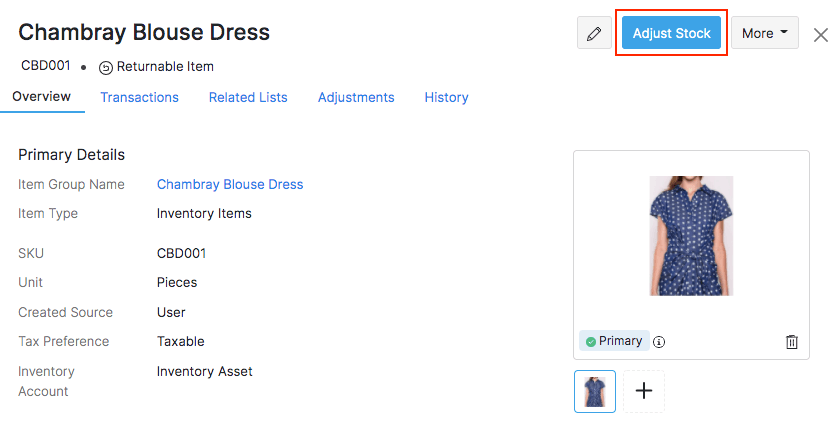
Open the item whose quantity or value you want to adjust.
Click the Adjust Stock button on the top right corner of the item details page.
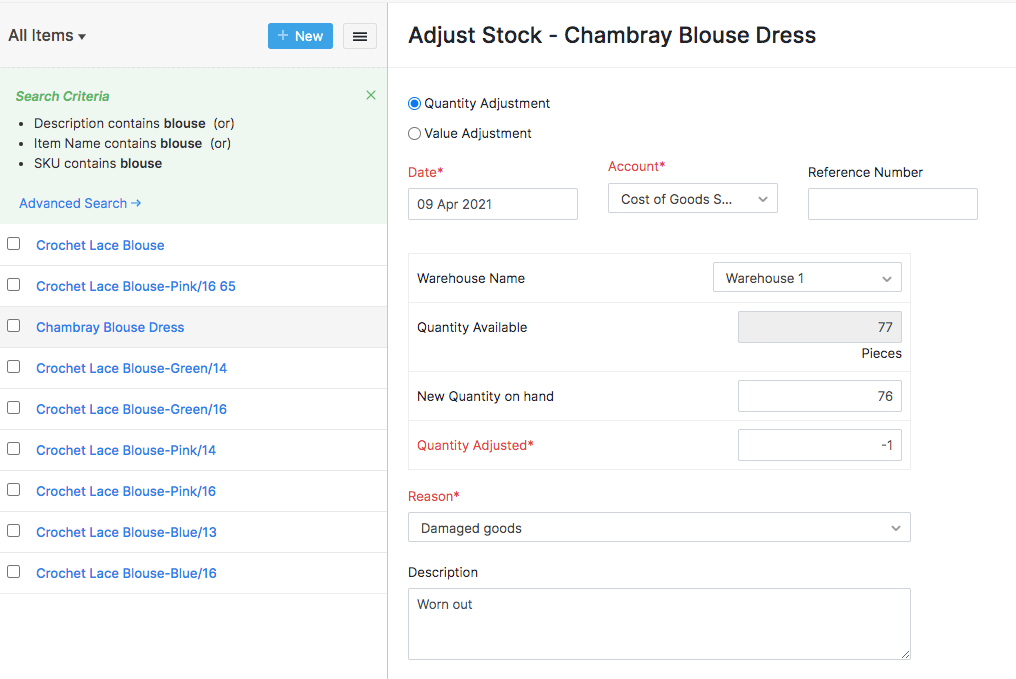
Select the type of adjustment you want to make.
Enter the new quantity or value.
Click the Save as Draft or Convert to Adjusted button at the bottom of the page.
Adjust stock for serial-tracked items
To adjust stock for serialized items:
Select the serialized items whose stock you want to adjust in the item details section.
Enter the new quantity or the adjusted quantity.
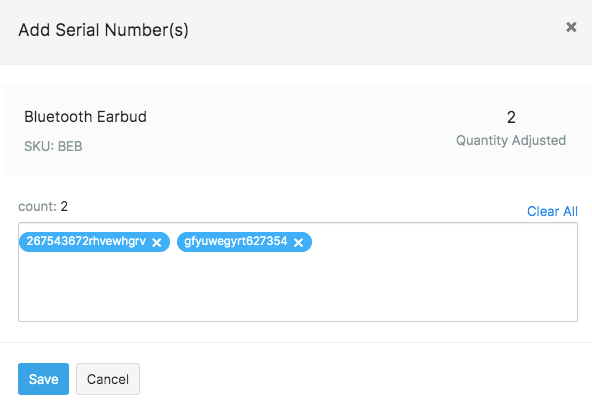
Click the Select Serial Numbers or the Add Serial Numbers option under the adjusted quantity.

Enter or select the serial numbers for the adjusted units in the dialog box. You can also enable barcode scanning to scan the serial numbers intead of entering them manually.
Enter the purchase value of the adjusted stock under the Cost Price field.
Click Save as Draft or Convert to Adjusted to successfully adjust stock.
Adjust stock for batch-tracked items
To adjust stock for batch-tracked items:
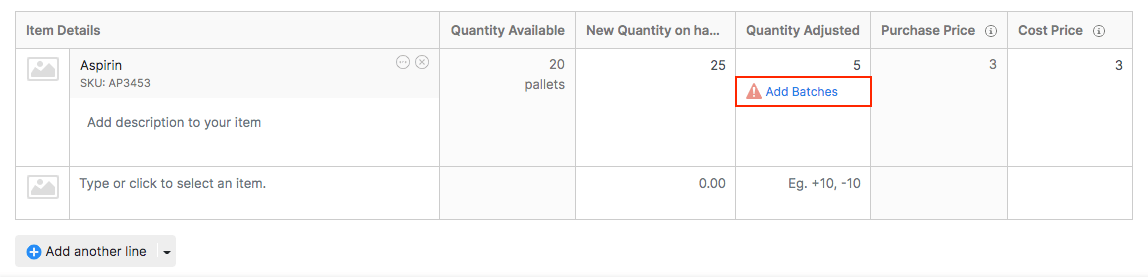
Select the items whose stock you want to adjust in the item details section.
Enter the new quantity or the adjusted quantity.
Click the Select Batches or the Add Batches option under the adjusted quantity.
Enter new batch numbers or select from the existing batch numbers for the adjusted units in the dialog box.
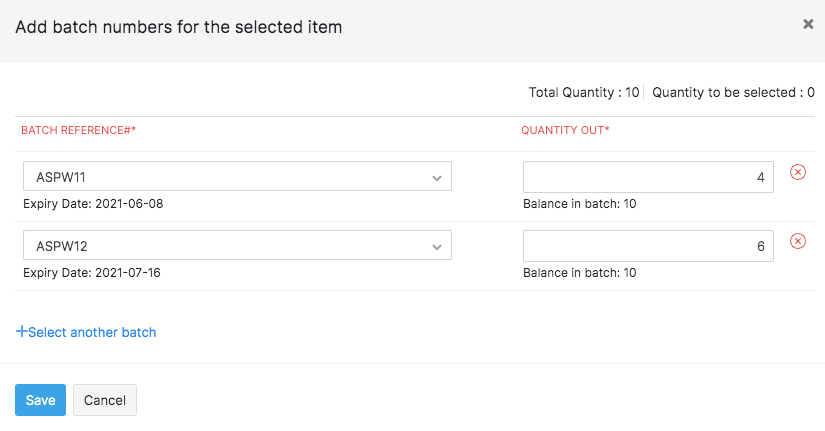
Enter the purchase value of the adjusted stock under the Cost Price field.
Click Save as Draft or Convert to Adjusted to successfully adjust stock.
Value Adjustment
A Value Adjustment is recorded in Zoho Inventory when the value of an item increases or decreases due to supply and demand. For example, if an item is slow-moving, it leads to a drop in the unit cost and the asset value.
Note: You can only make value adjustments for items which are in stock.
To adjust the value of your items:
Go to the Inventory Adjustments module under Inventory from the left sidebar.
Click the + New button on the top right corner of the page.
In the New Adjustment page, select Value Adjustment as your mode of adjustment.
Choose the account in which you want this adjustment to be reflected.
Select a reason for making this adjustment. If your reason isn’t listed in the drop down, then you can add or remove the reasons.
Choose a warehouse in which you want to make this adjustment .
Select the items whose value you want to adjust in the item details section.
Enter the Changed Value or the Adjusted Value. Based on the value entered in one field, the other field will be auto-populated with the appropriate value.
Click the Save as Draft or Convert to Adjusted button.
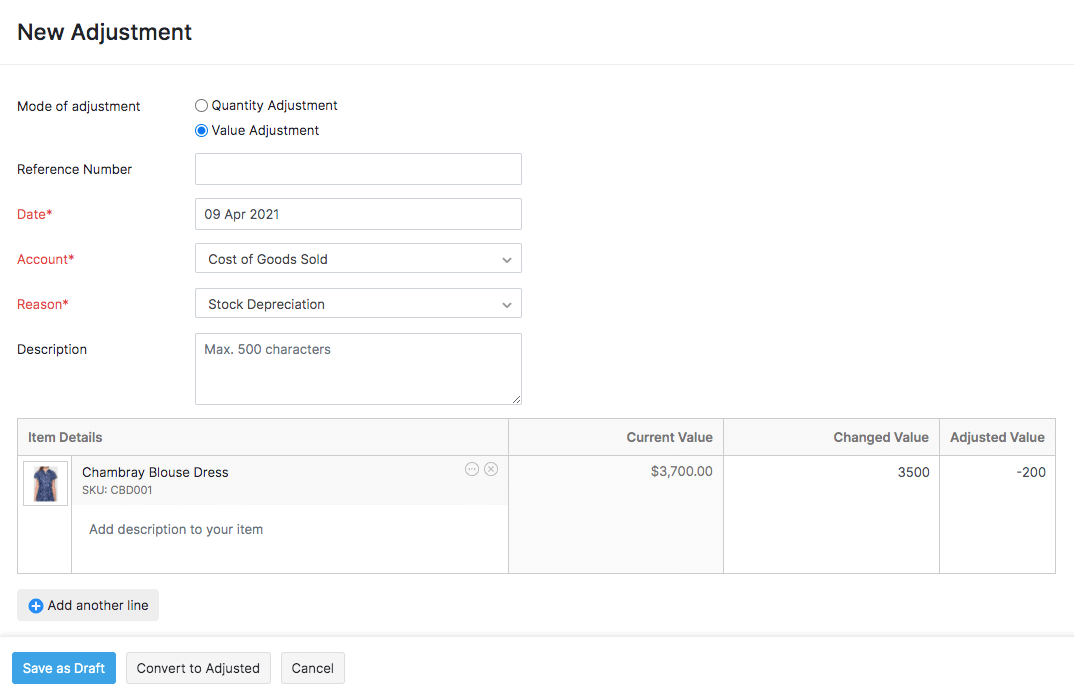
Insight: The Current Value is the sum of the cost price of the individual stock units of the item.
Manage Adjustment Reasons
Stock adjustments are done for a number of reasons. If your reason isn’t listed in the dropdown, you can add them as well as remove the unused reasons.
To manage adjustment reasons:
Go to the Inventory Adjustments module under Inventory from the left sidebar.
Click the + New button on the top right corner of the page.
Click the Reasons dropdown.
Select Manage Reasons.
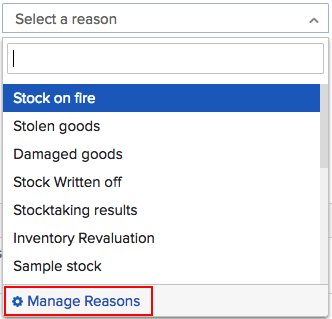
Click on + Add new reason.
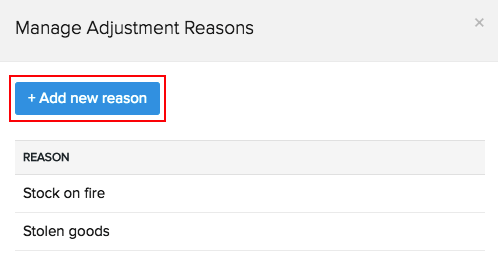
Enter the reason name and click Save and Select to add the new reason to your adjustment.
Hover over an unused reason and click Mark as Inactive to make the reason inactive or click the trash icon to delete it.

Pro Tip: You cannot delete a reason that is used in an adjustment. Instead, you can mark it as Inactive.
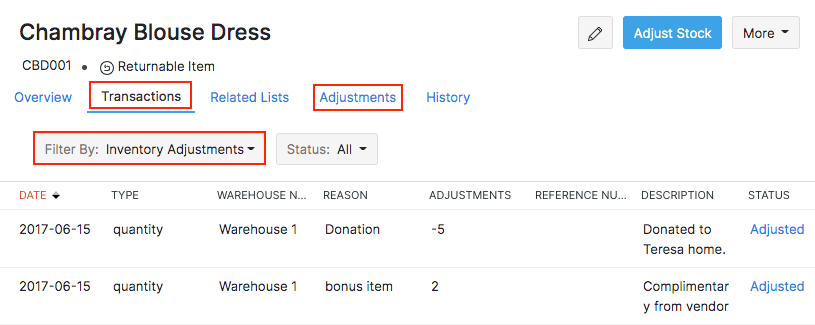
View Adjustments
To view all the adjustments made to an item:
Go to the Items module under Items from the left sidebar.
Open the item whose adjustments you want to view.
Go to the Adjustments tab. All the adjustments made to the item will be listed. Alternatively, you can also open the Transactions tab and filter by Inventory Adjustments.
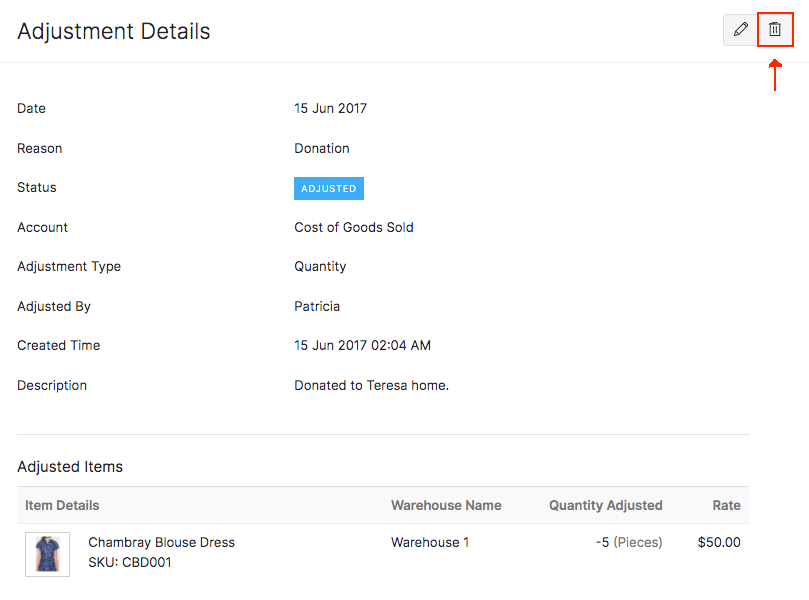
Click on an adjustment to view it in detail.
Delete Adjustment
To delete an adjustment:
Go to the Inventory Adjustments module under Inventory from the left sidebar.
Open the adjustment you want to delete.
Click the Trash icon in the top right corner of the page.
Click the Delete button in the pop-up to confirm your action.
Advance Search for Adjustments
You can view the list of adjustments that were recorded for a period using the advanced search for Item Adjustments. This helps you find out the number of instances where the stock was adjusted for a particular reason.
Click on the Magnifier icon on the search bar at the top.
Click on the Advance Search option.
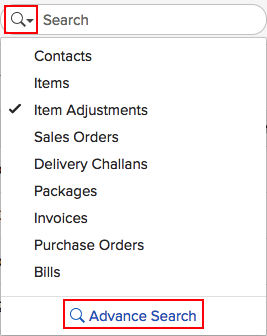
Select Item Adjustments from the Search dropdown.
You can filter by Adjustment Type, Reason and Date Range.
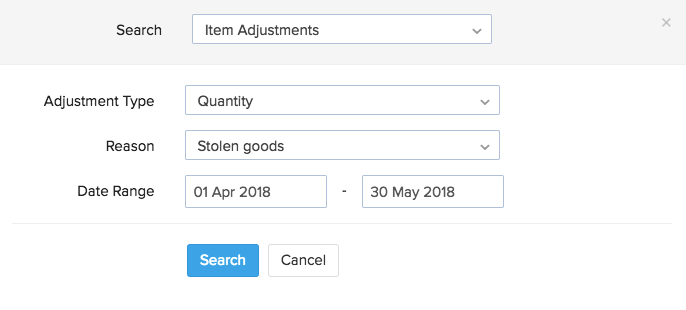
Click Search.