Departments and Designations
Departments and Designations are two essential features in Zoho Payroll that helps organisations manage their employees more efficiently. Departments are the different organisational divisions or units, such as Marketing, Sales, HR, Finance, and Operations. Designations, on the other hand, refer to the job titles of employees within each department.
Organisations can streamline their payroll processes, improve data management, and gain valuable insights into their workforce by creating and managing departments and designations. Overall, Departments and Designations play a crucial role in managing employees and ensuring the smooth functioning of an organisation.
Departments
Departments in Zoho Payroll enable you to record the different departments in your organisation, such as Marketing, Sales, HR, etc. When you record the departments of employees, you can:
Break down payroll data by department: This feature helps you to view the payroll summary of employees based on their departments so that you can make informed decisions.
View payroll spend for each department: This feature enables you to get a high-level view of how much each department spends on payroll. Based on the payroll expense of each department, you can allocate resources, plan budgets, and identify areas where you can potentially reduce costs and improve efficiency.
Generate reports by department: You can generate various reports based on the department-wise data. These reports can provide insights into the performance of each department.
Scenario: Zylker has several departments, including Marketing, Sales, HR, and Finance. The company wants to track the payroll data for each department separately to gain insights into their spending patterns and make informed decisions regarding resource allocation. By using the Departments feature in Zoho Payroll, the company can easily create and manage departments and assign employees to them.
For example, if the company notices that the Sales department has a higher payroll spend compared to other departments, they can analyse the data to determine the reasons for the increased spending. They can then make informed decisions about whether to increase or decrease the department’s budget, or re-allocate resources to other departments.
Create Departments
Here’s how you can create Departments in Zoho Payroll:
- Click the Settings icon at the top right side and click Departments.
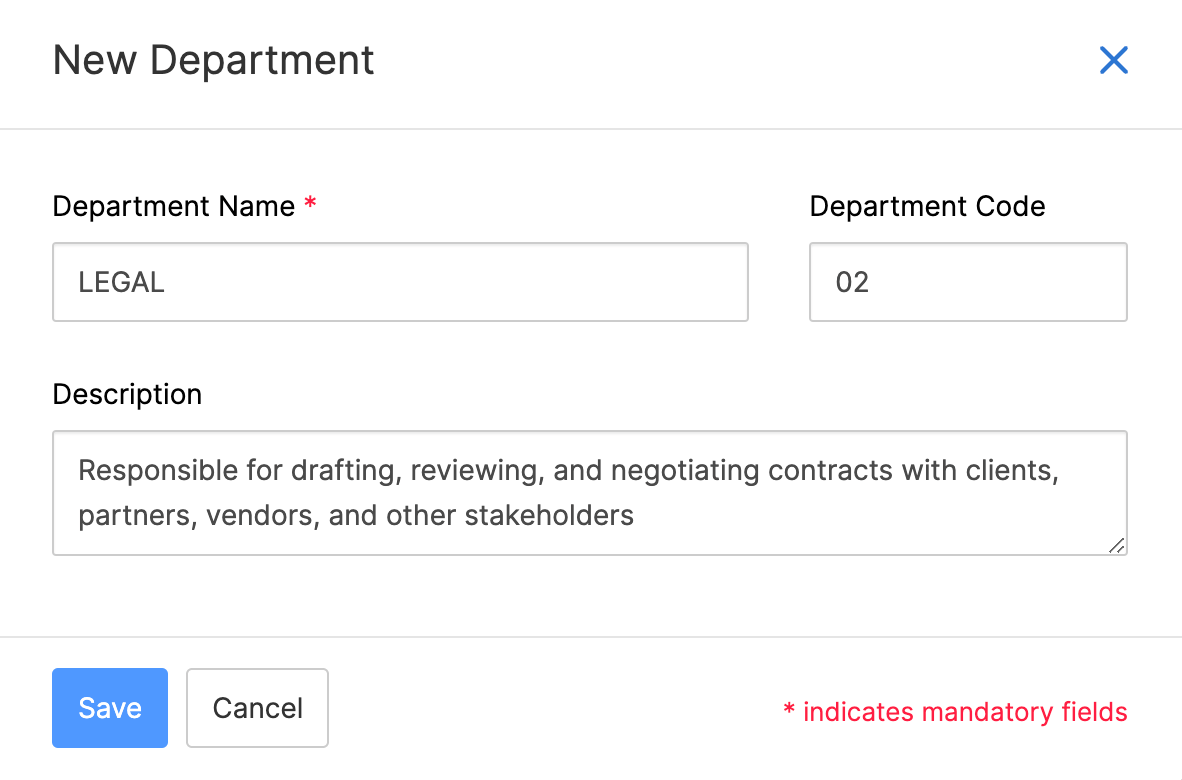
- Click + New Departments.

- Enter the name of the department you want to create.
- Enter a code for the department.
Insight: Department codes in Zoho Payroll are identifiers that you can assign to each department in your organisation. When you create a department in Zoho Payroll, you can assign it a department code. The department code can be any combination of letters, numbers, or symbols. For example, you could assign the code “MKTG-1” to the Marketing department, “SALES-5” to the Sales department, and so on.
- Enter a description for the department and click Save.
You can now add employees to departments while editing the basic information of the employees or while creating new employees.
Import Departments
Zoho Payroll allows users to import employee departments in bulk to save time and ensure accuracy. Importing departments can be useful for companies that have a large number of departments.
To import departments in Zoho Payroll:
- Click the Settings icon at the top right side and click Departments.
- Click Import.
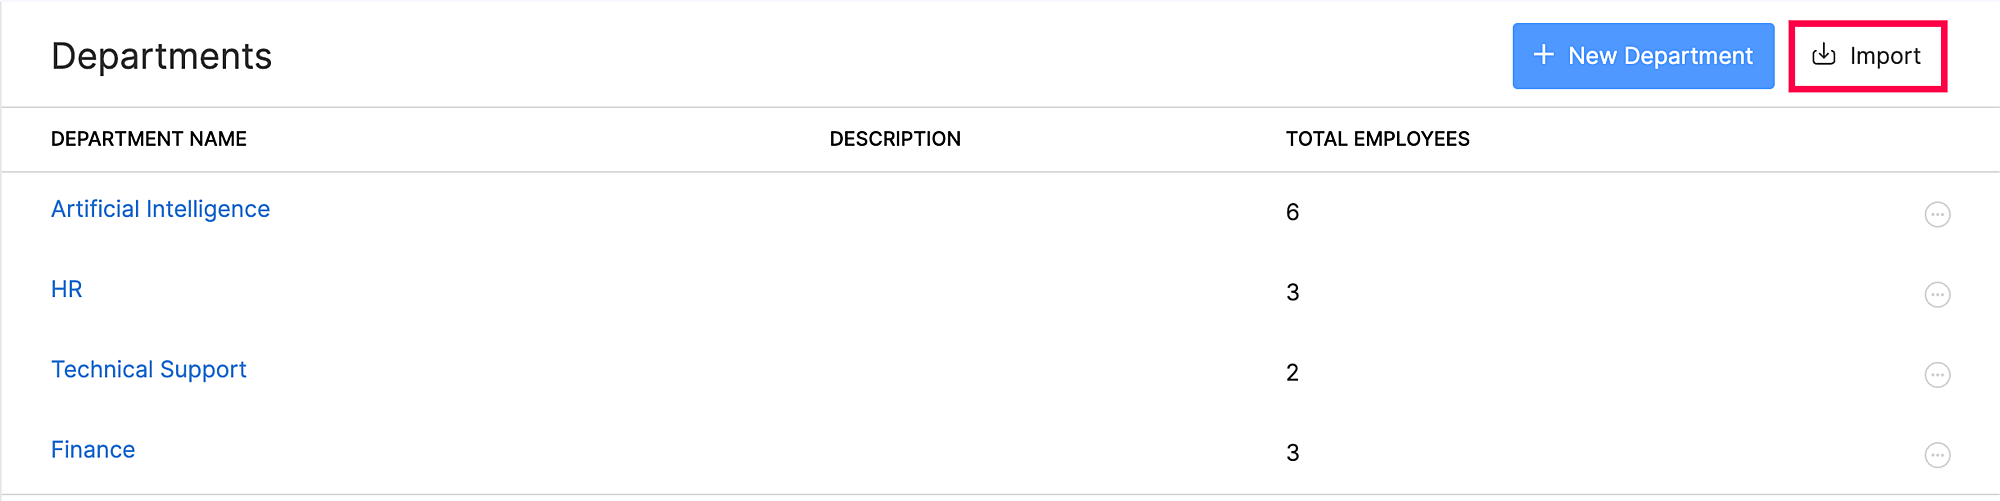
- You will be directed to another page where the data you wish to be imported needs to be uploaded.
- Data can be uploaded either as a CSV (Comma Separated Values), TSV (Tab Separated Values), or XLS (eXceL Spreadsheet) file from your files. Also select the character encoding based on your import file and click Next.
- Map the relevant fields and click Next again.
- Preview the import data and click Import.
The departments details from the file you uploaded will be imported to Zoho Payroll. You can now add employees to the departments you’ve imported.
Edit Departments
You can make changes to the departments you’ve created. To edit:
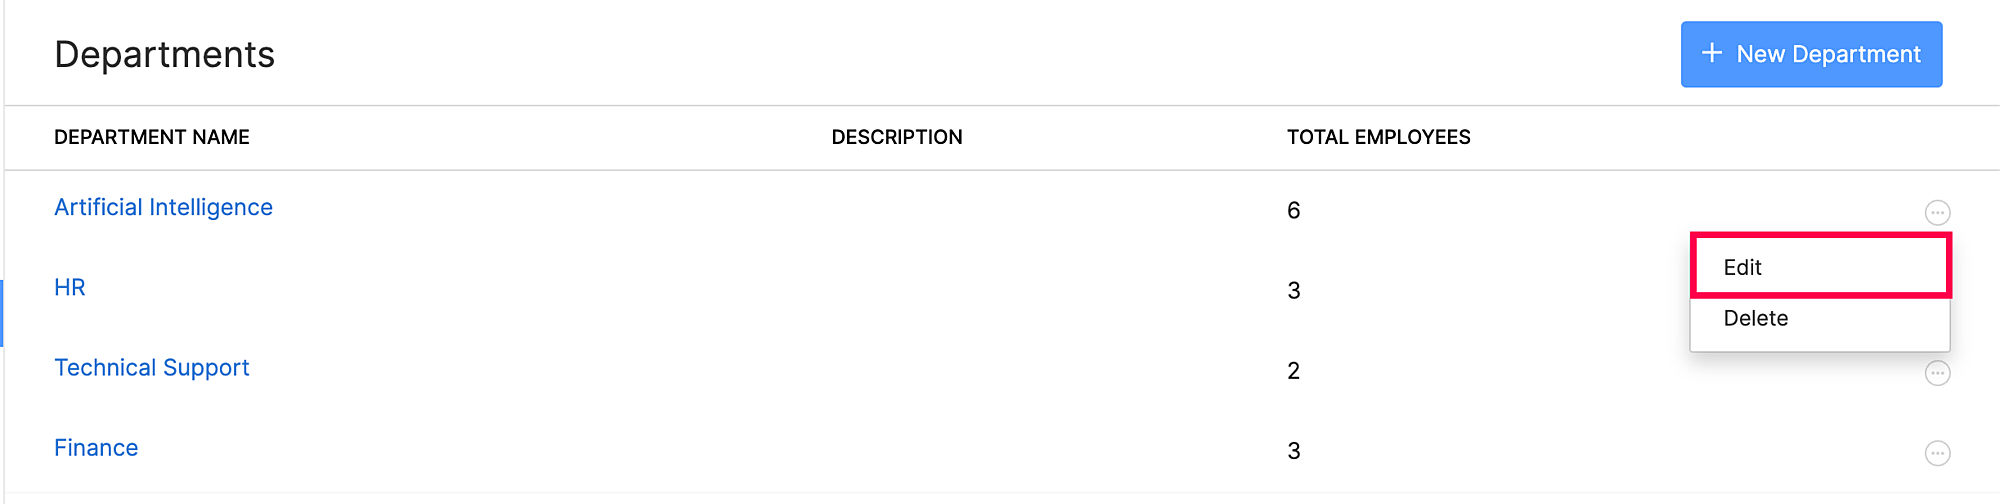
- Click the Settings icon at the top right side and click Departments.
- Hover over the department you want to edit and click the More icon next to the department.
- Click Edit and make the necessary changes.
- Click Save.
Delete Departments
You can delete departments when you no longer need them. For example, your company might dissolve or shutdown a department.
Prerequisite: You can delete a department only when employees are not a part of it.
To delete a department permanently:
Click the Settings icon at the top right side and click Departments.
Hover over the department you want to delete and click the More icon next to the department.
Click Delete and a confirmation pop-up will appear.
Click Yes.

Designations
Designations in Zoho Payroll enable you to record the job titles of employees in your organization. This feature is helpful for companies that have a large workforce and want to manage their employees’ data effectively. When you record the designations of employees, you can:
- Generate reports that break down payroll data by designation
- Carry out tasks such as salary revisions and exit processes easily
Scenario: A technology company may have multiple job titles within the engineering department, such as “Software Engineer,” “Senior Software Engineer,” and “Software Architect.” By assigning each employee to their respective job title designation, the company can easily generate reports that break down payroll expenses by job title.
This information can be useful for making decisions about salary adjustments and promotions. For instance, if the “Senior Software Engineer” designation consistently has higher payroll expenses than the other designations, the company may want to consider adjusting salaries or offering promotions to retain top talent.
Create Designations
Here’s how you can create Designations in Zoho Payroll:
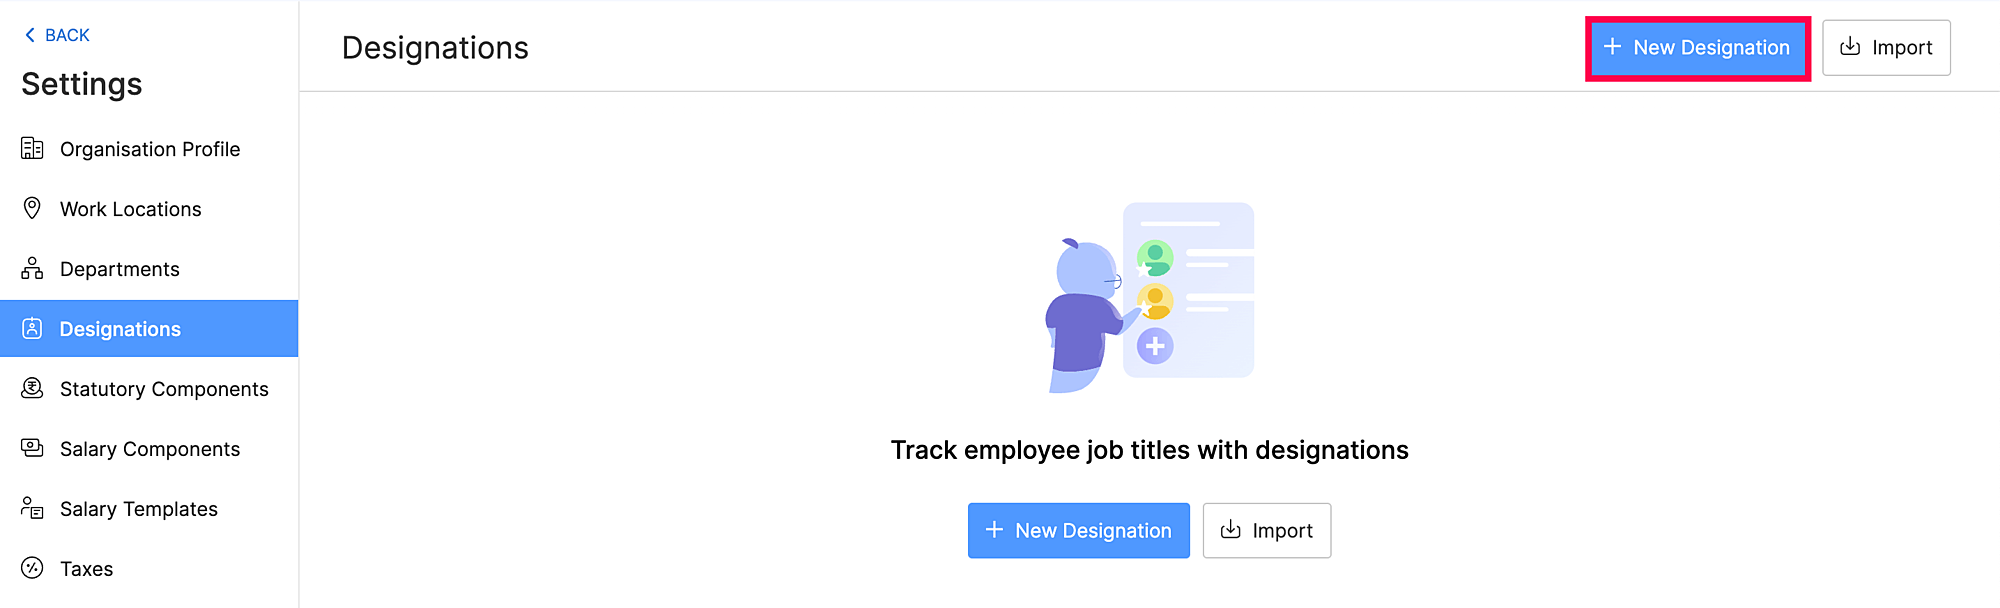
- Click the Settings icon at the top right side and click Designations.
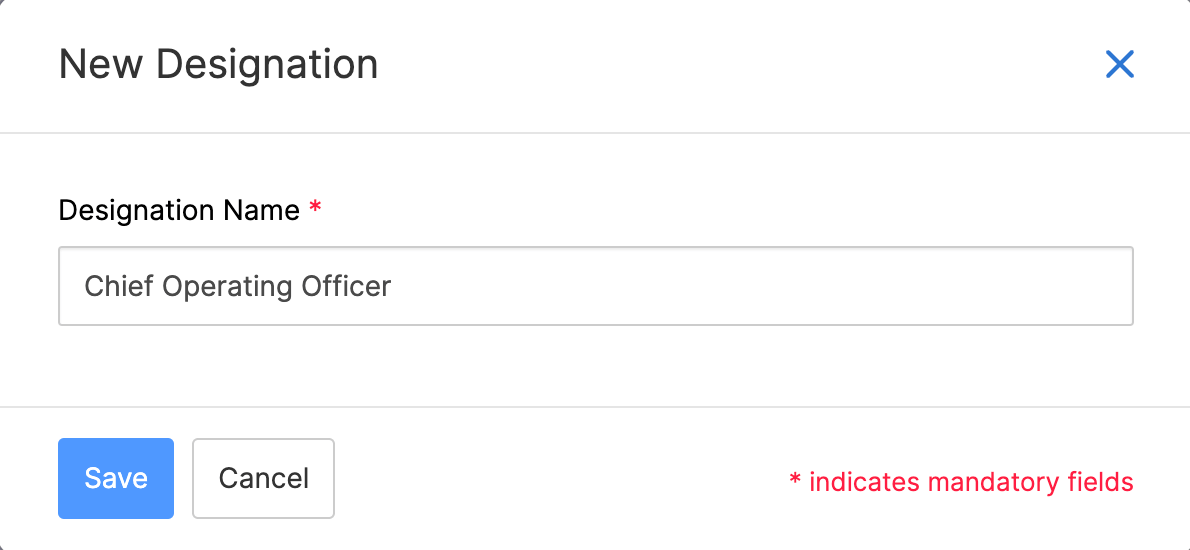
- Click + New Designation.
- Enter the name of the designation you want to create.
- Click Save.
Once you create a designation, you can record the designation of an employee while creating an employee.
Import Designations
Zoho Payroll allows users to import employee designations in bulk to save time and ensure accuracy. Importing designations can be useful for companies that have a large number of employees or frequently update job titles and responsibilities.
To import designations in Zoho Payroll:
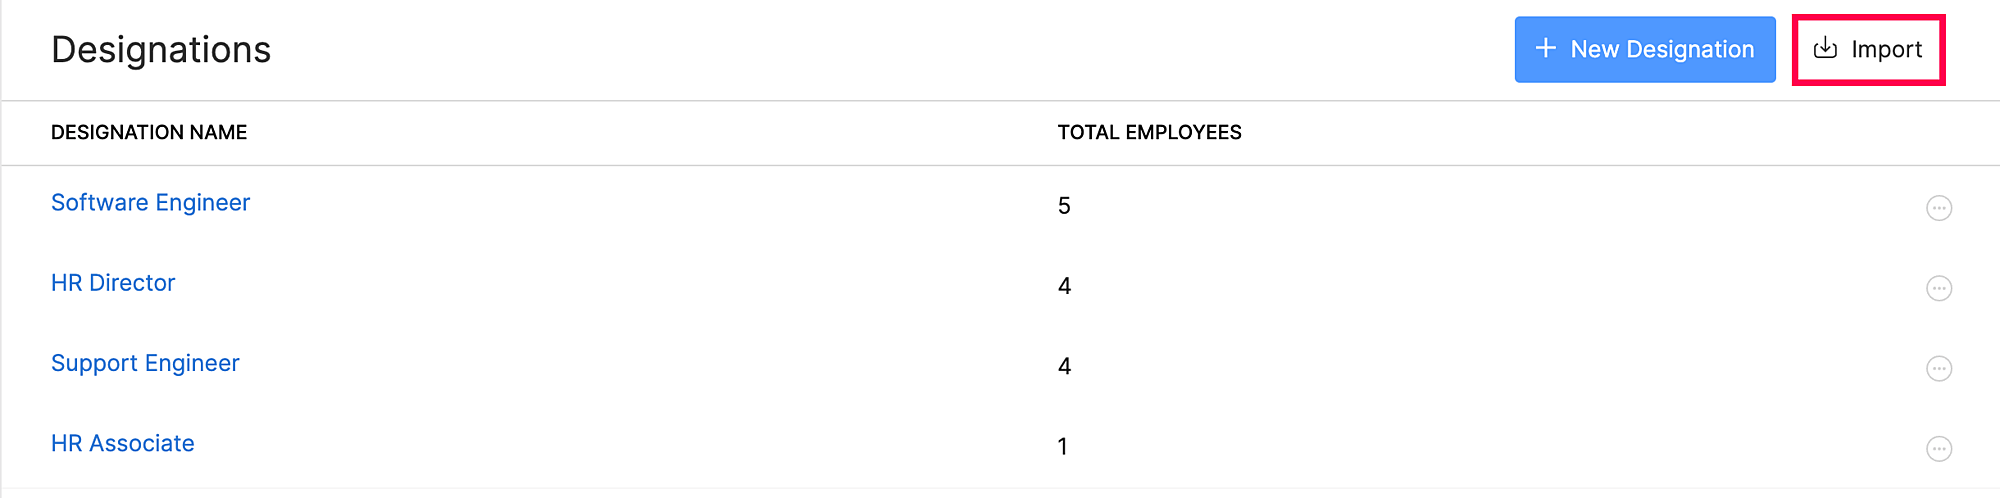
- Click the Settings icon at the top right side and click Designations.
- Click Import.
- You will be directed to another page where the data you wish to be imported needs to be uploaded.
- Data can be uploaded either as a CSV (Comma Separated Values), TSV (Tab Separated Values), or XLS (eXceL Spreadsheet) file from your files. Also select the character encoding based on your import file and click Next.
- Map the relevant fields and click Next again.
- Preview the import data and click Import.
The designation details from the file you uploaded will be imported to Zoho Payroll. You can now associate the imported designations to employees.
Edit Designations
You can make changes to a designation you’ve created. To edit:
- Click the Settings icon at the top right side and click Designations.
- Hover over the designation you want to edit and click the More icon next to the designation.
- Click Edit and make the necessary changes.
- Click Save.

Delete Designations
You can delete designations when you no longer need them.
Prerequisite: You can delete a designation only when employees are not associated with it.
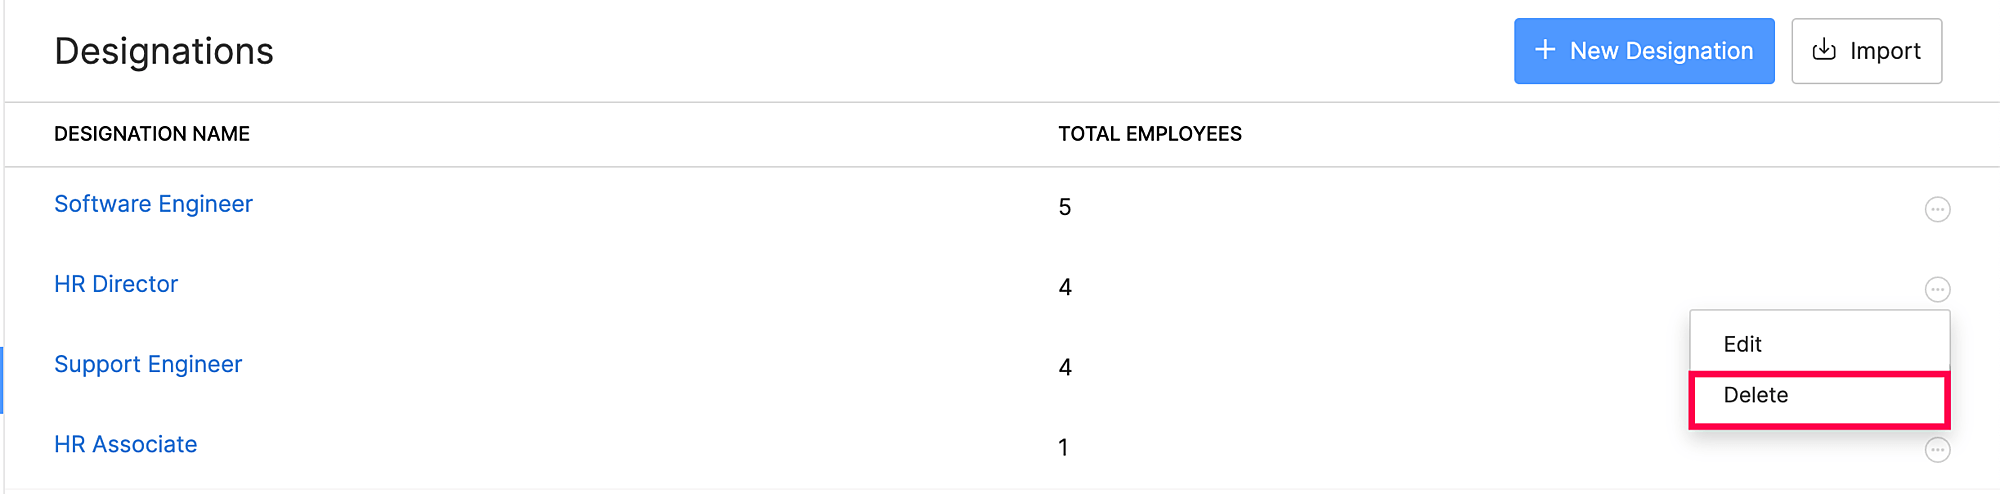
To delete a designation permanently:
Click the Settings icon at the top right side and click Designations.
Hover over the designation you want to delete and click the More icon next to the department.
Click Delete and a confirmation pop-up will appear.
Click Yes.