How do I file my GSTR-1?
Filing GSTR-1 involves three steps:
- Uploading transactions to the GSTN portal.
- Submit GSTR-1.
- Submit GSTR-1.
Step-1: Uploading transactions to the GSTN portal.
The first step is to upload your transactions to the GSTN portal. Before uploading your transactions to the GSTN, you can view the list of transactions that haven’t been pushed, by following these steps:
- Go to Returns modules.
- Click the number below Unpushed transactions.
You will see the list of transactions segregated based on the business type under the Transaction summary.
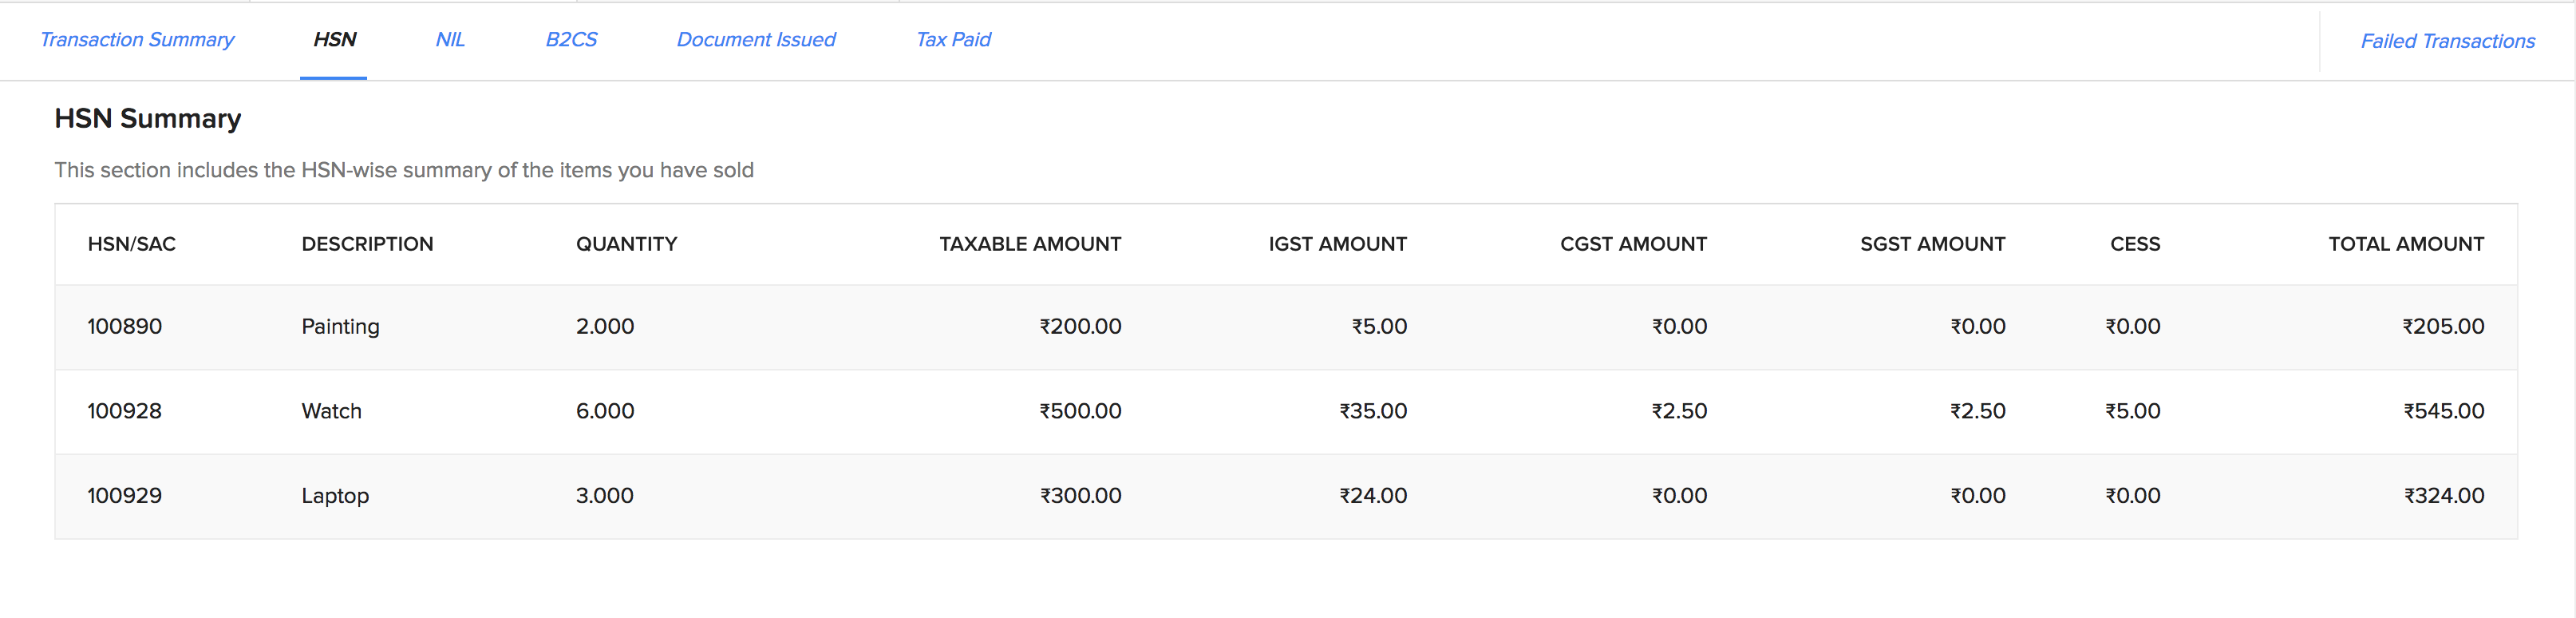
The HSN tab will give you the HSN summary of the transactions for the specified month.
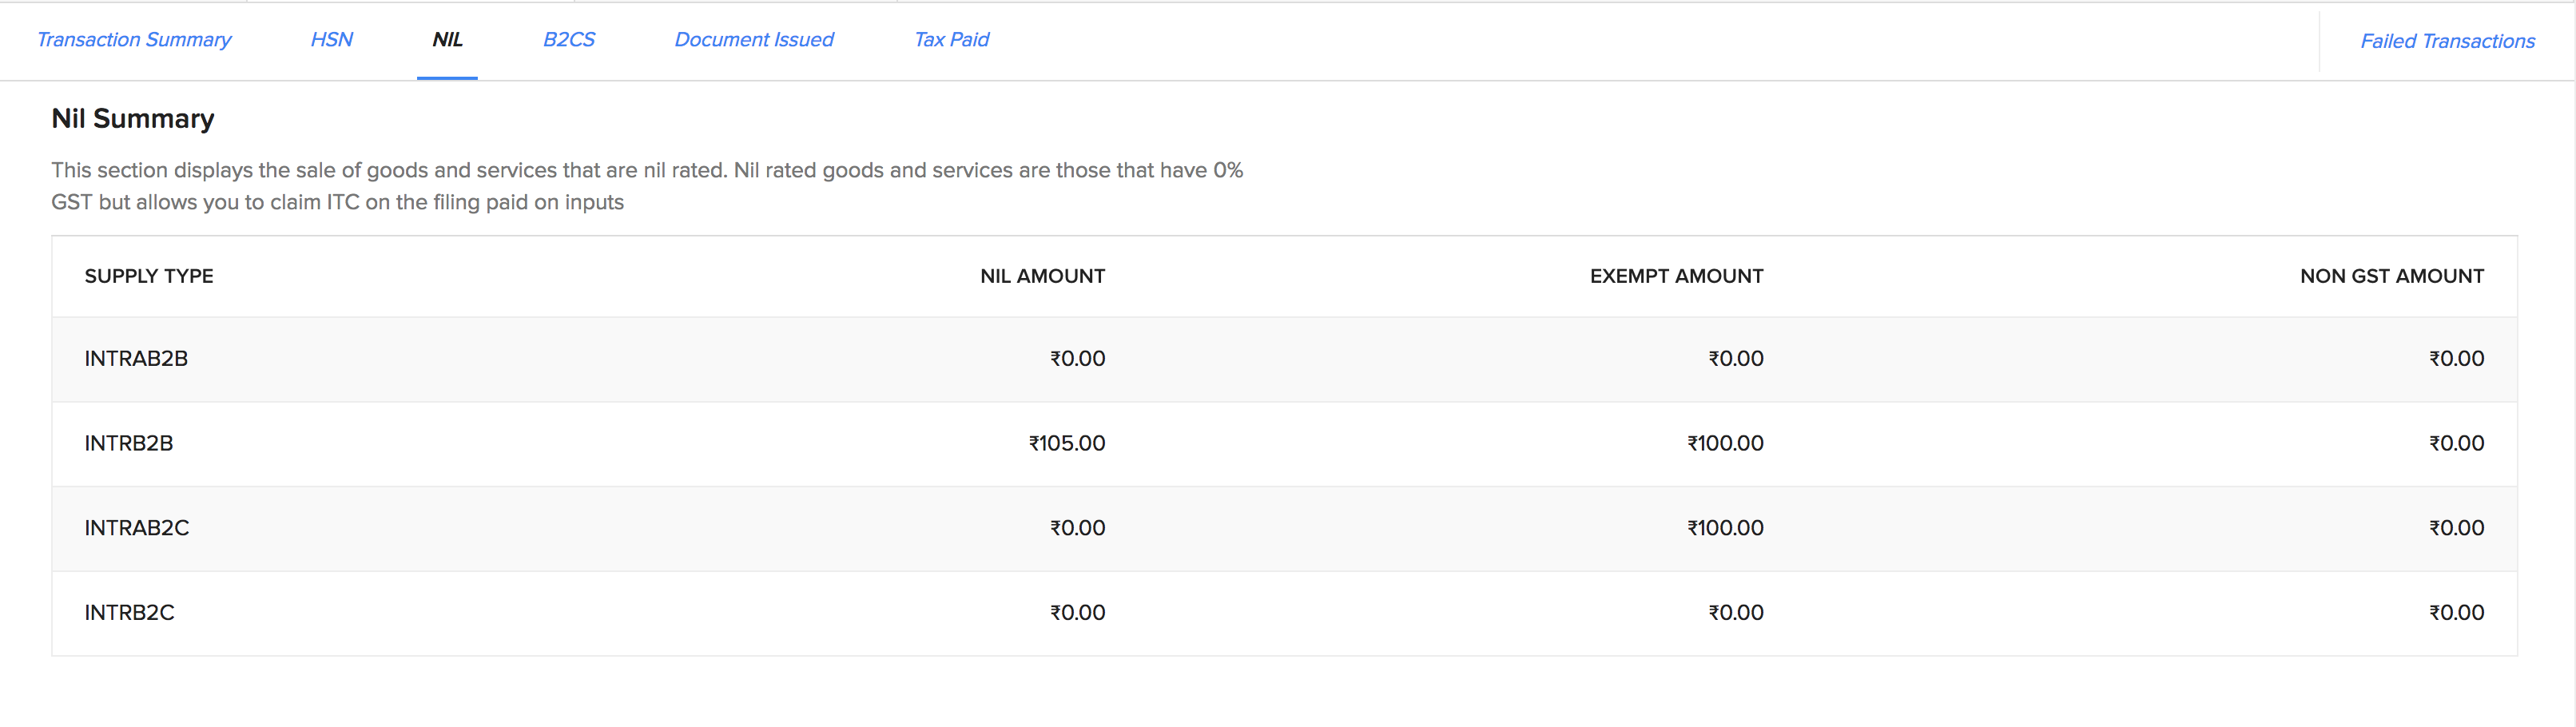
The Nil tab will provide you with the summary of Nil-rated outward supplies.
The B2CS tab will list the transactions corresponding to the table 7 of GSTR-1.
The Documents Issued tab will have the details of the documents you are about to upload to the GSTN. Currently, you will have to enter the details manually before uploading it to the GSTN.
You can do that by following these steps:
- Go to Returns module
- Click the number below Unpushed transactions.
- Click the Documents issued tab.
- Click Edit button.
- Enter the details of the documents to be uploaded and click Save.
Once done, you can now upload the transactions to the GSTN. To do that, please follow these steps:
- Click on Returns module.
- Once in, click on Push to GSTN corresponding to GSTR-1.
- On the pop up that appears, enter your Aggregate Turnover in the preceding Financial Year and Aggregate Turnover - April to June, 2017.
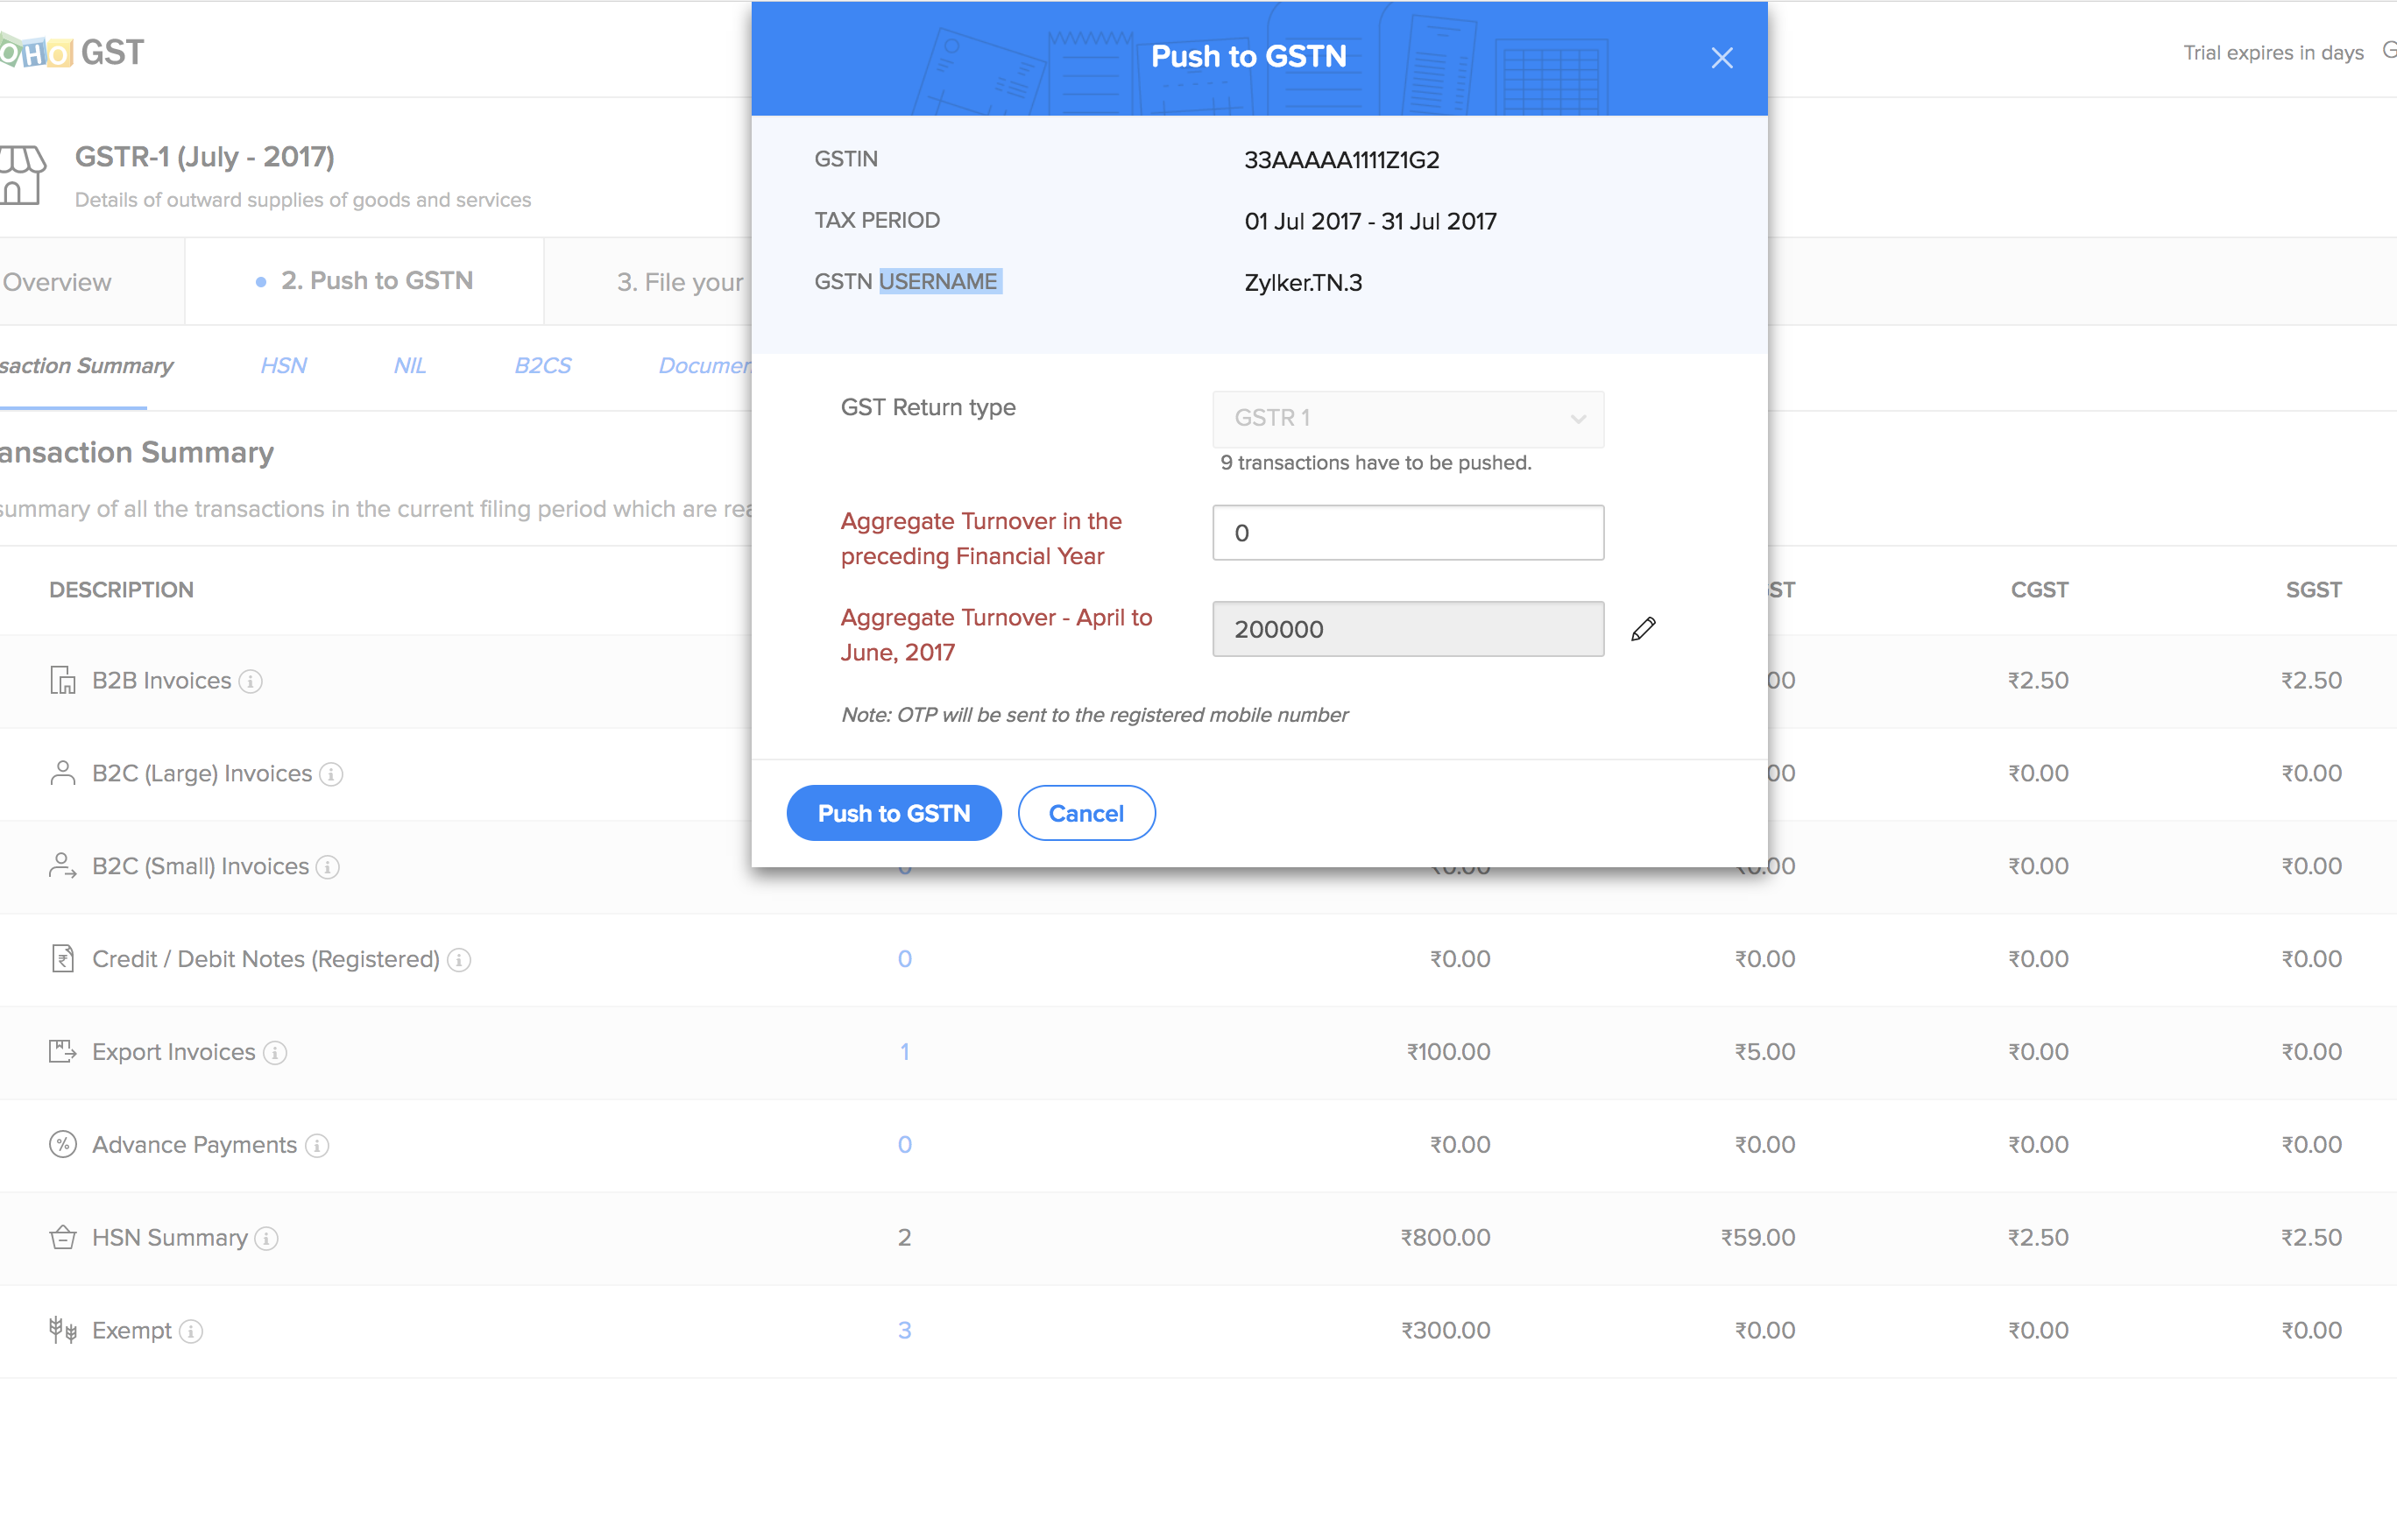
After entering all the details, click Push to GSTN. An OTP will be sent to your GST registered mobile number/ email address. Please enter it in the popup that follows and click Verify OTP. Once done, you will receive an email within the next 30 minutes on the status. If there are any errors, you can edit the corresponding transactions and re-push them.
Step-2: Submitting GSTR-1
The next step is to submit your GSTR1. Please note that this will freeze the data you’ve uploaded to the GSTN and you will not be able to edit or upload new transactions for the specified tax period.
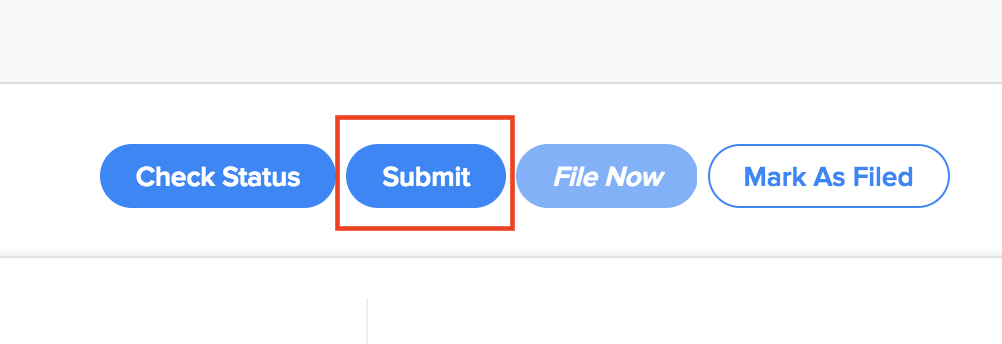
You can submit your return by following these steps:
- Click on Returns module.
- Click on File Now > File Online option corresponding to GSTR-1.
- Once in, click on Submit.
Step-3: Filing GSTR-1
The final step is to file your GSTR-1. You can do so by following these steps:
- Click on Returns module.
- Click on File Now > File Online option corresponding to GSTR-1.
- Once in, click on File Now button.
- On the pop up that appears, verify your return by uploading a suitable digital signature, and click on File Now.