

TDS Challans

A challan is a record of a TDS payment made to the government. In Zoho Books, you can record challans for TDS liabilities, associate unused challans with liabilities, and view, import, and export TDS challans.
Record TDS Challans
If you’ve paid the TDS to the authorities for a liability, you can record it as a challan in Zoho Books. Here’s how:
- Go to Filing & Compliance on the left sidebar and select TDS Liabilities.
- Select a liability.
- Click Record Challan in the top right.
- Enter the Amount.
- You can add Penalty for any delay in TDS Return filing.
- You can add Interest if you have failed to deduct TDS for this liability, or if you have not paid the full or partial tax to the government after deduction.
- Enter the Challan Number, BSR Code (Branch Code) of the challan and select the Payment Date.
- Select the Paid Through account.
- Select Auto allocate payment to all the listed liabilities to automatically associate the payment amount from this challan with all the listed TDS liabilities for the selected month.
Note: The Auto allocate Payment to all the listed liabilities option will be available only if the payment amount exceeds the liability amount.
- Select a Location.
- Click Save.
Associate TDS Challans
You can associate unused challans with a liability. These are challans with amounts that have not been fully allocated. Here’s how:
- Go to Filing & Compliance on the left sidebar and select TDS Liabilities.
- Select a liability.
- Select the transactions that you want to associate with the liability.
- Click Associate Challan in the top right corner.
- The unused challans will be listed in the pop-up that appears. Click Associate next to a challan to associate it with the selected liabilities.
View TDS Challans
To view all the challans that you created:
- Go to Filing & Compliance on the left sidebar and select TDS Challans.
You can view all the challans here. You can also record challans by clicking Record Challan.
Note: To edit a challan, go to Filing & Compliance > TDS Challans, select a challan, and click Edit in the top right. To delete a challan, go to Filing & Compliance > TDS Challans, select a challan, click the More icon, and select Delete Challan.
Import TDS Challans
You can import TDS challans in bulk into Zoho Books.
To import challans:
- Go to Filing & Compliance on the left sidebar and select TDS Challans.
- Click the More icon in the top right and select Import TDS Challans.
- Upload your file and click Next.
- Map the fields as required and click Next.
- Click Import.
Learn more about importing data to Zoho Books.
Export TDS Challans
You can export TDS challans as a CSV, XLS, or XLSX file. The exported file contains all columns displayed on the TDS Challans List page, along with Challan Cess Amount and Challan Surcharge Amount.
To export TDS challans:
- Go to Filing & Compliance on the left sidebar and select TDS Challans.
- Click the More icon in the top right and select Export TDS Challans.
- Click Export.
Learn more about exporting data from Zoho Books.
Attach Files to TDS Challans
You can attach the TDS challan receipt downloaded from the Income Tax Portal or any other related files to your TDS challans in Zoho Books. You can attach files during challan creation or add later from the challan details page.
Attach Files While Recording a Challan
To attach files:
- Go to Filing & Compliance on the left sidebar and select TDS Liabilities.
- Select a liability and click Record Challan in the top right.
- Go to the Attachments field and click the dropdown next to Upload File.
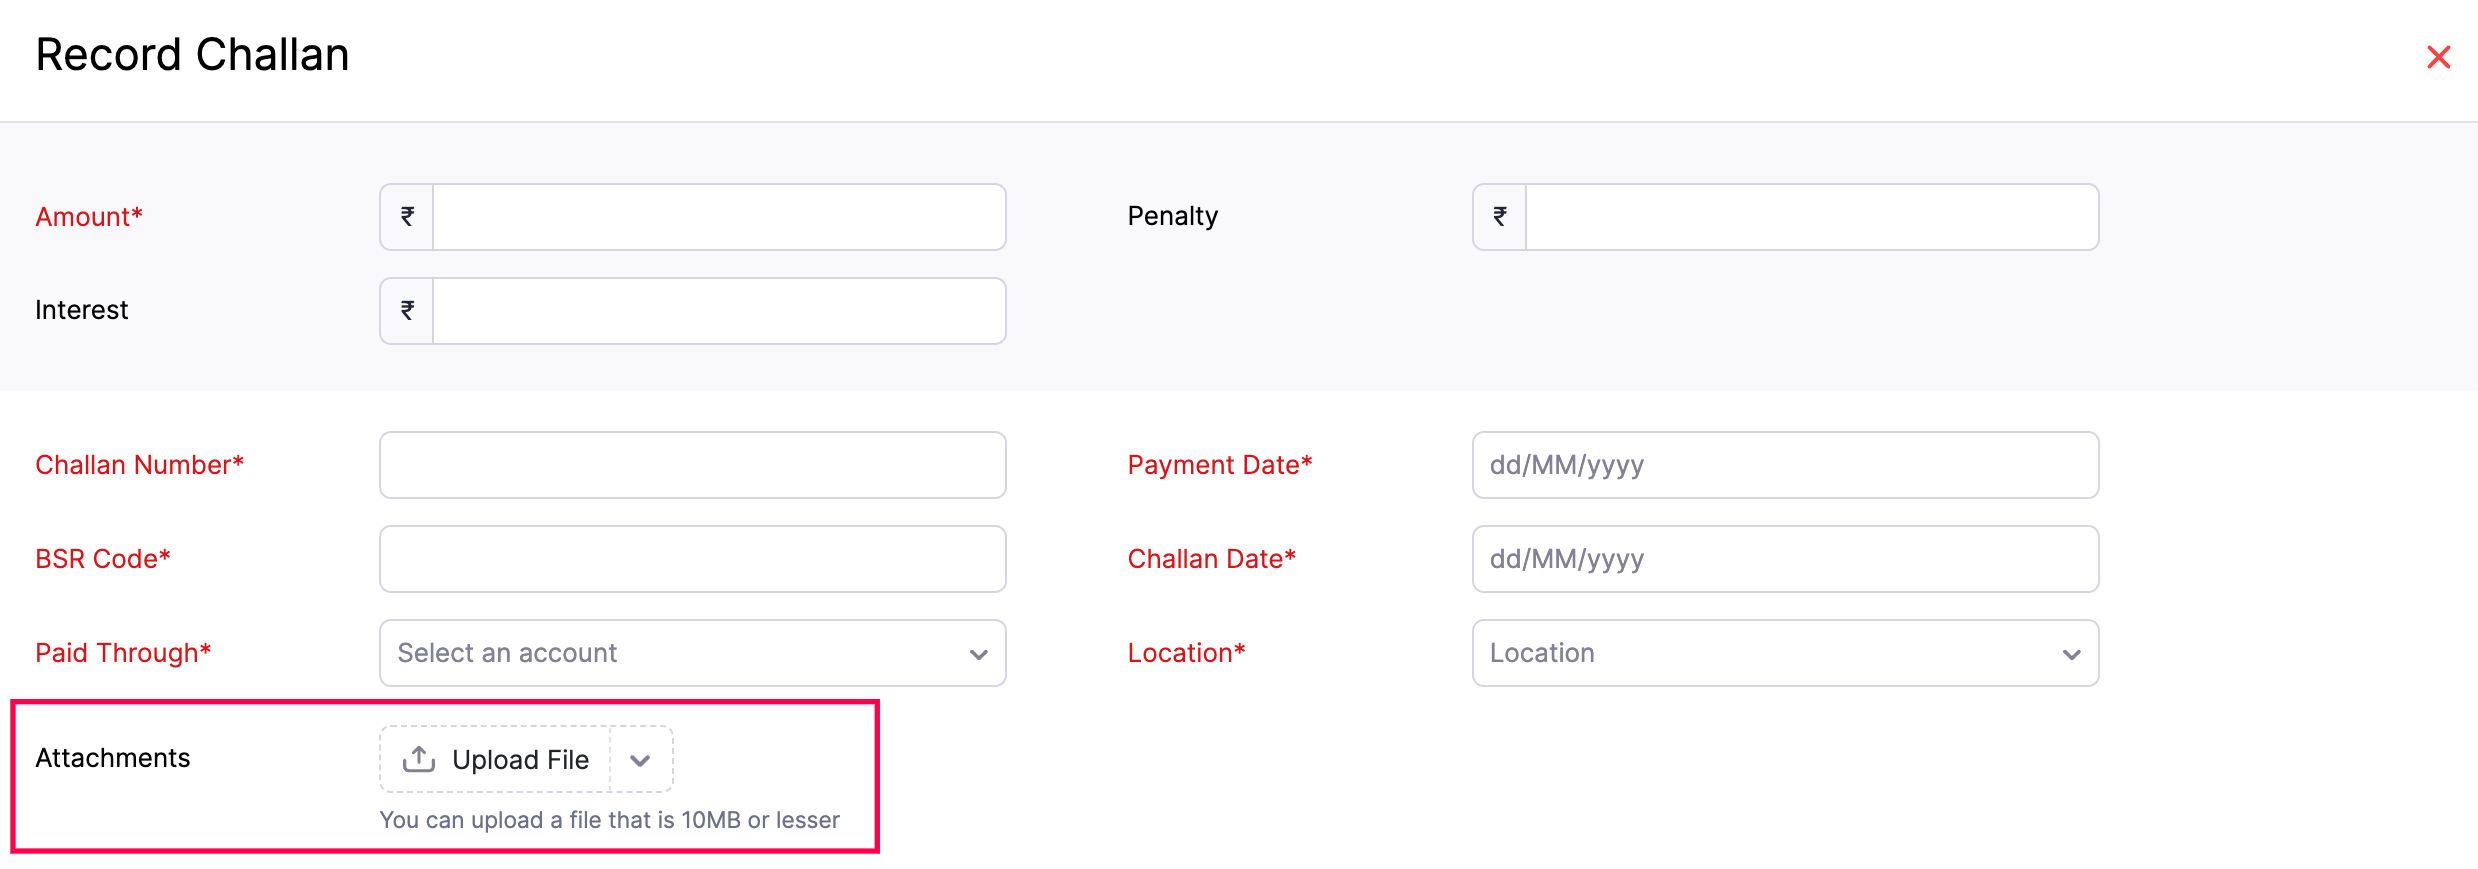
- choose one of the following options from the dropdown:
- Attach From Desktop: Upload files from your computer.
- Attach From Documents: Upload documents from your Zoho Books Documents folder.
- Attach From Cloud: Upload files from cloud services like Zoho WorkDrive, Google Drive, Dropbox, OneDrive, and more.
- Click Open.
Attach Files to an Existing Challan
To attach files to a challan you’ve already created:
- Go to Filing & Compliance on the left sidebar and select TDS Challans.
- Select the challan you want to attach files to.
- Click the Attachments icon in the top right corner.
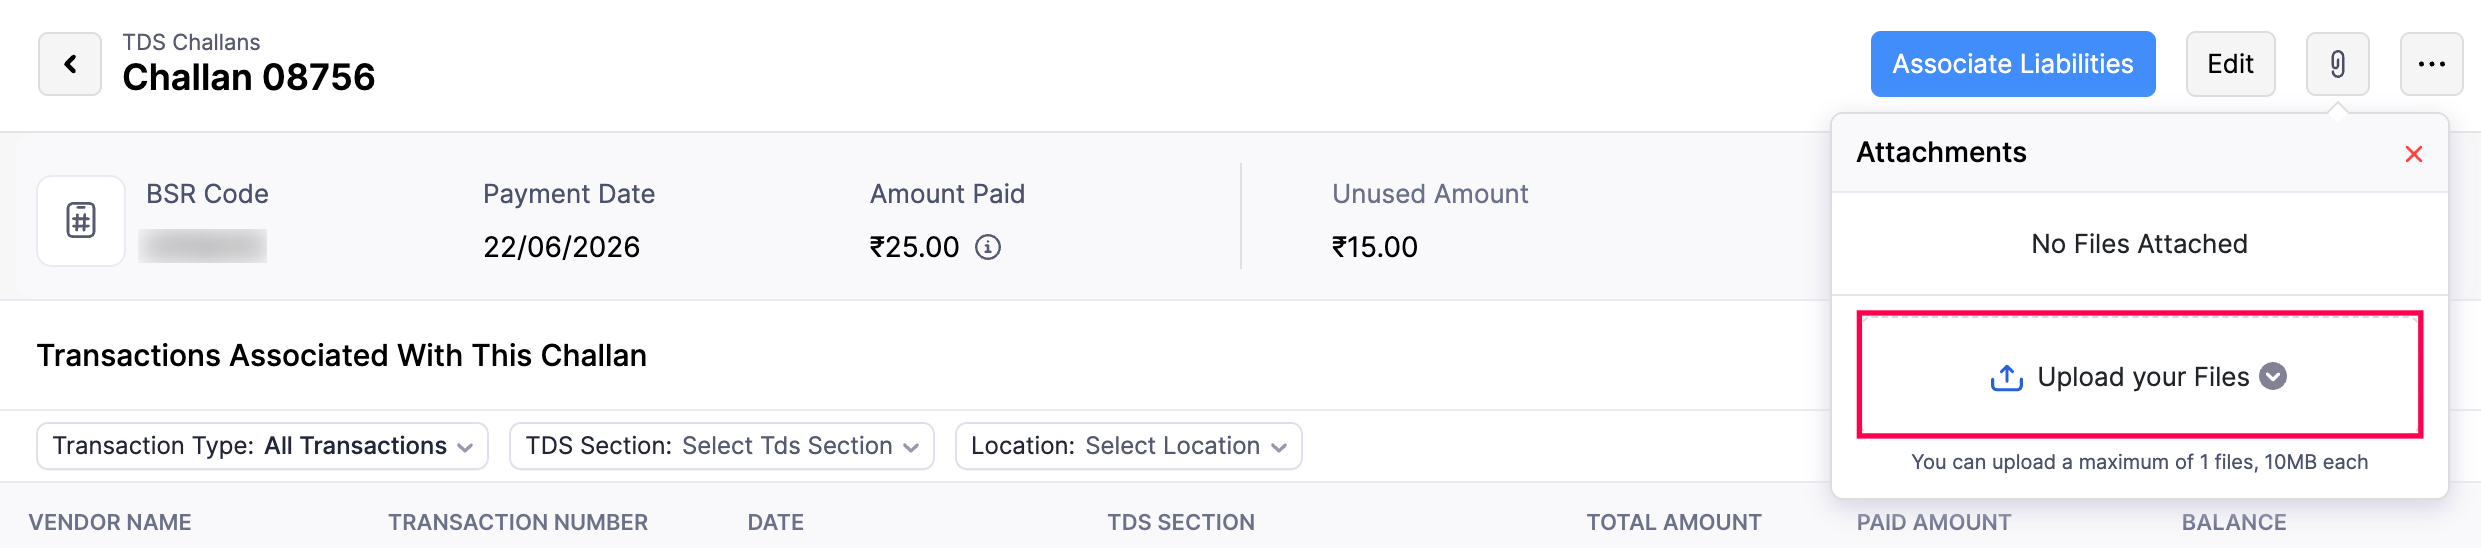
- In the Attachments panel, click Upload your Files and choose one of the following options:
- Attach From Desktop: Upload files from your computer.
- Attach From Documents: Upload documents from your Zoho Books Documents folder.
- Attach From Cloud: Upload files from cloud services like Zoho WorkDrive, Google Drive, Dropbox, OneDrive, and more.
- Click Open.
Note: You can delete the file by clicking the Delete icon next to it. Click the More icon next to the uploaded file to Download, Remove, and open the file in a new tab.
 Yes
Yes