
Payment Terms
Payment terms are agreements between customers or vendors on how and when a business should be paid for the goods and services they provide. They determine when payments are due for sales and purchase transactions, and businesses can use different payment terms based on their requirements.
Zoho Books provides default payment terms such as Due end of the month and Due end of next month. You can also create custom payment terms and associate them with customers, vendors, or transactions. This helps you apply due dates consistently and manage payment terms from one place.
Create Payment Terms
To create a new payment term:
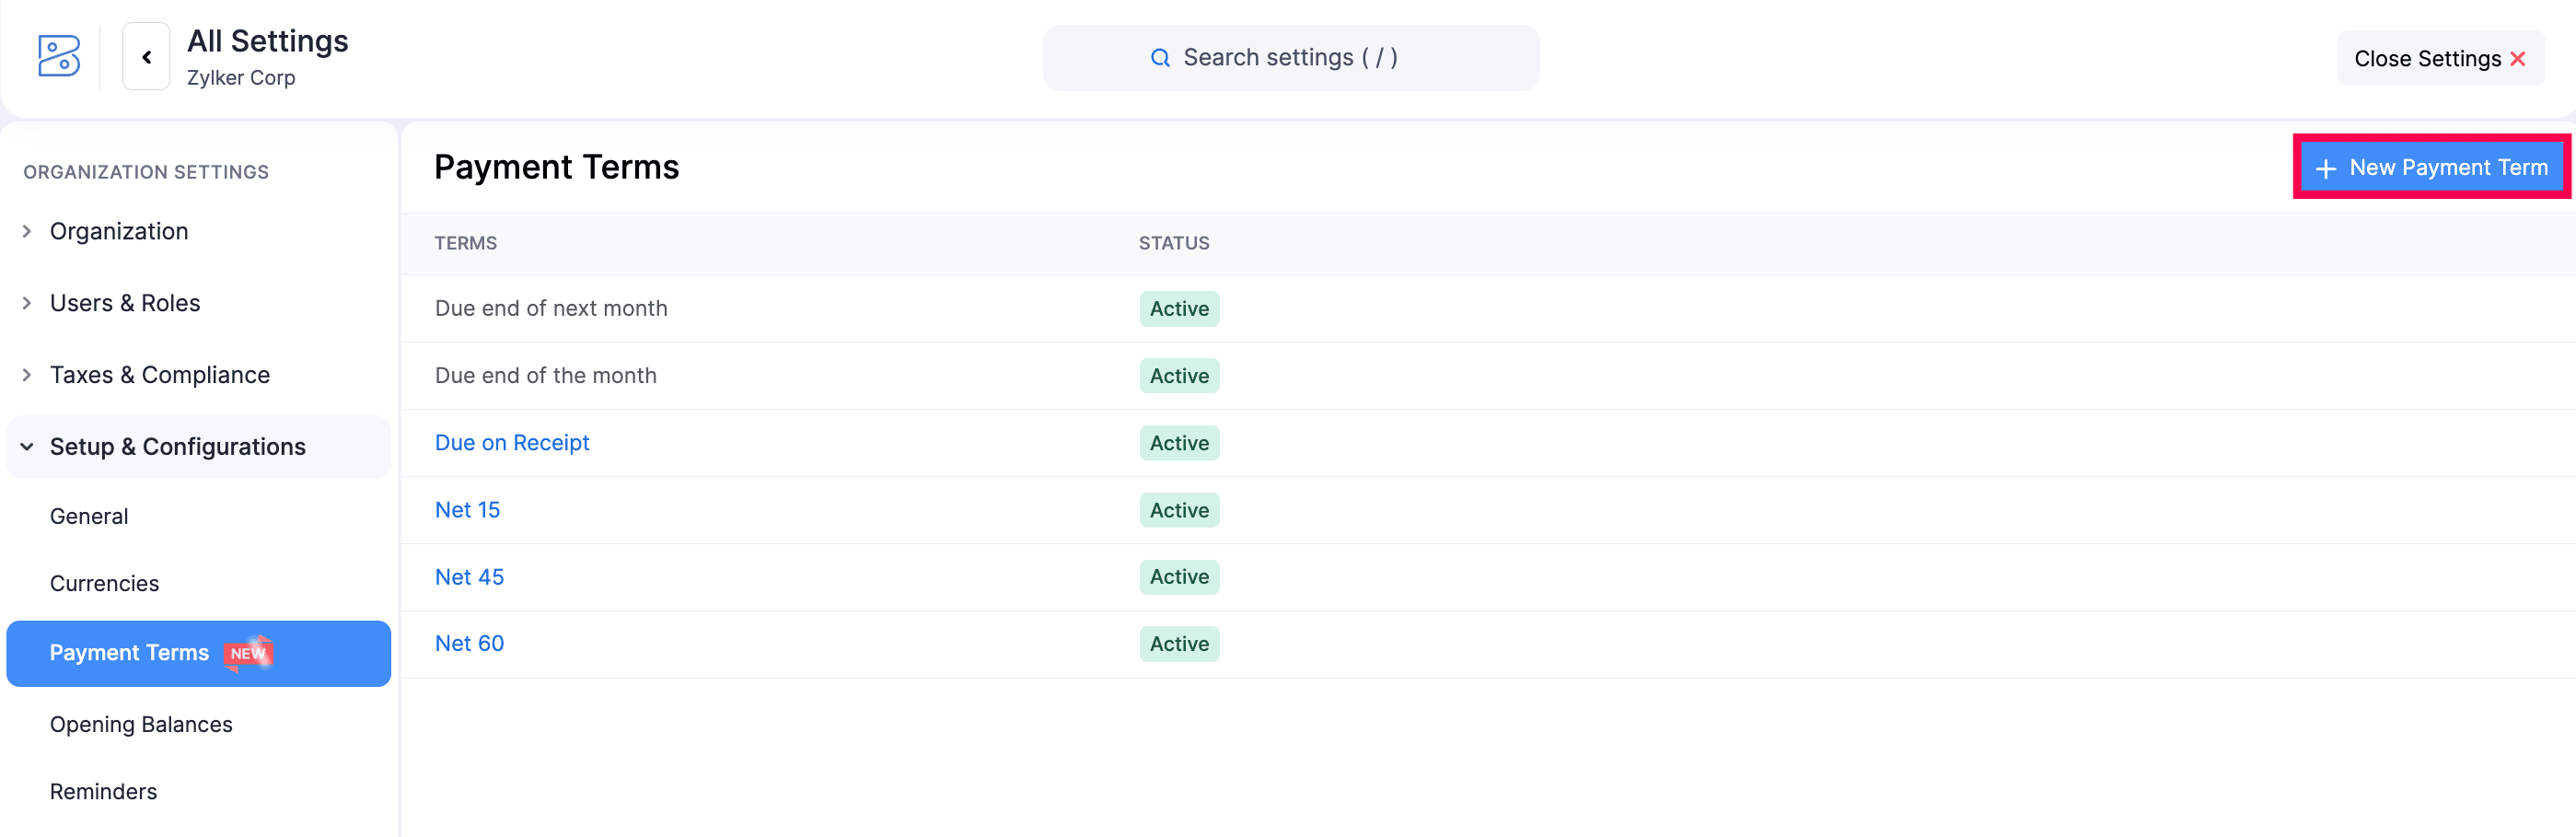
- Go to Settings.
- Under Organisation Settings, navigate to Setup & Configurations and select Payment Terms.
- Click + New Payment Term in the top right corner.
- Enter the Term Name.
- Enter the number of days next to Due After.
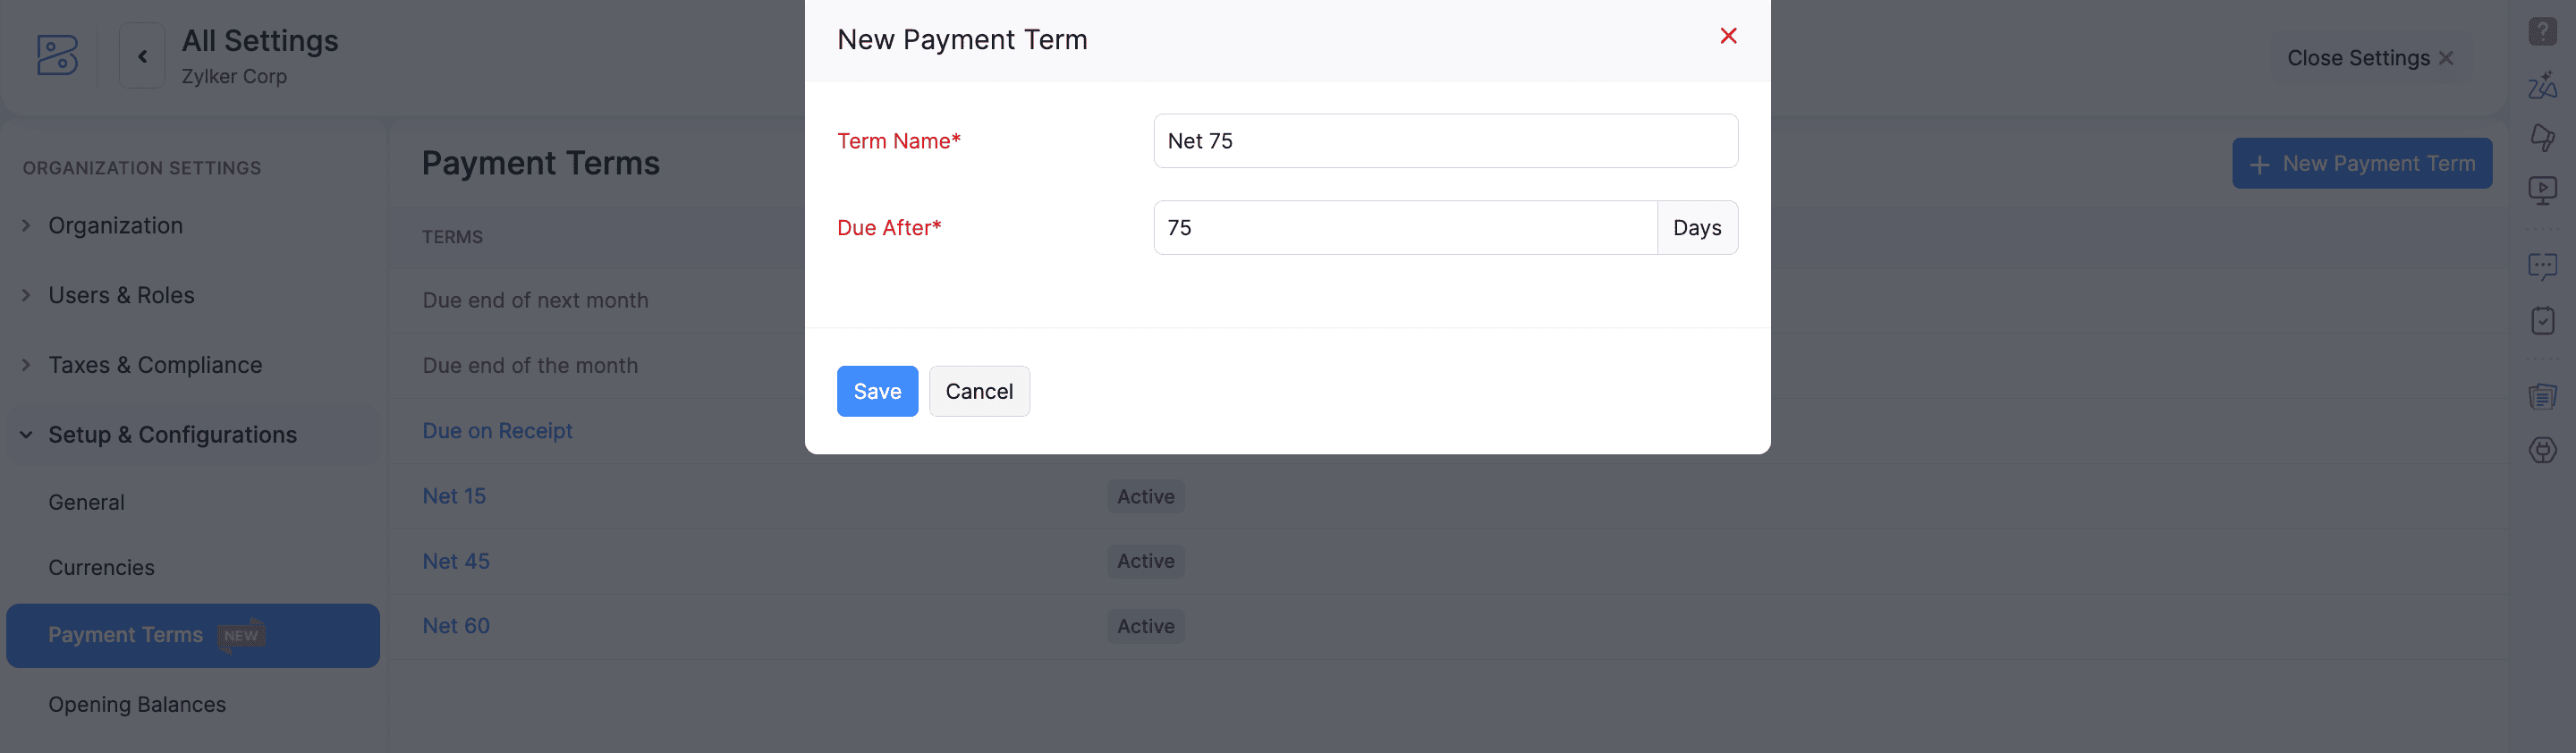
- Click Save.
Apply Payment Terms to Transactions
Scenario: Patricia, an accounts manager, works with retail clients who have different payment agreements. To accommodate these varying payment schedules, she creates custom payment terms such as Net 20, Net 75, and Net 90 in Zoho Books. While creating invoices, she selects the relevant payment term, ensuring that due dates align with agreed payment timelines and helping her team manage collections more effectively.
To associate a payment term to an invoice:
- Go to Sales on the left sidebar and select Invoices.
- Click + New in the top right corner of the page. Or, select the existing invoice for which you want to update the payment term and click Edit.
- Fill the required details.
- From the Terms dropdown, select the payment term you want to apply to this invoice. Or, click + New Payment Term to create a new payment term.
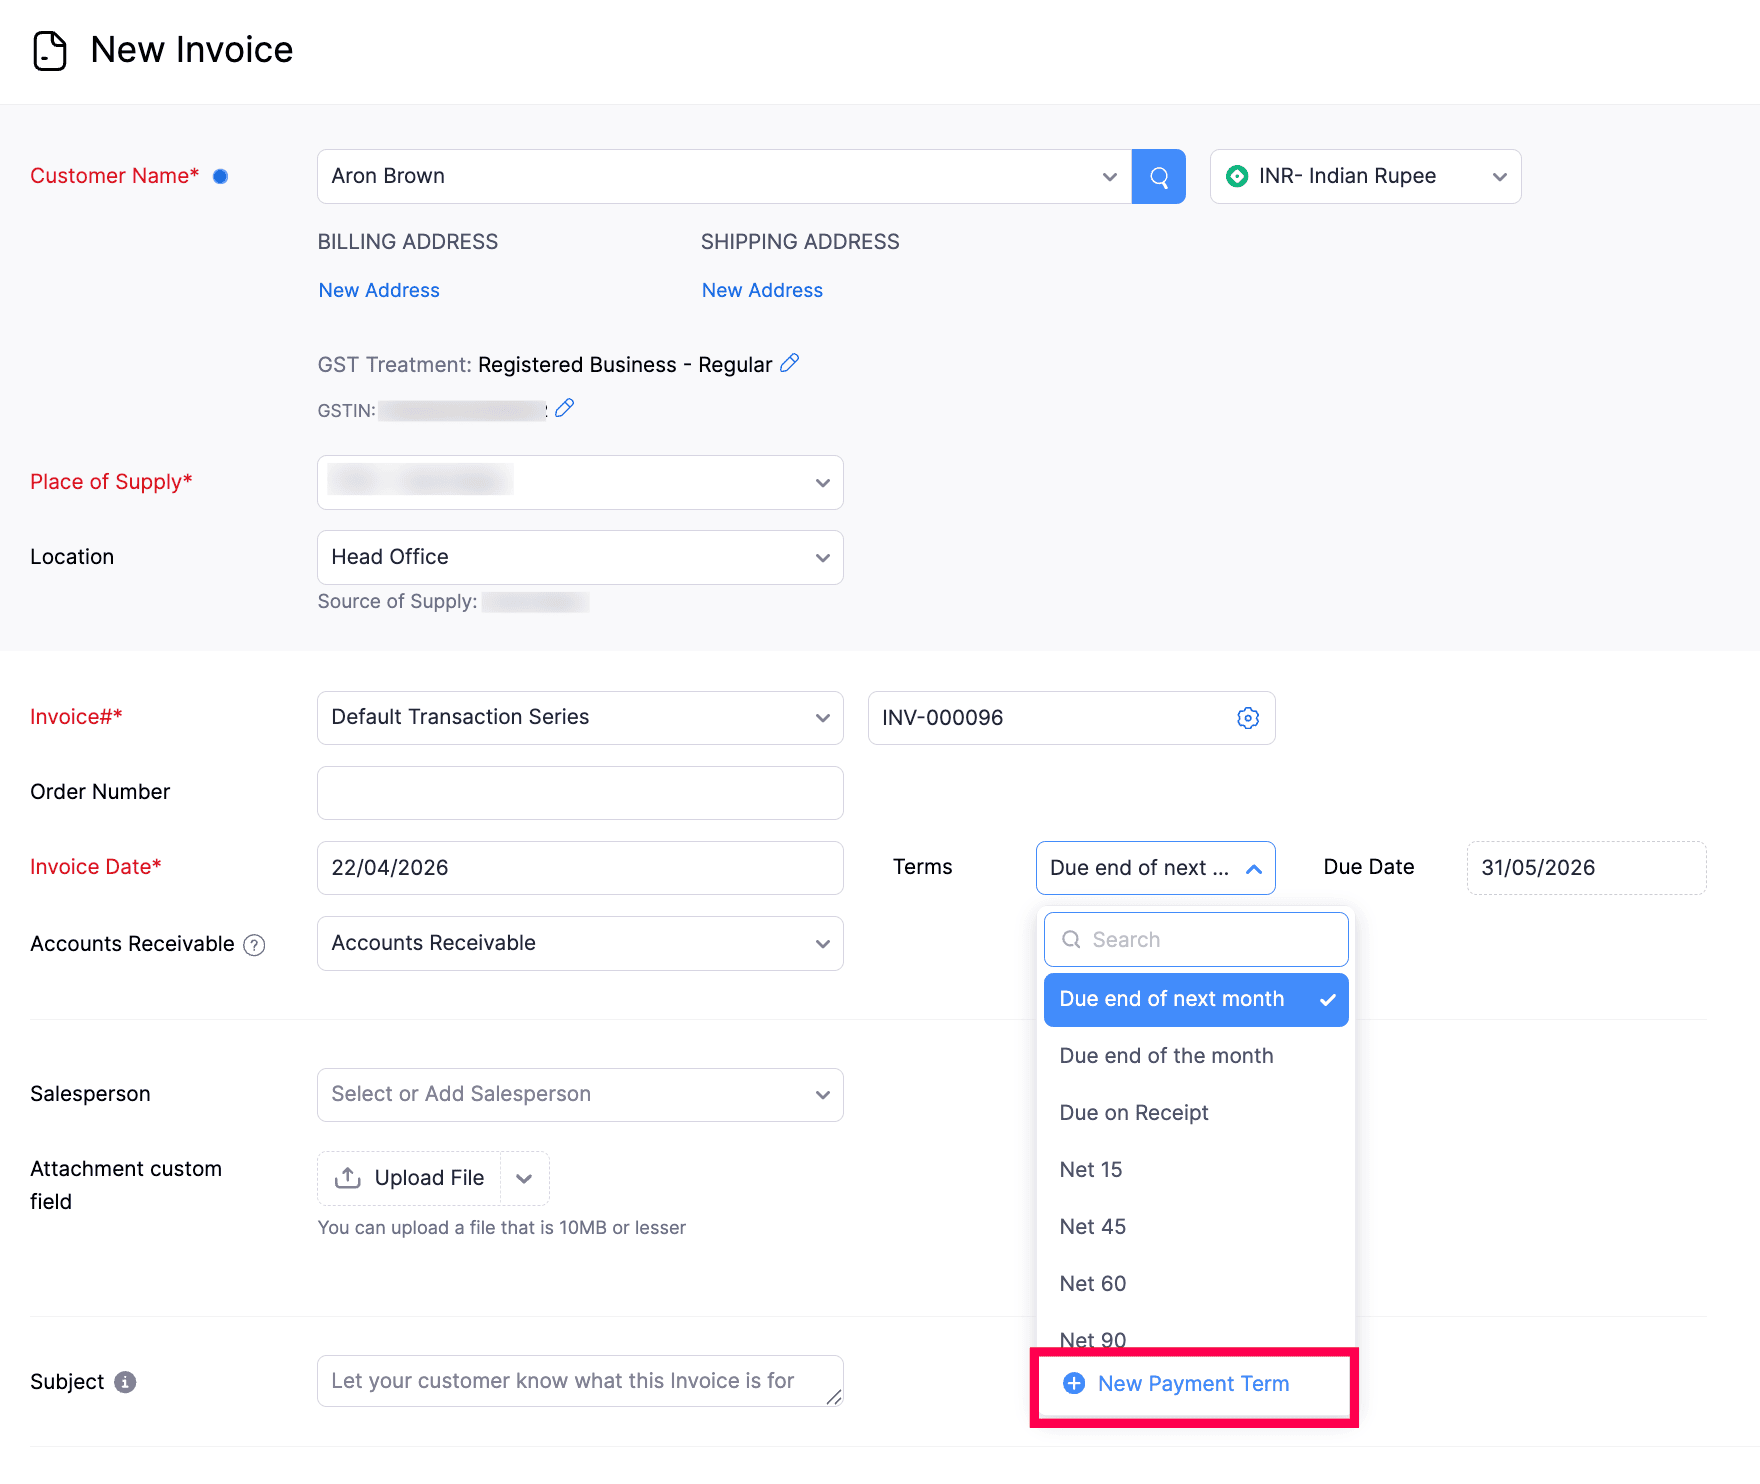
- Click Save and Send.
To update payment terms for multiple existing invoices in bulk:
- Go to Sales on the left sidebar and select Invoices.
- Select the invoices whose payment terms you want to update.
- Click Bulk Update on the top bar.
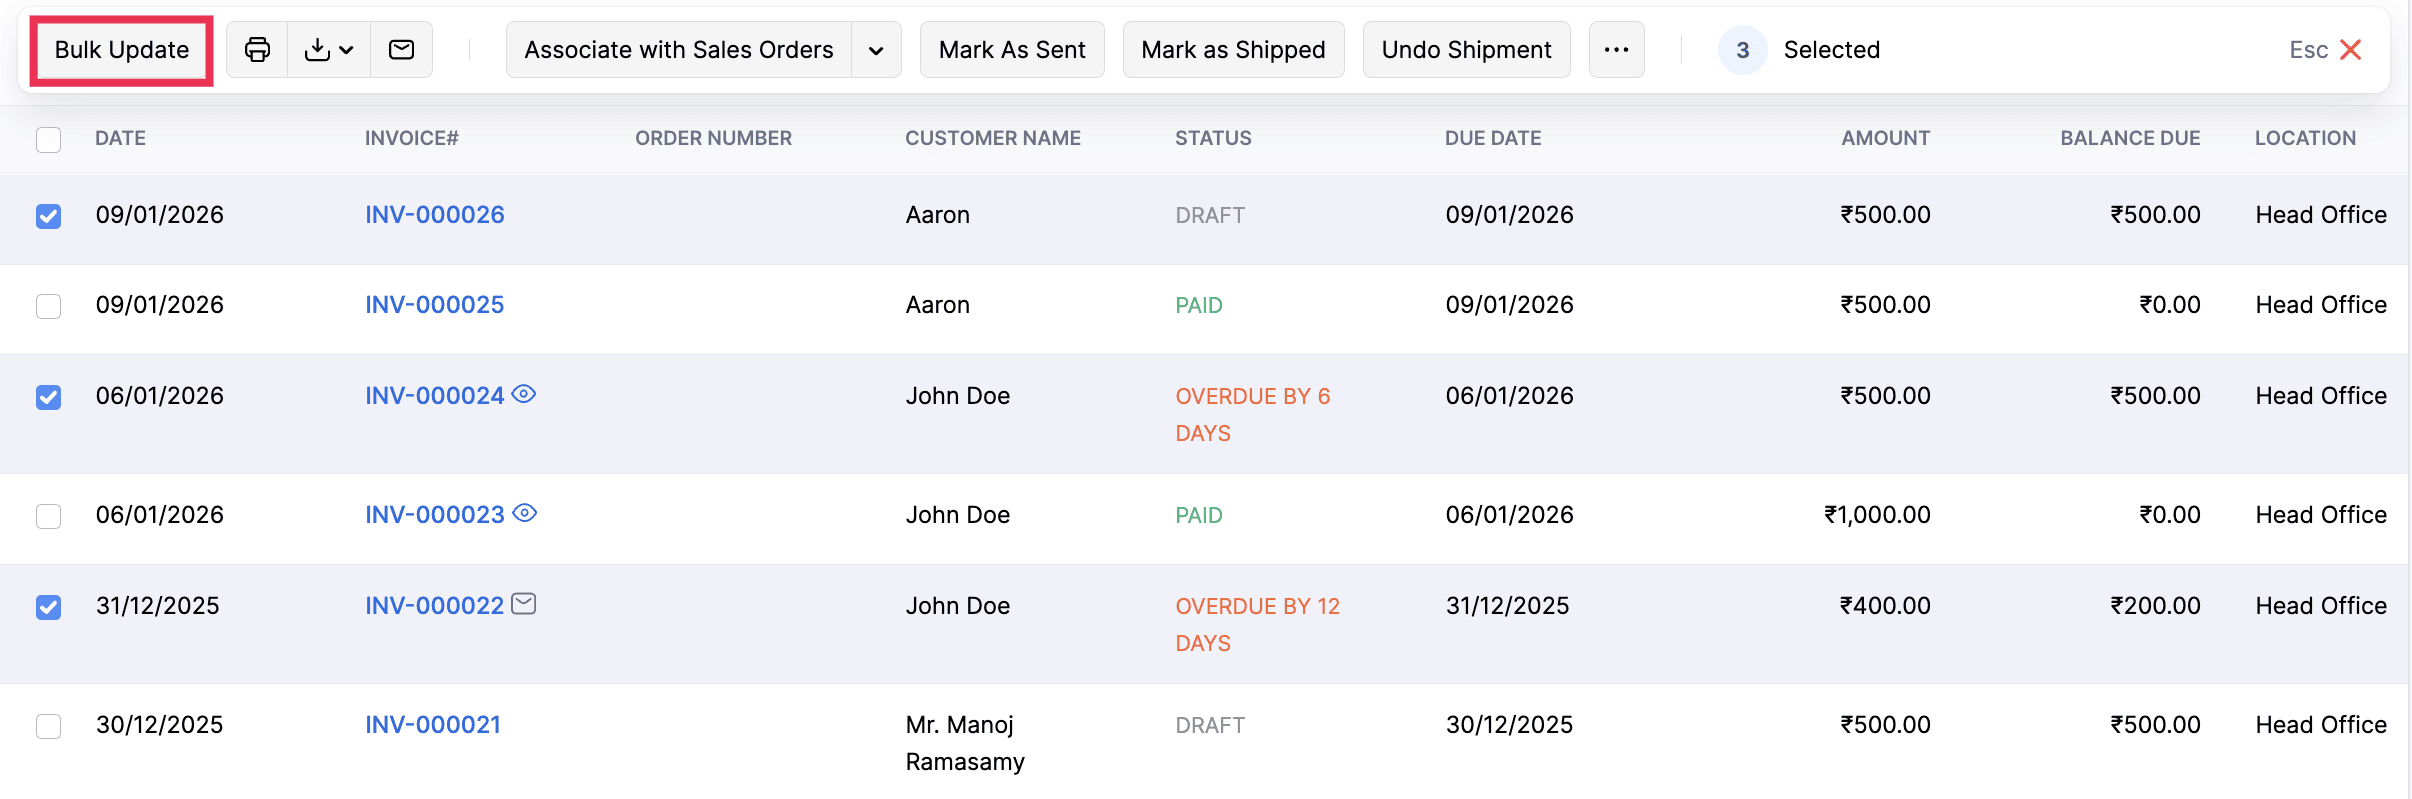
- From the Select a field dropdown, select Payment Terms, then select the payment term you want to apply.
- Enter a reason for performing the bulk update.
- Click Update.
Similarly, you can apply payment terms to other sales and purchase transactions while creating, editing, or bulk updating them.
Associate Payment Term to Customers and Vendors
Scenario: Daniel, a finance executive at a consulting firm with over 50 active clients, manages recurring invoices for customers with agreed payment schedules. Instead of manually selecting a payment term for every invoice, he associates the appropriate payment term with each customer in Zoho Books. As a result, new invoices automatically use the correct due date, reducing manual work and minimising billing errors.
To associate a payment term with a customer or vendor:
- Go to Sales on the left sidebar and select Customers. Or, go to Purchases on the left sidebar and select Vendors.
- Click + New in the top right corner of the page. Or, select the existing customer or vendor for whom you want to update the payment term and click Edit.
- Fill the required details.
- In the Payment Terms field, select the payment term you want to associate. Or, click New Payment Term to create a new payment term.
- Click Save.
Once associated, the selected payment term will be automatically applied to new transactions created for that customer or vendor.
Edit Payment Term
To edit an existing payment term:
- Go to Settings.
- Under Organisation Settings, navigate to Setup & Configurations and select Payment Terms.
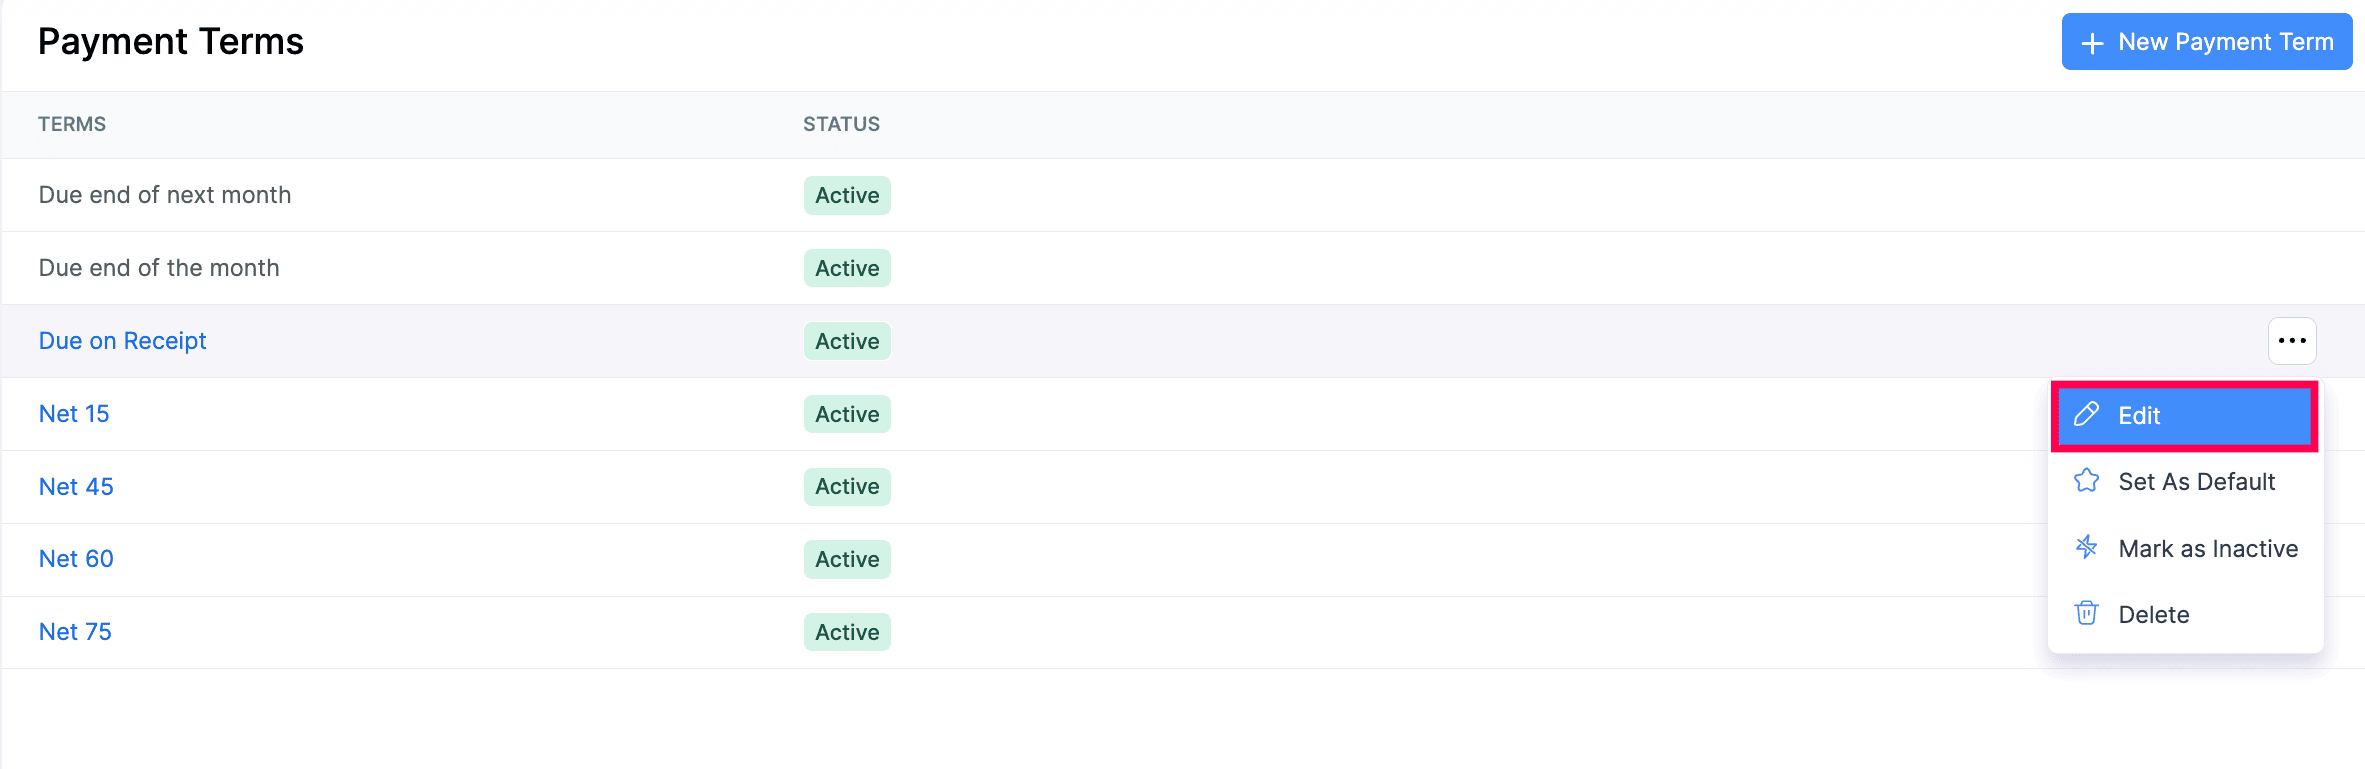
- Hover over the payment term you want to edit.
- Click the More icon.
- Select Edit.
- Make the required changes.
- Click Save.
The updated payment term will be applied to future transactions.
Set as Default
When you set a payment term as default, it is automatically applied to all new transactions, customers, and vendors.
To set a payment term as the default:
- Go to Settings.
- Under Organisation Settings, navigate to Setup & Configurations and select Payment Terms.
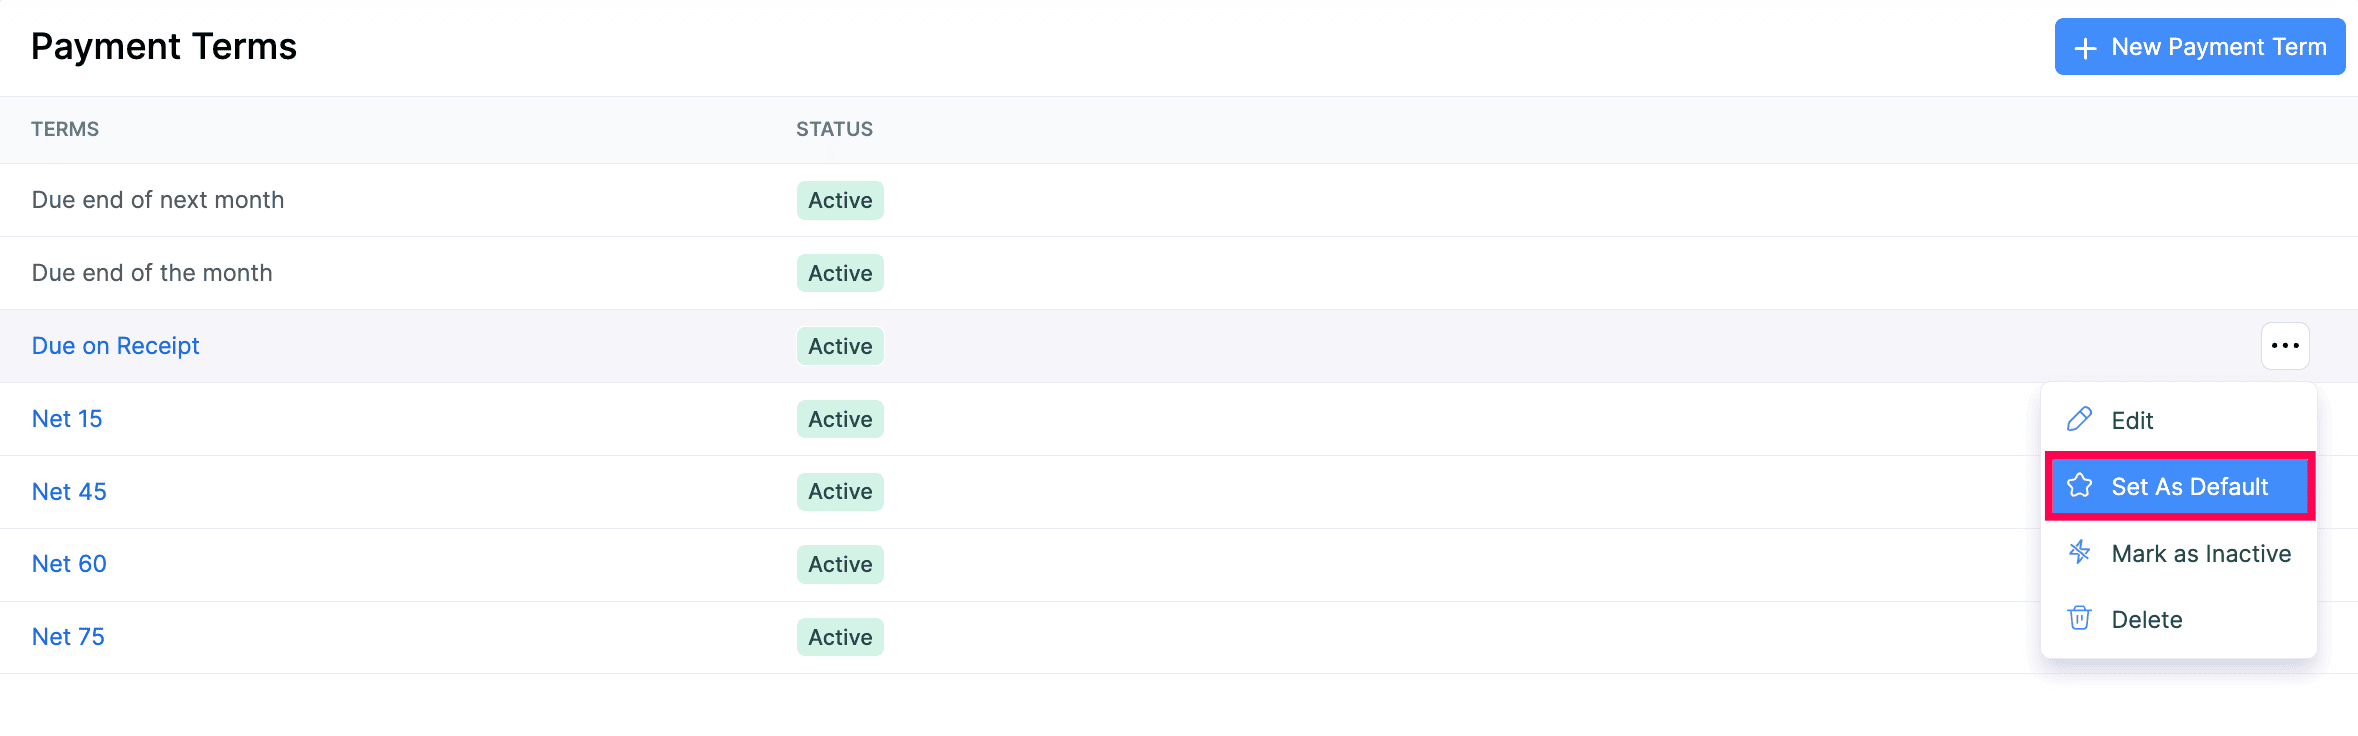
- Hover over the payment term you want to set as default.
- Click the More icon.
- Select Set As Default.
The payment term will be set as default. You can still select a different payment term when creating or editing individual transactions.
Note: Default payment terms cannot be deleted or marked as inactive. You can only edit them. To delete or mark a payment term as inactive, set a different payment term as the default first.
Mark as Inactive Or Active
To mark a payment term as inactive:
- Go to Settings.
- Under Organisation Settings, navigate to Setup & Configurations and select Payment Terms.
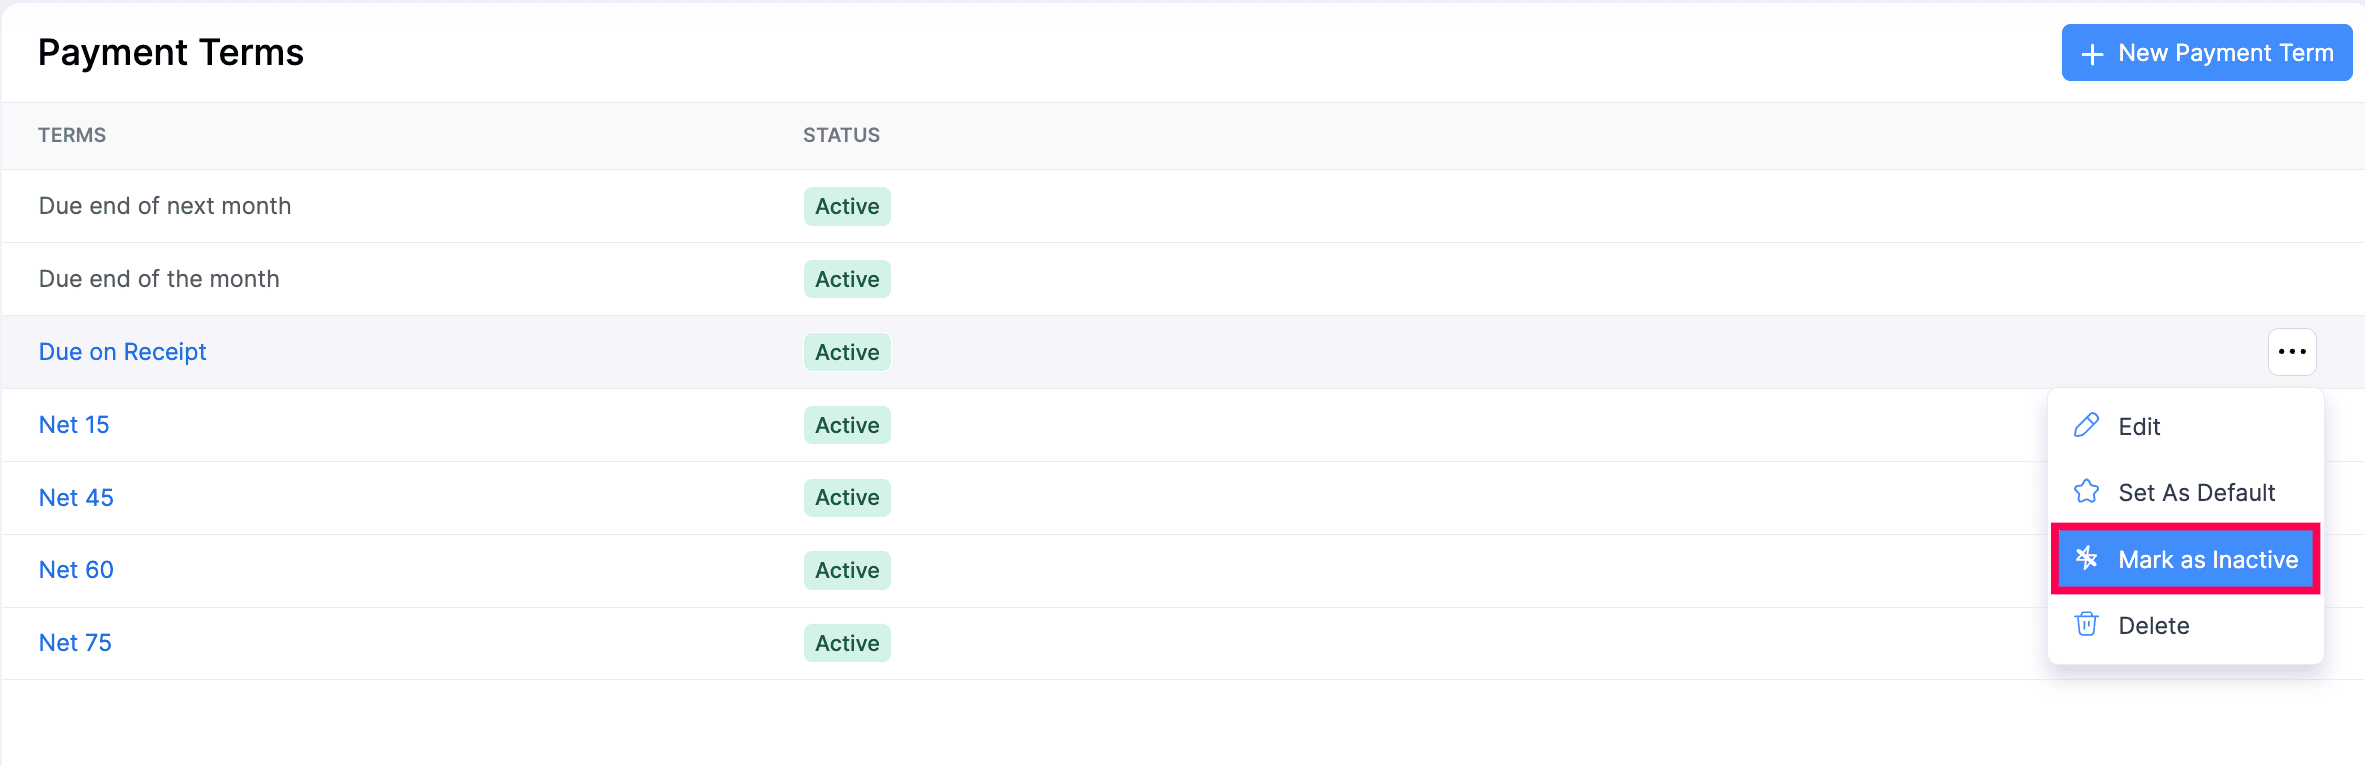
- Hover over the payment term you want to mark as inactive.
- Click the More icon.
- Select Mark as Inactive.
The payment term will be marked as inactive and you cannot associate it with customers or apply it to transactions in the future. Existing transactions using this term will remain unchanged.
To mark an inactive term as active again:
- Go to Settings.
- Under Organisation Settings, navigate to Setup & Configurations and select Payment Terms.
- Hover over the payment term you want to mark as active.
- Click the More icon.
- Select Mark as Active.
Delete Payment Term
To delete an existing payment term:
- Go to Settings.
- Under Organisation Settings, navigate to Setup & Configurations and select Payment Terms.
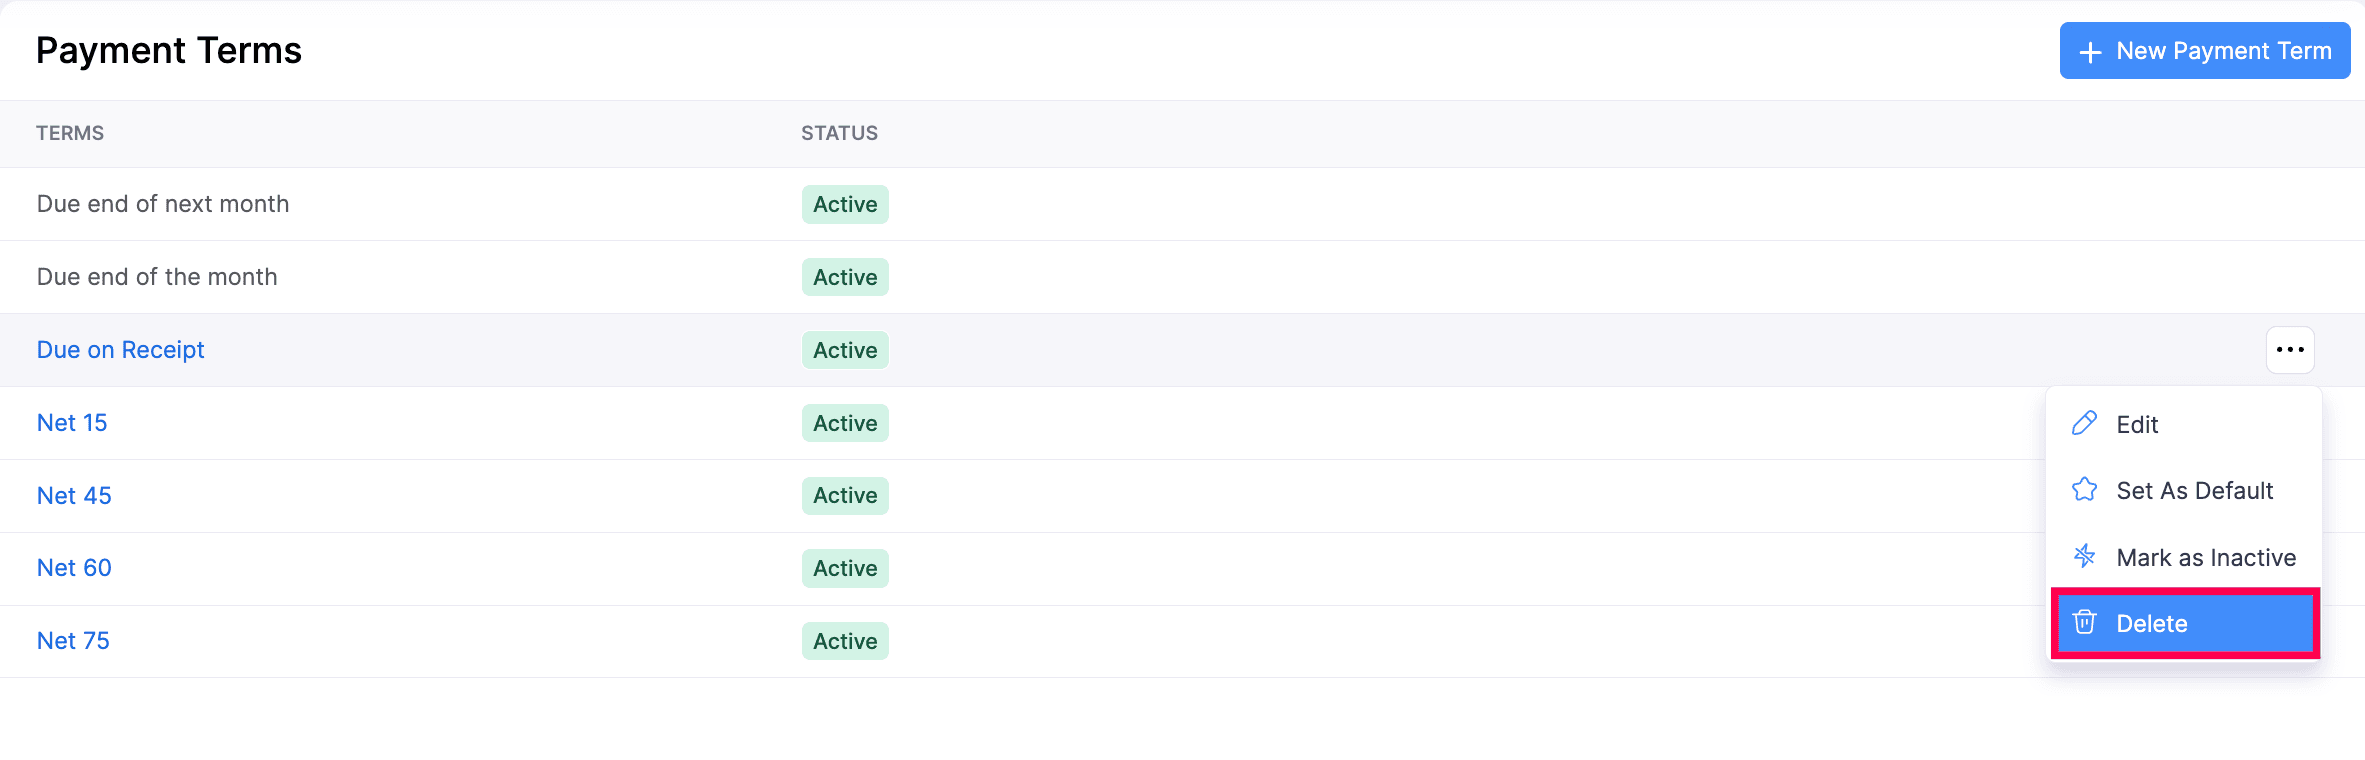
- Hover over the payment term you want to delete.
- Click the More icon.
- Select Delete.
- In the confirmation pop-up, click Delete again.
Note: You cannot delete a payment term associated with a customer or vendor. Dissociate the payment term before deleting it.
 Yes
No
Yes
No
Thank you for your feedback!