
Migrate to Zoho Billing from Other Software
Zoho Billing is a cloud-based billing and subscription management software that helps you automate invoicing, manage recurring payments, and track customer subscriptions. It also streamlines revenue operations, enabling you to manage the entire customer billing lifecycle from a single platform easily.
This guide provides a step-by-step walkthrough to set up your organisation, onboard your team, configure your catalog, and migrate your existing data.
Initial Setup
Organisation Profile
Start by creating your Zoho Billing organisation and adding your business details.
Create an Organisation
- Sign up to Zoho Billing.
- Enter your Organization Name and Email Address.
- Select your Business Location (Country).
- Click Create your account.

Configure Your Organisation Profile
Update your organisation’s profile to ensure your business details, branding, and other preferences are configured to meet your business needs.
- Log in to your Zoho Billing organisation.
- Navigate to Settings in the top right corner of the page.
- Select Profile under Organization.
- Update the following key details:
- Organization Name: Enter the full legal name of your business.
- Organization Logo: Upload your brand logo.
- Organization Address: Enter your registered business address.
- Primary Contact (Email): The default “From” address for invoices and notifications.
- Fiscal Year: Select the fiscal year applicable to your business (e.g., April–March for India).
- Time Zone: Select your organisation’s time zone.
- Tax ID: Enter your tax identification number (e.g., GSTIN for India).
- Click Save.
Learn more about configuring your organisation profile in Zoho Billing.
Configure Currencies
If your business operates across multiple currencies, configure the currencies you need and set their exchange rates relative to your base currency.
- Navigate to Settings in the top right corner of the page.
- Select Currencies under Setup & Configurations.
- The currency selected during organisation creation is set as your base currency.
To add additional currencies:
- Click + New Currency.
- Select the Currency Code from the dropdown.
- Enter the Currency Symbol and Currency Name.
- Click Save.
Learn more about configuring currencies in Zoho Billing.
The base currency is determined by the country selected during organisation creation and cannot be changed after transactions are recorded.
Users & Roles
Set up users and roles to control access to different areas of your organisation.
Configure Roles
- Log in to your Zoho Billing organisation.
- Navigate to Settings in the top right corner of the page.
- Select Roles under Users & Roles.
- Review the predefined roles available, such as Admin, Staff, and Timesheets Staff.
- Click + New Role to create a custom role, if required.
- Select the permissions that users with the role should have.
- Click Save.
Invite Users
- Log in to your Zoho Billing organisation.
- Navigate to Settings in the top right corner of the page.
- Select Users under Users & Roles.
- Click Invite User.
- Enter the user’s Name and Email Address.
- Select the appropriate Role.
- Click Send.
Learn more about managing users and roles in Zoho Billing.
Taxes, Compliance, and e-Invoicing
Configure the tax and compliance settings applicable to your business.
Configure Tax Rates and Tax Groups
- Log in to your Zoho Billing organisation.
- Navigate to Settings in the top right corner of the page.
- Select Taxes under Taxes & Compliance.
- In the Tax Rates page, click + New Tax .
- Enter the following details:
- Tax Name: Enter a descriptive name for the tax (e.g., GST 18%).
- Rate (%): Enter the applicable tax percentage (e.g., 18 for 18%).
- Tax Type: Select the type of tax applicable to your business, such as GST, IGST, CGST, or SGST.
- Click Save.
To create a Tax Group (for taxes that are applied together, such as CGST + SGST):
- Navigate to Settings in the top right corner of the page.
- Select Taxes under Taxes & Compliance.
- In the Tax Rates page, click the More icon and select + New Tax Group.
- Enter the Tax Group Name.
- Under Associate Taxes, select the individual tax rates to include in the group.
- Click Save.

Learn more about configuring GST and taxes in Zoho Billing.
Configure TDS and TCS
- Log in to your Zoho Billing organisation.
- Navigate to Settings in the top right corner of the page.
- Select Taxes under Taxes & Compliance.
- Switch to GST TDS Settings and enable GST TDS.
- Click Save.
Learn more about GST TDS and Income TDS in Zoho Billing.
Set Up e-Invoicing
For businesses subject to mandatory e-Invoicing regulations, Zoho Billing connects directly to the Invoice Registration Portal (IRP) to generate the Invoice Reference Number (IRN) and digitally signed QR Code.
- Log in to your Zoho Billing organisation.
- Navigate to Settings in the top right corner of the page.
- Select e-Invoicing under Taxes & Compliance.
- Click Enable e-Invoicing.

Once configured, you can push invoices to the IRP and after the QR code is generated, you can share them with customers. Learn more about setting up e-Invoicing and registering on the IRP in Zoho Billing.
Modules, Templates, and Notifications
Enable Required Modules
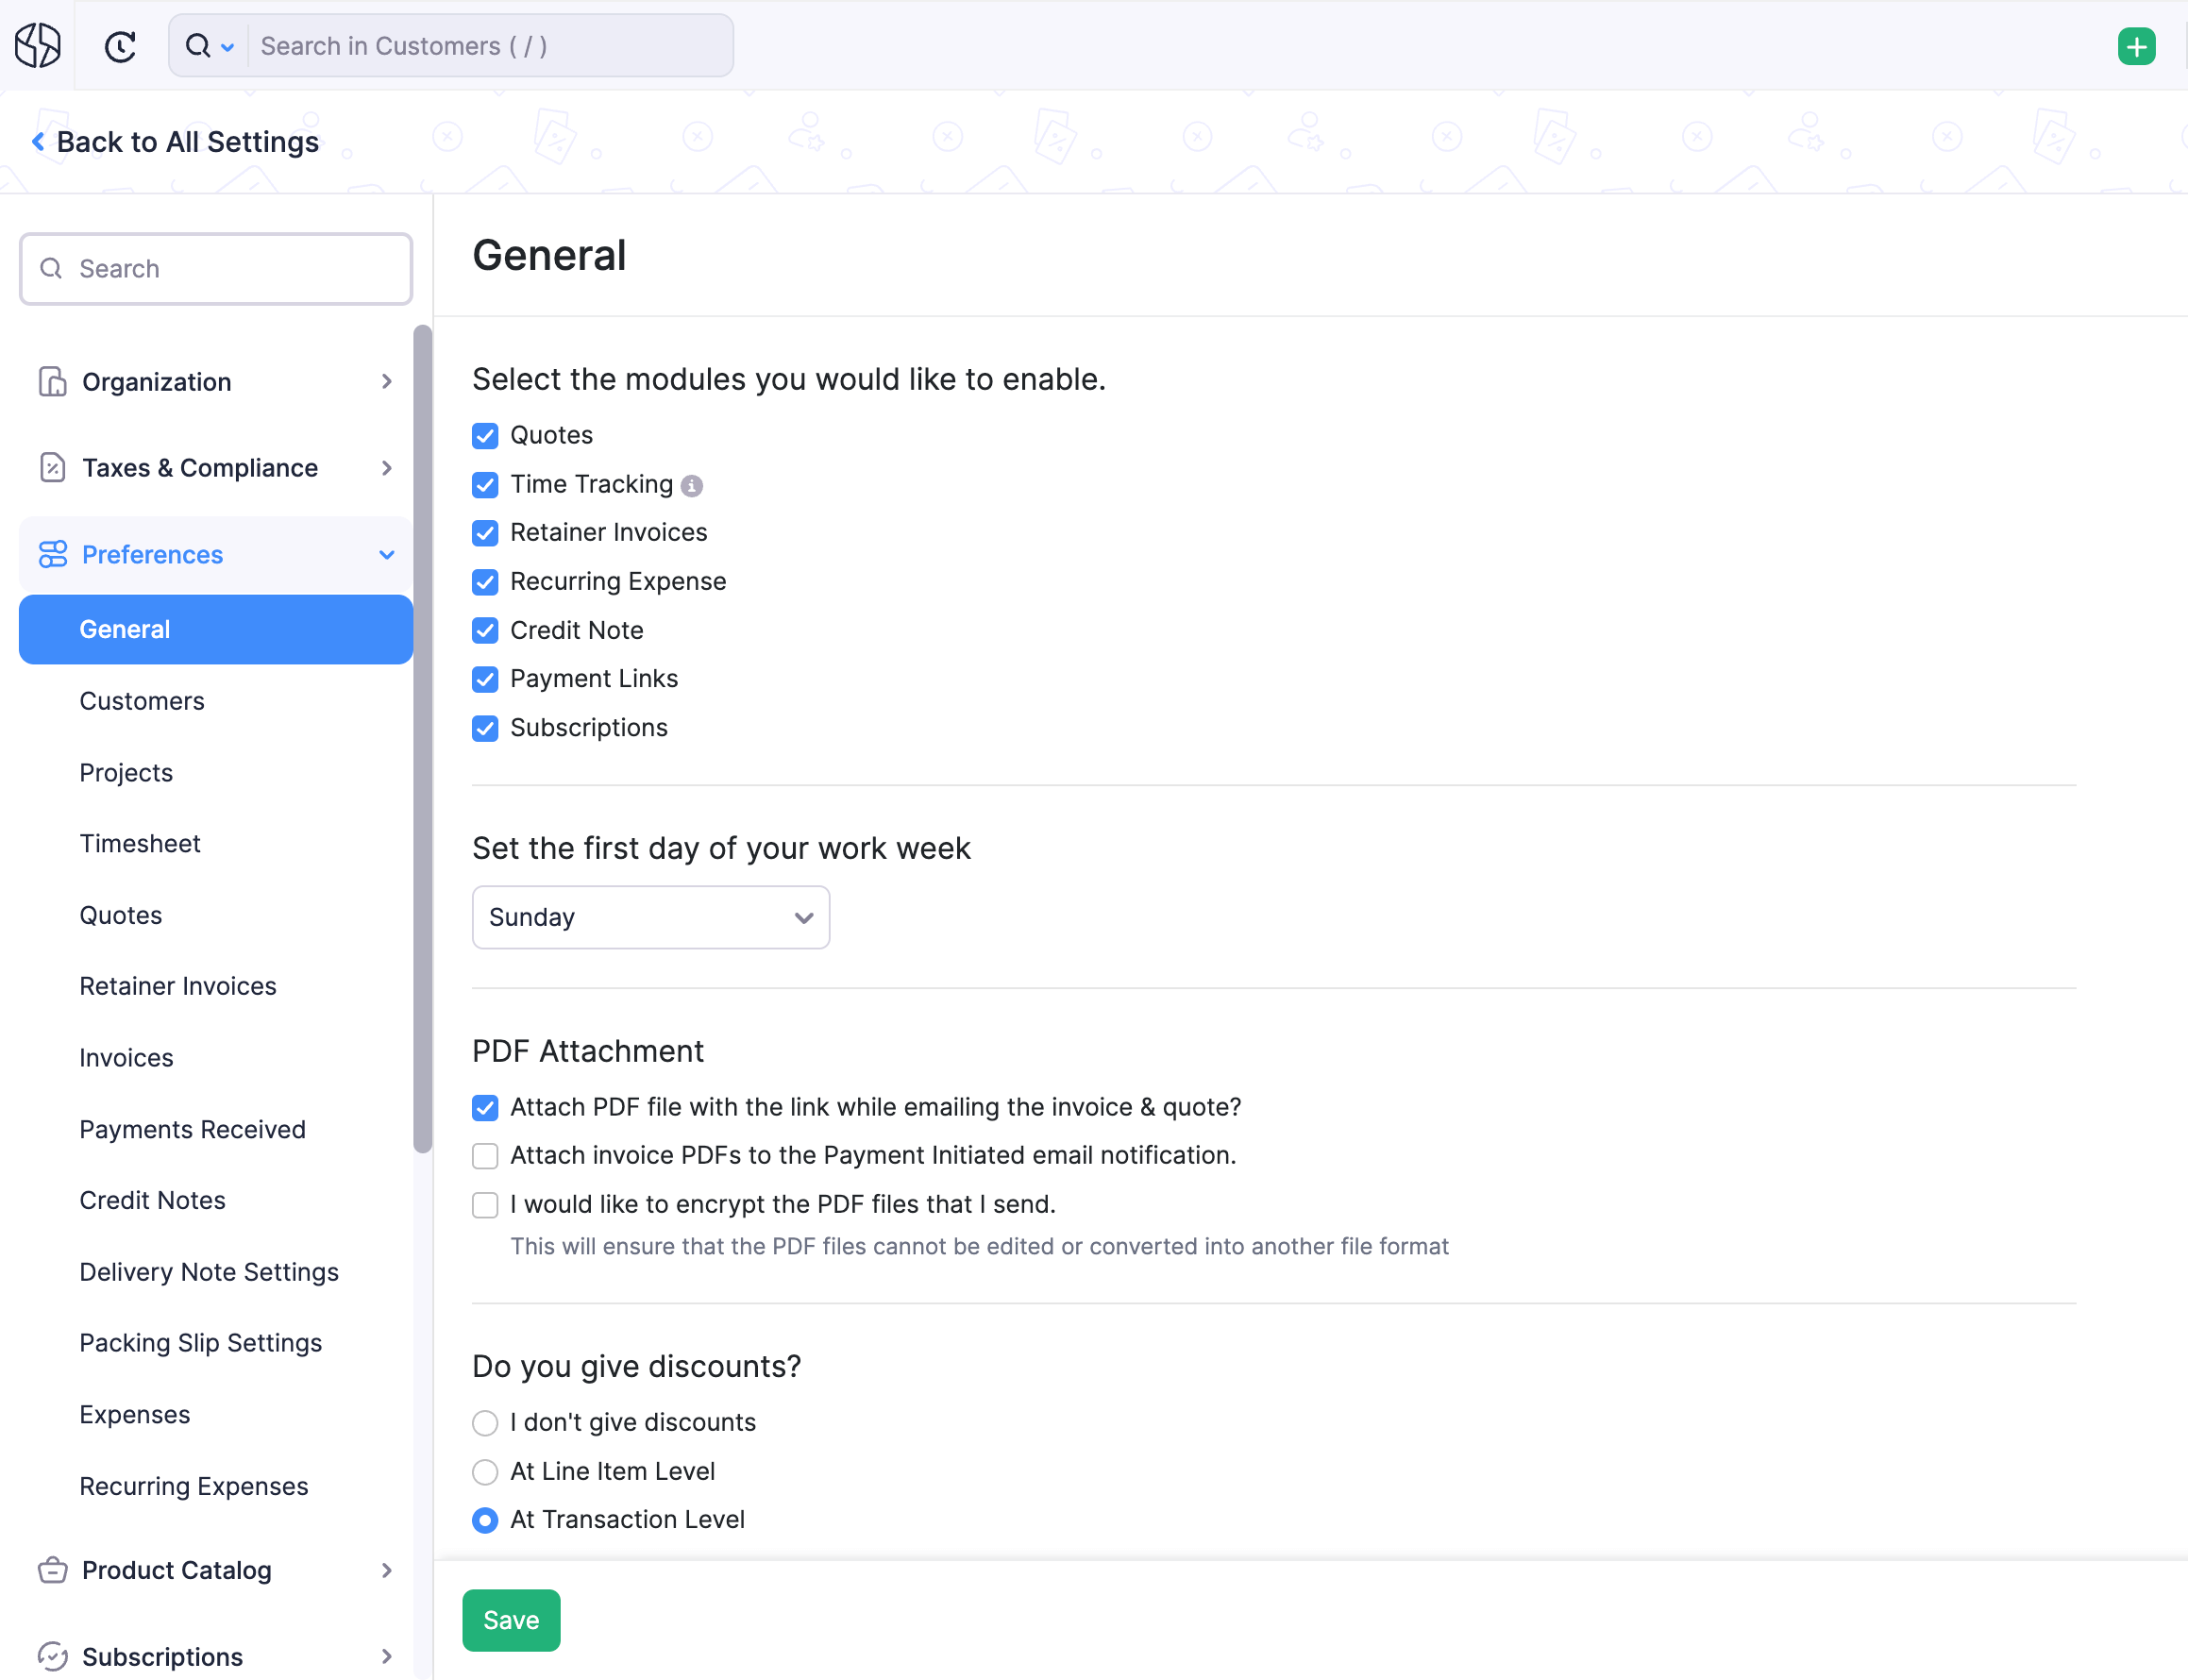
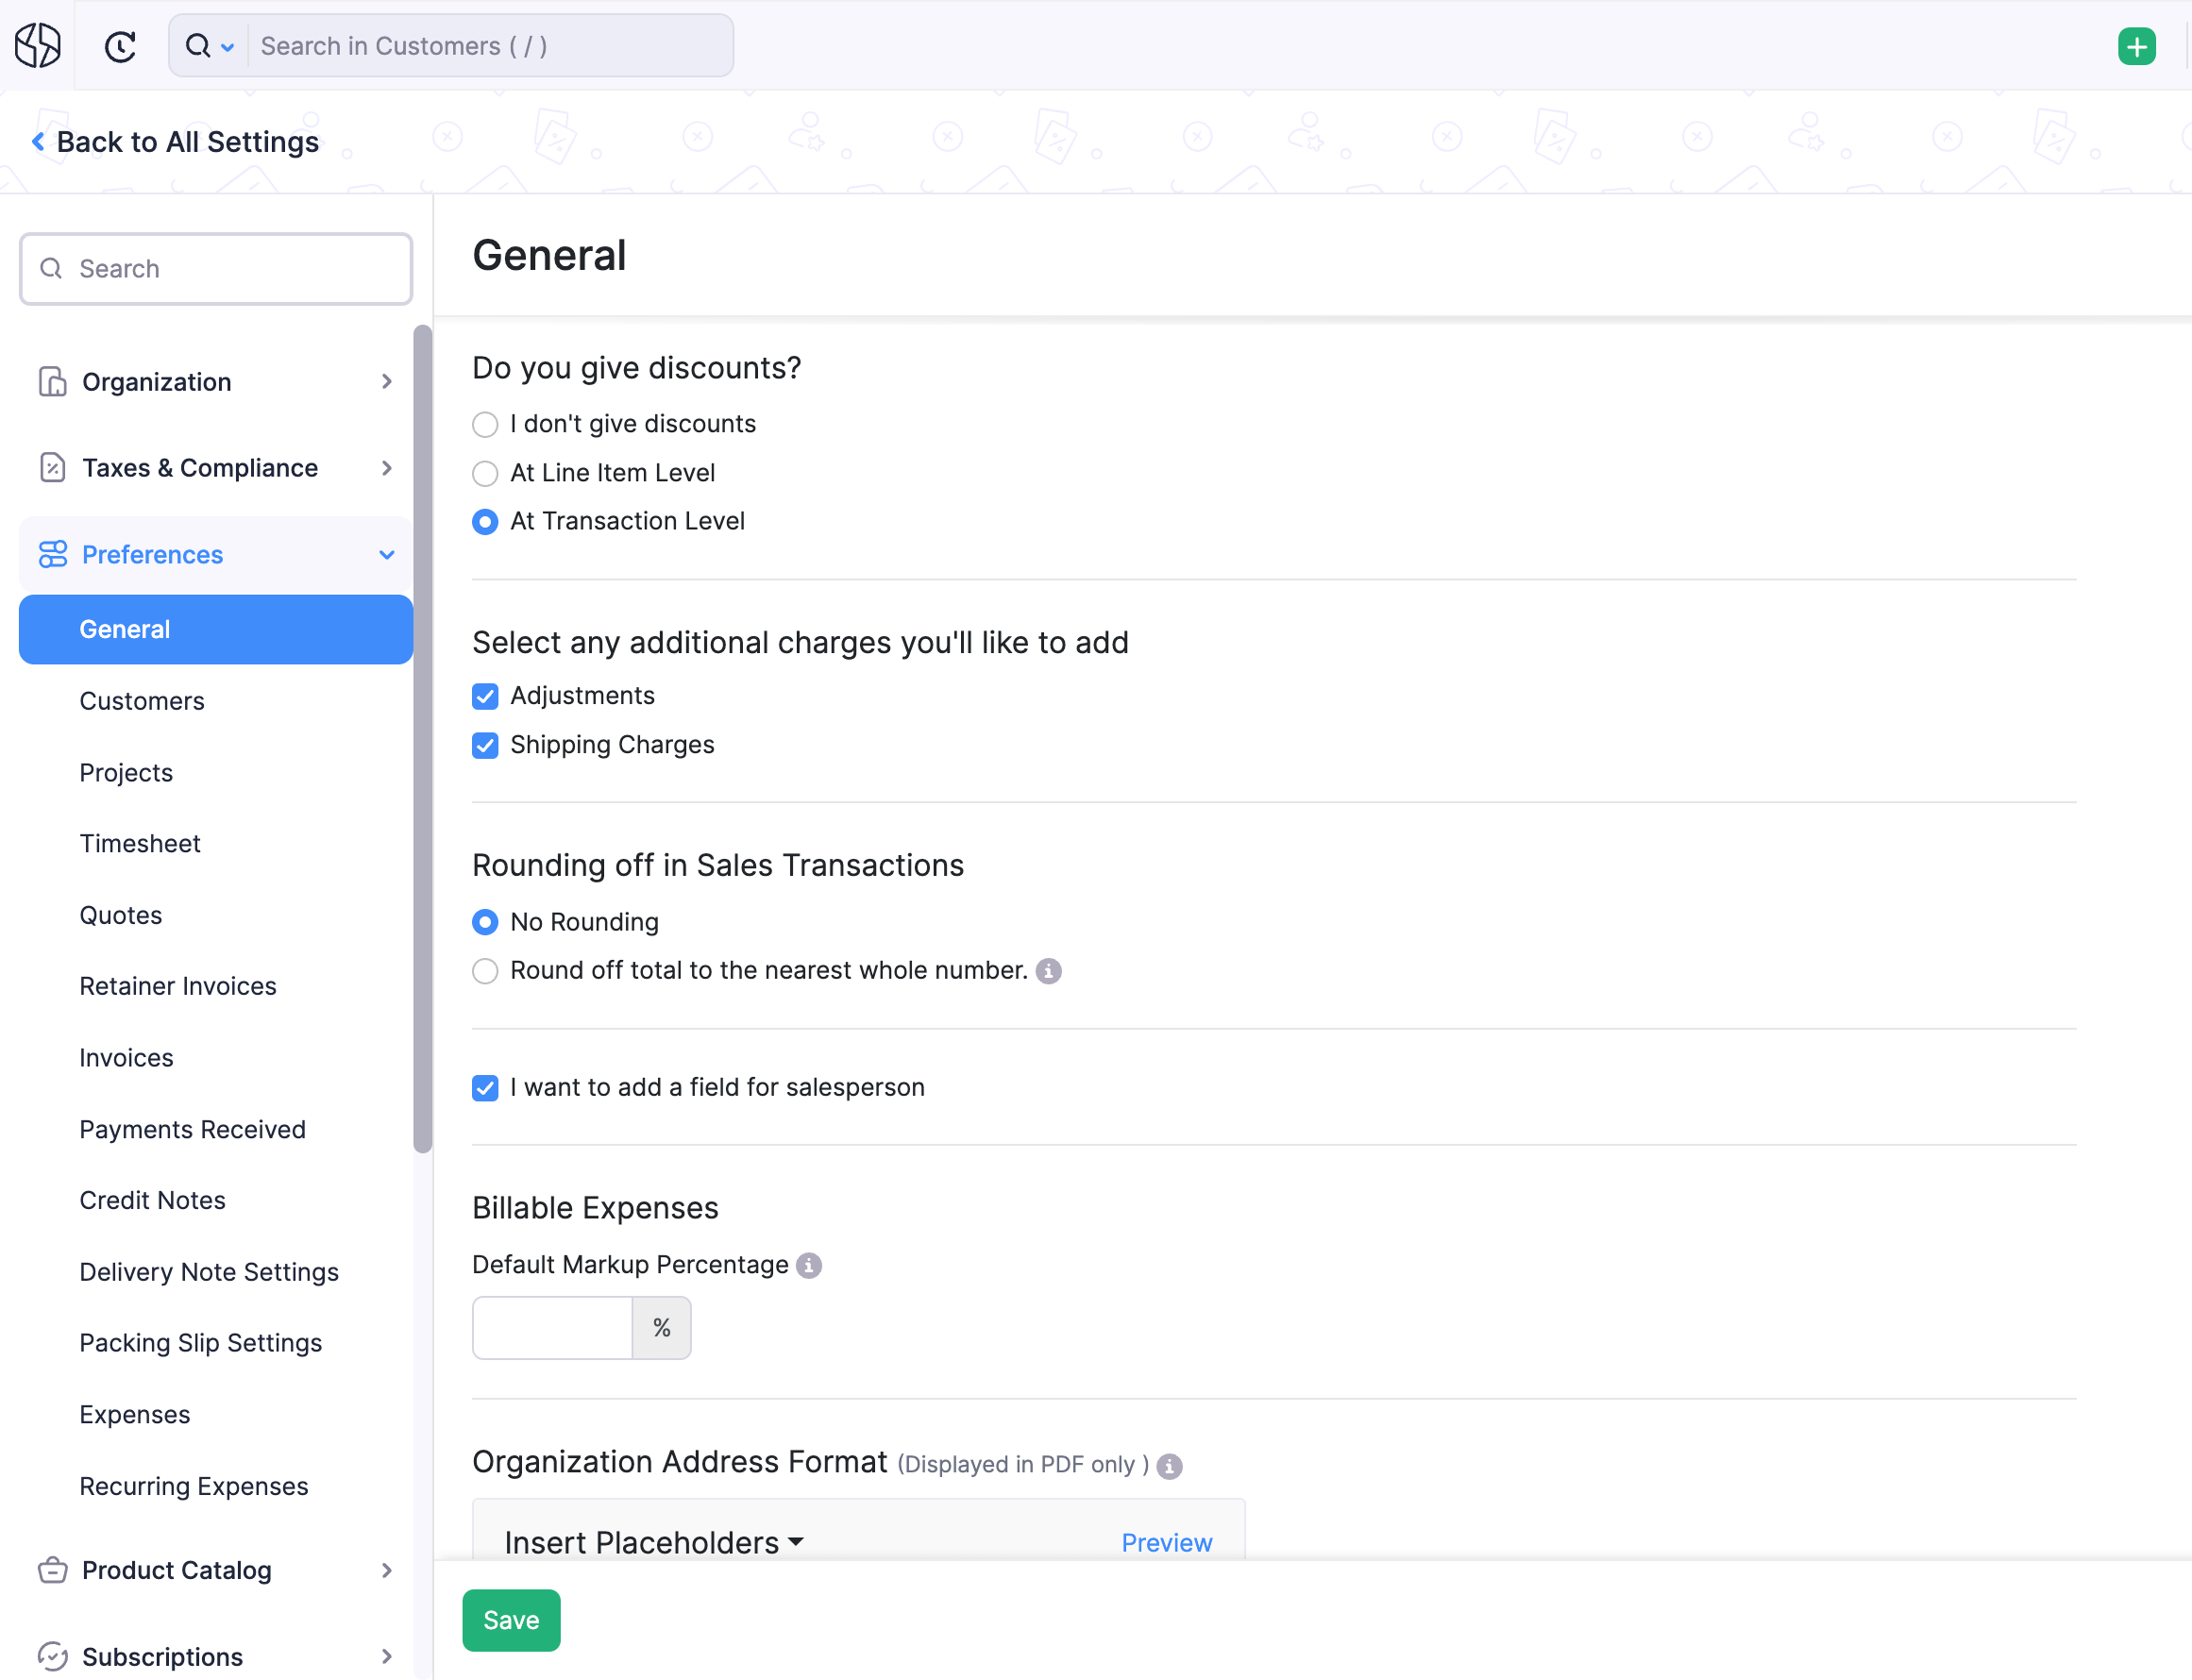
Configure which modules and features are active in your organisation, how discounts and charges are applied, and other general preferences.
- Log in to your Zoho Billing organisation.
- Navigate to Settings in the top right corner of the page.
- Select General under Setup & Configurations.
- Review and configure the module preferences as required.
- Click Save.
Learn more about configuring general settings in Zoho Billing.

Customise PDF Templates
- Log in to your Zoho Billing organisation.
- Navigate to Settings in the top right corner of the page.
- Select PDF Templates under Customization.
- Select the transaction type, such as Invoices.
- Choose a template and click Edit.
- Customise the required elements, including:
- Organization logo
- Header information
- Item table
- Footer notes
- Terms and conditions and more
- Click Save.
You can also add digital signature to your PDF templates in Zoho Billing. Learn More.
Configure Email Notifications and Reminders
Reminders
- Log in to your Zoho Billing organisation.
- Navigate to Settings in the top right corner of the page.
- Select Reminders under Setup & Configurations. The Reminders page includes two types of reminders:
- Manual Reminders: Send reminders to customers manually from an overdue or sent invoice’s details page.
- Automated Reminders: Schedule reminders to be sent automatically based on the expected payment date or due date. Click + New Reminder to add additional reminders.
- Enable the toggle for each automated reminder to activate it, and click the Edit icon to configure the schedule and message.
- Click Save.
Learn more about configuring reminders in Zoho Billing.
Email Notifications
- Log in to your Zoho Billing organisation.
- Navigate to Settings in the top right corner of the page.
- Select Email Notifications under Customization.
- Select the notification you want to customise.
- For each notification:
- Enable or disable the notification using the toggle.
- Click Edit to customise the Subject and Message Body.
- Click Save. You can also set up SMS notifications to alert customers about invoices and payment reminders via SMS.
Online Payments
Connect a payment gateway to enable your customers to pay invoices and subscription charges online.
- Log in to your Zoho Billing organisation.
- Navigate to Settings in the top right corner of the page.
- Select Payment Gateways under Online Payments.
- Choose a payment gateway based on your preference
You can try using Zoho Payments, the native payment gateway built into Zoho Billing. It supports UPI, Cards, and Net Banking, and connects directly without needing a third-party account.
Once a payment gateway is connected, customers can pay online through the payment link on invoices, through the Customer Portal, or through Hosted Payment Pages.
Customer Portal
The Customer Portal is a self-service interface where your customers can view their invoices, make payments, manage their subscriptions, and update their details.
Enable and Configure the Portal
- Log in to your Zoho Billing organisation.
- Navigate to Settings in the top right corner of the page.
- Select General under Customer Portal.
- Review and configure the available portal settings, including the portal name, login method, and portal preferences.
- Click Save.
Learn more about configuring the Customer Portal in Zoho Billing.
Create or Import Records
You can create or import the products and services that you sell. Depending on your business model, you can create one-time items or subscription offerings.
- Log in to your Zoho Billing organisation.
- Go to Product Catalog.
- Select the required option:
- Items for one-time products or services.
- Plans for subscription offerings.
- Addons for additional recurring or one-time charges.
- Click + New and enter the required details.
- Click Save.
You can also import your existing catalog data in bulk during migration. Refer to Step-by-Step Module Imports.
Create or Import Customers
Create your customers before creating transactions or subscriptions.
- Log in to your Zoho Billing organisation.
- Go to Customers.
- Click + New Customer.
- Enter the required customer details.
- Click Save.
You can also import customer and contact information in bulk. Refer to Import Customers and Contacts.
Learn more about creating customers.
Create Your First Invoice or Subscription
Invoices
Create invoices to bill your customers for one-time products or services.
- Log in to your Zoho Billing organisation.
- Go to Sales and select Invoices.
- Click + New Invoice.
- Select the Customer, enter the Invoice Date and Due Date, and add the required line items.
- Choose if you’d like to send the invoice or save it as draft:
- Save as Draft to review the invoice later.
- Save and Send to send the invoice to the customer.
Learn more about creating invoices.
Subscriptions
Create subscriptions to automatically bill your customers at regular intervals for a plan or item.
- Log in to your Zoho Billing organisation.
- Go to Sales and select Subscriptions.
- Click + New Subscription.
- Select or add a Customer Name and optionally select a Currency.
- Under Create Subscription For, select:
- Product (Plan & Addons): to create a subscription based on a plan from your product catalog.
- Items: to create a subscription based on individual line items.
- Select the Product or enter the required Items.
- Review the Billing Period, Start Date, and Trial Period (if applicable).
- Click Continue to review the subscription summary.
- Click Save or Save and Send to activate the subscription and notify the customer.
Learn more about creating subscriptions.
Migrate Data
If you are moving from another billing or accounting system, you can import your existing records into Zoho Billing.
Before importing data, review the available sample files and ensure that your data is prepared in the required format.
Import Process
The import process generally follows these steps:
- Log in to your Zoho Billing organisation.
- Go to the module that you want to import data into.
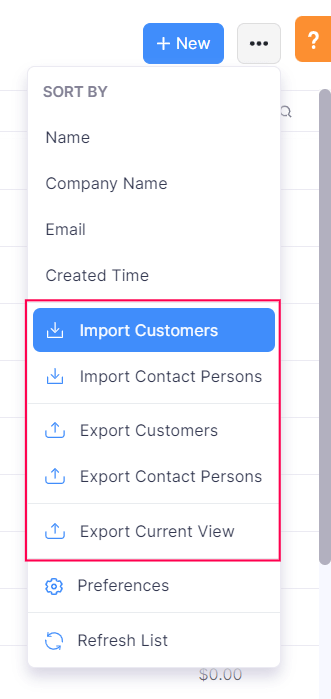
- Click the More icon at the top of the list and select the relevant Import option from the dropdown.
- Download the Sample File to review the required fields and format.
- Upload your prepared import file.
- Select the required file settings, such as character encoding and delimiter, if applicable.
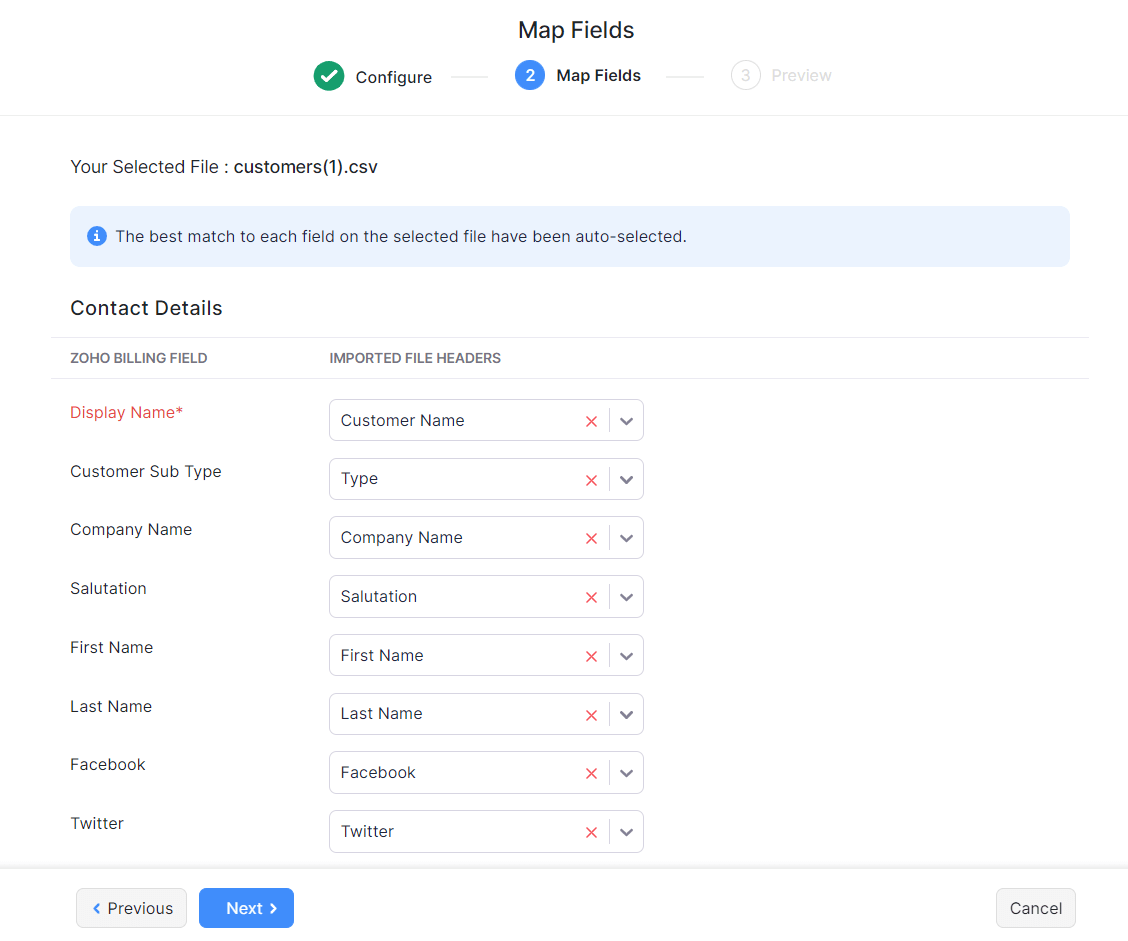
- Map the columns in your file to the corresponding Zoho Billing fields.
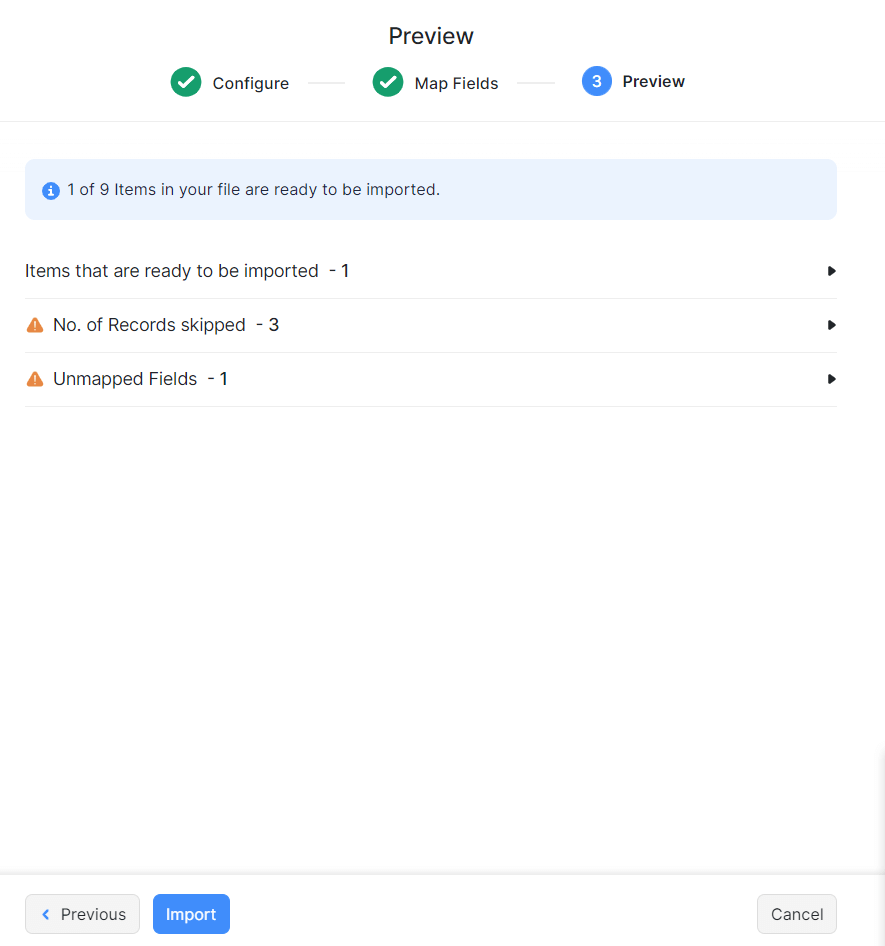
- Review the records and resolve any mapping or validation issues.
- Click Import.
Recommended Import Sequence
Import your data in the following order, as records in later modules depend on those imported earlier:
- Customers & Contacts
- Items (one-time goods and services)
- Product catalog in hierarchical order: Products → Plans → Addons → Coupons
- Subscriptions
- Quotes
- Invoices
- Payments Received
- Credit Notes
- Retainer Invoices
Step-by-Step Module Imports
Each module depends on records from the previous step. Importing in the wrong order will cause validation errors.
1. Customers & Contacts
Import your customer database and contact persons before creating transactions or subscriptions.
- Path: Customers > More Actions > Import Customers
- Download Sample File

You can also import additional contact persons. Go to Customers > More Actions > Import Contact Persons.
2. Items
Import items and services sold to customers.
- Path: Items > More Actions > Import Items
- Download Sample File
3. Product catalog
Subscription offerings must be imported in hierarchical order: Products → Plans → Addons → Coupons.
- Path: Product Catalog > Plans > Products > More Actions > Import Products
- Download Sample File
Plans
- Path: Product Catalog > Plans > More Actions > Import Plans
- Download Sample File
Addons
- Path: Product Catalog > Addons > More Actions > Import Addons
- Download Sample File
Coupons
- Path: Product Catalog > Coupons > More Actions > Import Coupons
- Download Sample File
4. Subscriptions
Import subscriptions after importing the required customers and product catalog records.
- Path: Sales > Subscriptions > More Actions > Import Subscriptions
- Download Sample File
5. Quotes
- Path: Sales > Quotes > More Actions > Import Quotes
- Download Sample File
6. Invoices
- Path: Sales > Invoices > More Actions > Import Invoices
- Download Sample File
7. Payments Received
- Path: Payments > Payments Received > More Actions > Import Payments
- Download Sample File
8. Credit Notes
- Path: Sales > Credit Notes > More Actions > Import Credit Notes
- Download Sample File
9. Retainer Invoices
- Path: Sales > Retainer Invoices > More Actions > Import Retainer Invoices
- Download Sample File
Automation and Technical Setup
Configure Workflow Rules
Use workflow rules to automate actions in Zoho Billing based on specific events and conditions, such as sending email alerts when an invoice is created or when a subscription is renewed.
- Navigate to Settings in the top right corner of the page.
- Select Workflow Actions under Automation.
- Click + New Workflow Rule.
- Enter a Rule Name and select the Module the rule applies to (e.g., Invoices, Subscriptions).
- Set the Trigger, the event that will activate the rule, such as when a record is created, updated, or on a scheduled date.
- Define Conditions to specify when the rule should apply (optional).
- Select the Actions to perform when the rule is triggered, such as:
- Send an Email Alert
- Create a Task
- Execute a Custom Function (Deluge script)
- Call a Webhook
- Click Save.
Learn more about configuring workflow rules.
Connect Zoho Apps and Other Integrations
Connect Zoho Billing with other Zoho apps and third-party services to extend its functionality.
- Navigate to Settings in the top right corner of the page.
- Select Zoho Apps under Integrations & Marketplace.
- From the list, click the app you want to connect, such as:
- Zoho CRM: sync customers, contacts, and deals between Zoho CRM and Zoho Billing.
- Zoho Books: integrate with Zoho Books for accounting and financial reporting.
- Zoho Desk: link support tickets to customer billing records.
- Follow the on-screen instructions for each integration to complete the integration.
For third-party integrations, select Other Apps under Integrations & Marketplace to connect tools such as Slack, Zapier, and more.
If you need help setting up or using Zoho Billing, contact our support team for implementation assistance at support@zohobilling.com. For a product walkthrough or help choosing a plan, write to presales@zohobilling.com.
Ask Zia is powered by AI. Responses are helpful but not always perfect.