
Departments
If you have different departments and teams in your company, you can add them as departments in Zoho Expense and assign the departments to the respective users.
You can view the users who belong to a particular department in the Departments page and all the expenses they create will be associated to that department by default. To view the expenses incurred under a department, the admin can run the Expenses by Department report under the Analytics section. You can also assign a department head for each department, and configure workflows such that a notification will be sent to the department head on submission or creation of an expense report.
Add Departments
To add the departments in Zoho Expense:
- Click Admin View on the left sidebar.
- Go to Settings on the left sidebar.
(OR)
Click Settings in the top right corner of the page. - Navigate to Organization Settings.
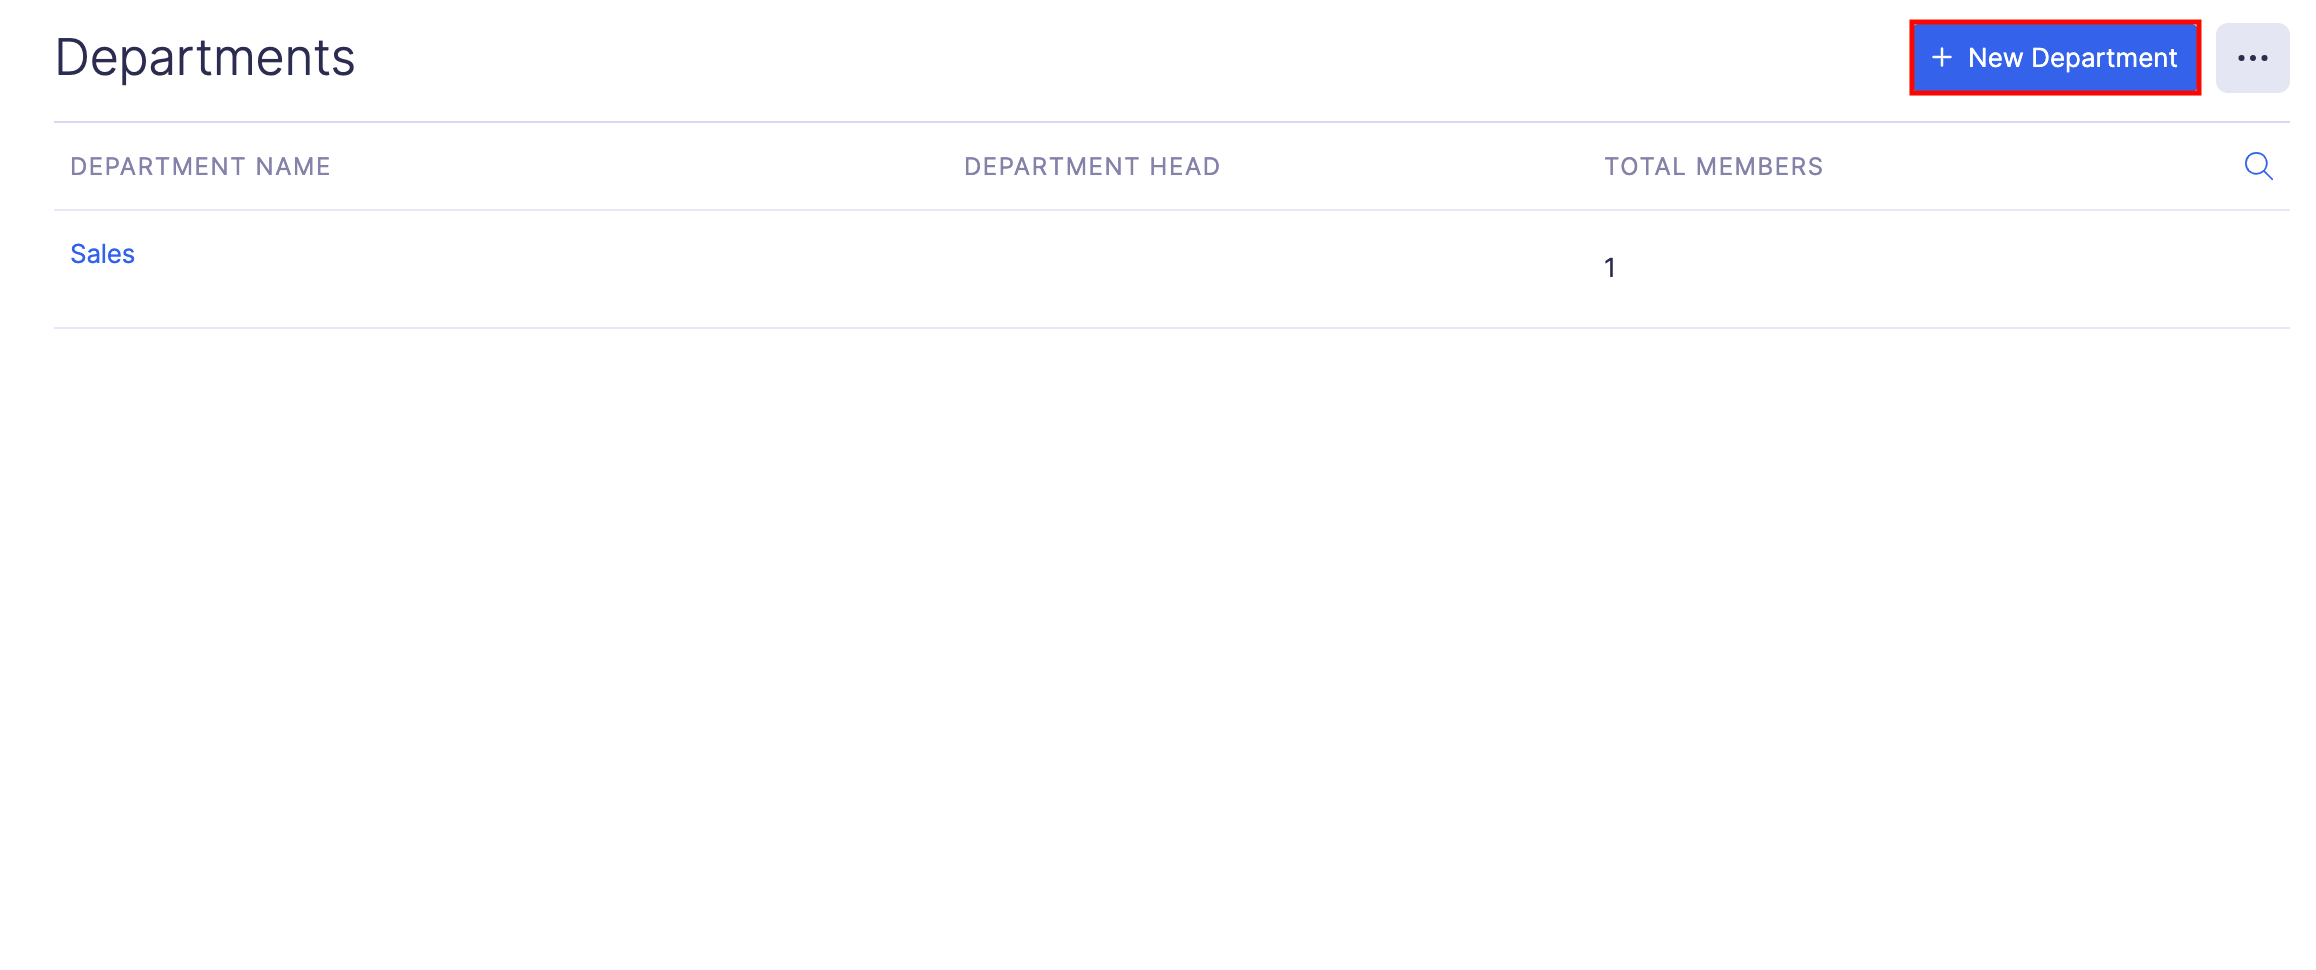
- Click Departments under Organization.
- Click the + New Department at the top right corner.
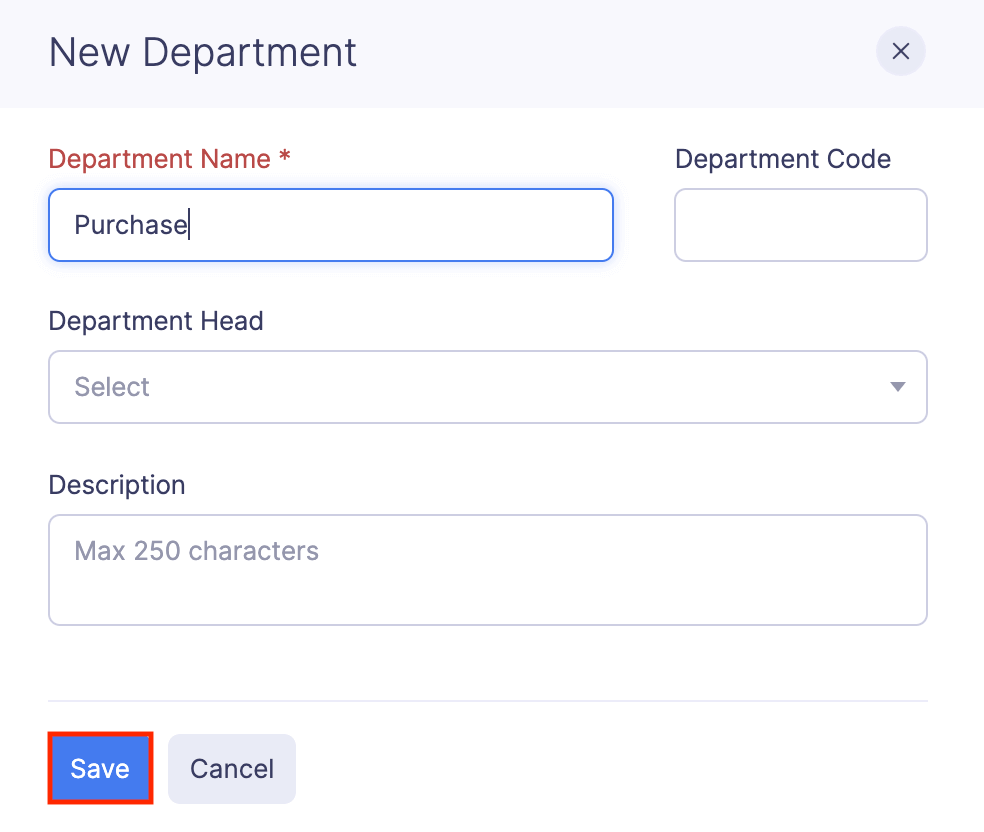
- Enter the necessary details such as Department Name, Department Code, etc.
- Select the Department Head from the dropdown.
- Click Save. A new department will be created. You can then assign this department to the users.
Pro Tip:
You can set up custom approval and let the users of a department submit their transactions to the Department Head for approval.
Import Departments
You can import departments in the following formats:
| CSV - Comma Separated Values | TSV - Tab Separated Values |
To import departments:
- Click Admin View on the left sidebar.
- Go to Settings on the left sidebar.
(OR)
Click Settings in the top right corner of the page. - Navigate to Organization Settings.
- Click Departments under Organization.
- Click the More icon at the top right corner of the page.
- Select Import Departments.

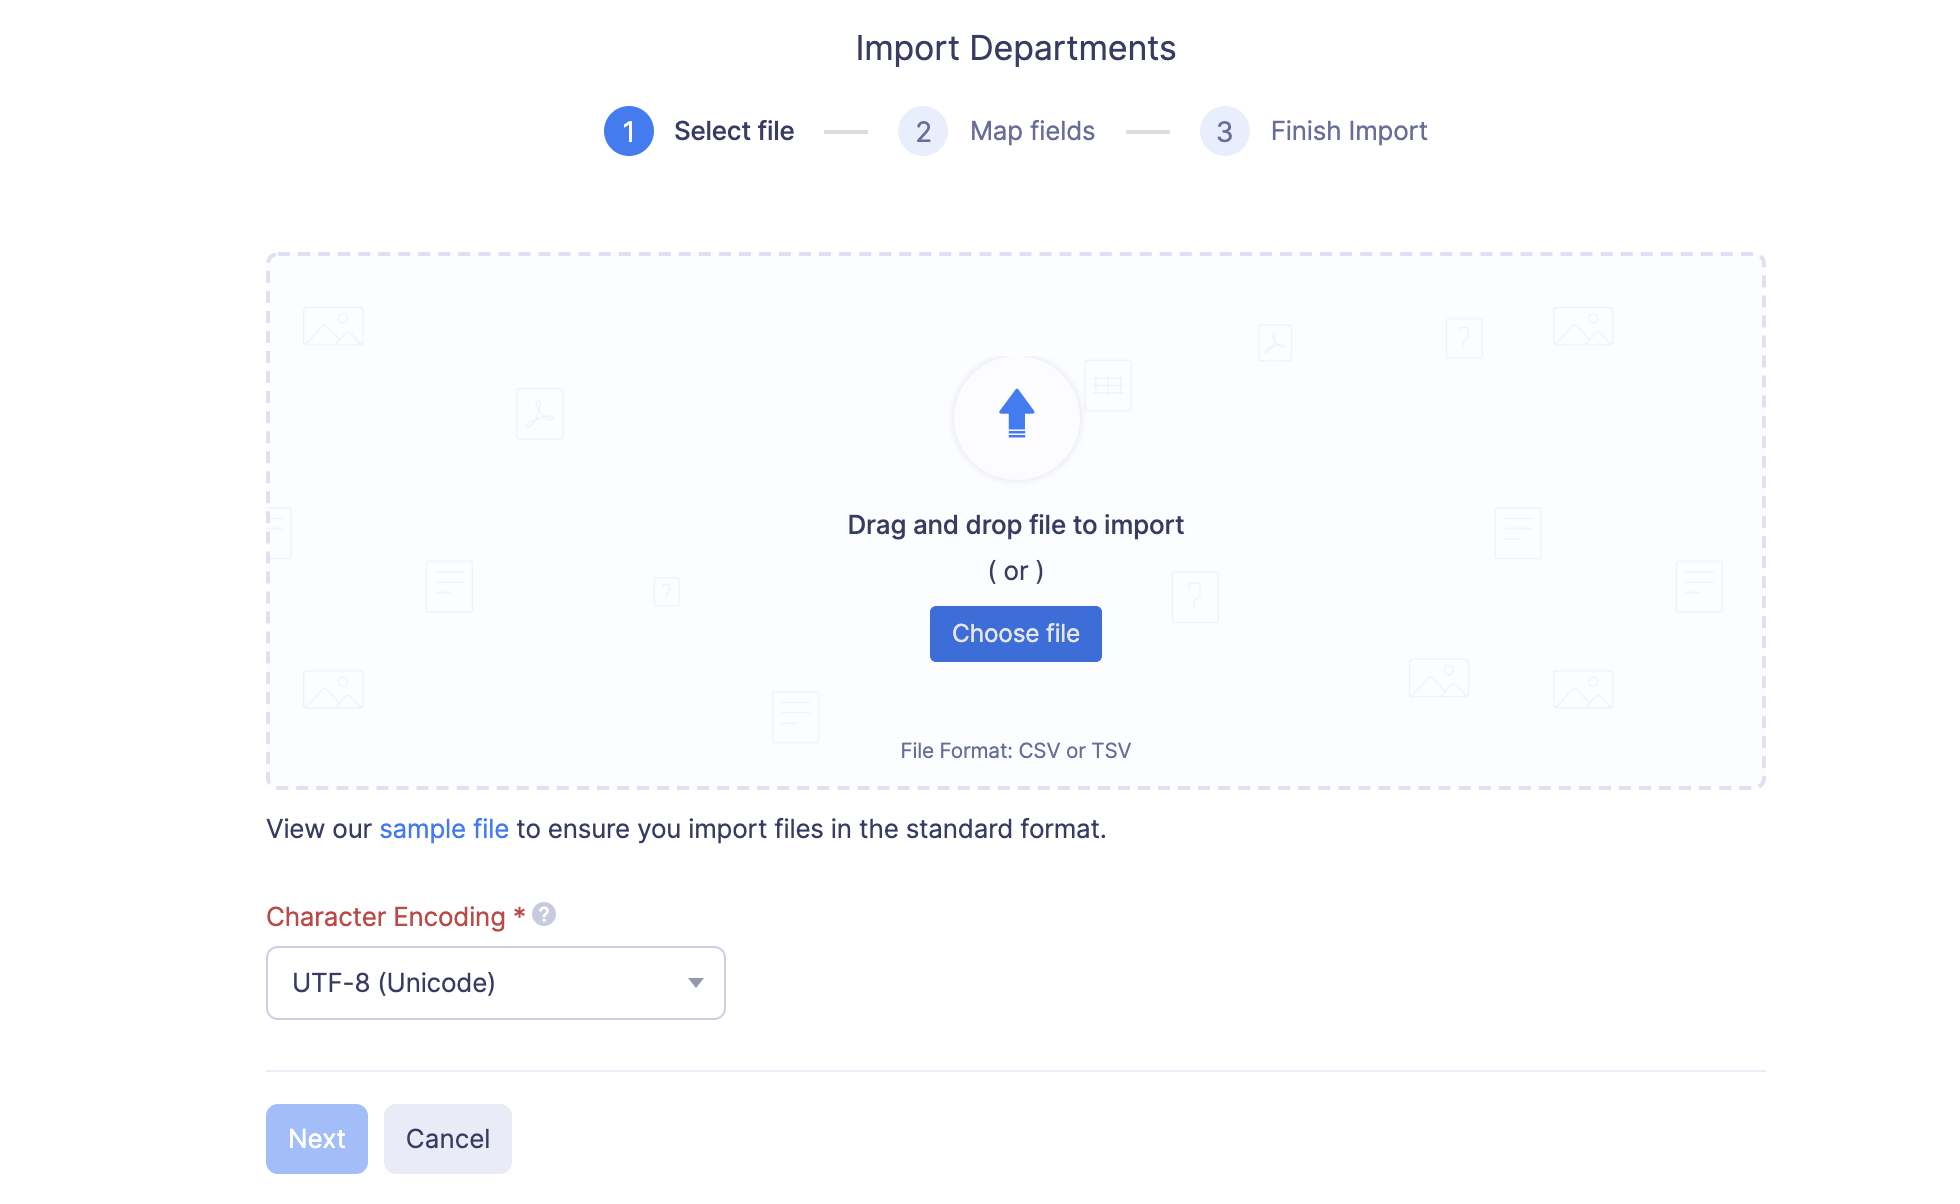
- In the first step, drag and drop a file or choose a file from your desktop or a cloud account.
- If you want to upload another file instead of the selected file, click Replace File and choose another file.
- Click Next.
- In the next step, the best match for each field in Zoho Expense will be auto-mapped with the fields in the imported file. If there are unmapped fields, you can map them manually.
- If you want to save the mapping for future use, mark the Save these selections for use during future imports option. Click Next.
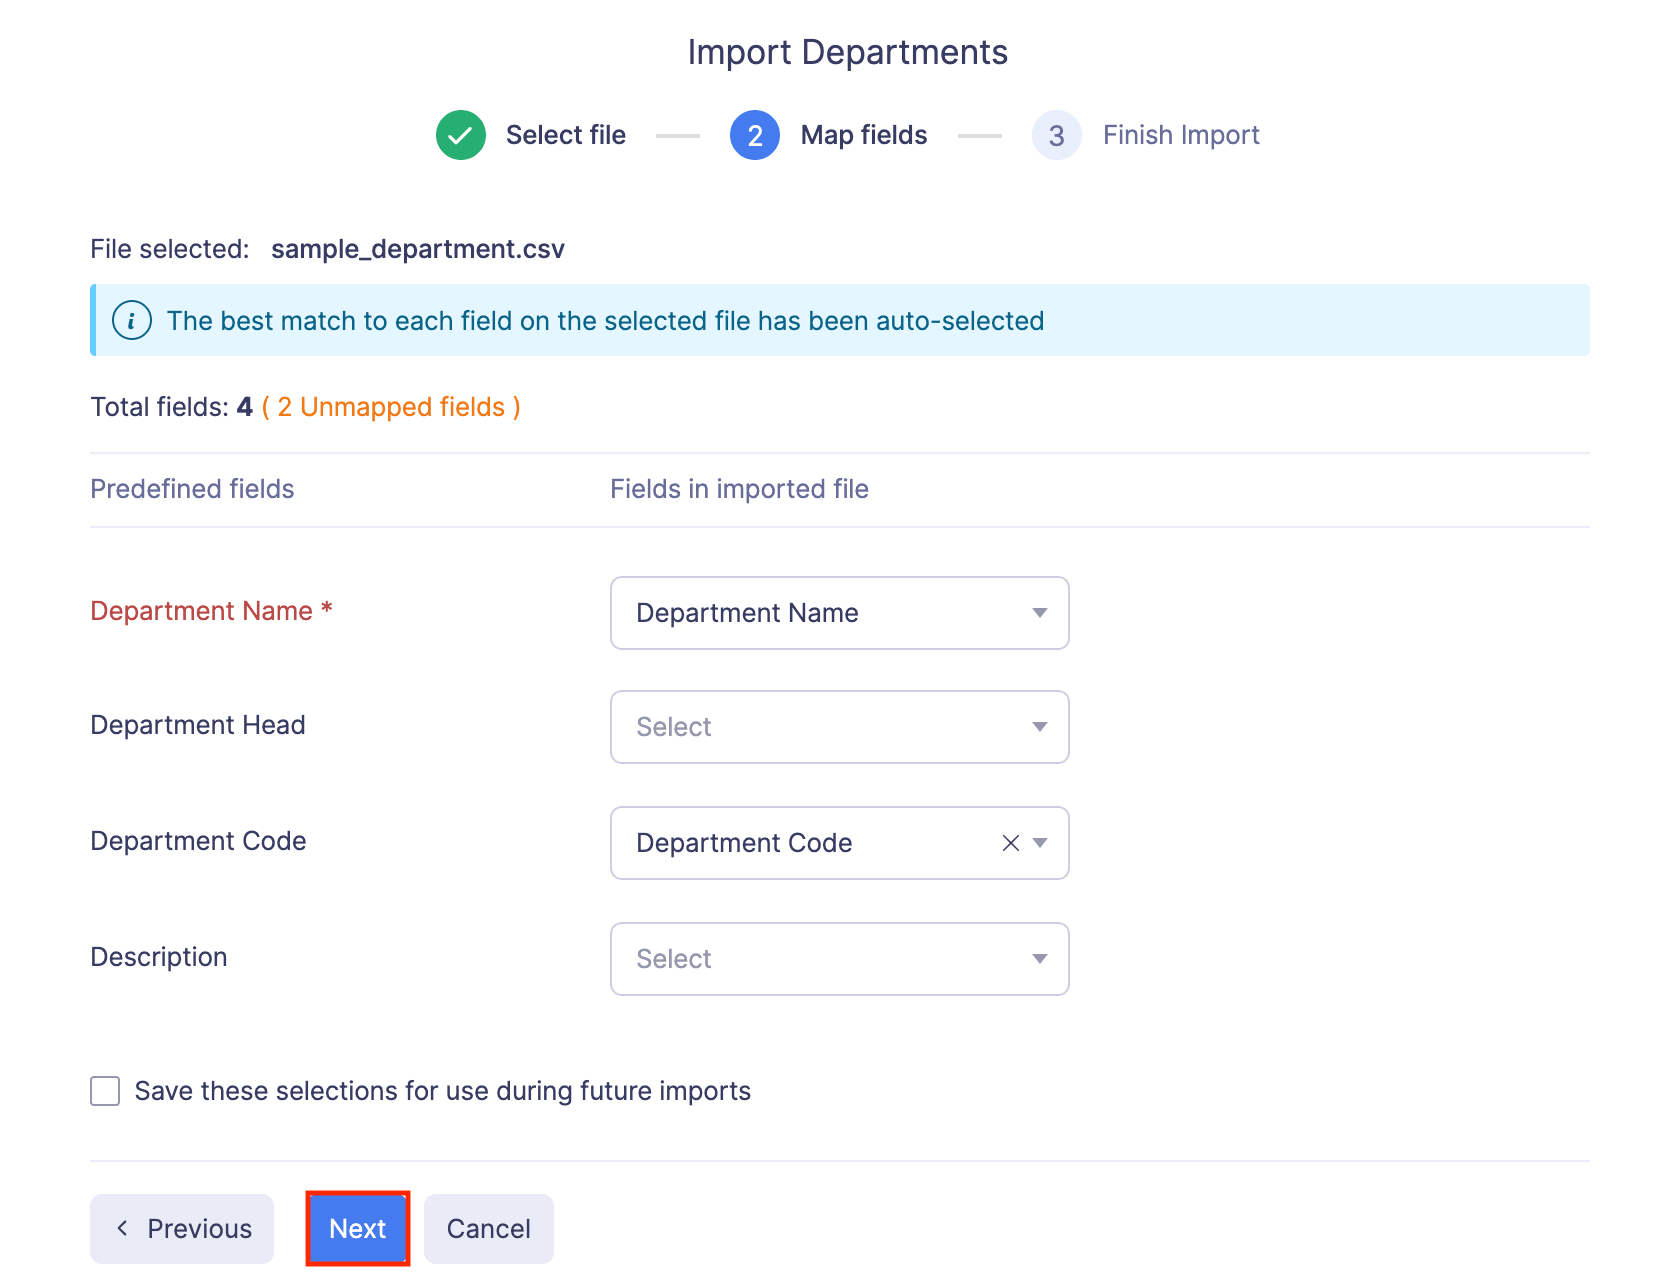
- The data in the unmapped fields will not be imported into Zoho Expense. If you want to map those fields, click Previous and map the unmapped fields.
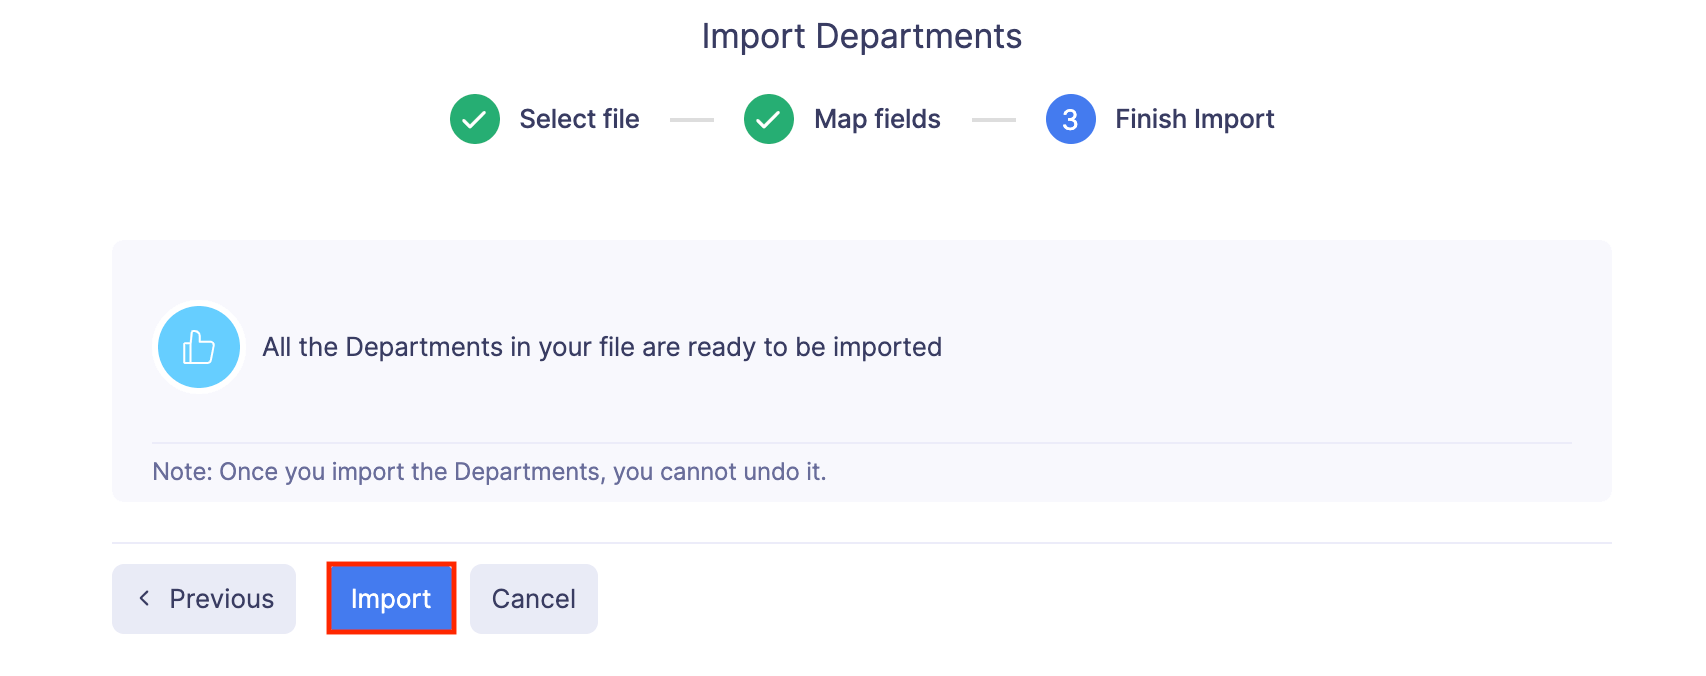
- Once you have mapped all the relevant fields, click Import to import departments into Zoho Expense.
Assign the Newly Created Departments to Users
The departments that you have created can be assigned to the respective users. To assign the department to a user:
- Click Admin View on the left sidebar.
- Go to Settings on the left sidebar.
(OR)
Click Settings in the top right corner of the page. - Navigate to Organization Settings.
- Click Users under Users & Roles.
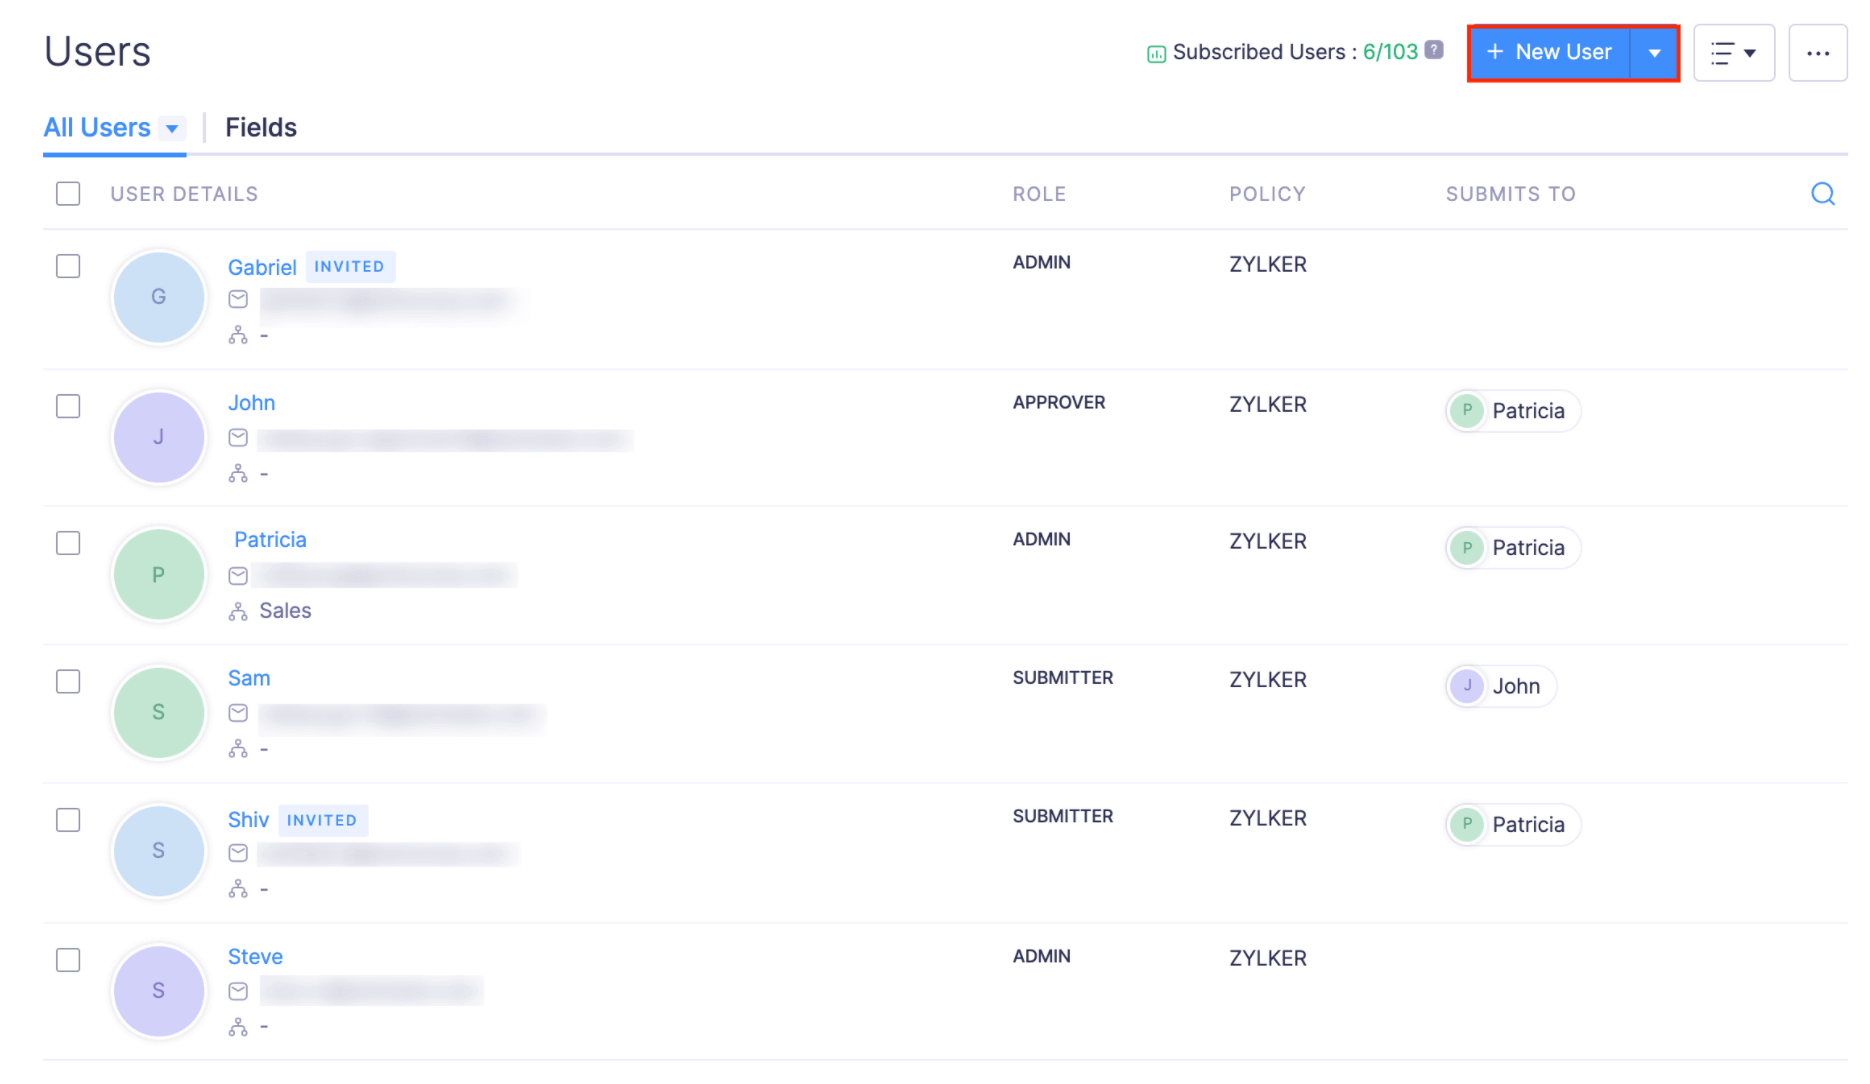
- If you want to assign a department while inviting a user, click + New User at the top right corner.
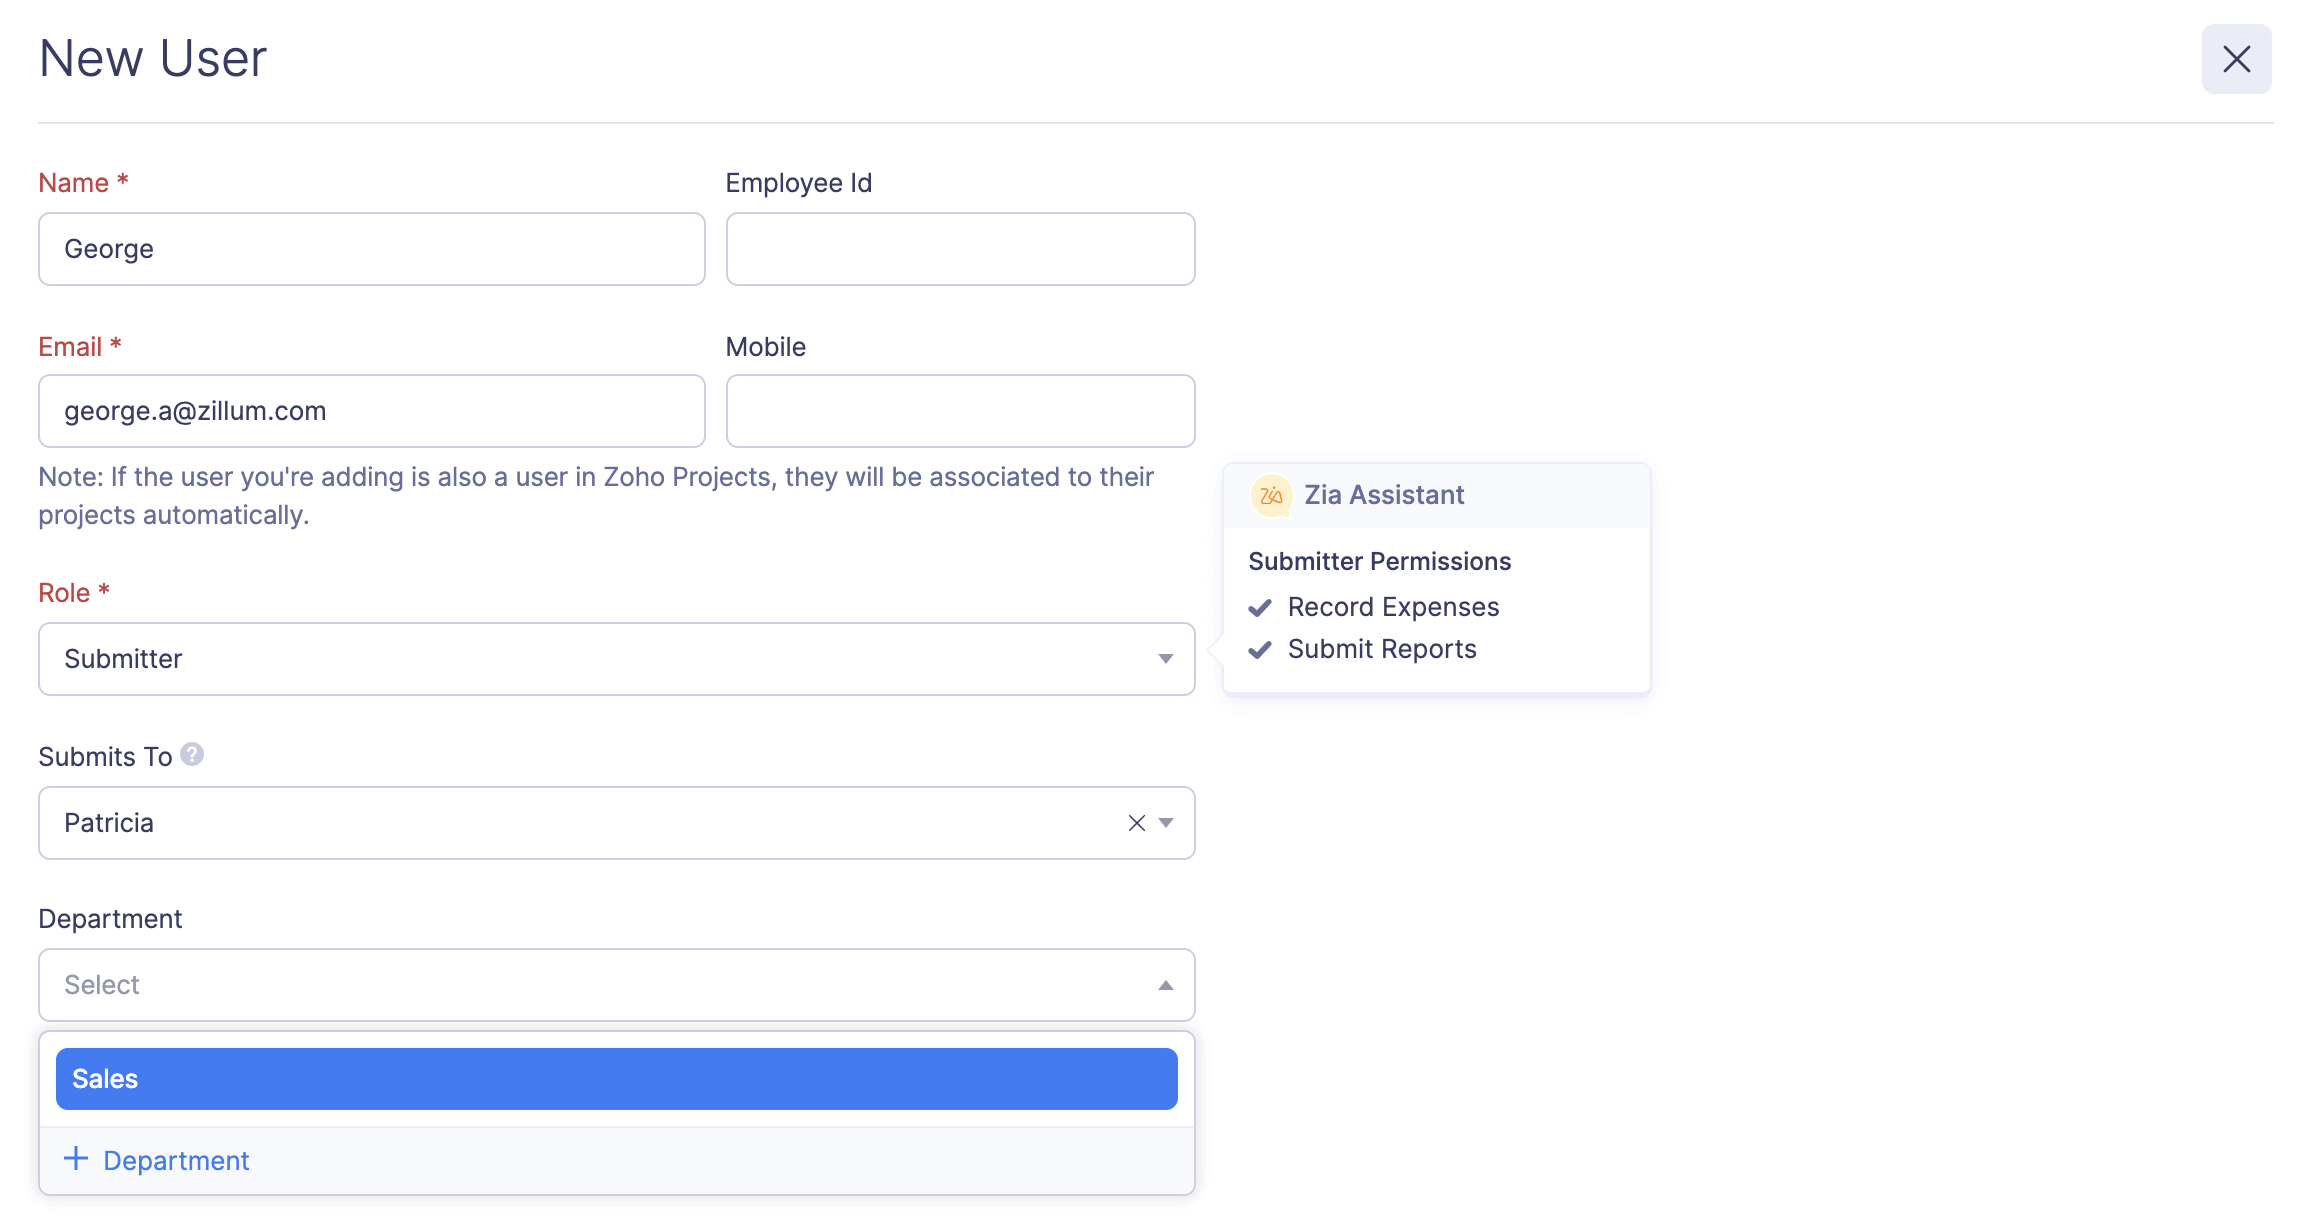
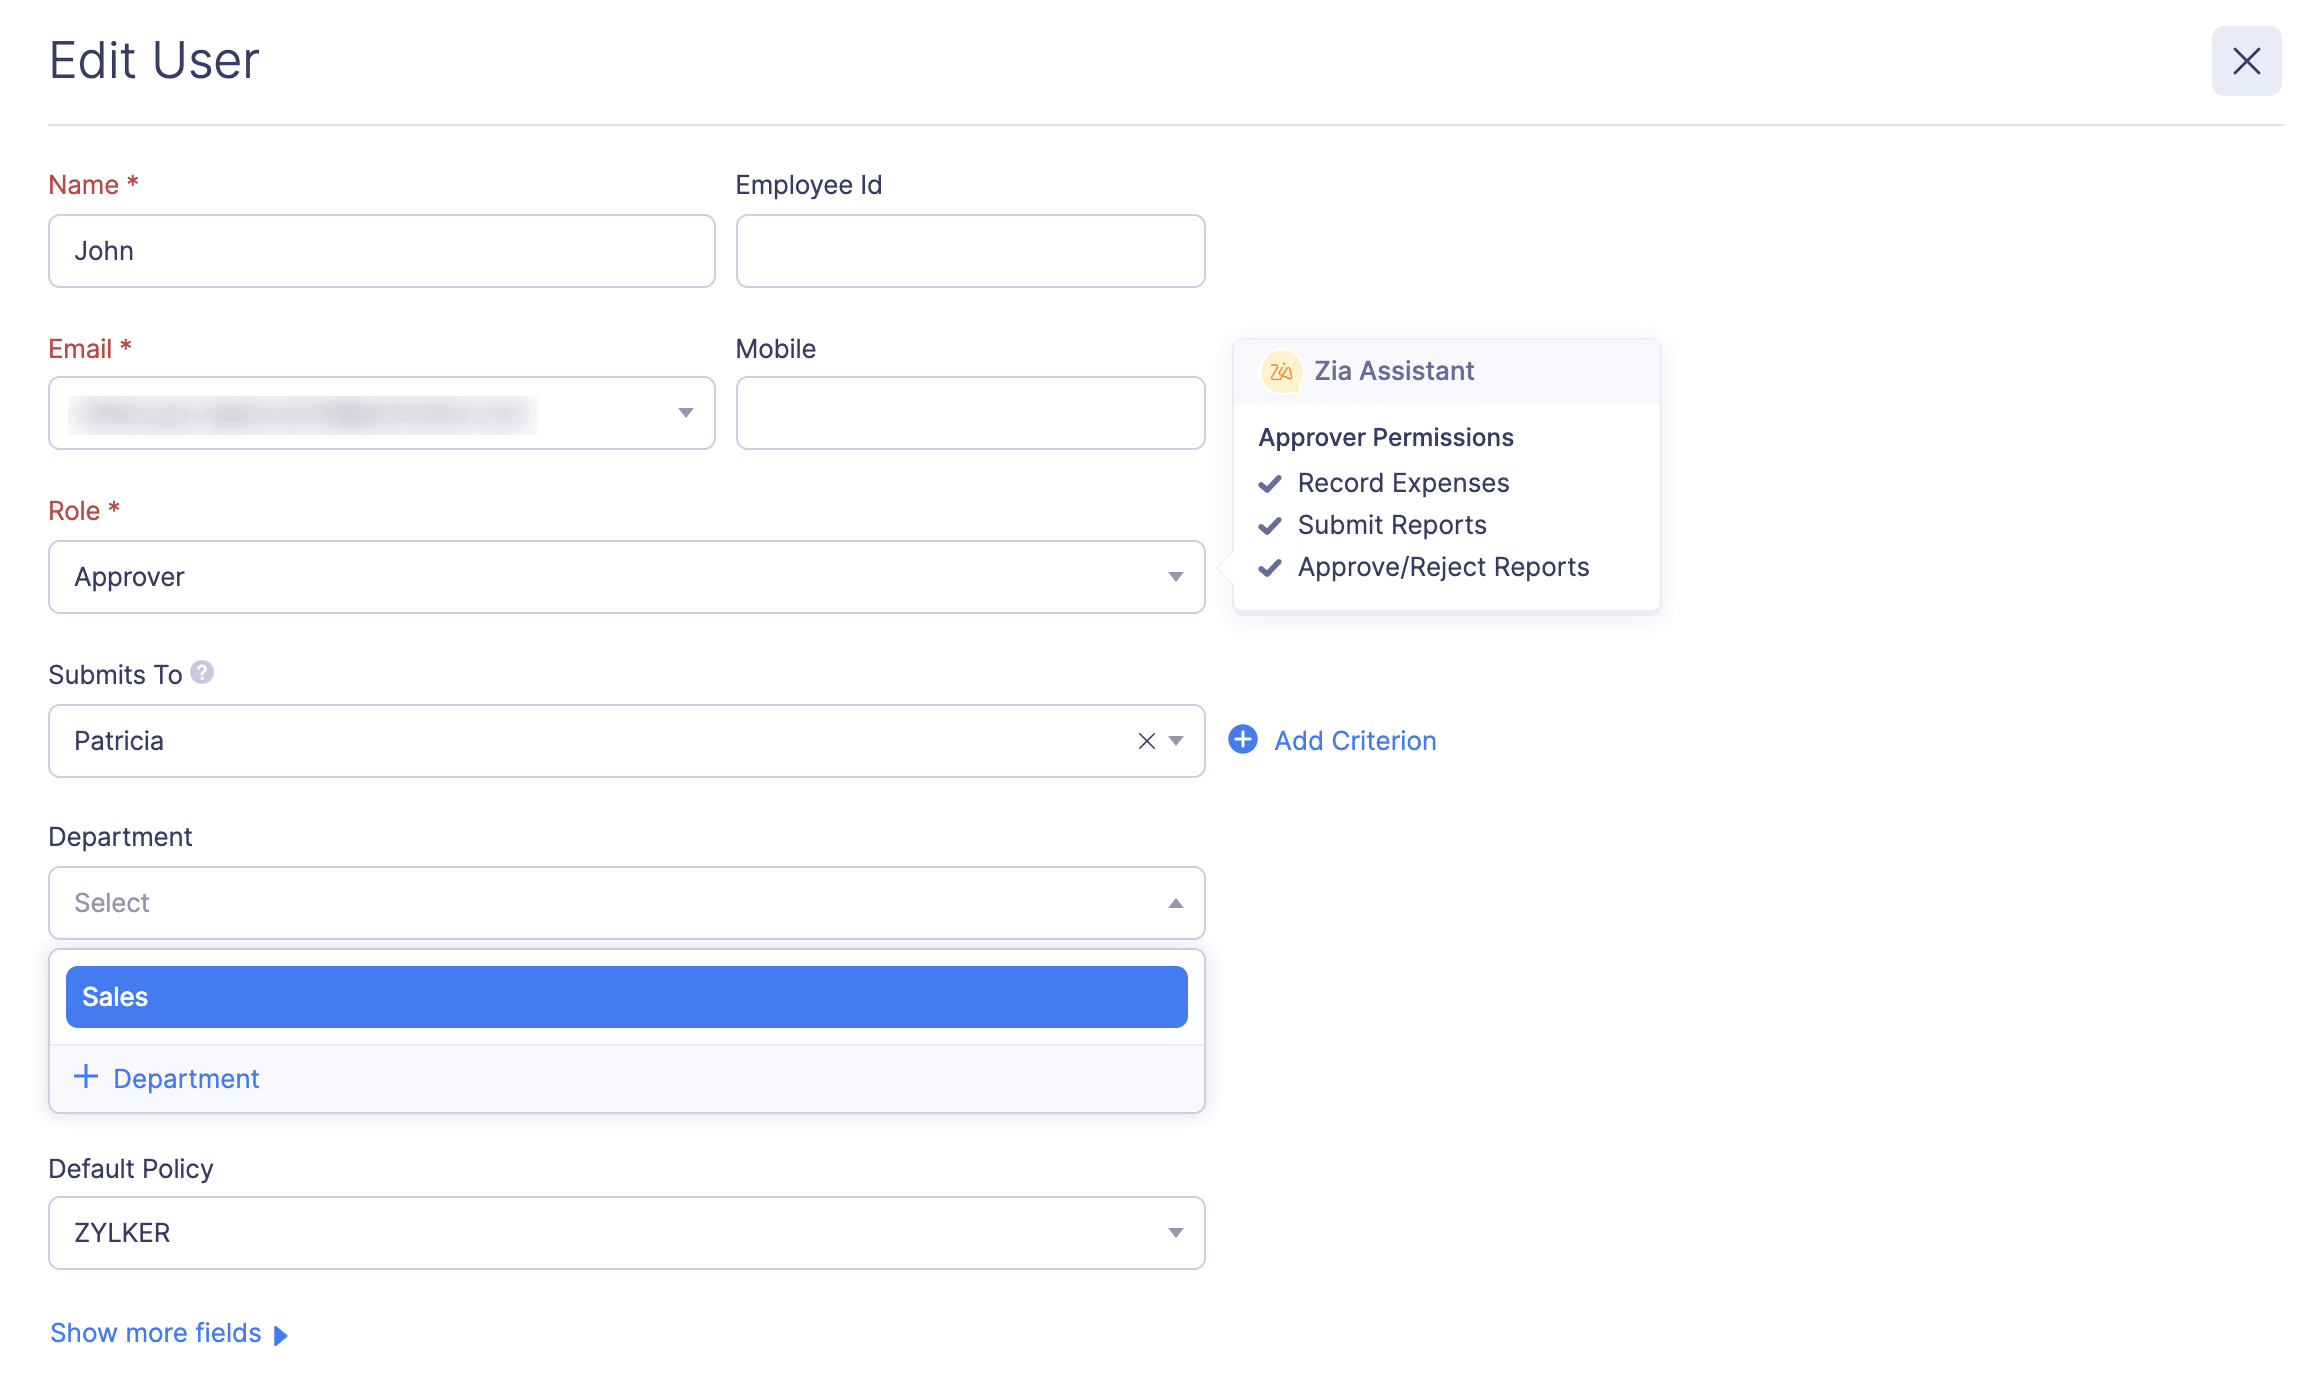
- Enter the Name, Employee ID, and Email Address of the user. Select the department for the user from the Department dropdown. Click Add. An invitation will be sent to the user’s email address.
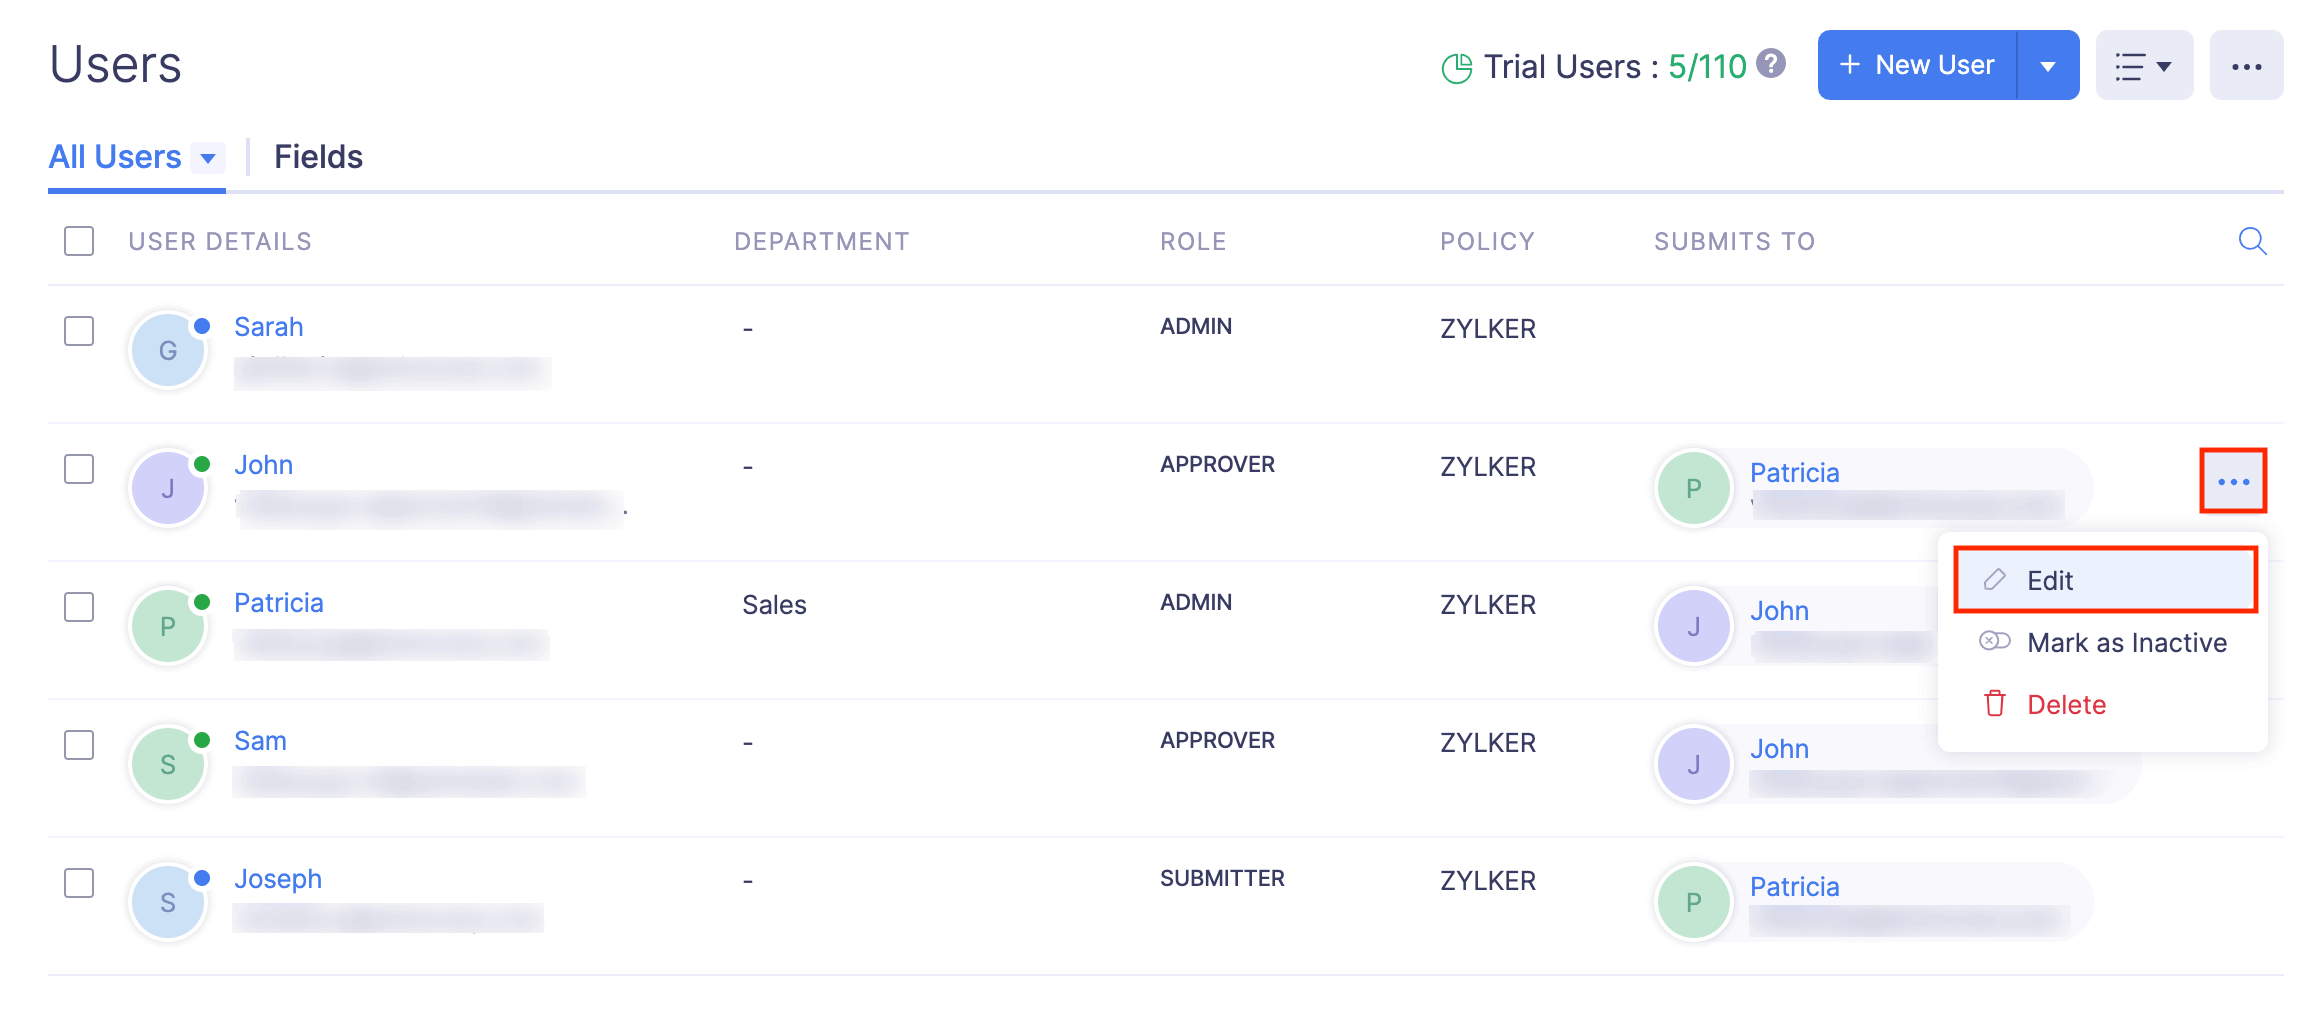
- If you want to assign the department to a user who has already been invited, click the More icon at the right corner of the user for whom you want to assign the department.
- Select Edit.
- Assign a department from the Department dropdown.
- Click Save. The user will be assigned to the selected department.
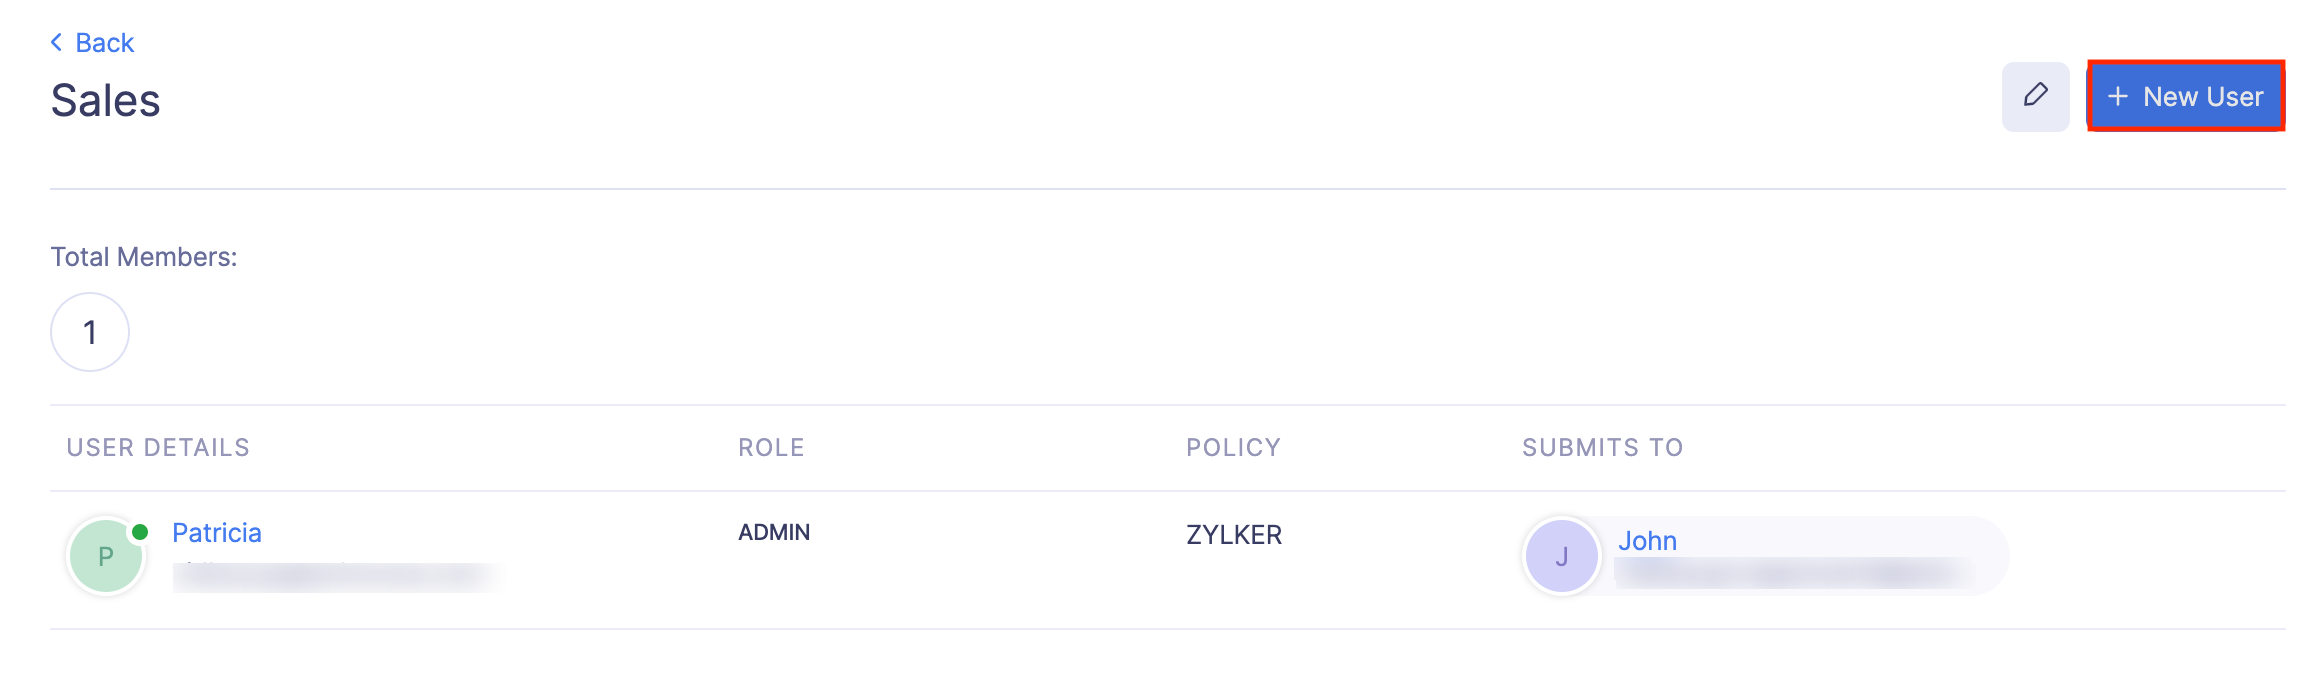
Note: If you would like to add users to a department who are not a part of your Zoho Expense organization:
- Click Admin View on the left sidebar.
- Go to Settings on the left sidebar.
(OR)
Click Settings in the top right corner of the page. - Navigate to Organization Settings > click Departments under Organization > select a department > click + New User at the top right corner of the page.
- Enter the Name, Employee ID, and Email Address of the user.
- Click Add. An invite will be sent to the email address of the user. Once the user accepts the invitation, the user will be associated to the respective department and will be able to access Zoho Expense.
Assign Departments to Users in Bulk
You can assign departments to more than one user at a time. To do this:
- Click Admin View on the left sidebar.
- Go to Settings on the left sidebar.
(OR)
Click Settings in the top right corner of the page. - Navigate to Organization Settings.
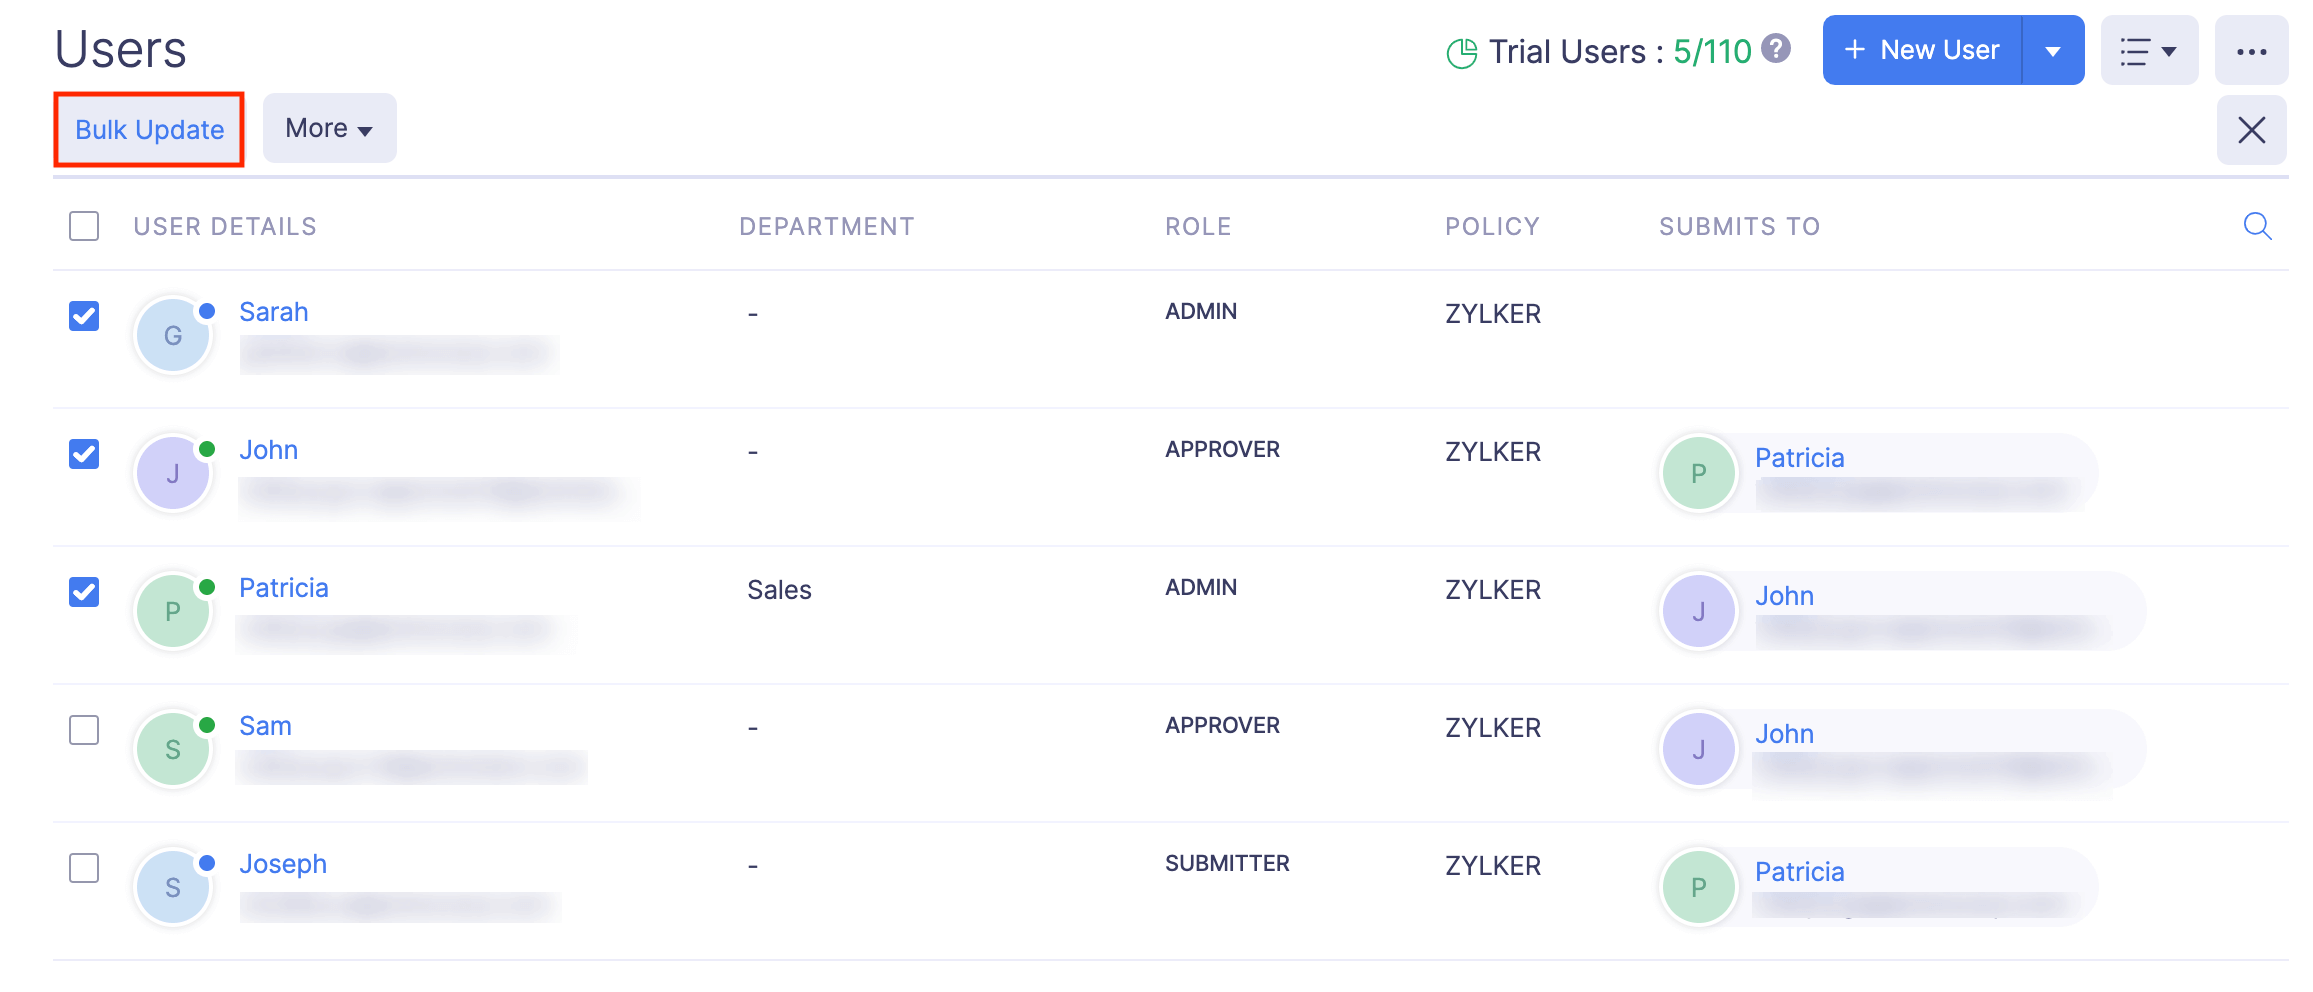
- Click Users under Users and Roles.
- Select the required users and click Bulk Update.
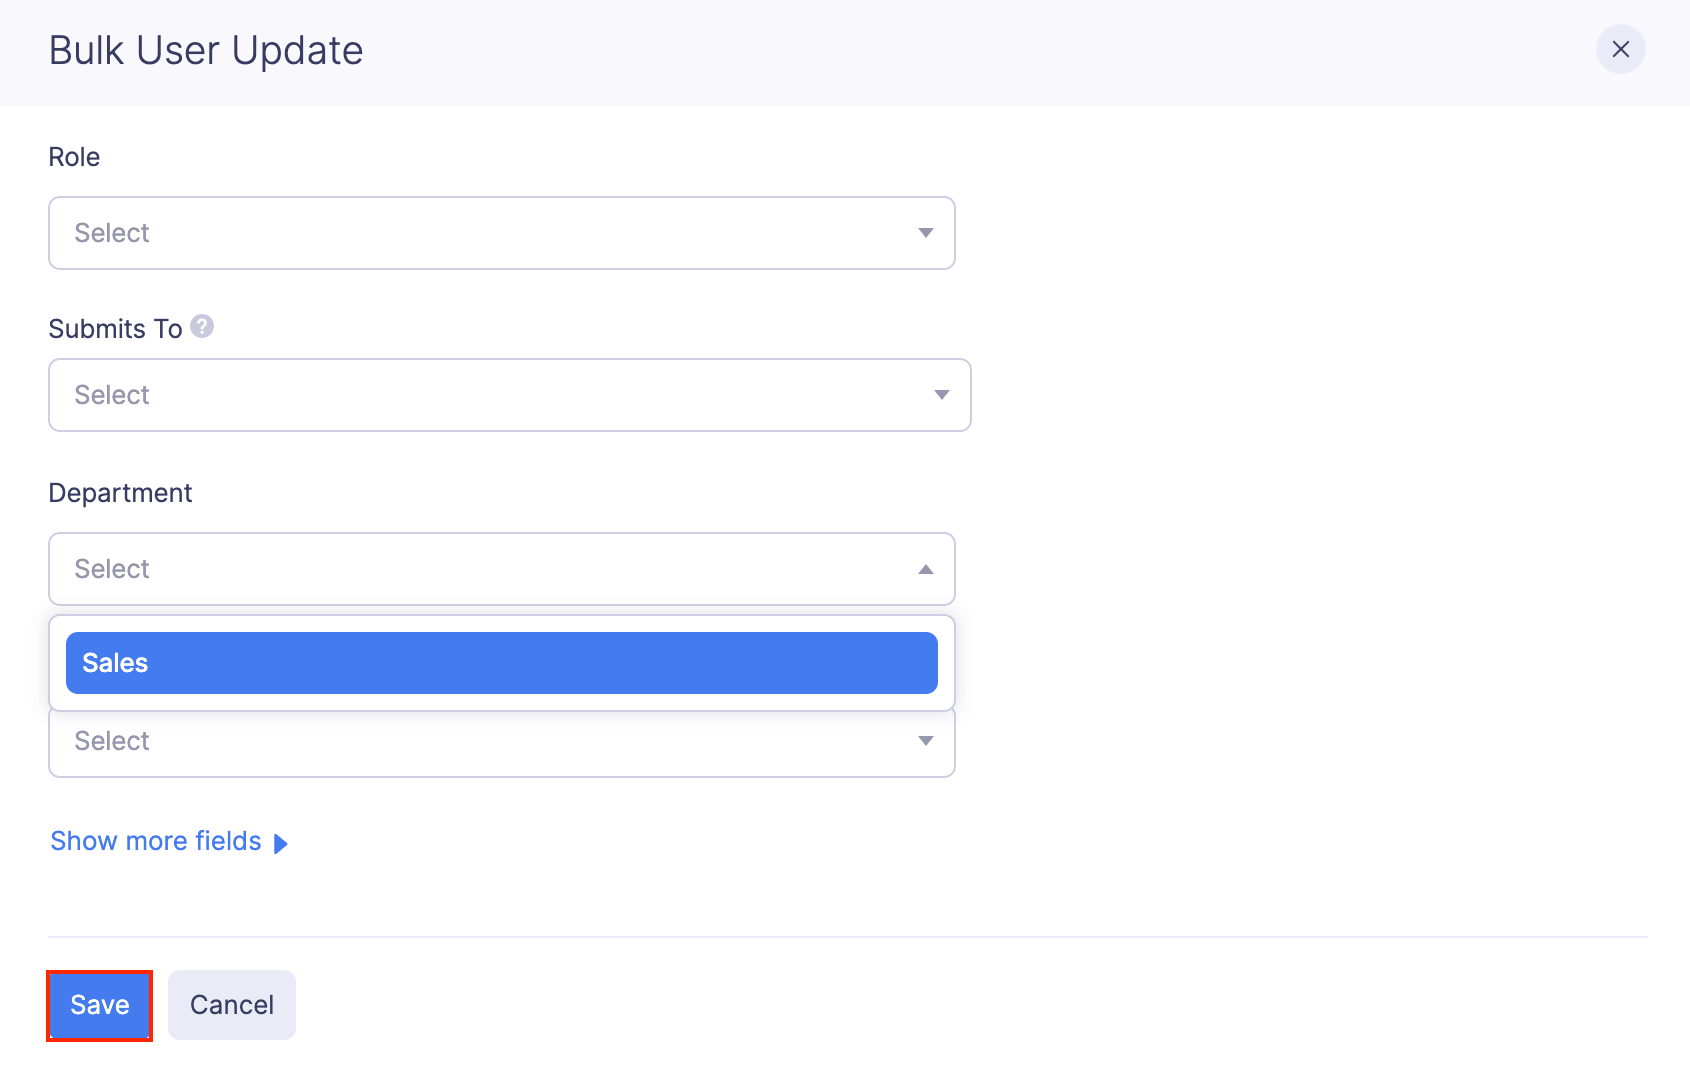
- Select a Department.
- Click Save. All the users will be assigned to the selected department.
Export Departments
You can export the departments in two formats:
| CSV - Comma Separated Values | XLS (XLSX) - Microsoft Excel |
To export departments:
- Click Admin View on the left sidebar.
- Go to Settings on the left sidebar.
(OR)
Click Settings in the top right corner of the page. - Navigate to Organization Settings.
- Click Departments under Organization.
- Click the More icon at the top right corner and select Export Departments.
- Select the format in which you want to export the departments [CSV or XLS (XLSX)].
- If you want to secure the report with a password, mark the I want to protect this file with a password option and provide a password in the Password field.
- Click Export to download the data to your computer.
Edit Department
If you want to make changes to the department name and other details, you can edit it. To edit:
- Click Admin View on the left sidebar.
- Go to Settings on the left sidebar.
(OR)
Click Settings in the top right corner of the page. - Navigate to Organization Settings.
- Click Departments under Organization.
- Hover over the department you want to edit and click the More icon at the right corner of the department.
- Select Edit.
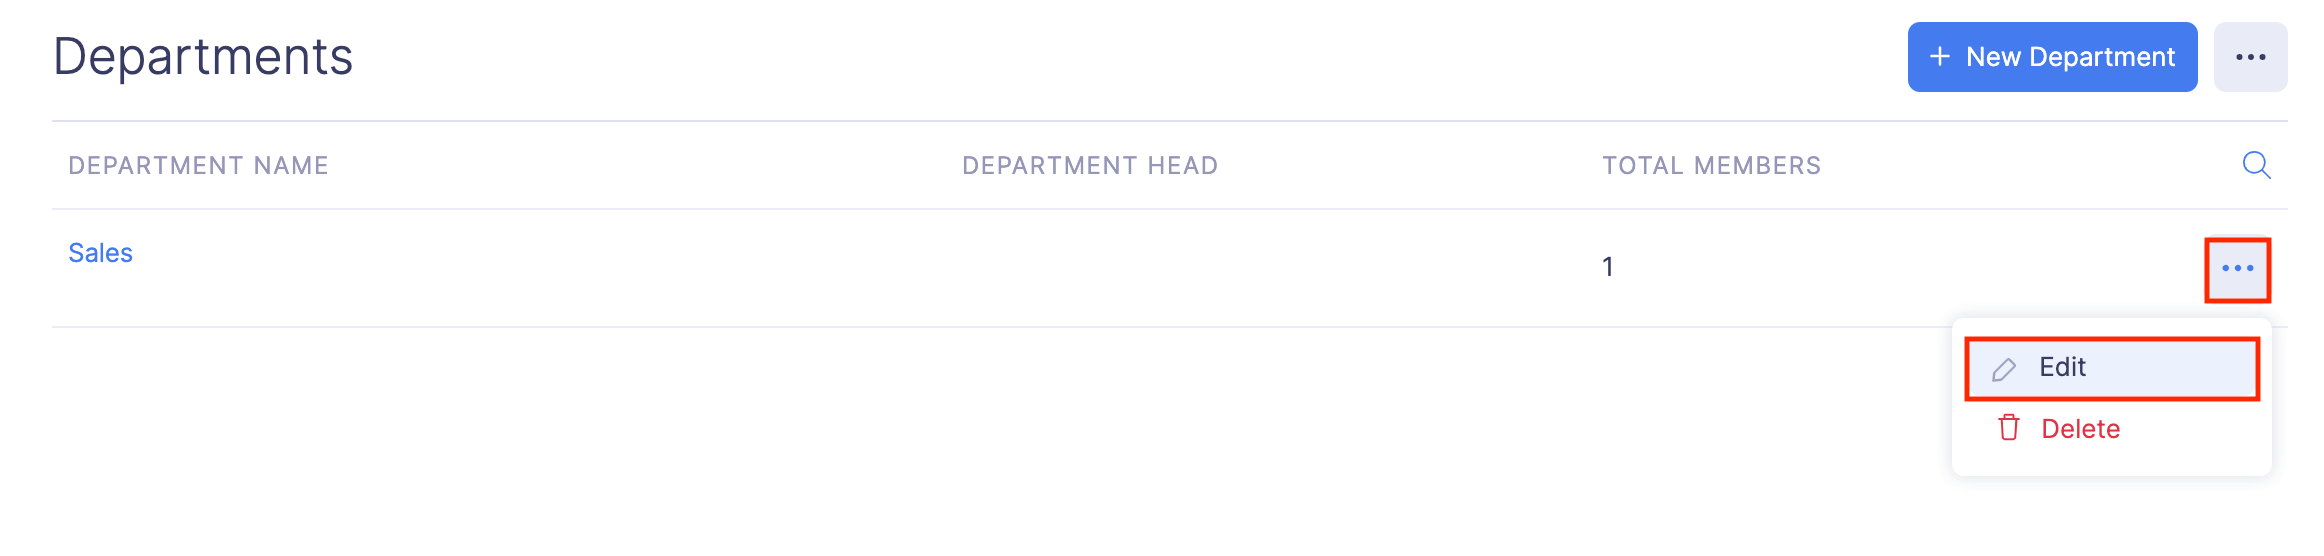
- Make the necessary changes and click Save. The department’s details will be updated with new changes.
Delete Department
You can delete the departments you have created in Zoho Expense. However, you cannot delete the departments that are already assigned to users. Instead, you can edit the users, remove the associated department from the users, and then delete the department.
To delete a department:
- Click Admin View on the left sidebar.
- Go to Settings on the left sidebar.
(OR)
Click Settings in the top right corner of the page. - Navigate to Organization Settings.
- Click Departments under Organization.
- Hover over the department you want to delete and click the More icon at the right corner of that department.
- Select Delete.
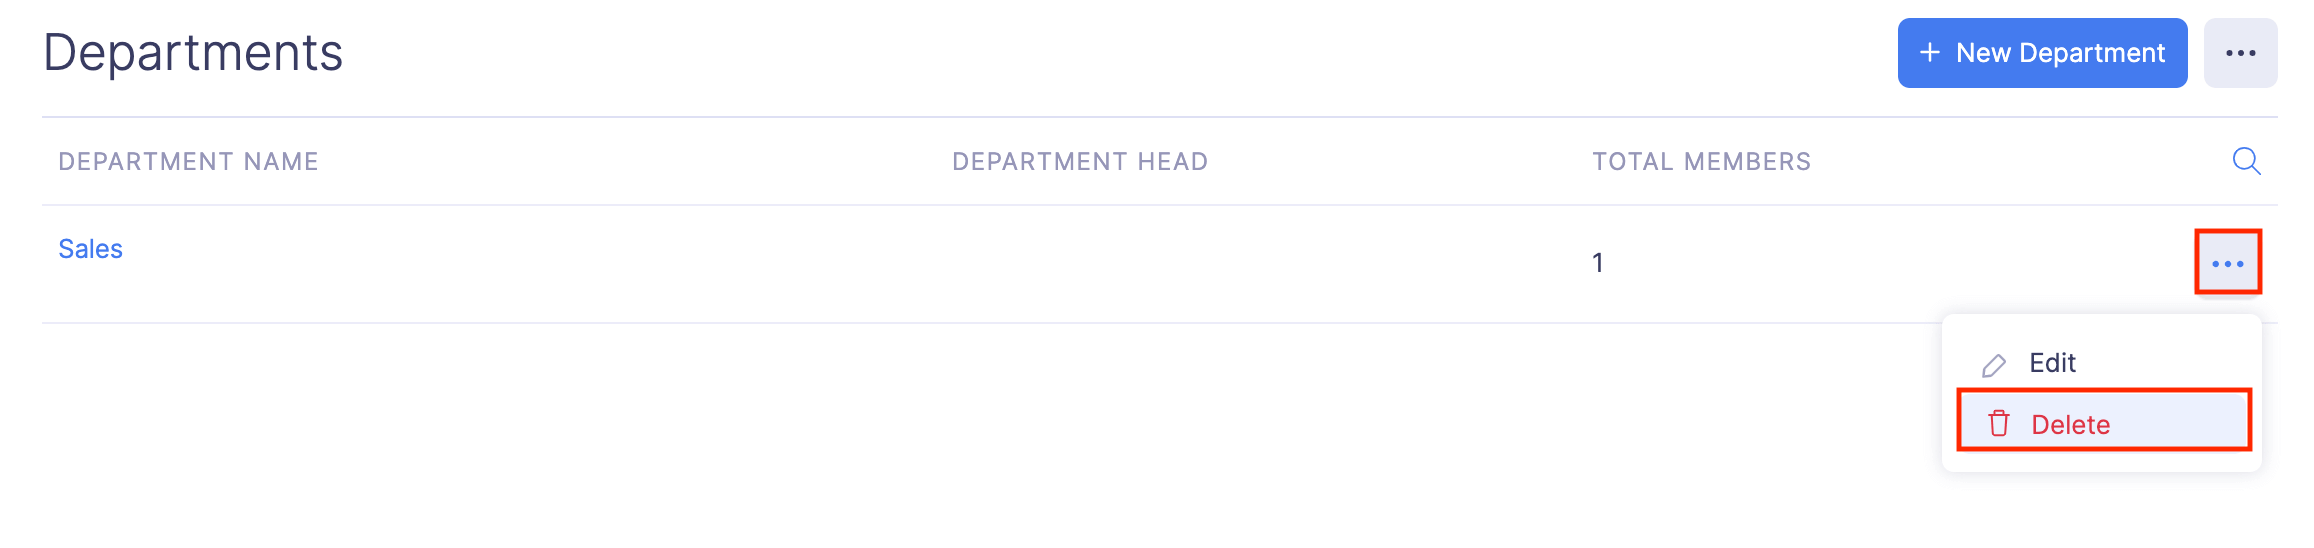
- Confirm your action by clicking Delete in the pop-up to delete the department.