
Policies - Overview
Expense policies are an effective way to control the expenses your employees incur on behalf of your business. It defines the rules and limits that every employee should keep in mind while incurring expenses on behalf of the company. Enforcing the policy manually is as tedious as manual expense reporting. In Zoho Expense, we have made it easier for you by automating your expense policy.
So, how does Policies work?
To begin with, a default policy will be enabled for ‘ALL’ the users in your organisation, with no limits or rules. You can configure the limits, rules, mileage, and per diem rates for your organization in the default policy, based on your business needs. Once that’s done, the policy rules and rates will be automatically applicable to all the expenses that your users will record.
However, in every organization, the nature of work differs for every department, hence, the spending limits might vary. In such cases, you can create multiple policies that cater to individual departmental needs. For instance, since the sales team travel a lot more than other departments, they will be provided with a higher limit on ‘Travel’ expenses when compared to other departments. Here, you can create a policy named ‘Sales Department’ and associate it with the users belonging to the corresponding department. Similarly, you can create expense policies that can be assigned to individual users.
Once you have created the policy and assigned users, it will be automatically applied on all expenses. Expenses exceeding the defined limits will be flagged as policy violations in the users’ expenses and reports.
Create a New Policy
Prerequisite: If you create a new policy, set that policy as the default policy for the users to whom you want to apply the rules and rates configured in that policy.
Other than the default policy, you can create new policies and assign them to the respective users. To create a new policy:
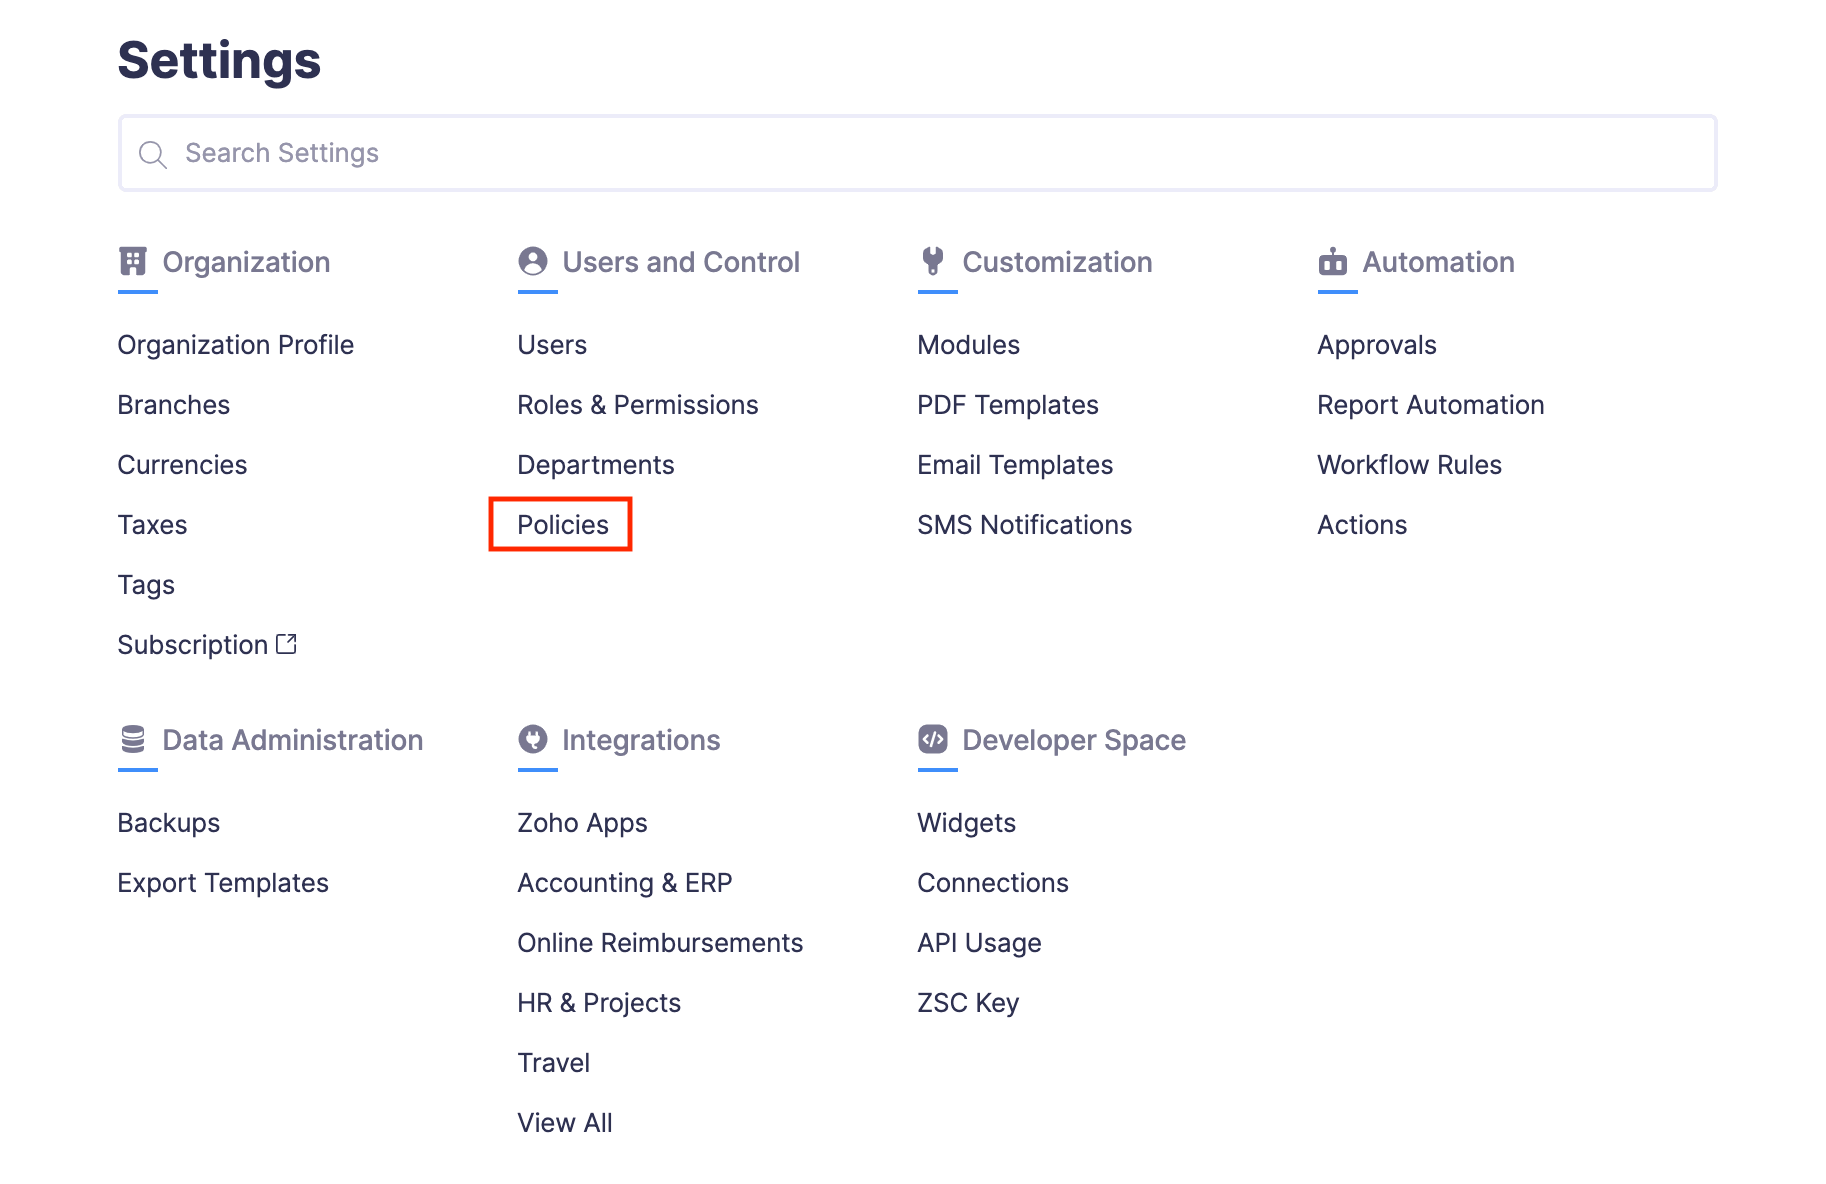
- Click Admin View.
- Go to Settings on the left sidebar.
(OR)
Click Settings in the top right corner of the page.
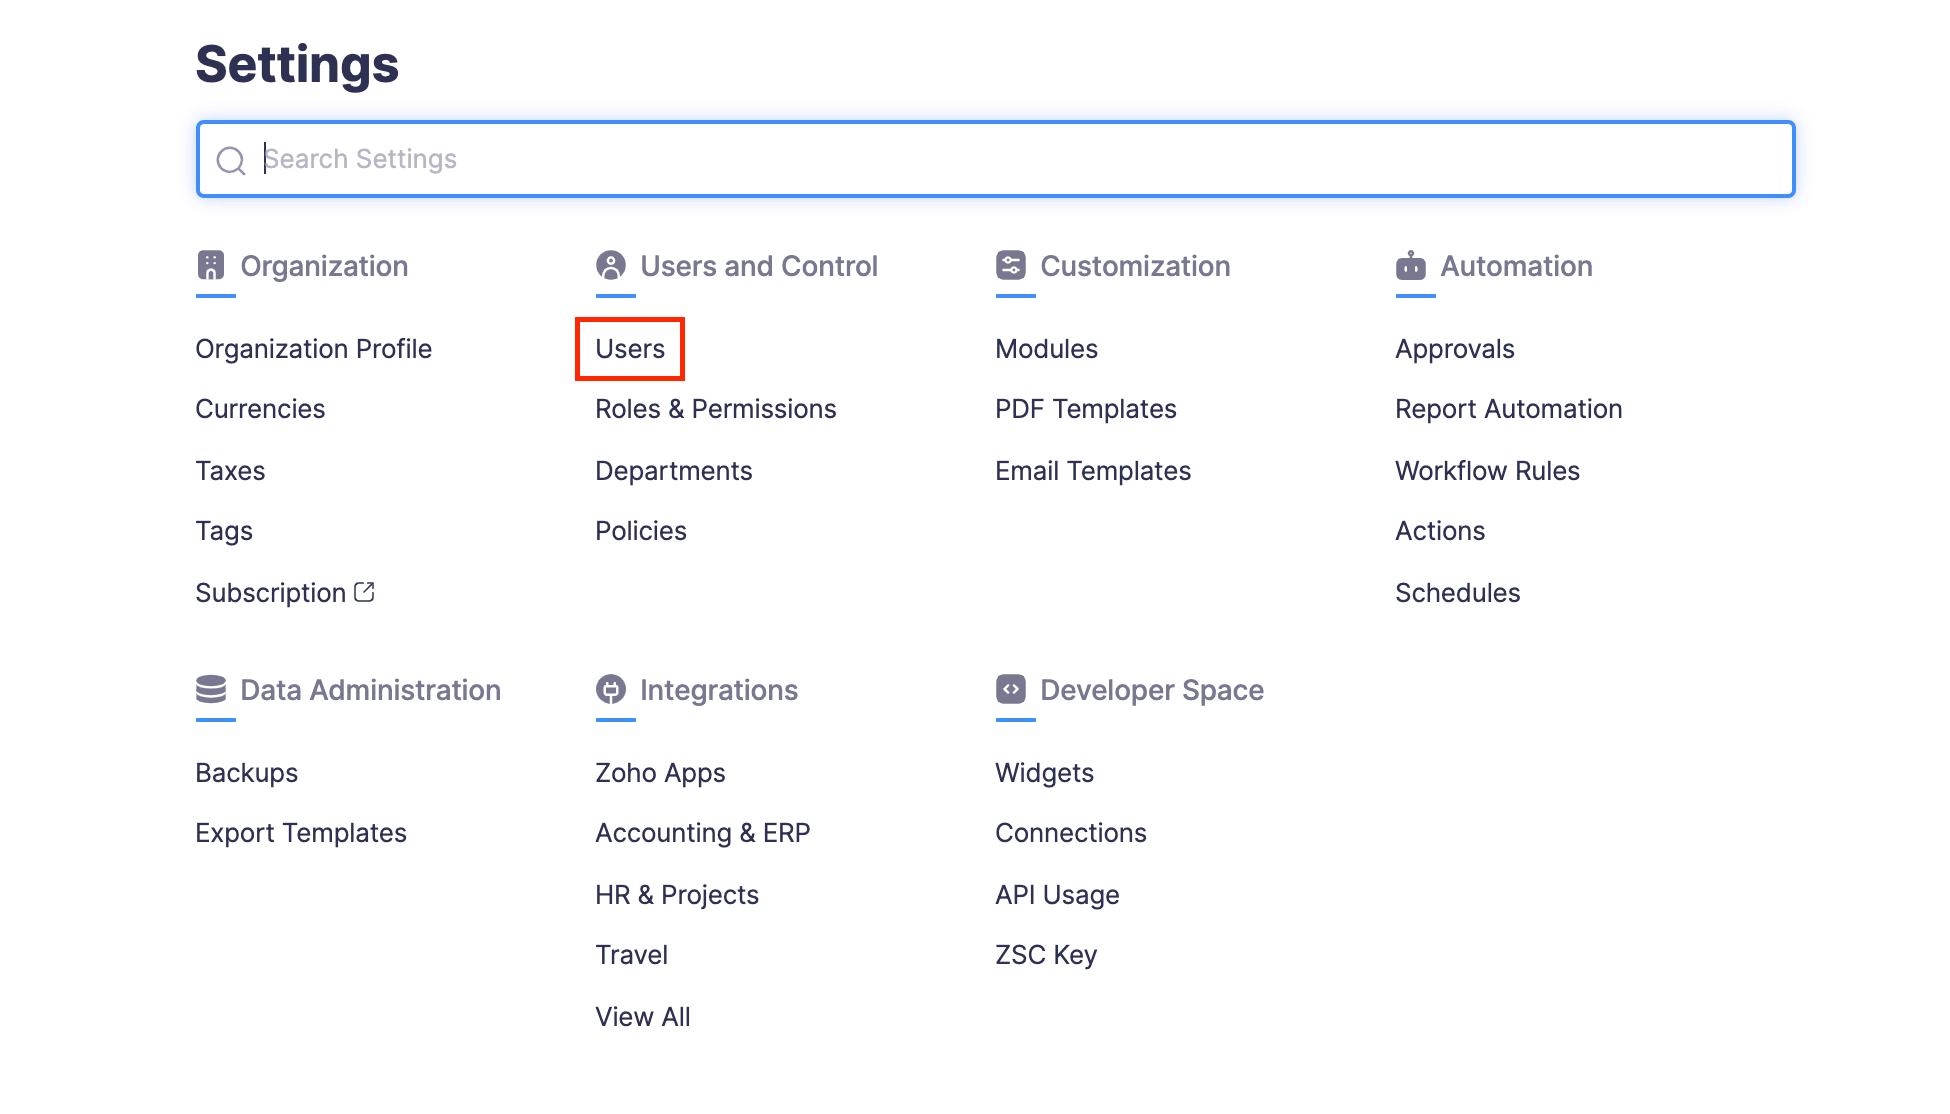
- Navigate to Organization Settings.
- Click Policies under Setup & Configurations.
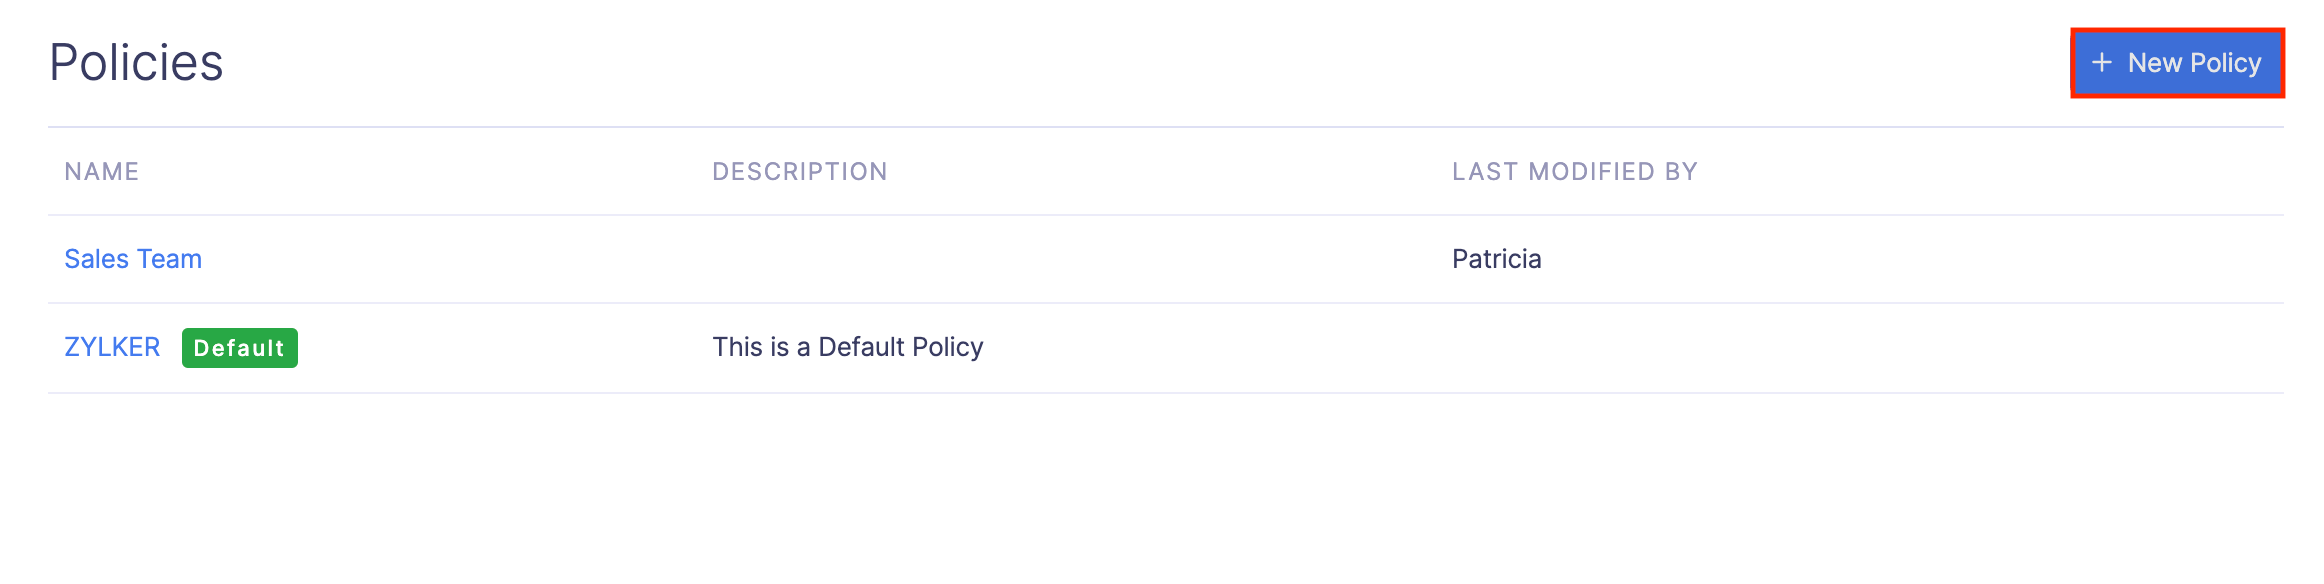
- Click + New Policy at the top right corner.
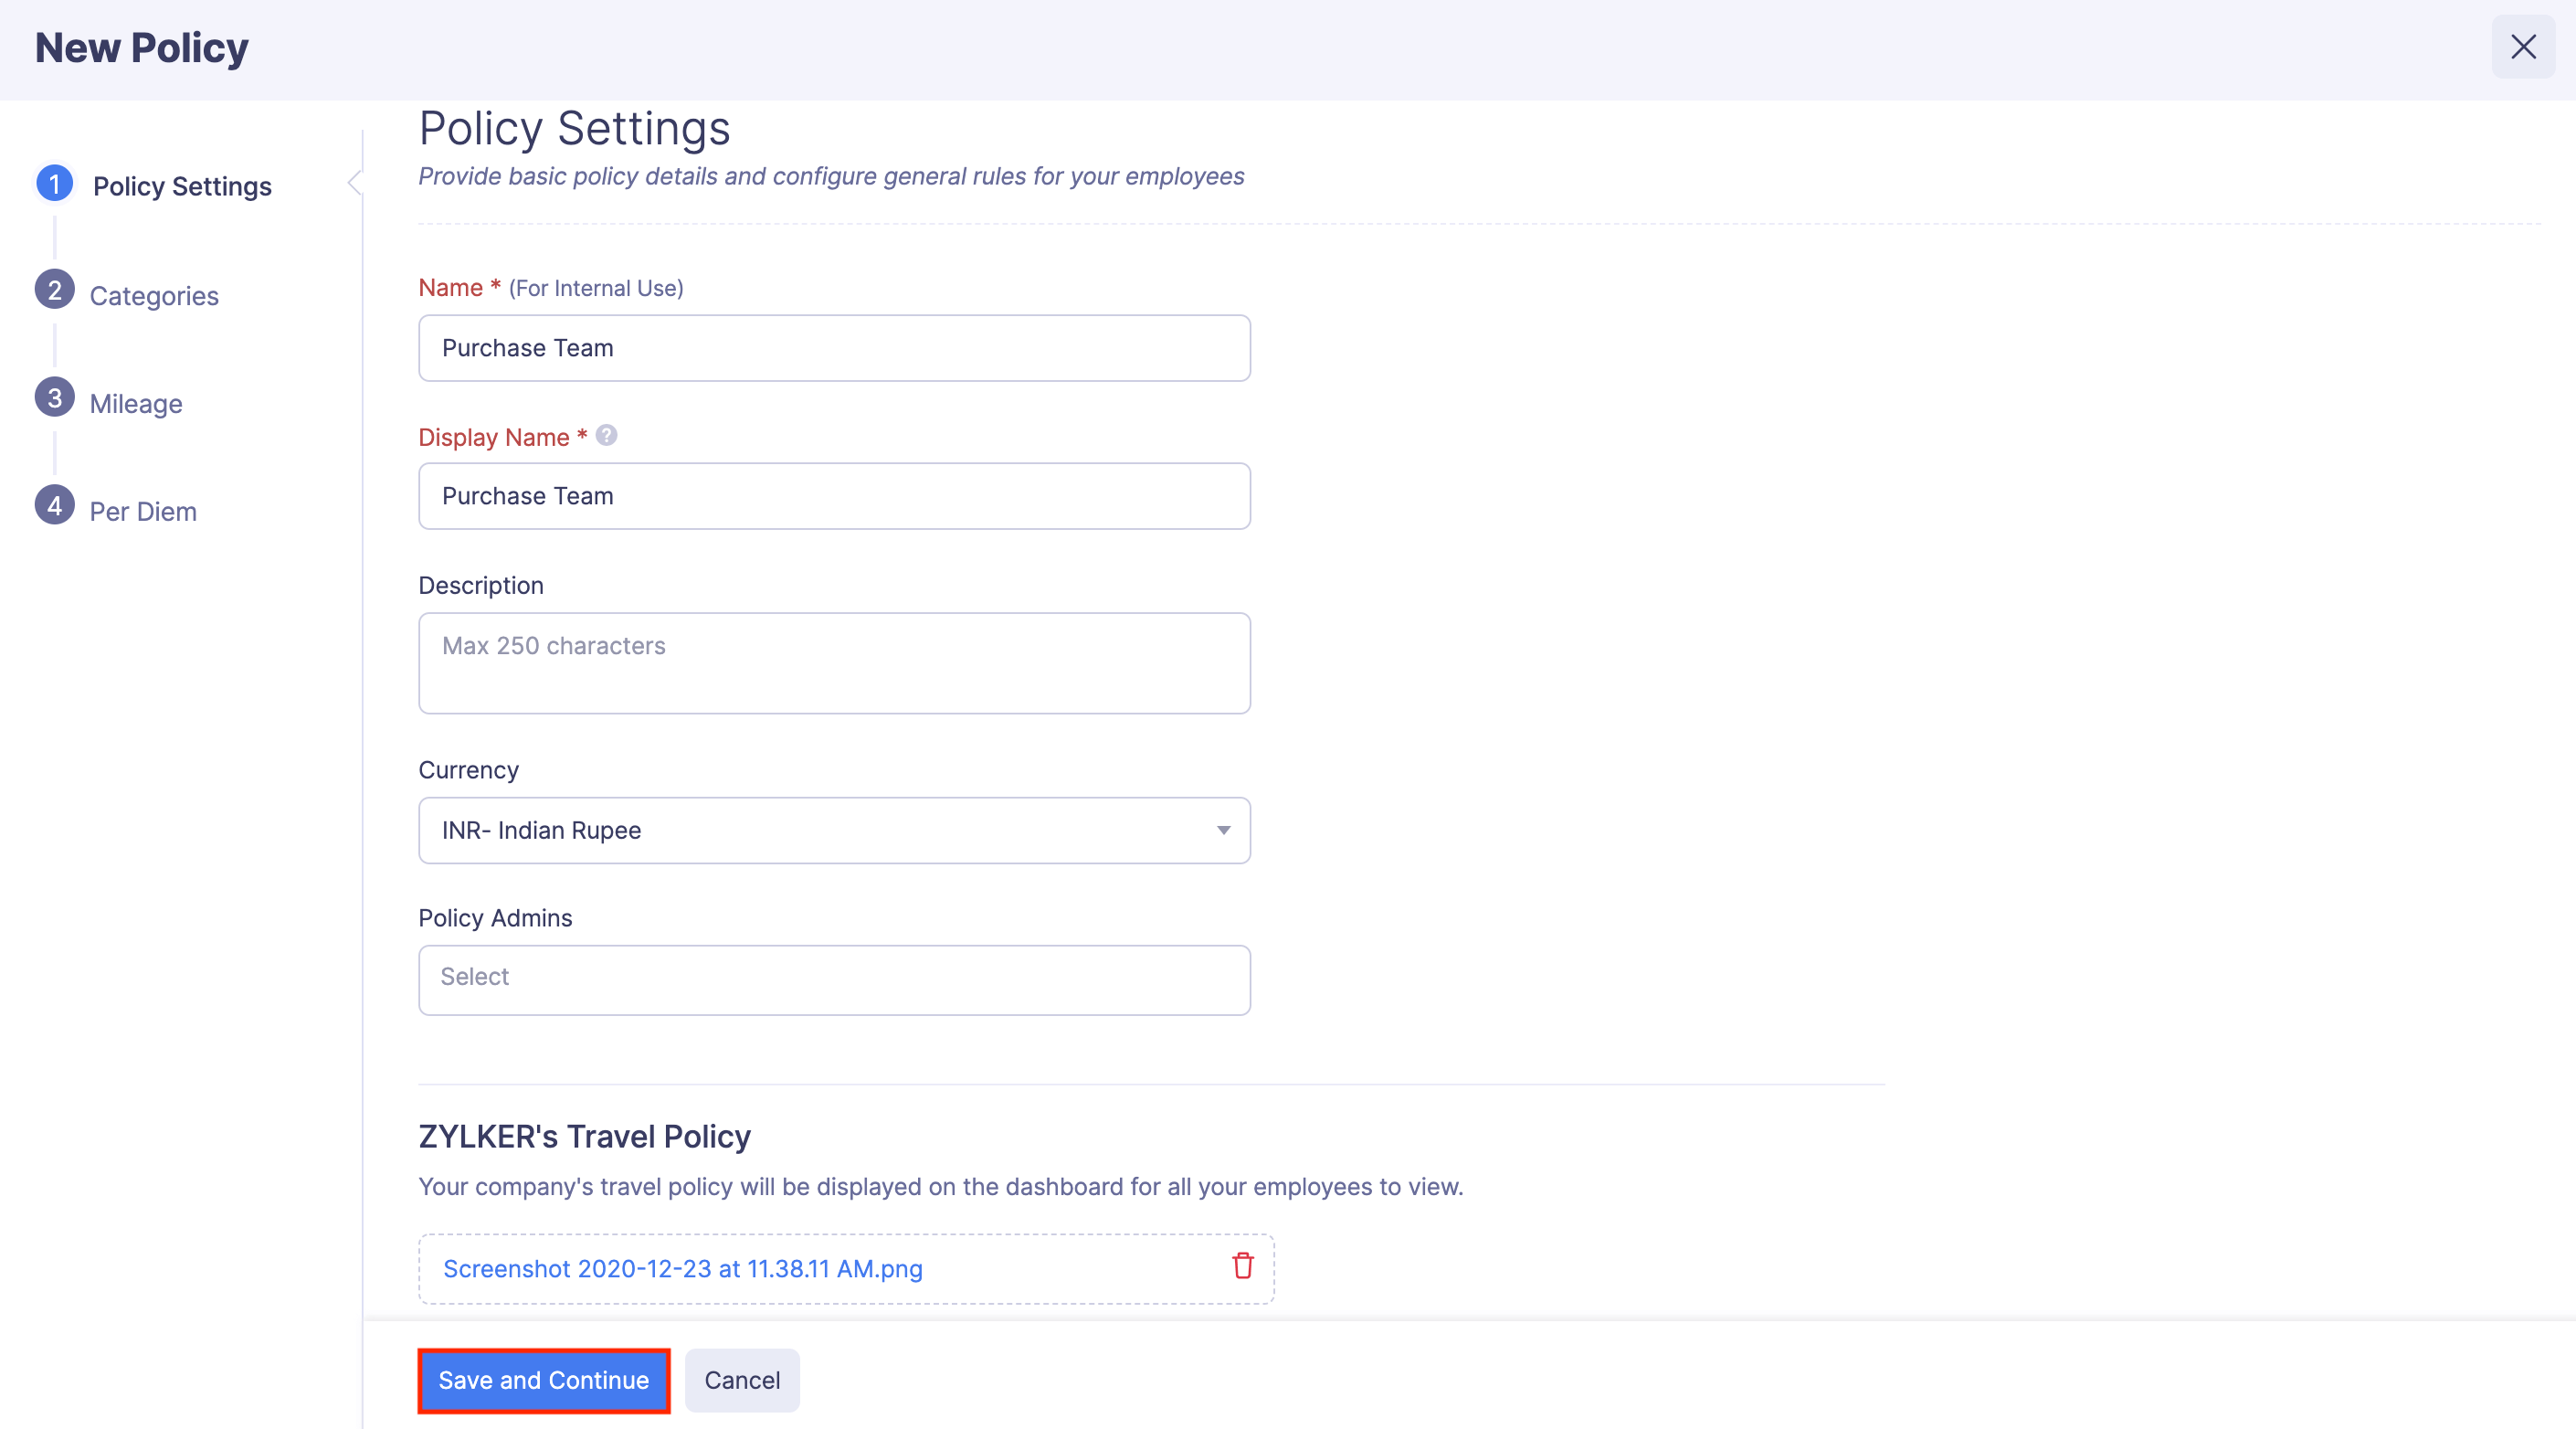
- Configure the basic policy settings. Click Save and Continue.
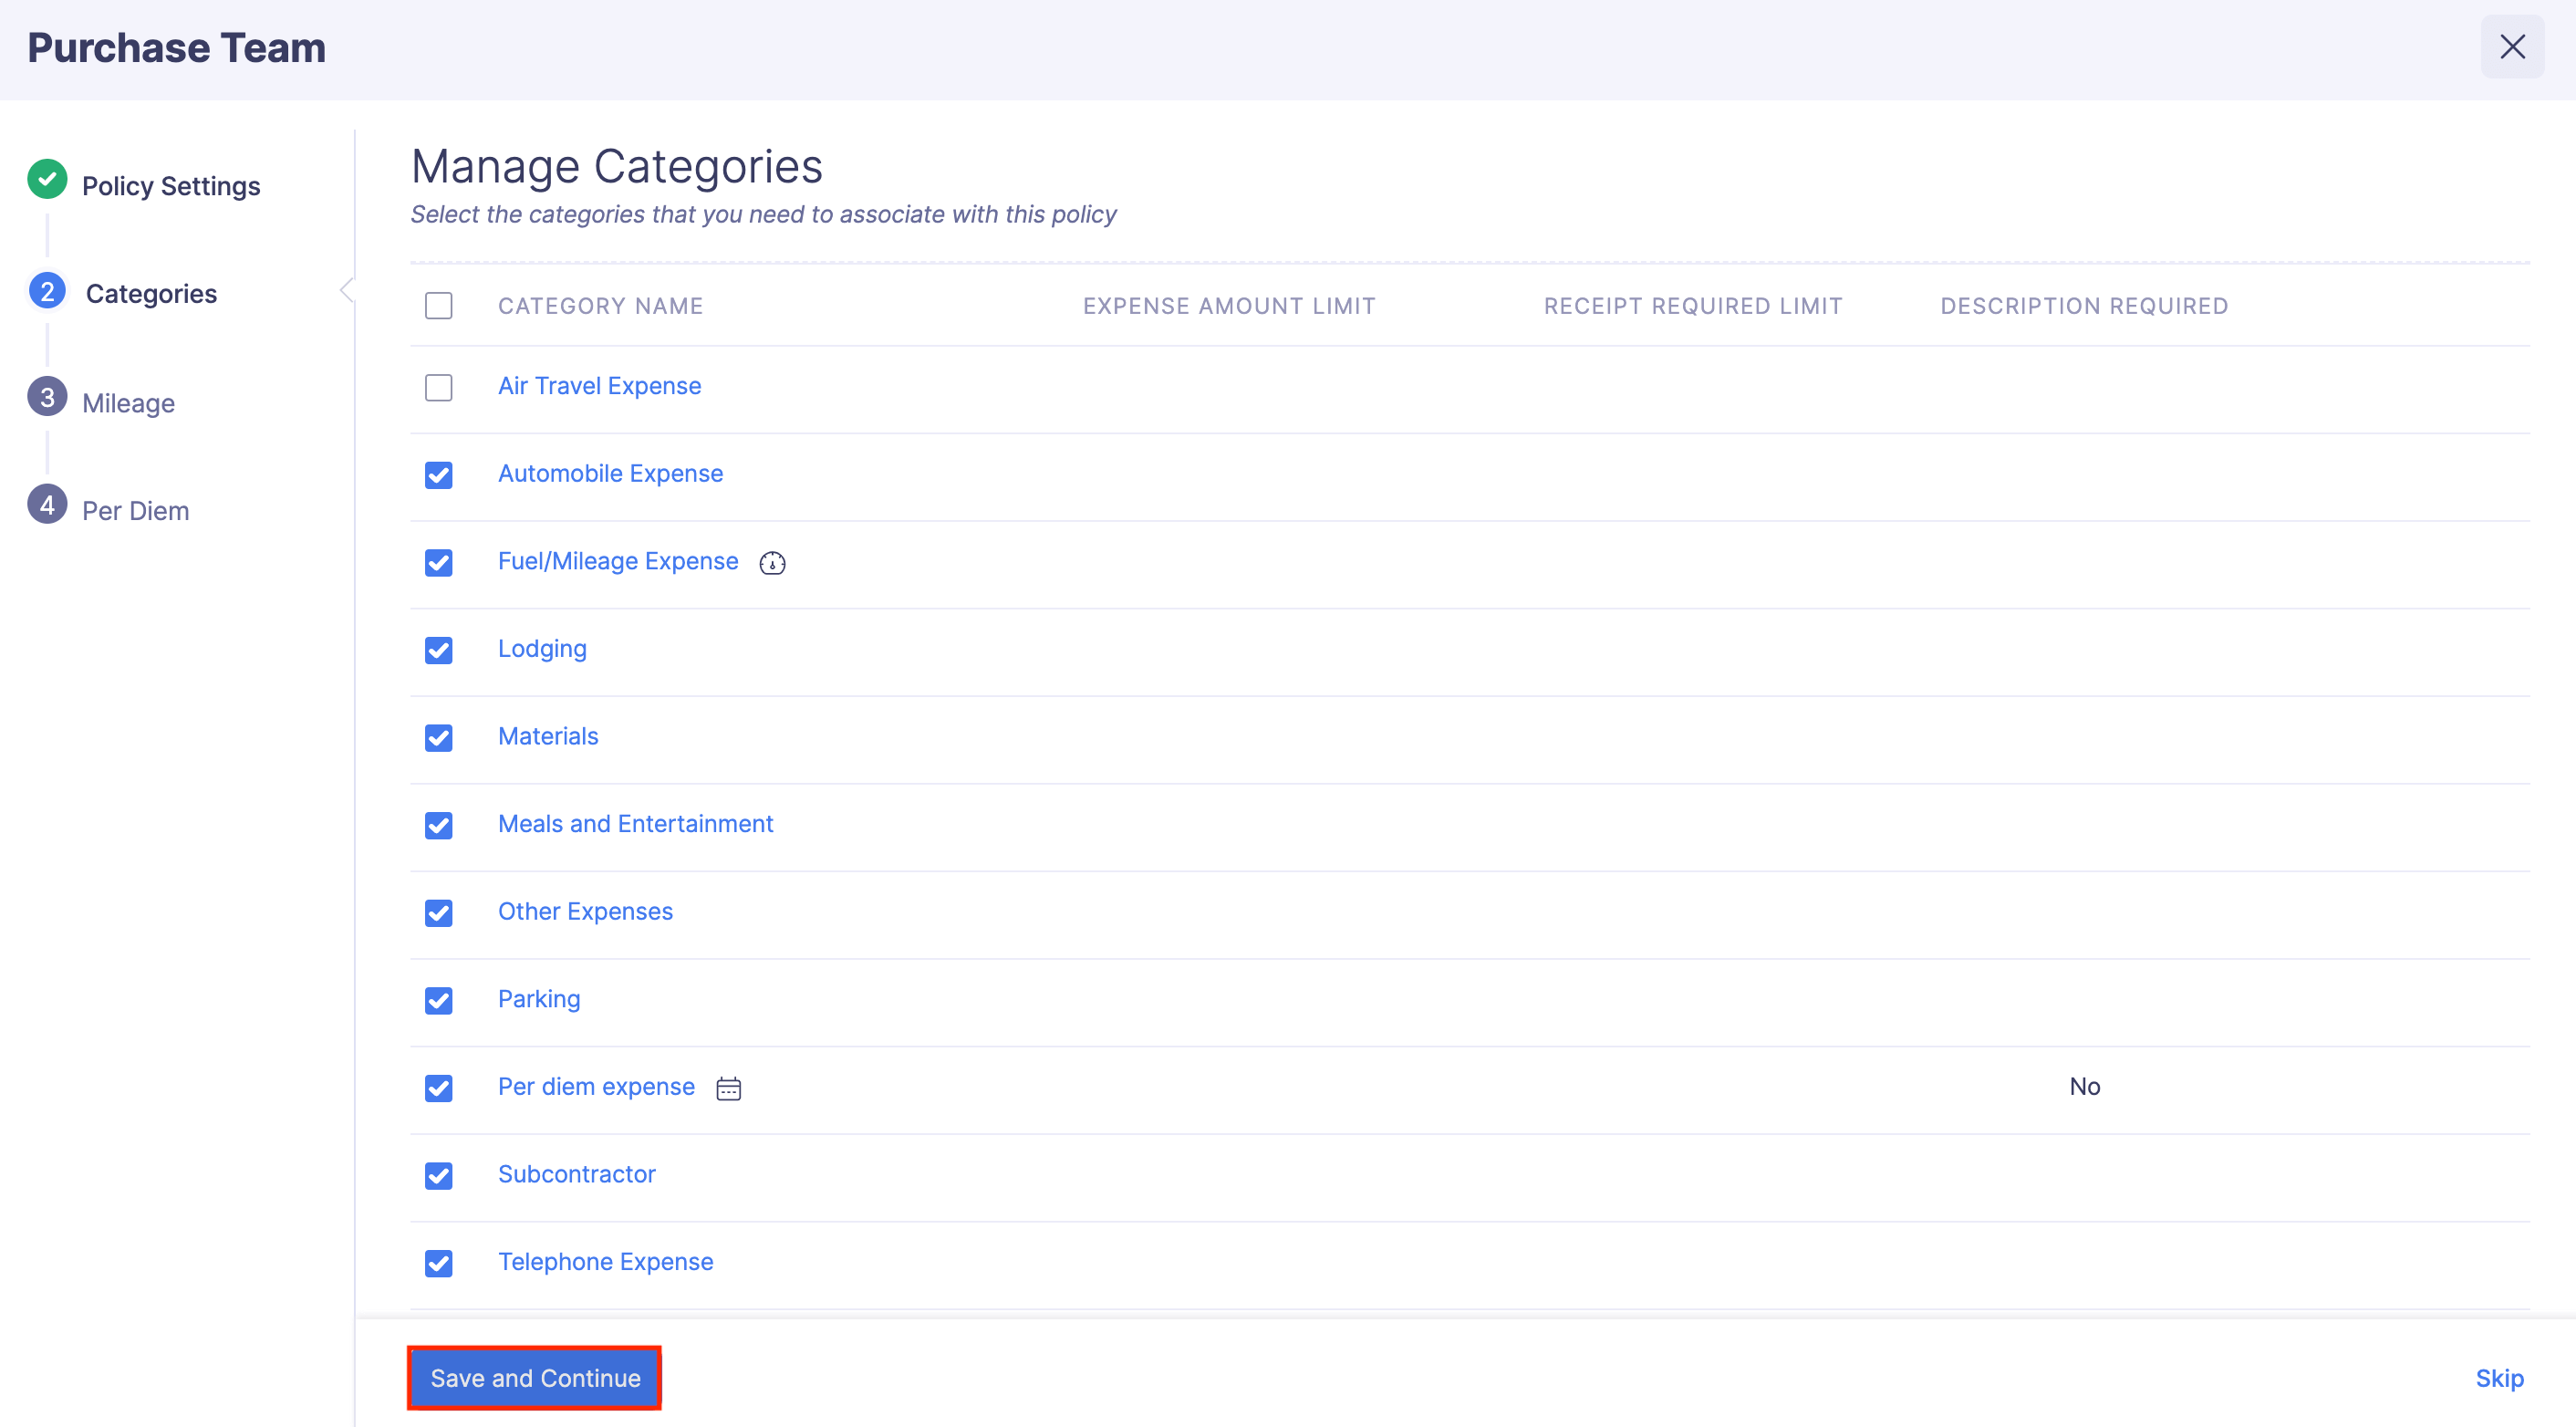
- Select the expense categories for which your employees will incur expenses and set limits for those categories. Click Save and Continue.
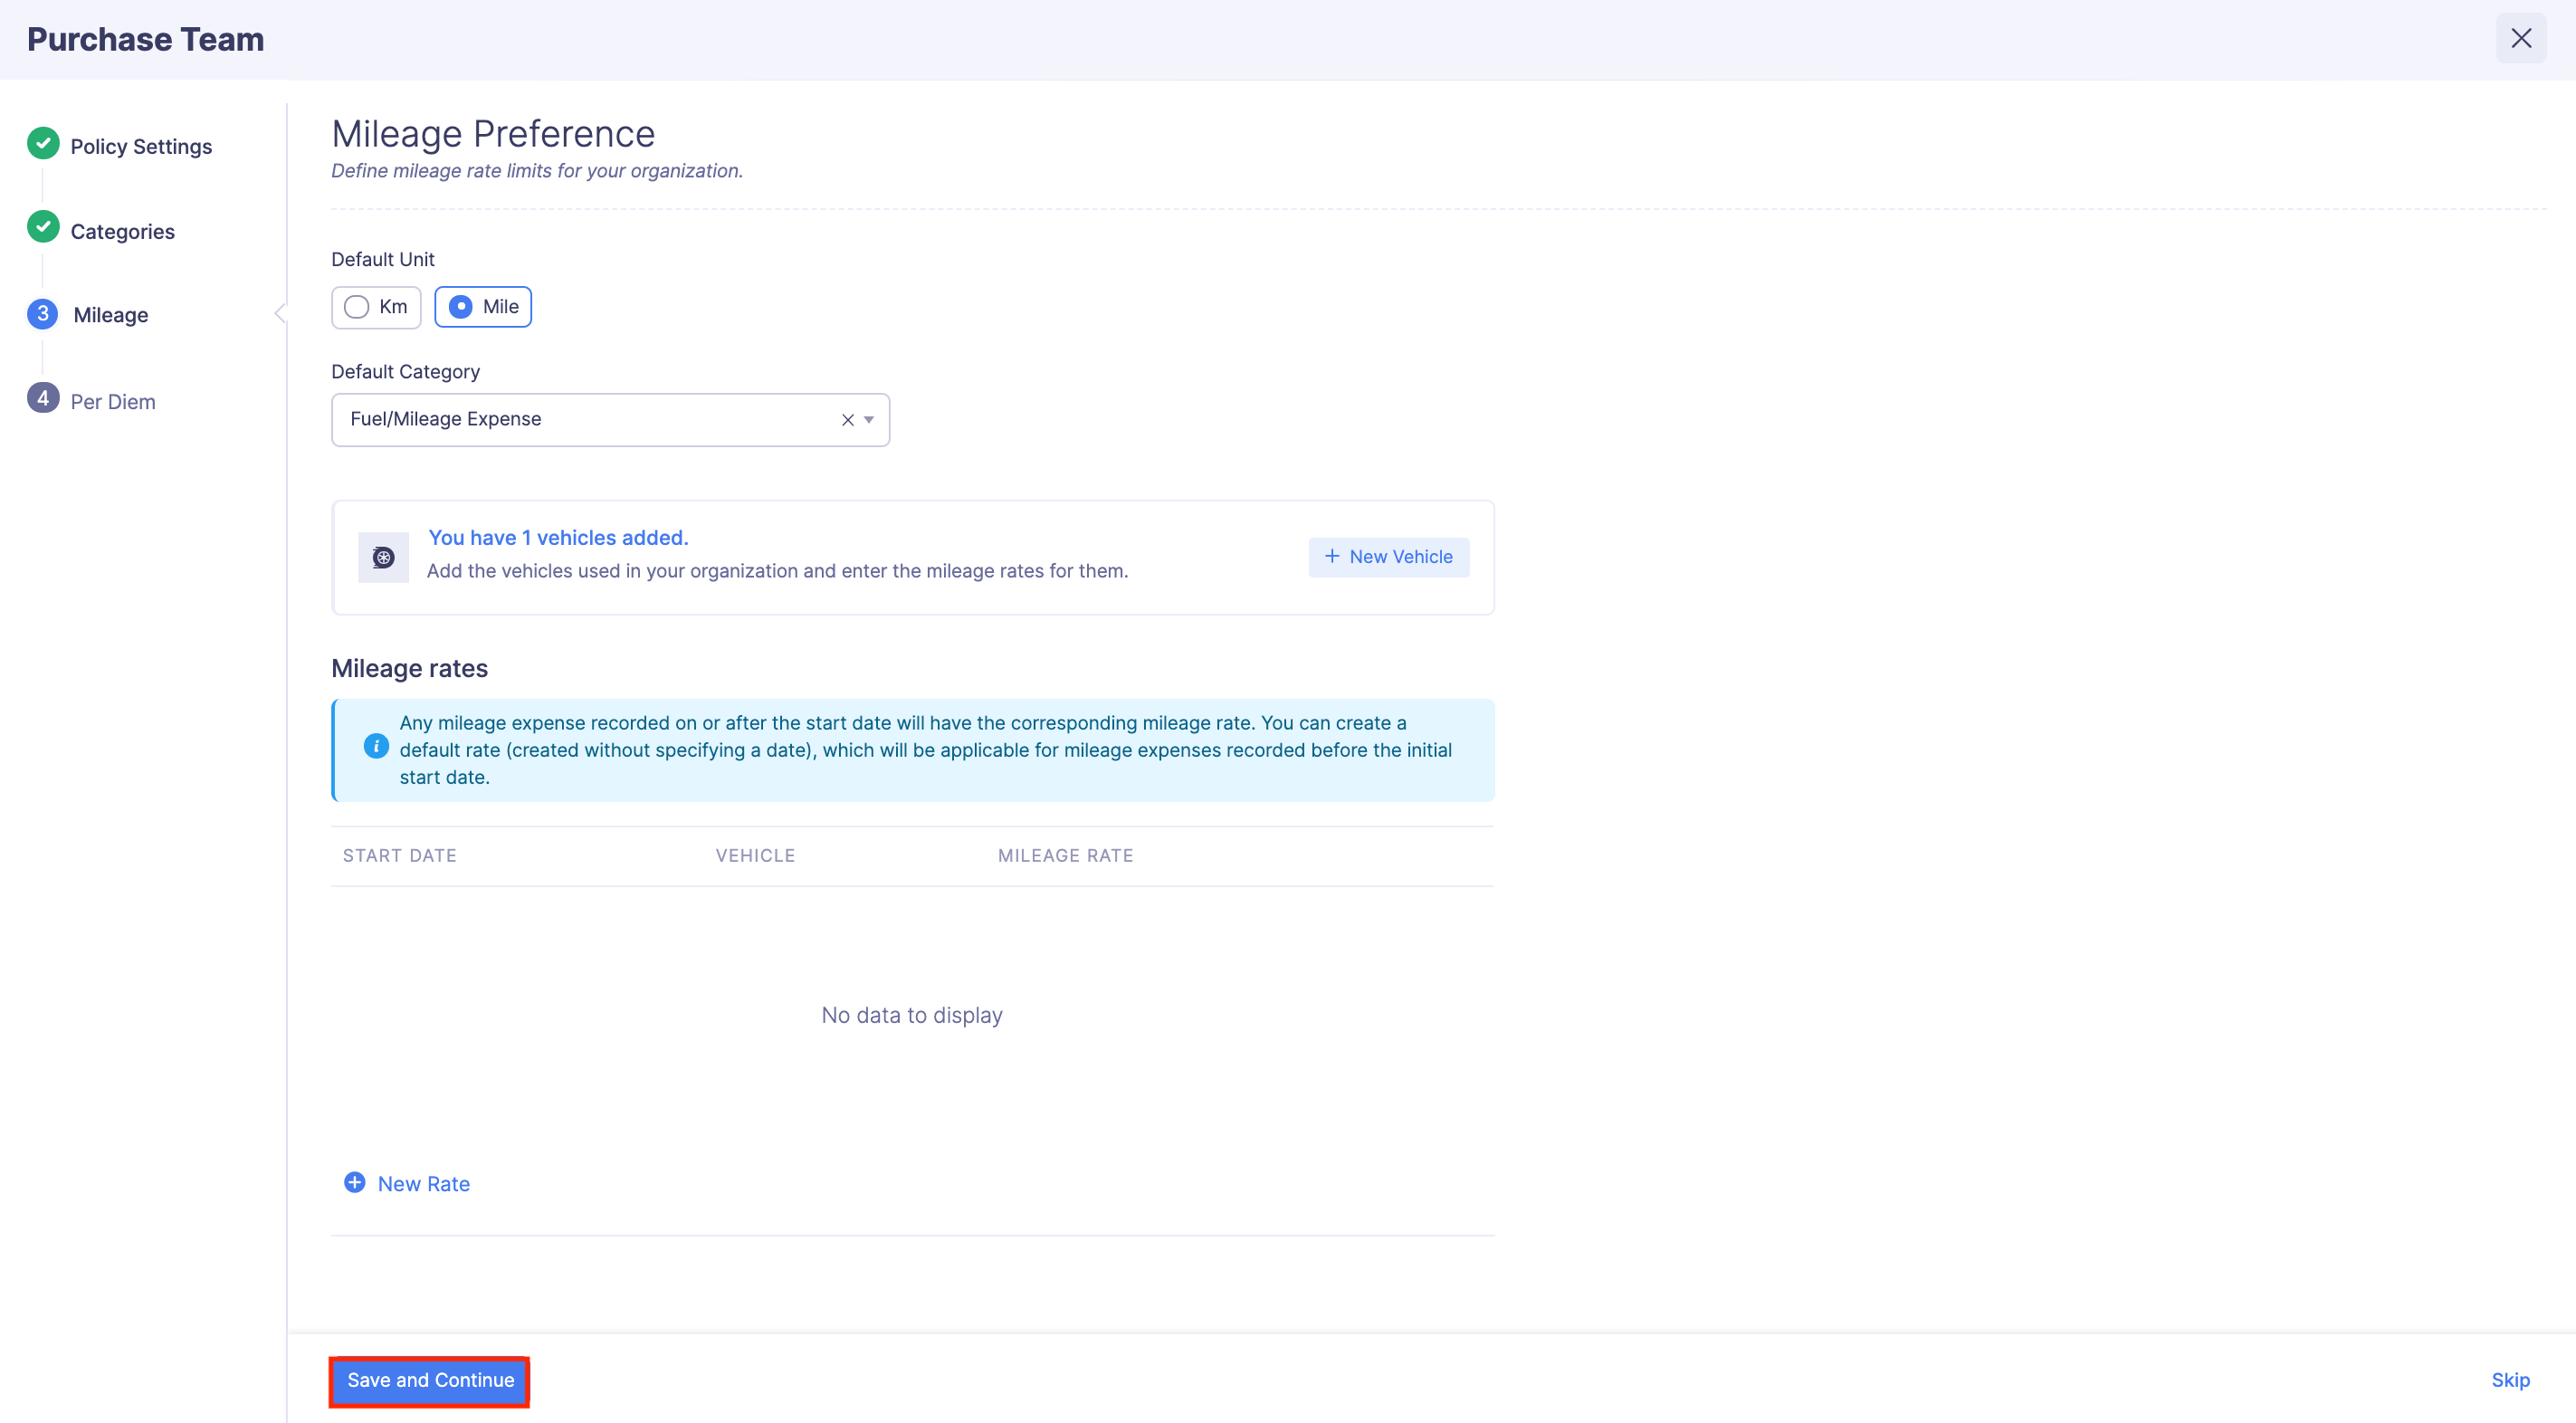
- Configure the mileage rates of your organization. Click Save and Continue.
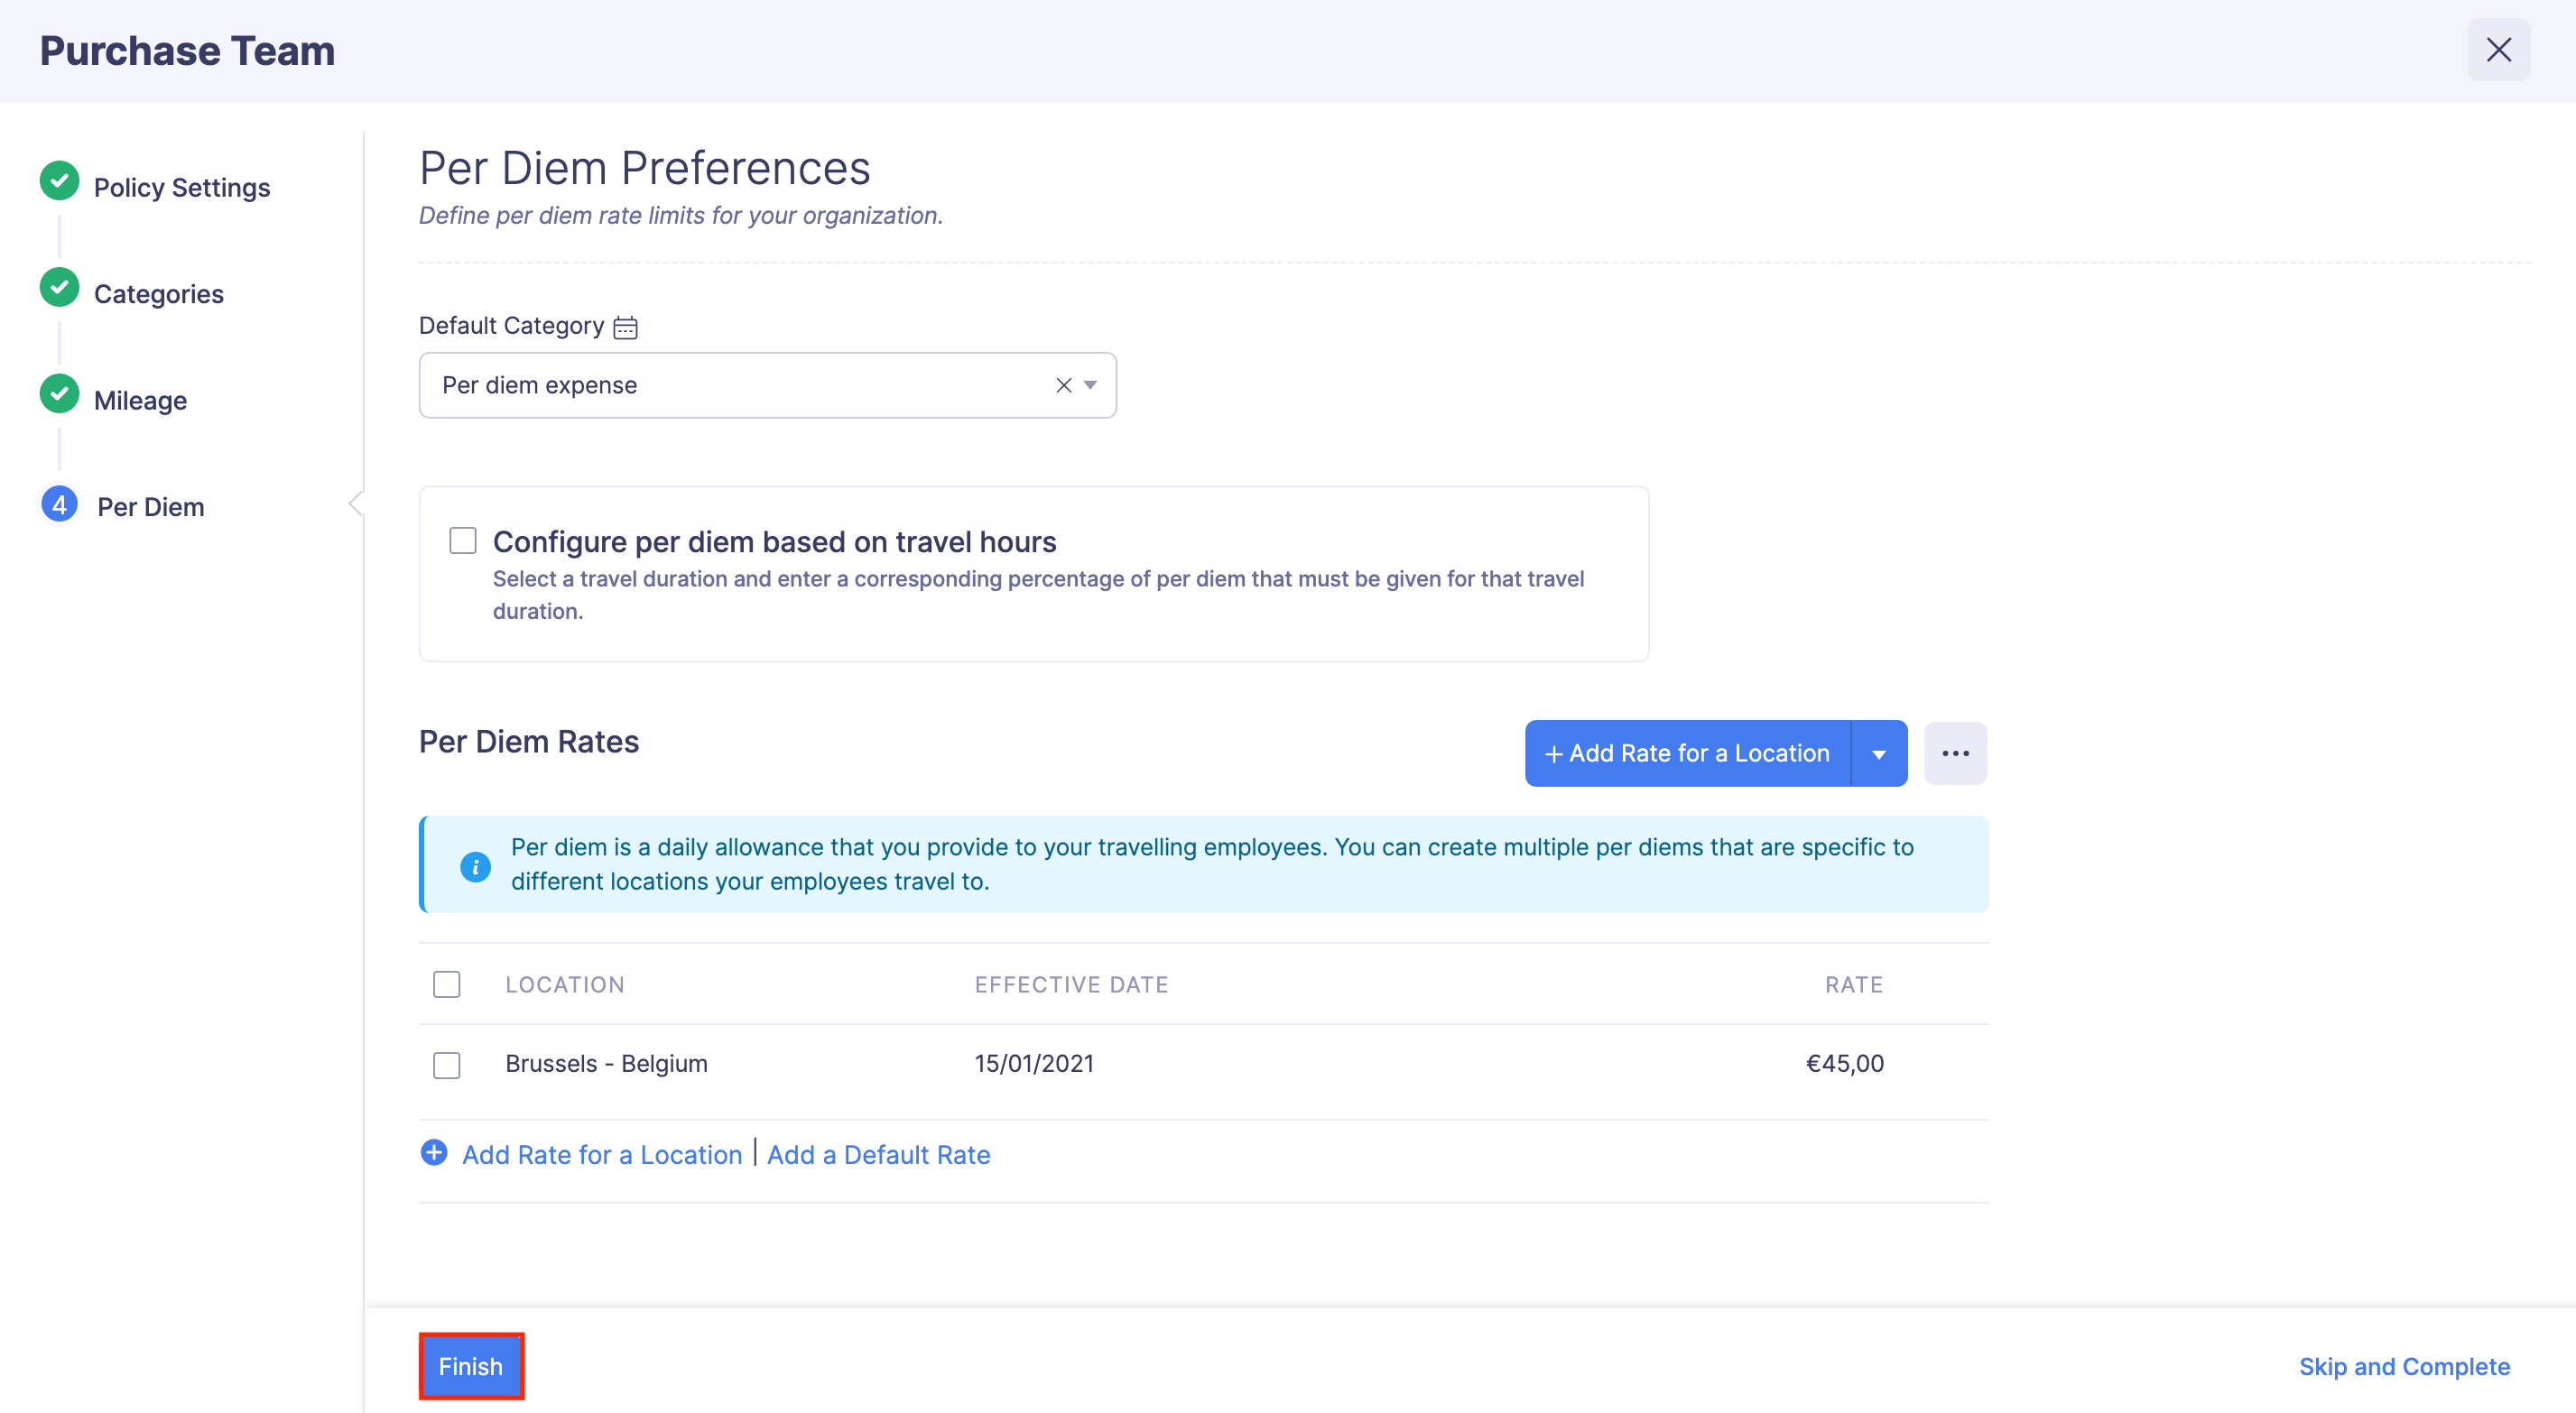
- Set per diem rates for your employees’ per diem expenses. Click Finish.
Your new policy will be created and you can assign it to the users.
Associate Policy With a User
On creating an organization, a default policy will be created automatically for you, without any limits or rules, which will be applied to all the users by default. However, you can associate a different policy to a user. Here’s how:
- Click Admin View.
- Go to Settings on the left sidebar.
(OR)
Click Settings in the top right corner of the page.
- Navigate to Organization Settings.
- Click Users under Users and Control.
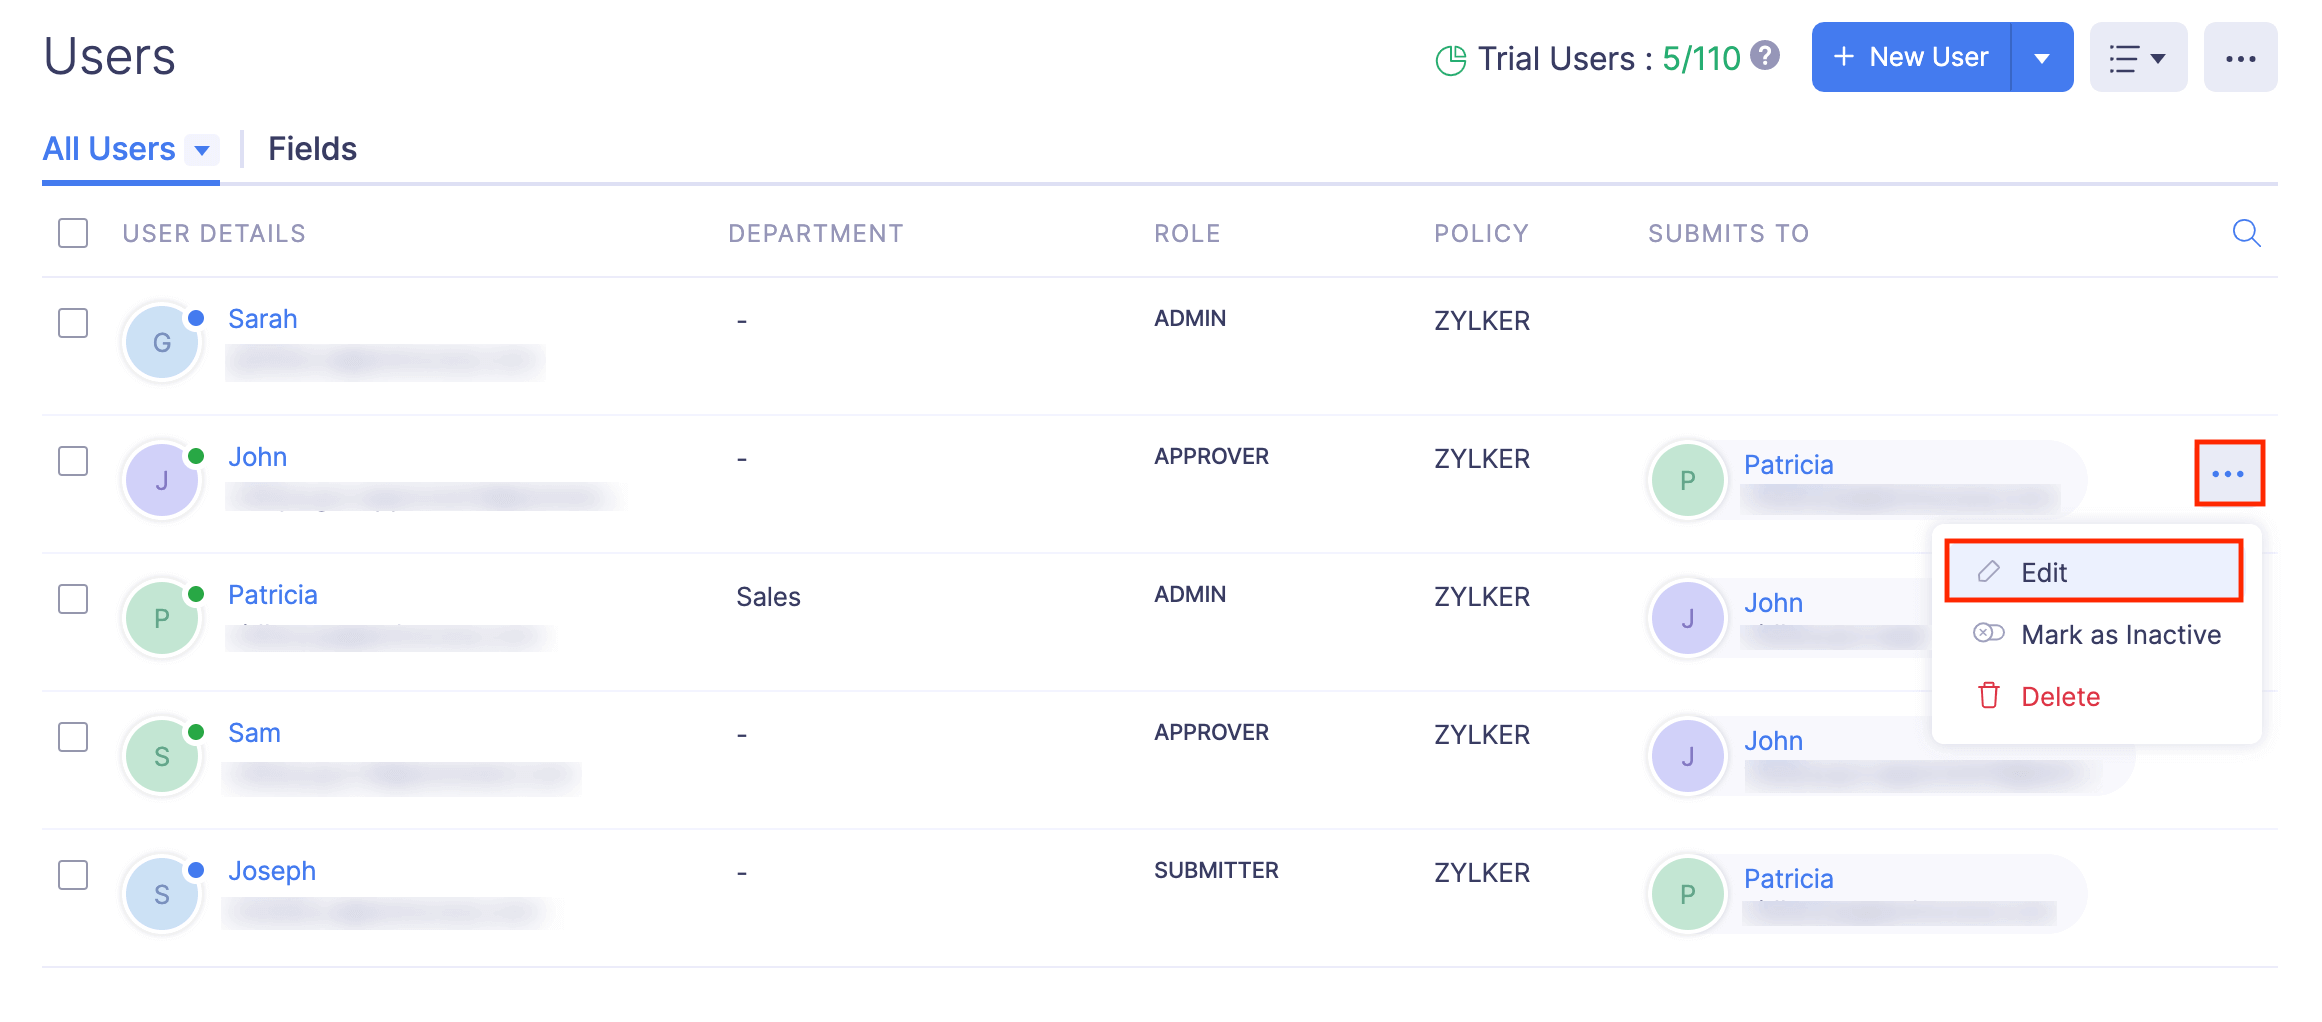
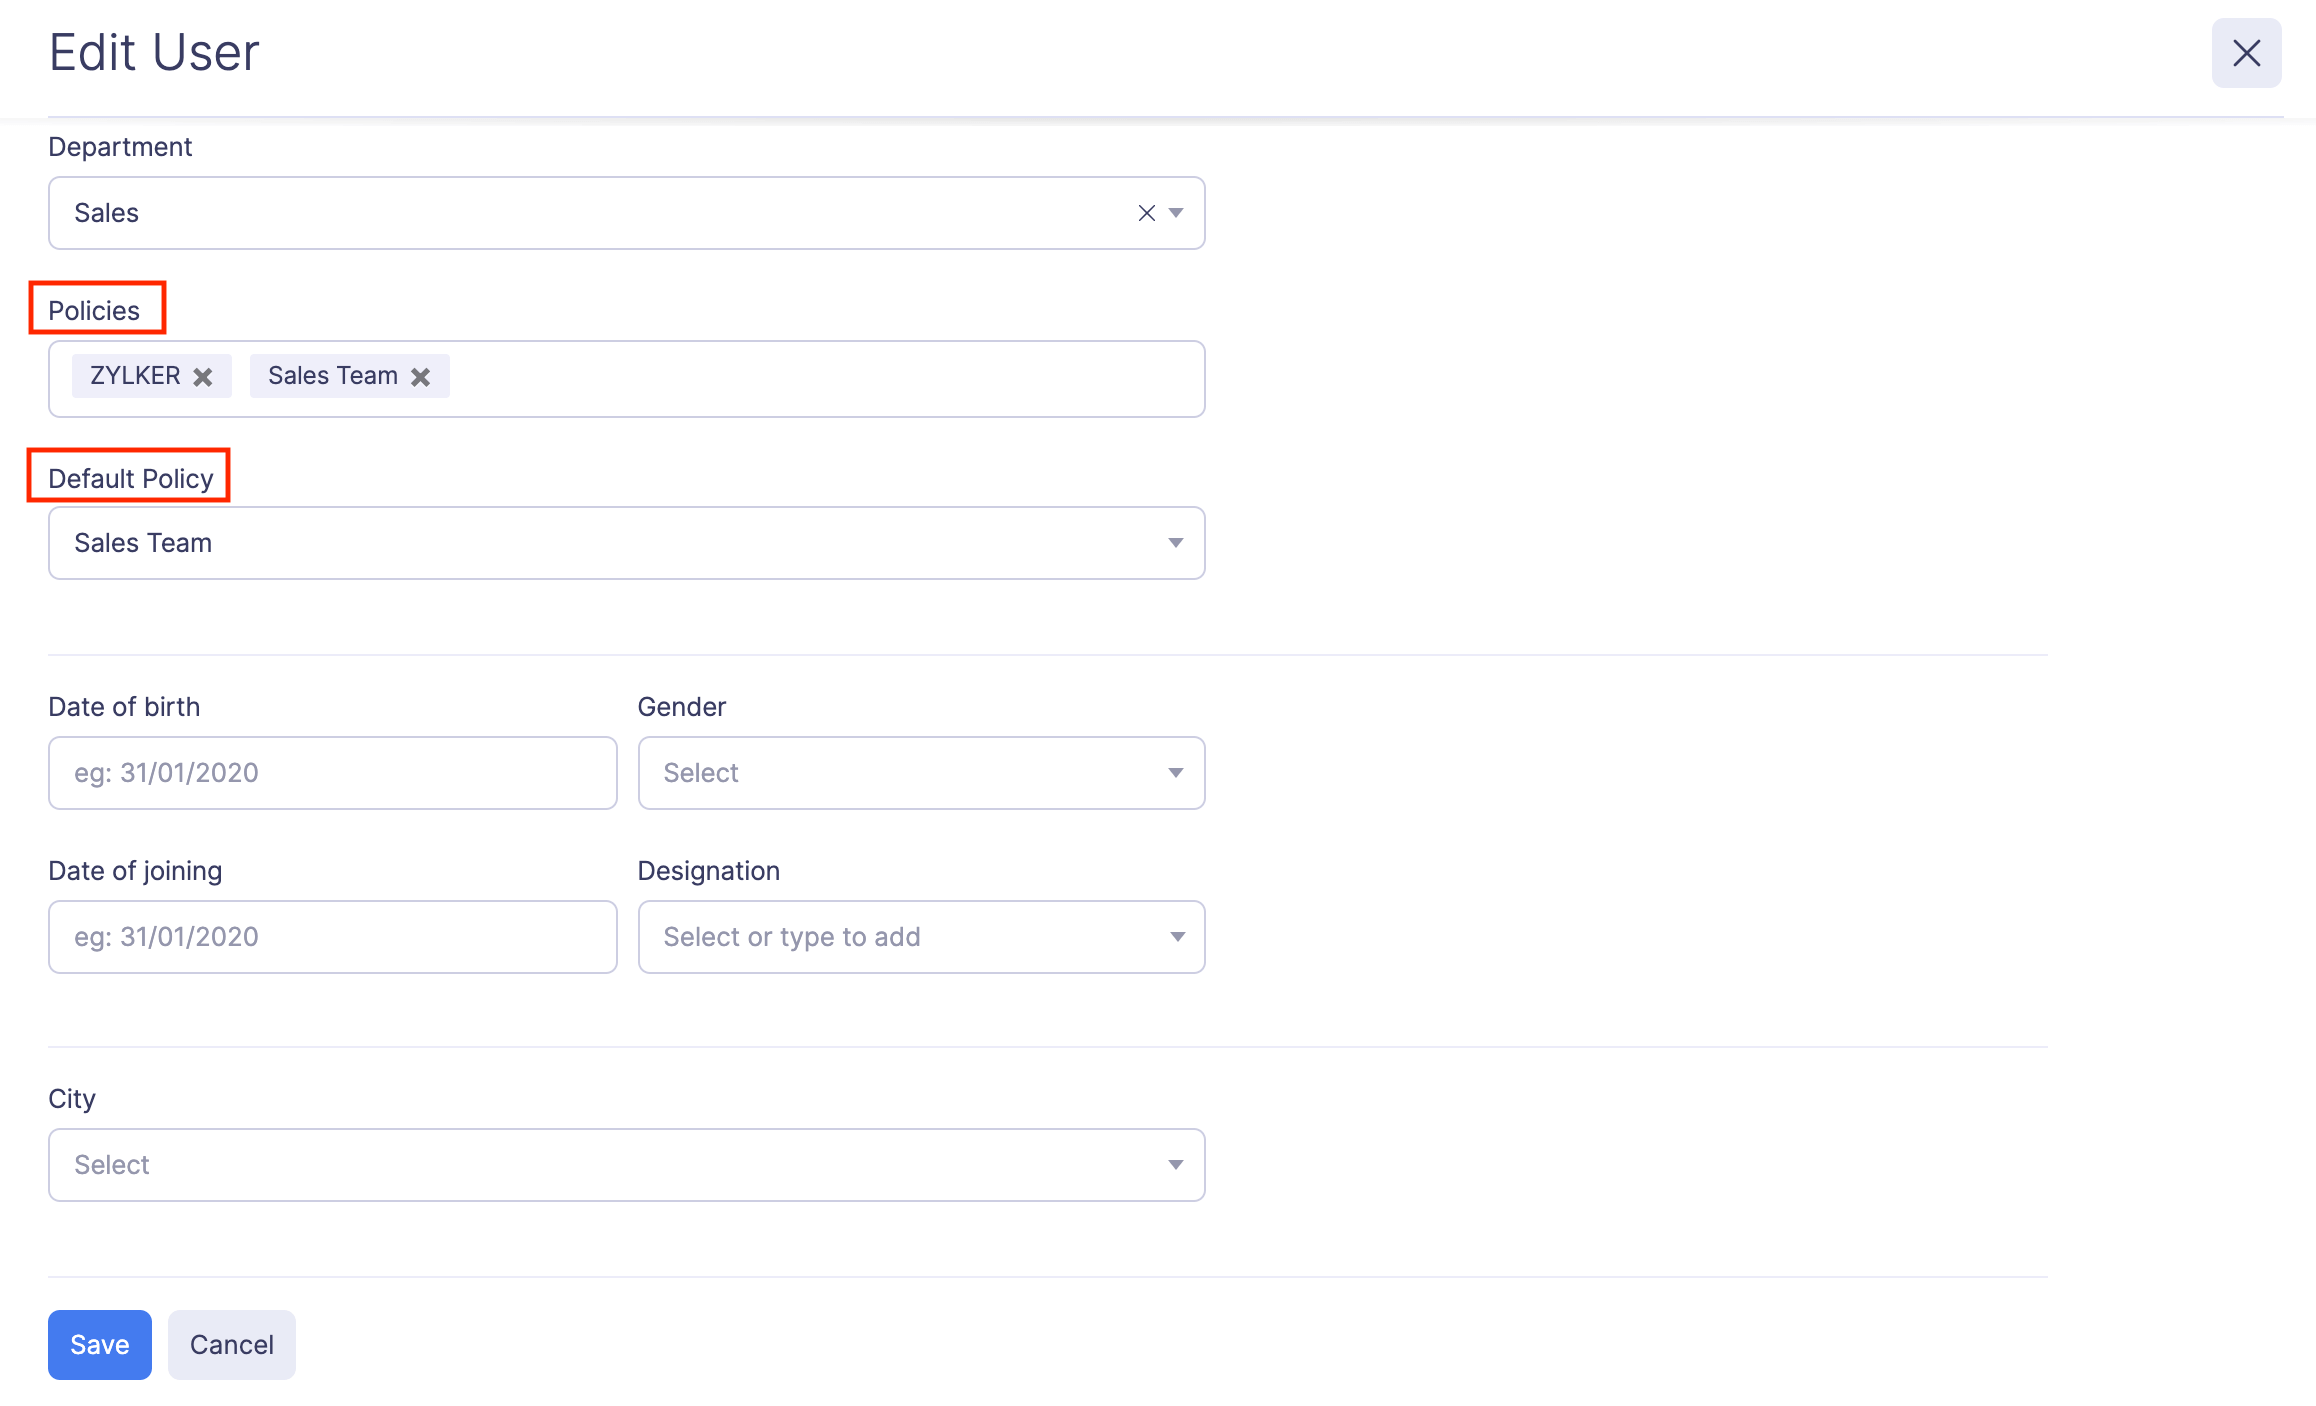
- Click the More icon at the right corner of the user for whom you want to apply the policy.
- Select Edit.
- Select the policy with which you want to associate this user under the Policies dropdown.
- Select the same policy under the Default Policy dropdown.
- Click Save. The selected policy will be associated with the user.
Edit Policy
You can make changes to the rules and the rates that you’ve configured in a policy by editing them. To edit a policy:
- Click Admin View.
- Go to Settings on the left sidebar.
(OR)
Click Settings in the top right corner of the page.
- Navigate to Organization Settings.
- Click Policies under Setup & Configurations.
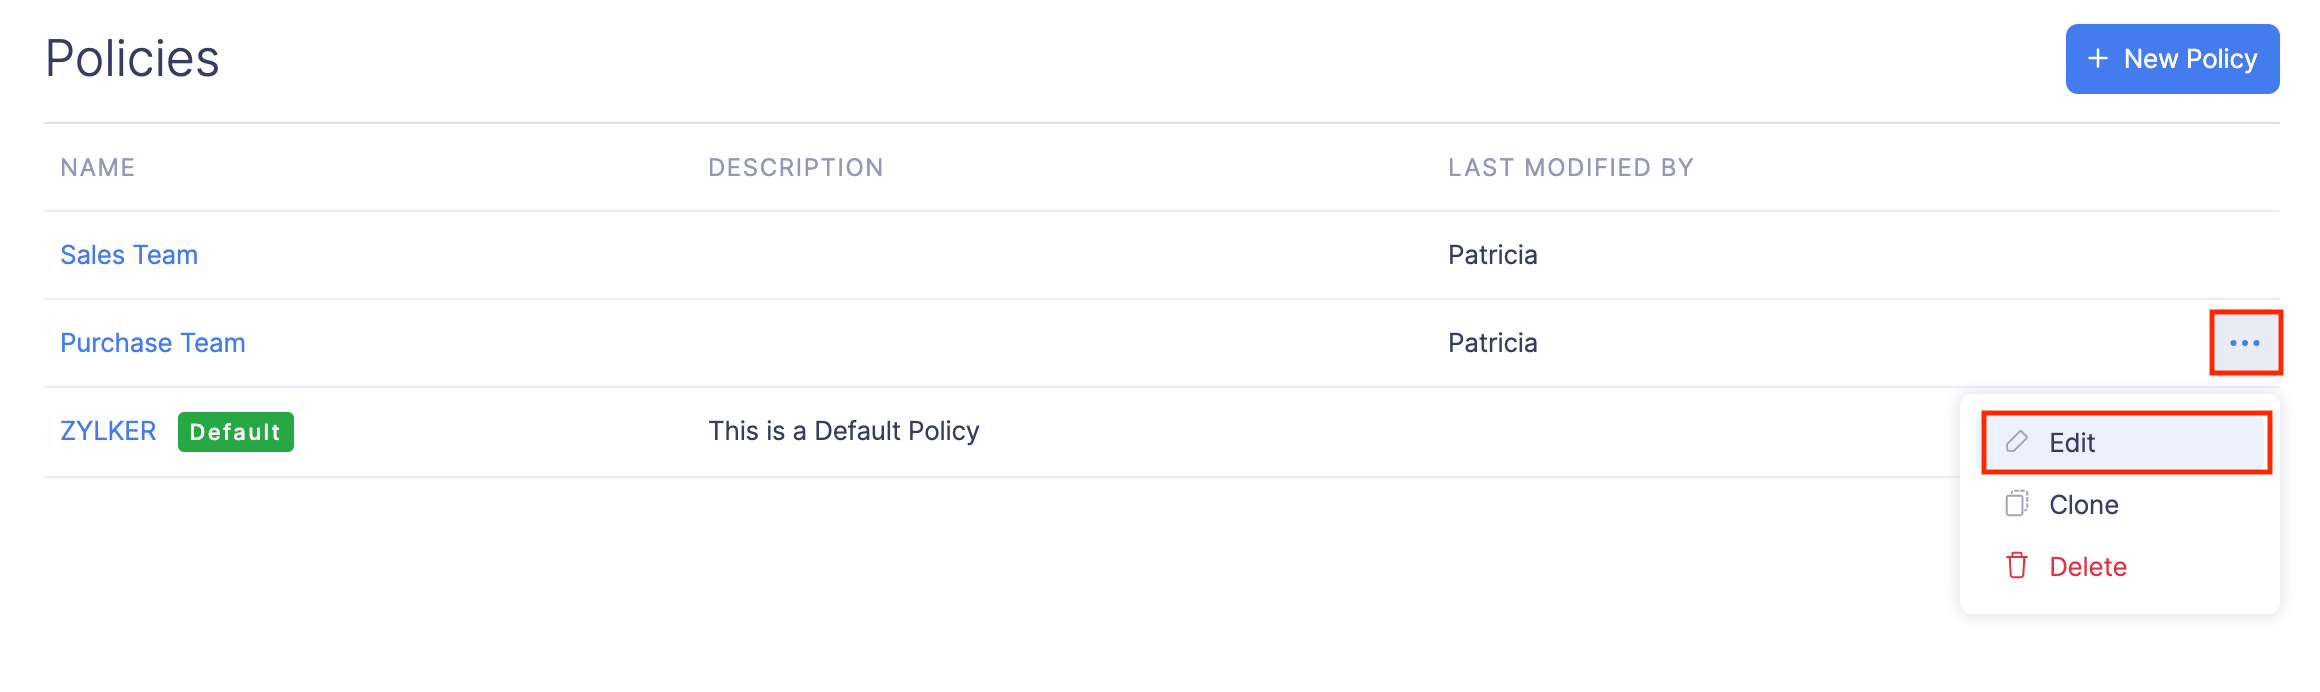
- Click the More icon at the right corner of the policy you want to edit.
- Select Edit.
- Make the necessary changes and click Save.
Clone Policy
If you would like to create a new policy with only a few changes to an existing policy, you can clone the existing policy and make changes as required. To clone a policy:
- Click Admin View.
- Go to Settings on the left sidebar.
(OR)
Click Settings in the top right corner of the page.
- Navigate to Organization Settings.
- Click Policies under Setup & Configurations.
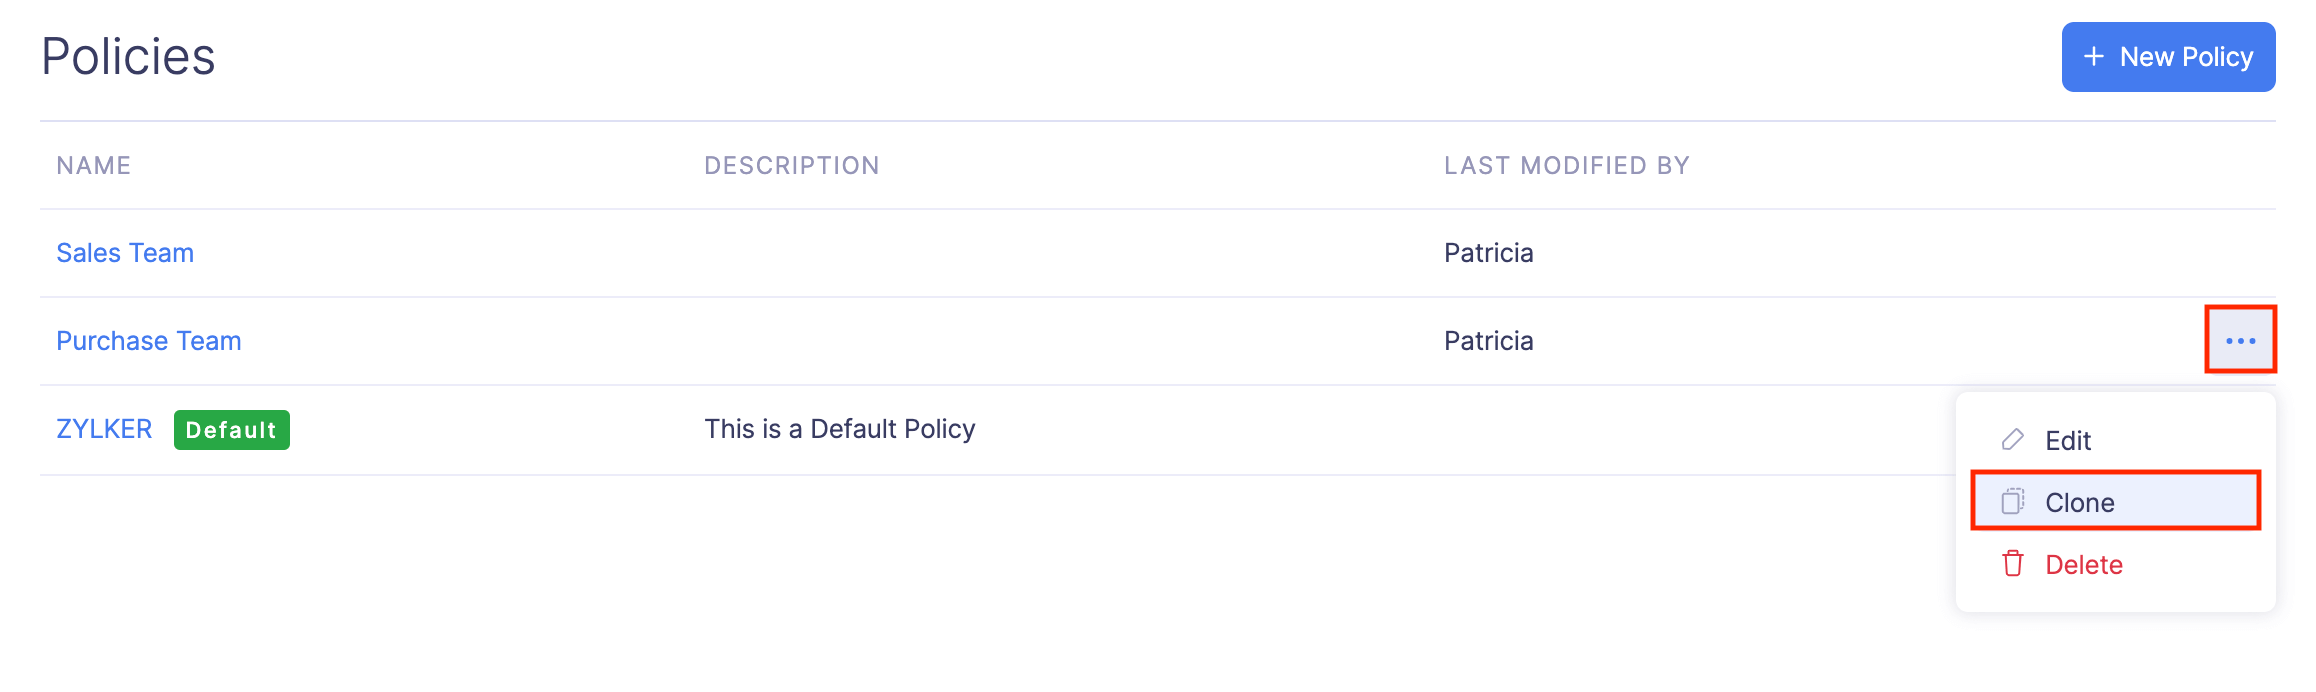
- Click the More icon at the right corner of the policy you want to clone.
- Select Clone.
- A new policy will open with the configurations made in the cloned policy. You can edit it and save it as a new policy.

Delete Policy
Prerequisite:
- The policy you want to delete must not be the default policy.
- The policy must not be associated to a user. You can edit the user, disassociate the policy from the user, and then delete the policy.
To delete a policy:
- Click Admin View.
- Go to Settings on the left sidebar.
(OR)
Click Settings in the top right corner of the page.
- Navigate to Organization Settings.
- Click Policies under Setup & Configurations.
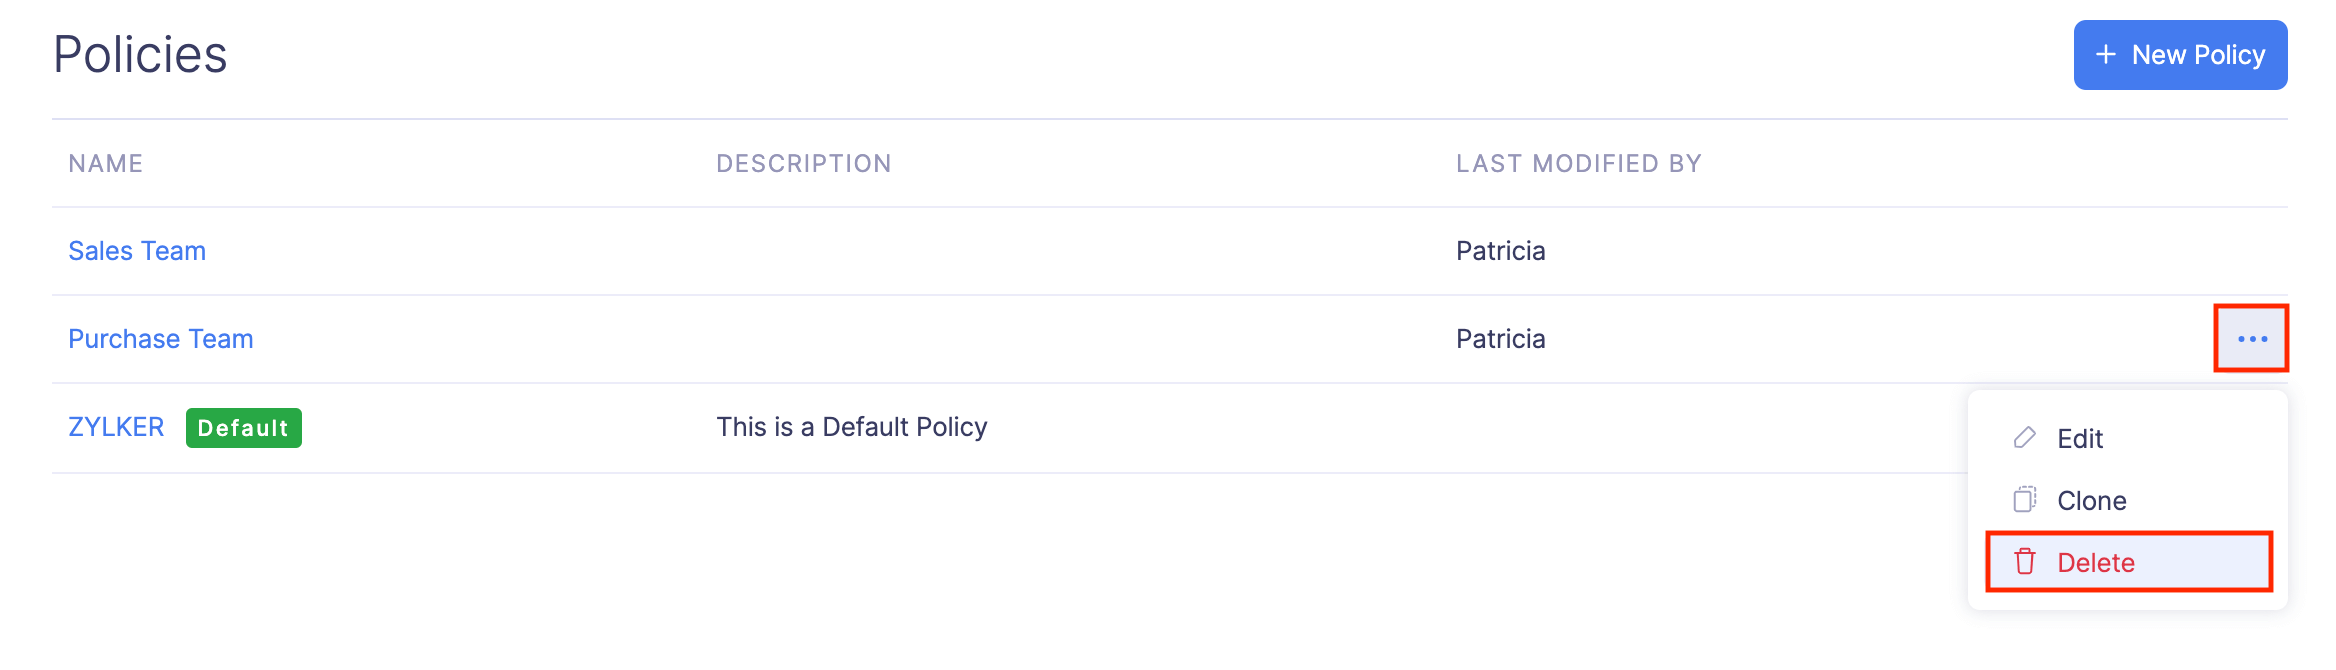
- Click the More icon at the right corner of the policy you want to delete.
- Select Delete.
- Click Delete again to delete the policy.