
Integrate Zoho Expense With Zoho Books
Zoho Expense simplifies the task of recording and reporting expenses. If you’re wondering whether you can import and export expenses into your books, you don’t have to! With the Zoho Expense and Books integration you can sync and view your expense data from within your Zoho Books account automatically. You can view your list of approved expenses, automatically updated and matched under the existing Chart of Accounts (CoA).
Configure Zoho Expense - Zoho Books Integration
Zoho Expense does not require any steps for it to be integrated with Zoho Books. Our system automatically links both the accounts, provided they both have the same organization profile.
View Approved Expenses in Zoho Books
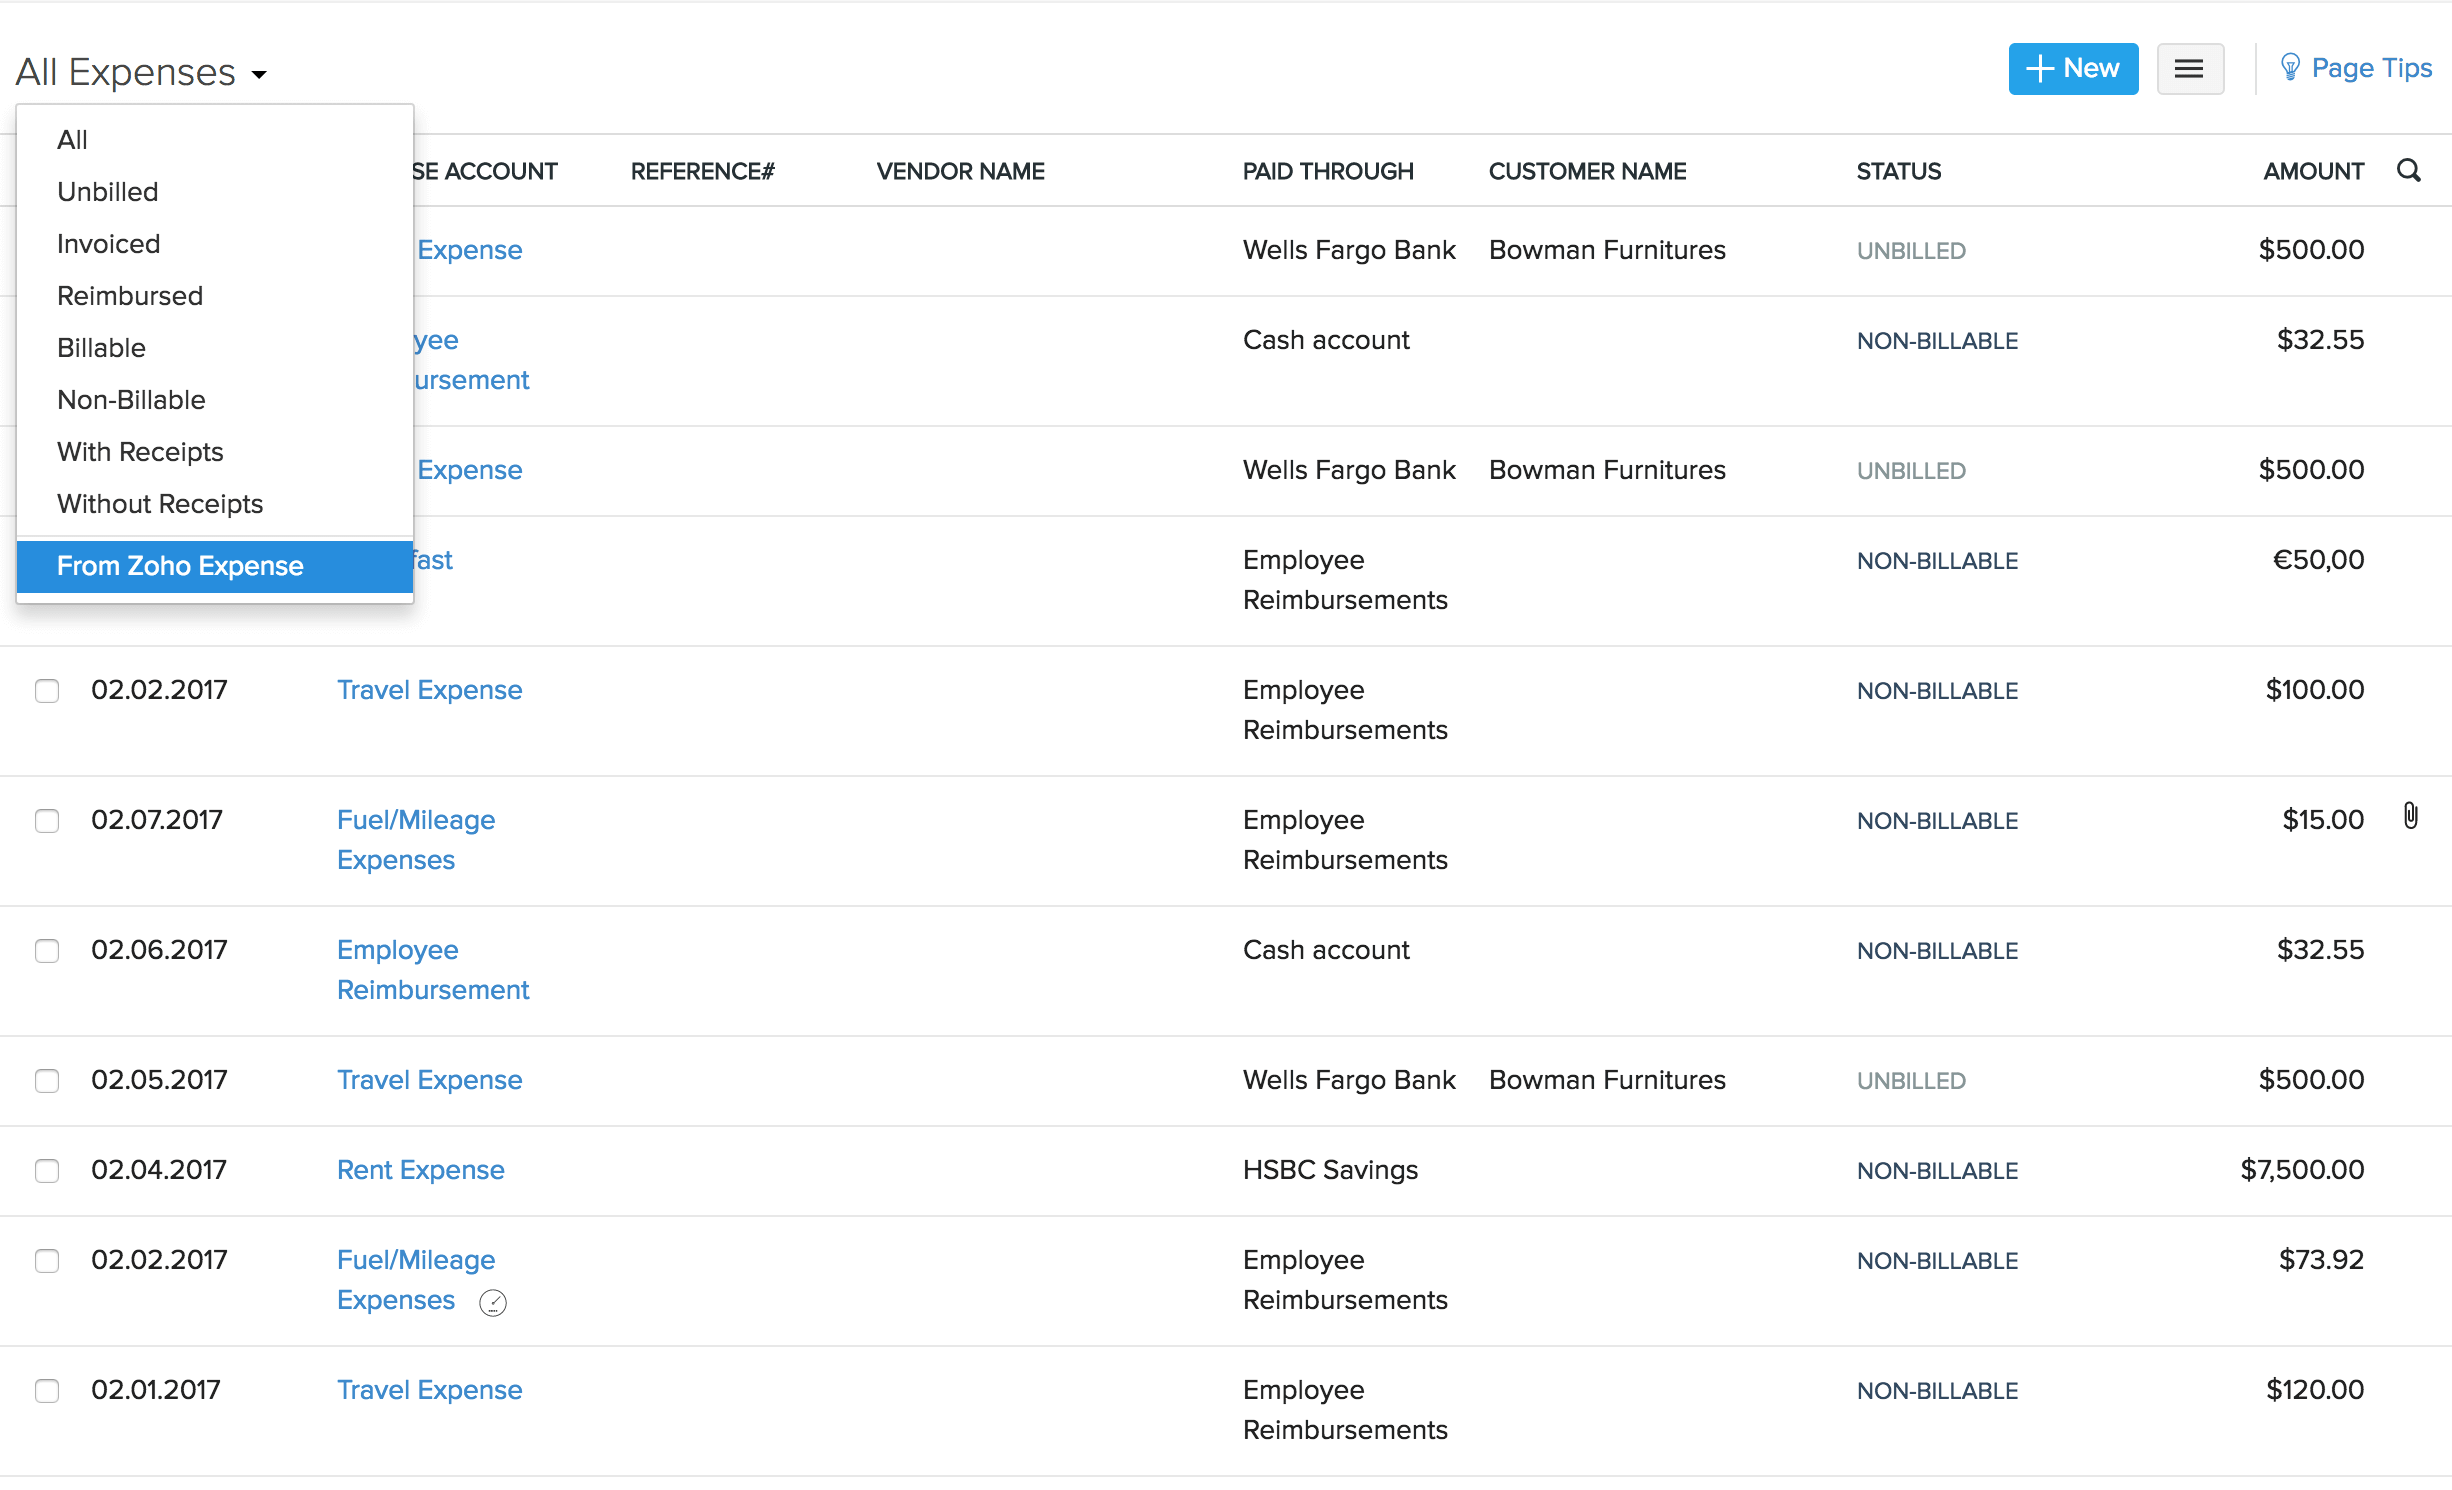
To view approved expenses from Zoho Expense in Zoho Books:
- Click the Purchases tab in the left sidebar of Zoho Books.
- Click the Expenses tab to see the list of expenses associated with your account.
- Click the filter drop-down present in the top left corner of the page.
- Select From Zoho Expense filter to see the list of approved expenses from Zoho Expense.
View Advances in Zoho Books
The Zoho Expense and Zoho Books integration allows you to view your employee advances along with the list of approved expenses.
You can view your employee advances under your Zoho Books account by performing the following steps:
- Go to the Reports on the left sidebar.
- Click Account Transactions under Accountant.
- Click the Customize Report button.
- In the page that opens, click + Add Filters and select Account in the dropdown.
- Select a comparator and select the account as Employee Advance.
- Click Run Report.
This will show you a list of the approved in Zoho Expense.
Record Reimbursement from Zoho Books
You can also record reimbursements from Zoho Books.
To do so, perform the following steps.
- Click the Banking tab in the left sidebar of Zoho Books.
- Select the Account through which reimbursement transactions are done.
- Go to the Add transaction drop-down and select Employee Reimbursement.
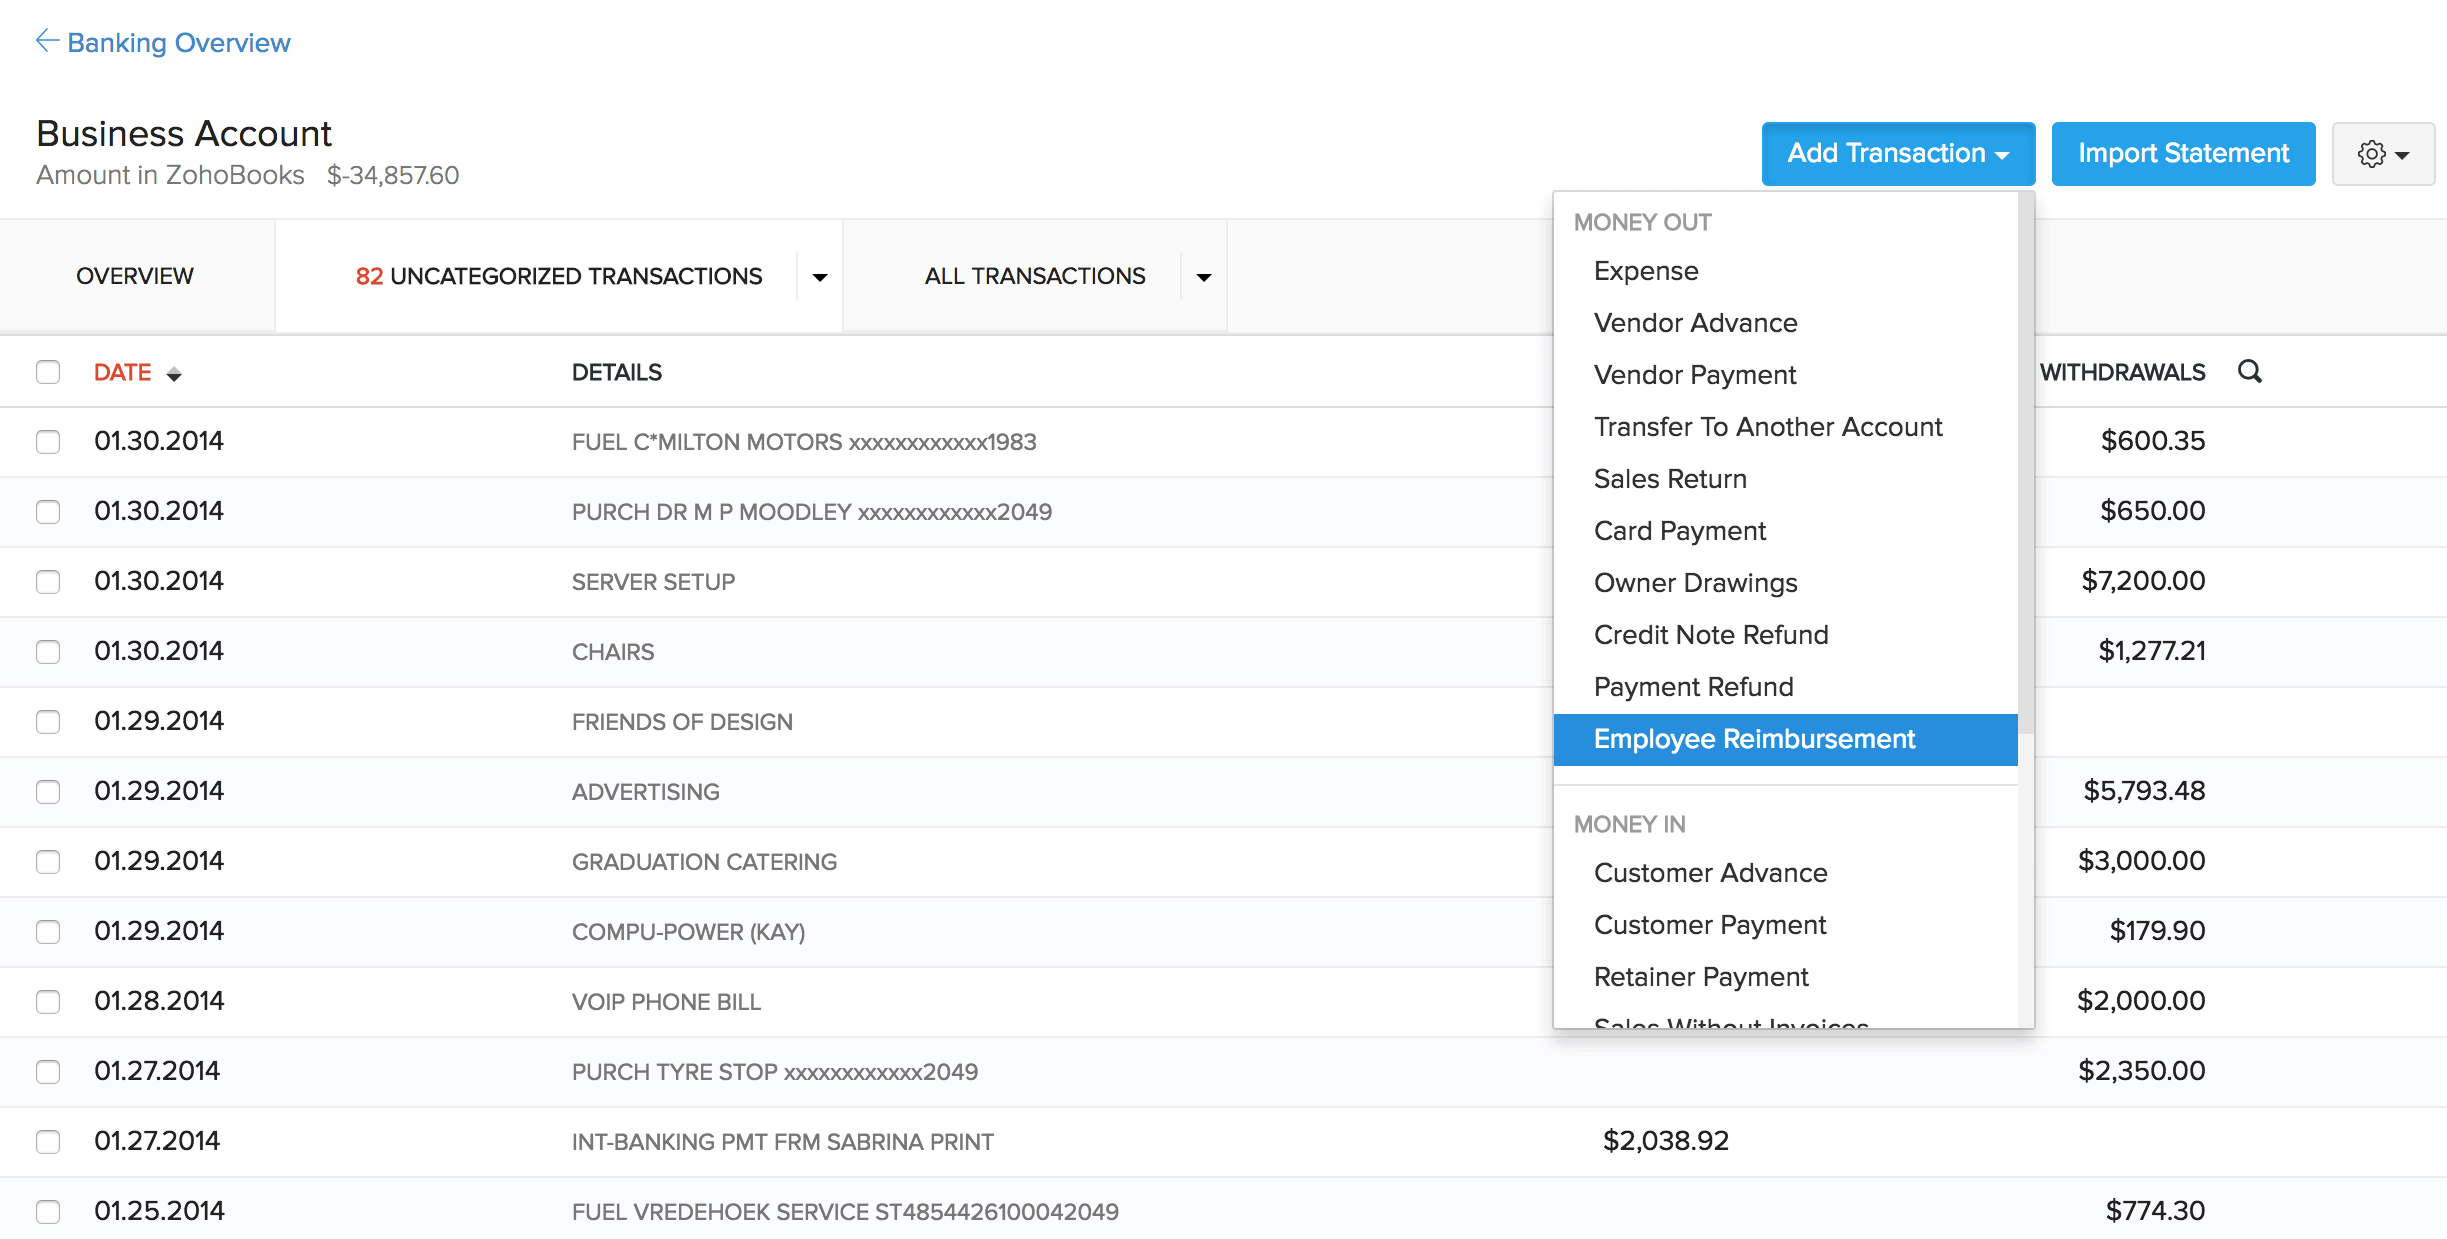
- You will see an Employee Reimbursement form in the right side of the screen.
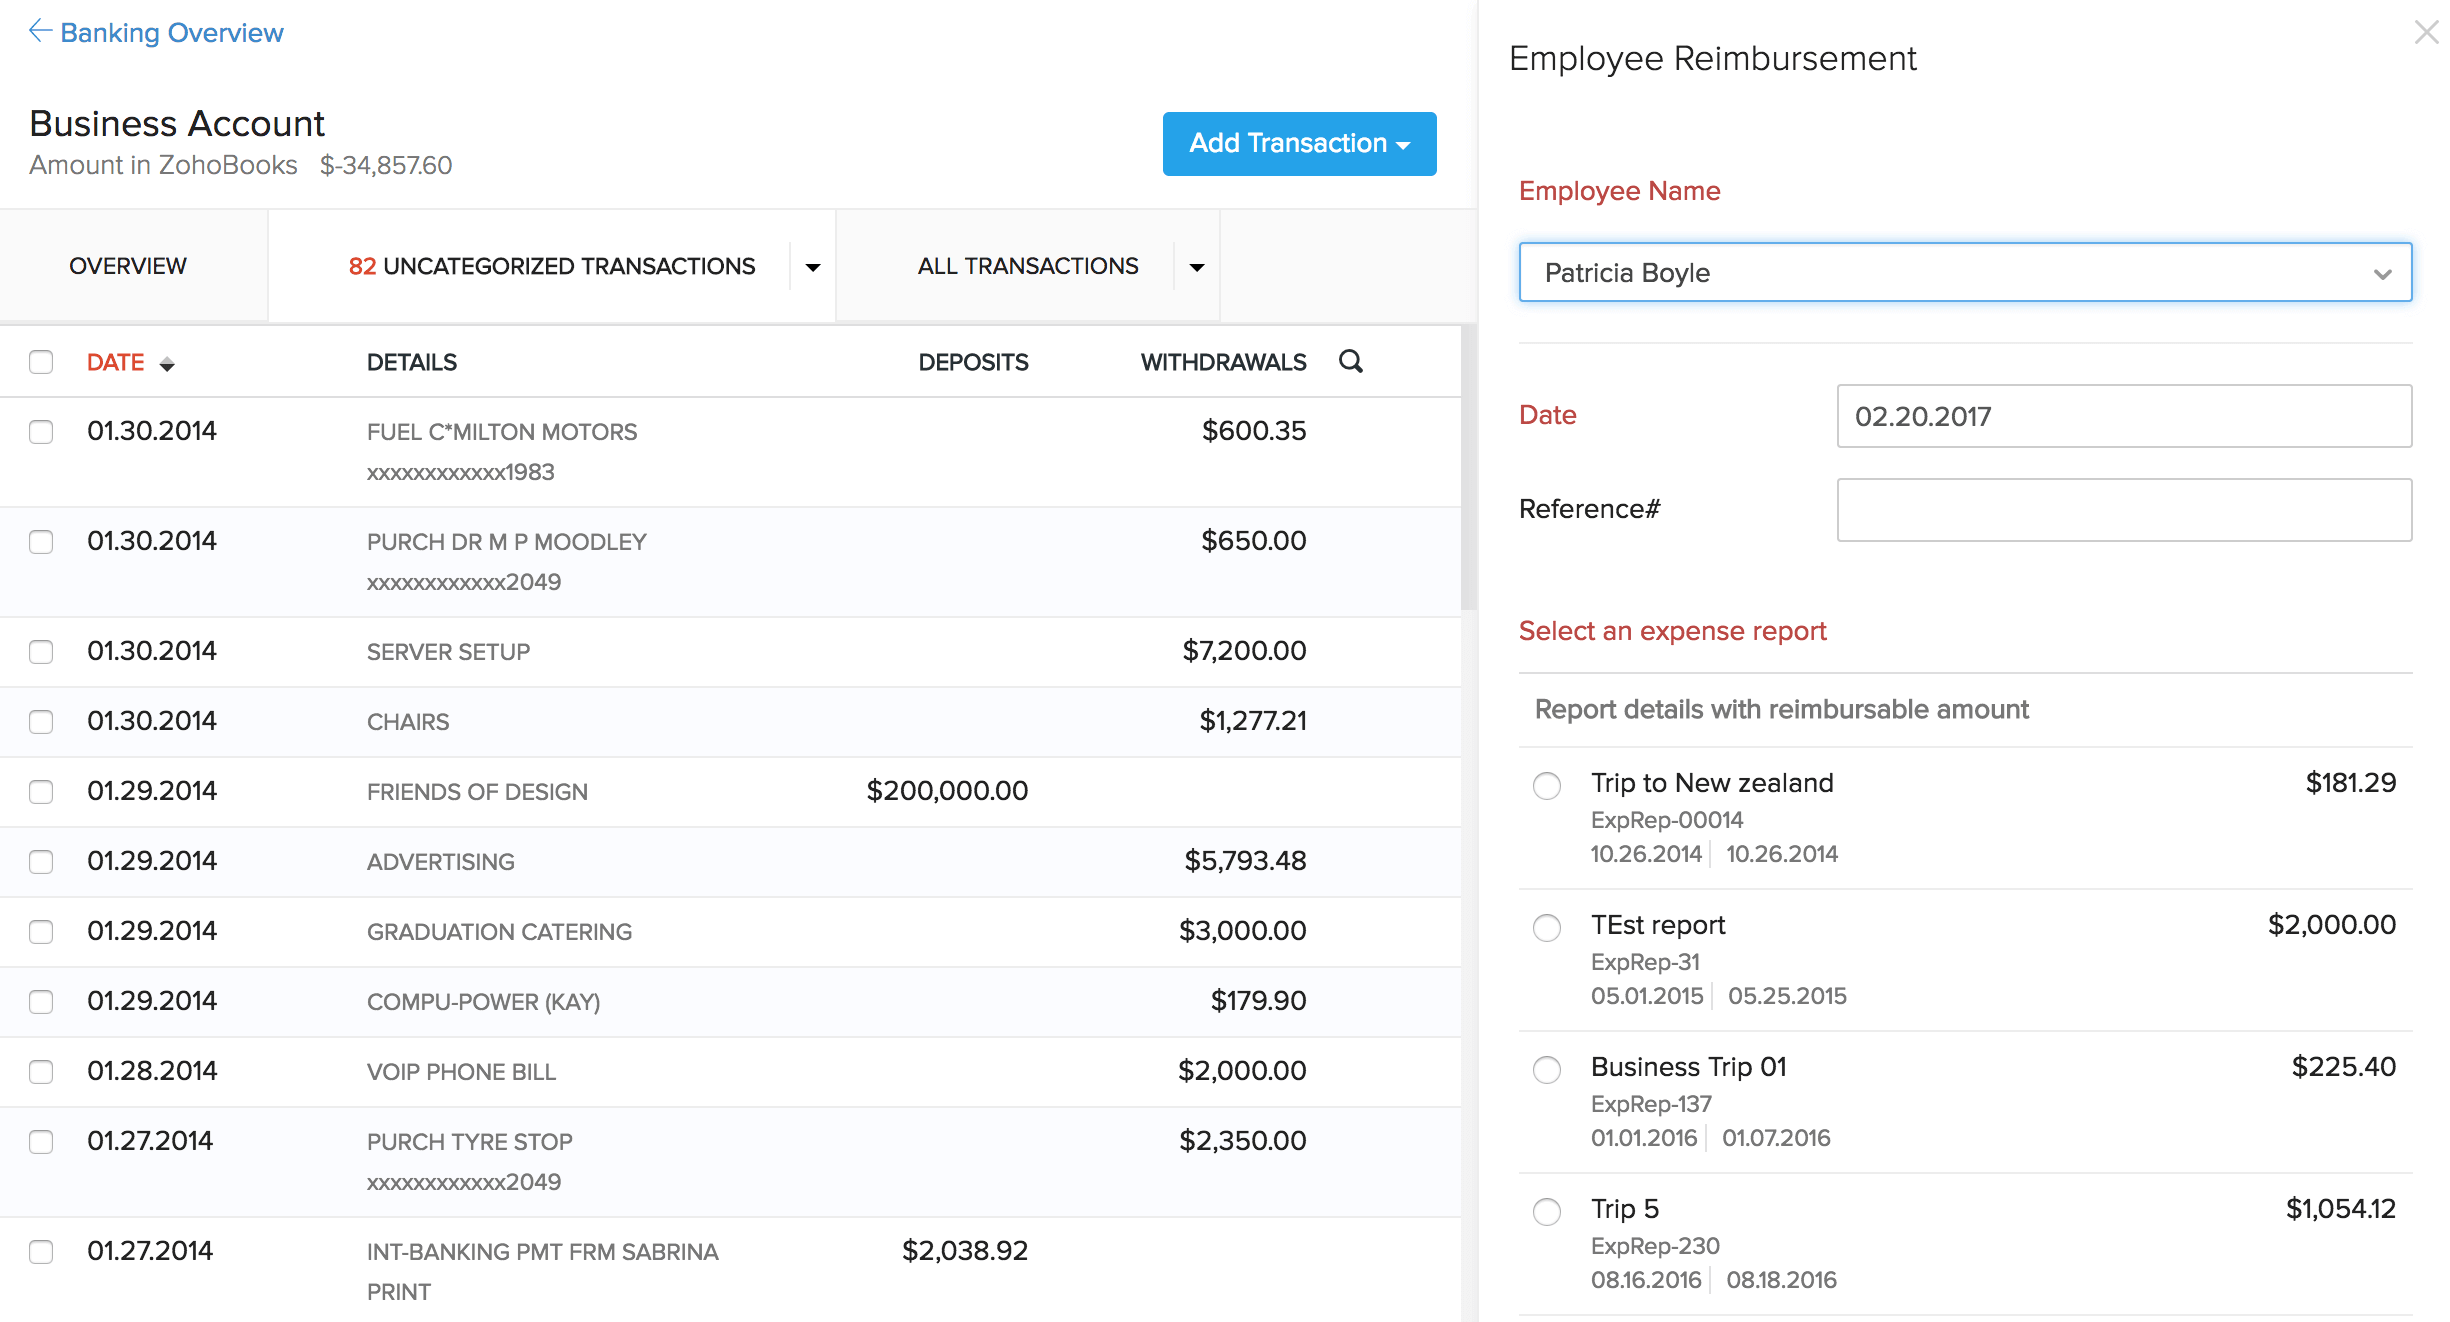
- On selecting an Employee’s name from the drop down, you will see a list of approved expense reports belonging to the employee, awaiting reimbursement.
- Select the report you want to reimburse and click Save.
Match and Categorize Transactions
Expense reports that are reimbursed manually will be tagged as Manually added transactions. However, on importing bank statements into Zoho Books, there arises a need to categorize the statement lines or match it with an existing transaction (reimbursed manually).
This is done by following the steps given below.
- Click the Banking tab in the left sidebar.
- Select the Bank account containing uncategorized transactions.
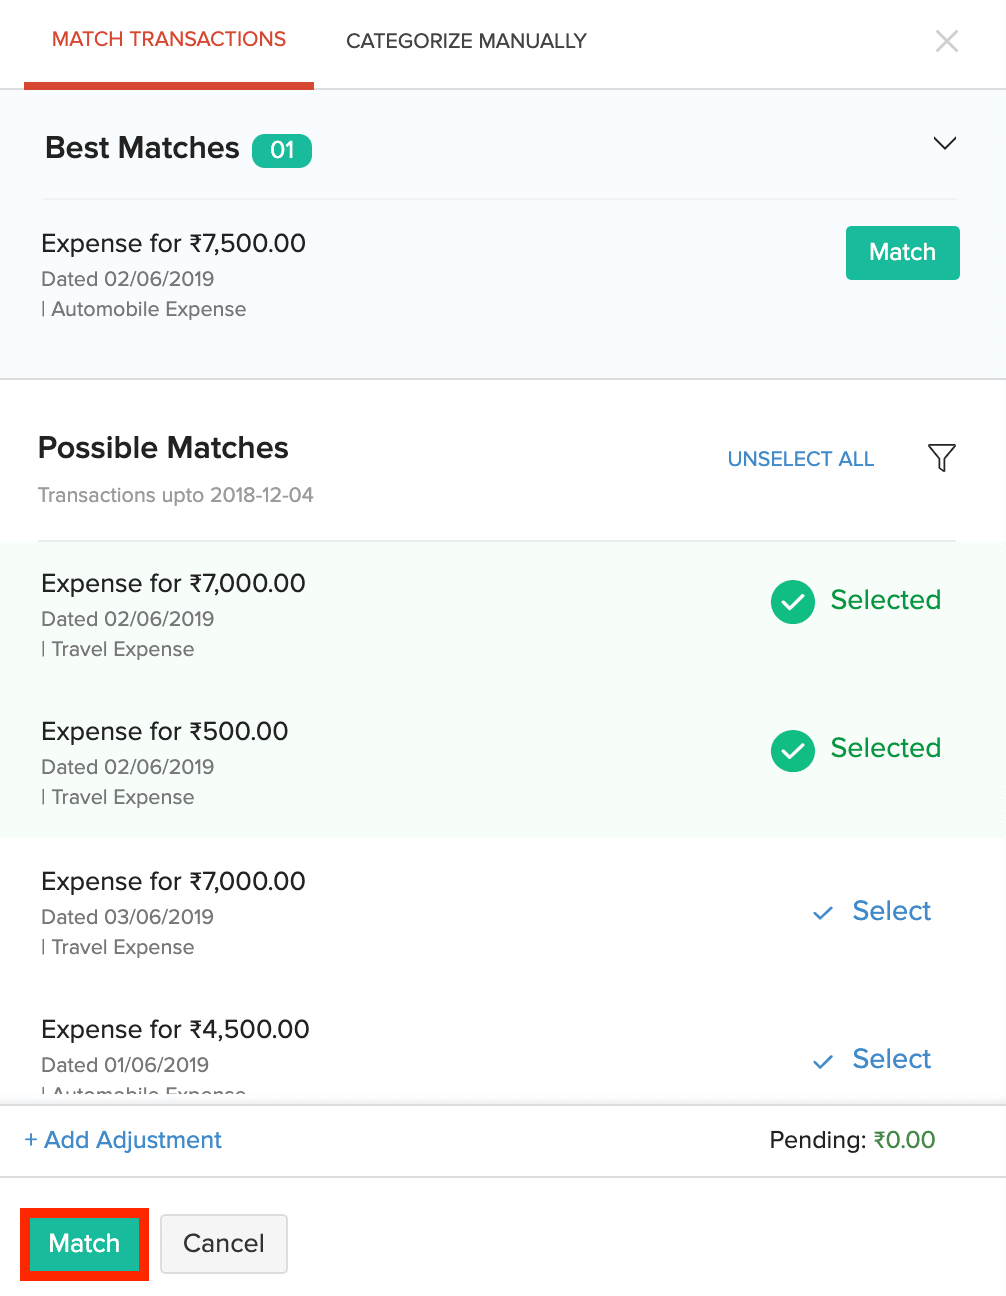
- Click on an uncategorized transaction, and you will see a list of transactions that can be matched with your uncategorized transaction.
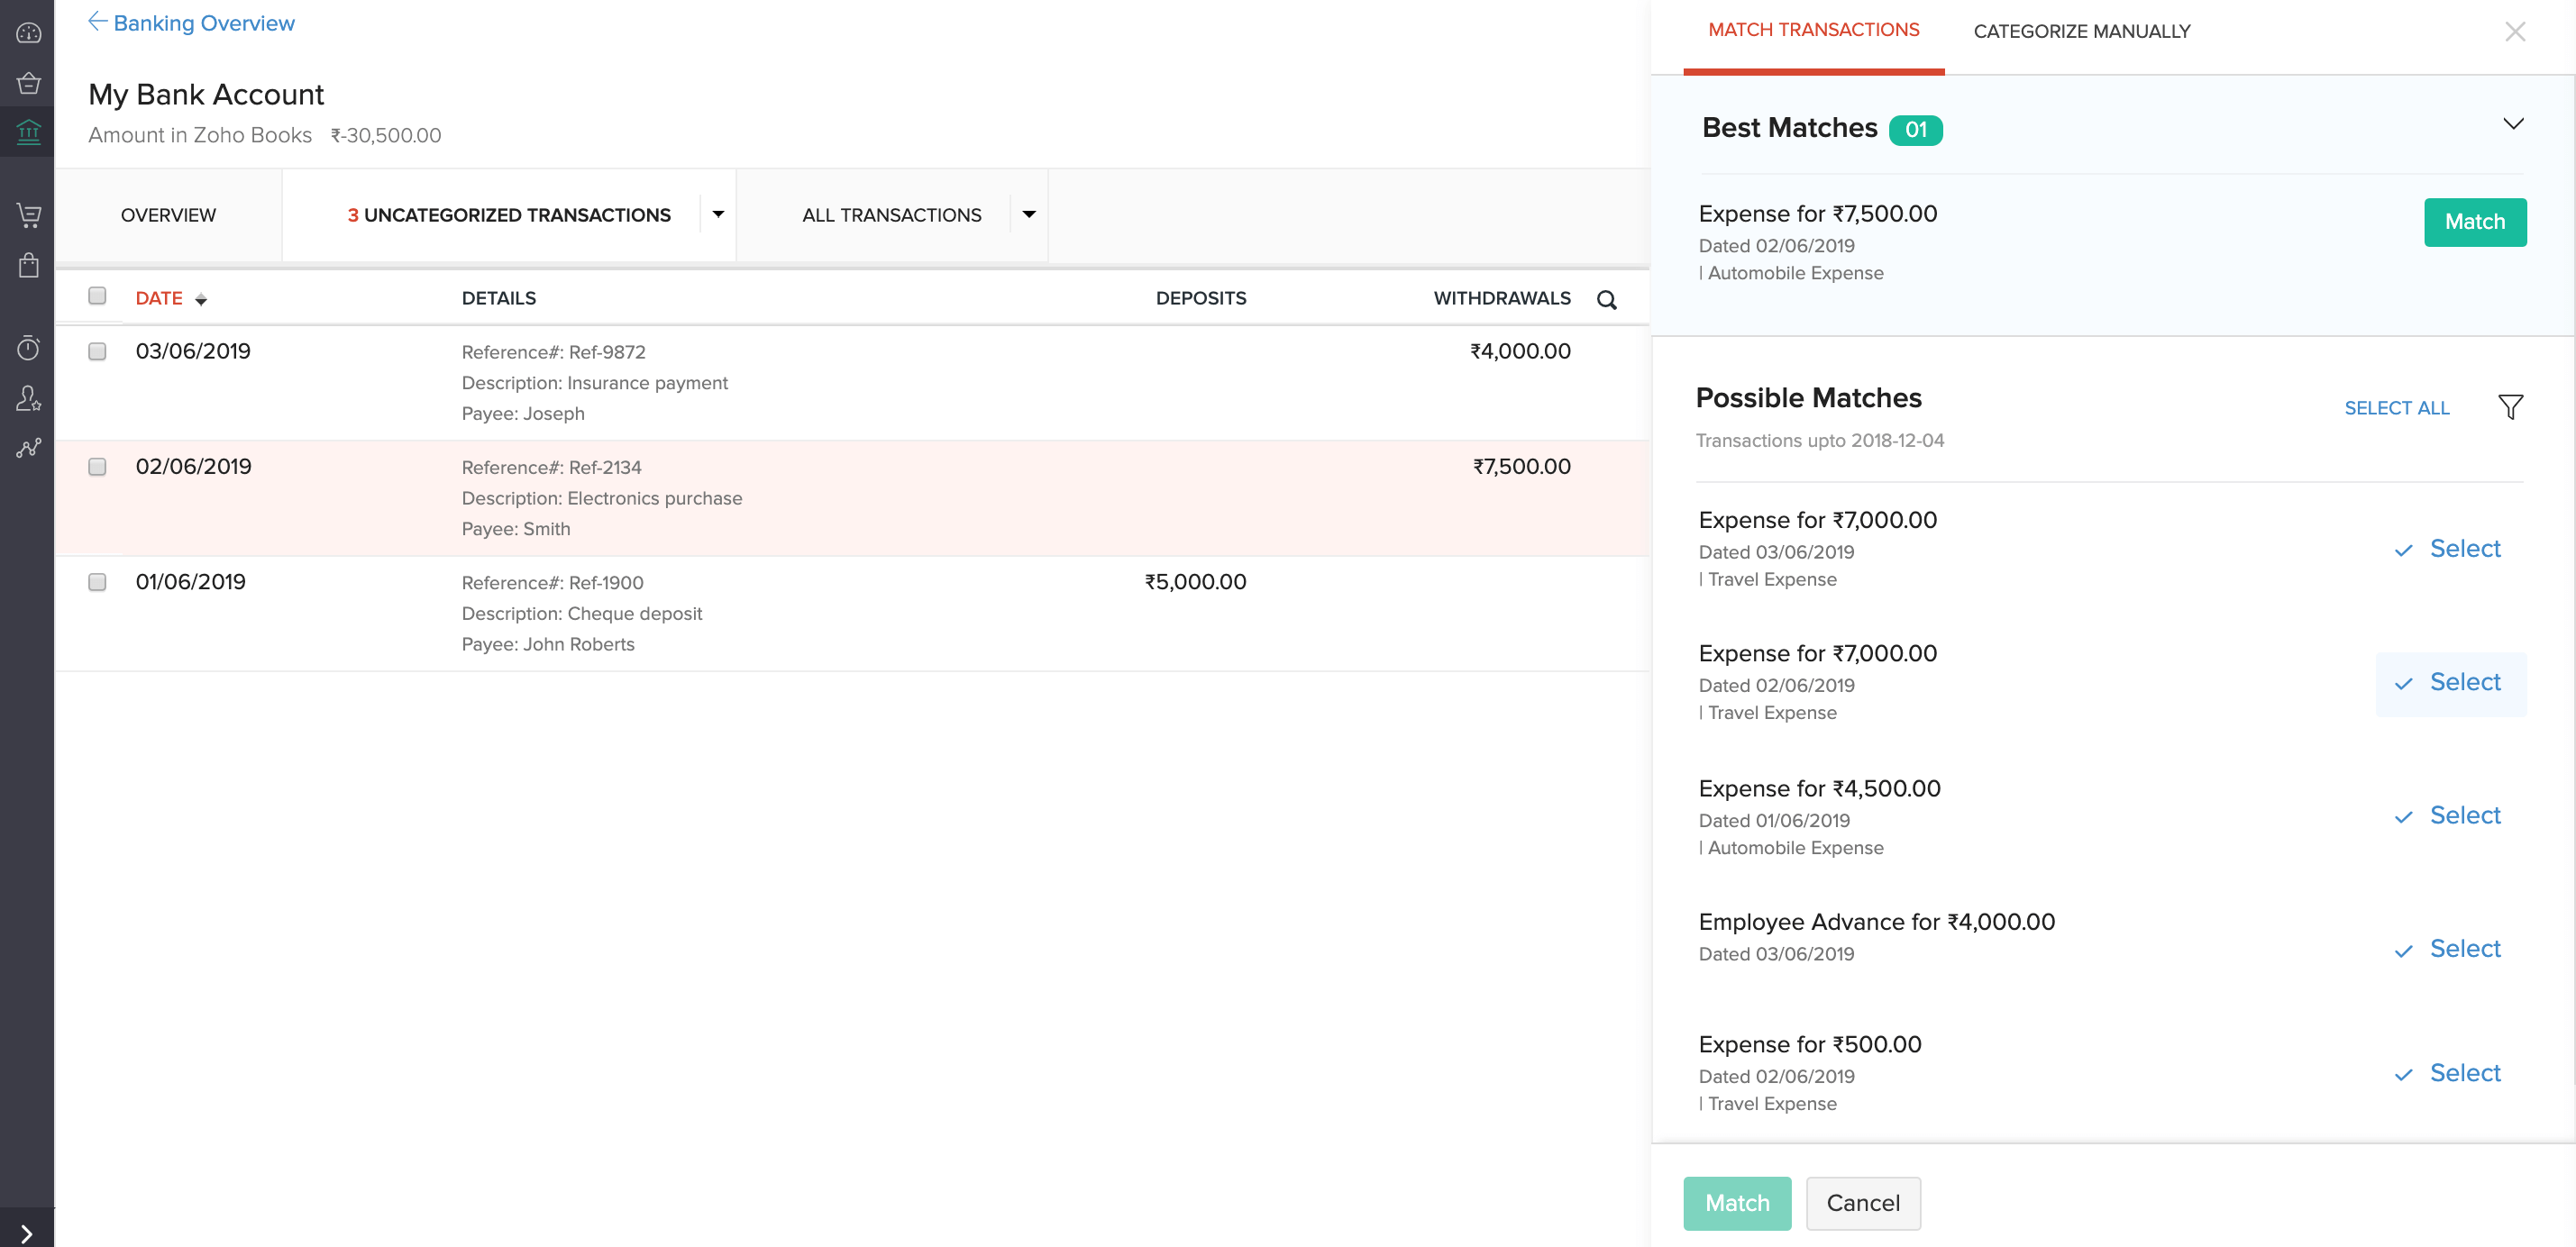
- On finding a transaction that can be matched, click Select.
- Click Match to match the transaction.
If the statement line does not have a matching transaction, or you do not want to associate it with an existing transaction, then you can categorize it manually using Categorize manually option located below the list of transactions.
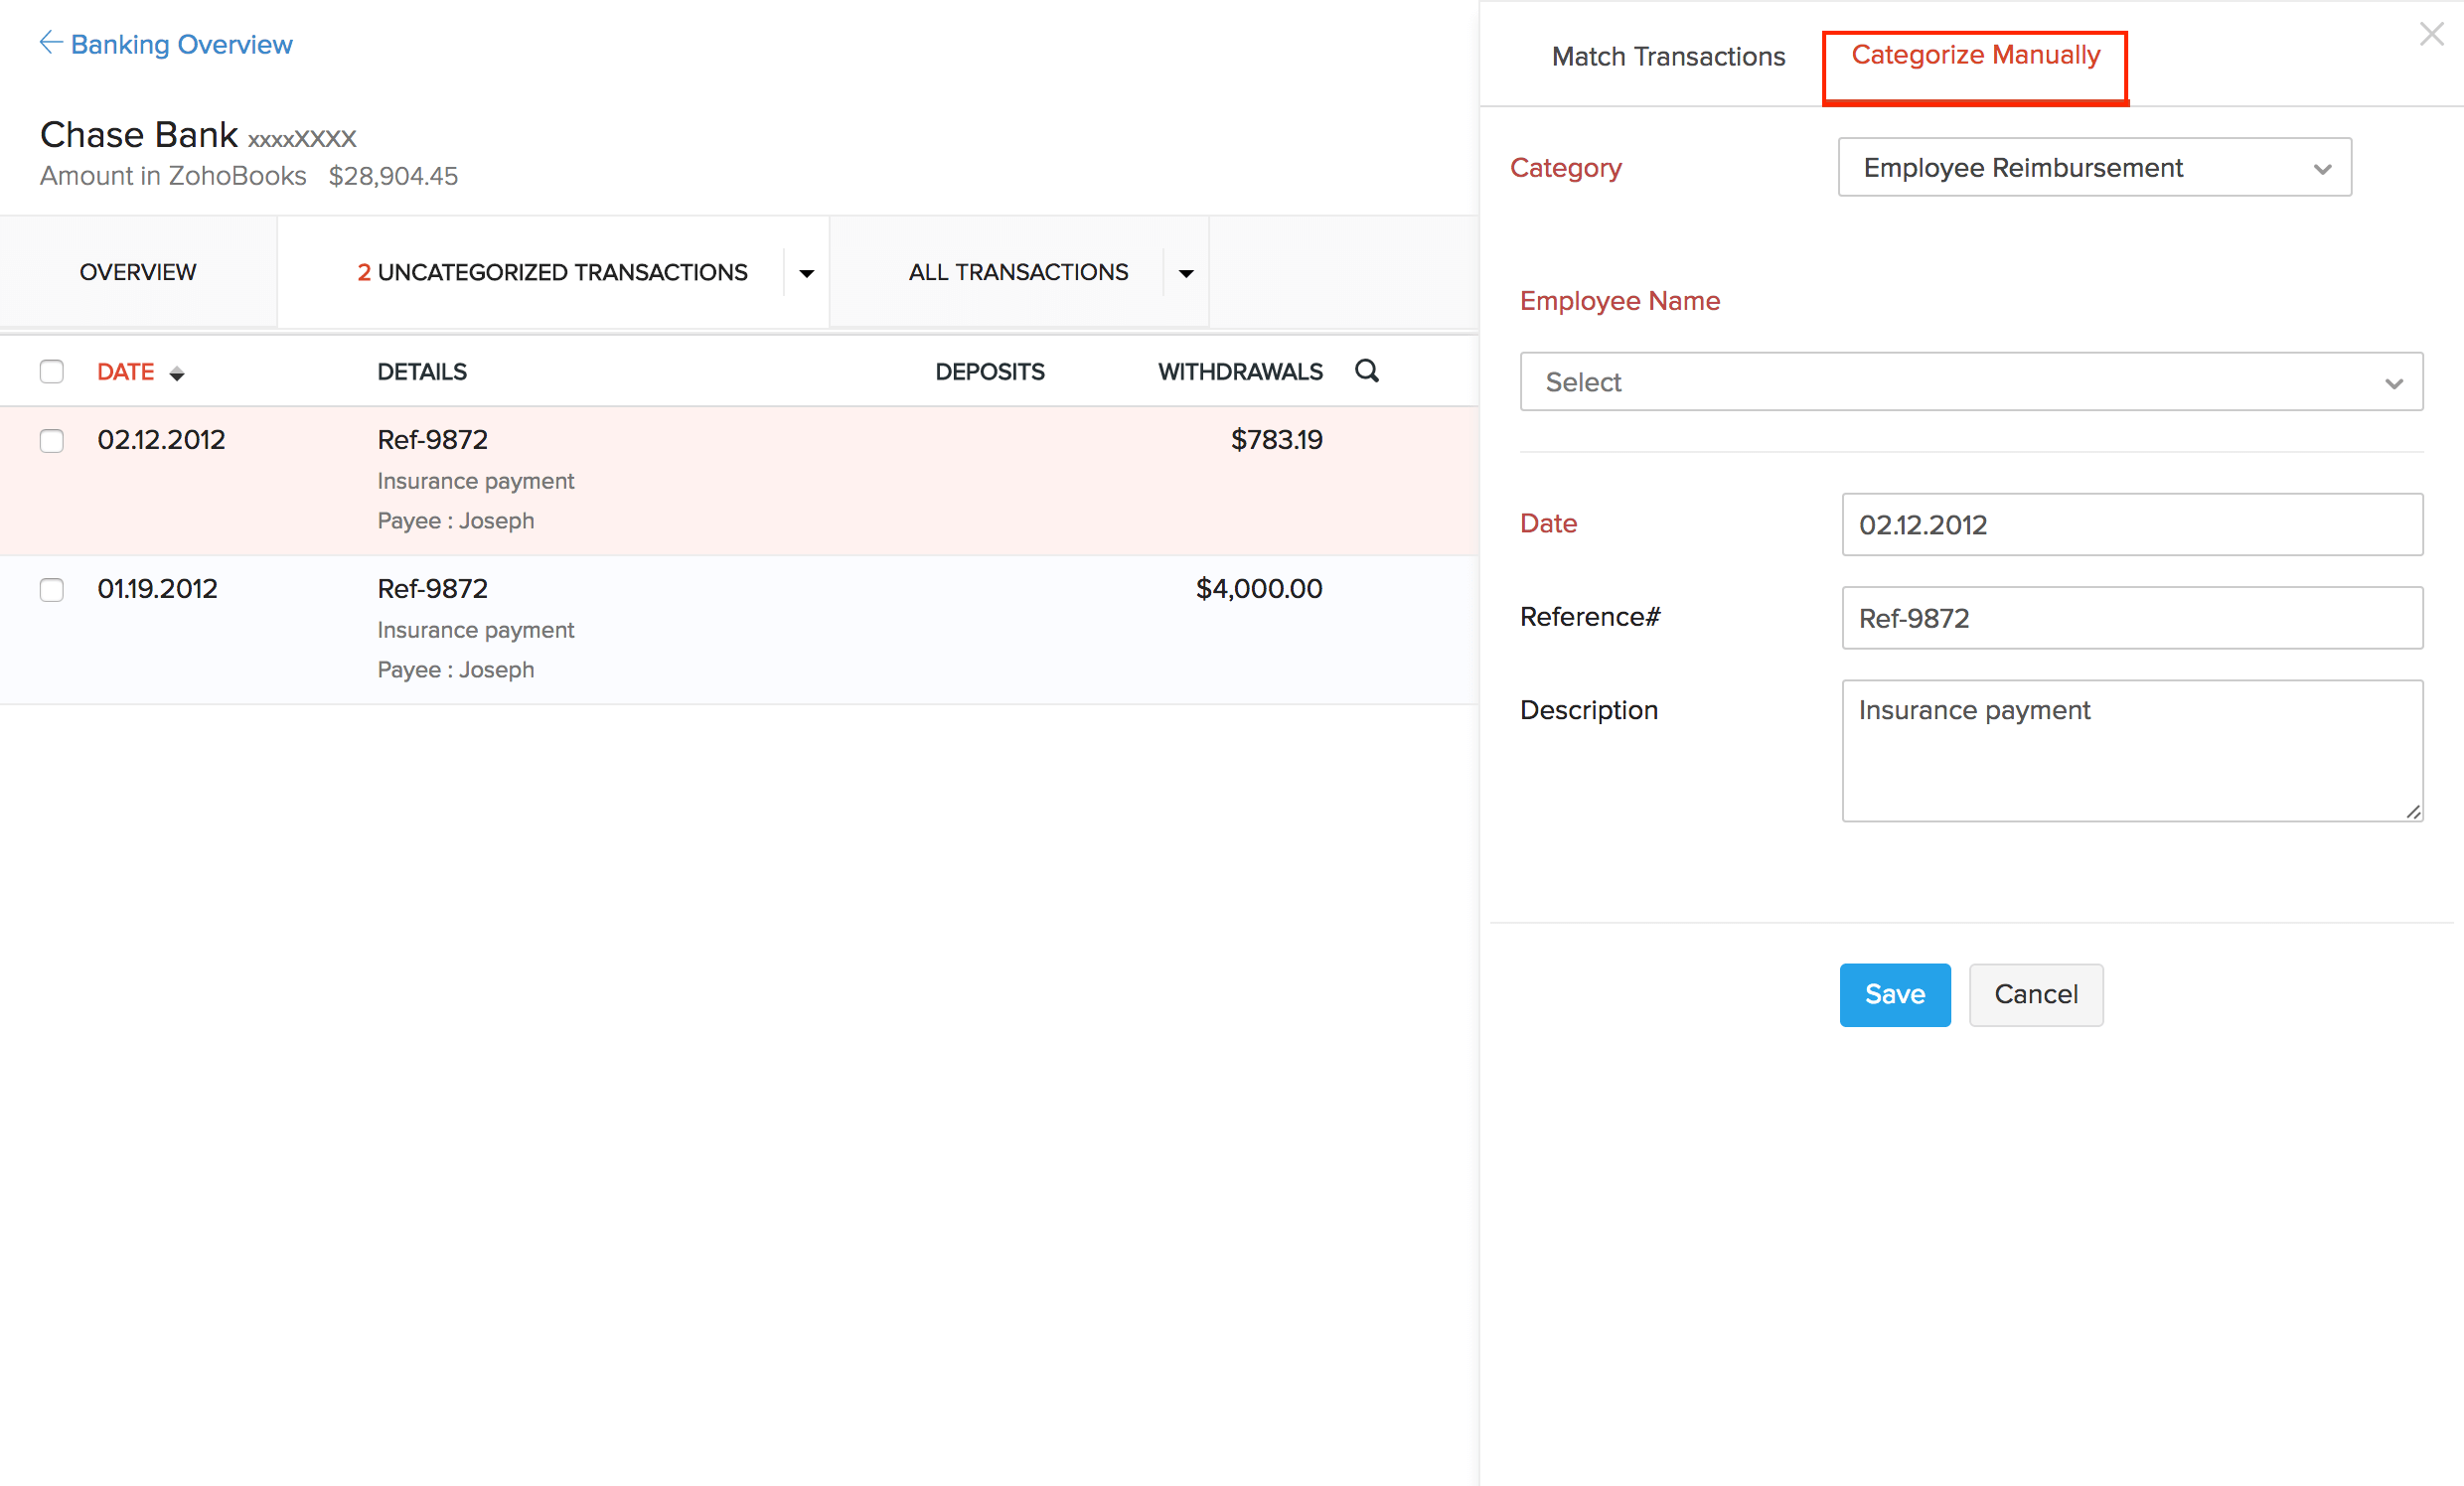
- Select Employee Reimbursement from Category drop-down.
- Choose the name of the Employee and the report with which you want to associate your uncategorized transaction.
- Click Save. Your transaction has been categorized.
Match Expense Categories under Chart of Accounts (CoA)
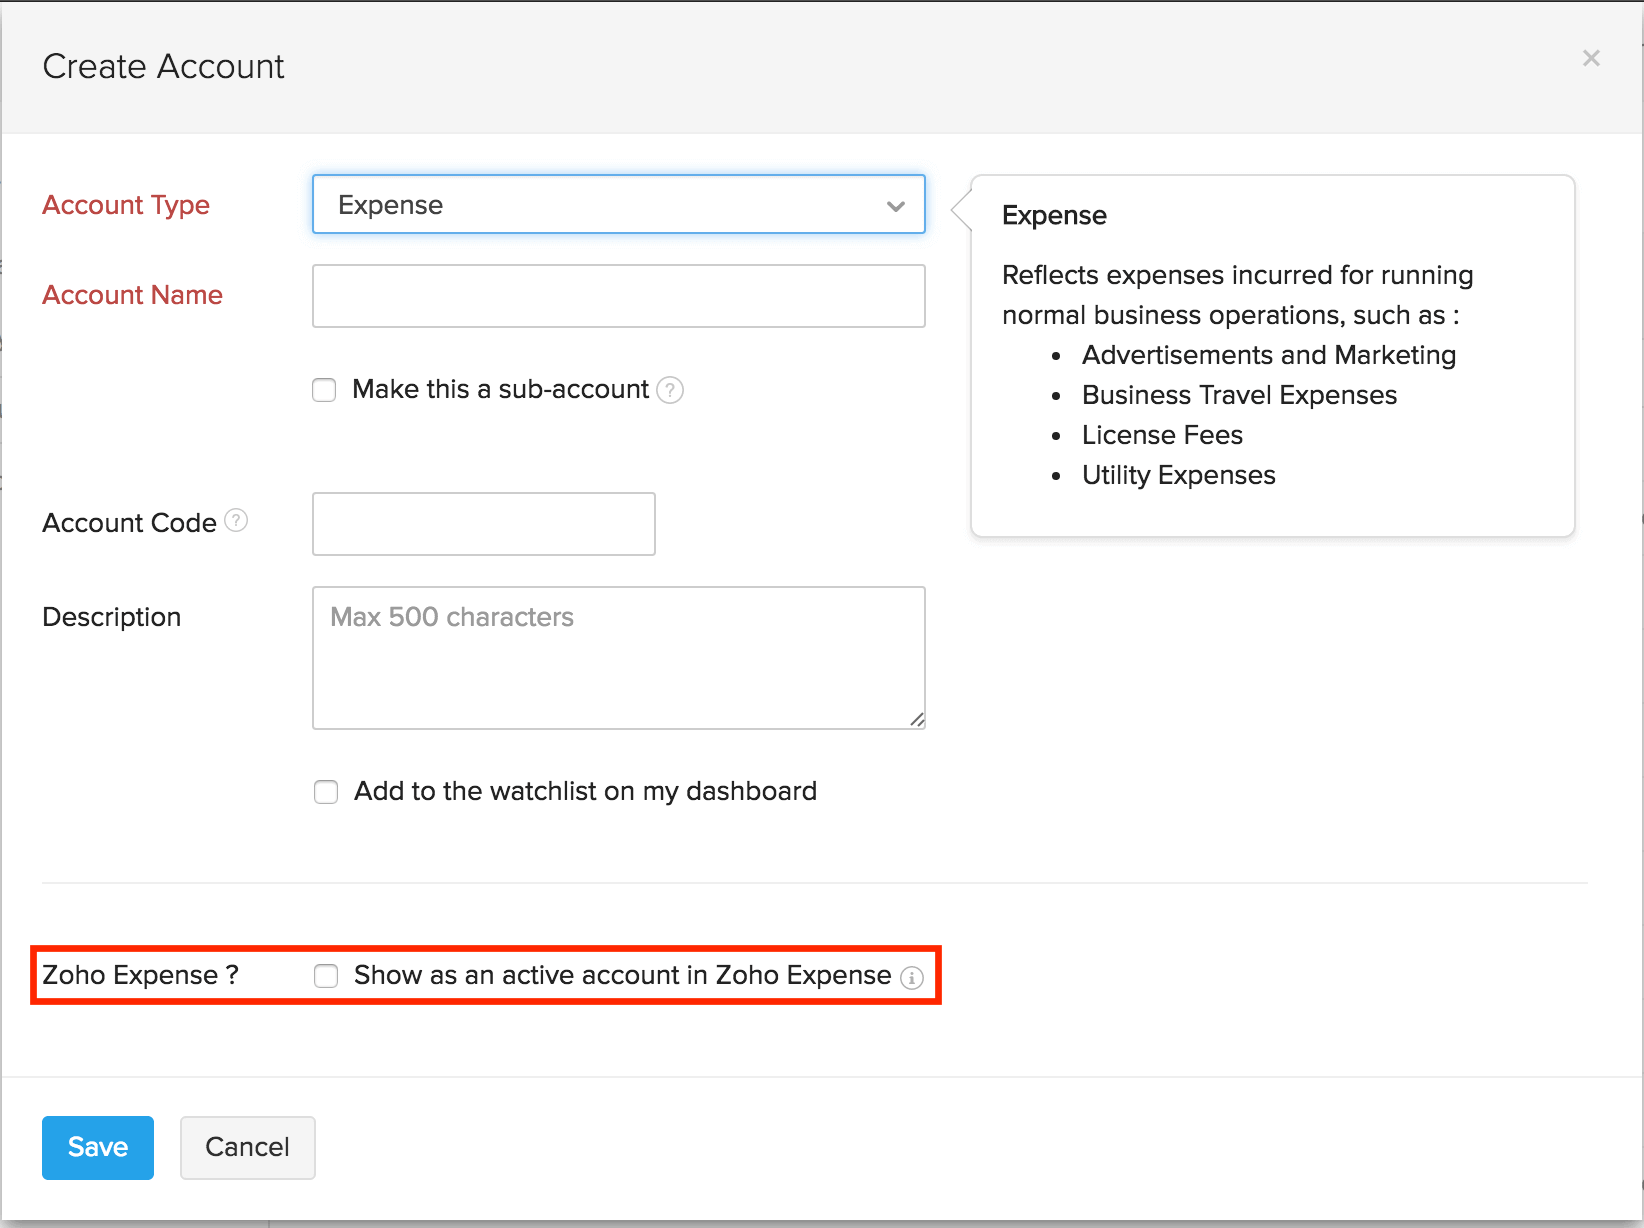
The expense categories created under the Categories section of Zoho Expense (Settings > Categories > + New Category) is automatically added under the Chart of Accounts section of Zoho Books. This saves you from re-creating the same category under Zoho Books.
Note: Newly created Chart of accounts will be an active category in Zoho Expense on checking the Show in Zoho Expense as an active account option in Zoho Books. Otherwise it will be visible as an inactive category in Zoho Expense. However, you can enable the inactive category. (To enable: Navigate to Admin > Settings > Categories > Click the filter drop-down in the top left corner of the page and select Inactive Categories > Select the category > Enable).
Sync Merchants and Vendors
If you want to use the vendors in Zoho Books to create expenses in Zoho Expense, you can contact support@zohoexpense.com and we will enable the sync. Once the sync is enabled, all the vendors in Zoho Books will be available as merchants in Zoho Expense, while the existing merchants in Zoho Expense will be deleted.
After the sync, if you create a merchant in Zoho Expense, it will be pushed as a vendor to Zoho Books automatically. Similarly, when you create a vendor in Zoho Books, it will be pushed as a merchant to Zoho Expense automatically.