Zoho Expense - Xero Integration
In this guide, you’ll learn how to integrate your Zoho Expense account with Xero’s accounting software. Before we do that, let’s take a look at some of it’s benefits.
- Accounting for your expenses: This integration will help you to account for your expenses that have been recorded in Zoho Expense.
- Avoid double entry: You can auto-export your expenses from Zoho Expense to Xero and they will be readily available in Xero for accounting. Hence, there is no need for re-entering your expenses in Xero.
How It Works
Once you integrate Zoho Expense and Xero, all your Expense Accounts, Customers and Tracking Categories in Xero are imported as Categories, Customers and Tags respectively. The reimbursable expenses are exported as Bills and the non-reimbursable expenses are exported as Bank Transactions to Xero.

Authorize Access to Xero
This is the first step towards setting up the integration with Xero. To set up:
- Click Admin View.
- Go to Settings on the left sidebar.
(OR)
Click the Gear icon at the top right side.

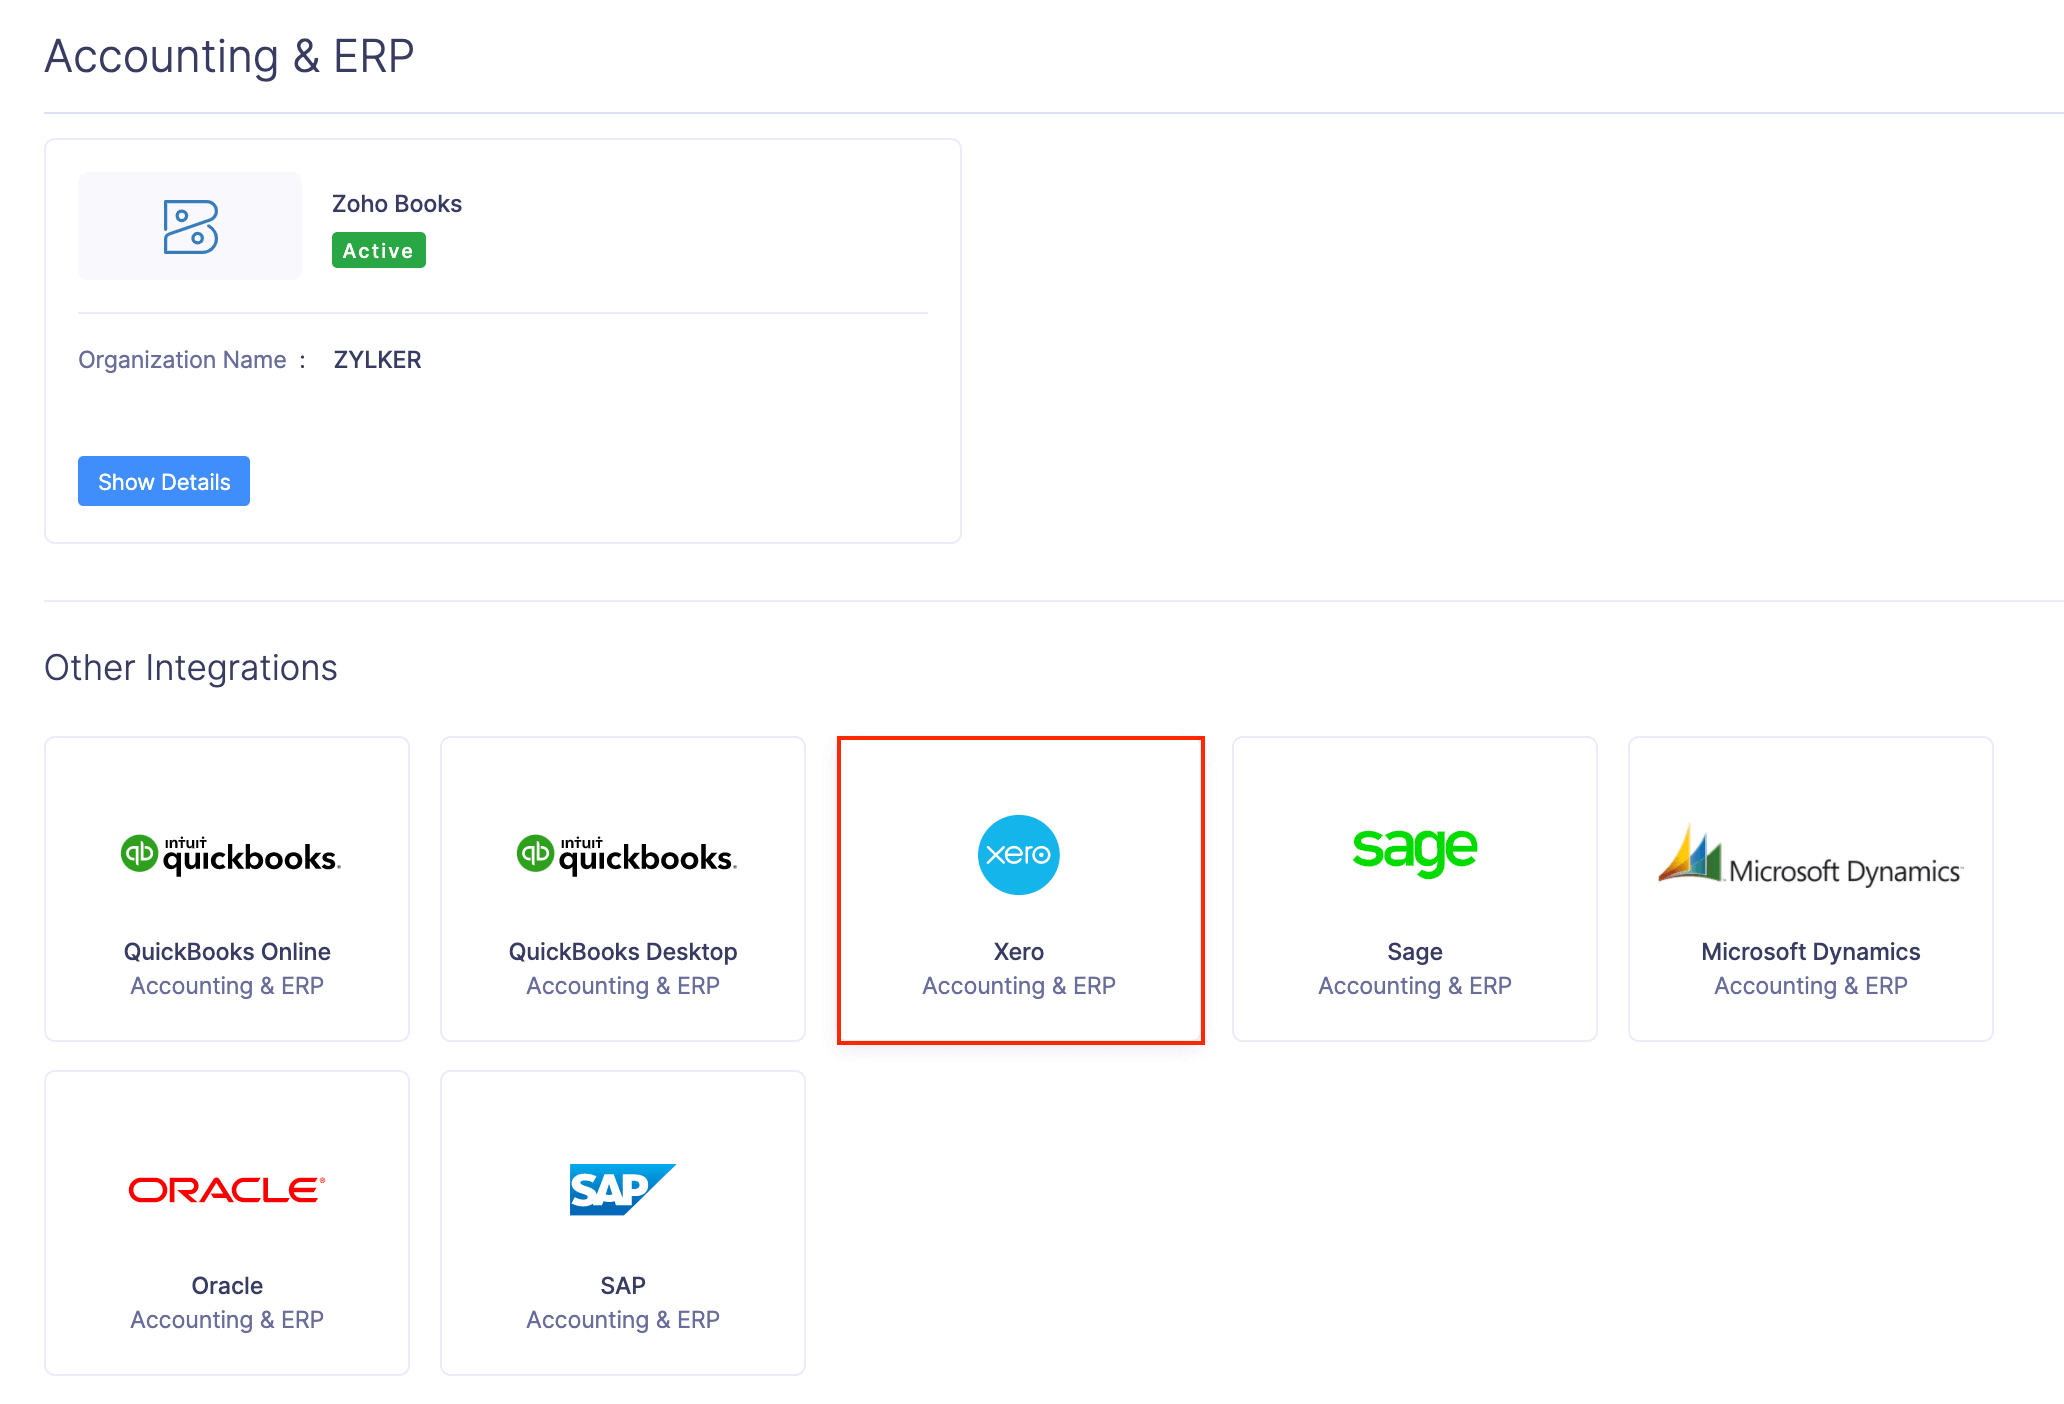
- Go to Accounting & ERP under Integrations.
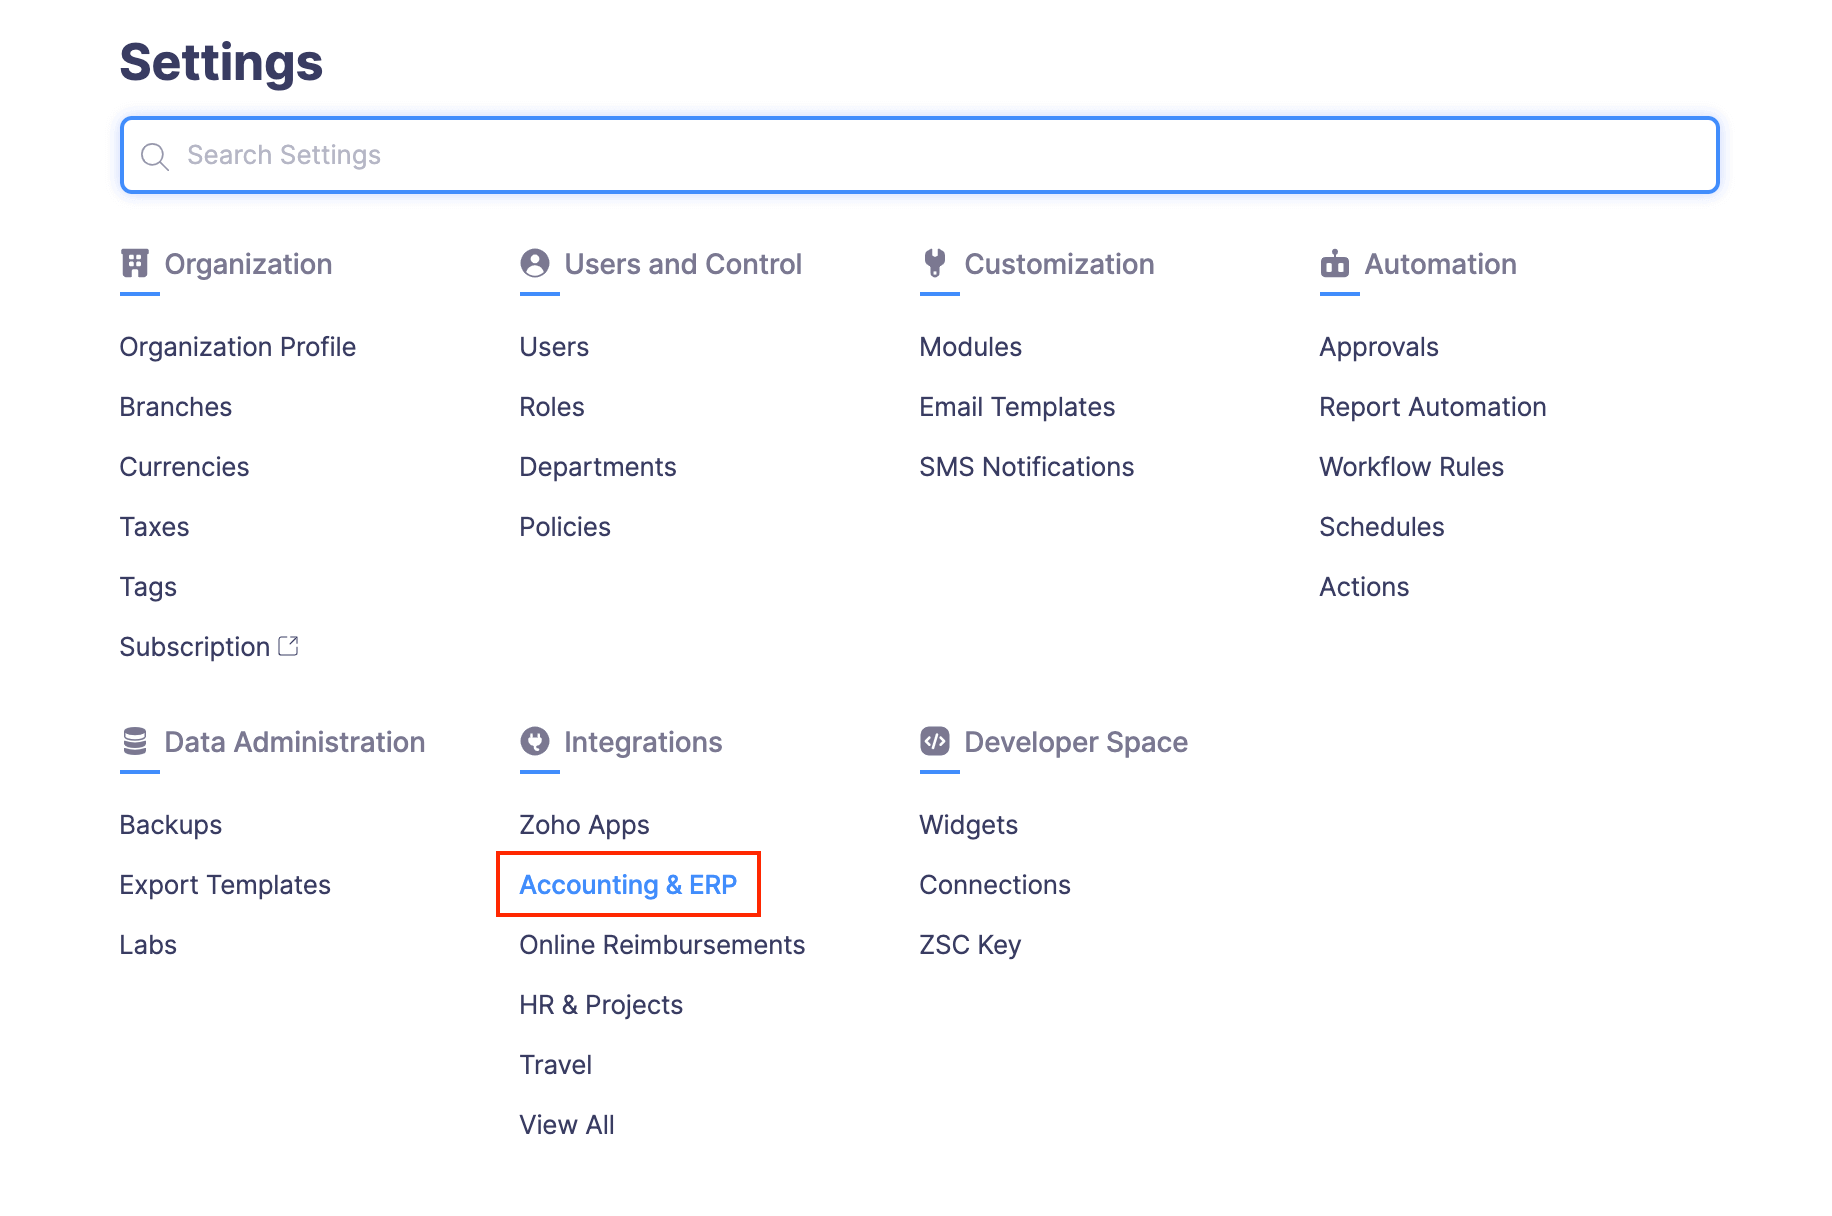
- Click Xero.
- Click the Connect to Xero button.
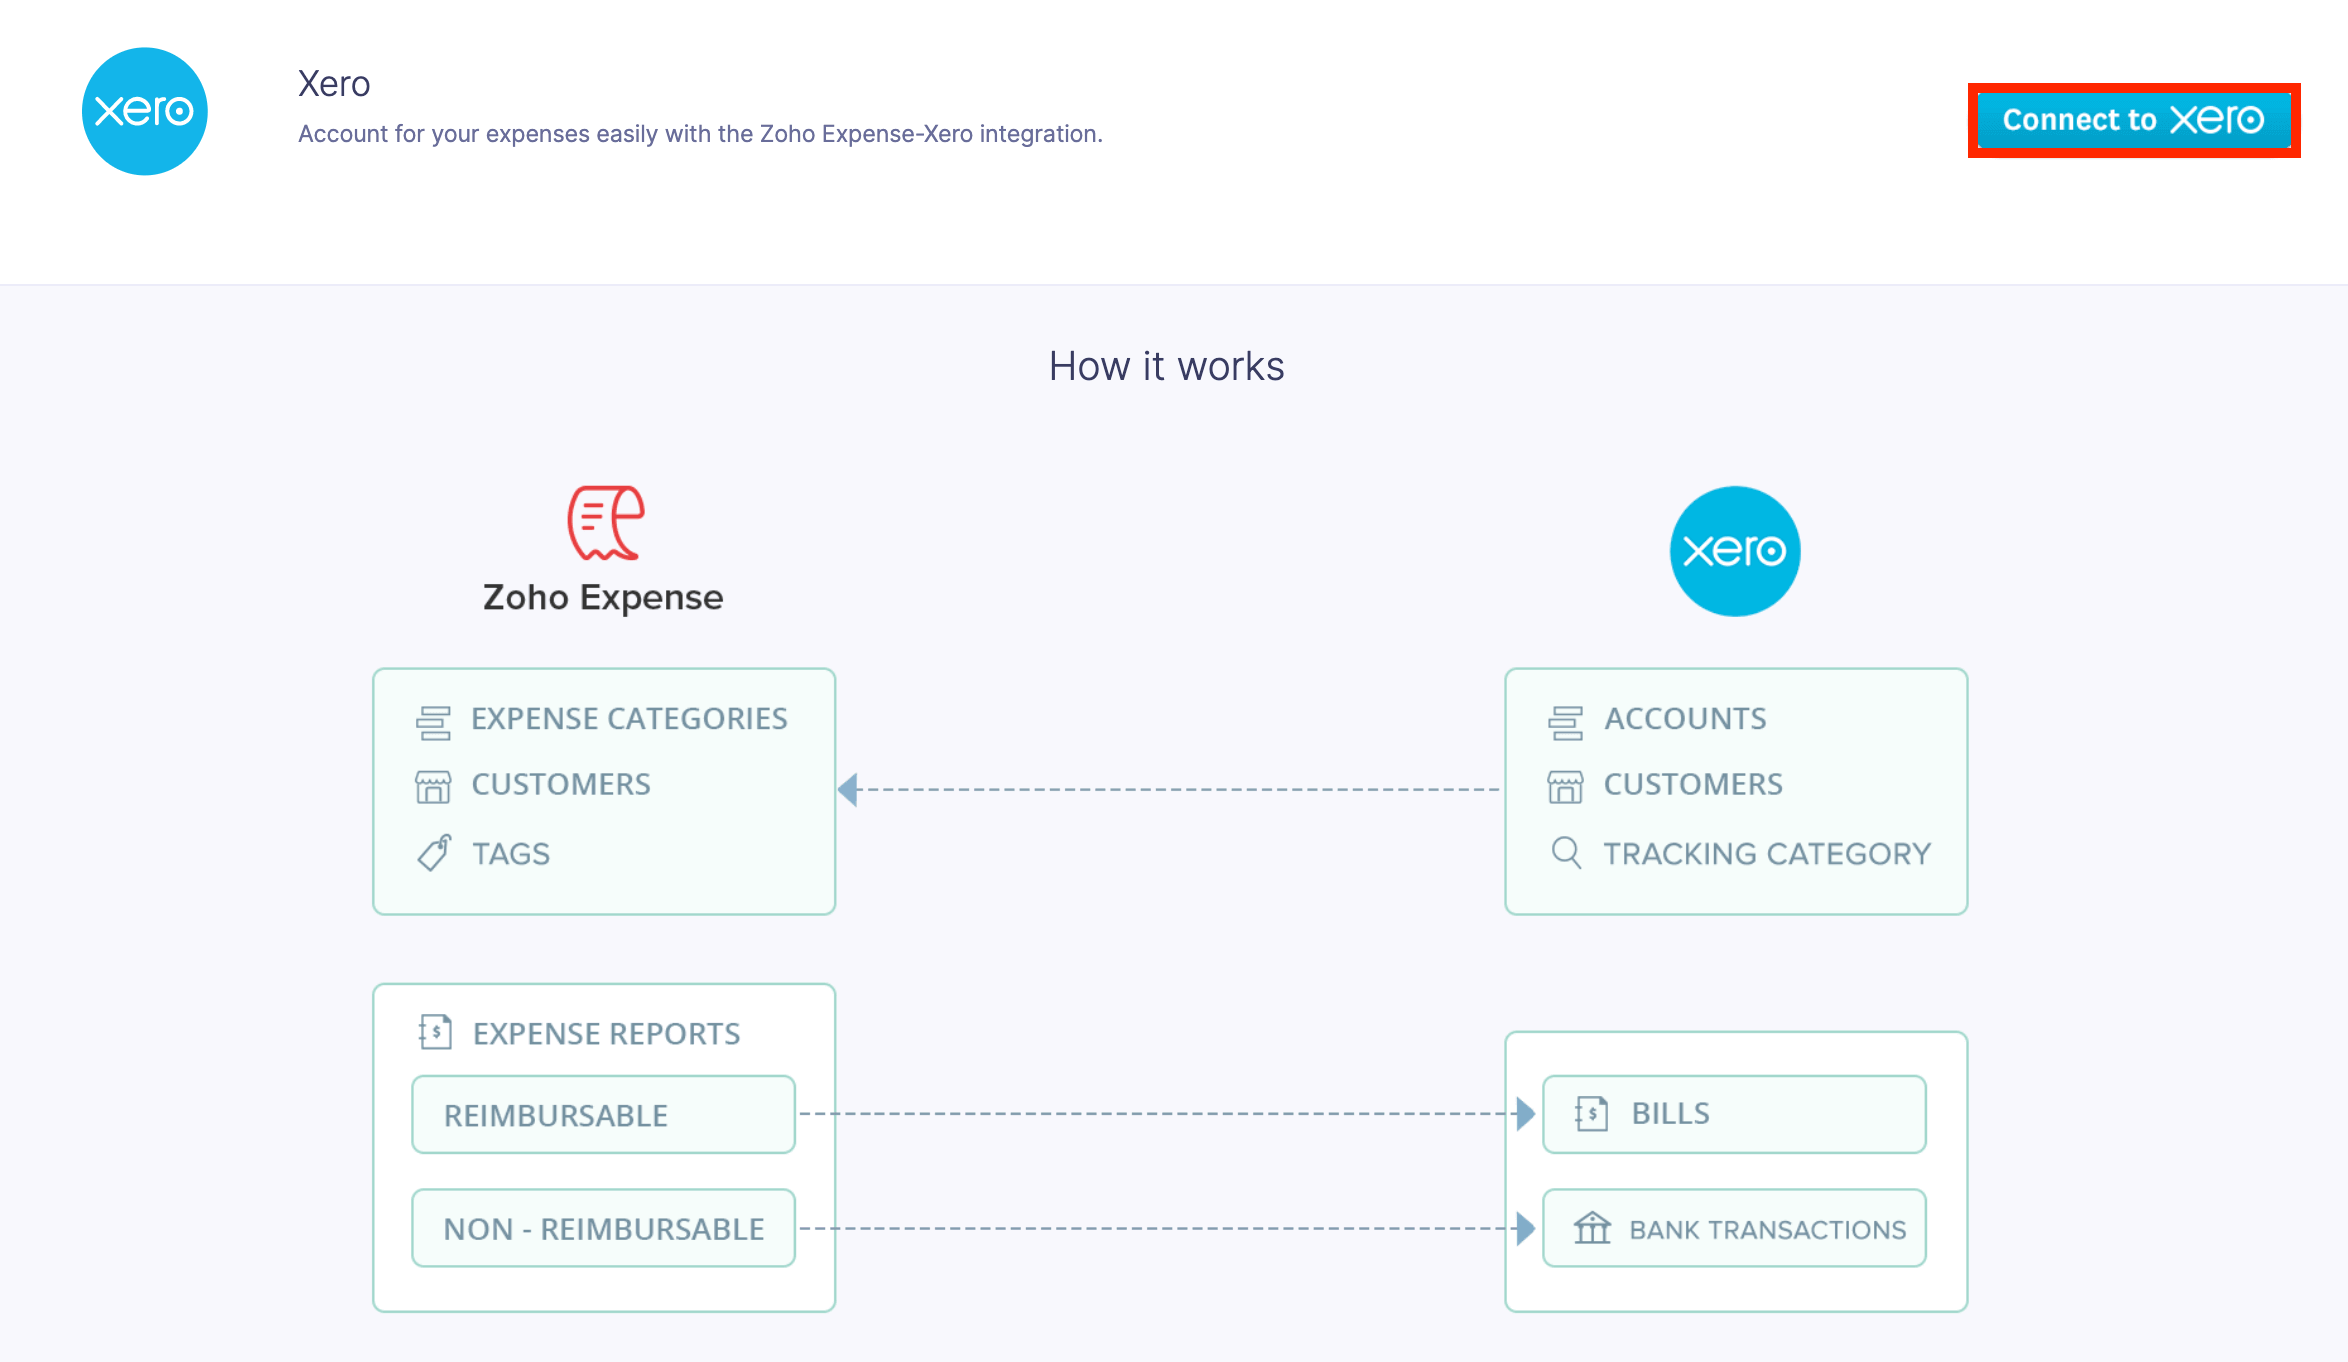
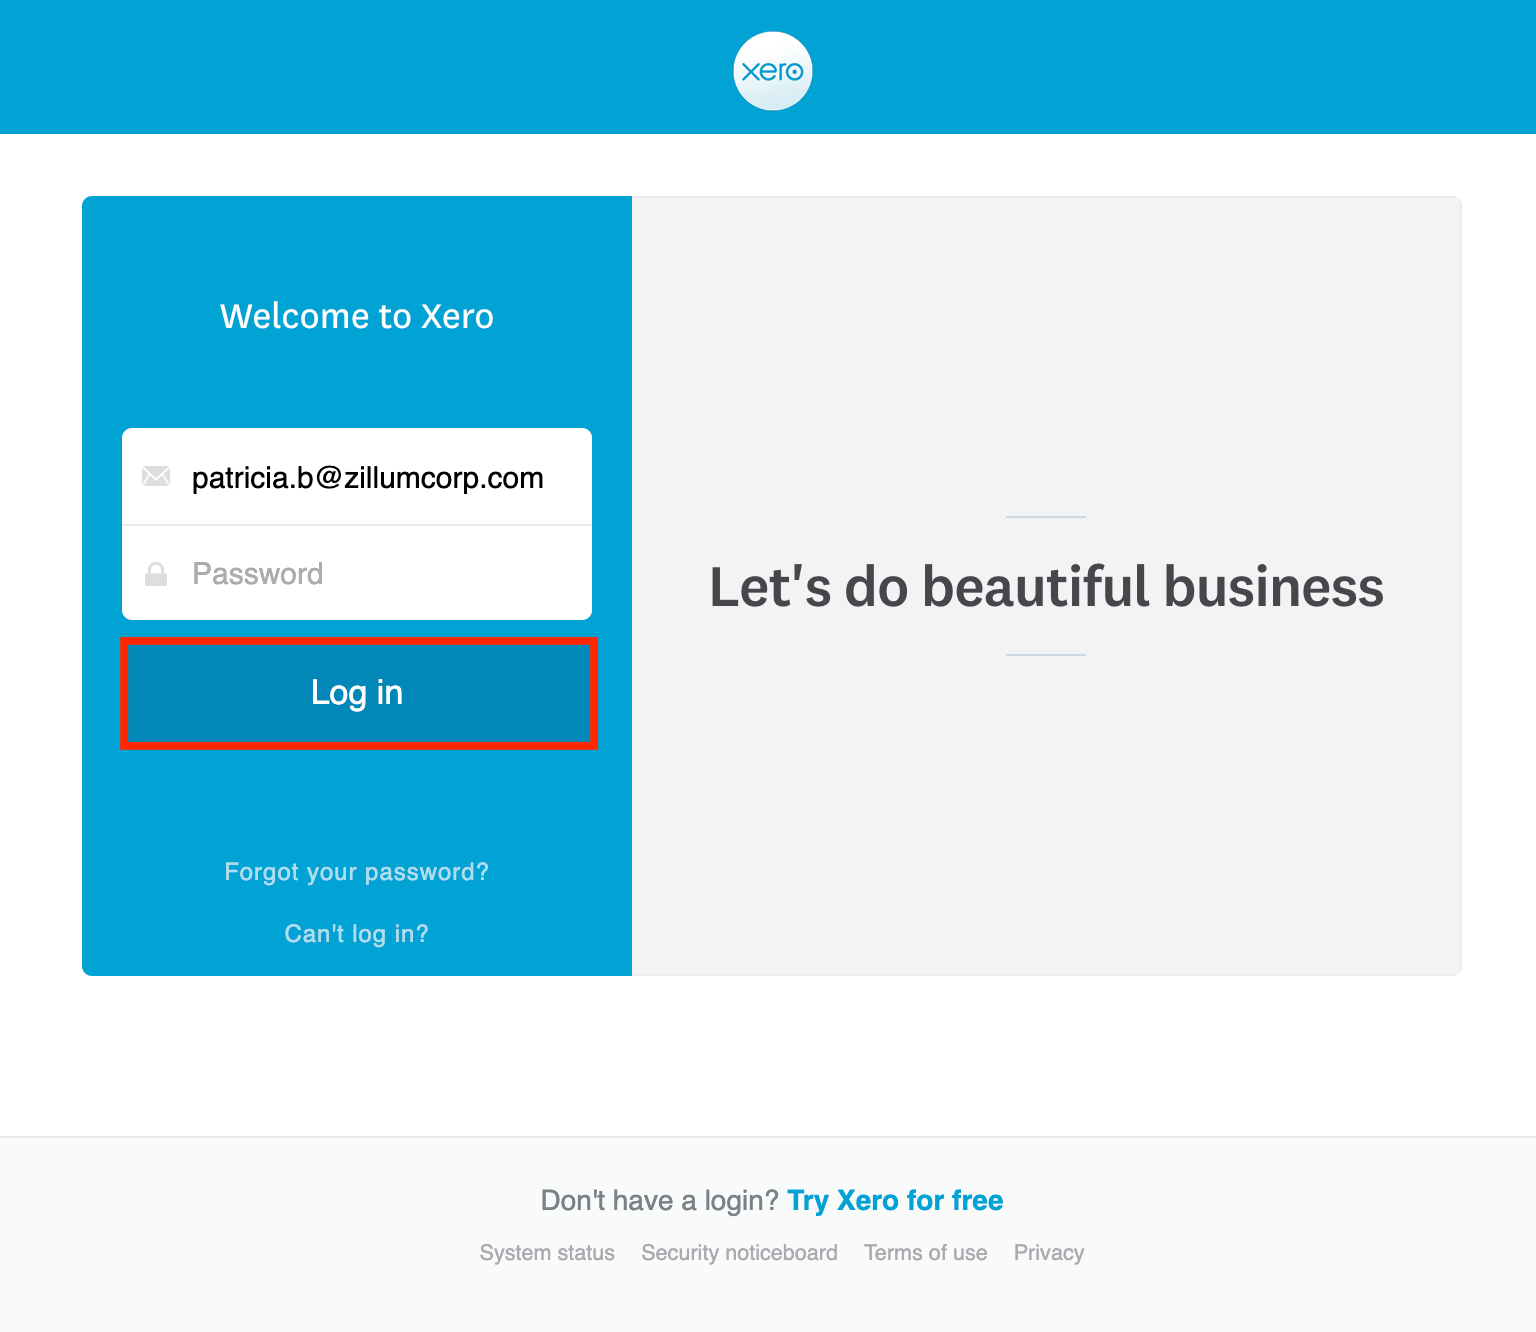
By doing so, you will be redirected to Xero’s sign-in page:
- Enter your credentials and sign in.
- Select the organization which you want to connect with Zoho Expense.
- Click the Allow access button to complete the authorization.
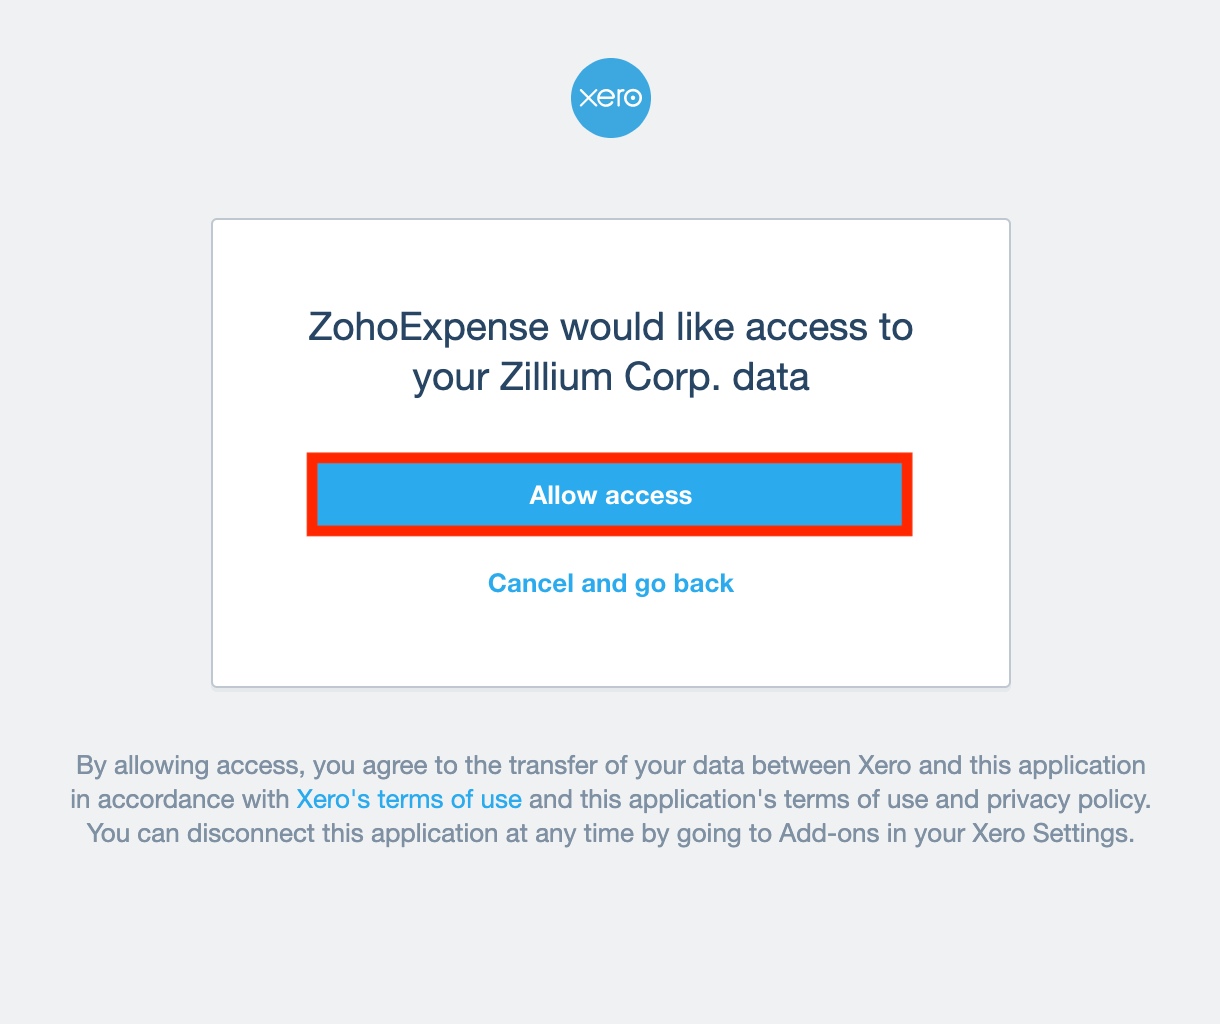
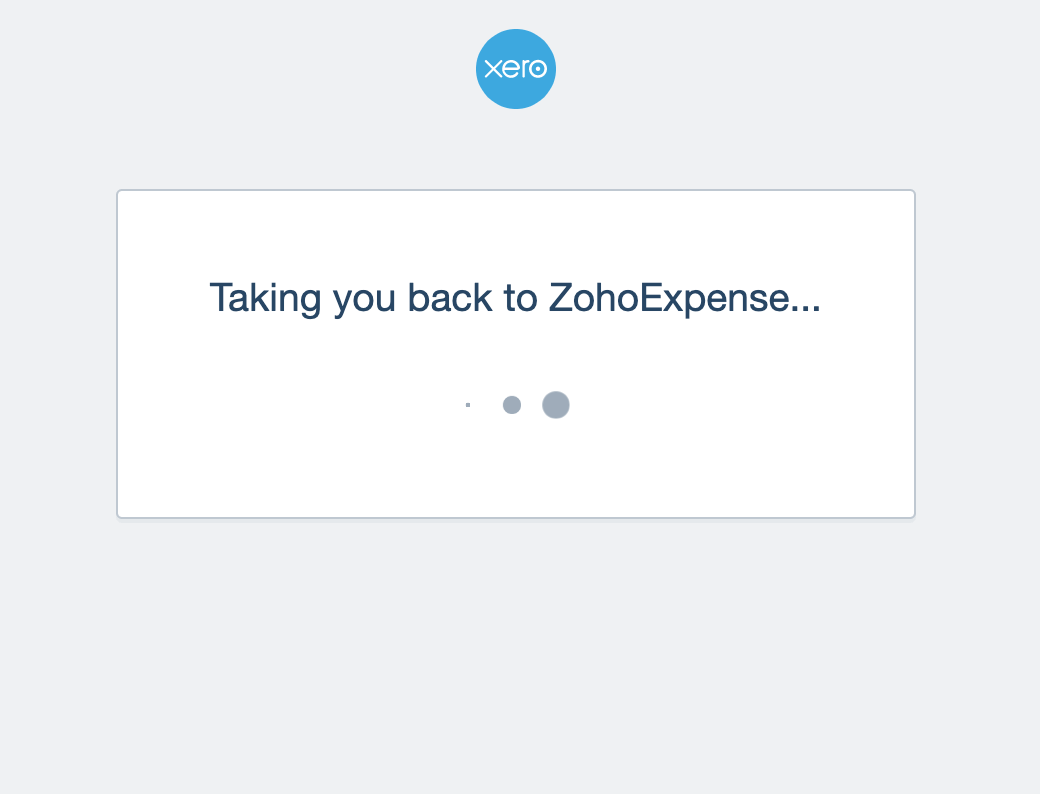
- Once this is done, you will be redirected back to Zoho Expense.
Note: You cannot connect multiple Xero organizations to your Zoho Expense organization and vice versa. Also, ensure that the organizations in both Xero and Zoho Expense have the same base currency.
Configure the Integration
Once you authorize access to Xero, you will be redirected to your Zoho Expense account to set it up. Here, you can configure how the data has to be imported from Xero and exported to Xero. Also, you can map Zoho Expense’s fields with Xero’s fields.
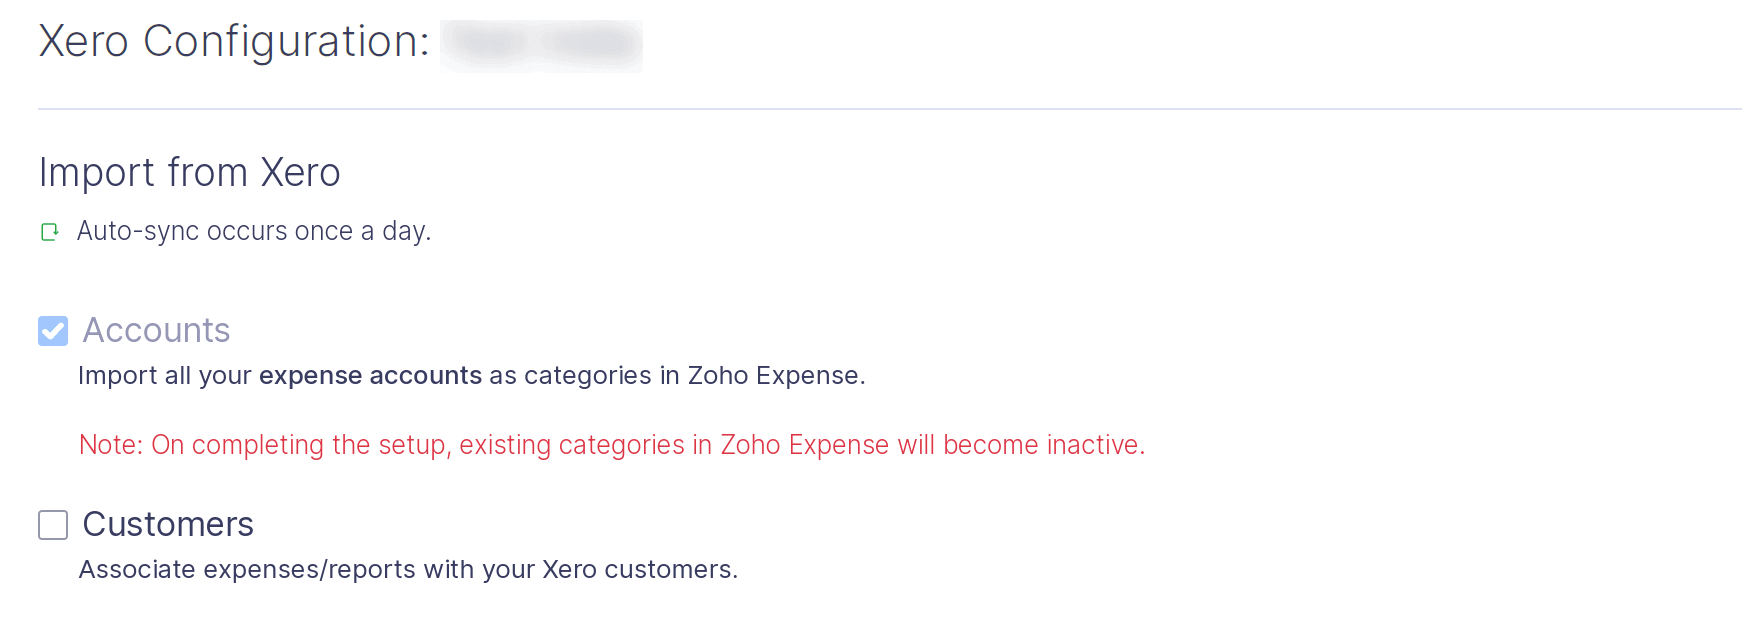
Import from Xero
To export expenses from Zoho Expense to Xero, the expense accounts and customers in Xero has to be fetched. It is for this purpose, we import data from Xero.
- Accounts: The expense accounts in Xero can be imported as categories in Zoho Expense. As a result, the existing categories in Zoho Expense will become inactive.
Note: You will not be able to export the expenses that have been associated with the categories that are activated after the sync.
- Customers: All your customers from Xero can be imported to Zoho Expense. These imported customers can be associated with your expenses in Zoho Expense.
-
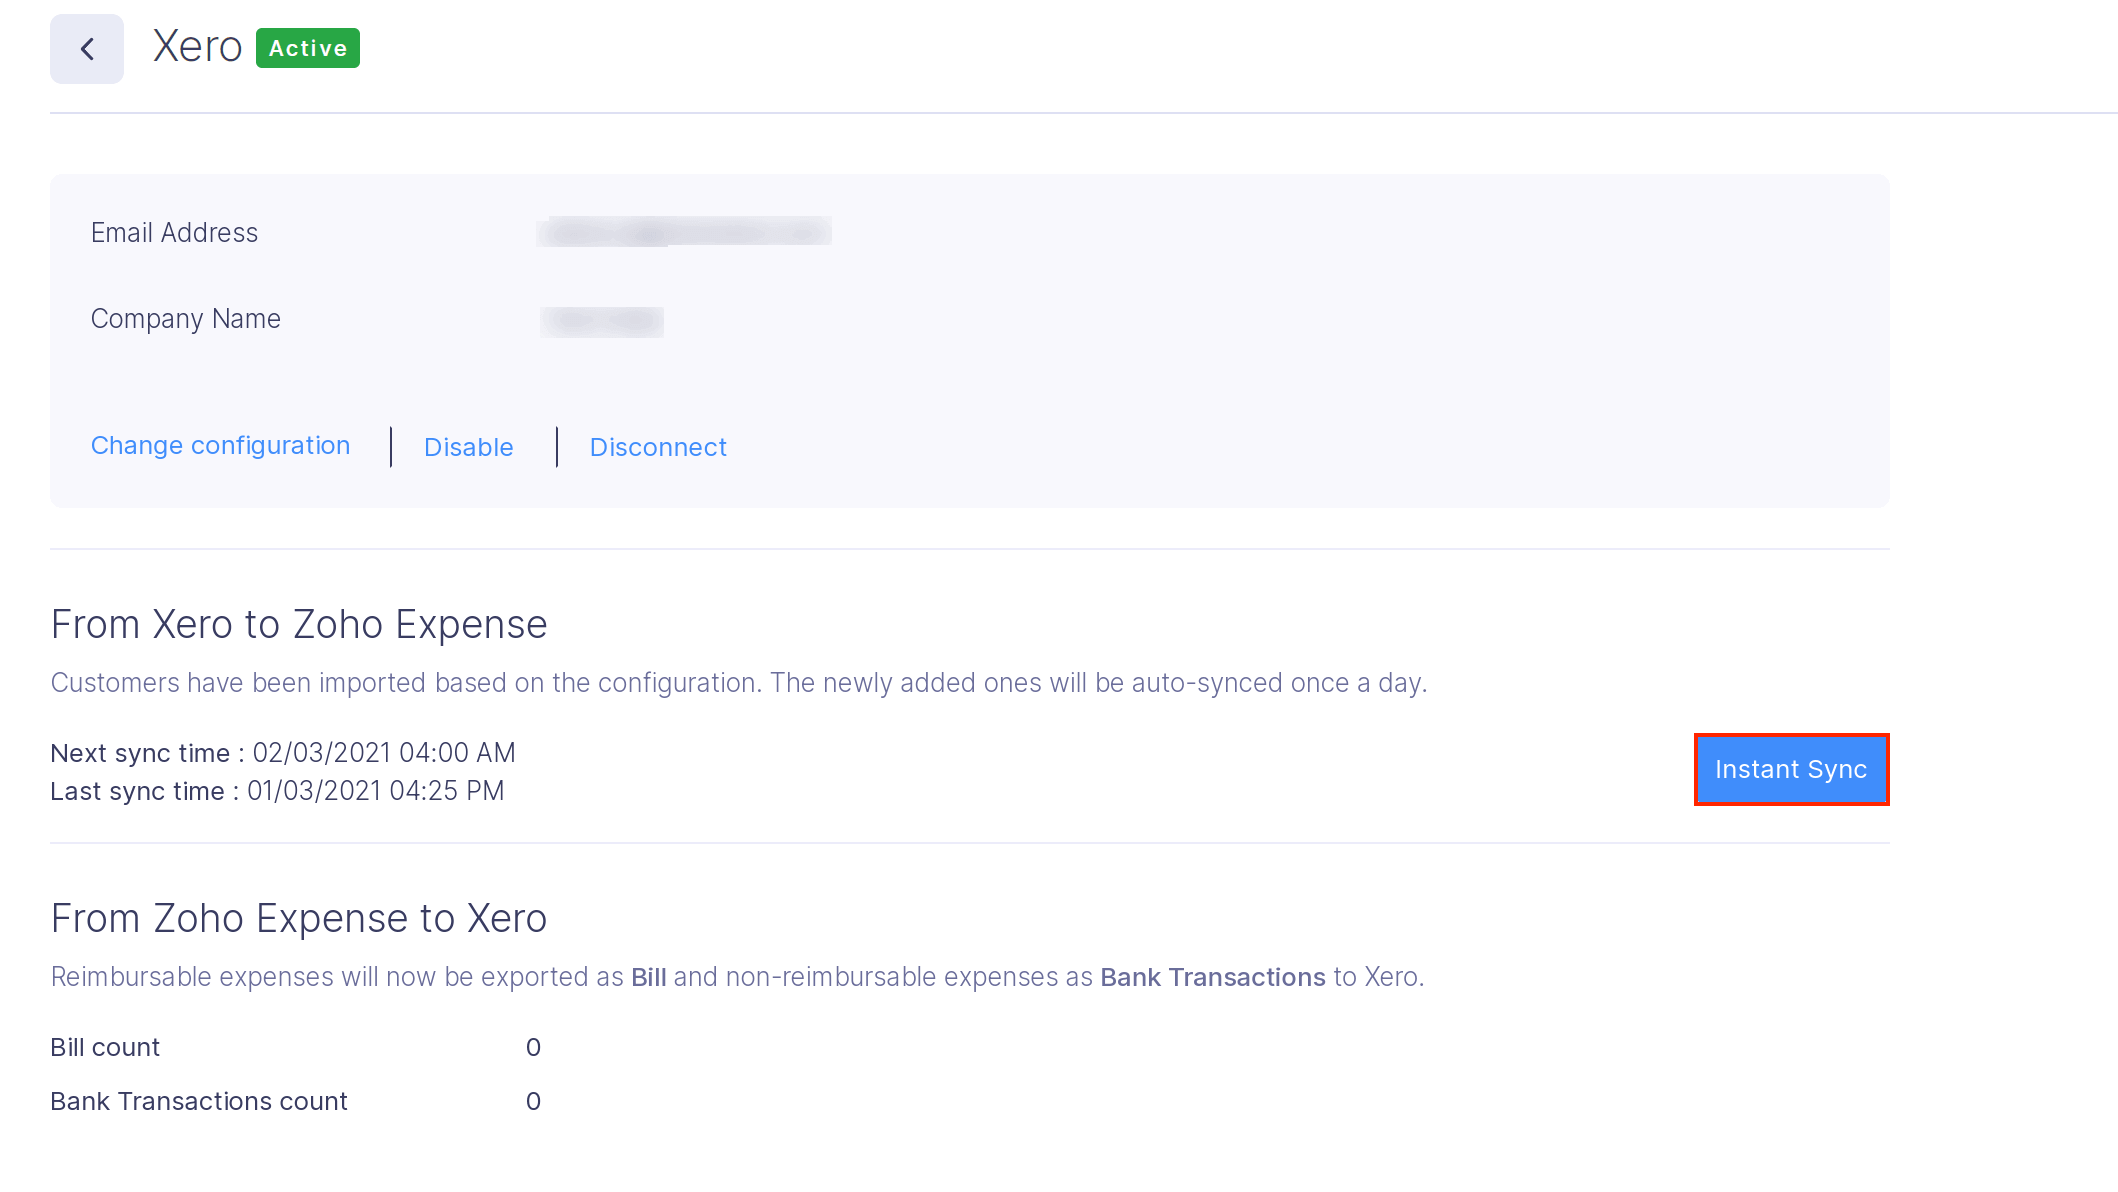
Any new addition to the list of customers or expense accounts in your Xero account will be automatically reflected in Zoho Expense, by virtue of the auto-sync that occurs once a day.
-
If you wish to view the changes immediately, you can do so by clicking the Instant Sync button.
Export to Xero
Let’s take a look at how you can export the reimbursable and non-reimbursable expenses from Zoho Expense to Xero.
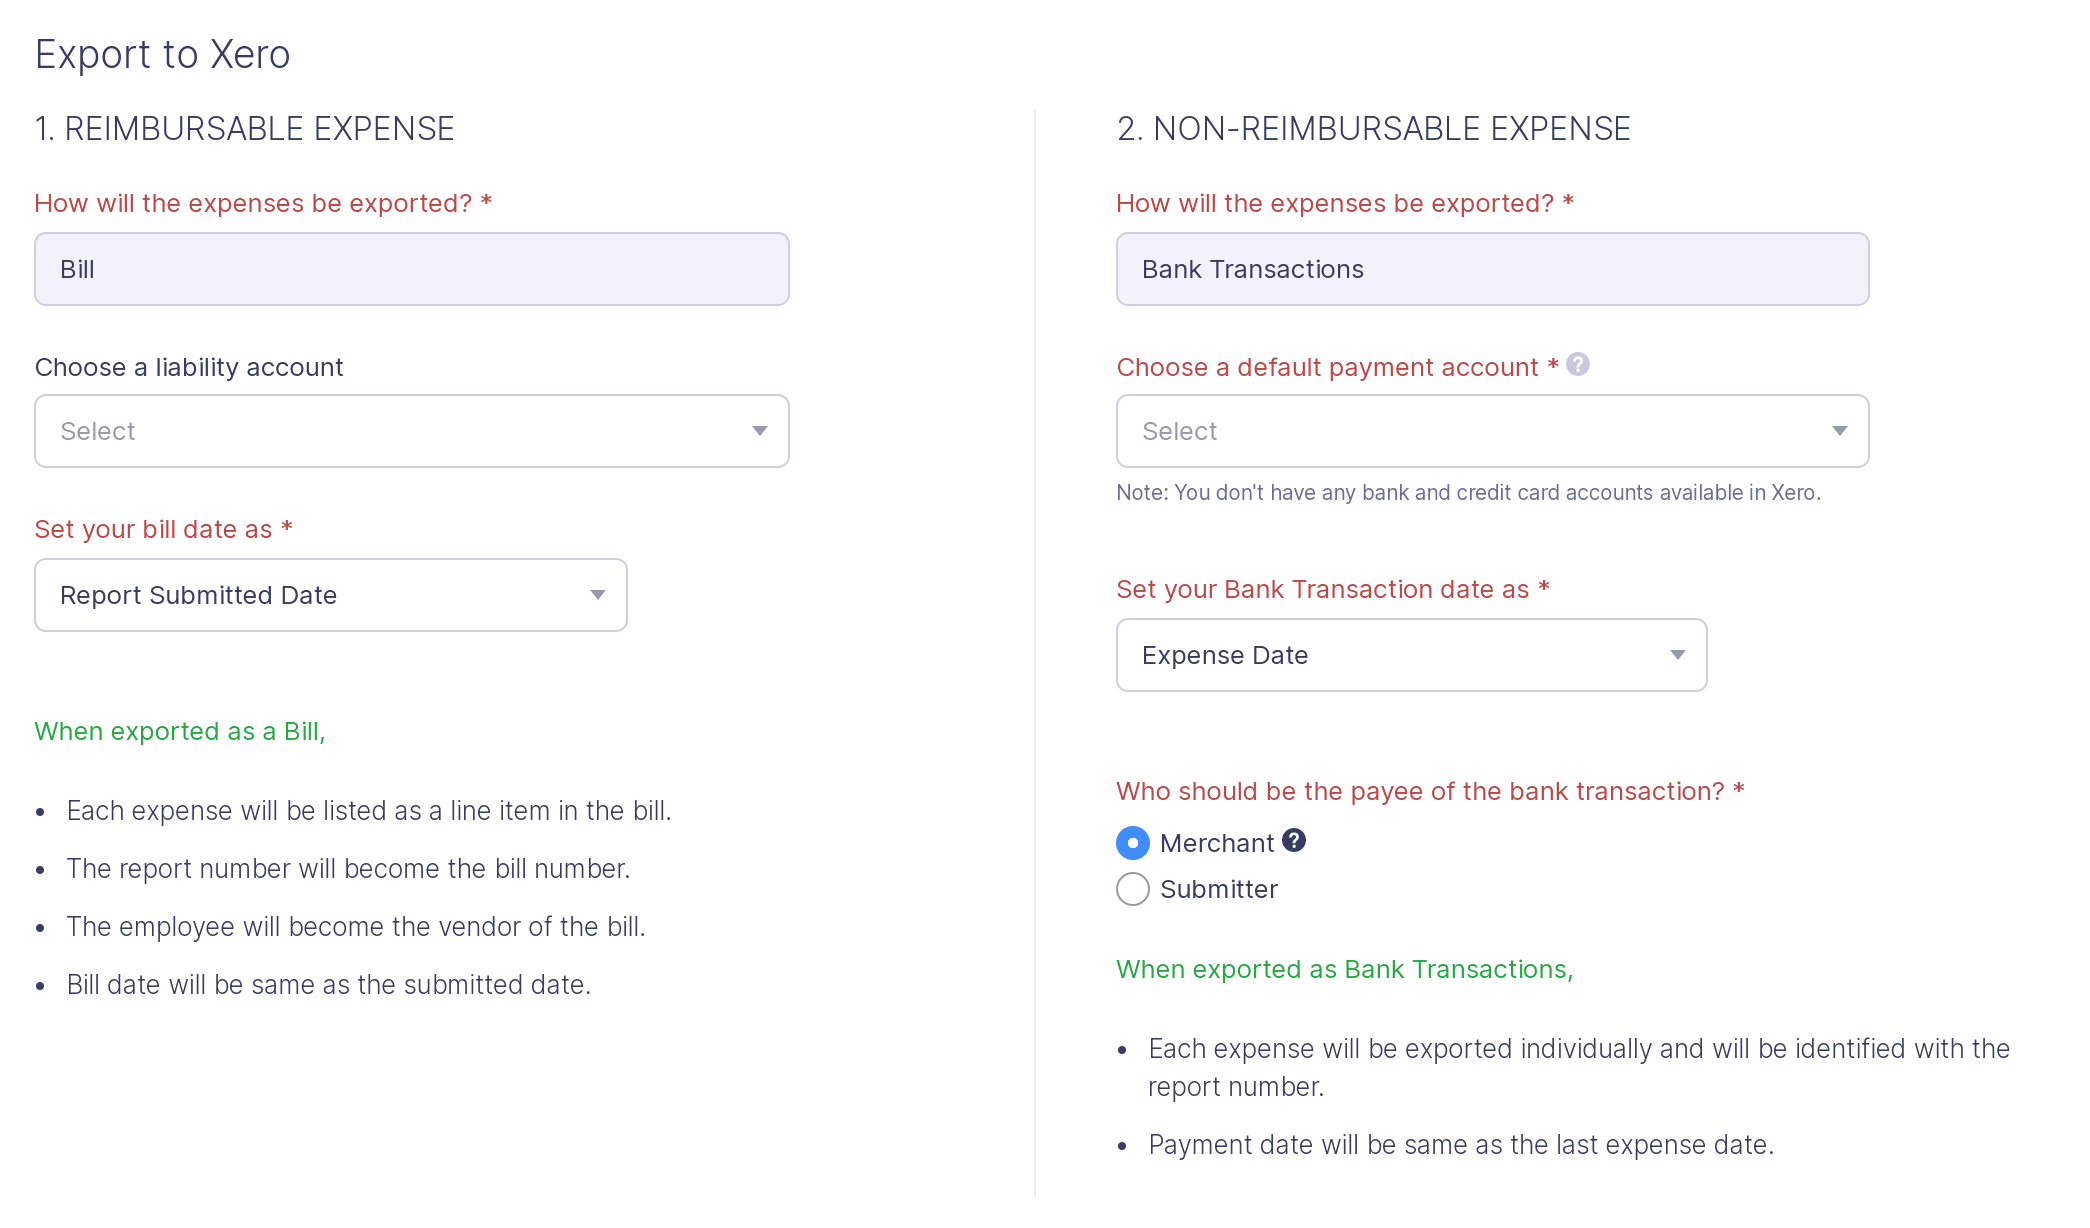
Exporting Reimbursable Expenses
- The reimbursable expenses in Zoho Expense will be exported as Bills and the vendor of the Bill will be the employee who recorded the expense.
- The amount to be paid to an employee can be tracked under a liability account that is selected from the dropdown.
- You can set the bill date as any one of the following:
- Last Expense Date
- Report Approval Date
- Report Submitted Date
Exporting Non-reimbursable Expenses
- The non-reimbursable expenses in Zoho Expense will be exported to Xero as Bank Transactions.
- In the choose a default payment account dropdown, the credit card accounts and bank accounts will be listed for choosing the payment account of non-reimbursable expenses.
- You can set the Bank Transaction date as any one of the following:
- Expense Date
- Report Approval Date
- Report Submitted Date .
- Select whether the Merchant or the Submitter should be the payee of the bank transaction.
Note: If an expense report has credit expenses and the reimbursable total of the expense report is less than zero, it will be exported to Xero as a Supplier Credit Note.
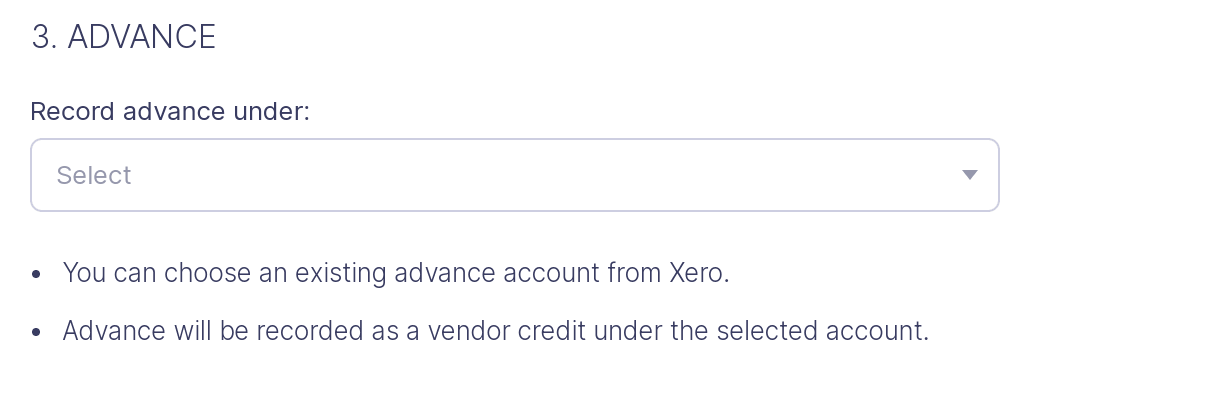
Advance
- The Advance in Zoho Expense will be exported to Xero as Supplier Credit Notes.
- In the Record advance under dropdown, you can choose an existing advance payment account from Xero.
Mapping Fields
You can map the taxes and tags in Zoho Expense with Xero’s taxes and tracking categories respectively.
Taxes
The taxes that have been created in Zoho Expense can be mapped with the corresponding taxes in Xero. To map the taxes:
- Navigate to the Accounting Tax section.
- Select a tax from the dropdown under the Zoho Expense Taxes.
- Select a corresponding tax in Xero under the Xero Taxes dropdown.
- Once this is done, when expenses with taxes are exported from Zoho Expense, the corresponding tax in Xero will be automatically applied.
Tags
The tags that have been created in Zoho Expense can be mapped with tracking categories in Xero. To map the tags and tracking categories:
- Navigate to the Tags section.
- Select a tag from the dropdown under the Zoho Expense Tags.
- Select a corresponding tracking category in Xero under the Xero Tracking Categories dropdown.
- Once this is done, the options of the tracking categories in Xero will be imported as the options of the corresponding tags in Zoho Expense. However, the options of a tag in Zoho Expense will not be exported as the options of tracking categories in Xero.
Note: After mapping the tags and tracking categories, the existing options of the tags in Zoho Expense will become inactive.
Share Access
You can share your access to export reports to Xero with other admins. These admins can also instant-sync the data between Zoho Expense and Xero, and map users and merchants with vendors.
To share access, select the users from the dropdown. You can also share access with multiple users.

Configure Export of Reports
Once the report is approved, it is ready to be exported to your Xero account. It can be automatically exported to Xero upon approval or manually exported by the admin who initiates the integration with Xero.

After you’ve chosen the data you would like to import, export and map, click Save. The data that you’ve chosen to import, export and map will be auto-synced once a day. You can also do instant sync by clicking the Instant Sync button in the Xero integration page.
Now, you’re all set to enjoy the Zoho Expense – Xero integration.
Map Card Feeds
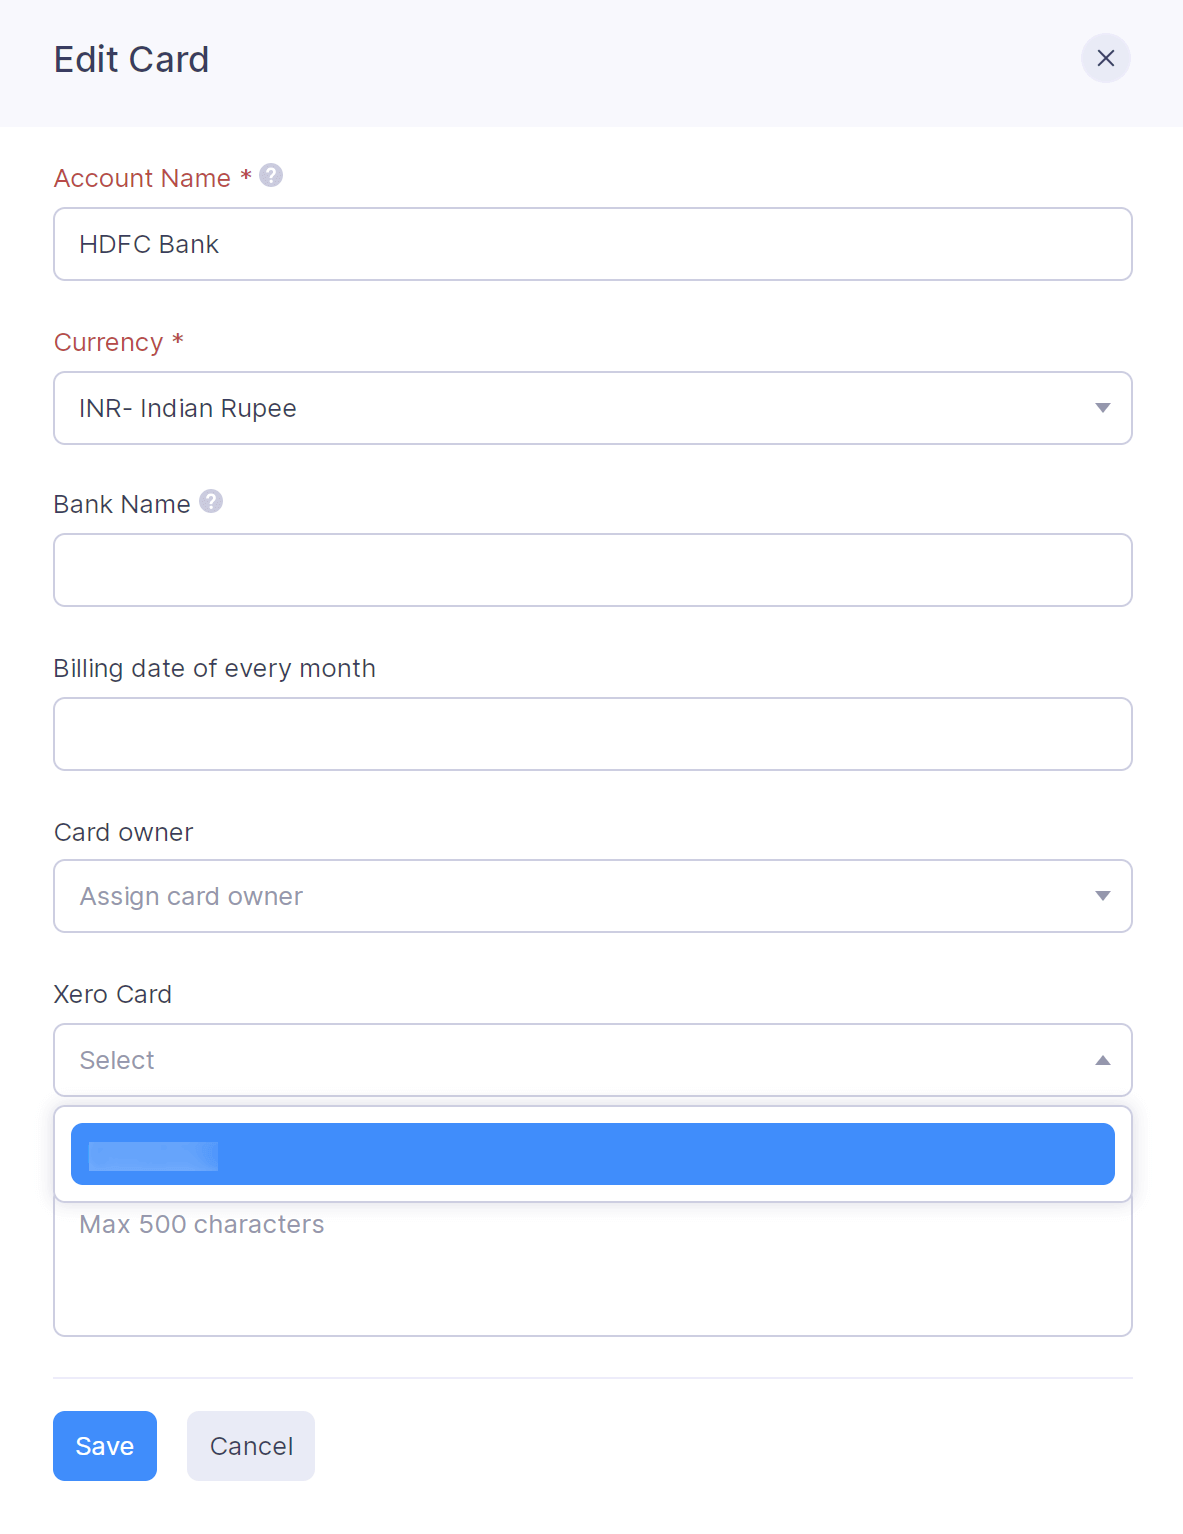
Sometimes, you might want to export card feeds recorded in Zoho Expense to Xero for accounting or other purposes. You can export your card feeds in Zoho Expense to Xero in a few simple steps:
- Associate a card feed in Zoho Expense with a card in Xero.
- Click Admin View.
- Go to Corporate Cards on the left sidebar.
- Select the card.
- Click the More icon on the top right corner.
- Select Edit.
- Select a card or a bank account from the Xero Card dropdown.
- Click Save.
-
Export reports associated with the card in Zoho Expense to Xero.
-
View all transactions of this card in Xero.
Note: You can view the exported transactions under the associated card’s feed in Xero.
Map Users and Vendors
When you export reimbursable expenses from Zoho Expense, they will be exported as bills to Xero and the vendor of the bill will be the user who had created that expense. Hence, to fetch the vendors for creating bills in Xero, you will have to map the users in Zoho Expense with the vendors in Xero. To map the users:
- Click Admin View.
- Go to Settings on the left sidebar.
(OR)
Click the Gear icon at the top right side. - Go to Users under Users and Control.
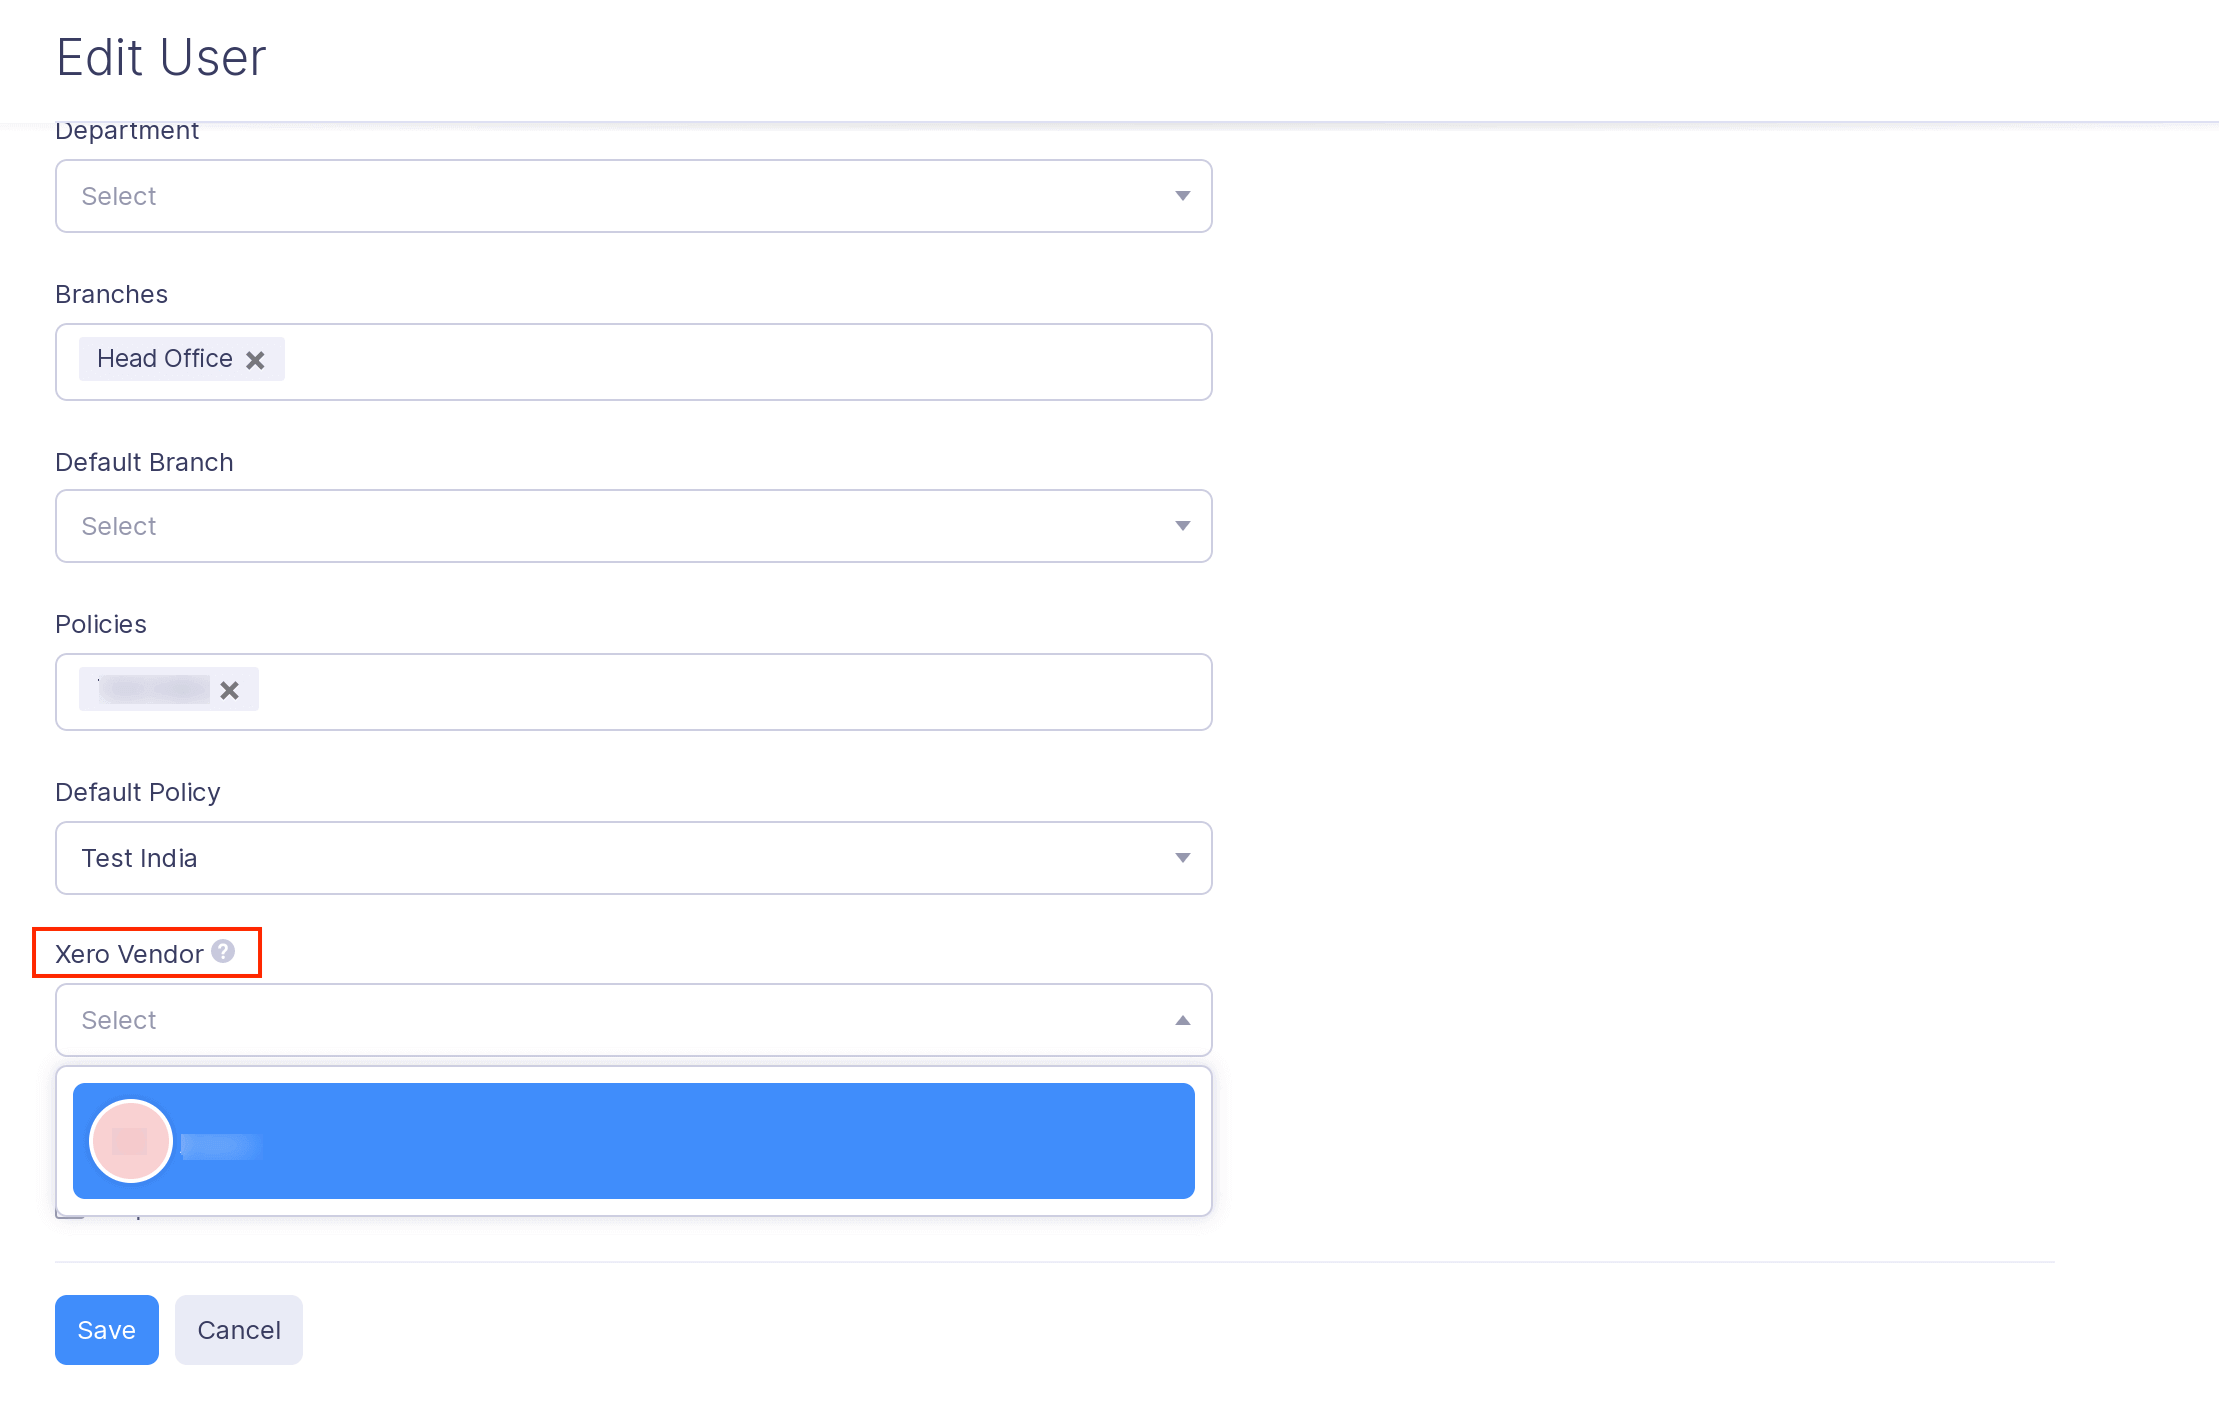
- Hover over the user you want to map with the Xero vendor and click the More icon at the right side of the user.
- Click Edit.
- Select a vendor from the Xero Vendor dropdown.
- Click Save.
Once this is done, whenever a reimbursable expense created by the user is exported, the mapped Xero vendor will be the vendor of the bill.
Note: If you have not mapped the user with the corresponding Xero vendor while exporting reimbursable expenses, a new vendor will be created in Xero and this vendor will be automatically mapped with the user in Zoho Expense.
Map Merchants and Vendors
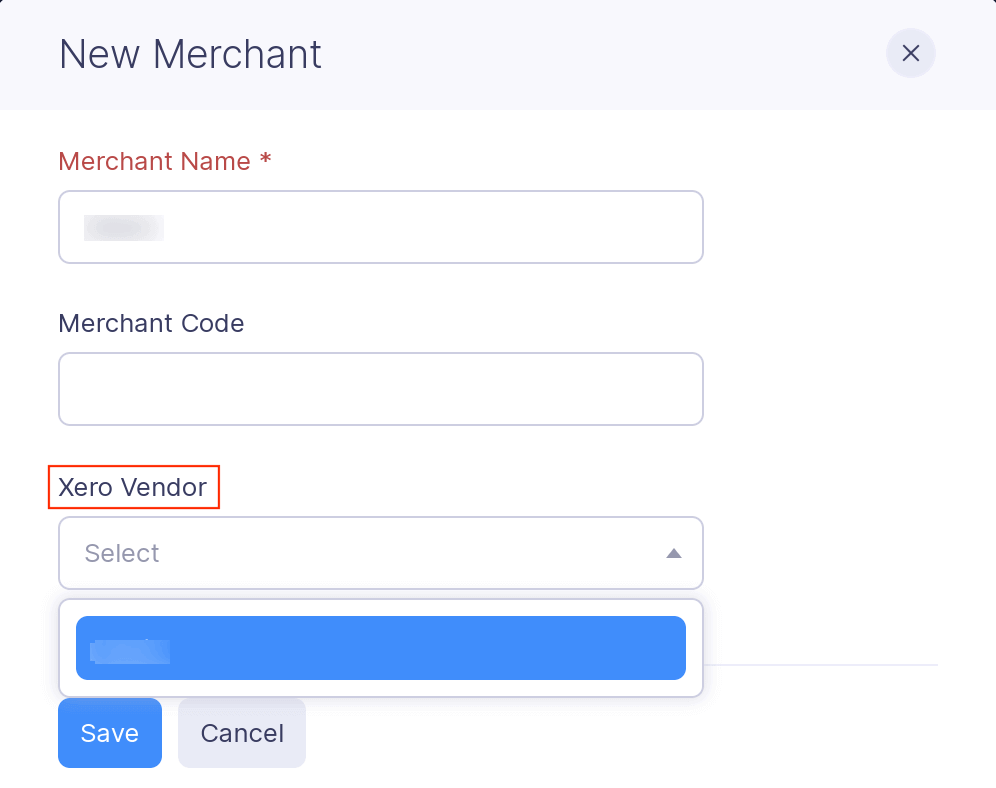
When you export non-reimbursable expenses from Zoho Expense, they will be exported as bank transactions to Xero. If you have configured merchants to be the payee of the bank transactions, you can map the merchants in Zoho Expense with the vendors in Xero. To map the merchants:
- Click Admin View.
- Go to Settings on the left sidebar.
(OR)
Click the Gear icon at the top right side. - Go to Modules under Customization.
- Click Merchants.
- Hover over the merchant you want to map with the Xero vendor and click the More icon at the right side of the merchant.
- Select Edit.
- Select a vendor from the Xero Vendor dropdown.
- Click Save.
Once this is done, whenever a non-reimbursable expense with the merchant is exported, the mapped Xero vendor will be the payee of the bank transaction.
Note: If you have not mapped the merchant with the corresponding Xero vendor while exporting non-reimbursable expenses, a new vendor will be created in Xero and this vendor will be automatically mapped with the merchant in Zoho Expense.
Export Your Reports to Xero
Your expense reports can be exported manually or automatically upon approval, as per the configurations made in the Xero integration page. If you choose to export your reports manually, perform the following steps:
- Click Admin View.
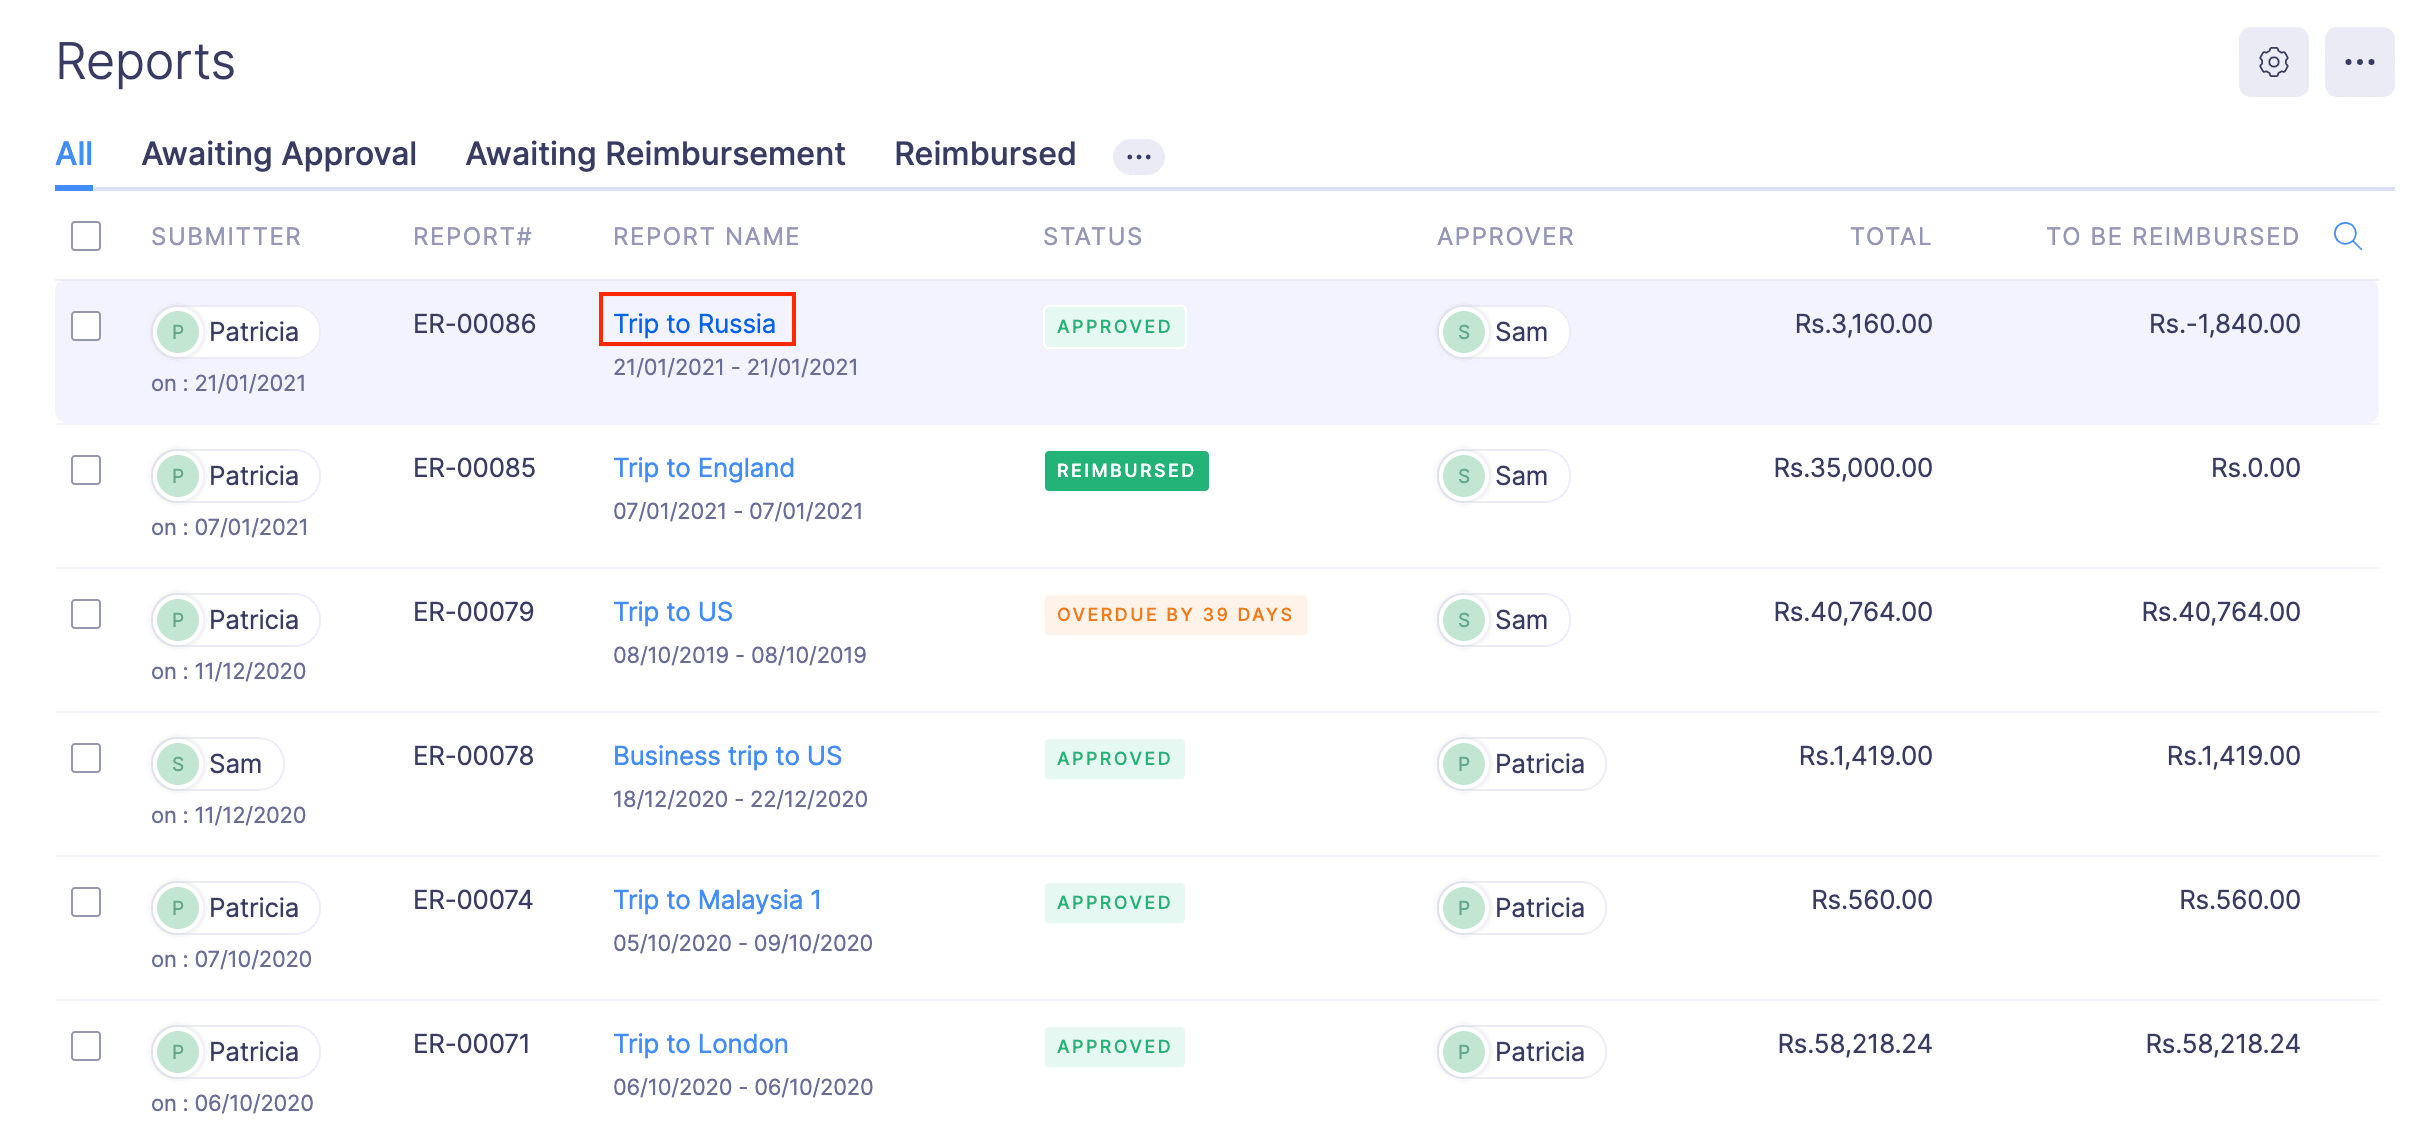
- Go to Reports.
- Click the approved report you want to export to Xero.
- Click on the Export to Xero button located on top of the report.
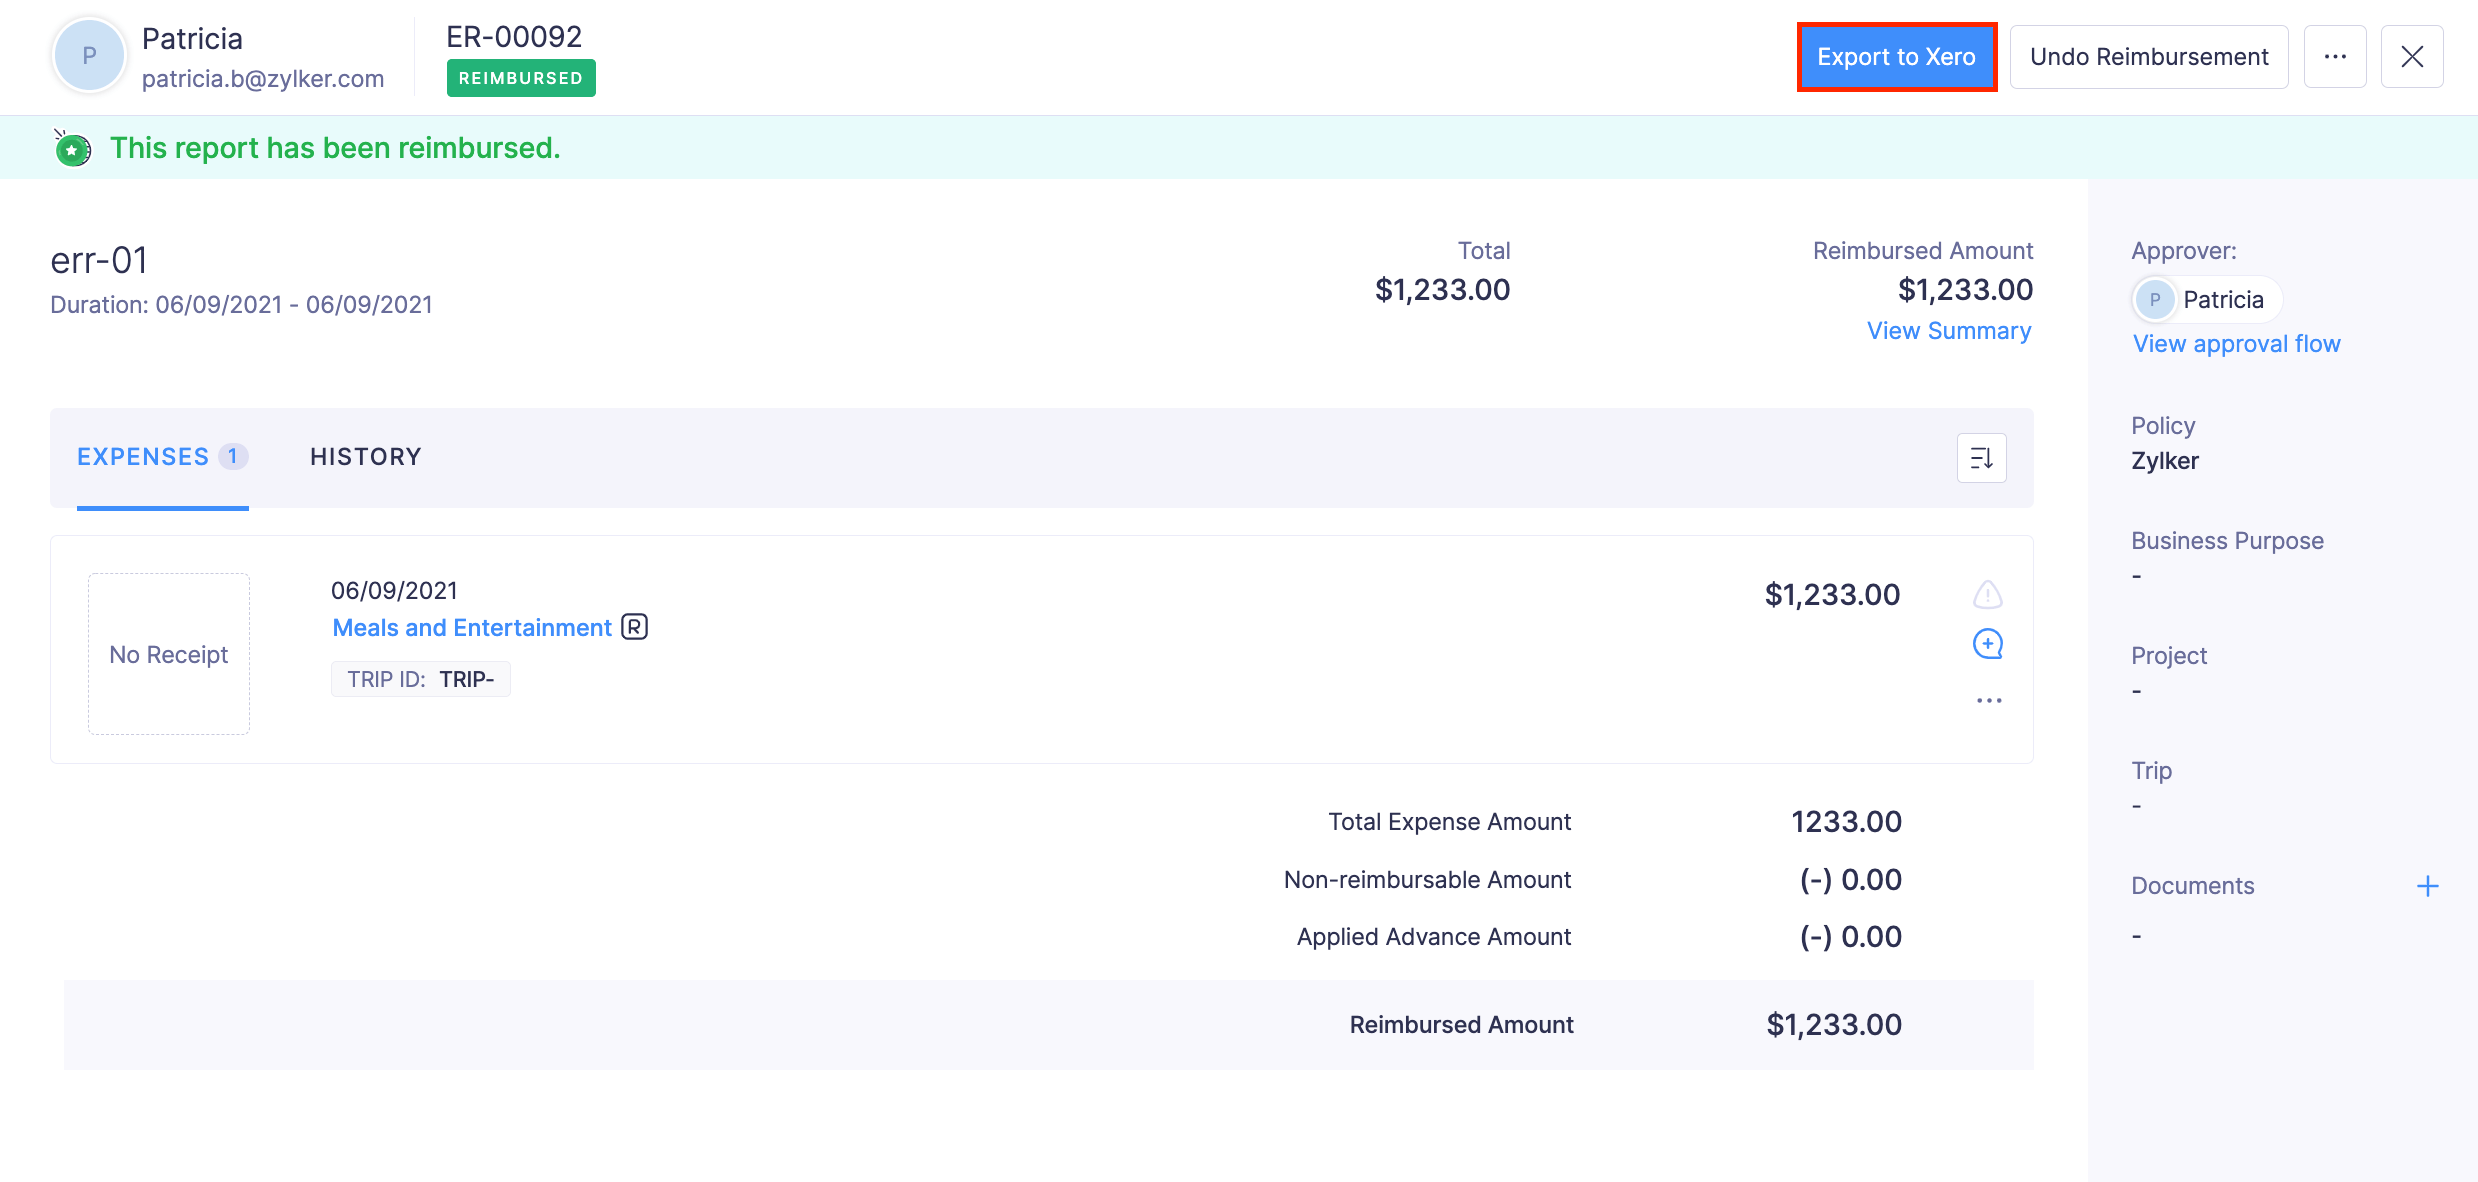
- Once that’s done, you will know how each expense was exported. If your report contains both reimbursable and non-reimbursable expenses, each will be exported separately as configured previously.
- For reimbursable expenses, reimbursement has to be recorded manually after making the reimbursement in Xero.
- If you have made changes in the exported expenses and you want those changes to be updated in Xero, that can be done by clicking on Export to Xero button once again. By doing so, the changes made will overwrite the existing transaction.
Disconnect the Integration
When you disconnect the integration, you will no longer be able to export your expense reports to Xero. However, all the imported accounts, users and customers from Xero will continue to remain active in Zoho Expense.
To disconnect the integration:
- Click Admin View.
- Go to Settings on the left sidebar.
(OR)
Click the Gear icon at the top right side.
- Go to Accounting & ERP under Integrations.
- Click Xero.
- Click Disconnect.
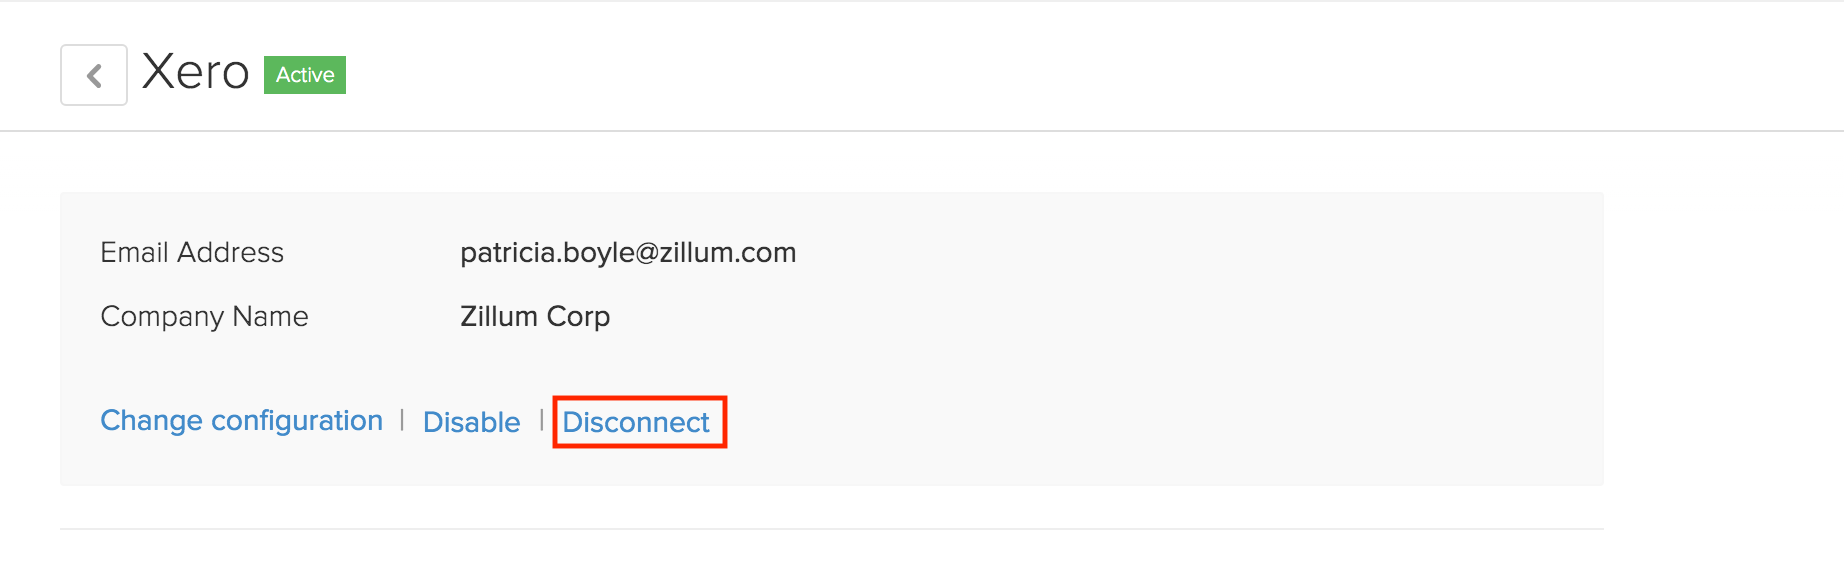
A pop-up will appear on the screen. Click Confirm to disconnect the integration.