Integrate Zoho Expense With Amazon Business
Amazon Business is a marketplace exclusively designed to purchase business supplies. You can get access to a vast network of suppliers with quantity discounts, tax-exempt purchases, and other features tailored to suit all types of business purchases. You can purchase business supplies from Amazon Business using either the Amazon Punchout integration or the Amazon Punchin integration.
Amazon Business Punchout and Punchin integrations are tools that connect your expense management system (Zoho Expense) directly with Amazon Business, streamlining the purchasing process, and making the process seamless.
Note: This integration is available for organizations with country as US in Zoho Expense.
How does the integration work?
Punchout Integration: Once the integration is enabled, users with access to the Amazon Business integration can choose to create purchase request using Amazon Business from Zoho Expense. Users can click Create Purchase Request Using Amazon Business. They will be redirected to Amazon Business where they can add the items they want to buy to their carts, checkout, and submit their order for approval. User will be punched out of Amazon, and redirected to Zoho Expense. Their items for purchase in Amazon will automatically be fetched into Zoho Expense and added to the purchase request. Users can then enter any additional information required, such as the date and item category, and save the request. Finally, once the purchase request is created, the users can submit it for approval, upon approval, their order will be placed on Amazon.
Punchin Integration: Once the integration is enabled, users can directly go to Amazon Business and add the items they want to buy to their cart, select your group, and enter the shipping address and payment method. Once they submit their order for approval, they will be redirected to Zoho Expense. The items added will be fetched into Zoho Expense and added to the purchase request. Users can save the request and submit it for approval. Once the purchase request is approved, their order will be placed on Amazon.
Key benefits
- Seamless Purchasing: Users can access Amazon Business directly from their Zoho Expense organization, streamlining the purchasing process and making it more user-friendly.
- Purchase Control: Ensure that all orders are reviewed and approved by approvers in Zoho Expense before they are placed on Amazon Business.
- Enhanced buying experience: Provide users with access to a wide range of business supplies, all in one place, along with a personalized shopping experience on Amazon Business.
- Get insights on your business purchases: Gain insights into your organization’s spending on Amazon Business to track expenses, make informed budgeting decisions, and find opportunities to save cost.
Note:
- These integrations are in early access. Contact support@zohoexpense.com to enable this feature in Zoho Expense.
- The Amazon Business integration is available only for the US edition of Zoho Expense.
Prerequisite:
- Enable the Purchase Request module in your organization (Admin View > Settings > Modules > Purchase Request > Enable).
- Ensure you’ve created at least one vendor to associate during the configuration.
- Ensure you have an Amazon Business account.
- Provide the company address in your Organization Profile as it will be used as the shipping address for all orders placed through this integration. Orders with inaccurate addresses will not be processed by Amazon Business.
Setting Up the Integration in Zoho Expense
Navigate to the Admin View.
Go to Settings.
(OR)
Click the gear icon at the top.
In Integrations, select View All.
Click Amazon Business.
Click Set Up Now.
(OR)
Click View Details. (If you’re an existing user of the Amazon Business integration, a pop-up will be displayed asking you to update the integration. Click Update Integration.)
Configuring Punchout and Punchin Integrations
You can configure punchout for a group. Here’s how:
Note: If you have multiple groups in your Amazon Business account, the integrations have to be enabled for each group separately.
- Log in to your Amazon Business account.
- Hover over your account name and select Business Settings from the dropdown.
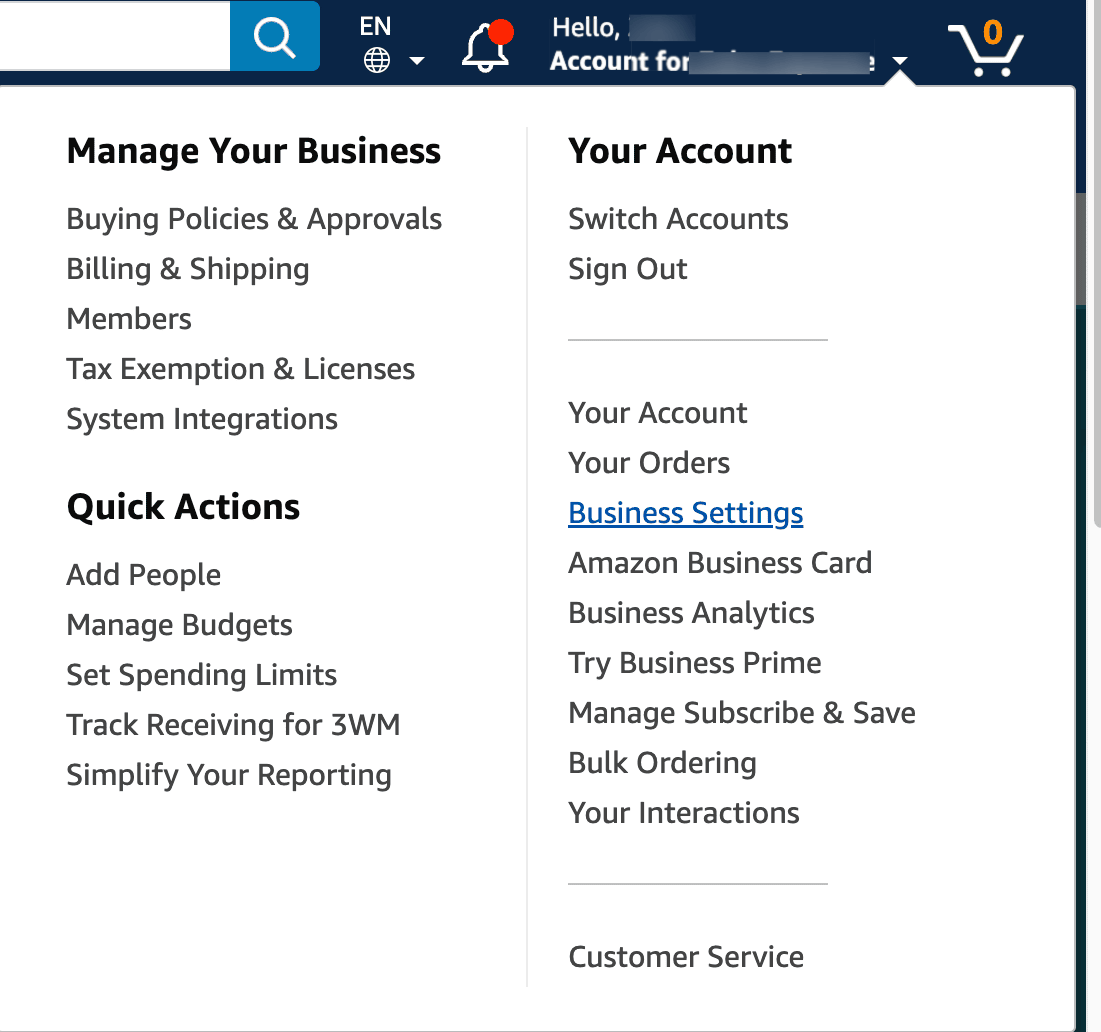
Go to the System integrations section.
Click Configure purchasing system.
Search for Zoho-Expense in the search bar
Verify the System Login and Password, and click Save.
The From Identity, Shared Secret, and Purchase Order Request URL will be generated for the group in Amazon Business.
Then, log in to your Zoho Expense organization.
Navigate to the Admin View.
Go to Settings.
(OR)
Click the gear icon at the top right corner.
In Integrations, select View All.
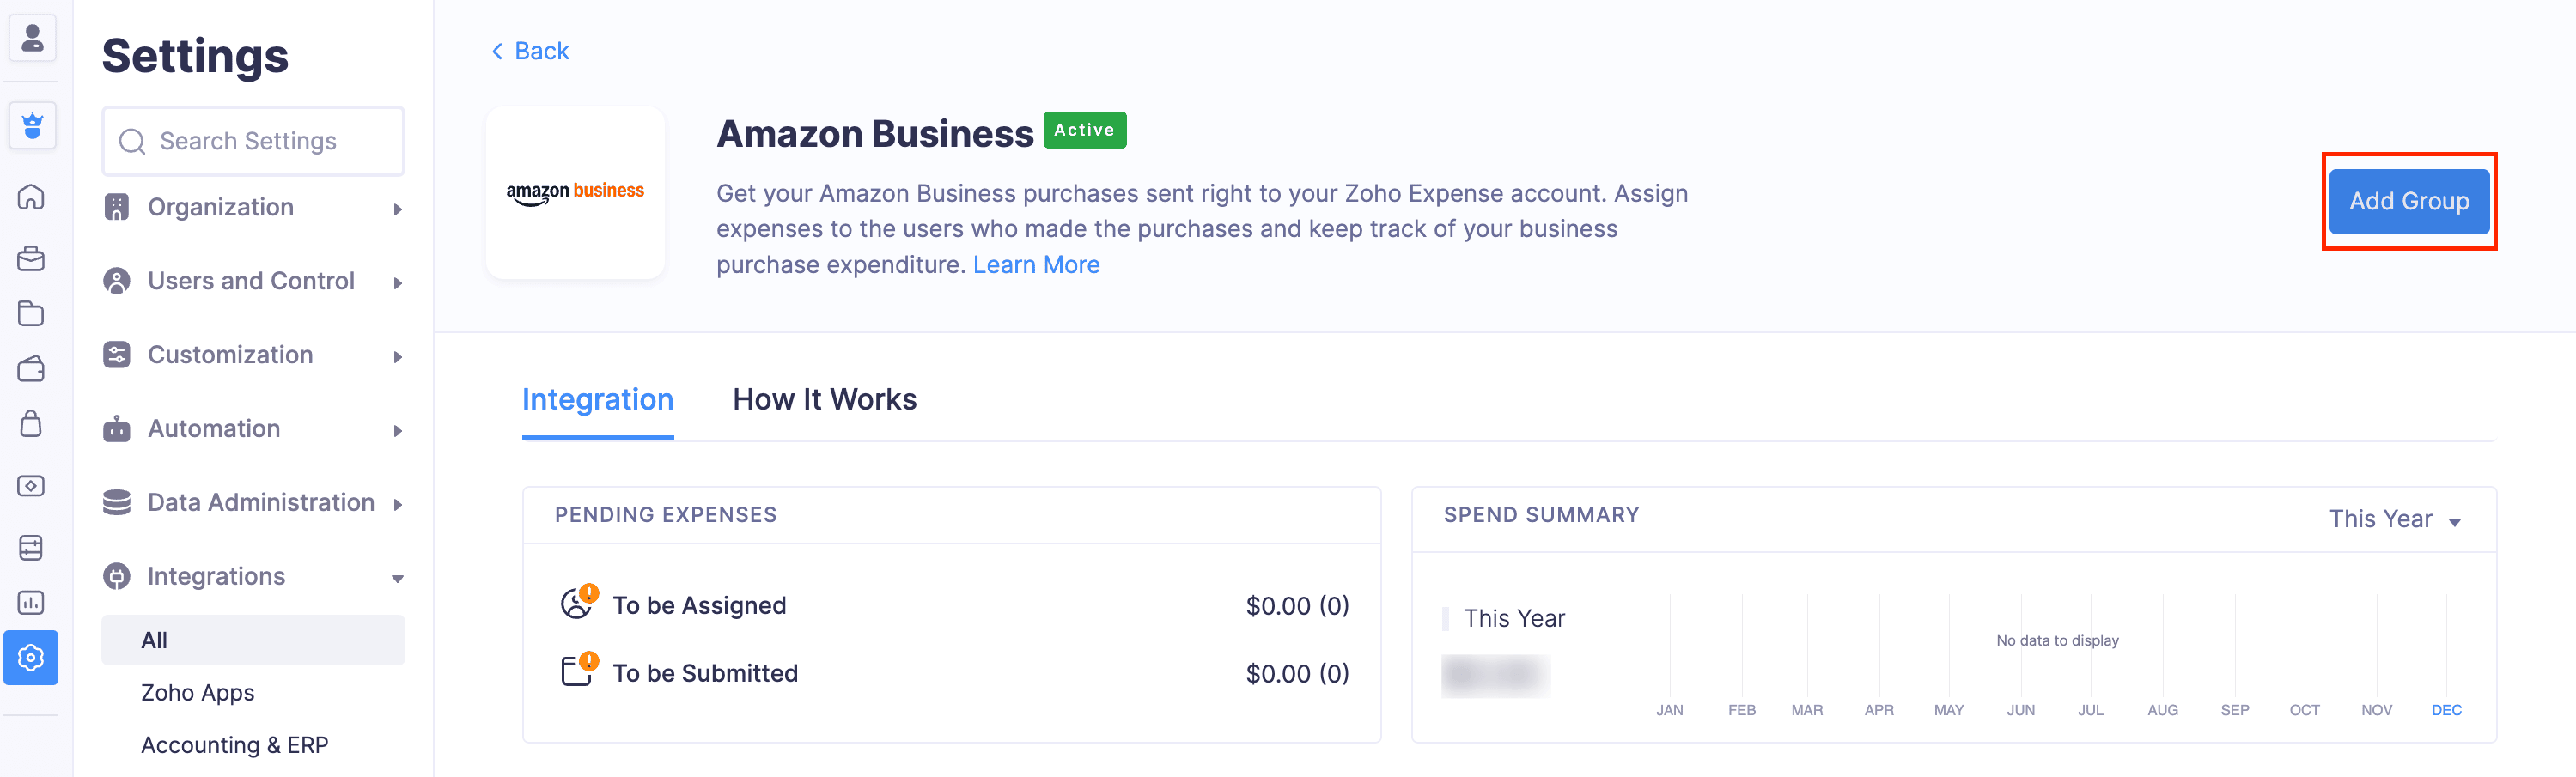
Go to Active Integrations and click Amazon Business.
Click Add Group.
- Enter the Group Name. It’s recommended to use the same name used in your Amazon Business account.
- Add a description, if required.
- Mark the checkbox Associate with all users if you want to associate all the users in your organization to the group.
- If you want to associate the group with particular users in your organization, select and add users from the dropdown. Click Save and Continue.
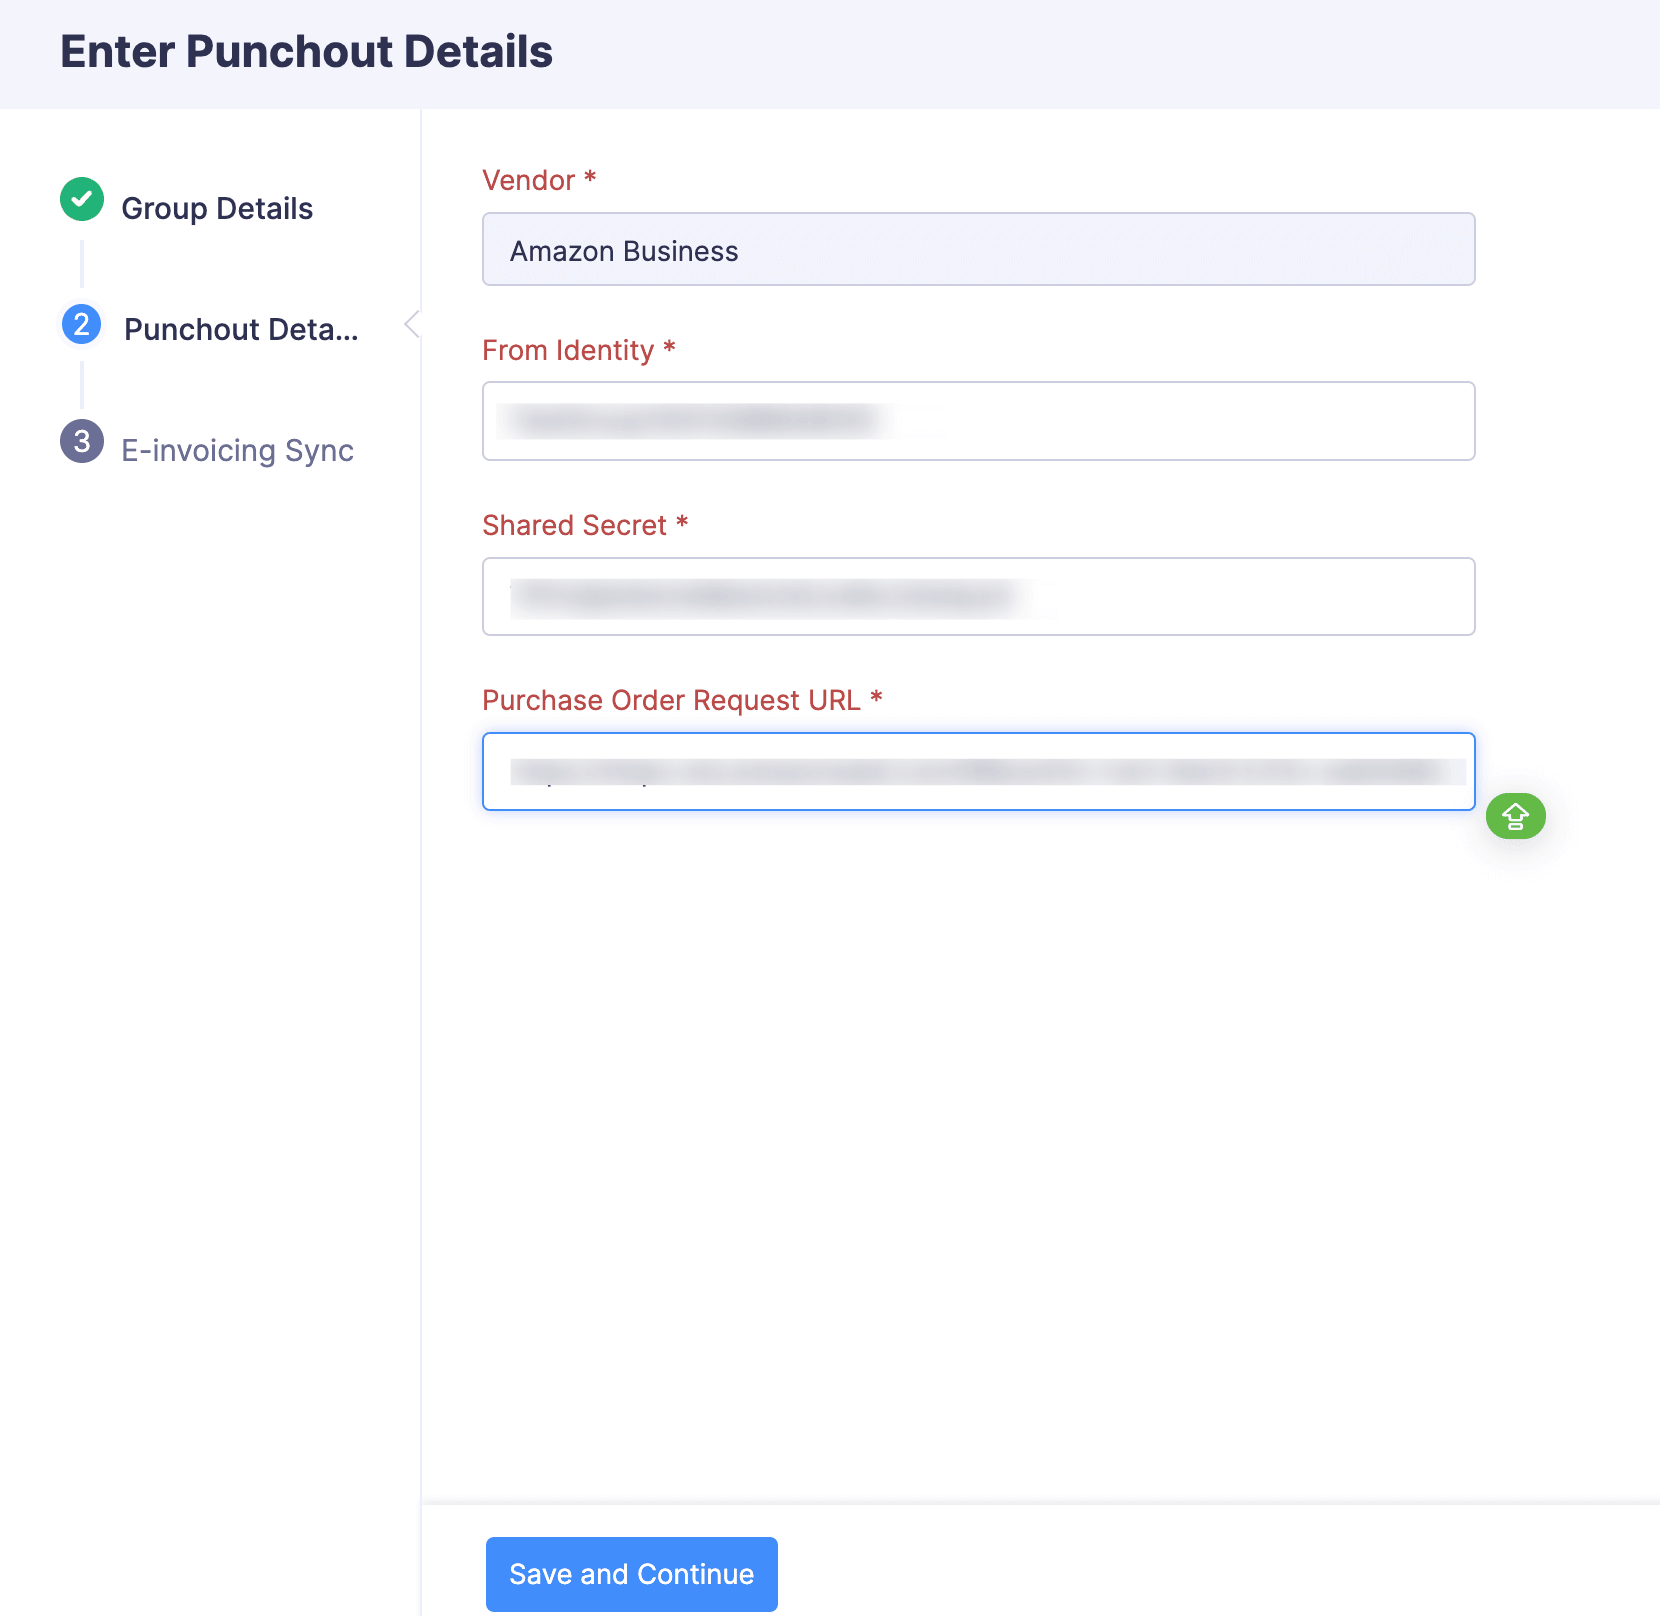
- Next, enter your punchout details of the group, including From Identity, Shared Secret, and Purchase Order Request URL from Amazon Business in the respective fields.
- Click Save and Continue.
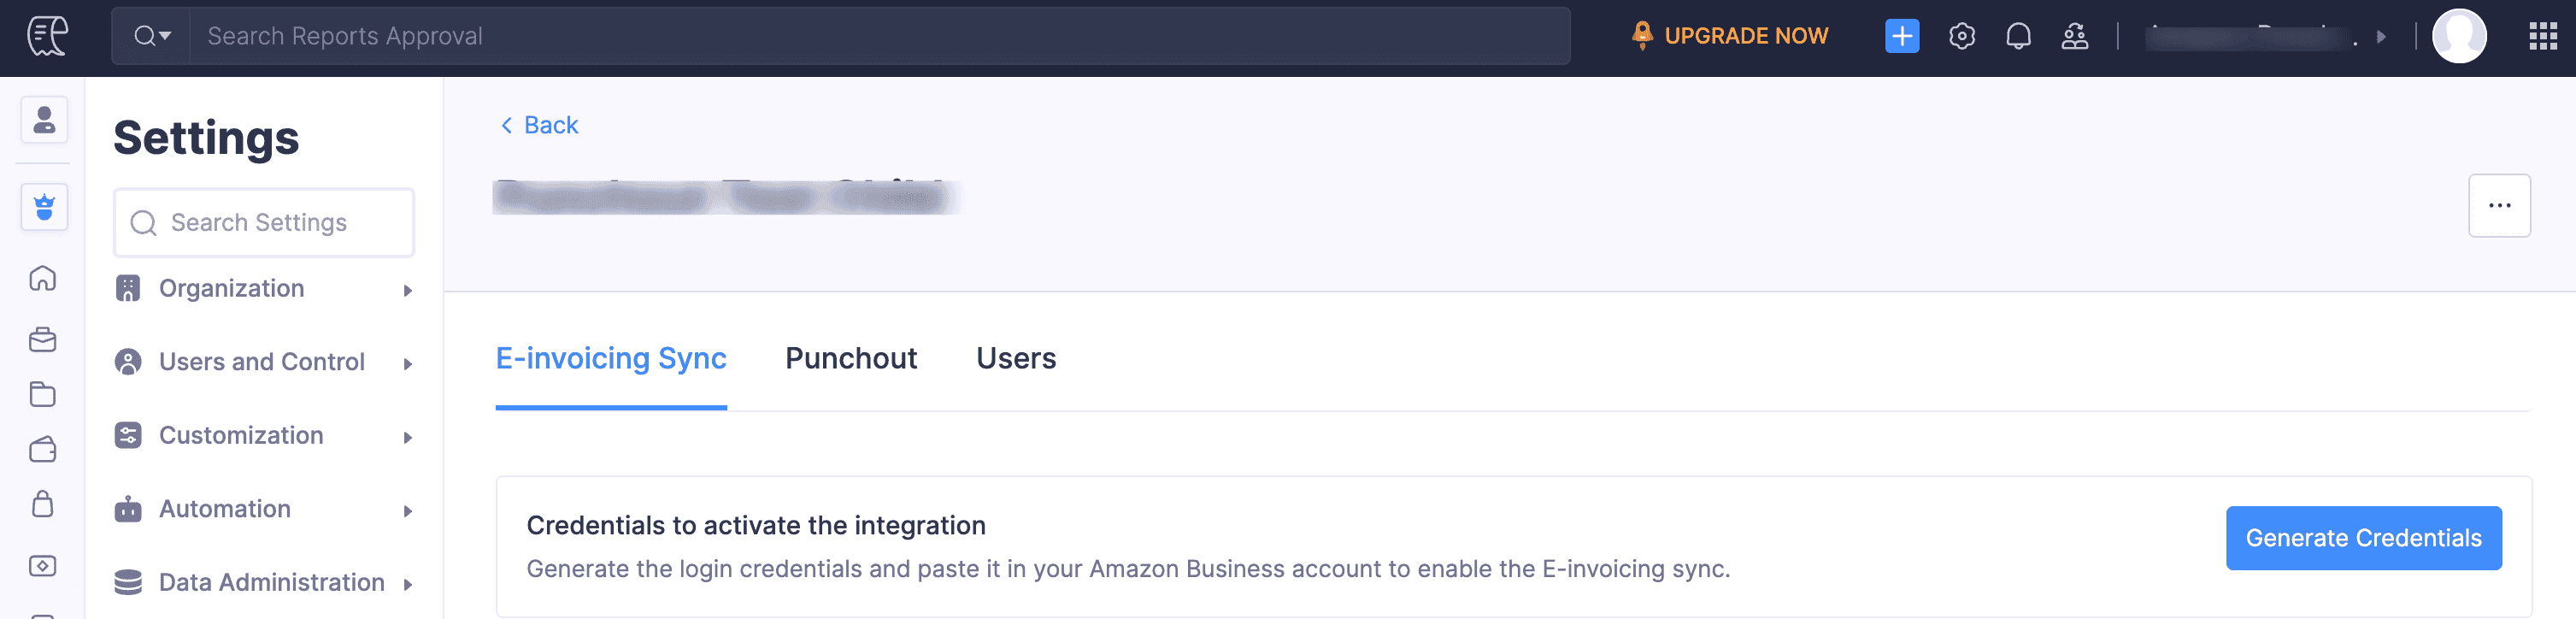
- To activate E-invoicing Sync for the group, click Generate Credentials. If you prefer to activate it later, click Finish.
- Go to the Punchout tab.
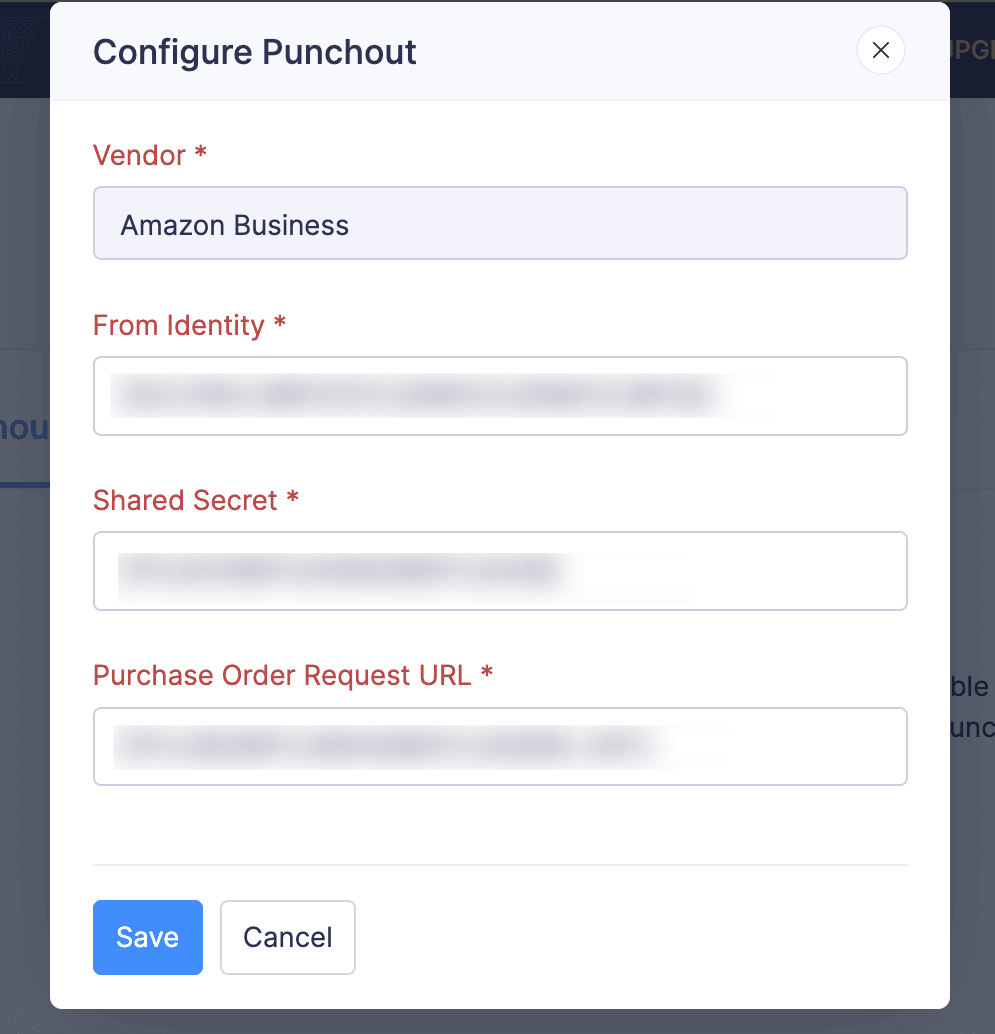
- Click Configure Punchout.
- In the pop-up, select the vendor with whom you want to associate the expenses incurred from Amazon Business.
Note: You will have to configure the vendor name only once. After which, it will be auto-populated for the newly created groups.
- Then, paste the From Identity, Shared Secret, and Purchase Order Request URL copied from Amazon Business in the respective fields.
- Click Save.
To configure punchin for a group:
First, configure the punchout integration. Then, contact Amazon Business to enable the punchin integration. Once enabled, you can follow the same steps mentioned in the punchout integration to configure it in both Zoho Expense and Amazon Business.
Adding a New Group
Users are assigned to groups to place their order on Amazon Business using the punchout and punchin configurations in each group. To add a new group:
Navigate to the Admin View.
Go to Settings.
(OR)
Click the gear icon at the top.
In Integrations, select View All.
Go to Active Integrations and click Amazon Business.
Click Add Group.
Enter the same group name used in your Amazon Business account.
Add a description, if required.
Mark the checkbox Associate with all users if you want to associate all the users in your organization to the group.
If you want to associate the group with particular users in your organization, select and add users from the dropdown.
Click Save and Continue.
Next, enter your punchout details of the group, including From Identity, Shared Secret, and Purchase Order Request URL from Amazon Business in the respective fields.
Click Save and Continue.
To activate E-invoicing Sync for the group, click Generate Credentials. If you prefer to activate it later, click Finish.
Activating E-invoicing Sync
If you want to create expense automatically in Zoho Expense for orders placed on Amazon, you can enable the e-invoicing sync. To activate e-invoicing sync:
Navigate to the Admin View.
Go to Settings.
(OR)
Click the gear icon at the top.
In Integrations, select View All.
Go to Active Integrations and click Amazon Business.
Click the group for which you want to configure E-invoicing Sync.
In the E-invoicing tab, click Generate Credentials. E-invoicing Sync will be activated for the group.
- To activate E-invoicing sync for the same group in Amazon, Log in to your Amazon Business account.
- Hover over your account name and select Business Settings from the dropdown.
- Navigate to the group name dropdown at the top. The existing groups and its subgroups will be displayed. Select the group for which you want to activate E-invoicing Sync from the dropdown.
- Then, hover over your account name and select Business Settings from the dropdown.
- In System Integrations click Configure E-Invoicing.
- Click Set up your invoice connection.
- Select Zoho-Expense as your reconciliation system.
- Enter the System Login ID and Password generated in Zoho Expense in the Identity in cXML and Shared secret in cXML fields respectively.
- Click Save.
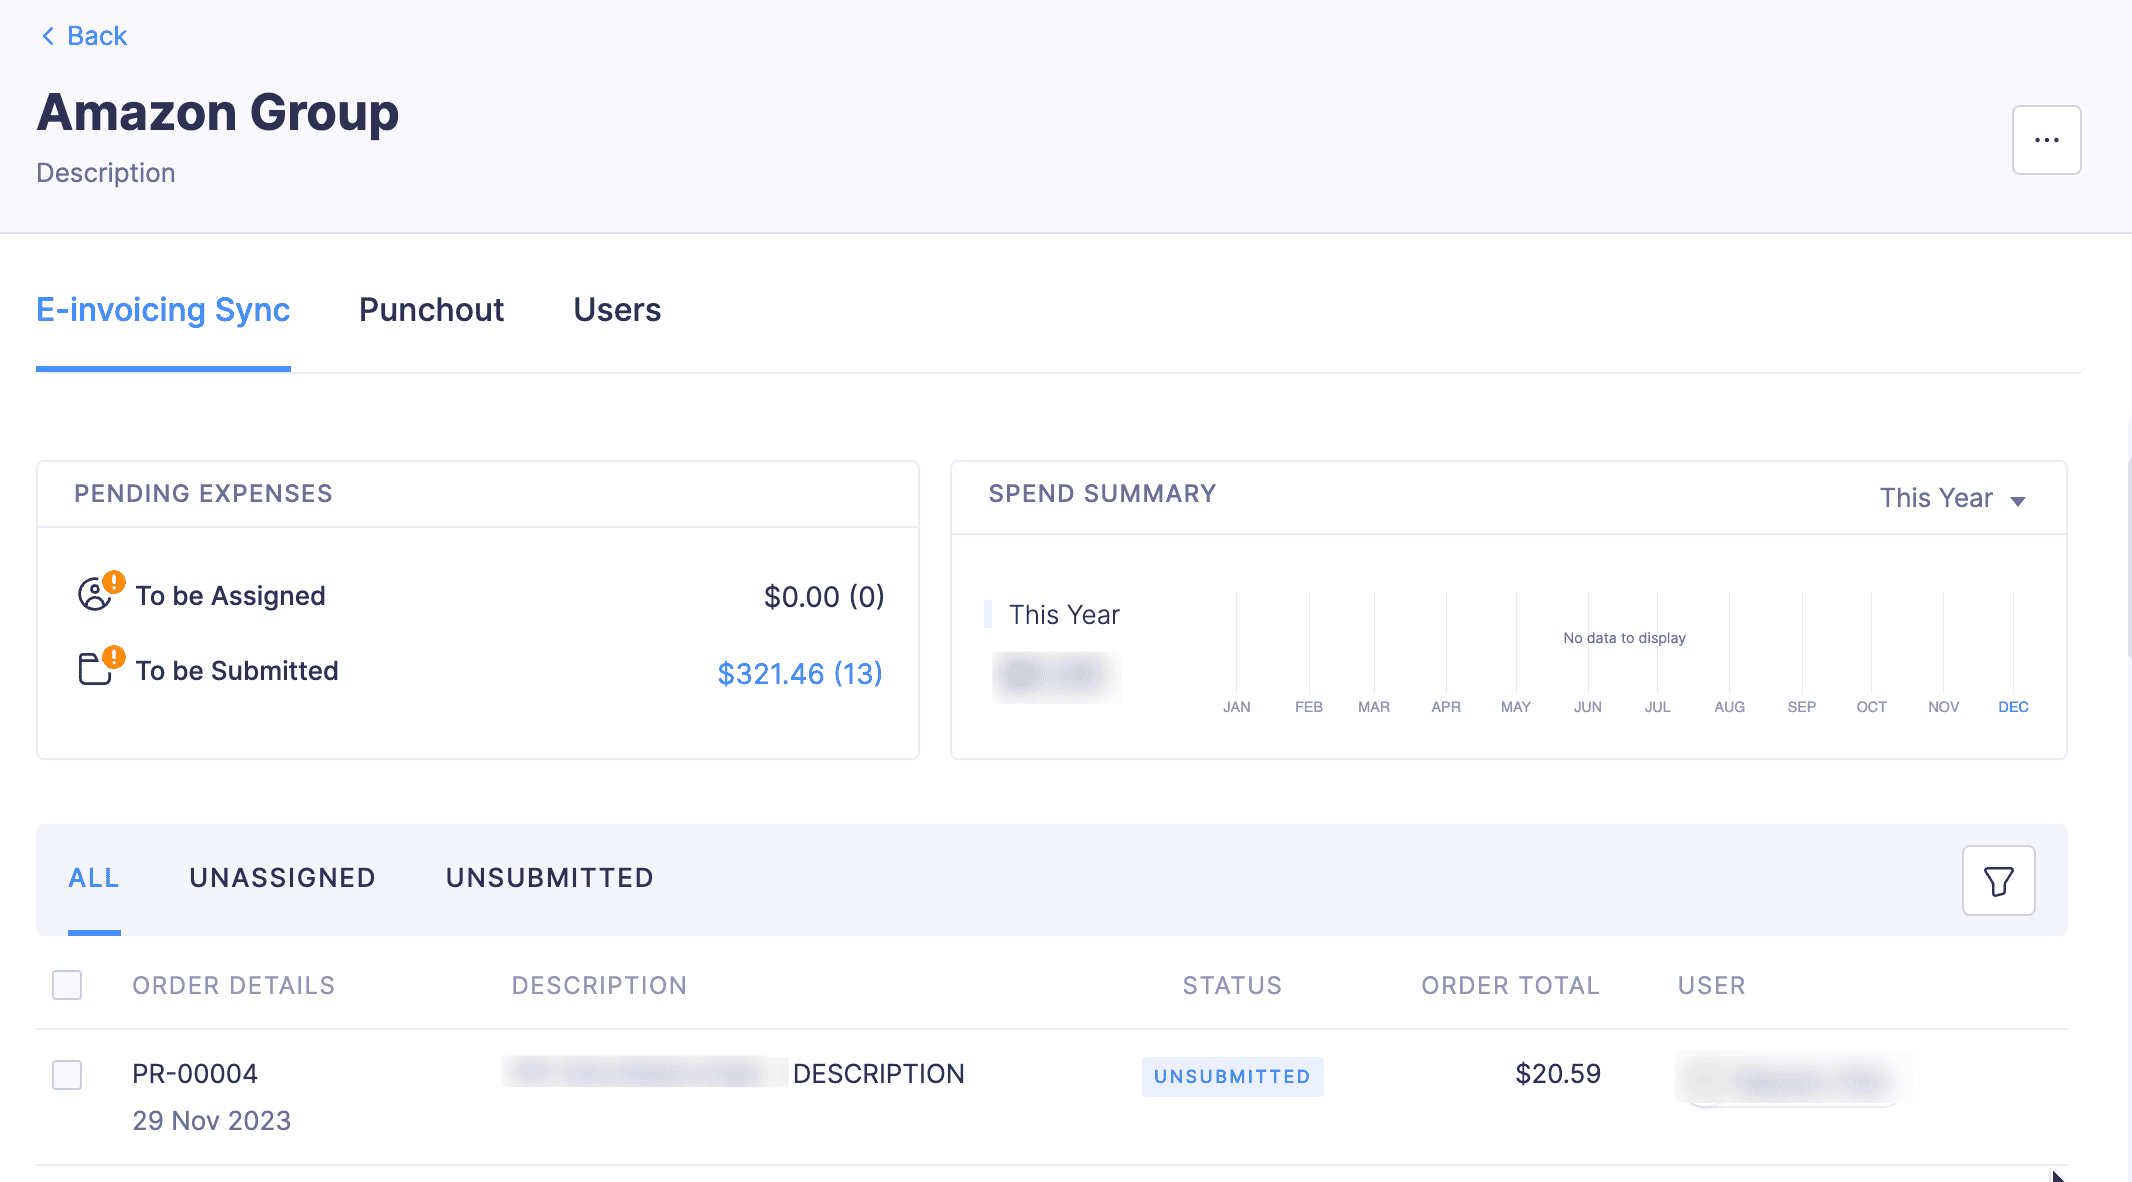
Amazon Business Dashboard
Get an overview of all your Amazon Business purchases from the dashboard. It gives you a graphical representation of the monthly spend summary of your Amazon Business account along with the credentials to activate E-invoicing sync. Also, it gives you an aggregate of the expense amount that is yet to be assigned to the respective users and a total of expenses that are yet to be submitted for approval.
All the expenses incurred from Amazon Business will be listed in the All tab along with the status of the expenses. In the Unassigned tab, you can find the expenses that are yet to be assigned to a user. The Unsubmitted tab will list all the assigned expenses that are yet to be submitted for approval.
To view the dashboard:
Click Admin View.
Go to Settings on the left sidebar.
(OR)
Click the Gear icon at the top right side.
Click View All in Integrations.
Go to Active Integrations and click Amazon Business. If you want to view the dashboard of a particular group, click the group name under All Groups for which you want to view the dashboard. The dashboard will be displayed in the E-invoicing tab.