
Validation Rules
Validation Rules in Zoho Expense help you enforce data integrity by setting restrictions on the values users can enter. When a user tries to save a transaction, the rule checks if the data in the field that you have set a restriction for meets your predefined conditions.
If the value entered in the field violates the conditions you’ve set, an alert message will be displayed, and the transaction will not be created. You can also set multiple criteria for a single validation rule.
Create Validation Rules
You can create a validation rule by setting certain criteria for the fields in a transaction. Here’s how:
- Click Admin View on the left sidebar.
- Go to Settings on the left sidebar.
(OR)
Click Settings in the top right corner of the page. - Select Modules under Customization.
- Select the module for which you want to create a validation rule.
- Go to the Validation Rules tab of the respective module.
- Click + New Validation Rule in the top right corner of the page.
- Enter the Validation Rule Name in the field provided.
- Click + Add Validation and add the condition to be met in the Add Validation pop-up.
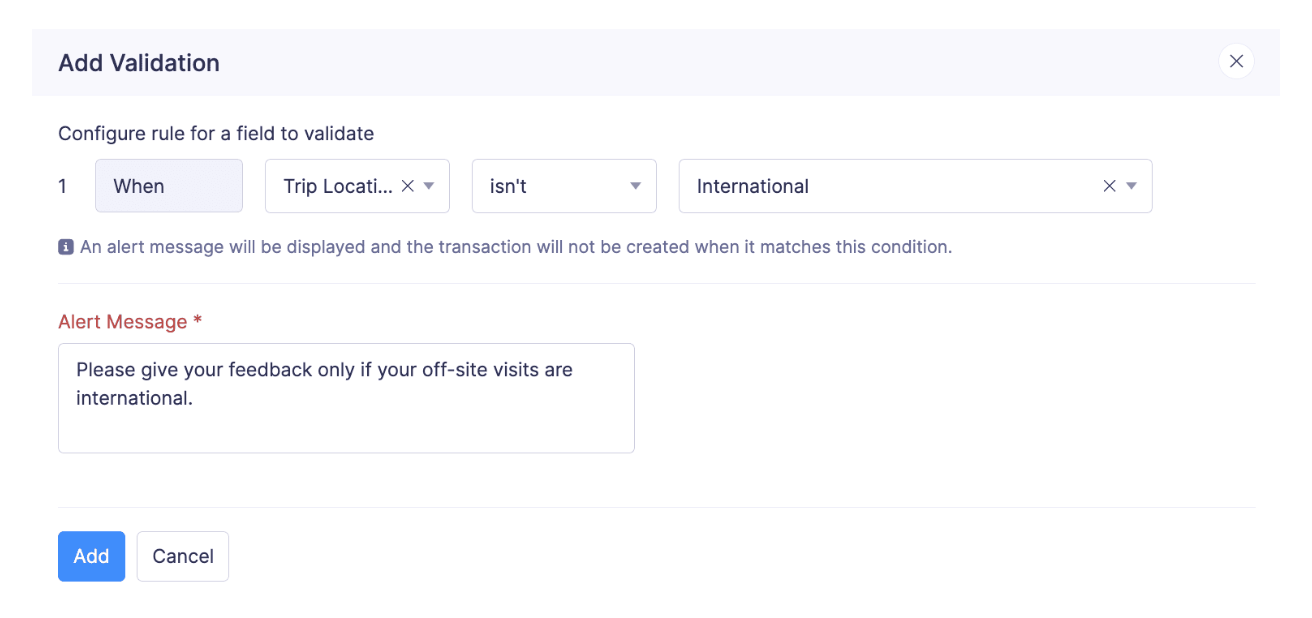
- Enter the Alert Message to be displayed when the transaction violates the validation rule.
- Click Add in the Add Validation pop-up.
- You can also add a subrule to the validation rule by clicking + New Sub Rule.
- You can add another validation by clicking + Add Another Validation.
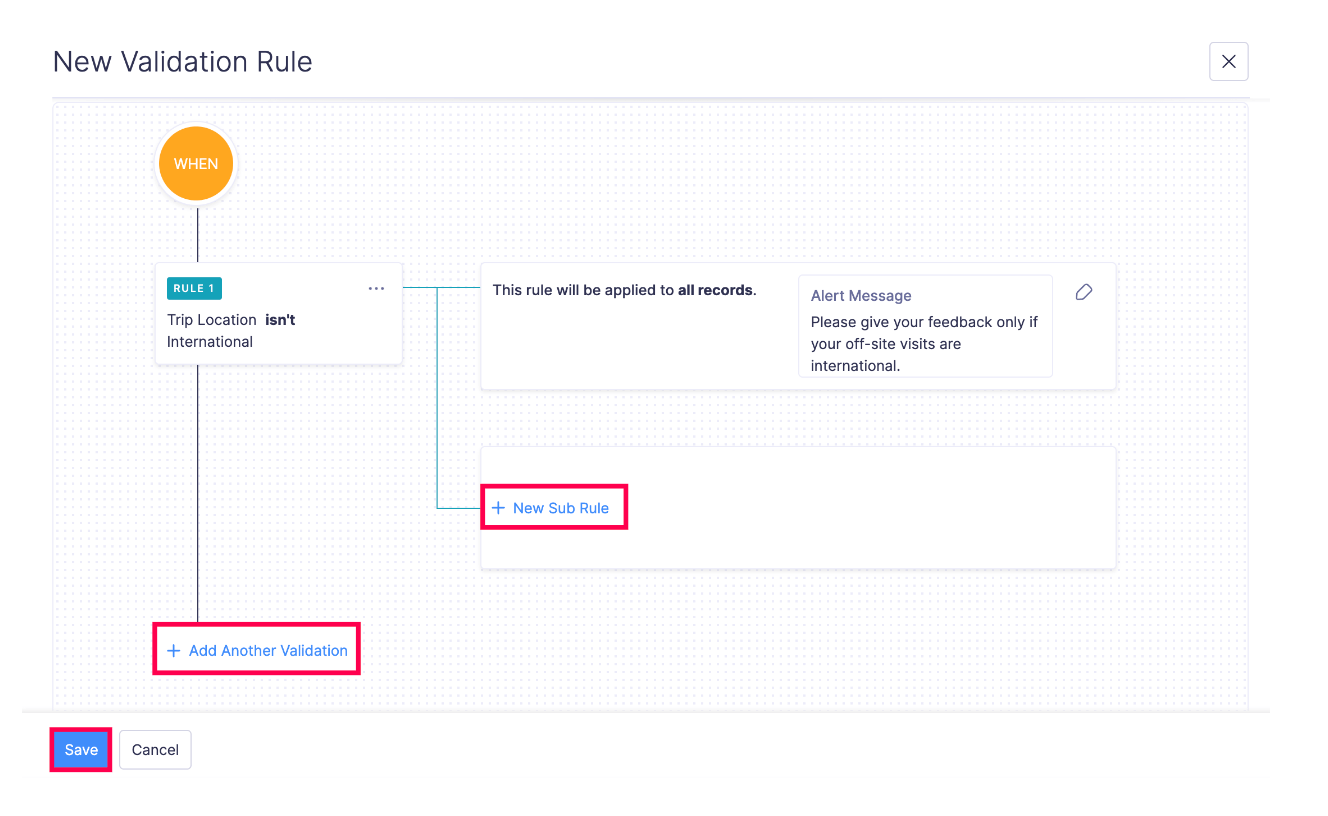
- Click Save.
Add Multiple Validation Criteria
When you create a validation rule, you can choose to include multiple validation criteria to further finetune the validation rule. Here’s how to add multiple validation criteria to a validation rule:
- Click Admin View on the left sidebar.
- Go to Settings on the left sidebar.
(OR)
Click Settings in the top right corner of the page. - Select Modules under Customization.
- Select the module for which you want to create a validation rule.
- Go to the Validation Rules tab of the respective module.
- Click + New Validation Rule in the top right corner of the page.
- Enter the Validation Rule Name in the field provided.
- Click + Add Validation and add the condition to be met in the Add Validation pop-up.
- Enter the Alert Message to be displayed when the transaction violates the validation rule.
- Click Add in the Add Validation pop-up.
- Now, Click + Add New Validation and provide another validation rule by following the steps above.
- You can also click More icon next to the validation rule to Edit or Delete the validation rule.
- Click Save.
Add Subrules
If you would like to include an additional rule to your existing condition, you can add subrules. This is applicable only when you’ve chosen to apply the rule to transactions based on specific criteria. Here’s how to add subrules to the validation rules:
- Click Admin View on the left sidebar.
- Go to Settings on the left sidebar.
(OR)
Click Settings in the top right corner of the page. - Select Modules under Customization.
- Select the module for which you want to add a subrule to the validation rule.
- Go to the Validation Rules tab of the respective module.
- Click + New Validation Rule in the top right corner of the page.
- Enter the Validation Rule Name in the field provided.
- Click + Add Validation and add the condition to be met in the Add Validation pop-up.
- Enter the Alert Message to be displayed when the transaction violates the validation rule.
- Click Add in the Add Validation pop-up.
- Now, Click + New Sub Rule and choose the record where you want to apply this subrule.
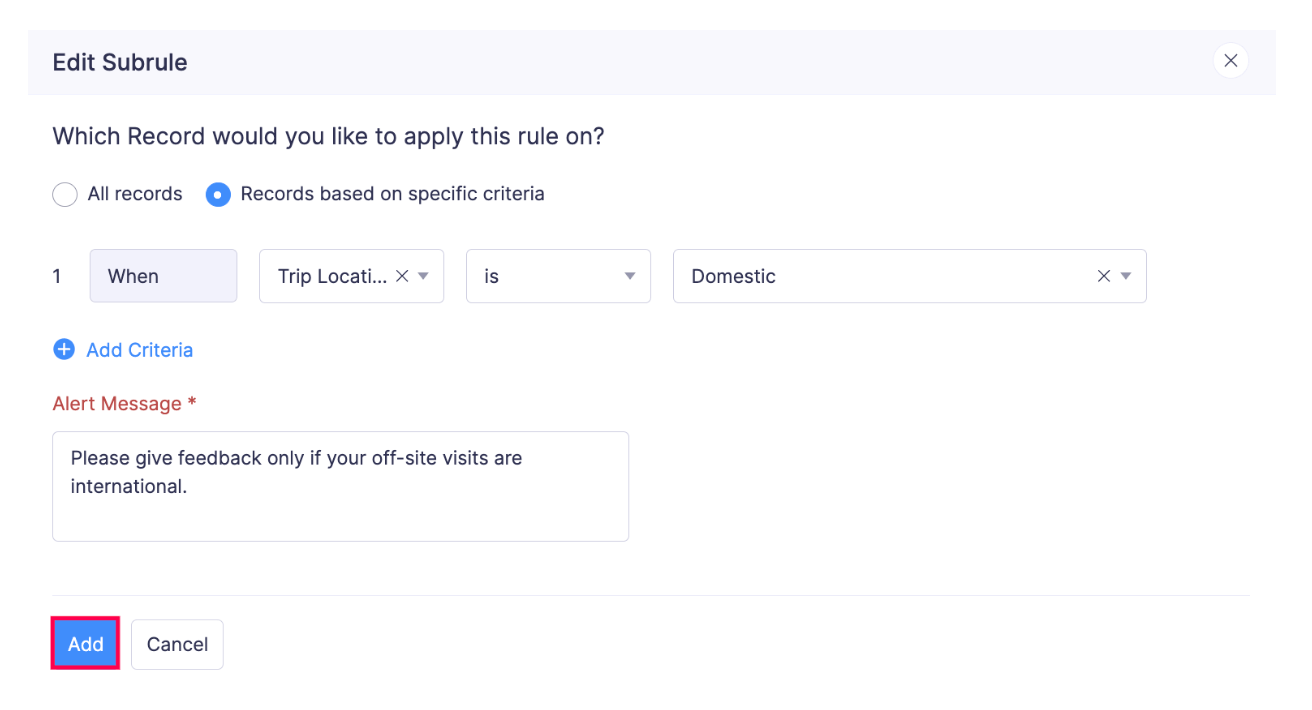
- Enter the Criteria and the Alert Message.
- Click Add.
- Verify the subrule you had created and click Save for the changes to reflect.
Edit Validation Rules
Here’s how you can edit a validation rule:
- Click Admin View on the left sidebar.
- Go to Settings on the left sidebar.
(OR)
Click Settings in the top right corner of the page. - Select Modules under Customization.
- Select the module for which you want to edit the validation rule.
- Go to the Validation Rules tab of the respective module.
- Hover over the validation rule and click the More icon.
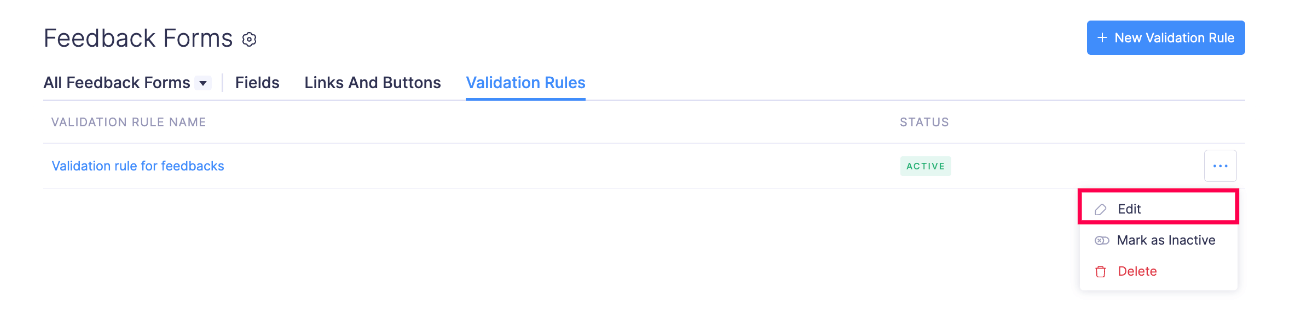
- Click Edit and make the necessary changes.
- Click Save.
Delete Validation Rules
Here’s how you can delete a validation rule:
- Click Admin View on the left sidebar.
- Go to Settings on the left sidebar.
(OR)
Click Settings in the top right corner of the page. - Select Modules under Customization.
- Select the module for which you want to delete the validation rule.
- Go to the Validation Rules tab of the respective module.
- Hover over the validation rule and click the More icon.
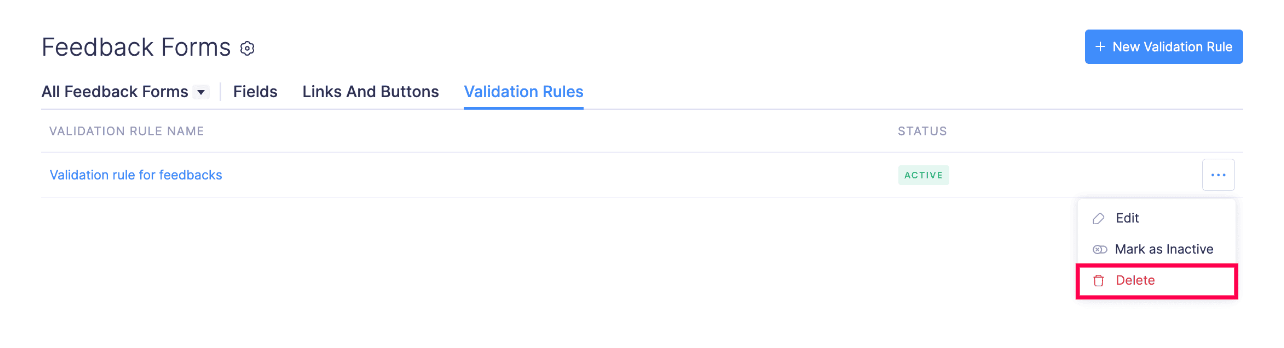
- Click Delete.
- Confirm your action by clicking Delete again to delete the validation rule in the pop-up.
Mark Validation Rule as Inactive
Instead of deleting a validation rule, you can mark the validation rule as inactive. This allows you to temporarily disable the validation rule and reuse when necessary. Here’s how to mark a validation rule as inactive:
- Click Admin View on the left sidebar.
- Go to Settings on the left sidebar.
(OR)
Click Settings in the top right corner of the page. - Select Modules under Customization.
- Select the module for which you want to mark the validation rule as inactive.
- Go to the Validation Rules tab of the respective module.
- Hover over the validation rule and click the More icon.
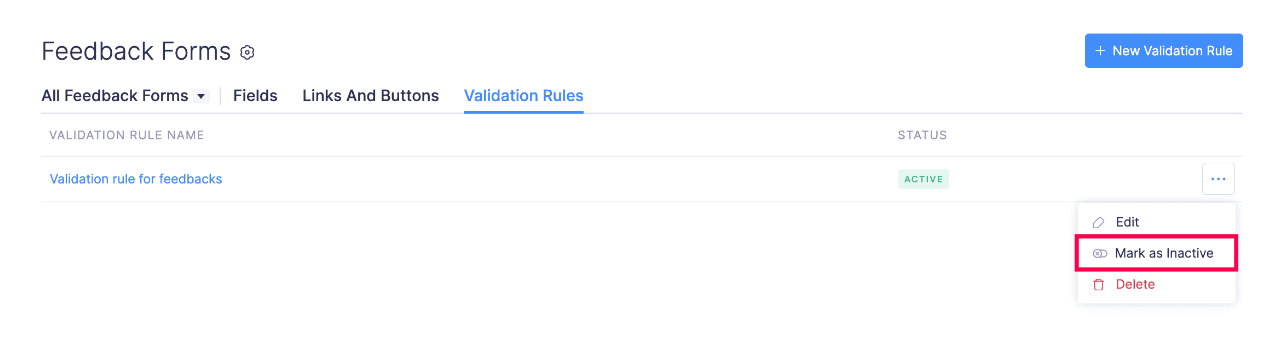
- Click Mark as Inactive.
The validation rule will be updated and marked as inactive.
Mark an Inactive Validation Rule as Active
Here’s how you can mark an inactive validation rule as active:
- Click Admin View on the left sidebar.
- Go to Settings on the left sidebar.
(OR)
Click Settings in the top right corner of the page. - Select Modules under Customization.
- Select the module for which you want to mark the validation rule as active.
- Go to the Validation Rules tab of the respective module.
- Hover over the validation rule and click the More icon.
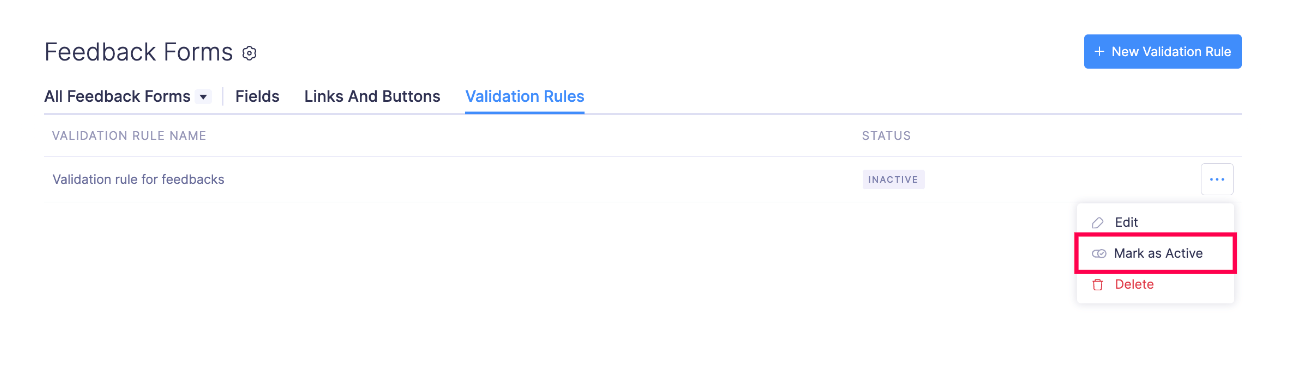
- Click Mark as Active.
The validation rule will be updated and marked as active.
 Yes
No
Yes
No
Thank you for your feedback!