
Add, Assign, and Fetch Corporate Card Feeds via Plaid
You can fetch the corporate cards that are issued to the users in your organization by connecting with the bank that has issued them. After fetching the corporate cards, assign them to the respective users. Once this is done, our third-party service provider will fetch the cards’ feeds from the bank and sync them with Zoho Expense. You will be able to view all the transactions made by the users with their corporate cards. However, you will not be able to edit or convert them into expenses.
Note: This integration is currently available only in the US and Canada editions of Zoho Expense.
To connect your employee’s corporate card with Zoho Expense:
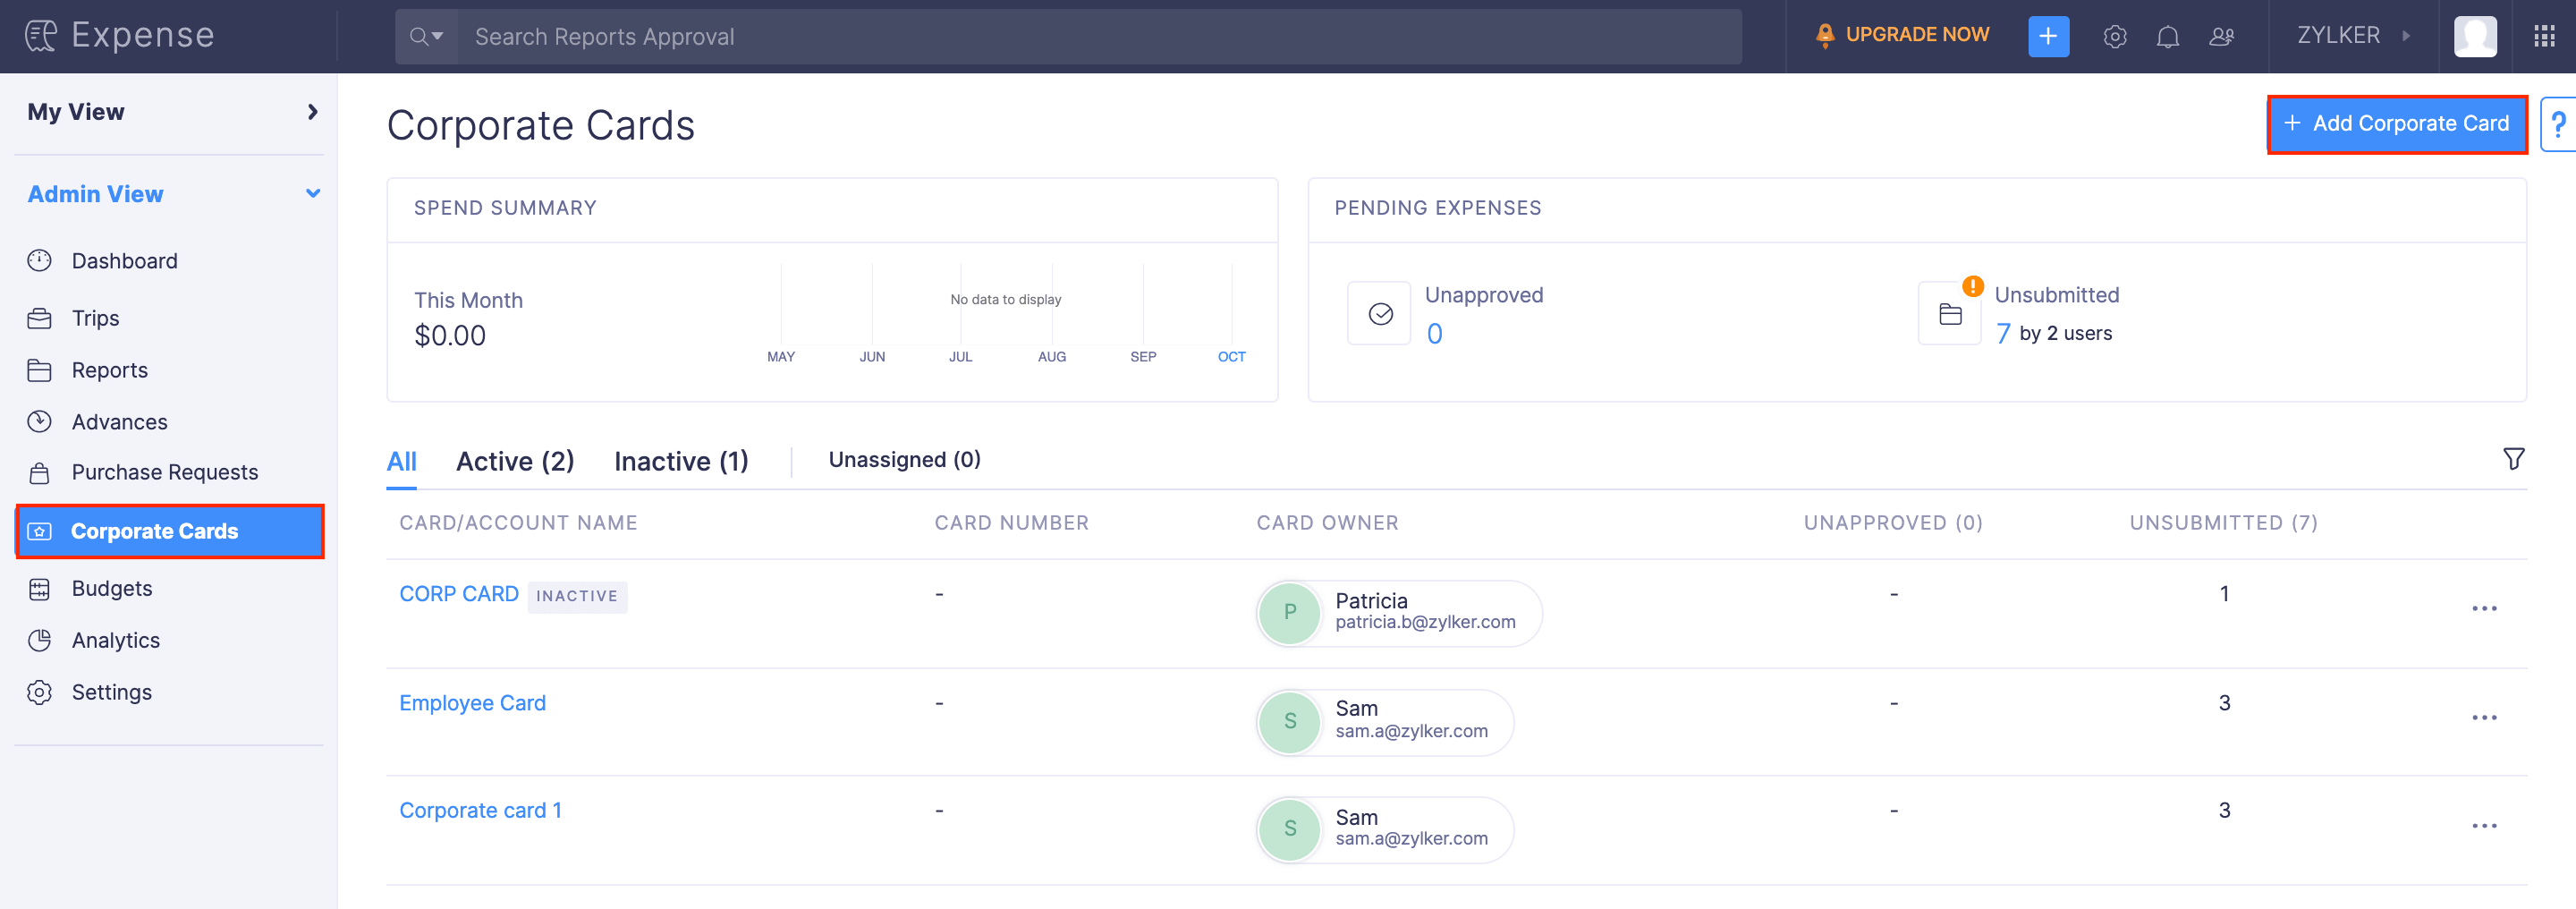
- Go to Corporate Cards on the left sidebar.
- Click the + Add Corporate Card at the top right corner.
- In the pop-up that appears, mark the box to agree to the end user terms, and click Proceed.
- In the page that follows, click Continue to agree to Plaid’s End User Privacy Policy.
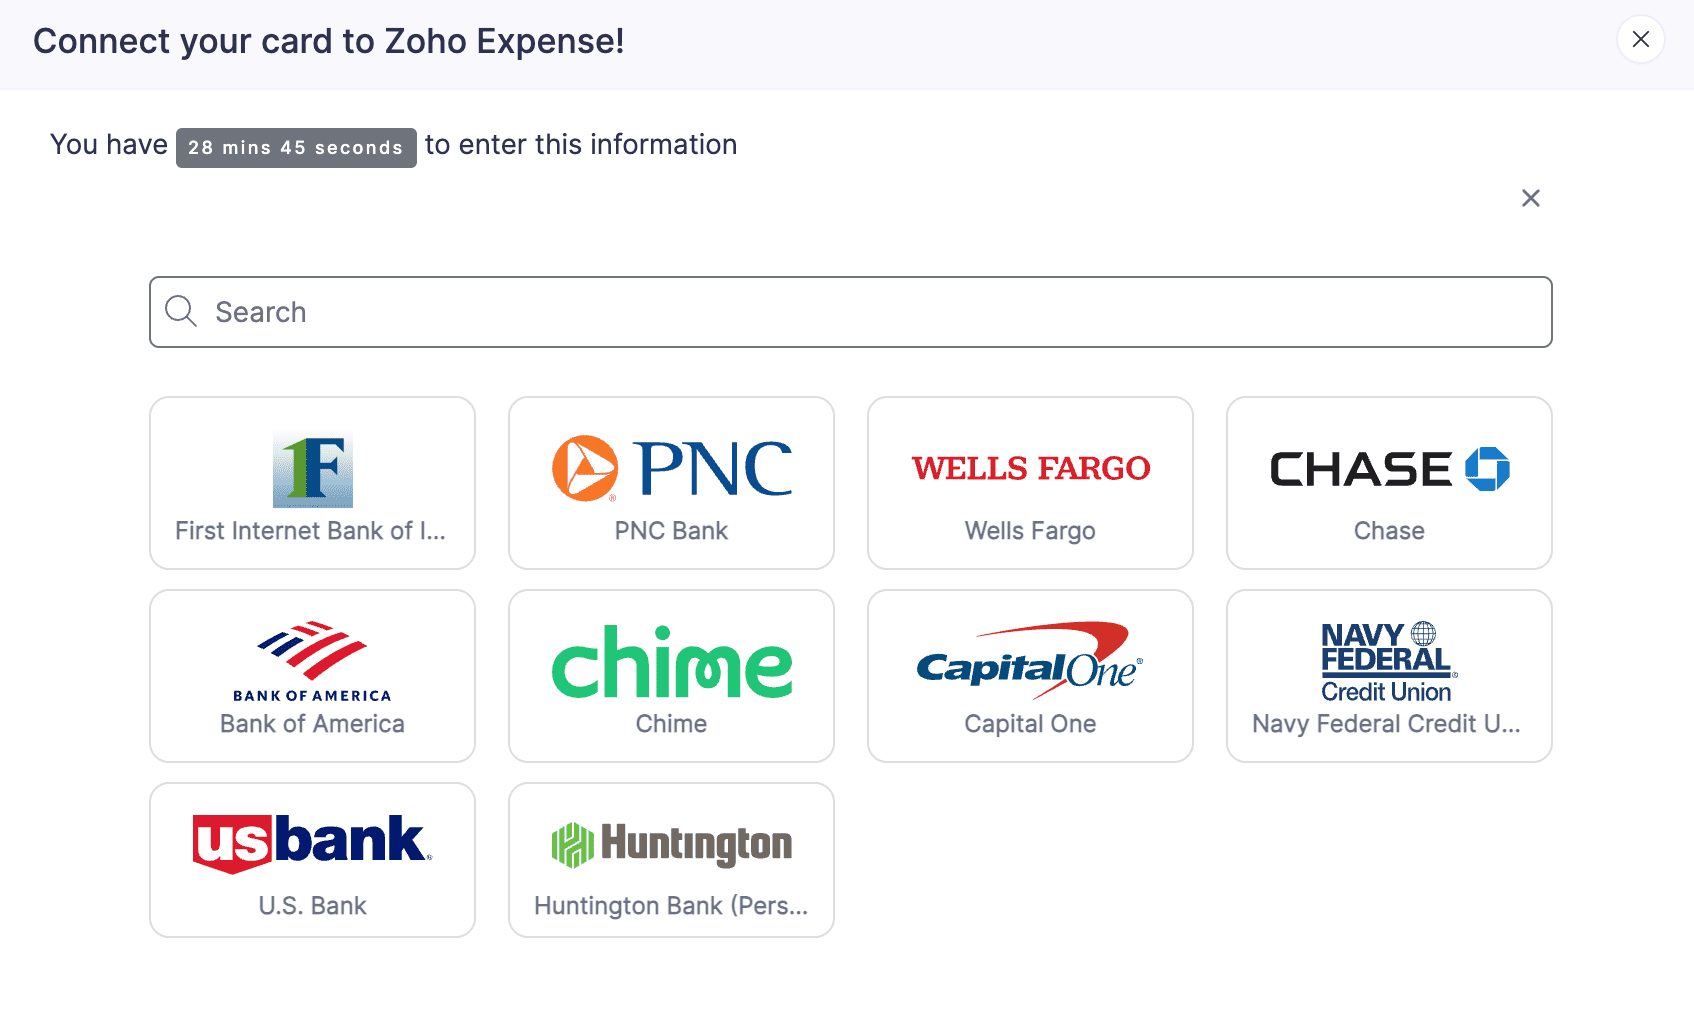
- Enter the bank’s name in the search bar or select it from the list and click Continue to login.
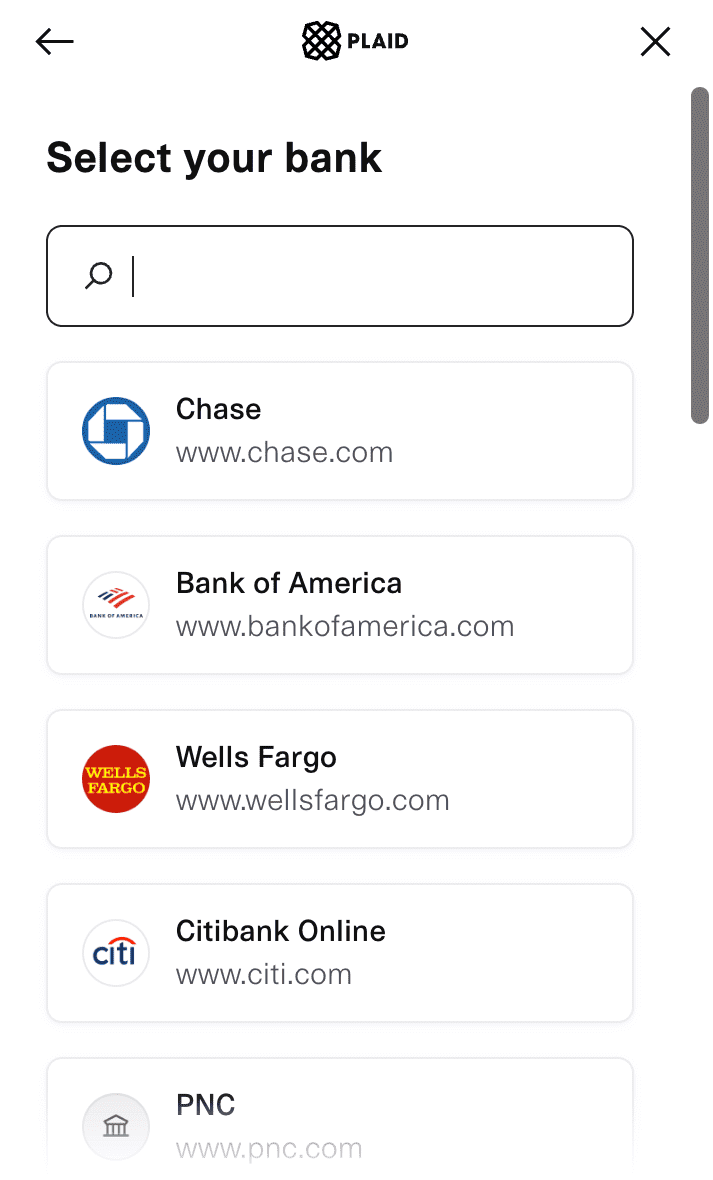
Note: If the bank’s name is not listed, then the bank is not supported by Plaid for automatic feeds. You can switch to yodlee and fetch the card feeds from your bank account.
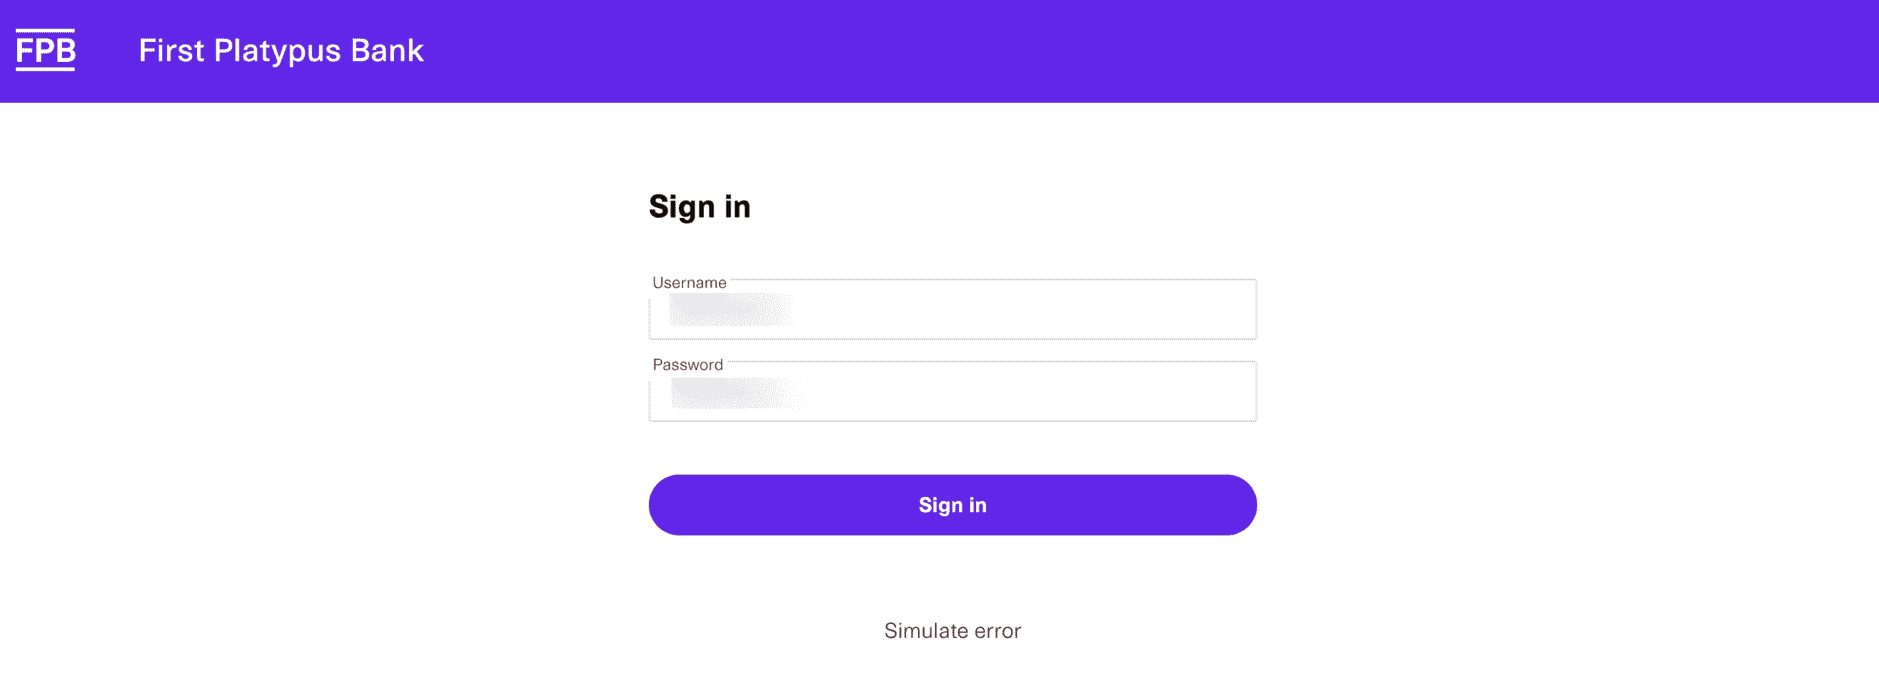
- Enter the credentials to log into the account. Click Sign in.
- Next, select the accounts you want to connect with Plaid and fetch feeds into Zoho Expense.

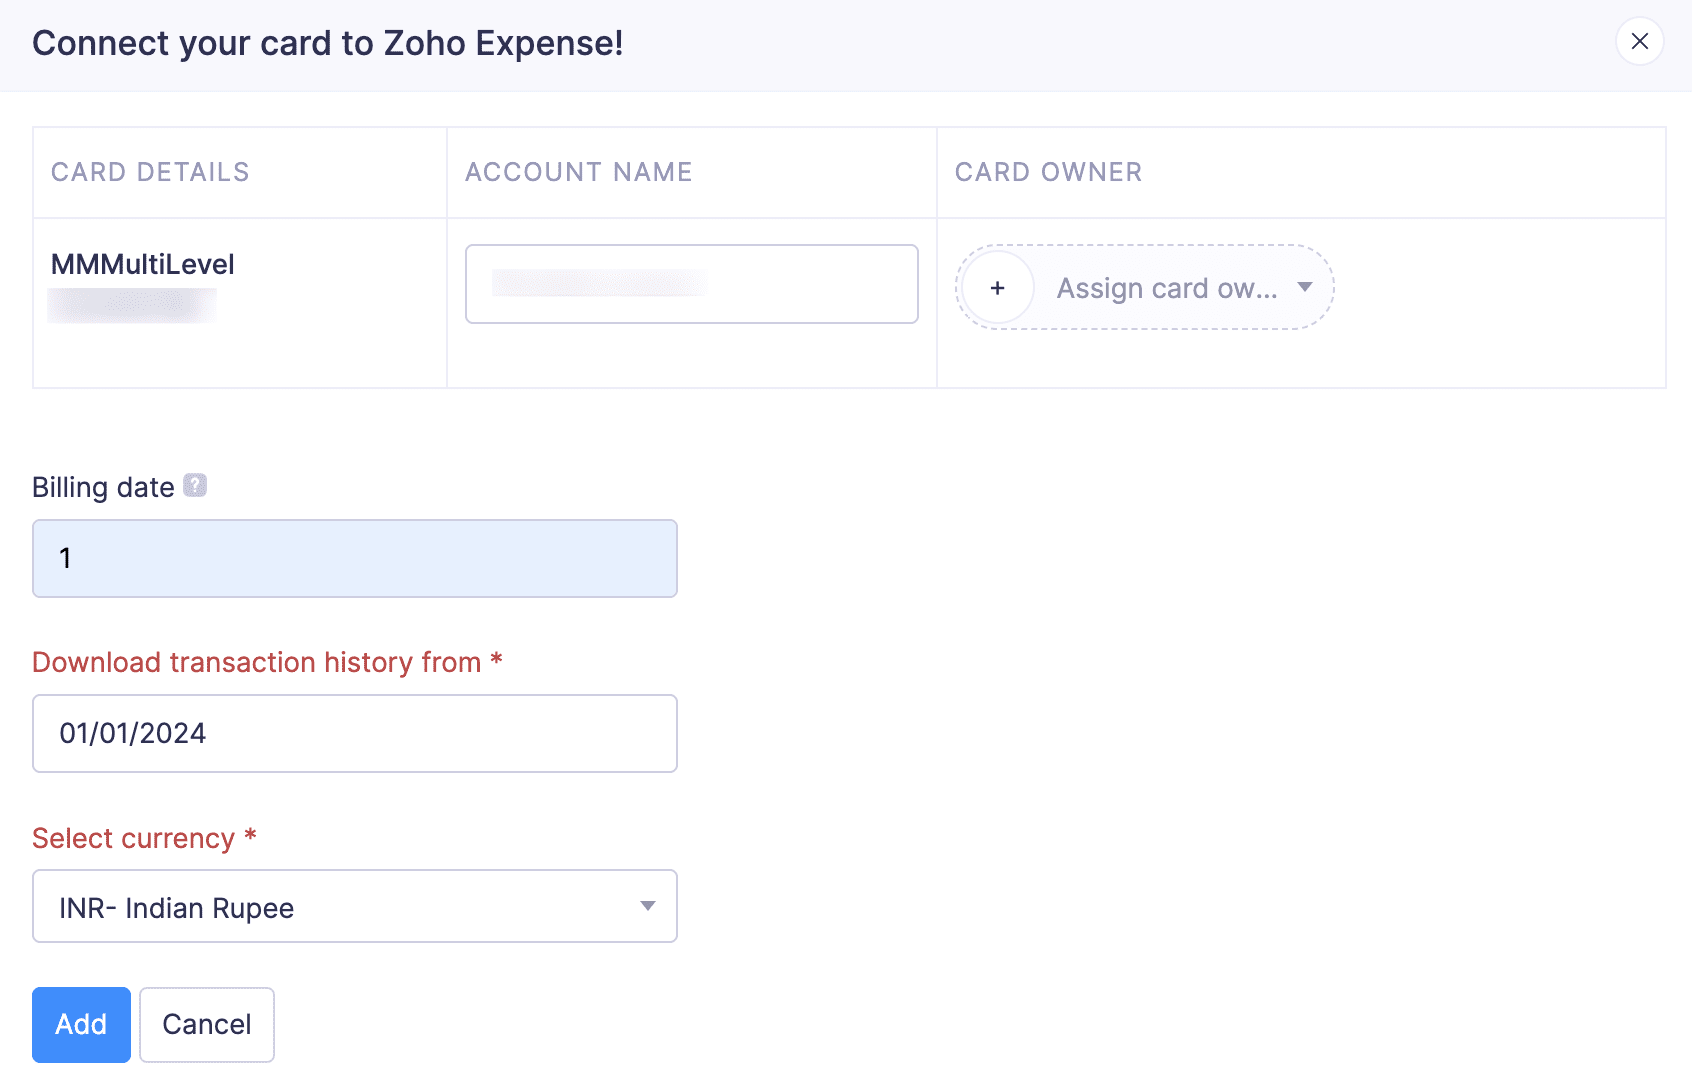
- On the page that opens, under Account Name you can enter the name by which you want to display the card in Zoho Expense.
- You can also assign an owner to this card by clicking + Add card owner.
- In the Billing Date field, enter the date on which the card will be billed every month.
- Choose the date from when you would like to download the transaction history. You can download up to 90 days of transaction history.
- Select the currency with which the transactions are made in those cards.
- Click Add. The card will be added, and your employee will now receive card feeds directly from the bank to Zoho Expense.
Add, Assign, and Fetch Corporate Card Feeds via Yodlee
You can fetch the corporate cards that are issued to the users in your organization by connecting with the bank that has issued them. After fetching the corporate cards, assign them to the respective users. Once this is done, our third-party service provider will fetch the cards’ feeds from the bank and sync them with Zoho Expense. You will be able to view all the transactions made by the users with their corporate cards. However, you will not be able to edit or convert them into expenses.
To connect your employee’s corporate card with Zoho Expense:
- Go to Corporate Cards on the left sidebar.
- Click the + Add Corporate Card at the top right corner.
- Enter your employee’s bank’s name in the search bar or select it from the list.
Note: If your bank’s name is not listed, then your bank is not supported by Yodlee for automatic feeds. You can contact the support team by clicking Contact Us with your card details.
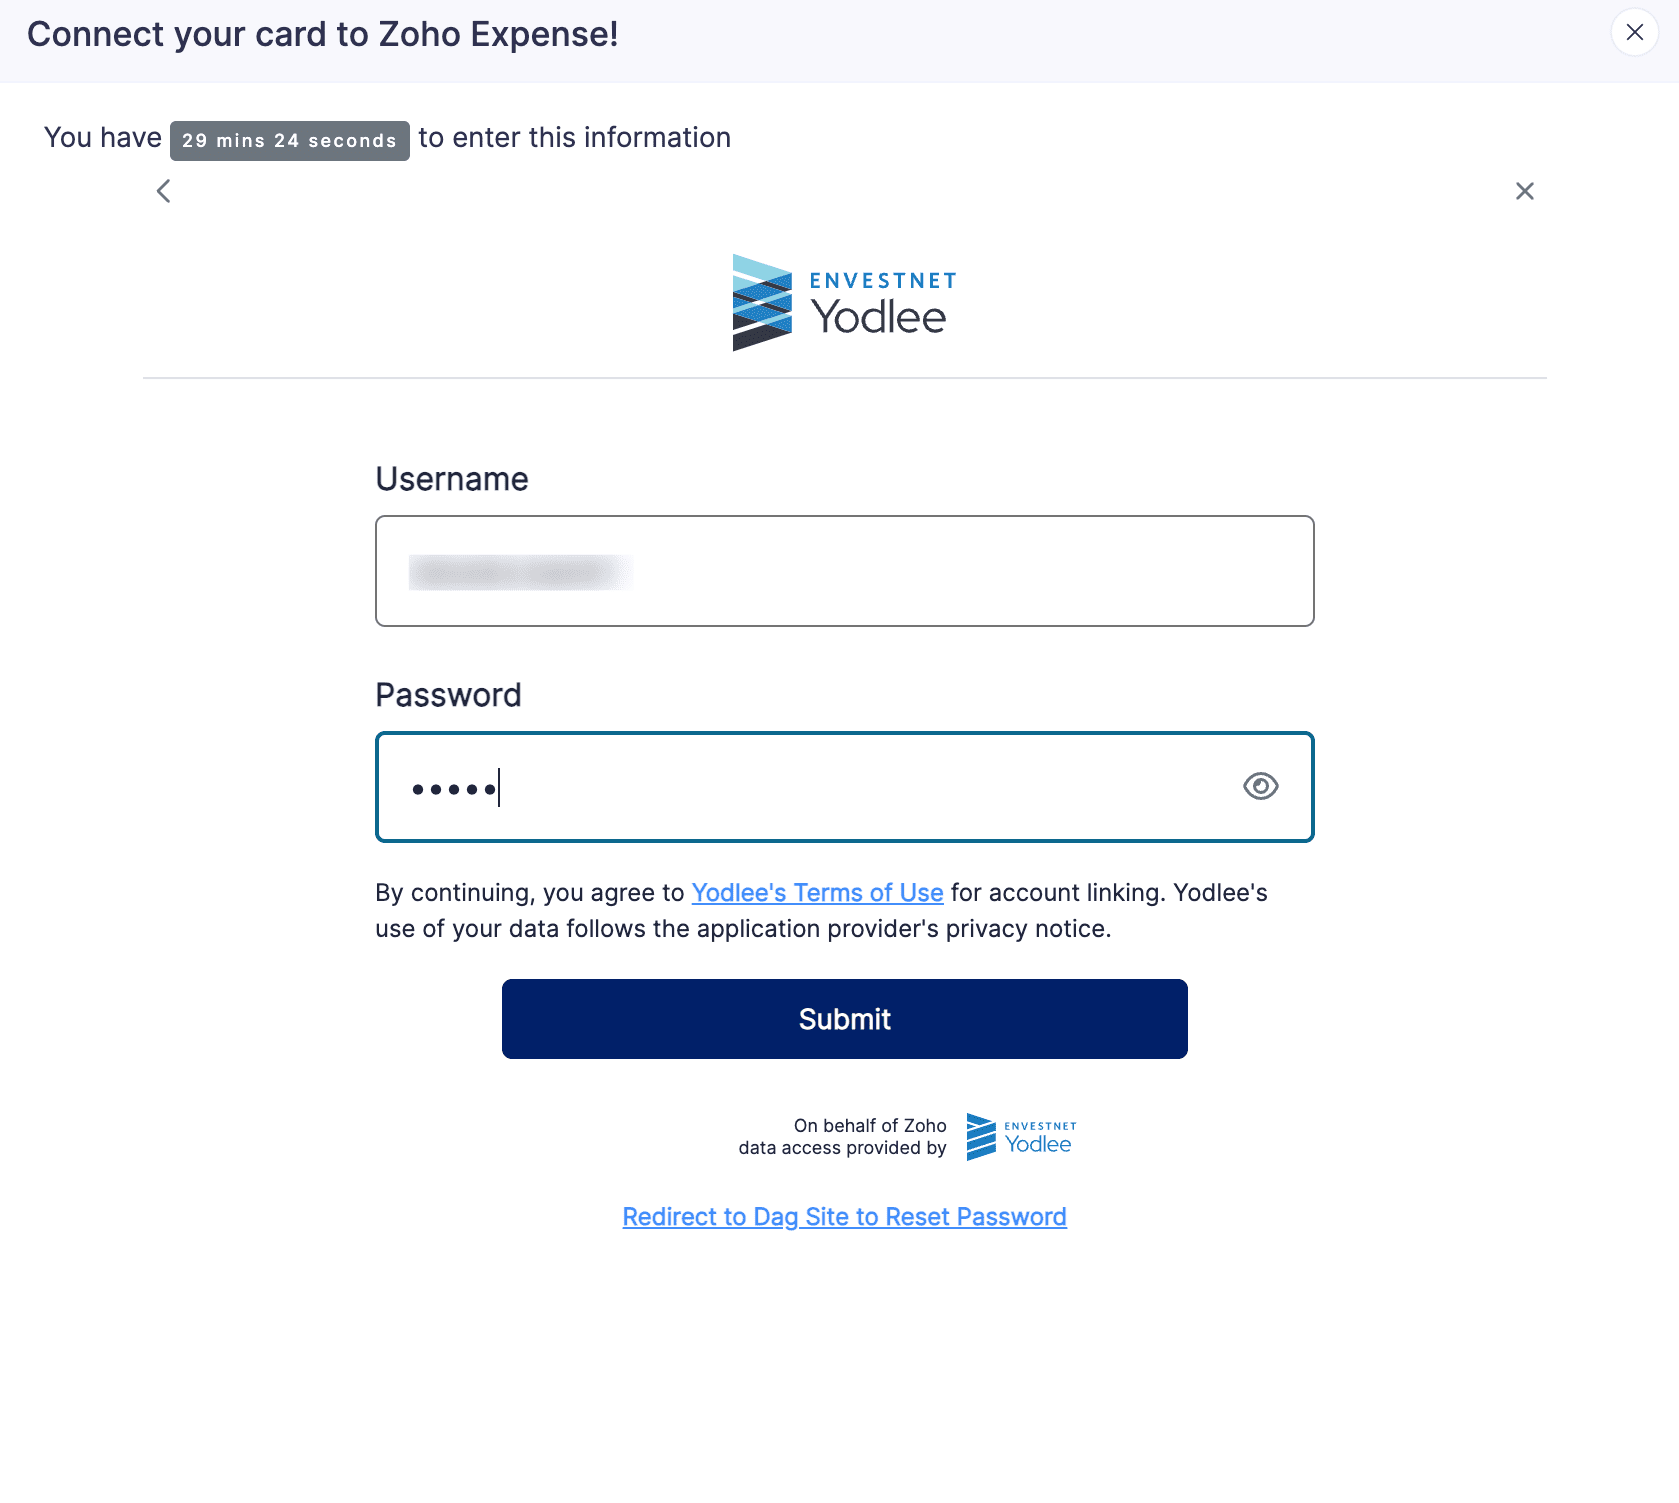
- In the page that opens, enter the credentials to log into the bank account and click Submit.
- Next, all the cards listed under the authenticated bank account will be connected with Yodlee. Click Save and Finish.
- On the page that opens, under Account Name, enter the name by which you want to display the card in Zoho Expense.
- You can also assign an owner to this card by clicking + Assign Card Owner.
- In the Billing Date field, enter the date on which the card will be billed every month.
- Choose the date from when you would like to download the transaction history. You can download up to 90 days of transaction history.
- Select the currency with which the transactions are made in those cards.
- Then click Add. Your employee’s card will be added, and feeds will be fetched directly from your employee’s bank account to Zoho Expense.