
Integrate Zoho Inventory with Google Workspace
Integrating Zoho Inventory with your Google Workspace account combines the powerful accounting features of Zoho Inventory with Google’s storage (Gmail) and communication (Google Contacts) services. By signing in once, you can easily access Zoho Inventory while logged into your Google Workspace account.
Note: The integration follows Google’s Limited Use requirements to access and share information from Google APIs in a secure way, as permitted by Google.
Benefits of the Integration
- Import contacts from your Google Workspace account as Customers in Zoho Inventory, and create transactions for them.
- Fetch emails of imported customers and view them in Zoho Inventory.
- Associate emails and its attachments with the corresponding customers in Zoho Inventory.
Prerequisite:
- You need a Google Workspace email address (not a Gmail address).
- The email must be the same one you use to log into Zoho Inventory.
- You must be an Admin in your Google Workspace account to set up integration.
Integrate With Google Workspace
To integrate your Zoho Inventory organization with your Google Workspace account:
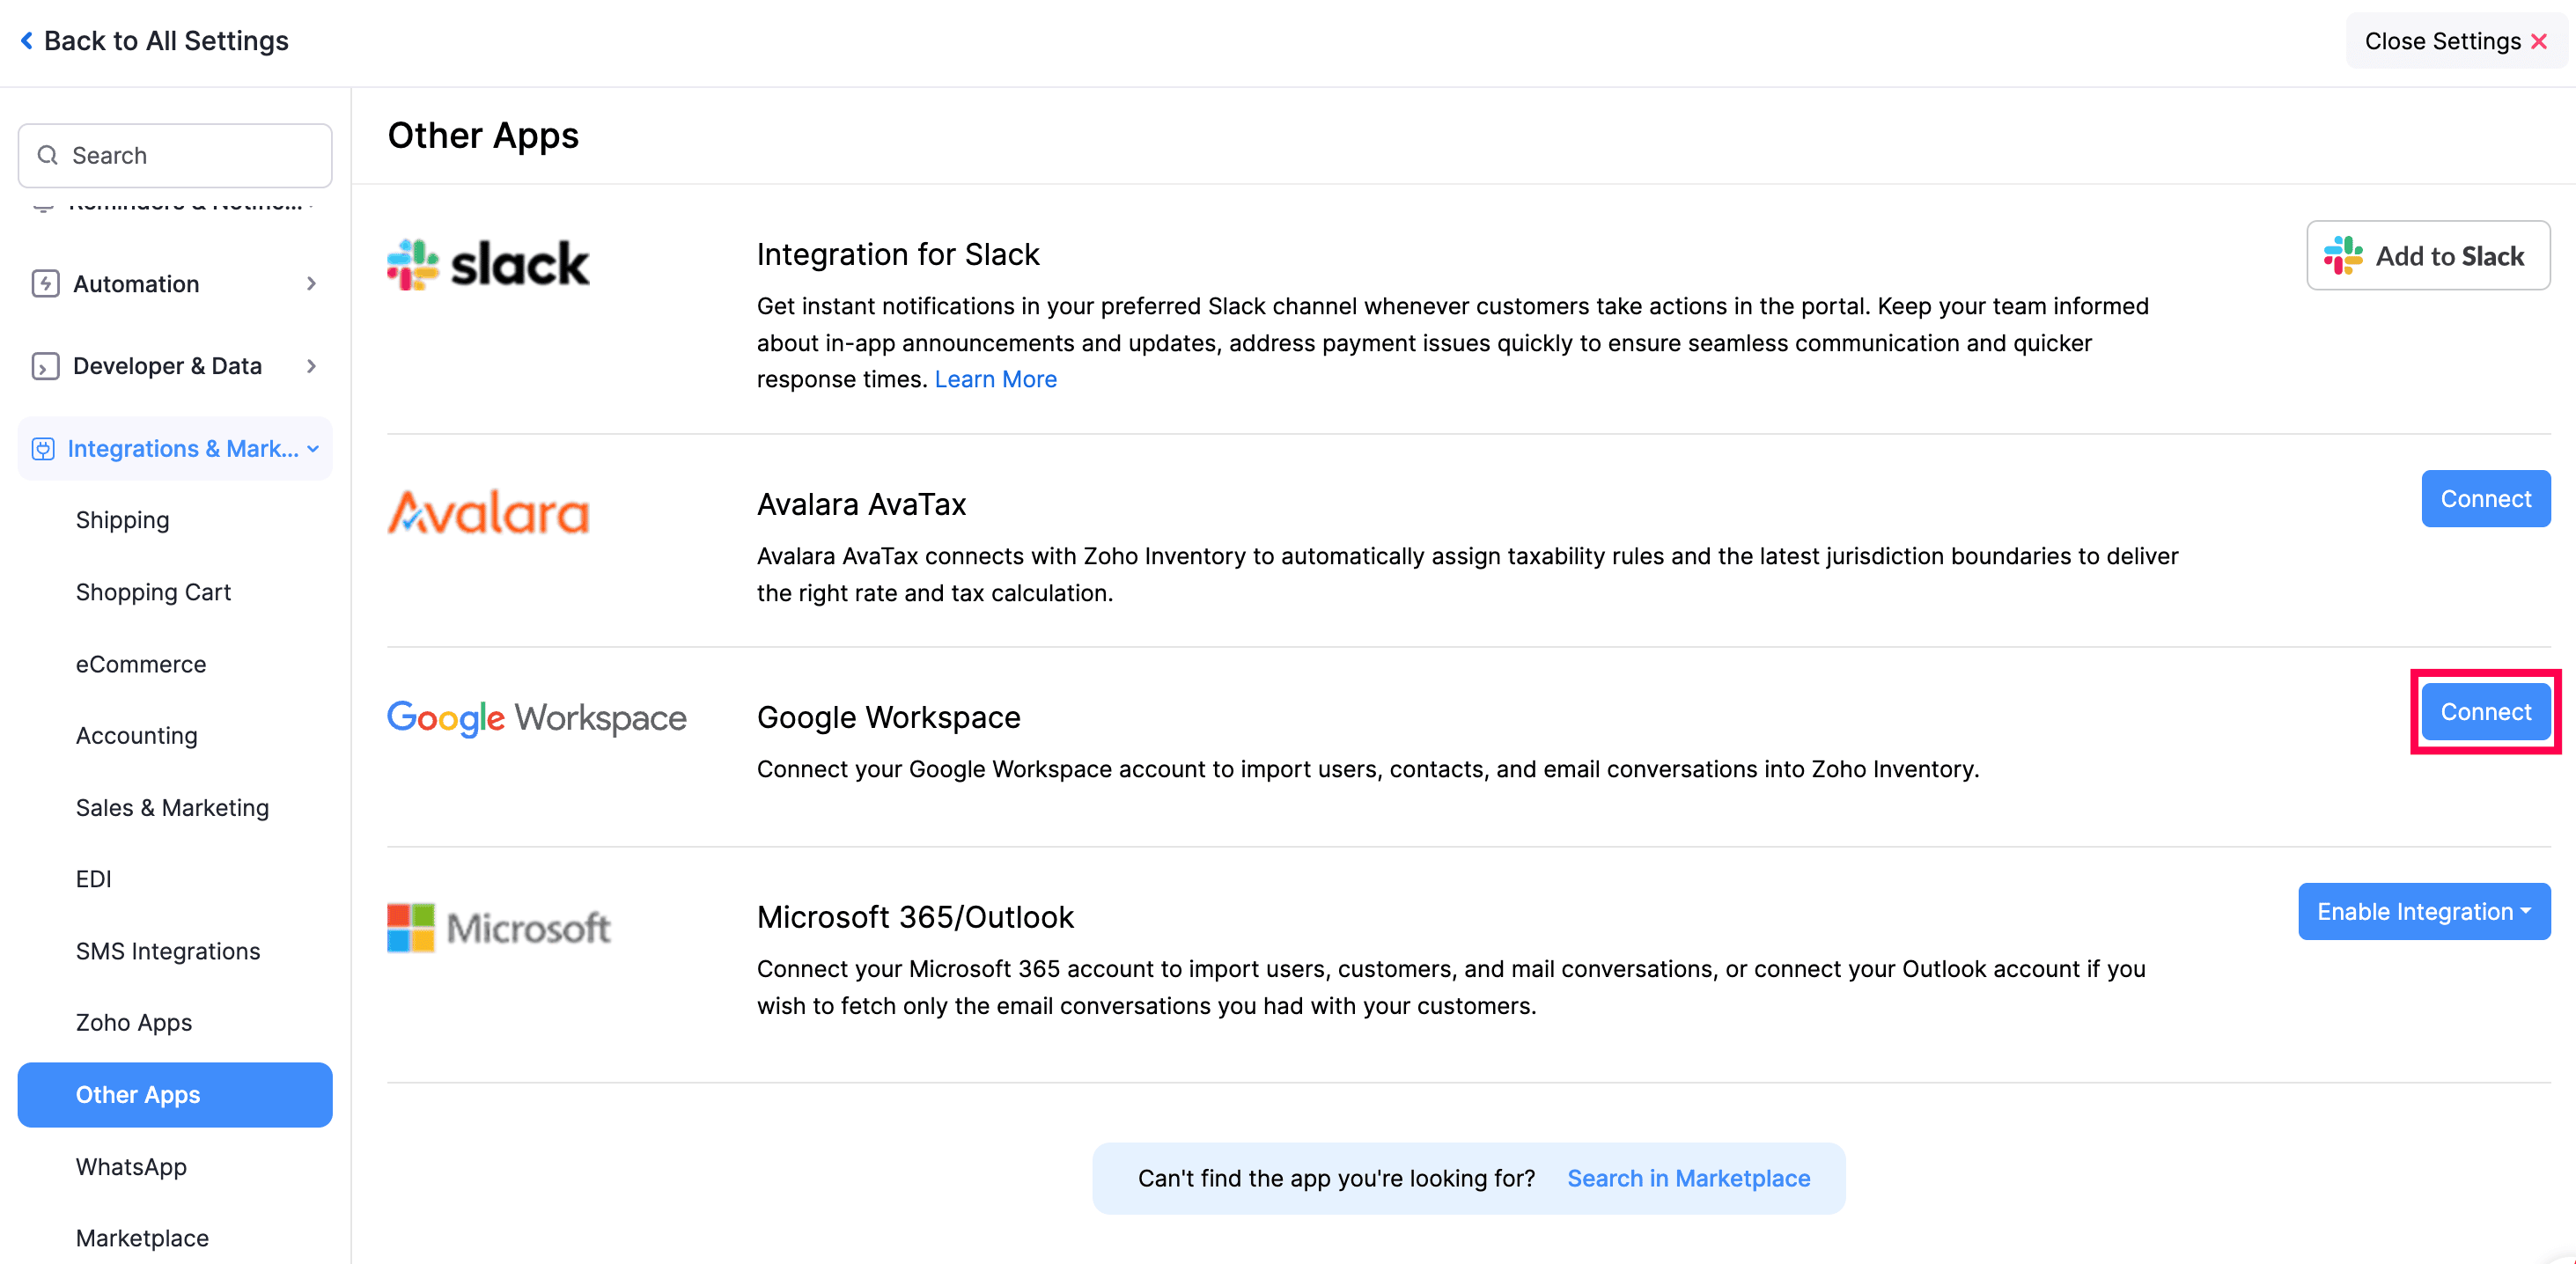
Go to Settings.
Select Other Apps under Integrations & Marketplace.
Click Connect next to Google Workspace.
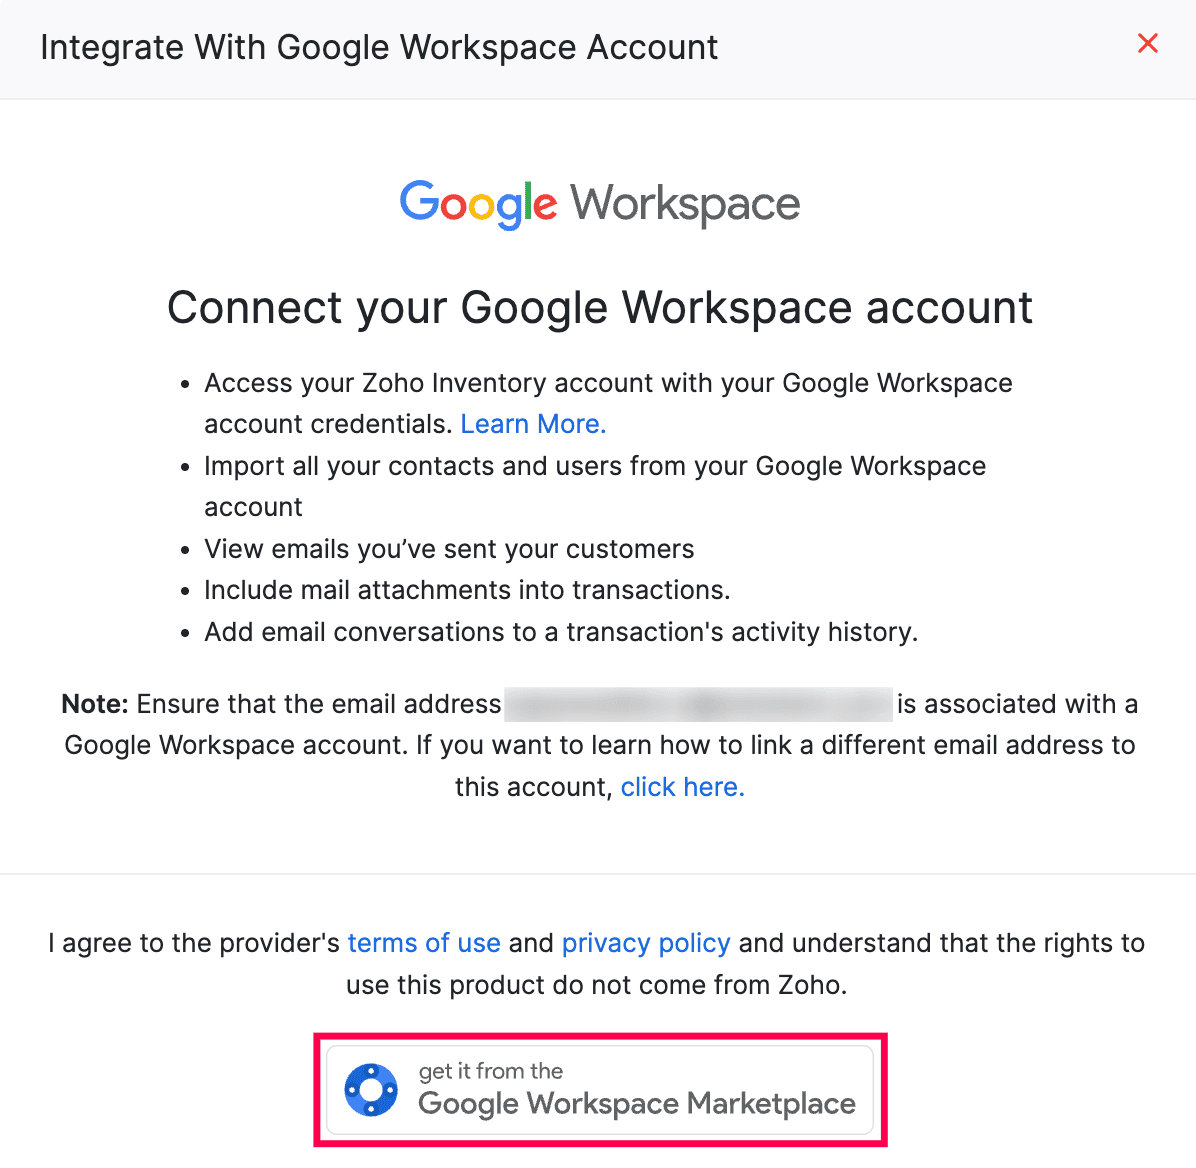
In the Integrate With Google Workspace Account pop-up, read the terms and click get it from the Google Workspace Marketplace. You’ll be redirected to the Google Workspace Marketplace page.
Click Admin Install or Individual Install next to Zoho Inventory.
- If you’re an admin in the Zoho Inventory organization and have users, clicking Admin Install will install the Zoho Inventory app for you and your users in the organization.
- In the pop-up that appears, click Continue to provide permission.
- In the next page, select if you want to enable it to all the users in your organization or only to specific groups or organizational units. This way, the users in your organization will be grouped together, and similar preferences will be applied to them.
- Read and agree to the application’s Terms of Service, Privacy Policy, and Google Workspace Marketplace’s Terms of Service, and click Finish.
- If you choose to enable Zoho Inventory only for specific users, you’ll be redirected to the Select Users page, where you can select the required groups and organizational units, and click Finish.
- Whereas, if you click Individual Install, the Zoho Inventory app will be installed only for you.
- In the Sign in with Google pop-up, select the required Google Workspace account and click Continue.
- Under Select what Zoho Inventory can access, choose Select All, and click Continue.
- If you’re an admin in the Zoho Inventory organization and have users, clicking Admin Install will install the Zoho Inventory app for you and your users in the organization.
The Zoho Inventory app will be installed in your Google Workspace account.
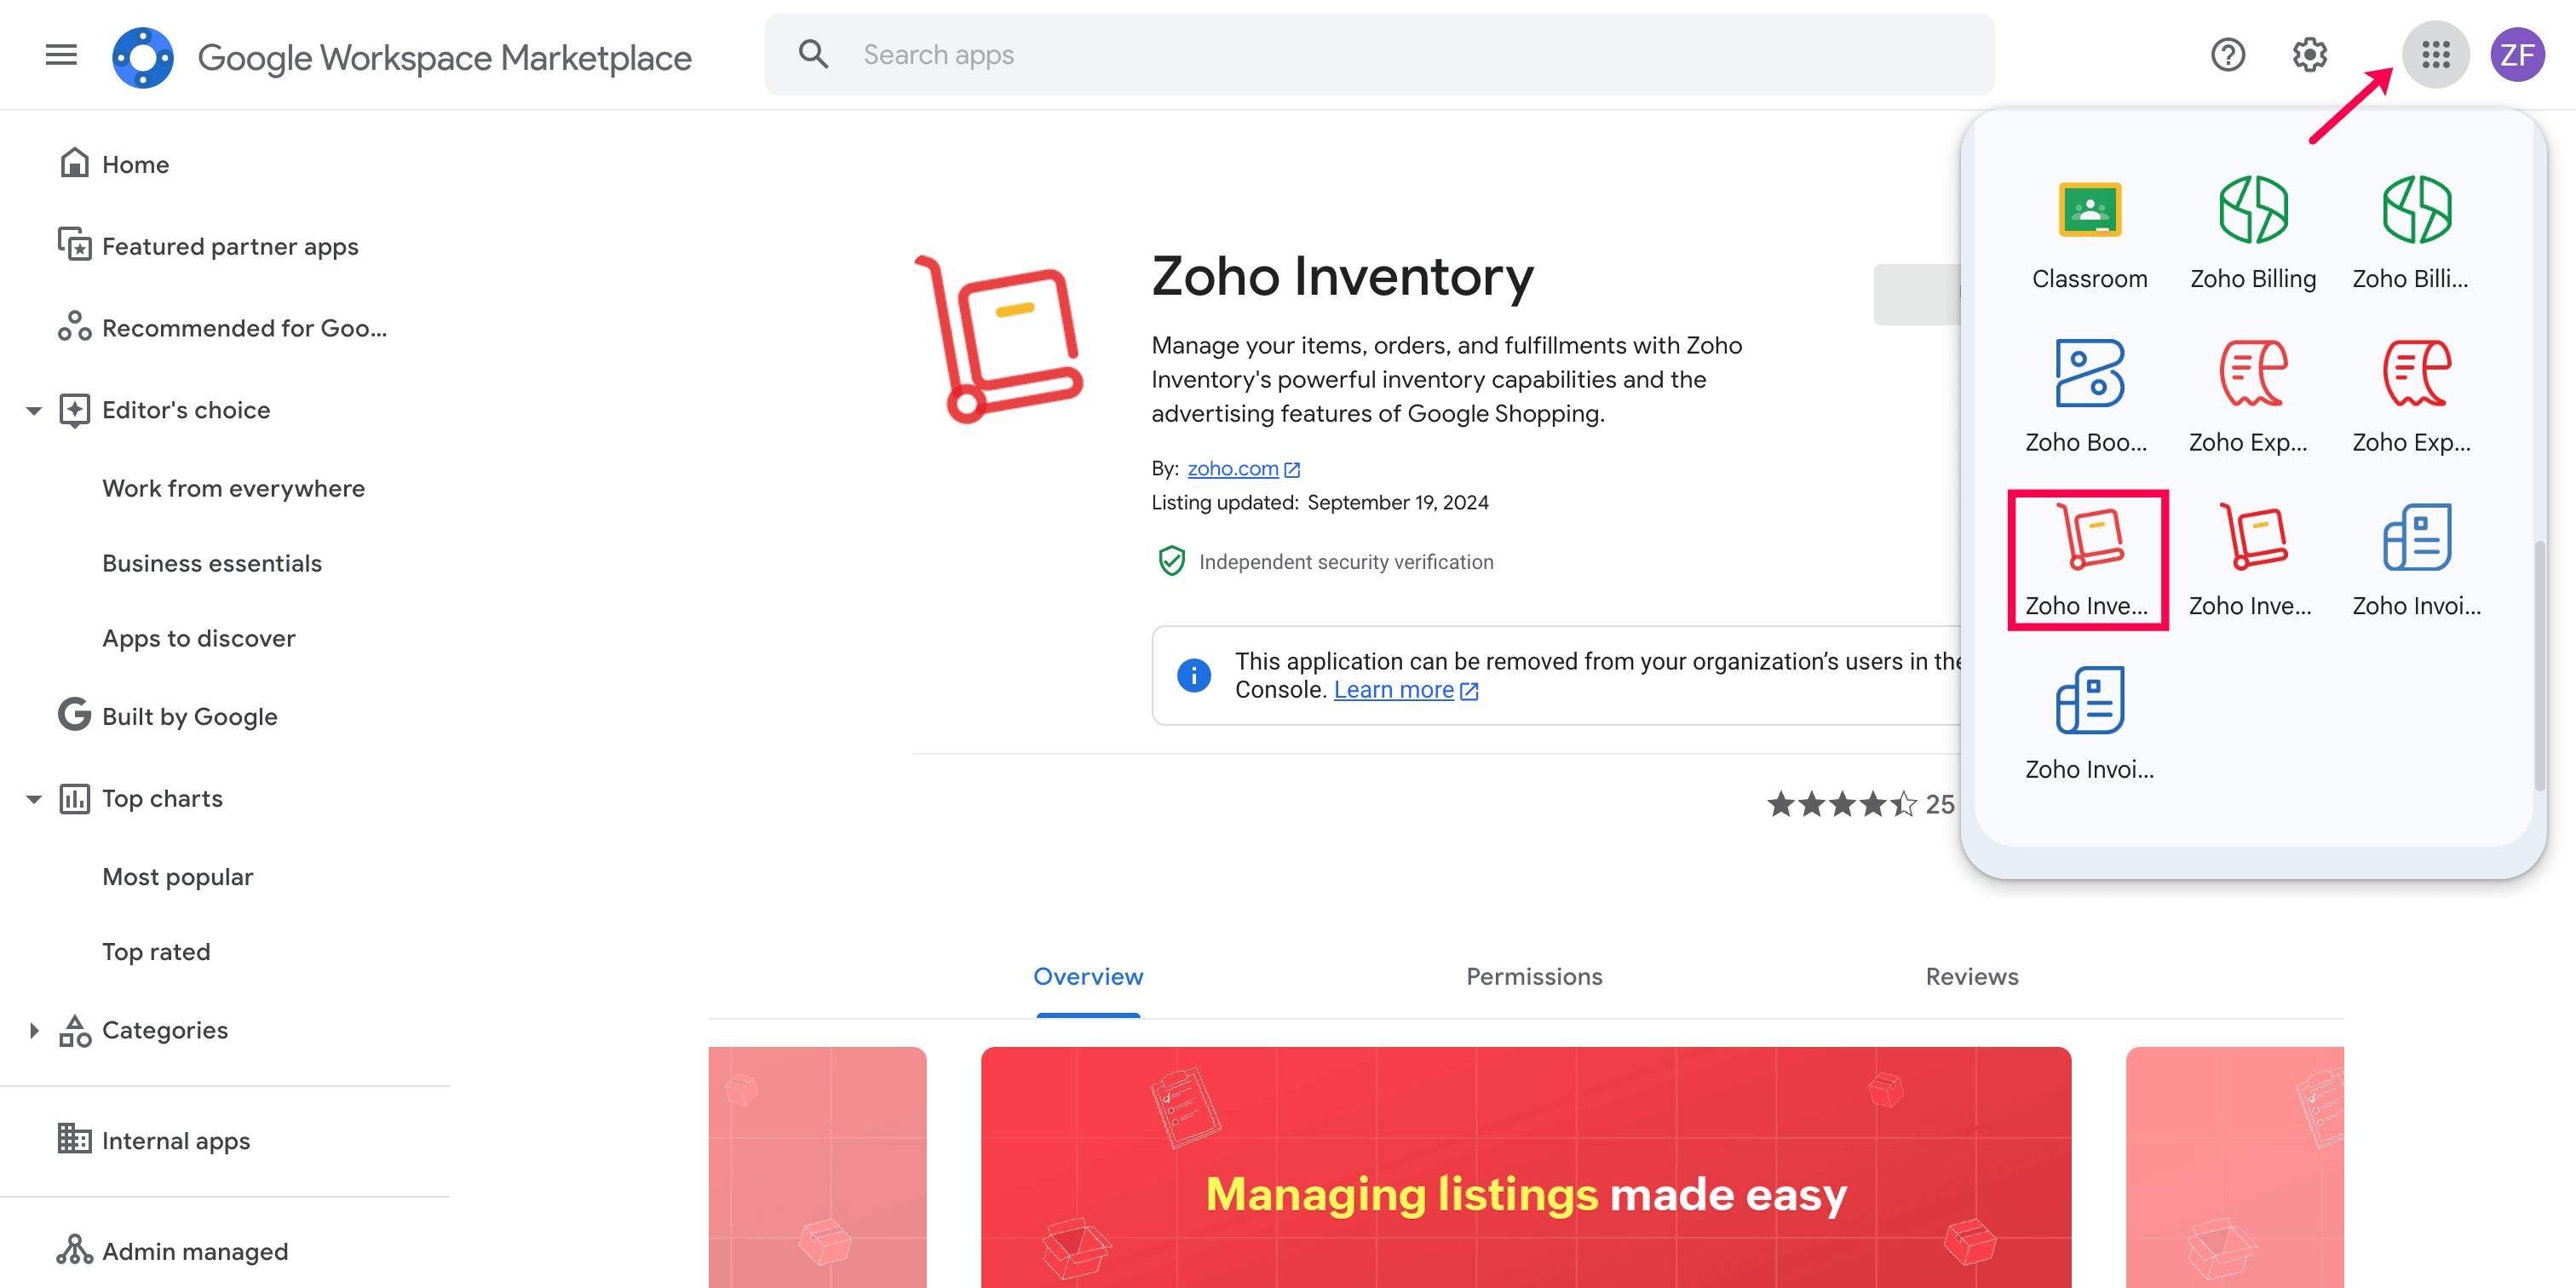
Once installed, click the Google Apps icon and select Zoho Inventory from the pop-up. You’ll be redirected to the My Organizations list page. Click Go to Organization next to the required Zoho Inventory organization you want to integrate with your Google Workspace account.
Now, you can access your Zoho Inventory organizations directly from the Google Apps list.
Import Customers from Google Workspace
To import customers from your Google Workspace account into Zoho Inventory:
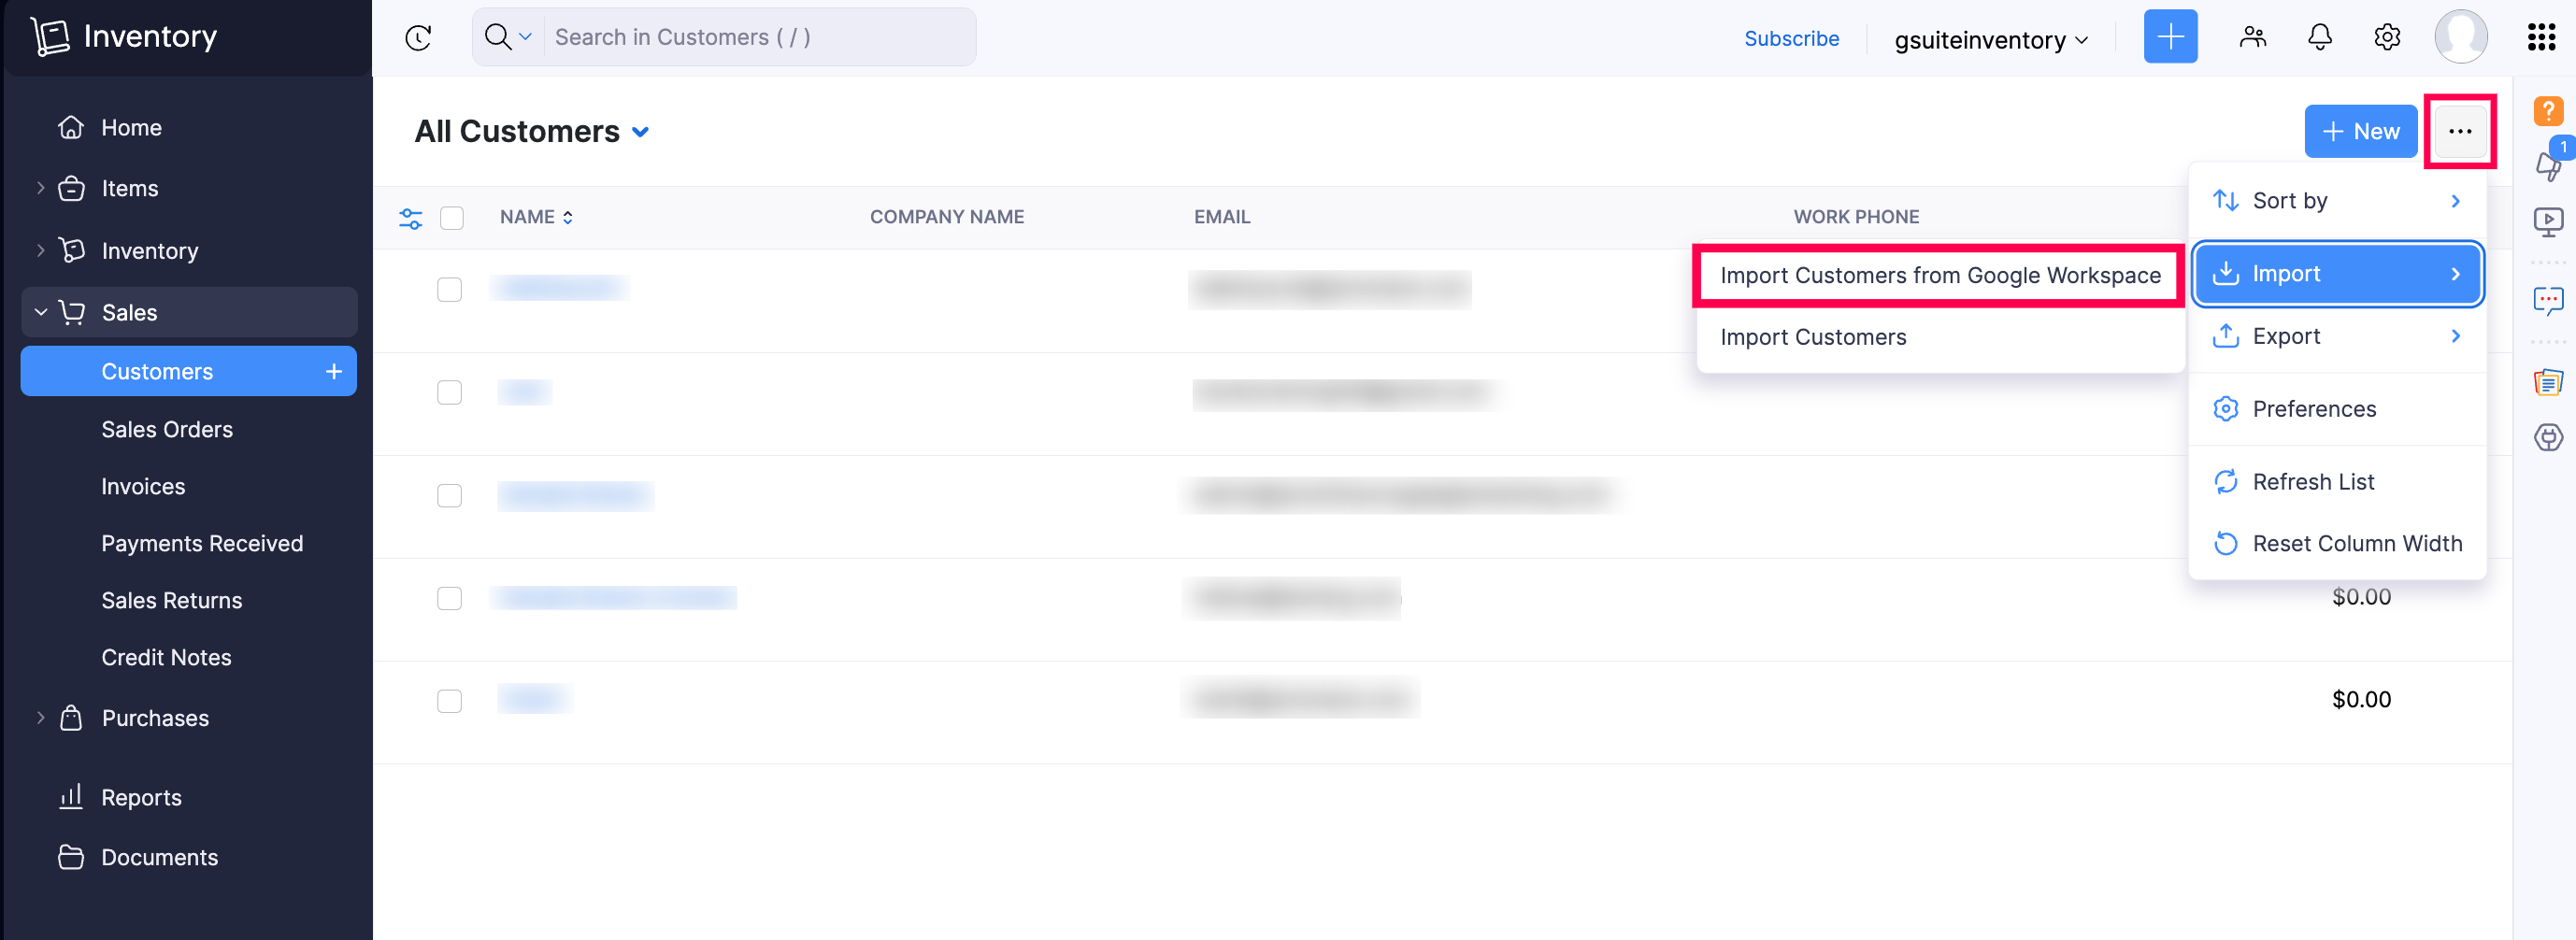
Go to Sales on the left sidebar and select Customers.
Click the More icon in the top right corner and select Import Customers from Google Workspace from the dropdown.
In the Import Contacts from Google Workspace page, hover over the required customers, and click Add.
Click Continue to Import.
The selected contacts will be imported as Customers into Zoho Inventory. Once done, you can record other details like tax details, credit limits, opening balances, and more, and create transactions for them.
You can also sync and view their emails in Zoho Inventory. Here’s how:
Go to Sales on the left sidebar and select Customers.
Select the Google Workspace customer whose email you wish to sync into Zoho Inventory.
Navigate to the Mails tab on the customer’s Details page.
Click the System Mails dropdown, and select the required email.
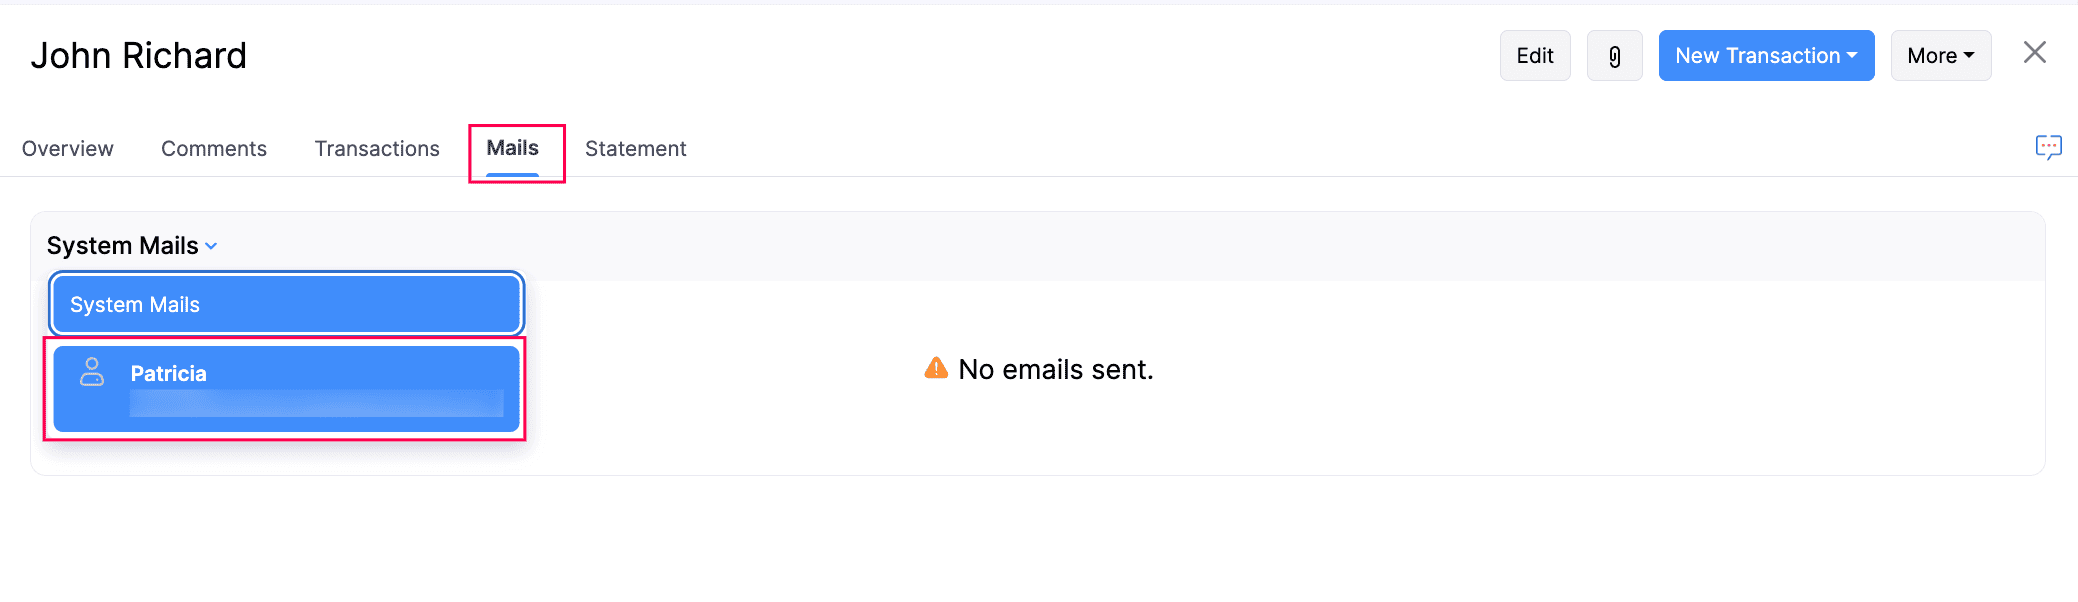
Now, you can view the list of email conversations your customer has received, along with any included attachments.
Other Actions
There is a list of actions you can perform in the Mails tab of the Customers module:
Add Email to Invoices and Quotes
You can associate an email and its attachments when you record quotes or invoices for the customer imported from your Google Workspace account, for internal use. To do this:
- Go to Sales on the left sidebar and select Customers.
- Select the required customer for whom you want to view emails.
- Navigate to the Mails tab.
- Click the System Mails dropdown and select the Google Workspace email linked with Zoho Inventory.
- Select the required email conversation.
- In the pane that appears, click the Add mail to dropdown, and select Invoice or Quote, based on your preference.
You’ll be redirected to the respective transaction’s Creation page, where the email will be attached. You can enter the required details and save it.
Add Email to Customer Activity
You can add your customer’s email conversations as a part of the customer’s activity, for internal use. Here’s how:
- Go to Sales on the left sidebar and select Customers.
- Select the required customer for whom you want to view emails.
- Navigate to the Mails tab.
- Click the System Mails dropdown and select the Google Workspace email linked with Zoho Inventory.
- Select the required email.
- In the pane that appears, click the Add mail to dropdown, and select Customer Activity.
The respective email will be associated with the customer, and you can view it at the bottom of the customer’s Details page.
Add Email Attachments to Customer
You can add your customer’s email conversations along with the email attachments as a part of the customer’s activity. Here’s how:
- Go to Sales on the left sidebar and select Customers.
- Select the required customer for whom you want to view emails.
- Navigate to the Mails tab.
- Click the System Mails dropdown and select the Google Workspace email linked with Zoho Inventory.
- Select the required email.
- In the pane that appears, click the Add mail to dropdown, and select Add mail attachments to customer under Other Actions.
- In the pop-up that appears, select the required attachment, and click Attach.
The selected attachments in the email will be associated with the customer in Zoho Inventory, and you can view them by clicking the Attachment icon in the top right of the customer’s Details page.
Invite Google Workspace Users
To invite users from your Google Workspace account as users into your Zoho Inventory organization:
Go to Settings.
Select Users under Users & Roles.
Click the dropdown next to Invite User and select Invite Google Workspace User.
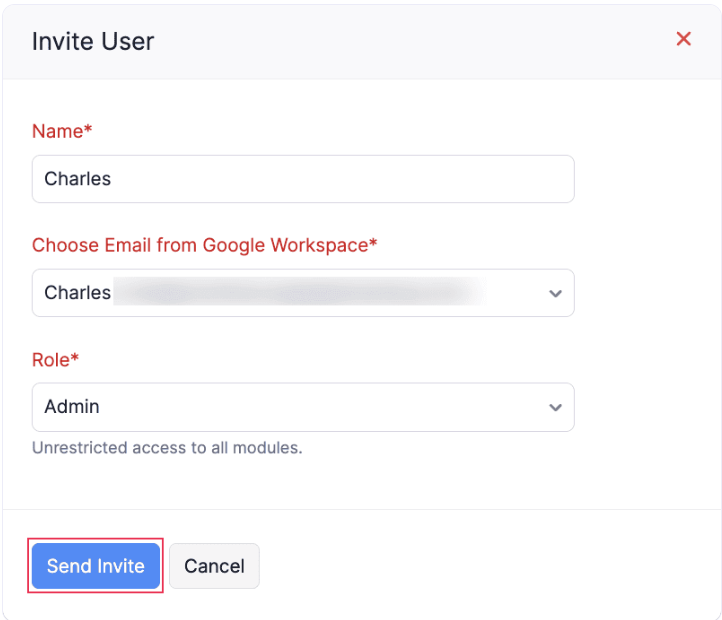
In the Invite User dropdown, fill in the following fields:
- Enter the Name of the user you want to invite.
- Select their email from the Choose email from Google Workspace dropdown.
- Select the Role you want to associate with the user.
Click Send Invite.
The respective user will receive an invitation link in their email. They must accept the invitation to join your Zoho Inventory organization.
Disable Integration
To disable the integration with Google Workspace:
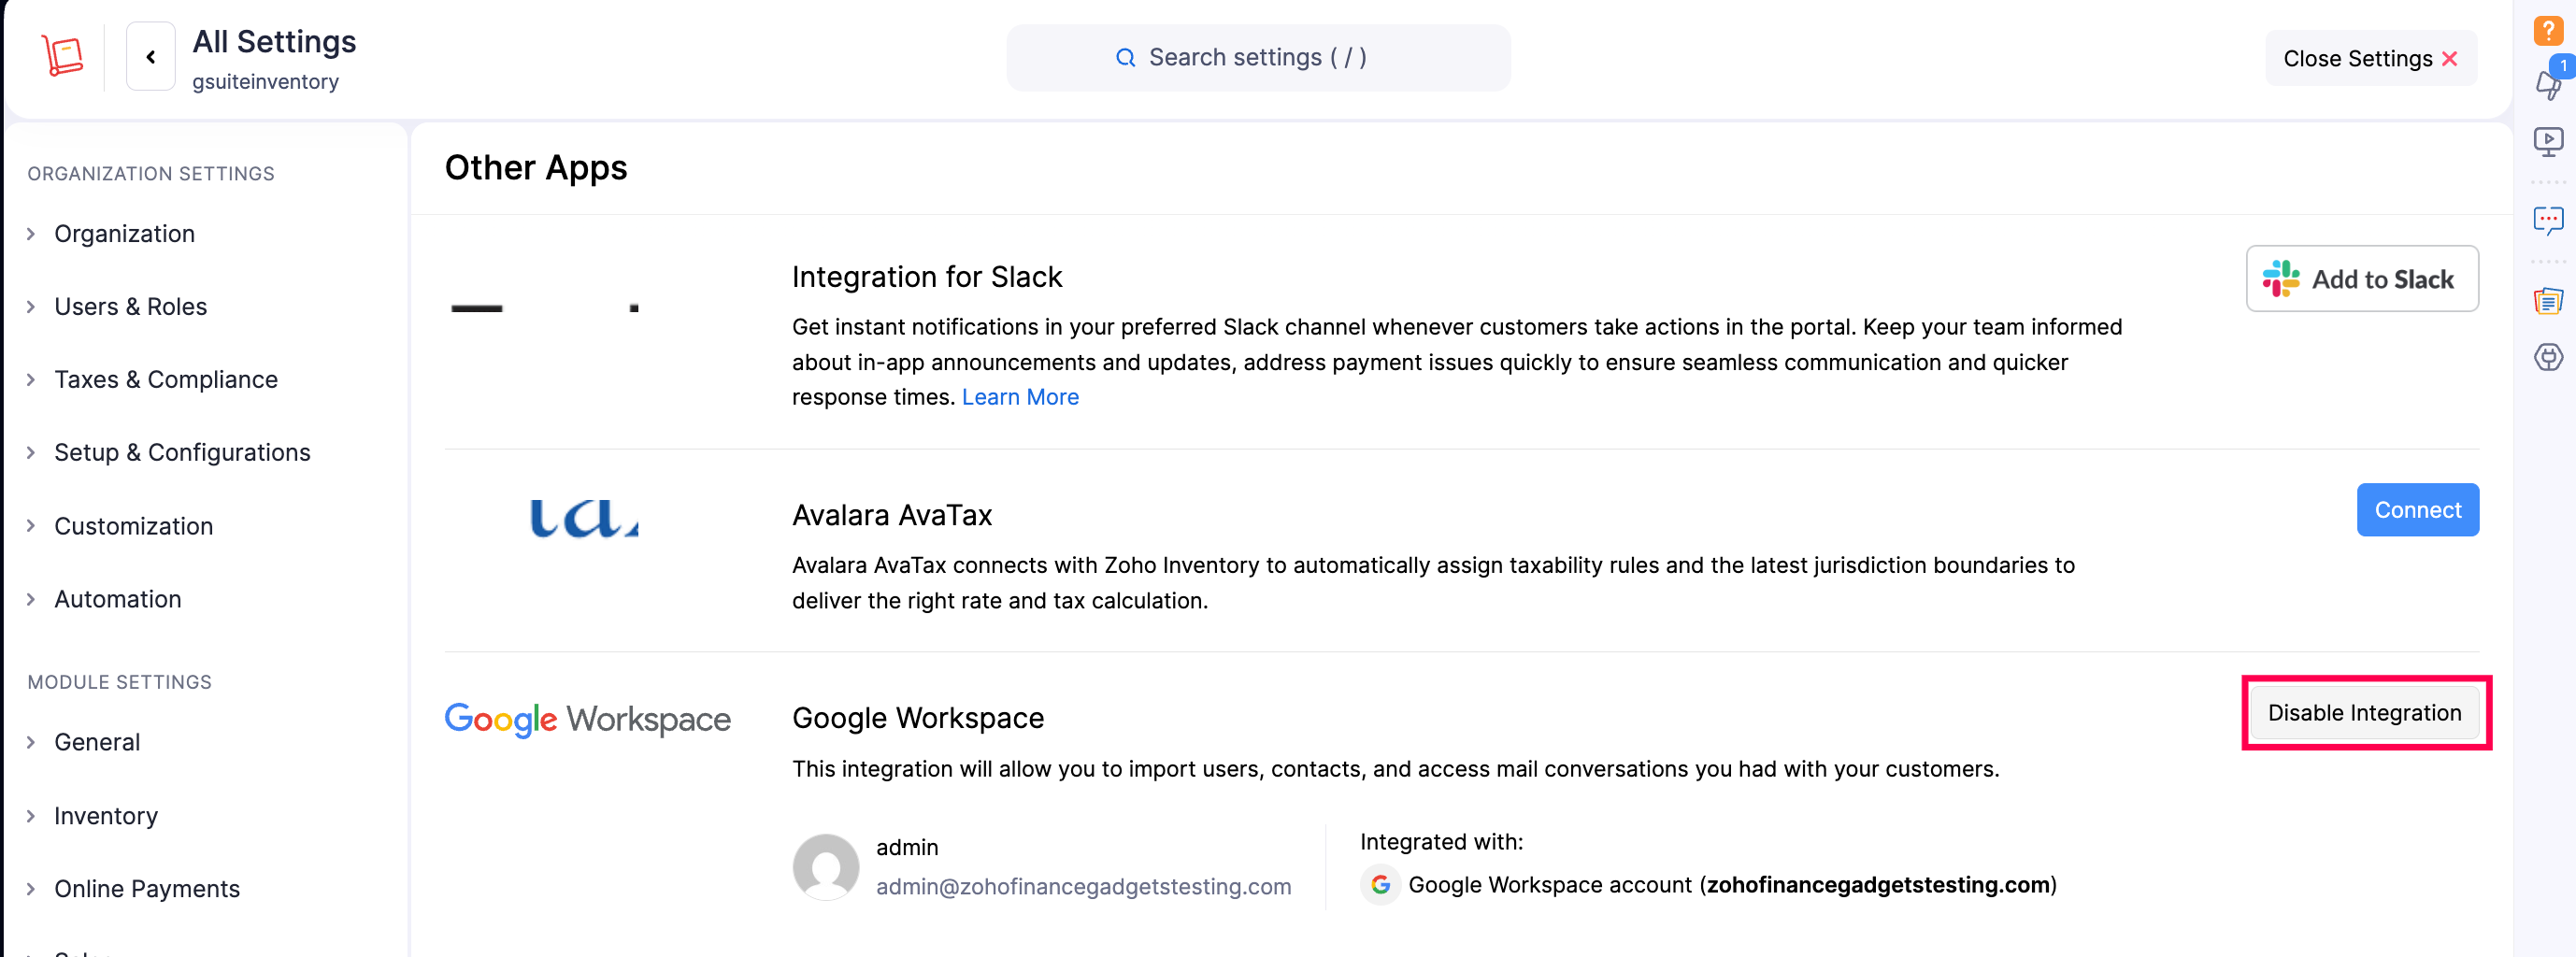
Go to Settings.
Select Other Apps under Integrations and Marketplace.
Click Disable Integration next to Google Workspace.
In the pop-up that appears, click Disable Integration to confirm.
The integration with Google Workspace will be removed from your Zoho Inventory organization. However, any customers and users imported from Google Workspace will be available as standalone customers and users in your Zoho Inventory organization.
Meanwhile, the Zoho Inventory app installed in your Google Workspace account will still be available under the Google Apps icon. To uninstall it:
- Log into your Google Admin Console.
- Go to Apps on the left sidebar, click Google Workspace Marketplace Apps, and select Apps list.
- In the list page, select Zoho Inventory.
- Click Uninstall App in the left pane.
- In the pop-up that appears, click Uninstall to confirm.
The Zoho Inventory app will be uninstalled.