
Autoscan Receipts
In this help document you will learn how to upload receipts for autoscan using the web and iOS applications in Zoho Expense.
While autoscanning the receipts, Zoho Expense fetches the following essential details:
- Date
- Amount
- Merchant Name
- Currency
- Payment Mode
To view the receipts for which the autoscanning is in progress, navigate to Expenses module. You can also view the scan-failed receipts here.

The receipts will also be auto-categorized. The first expense with a new merchant will have to be categorized manually in an organization. Subsequent expenses containing the same merchant will be auto-categorized during the autoscan. Autoscanning works best for receipts in the following languages:
| Chinese | Danish | Dutch | English |
| French | German | Italian | Malay |
| Norwegian Bokmal | Portuguese | Russian | Swedish |
| Spanish | Thai | Vietnamese |
The receipts you upload should belong to any of the following file formats:
- JPEG (JPG)
- PNG
- DOC (DOCX)
- TIFF (TIF)
- XML
- XLS (XLSX)
The receipt you upload for autoscan should belong to any of the following file formats:
- JPEG (JPG)
- PNG
Ways to Upload Receipts
You can upload your receipts in multiple ways.
- Upload from your computer or your cloud accounts.
- Drag and drop receipts for autoscan.
- Clip portions from any webpage using the Chrome extension.
- Clip portions from microsoft webpages using Microsoft Edge extension.
- Email receipts to your Zoho Expense organization.
Upload Receipts from Your Computer or Cloud Accounts
You can upload receipts from your computer or cloud accounts and expenses will be created for them automatically, if autoscan is enabled. You can upload receipts from any of the following cloud accounts:
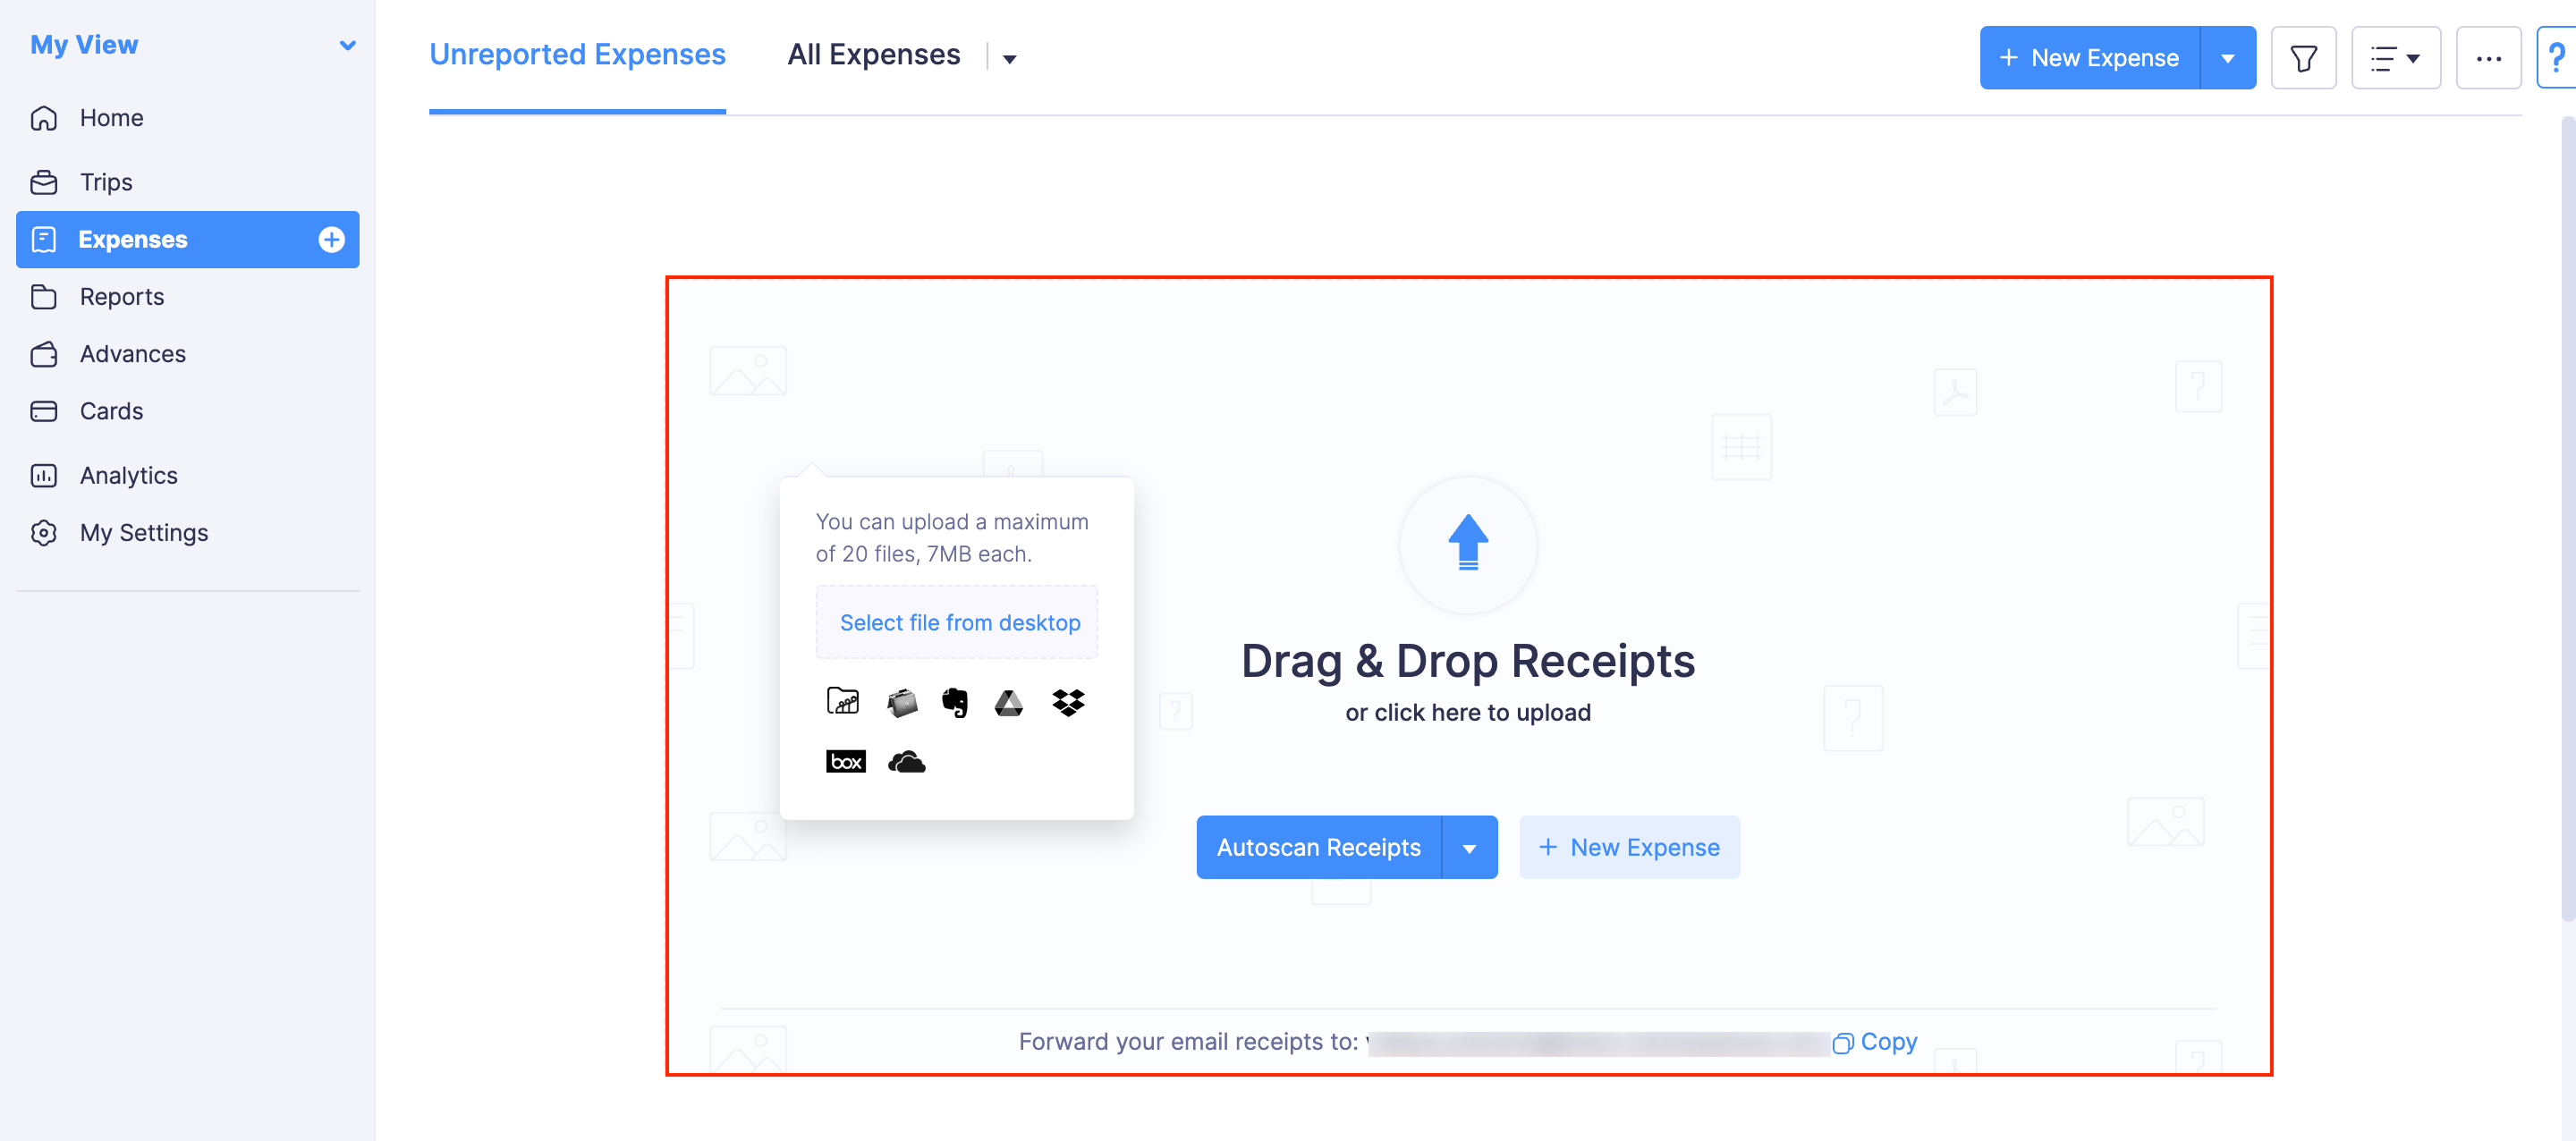
To upload receipts from computer:
- Go to Home or Expenses on the left sidebar.
- Click anywhere in the Drag & Drop Receipts section.
- Click Select file from desktop.
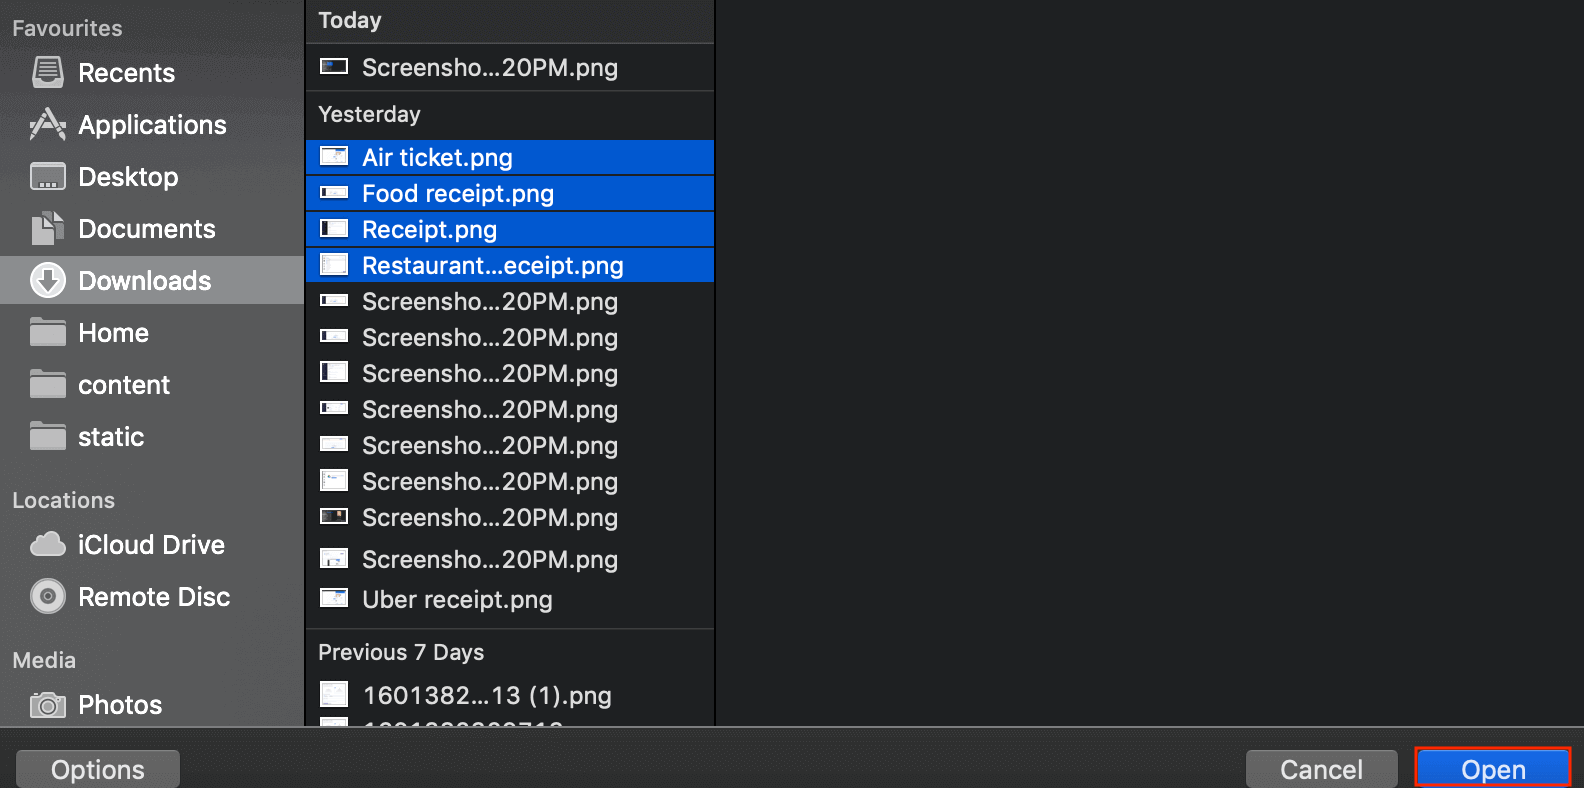
- You can attach the receipts individually or if you have multiple receipt images, you can select them at one go and upload them. To upload multiple receipt images from the computer, press and hold the Shift key and the Down Arrow key together to select the receipts.
- Click Open. All the selected receipts will be uploaded to Zoho Expense.
To upload receipts from your cloud accounts:
- Go to Home or Expenses on the left sidebar.
- Click anywhere in the Drag & Drop Receipts section.
- In the pop-up that appears, select a cloud account from which you want to upload receipts.
- Click the Authenticate button to provide access to the files in your cloud account.
- Select the receipts and click Attach.
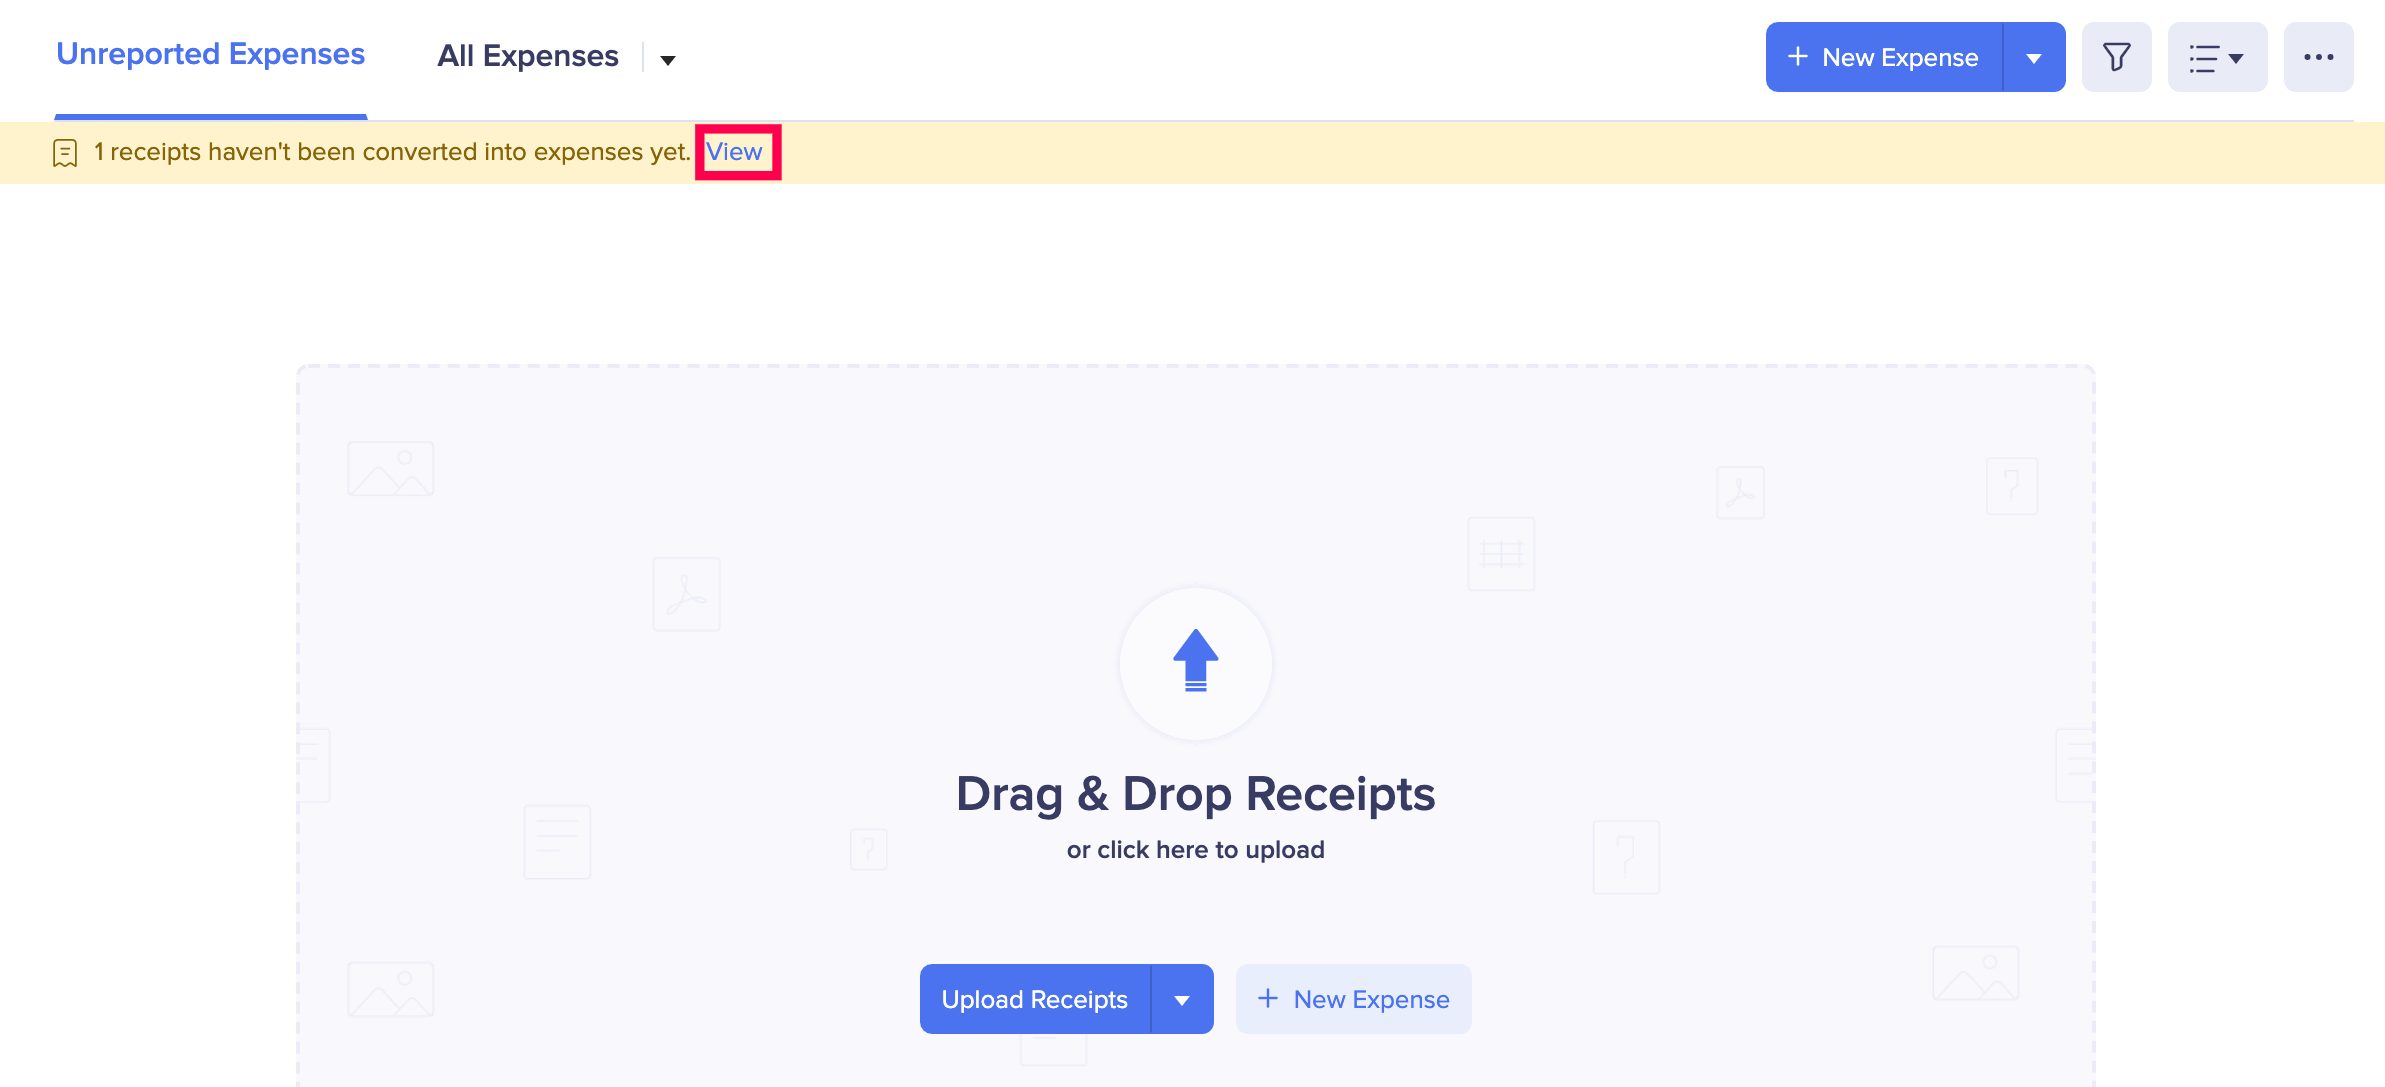
Note: If autoscan is not enabled in your organization, all the uploaded receipts will be listed as unexpensed receipts. To view the unexpensed receipts, go to Expenses > click View in the yellow band at the top of the page.
Drag and drop receipts for autoscan
If autoscan is enabled in your organization, once you upload the receipts, they will be scanned automatically in Zoho Expense. You can drag & drop the receipts in the Drag & Drop Receipts section of the Home page or upload receipts from your computer or cloud accounts.
Upload Receipts Using Chrome Extension
You can clip a portion of any webpage and upload it as a receipt to your Zoho Expense organization using the Chrome extension.
Prerequisite: You must use a browser that uses Chromium as its browser engine.
- Download the Zoho Expense Chrome extension.
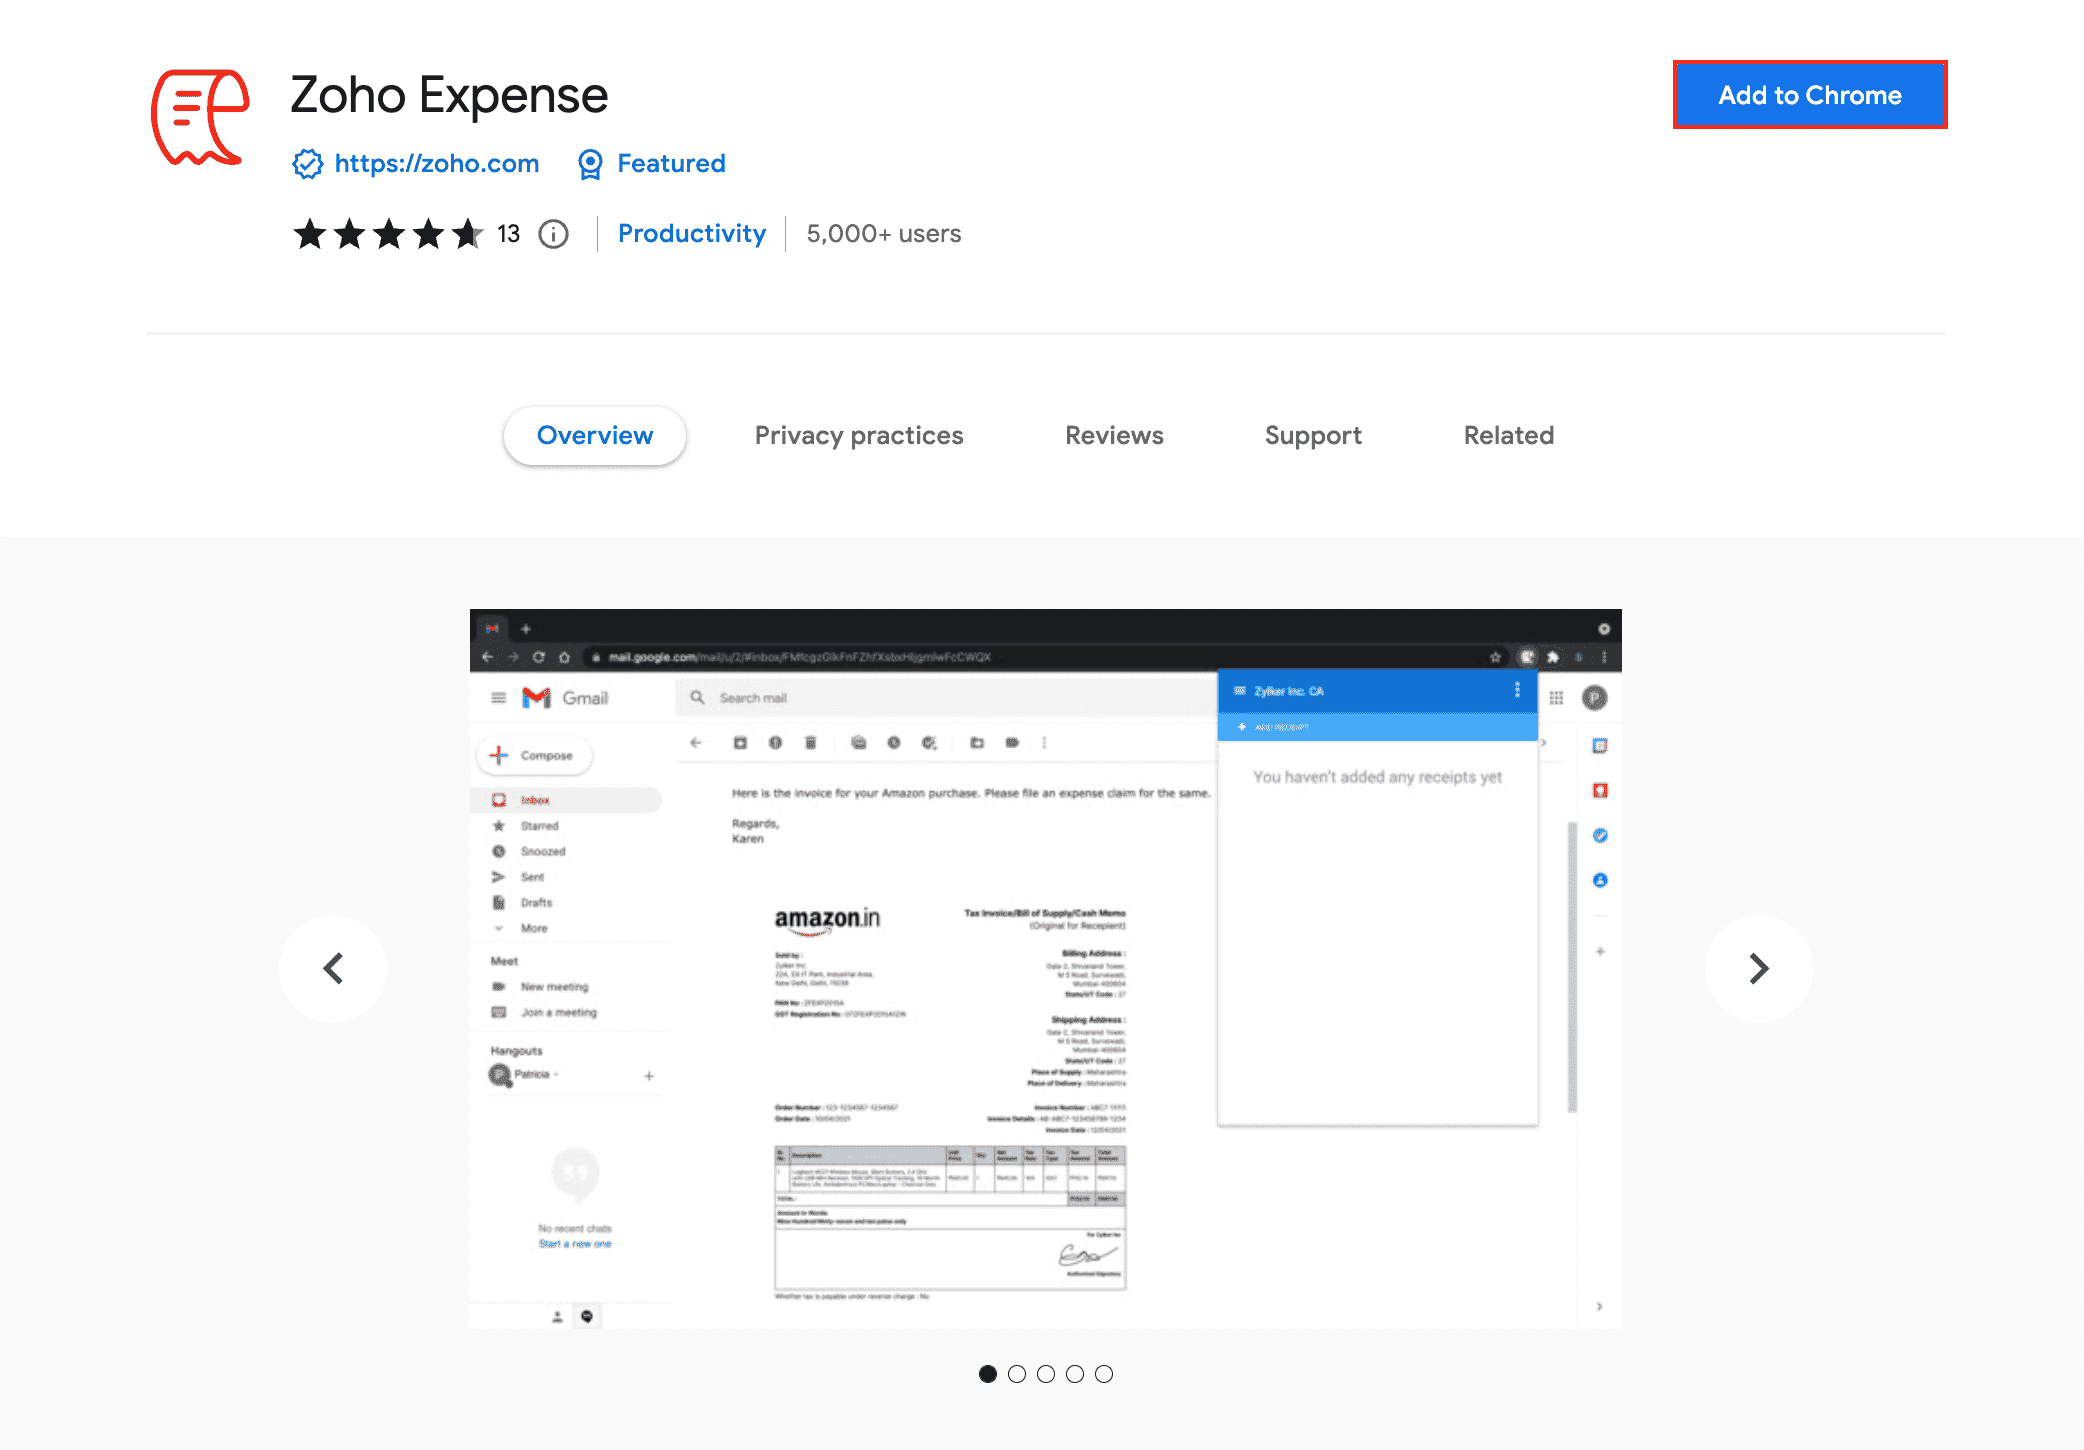
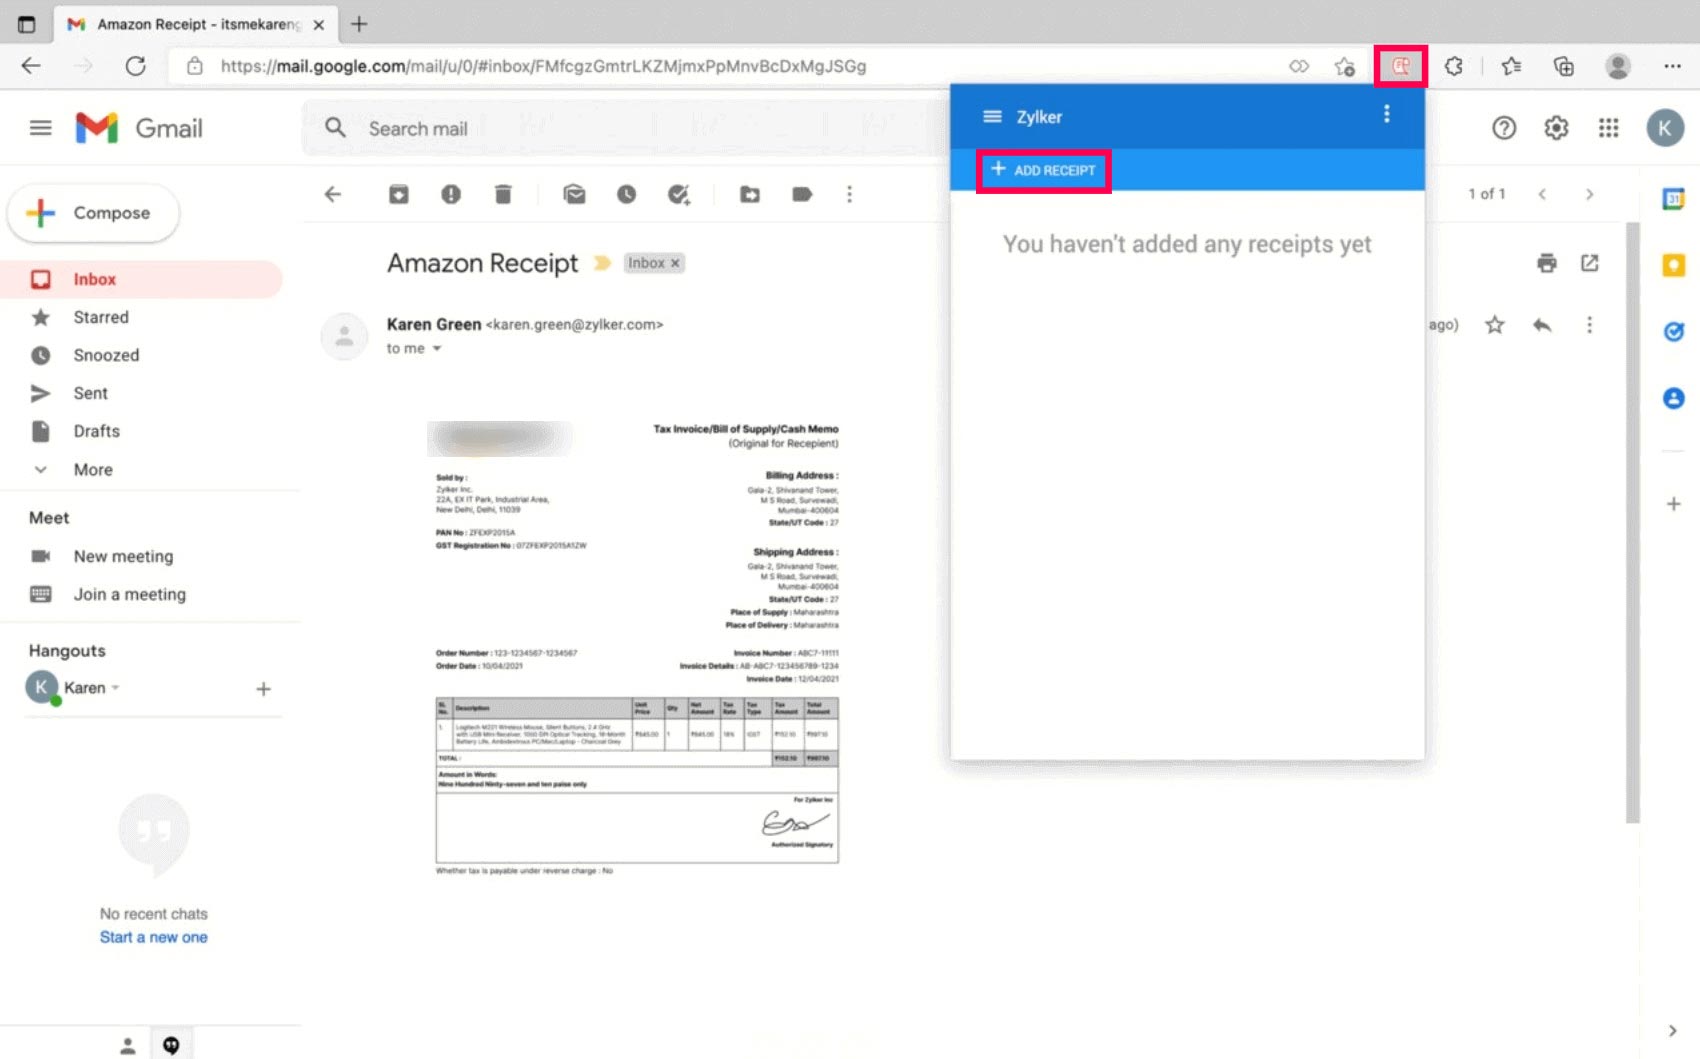
- After the download, the Zoho Expense extension icon will appear next to the address bar. Click the Zoho Expense extension icon and click + Add Receipt.
- Click and drag on the screen to clip a portion of the webpage that has a receipt.
- Click Upload. The receipt will be uploaded to Zoho Expense.
- If your receipt is in the image format, right-click on the image.
- Click Send To Zoho Expense and the receipt will be automatically uploaded to Zoho Expense.
Protip: You can also access the extension by right-clicking on any portion of the page. Select Zoho Expense. Click Clip and Send or Send Visible Region and your receipt will be uploaded to Zoho Expense.
Upload Receipts Using Microsoft Edge Extension
You can clip a portion of any microsoft webpage and upload it as a receipt to your Zoho Expense organization using the Microsoft Edge extension.
Prerequisite: You must use a browser that uses Chromium as its browser engine.
To upload receipts using the Microsoft Edge extension:
- Download the Microsoft Edge extension.
- After the download, the Zoho Expense extension icon will appear next to the address bar.
- Click the Zoho Expense extension icon and click + Add Receipt.
- Click and drag on the screen to clip a portion of the webpage that has the receipt.
- Click Upload to upload the receipt to Zoho Expense.
- If your receipt is in the image format, right-click on the image. Click Send To Zoho Expense and the receipt will be automatically uploaded to Zoho Expense.
Protip: You can also access the extension by right-clicking anywhere on the page. Select Zoho Expense. Click Clip and Send or Send Visible Region and your receipt will be uploaded to Zoho Expense.
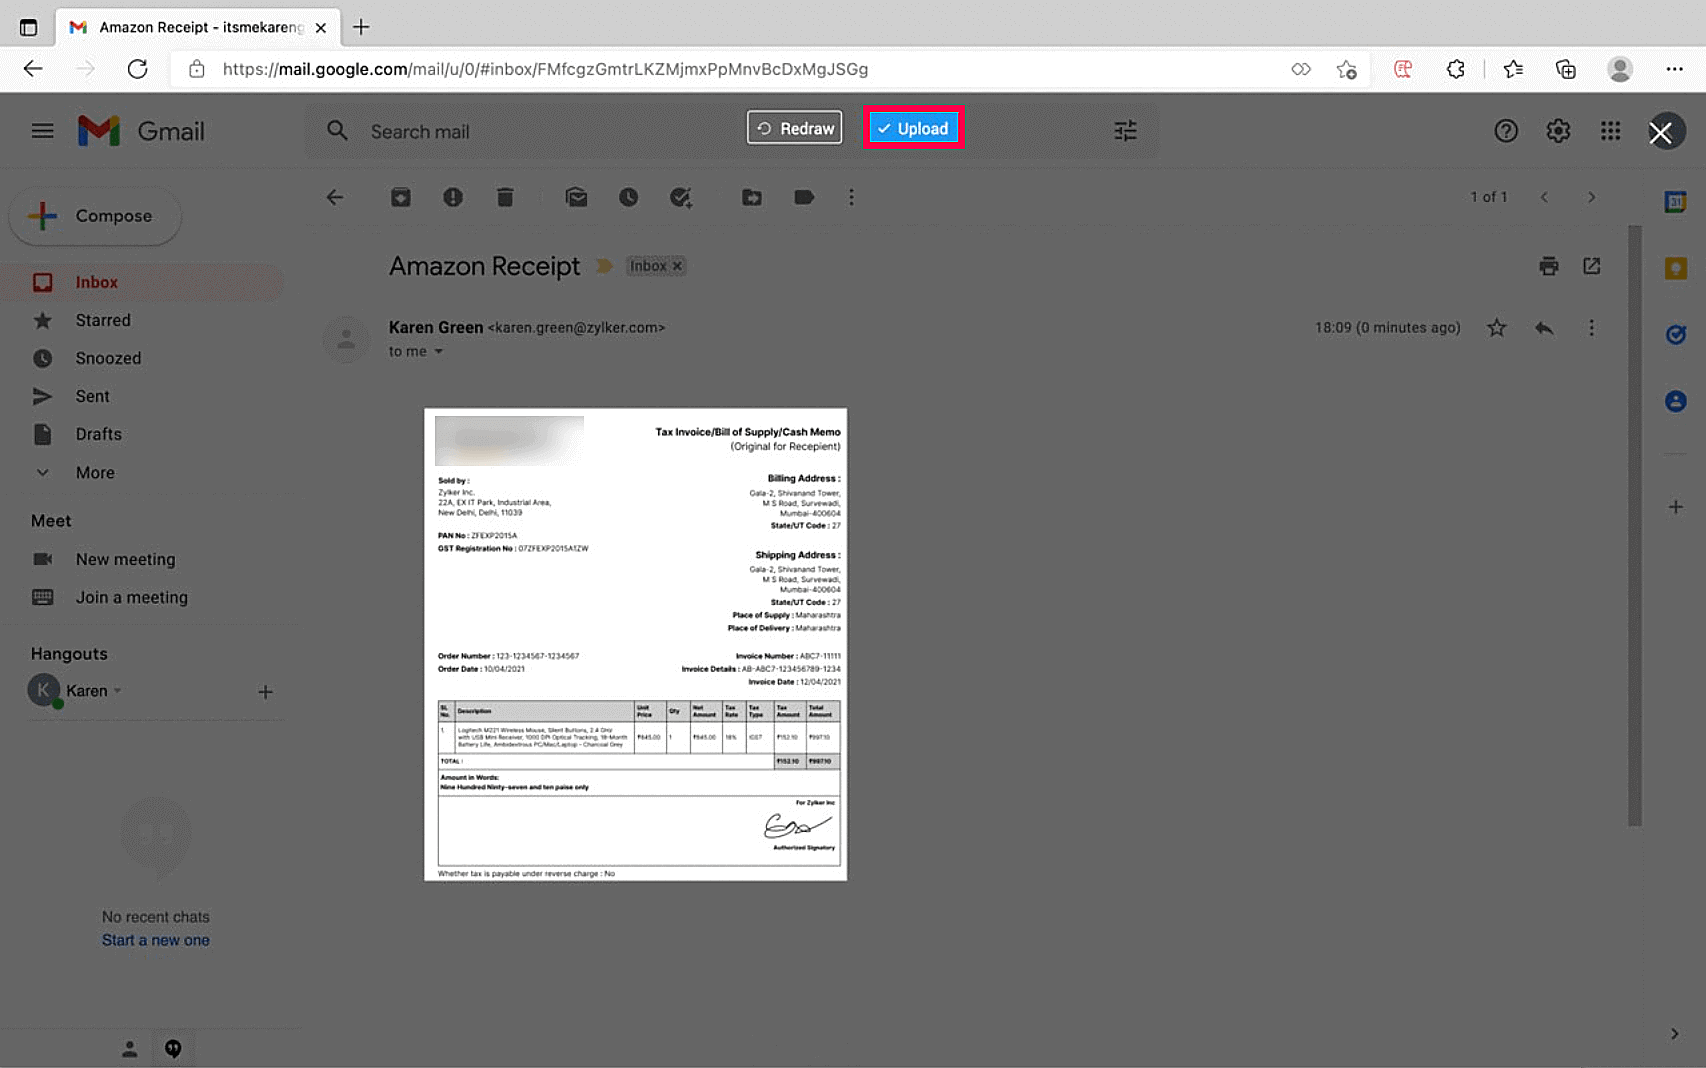
Email Receipts to Your Organization
All the receipts you have in your mailbox, such as airline, food, and lodging expenses can be forwarded to your Zoho Expense organization. This feature is very helpful when you’re on the move or have a large number of receipts that you can’t upload manually.
- When you log in to the organization you’re invited or when you create a new organization in Zoho Expense, a receipt forwarding email address will be created for you.
- You can send receipts from any email address to your receipt forwarding address. The receipt forwarding address is unique to every user. If autoscan is enabled in your organization, the receipts sent to this address will be autoscanned and converted into expenses.
- If you want to update the receipt forwarding address, go to My Settings > Preferences > Update.
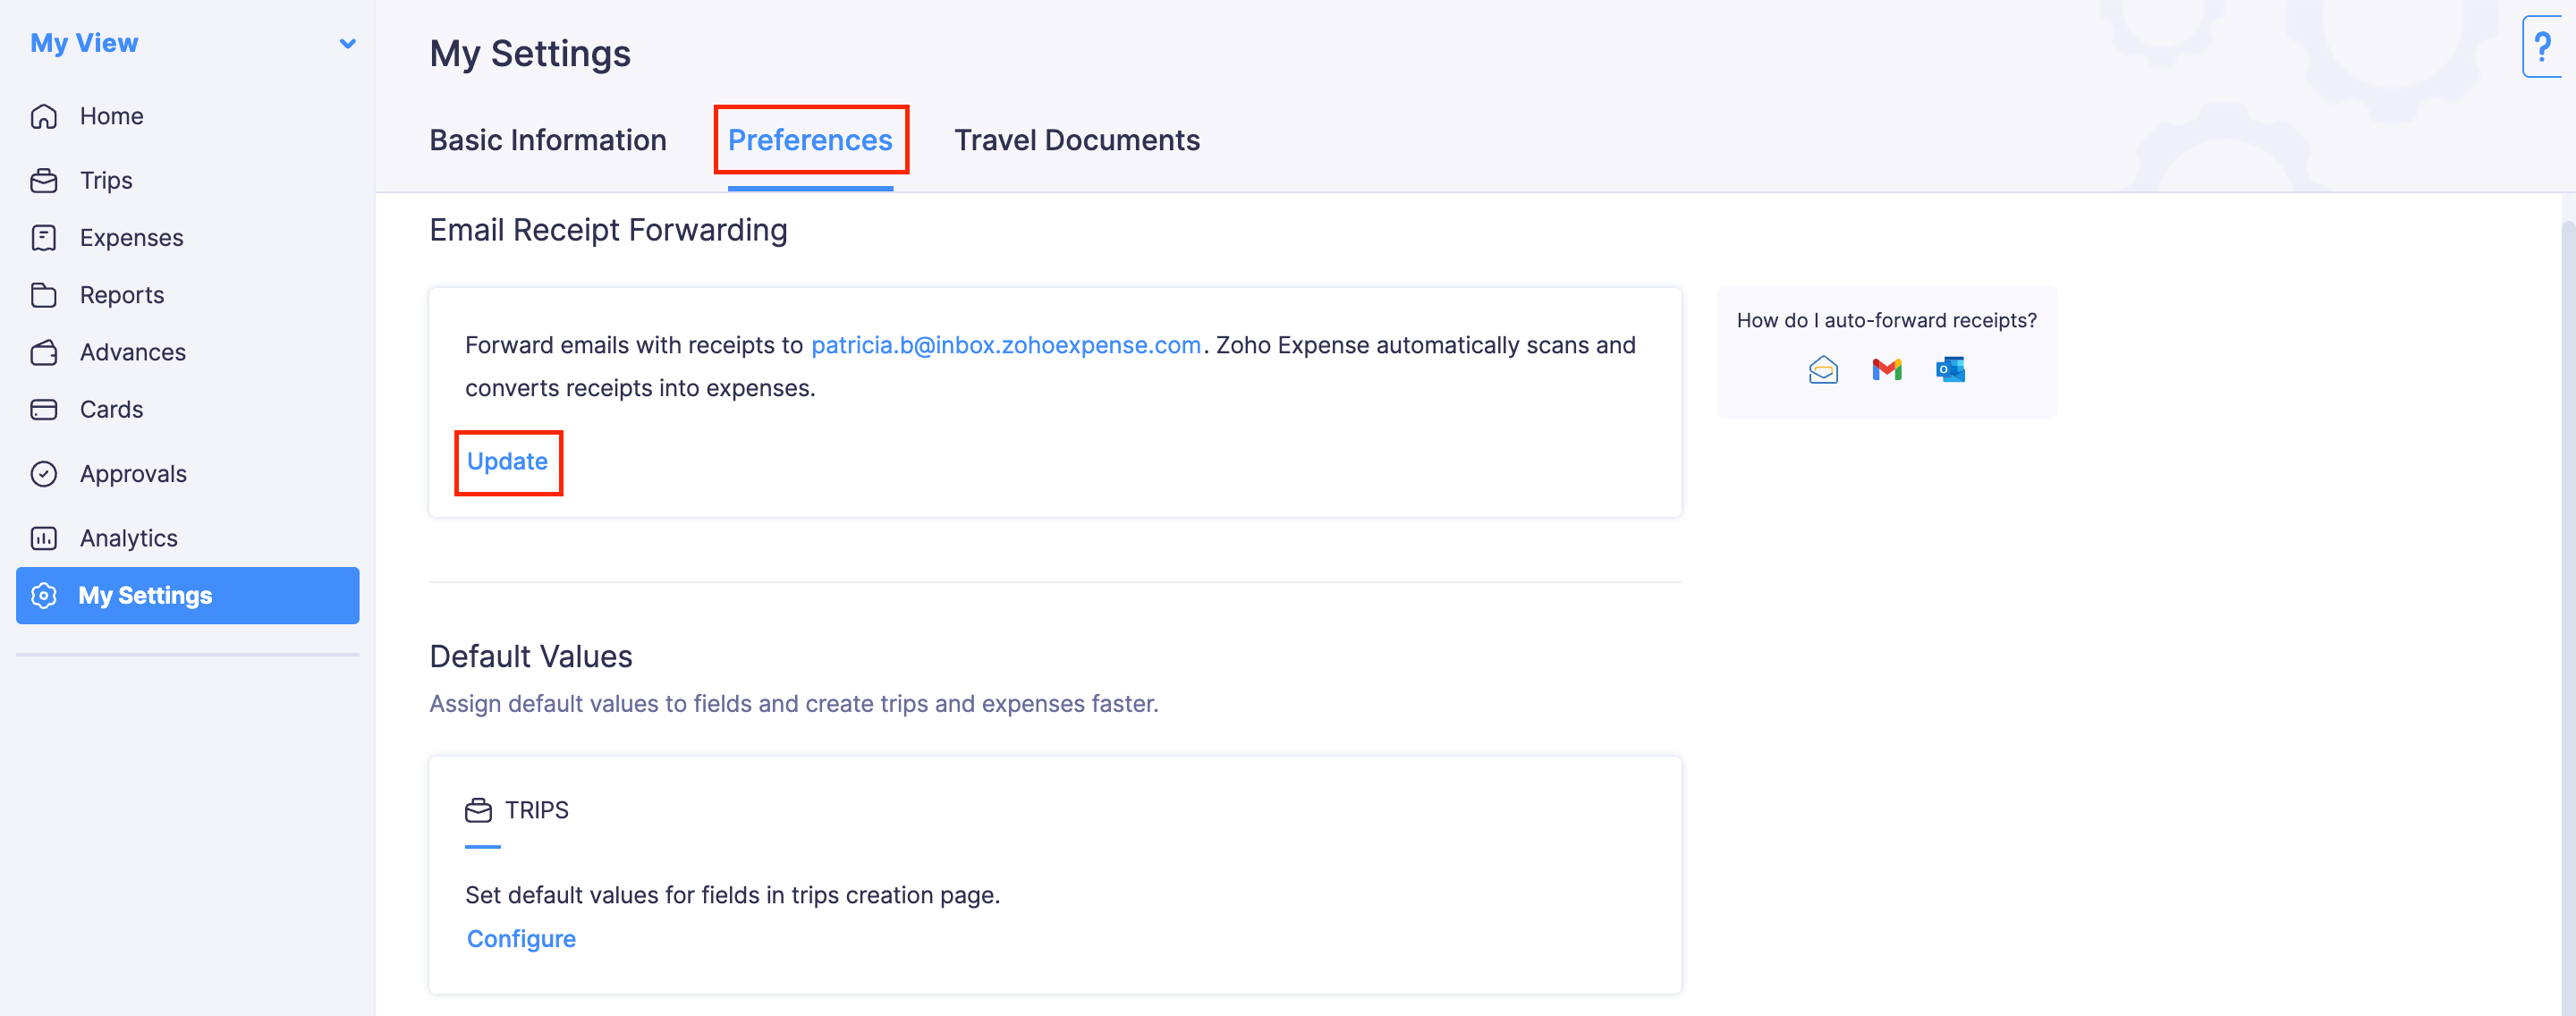
- Enter the new receipt forwarding address and click Save.
Notes:
- You can upload an attachment that is a maximum of 15MB per email. If there is more than one attachment, every attachment will be created as an expense.
- Only the respective user can update the Receipt Forwarding Email Address.
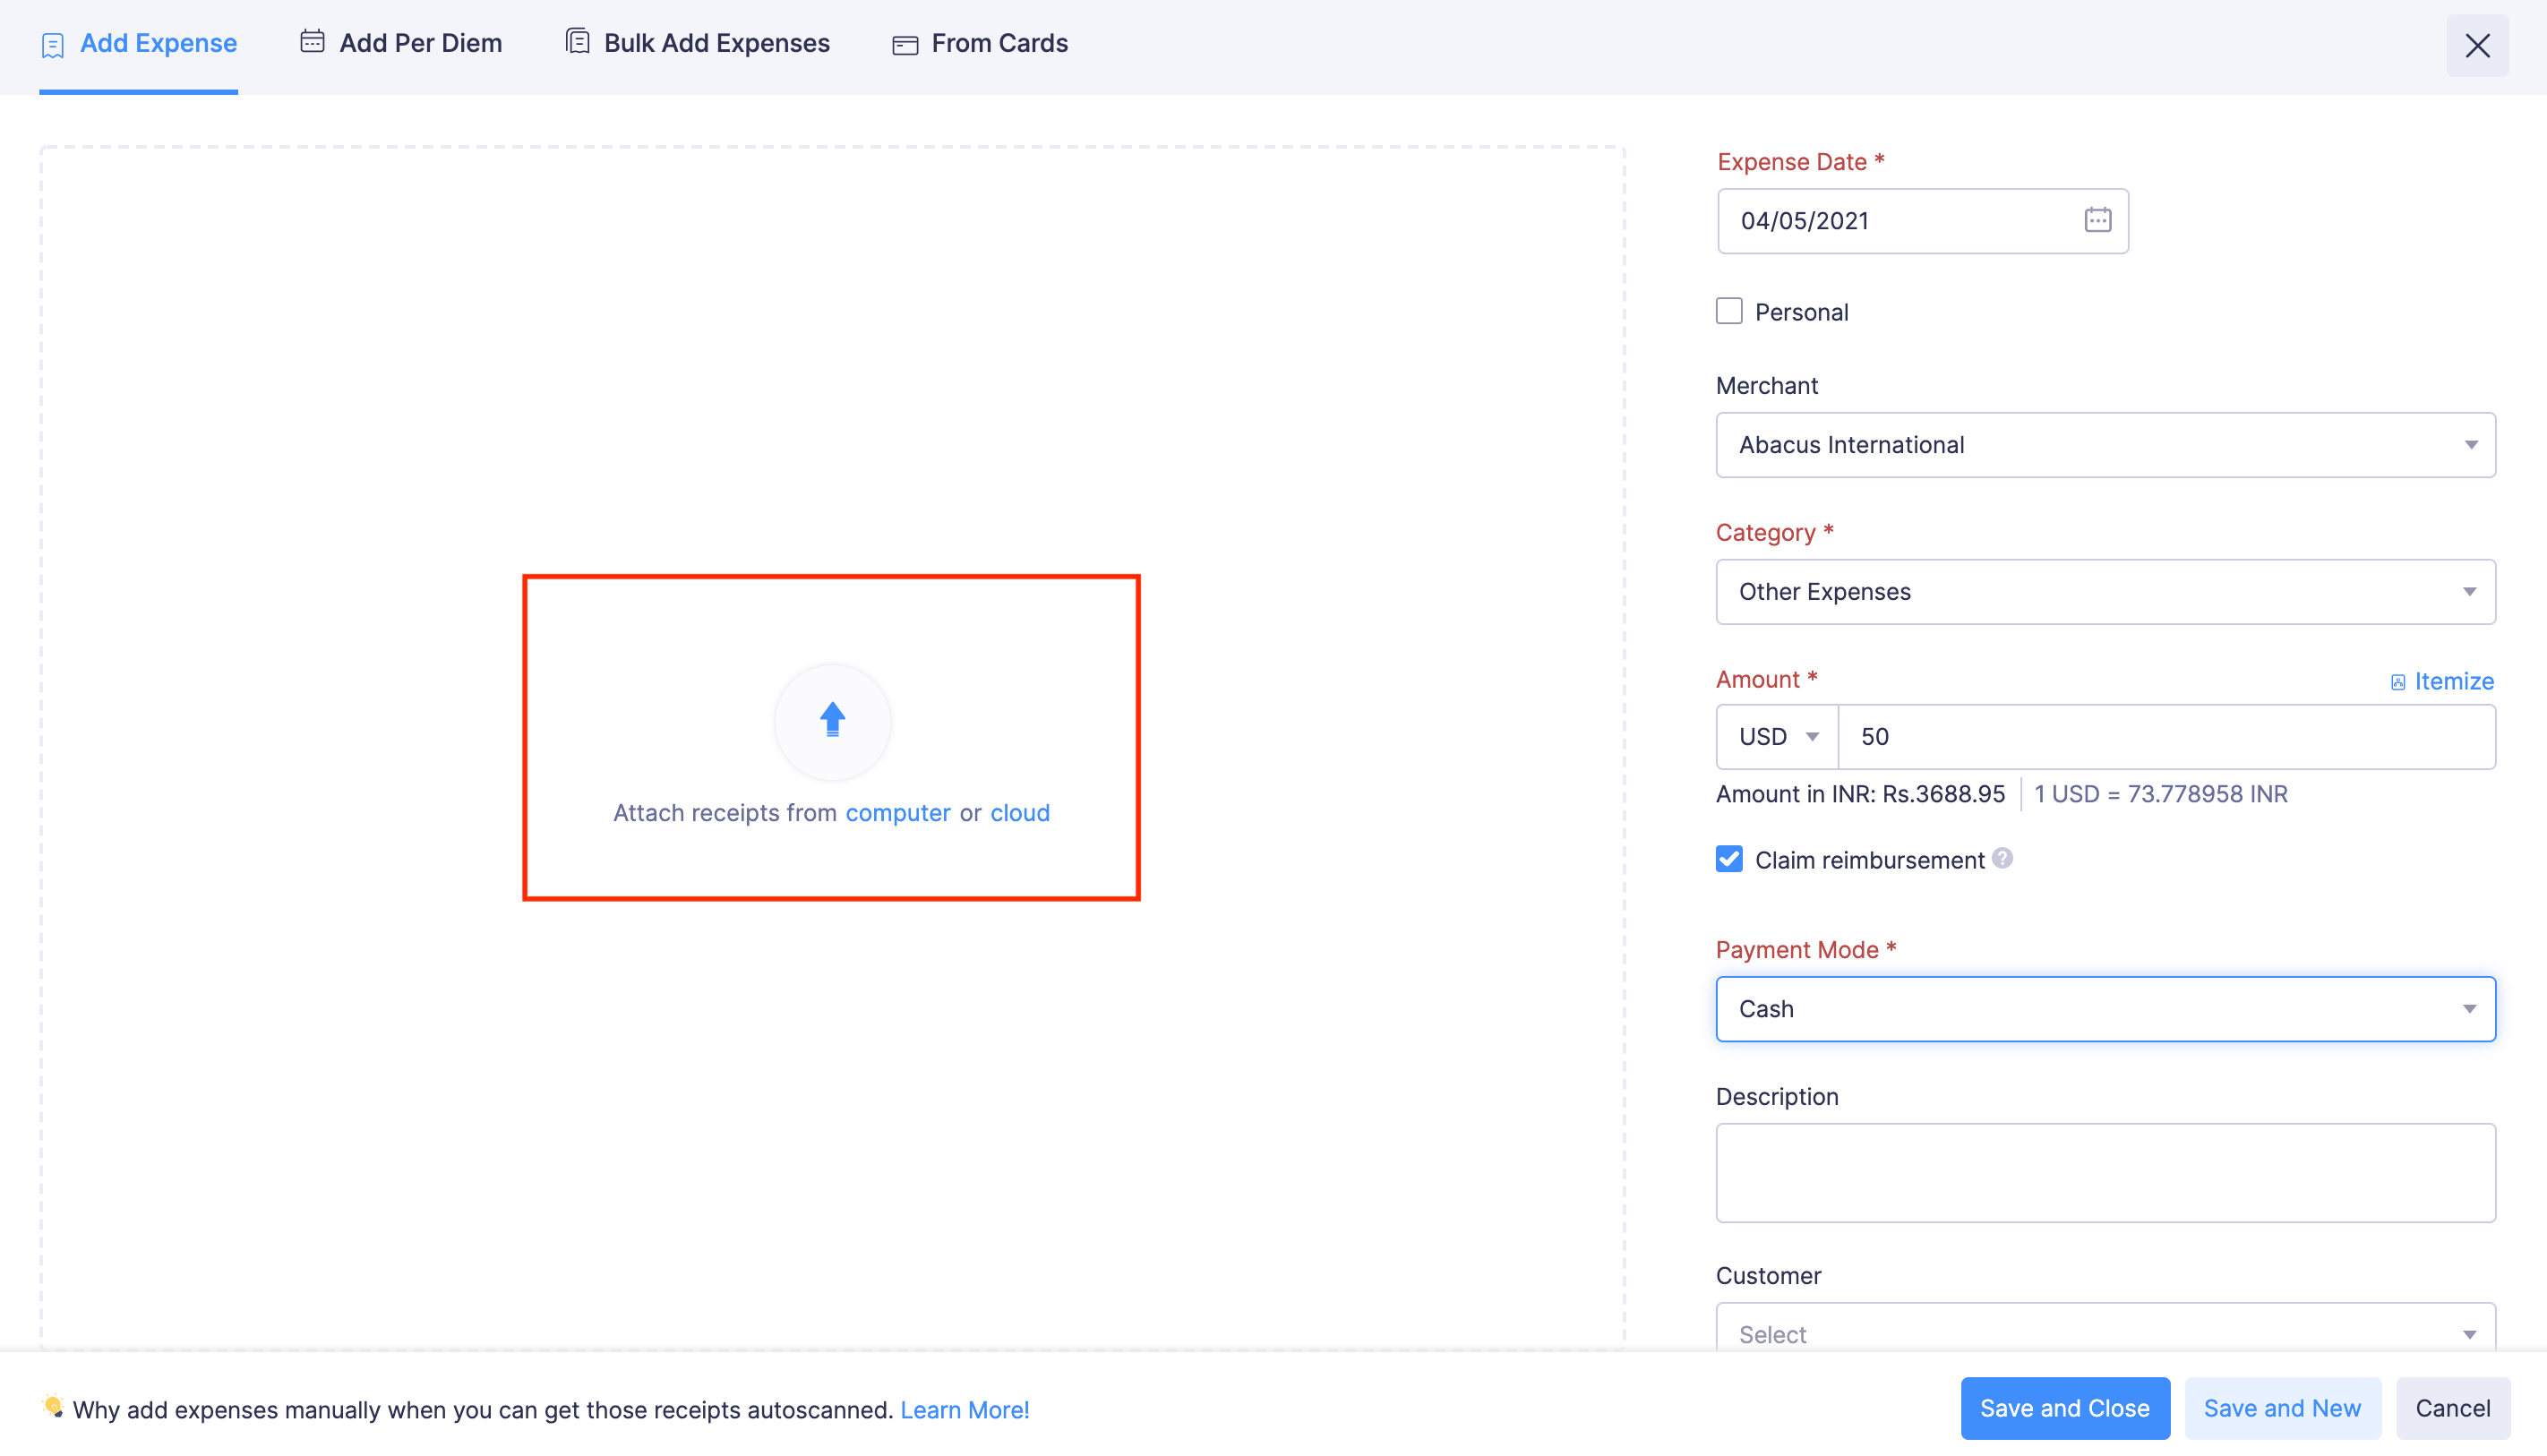
Attach Multiple Receipts to an Expense
You can attach a maximum of 5 receipts to an expense, of 7 MB each. You can attach receipts in selected receipt formats. To attach:
- Go to Expenses on the left sidebar.
- Click the expense for which you want to attach receipts.
- Click Attach receipts from computer or cloud or click anywhere at the left hand side of the expense creation page. You can attach the receipts from computer or from your cloud account.
- You can attach the receipts individually or if you have multiple receipt images, you can select them at one go and upload them. To upload multiple receipt images from computer, press and hold the Shift key and Down Arrow together to select the receipts. Click Open and the receipts will be added to the expense.
- Click Save and Close to save the expense. The receipts will be attached only when you save the expense.
If autoscan is enabled in your organization, once you upload the receipts, they will be scanned automatically in Zoho Expense. While autoscanning the receipts, Zoho Expense fetches the following essential details:
- Date
- Amount
- Merchant Name
- Currency
- Payment Mode
The receipts will also be auto-categorized. The first expense with a new merchant will have to be categorized manually in an organization. Subsequent expenses containing the same merchant will be auto-categorized during the autoscan. Autoscanning works best for receipts in the following languages:
| Chinese | Danish | Dutch | English |
| French | German | Italian | Malay |
| Norwegian Bokmal | Portuguese | Russian | Swedish |
| Spanish | Thai | Vietnamese |
The receipts you upload should belong to any of the following file formats:
- JPEG (JPG)
- PNG PDF
- DOC (DOCX)
- TIFF (TIF)
- XML
- XLS (XLSX)
The receipt you upload for autoscan should belong to any of the following file formats:
- JPEG (JPG)
- PNG
Upload Receipts for Autoscan
Here’s how you can upload your receipts for autoscan:
- Open the Zoho Expense app on your device.
- Tap the Camera icon.
(Or)
Tap the Menu icon in the top left corner, tap Expenses, tap the + icon at the bottom right corner, select Upload Receipts for Autoscan, and choose whether you want to upload from files, photo library, or take a photo.
(Or)
Tap the Menu icon in the top left corner, select Expenses, and click the Camera icon in the top right corner.
- Select any of following options to add receipts for autoscan:
- Single: If you want to add a single receipt select Single.
- Quick Scan: To add multiple receipts for autoscan, select Quick Scan. The receipts will be uploaded immediately without any preview.
- Multipage: If you want to combine multiple pages of a receipt, select Multipage. All the receipt images will be added as a PDF document.
- Upload from Files: Tap the Image icon in the bottom left corner, select Choose from Files to add receipts for autoscan from your files.
- Photo Library: Tap the Image icon in the bottom left corner, select Photo Library to add receipts for autoscan from your photos.
- Share Receipts: Go to Photos > Share icon > Zoho Expense > Upload. The image will be uploaded for autoscan.
- Once done, tap Autoscan at the bottom of the page to create expense via autoscan or click Add Manually, to manually add the expense. Your image will be uploaded for autoscan. You can view them under Receipts being scanned in the expense list screen. Once the scan is completed successfully, it will be created as an uncategorized expense. If the scan has failed, you can view under Scan Failed Receipts in the expense list screen. You can tap the receipt and add it manually or delete it by clicking the respective buttons.
 Yes
No
Yes
No
Thank you for your feedback!