
Custom Modules in Customer and Vendor Portals
If you want your customers or vendors to view and manage the records of a custom module, you can enable the custom module for the customer and vendor portals, respectively. You can also configure which records they can view and what actions they can perform from their portals.
Note: This feature is only available in certain plans of Zoho Books. Visit our pricing page to check if it’s available in your current plan.
Scenario 1: Zylker Rentals rents electronics and appliances on a periodic basis to its customers. They use the Custom Modules feature in Zoho Books to track details such as the product rented, the customer who rented it, rental duration, rent amount, and more using the Active Rentals custom module. Until now, only Zylker Rentals could manually enter the details of rented products. Now, with the feature to display custom modules in the Customer Portal, Zylker Rentals allows their customers to directly request products for rent through their portal. Zylker Rentals only needs to verify and approve the rental request details.
Scenario 2: Zylker Constructions requests different materials required for building houses from various vendors. To keep track of each request, including the requested materials, status, delivery updates, and other details, Zylker Constructions uses the Custom Modules feature in Zoho Books and enables this module for its vendors. When Zylker Constructions creates a request from the module, it notifies the vendors. The vendors can log in to their portal to review the request and approve it if they can deliver the materials. Once a request is processed and shipped, vendors update the delivery status and add the tracking URL.
Show a Custom Module in the Customer and Vendor Portals
To display the records of a custom module in the portals of your customers and vendors:
- Go to Settings in the top right corner.
- Click the required custom module under Custom Modules.
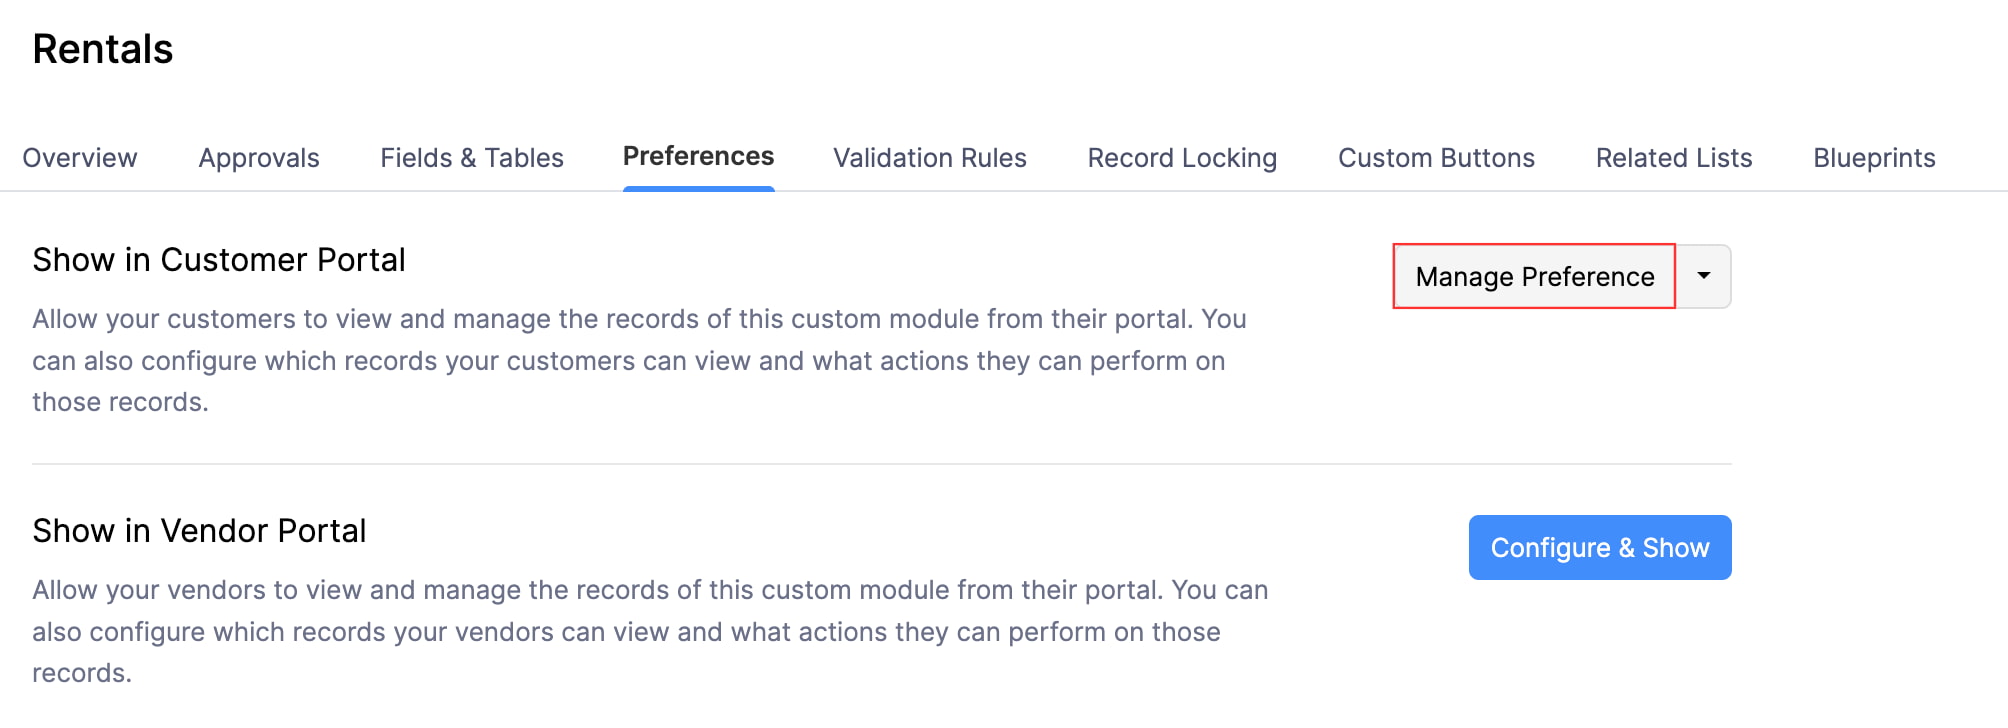
- Go to the Preferences tab.
- Click Enable and Configure next to the portal in which you want to show the custom module’s records.
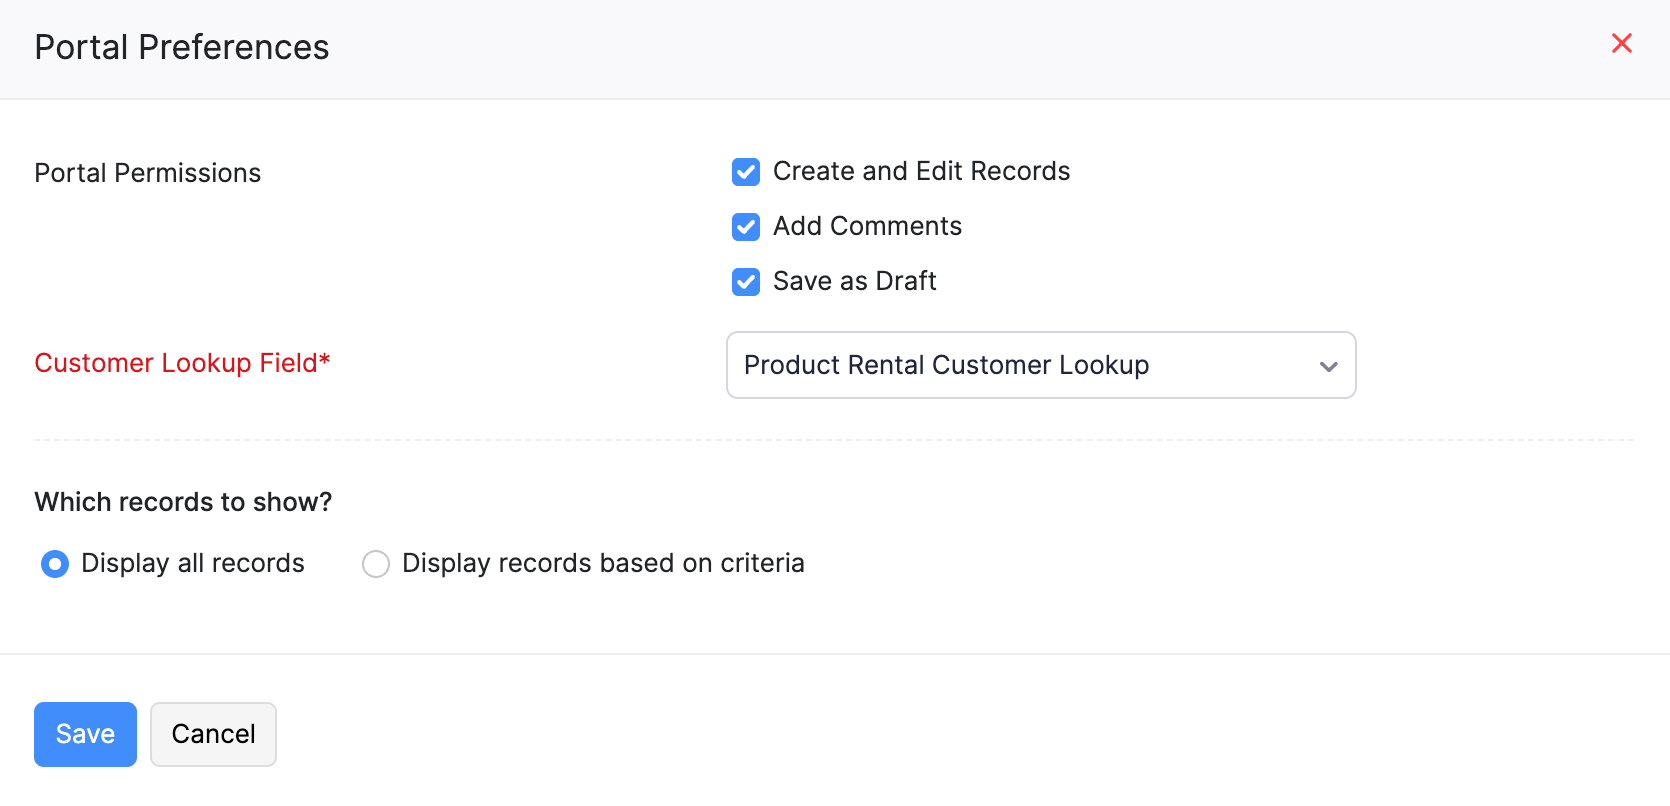
- Select the actions your customers or vendors can perform on the custom module’s records from their portals.
- Create and Edit Records: Check this option if you want your customers or vendors to create and edit records in the custom module from their portals.
- Save as Draft: Check this option if you want to allow your customers or vendors to save the records they created as a draft. This option will be shown if you enable Create and Edit Records.
- Add Comments: Check this option if you want to allow your customers or vendors to add comments to the records of the custom module from the portals.
- Select the Lookup Field. This links the custom module’s records to the respective customer or vendor. If there are no lookup fields, click + New Lookup Field and fill in the required details to create a new one.
- Choose which records of the module your customers or vendors can view.
- Select Display all records if your customers or vendors can view all the records created in the custom module.
- Select Display records based on criteria if your customers or vendors can only view the records that meet the criteria you set.
- Click Save.
Update Custom Field Preferences
For your customers and vendors to create or edit the custom fields of a record from their portals, you need to enable the Display in Portal option for the required custom fields. Here’s how:
- Go to Settings in the top right corner.
- Click the required custom module under Custom Modules.
- Go to the Fields & Tables tab.
- Click Manage Fields and Tables in the top right corner.
- Hover over the field you want to be displayed in the customer and vendor portals and click the Edit icon above it.
- Select Yes for Display in Portal.
Note: The Display in Portal option is not supported for the Attachment, Lookup, and External Lookup custom fields.
- If you want your customers and vendors to edit the field from their portals, click Yes for Edit in Portal. Otherwise, click No.
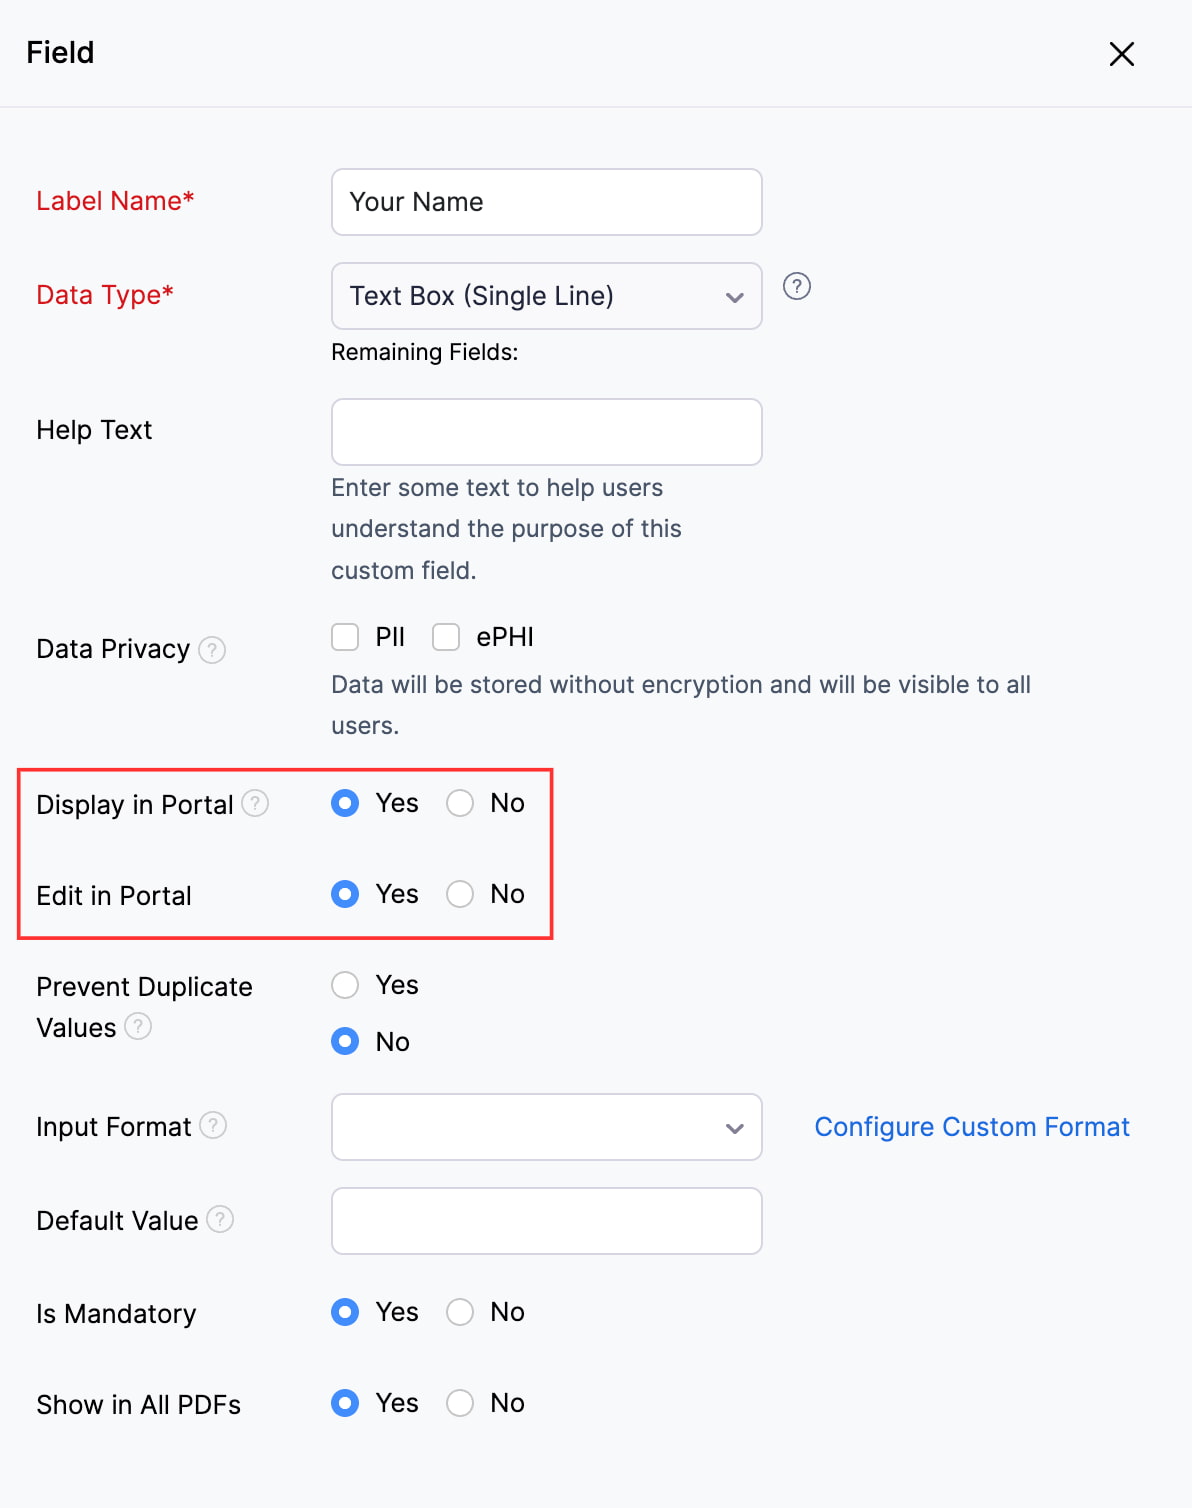
- Click Save once you’ve updated the preferences of the required custom fields.
Manage Portal Preferences for a Custom Module
If you want to update the portal preferences for a custom module:
- Go to Settings in the top right corner.
- Click the required custom module under Custom Modules.
- Go to the Preferences tab.
- Click Manage Preferences next to the customer or vendor portal.
- Make the necessary changes and click Save.
You can also manage the portal preferences of a custom module from the Preferences page of the portals. Here’s how:
Note: This option is currently available for the Customer Portal.
- Go to Settings in the top right corner.
- Click Customer Portal under Setup & Configurations.
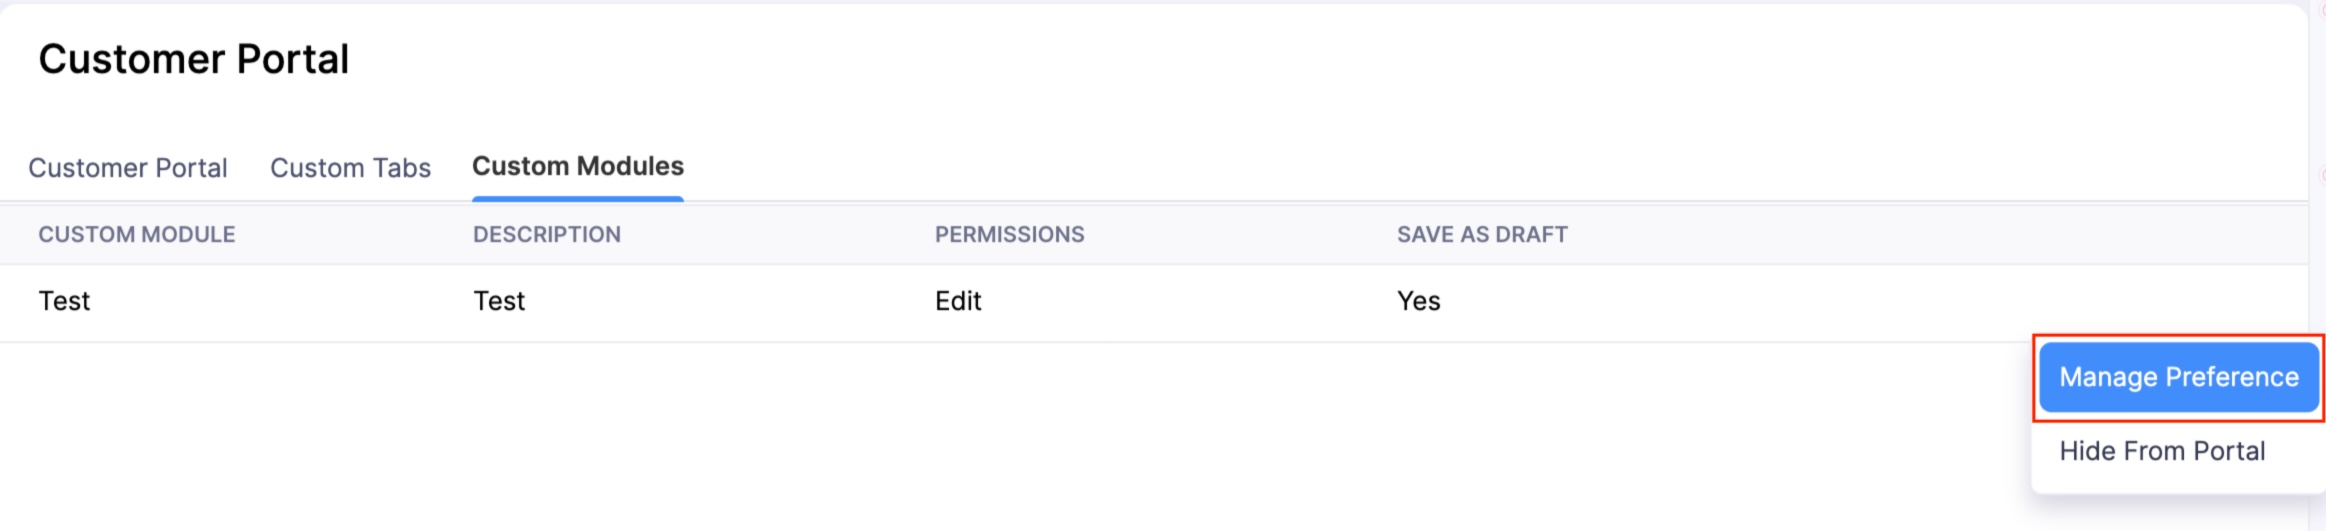
- Go to the Custom Modules tab.
- Click the More icon next to the required custom module and select Manage Preferences.
- Make the necessary changes and click Save.
Hide a Custom Module From the Customer and Vendor Portals
You can hide the custom module from the customer and vendor portals. Here’s how:
- Go to Settings in the top right corner.
- Click the required custom module under Custom Modules.
- Go to the Preferences tab.
- Click the dropdown next to Manage Preferences and click Hide From Portal.
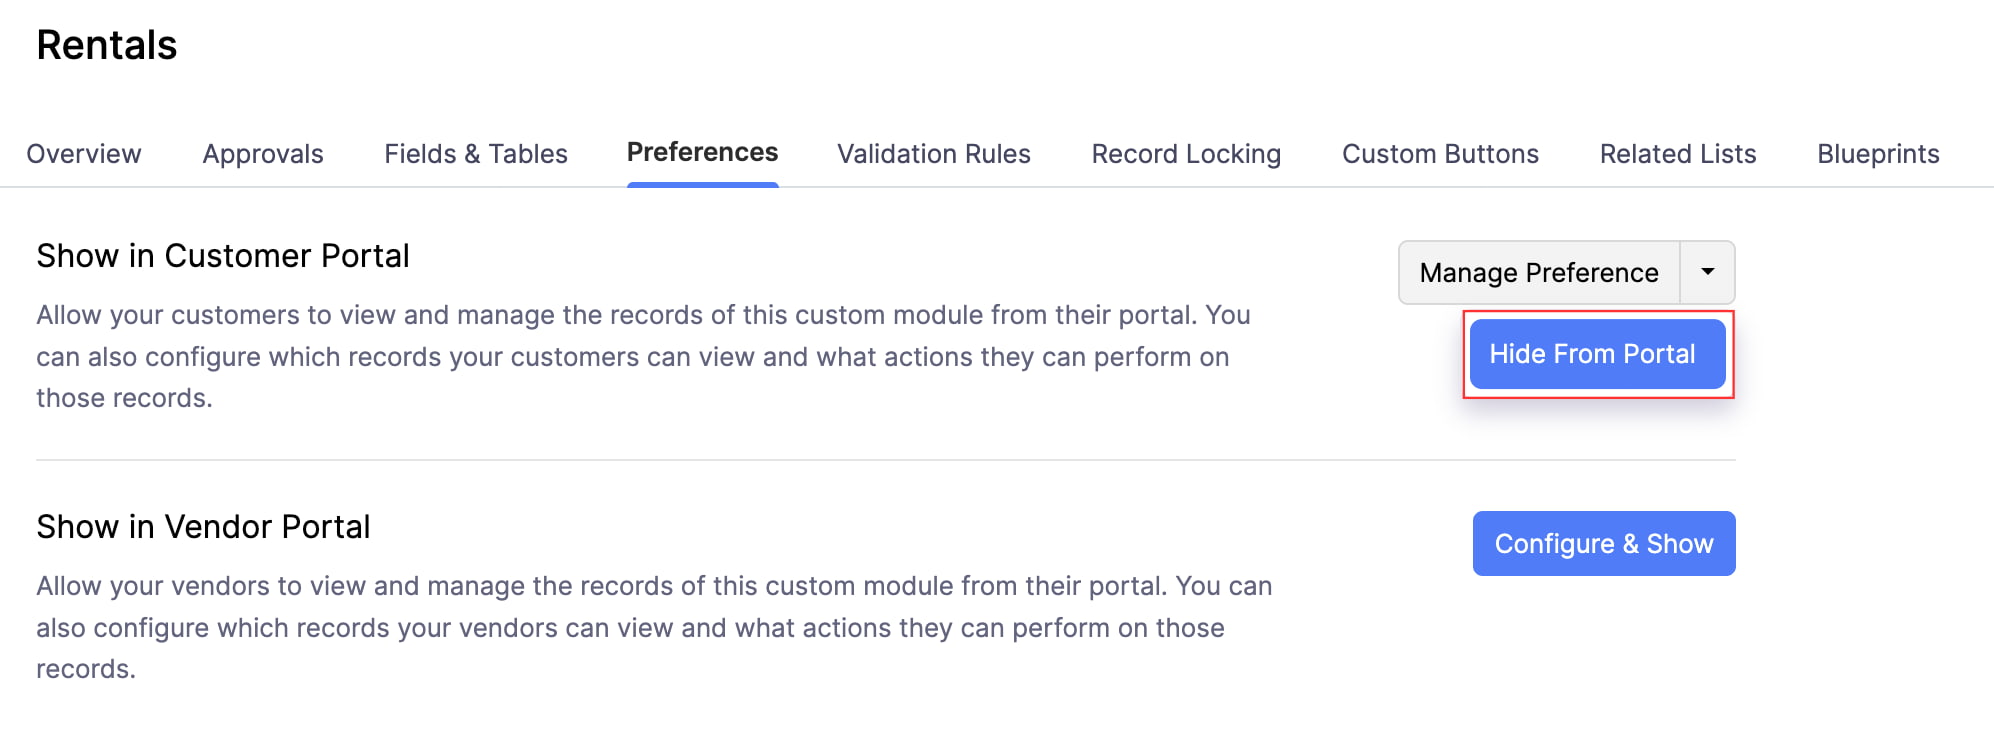
- Click Hide From Portal again in the pop-up that appears to confirm your action.
You can also hide the custom module from the customer and vendor portals from the Preferences page of the portals. Here’s how:
Note: This option is currently available for the Customer Portal.
- Go to Settings in the top right corner.
- Click Customer Portal under Setup & Configurations.
- Go to the Custom Modules tab.
- Click the More icon next to the required custom module and select Hide From Portal.
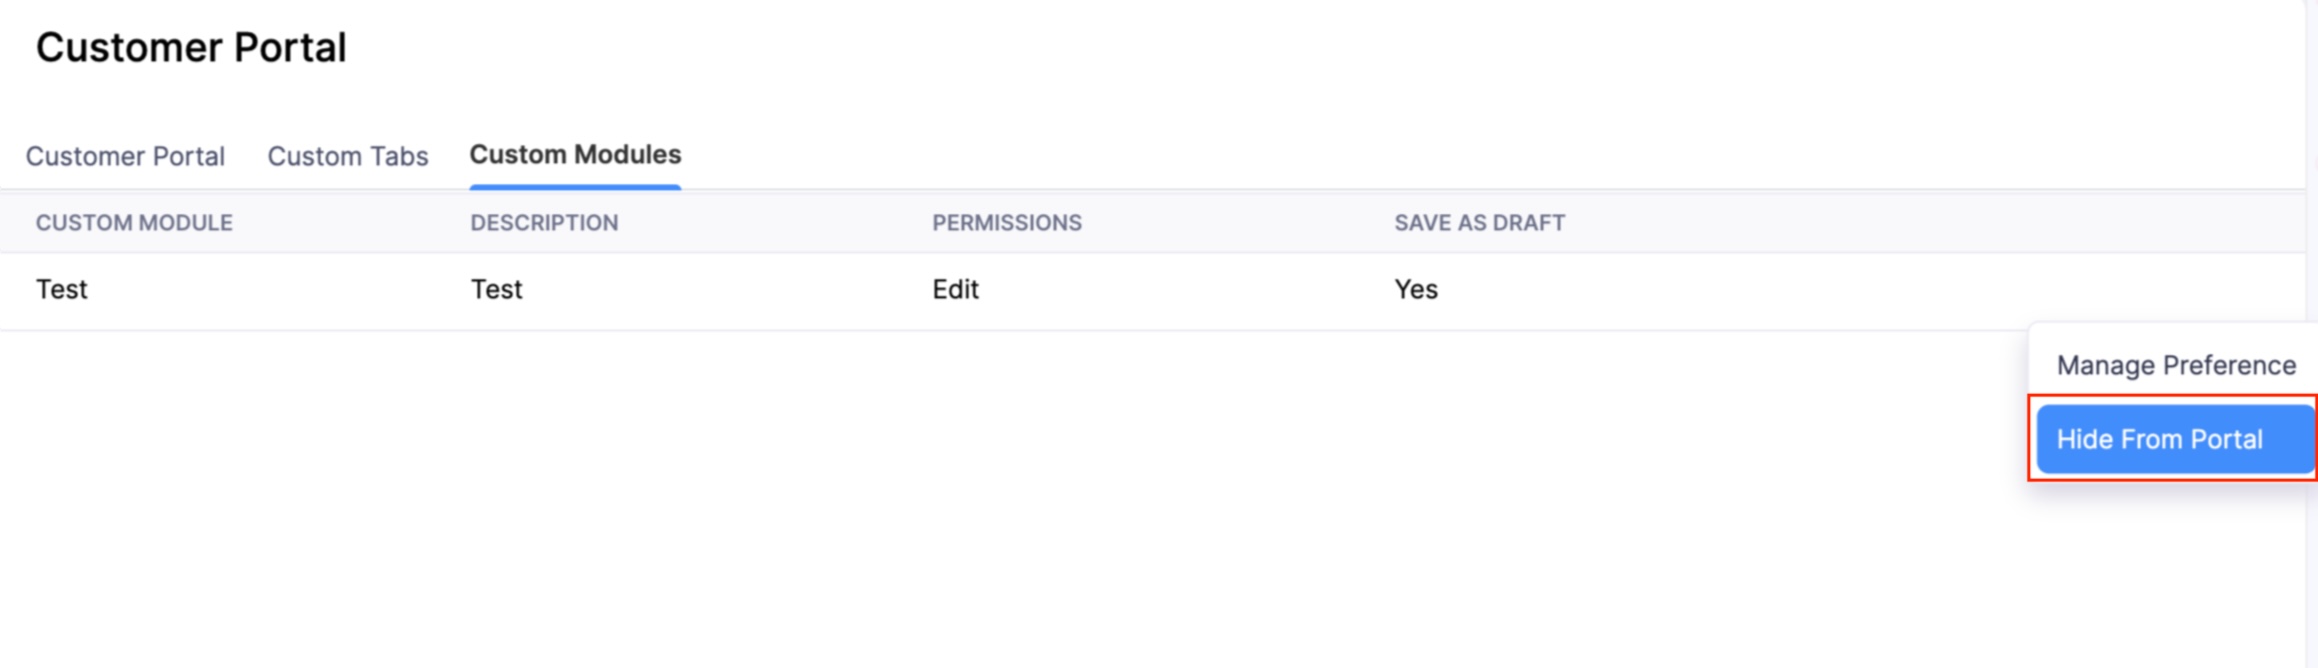
- Click Hide From Portal again in the pop-up that appears to confirm your action.
Approve a Record Submitted by Your Customers and Vendors
If you’ve enabled the option for your customers or vendors to create and submit records in a custom module from their portals, you can review and either accept or reject the submitted records.
To approve a record submitted by your customers or vendors:
- Click Custom Modules on the left sidebar and select the required custom module.
- Click All at the top and select Portal Submitted.
- Click the record you want to consider for approval.
- Click Accept at the top.
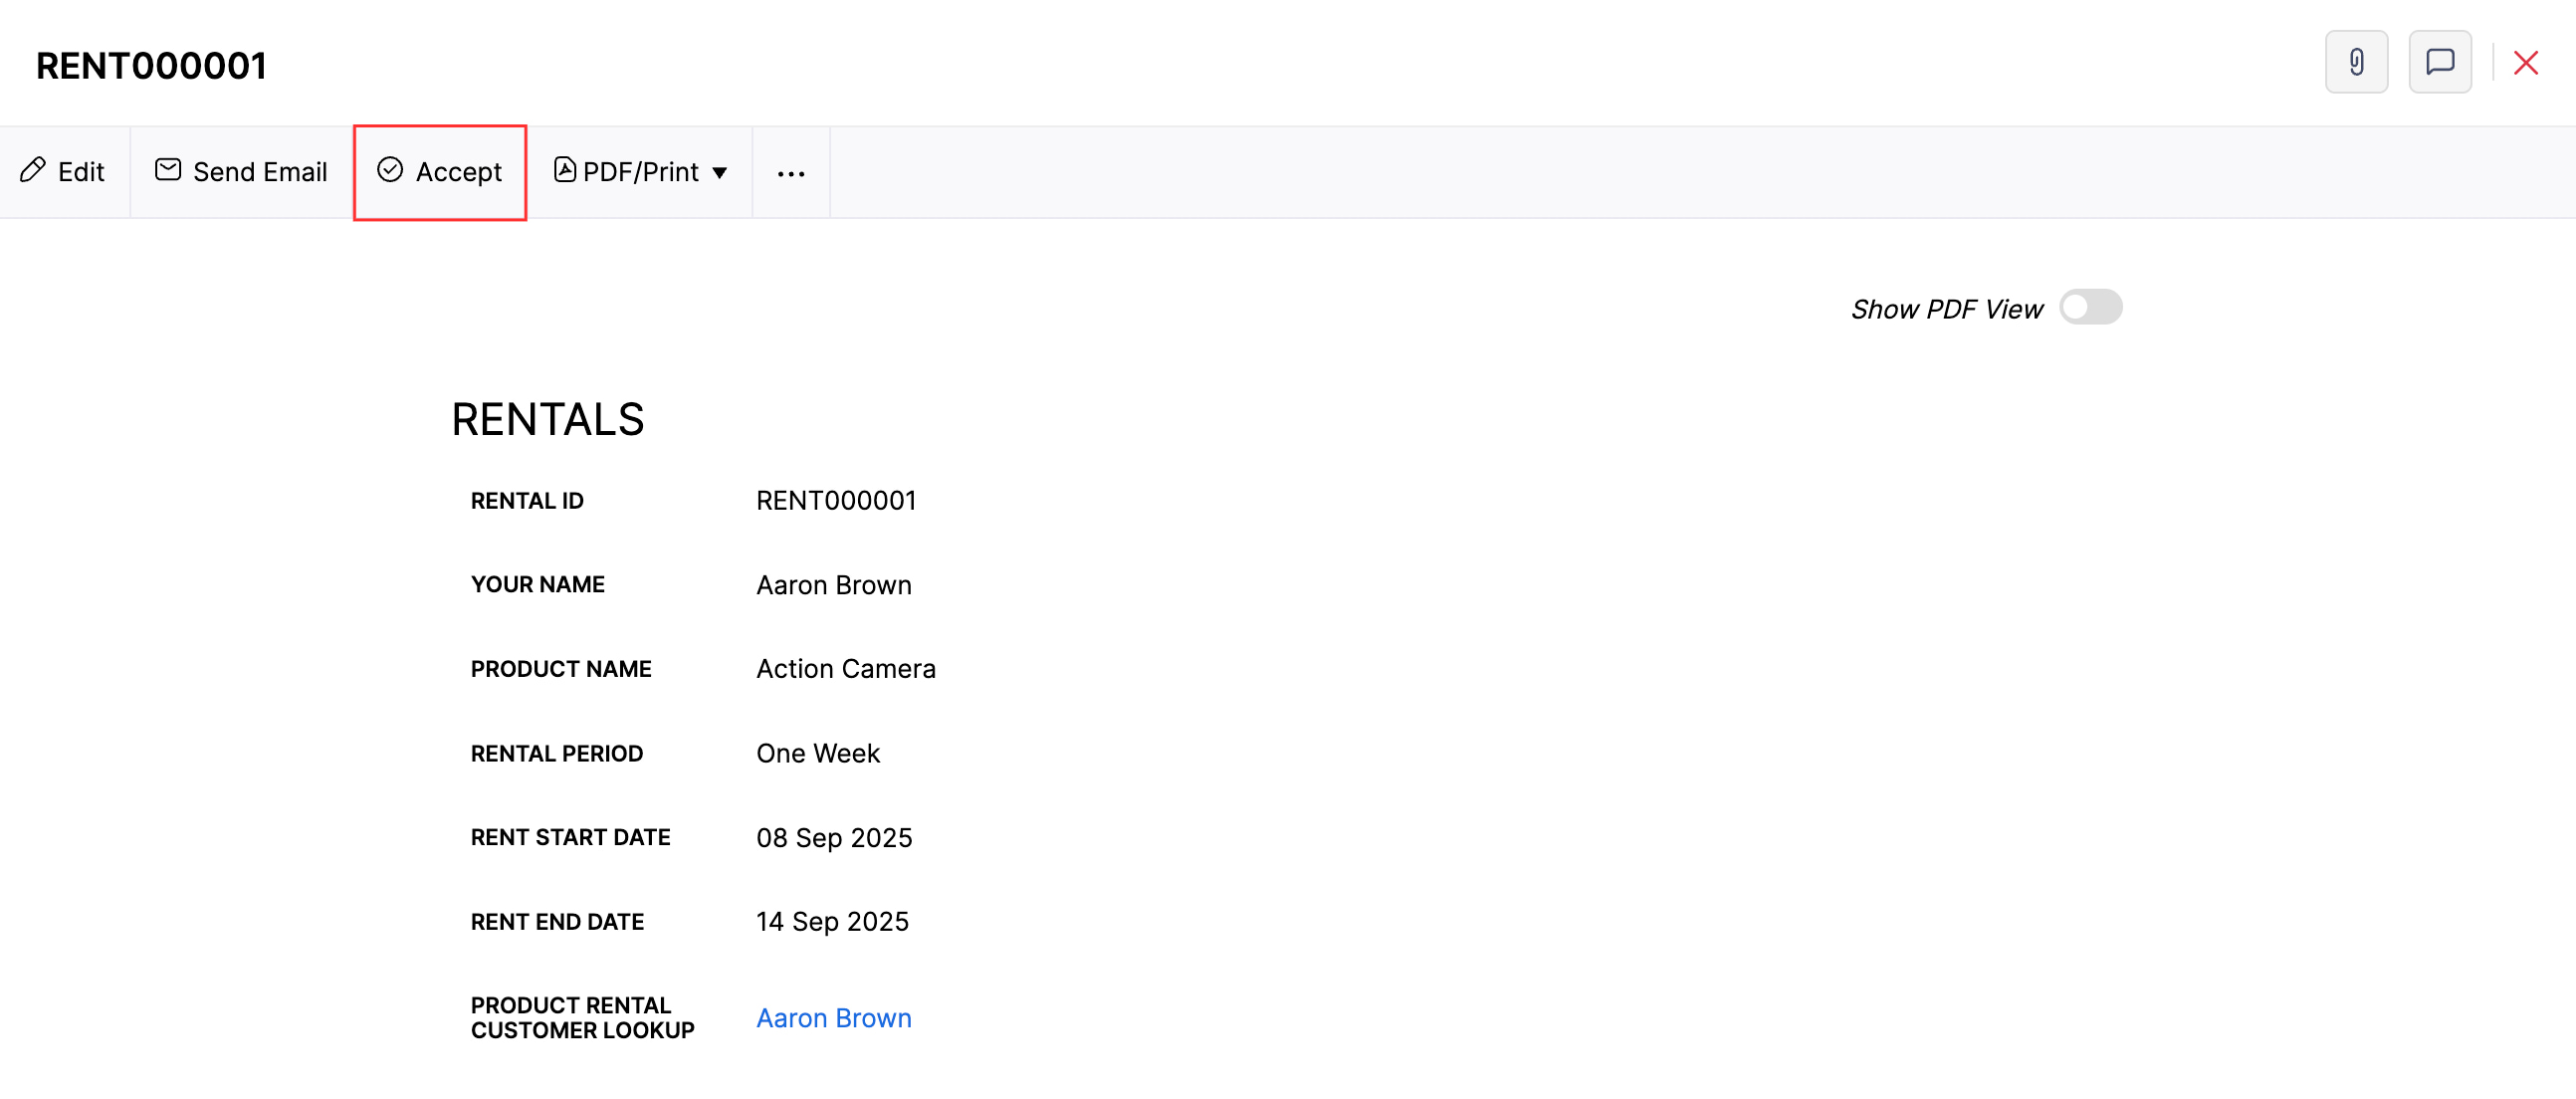
- Click Accept again in the pop-up that appears to confirm your action. The record will be added to the custom module.
Delete a Record Submitted by Your Customers & Vendors
If you’ve enabled the option for your customers or vendors to create and submit records in a custom module from their portals, you can review and either accept or reject the submitted records.
Note: If you delete a record submitted by your customers or vendors, it will be deleted from the custom module in your organization as well as from your customers’ or vendors’ portals.
To delete a record submitted by your customers or vendors:
- Click Custom Modules on the left sidebar and select the required custom module.
- Click All at the top and select Portal Submitted.
- Click the record you want to consider for approval.
- Click the More icon at the top and select Delete.
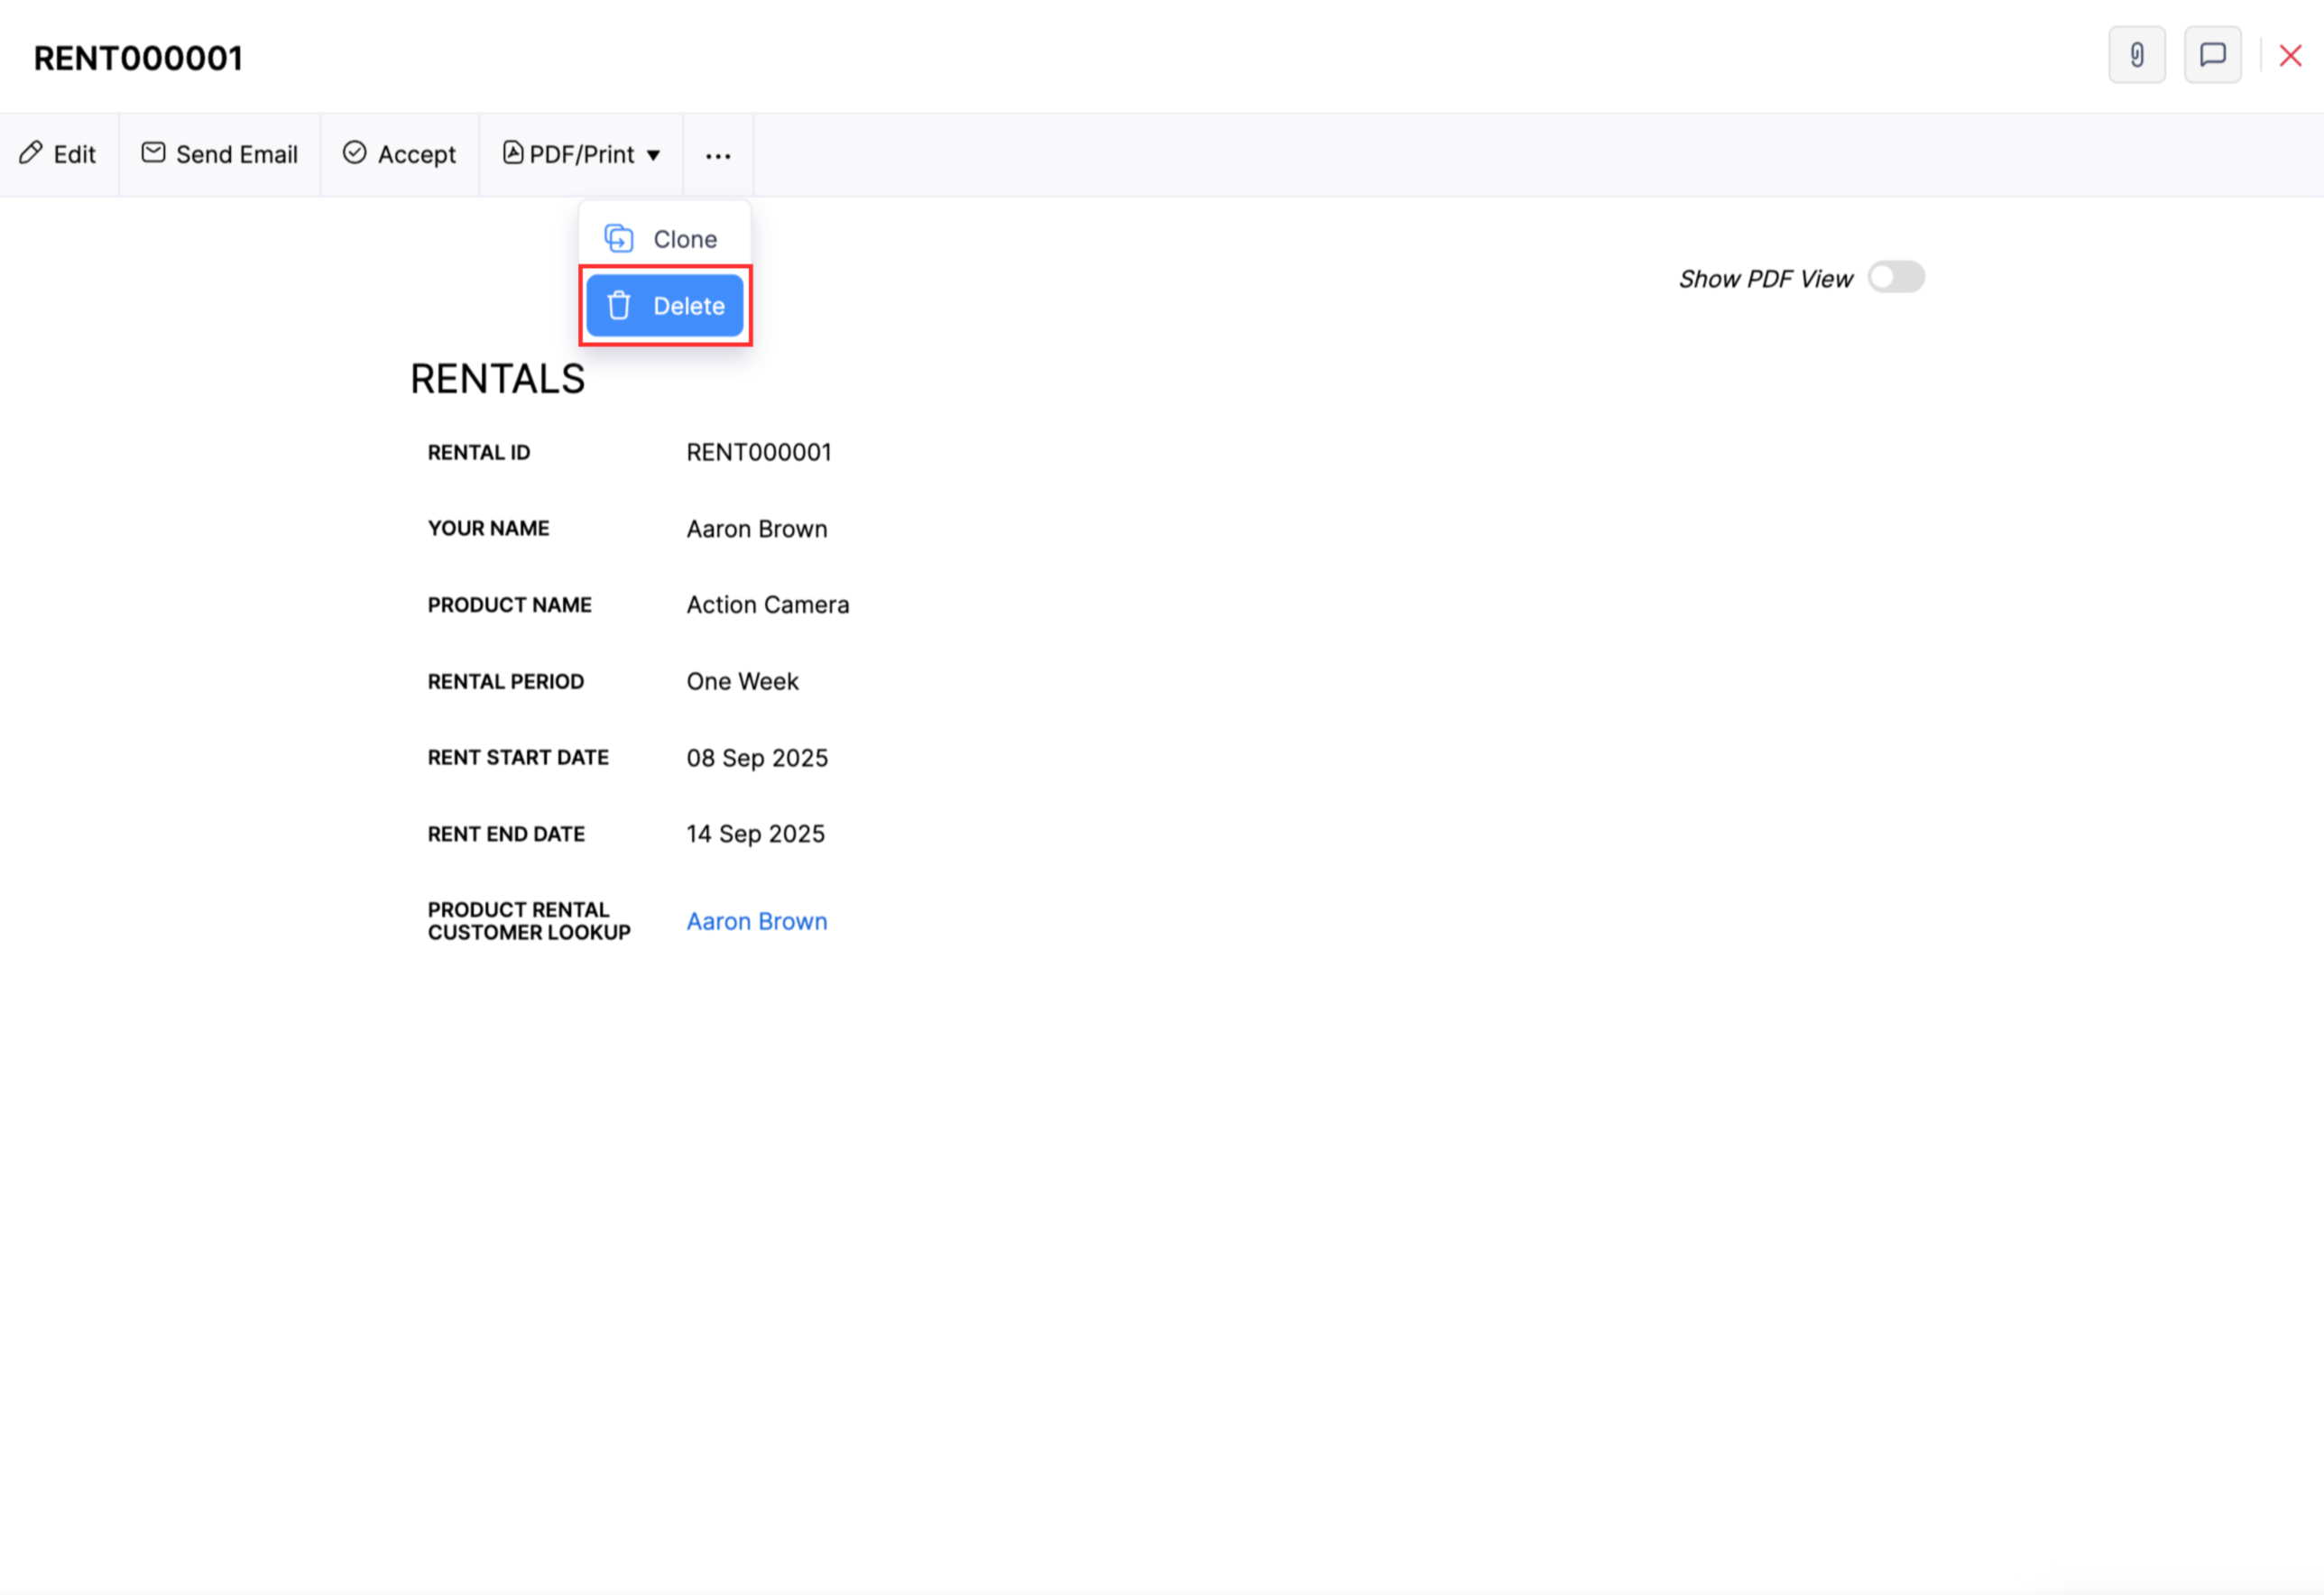
- Click Proceed in the pop-up that appears to confirm your action.
 Yes
No
Yes
No
Thank you for your feedback!