
Module Settings
In Zoho Payroll, you will be able to configure approvals, set up custom fields and custom buttons for the modules as mentioned in the below table.
| Feature | Configurable Modules |
|---|---|
| Approvals | Pay runs, salary revisions, and loans |
| Custom Fields | Employees and loans |
| Custom Buttons | Employees, salary revisions and loans |
Approvals
The Approvals feature helps you manage and streamline approval workflows for key payroll processes, such as Salary Revisions, Loans and Pay Runs. This ensures that updates and changes are reviewed before they are applied.
Simple Approval
In this approval flow, any user with relevant approval permissions can approve pay runs, salary revisions or loans. This is the default approval flow for your organization.
To set up the Simple Approval flow:
- Go to Settings in the top right corner and select a module under Module Settings.
- Select the module for which you would like to set up the simple approval flow. It can be pay runs, salary revisions or loans.
- Select Simple Approval.
- Click Save.
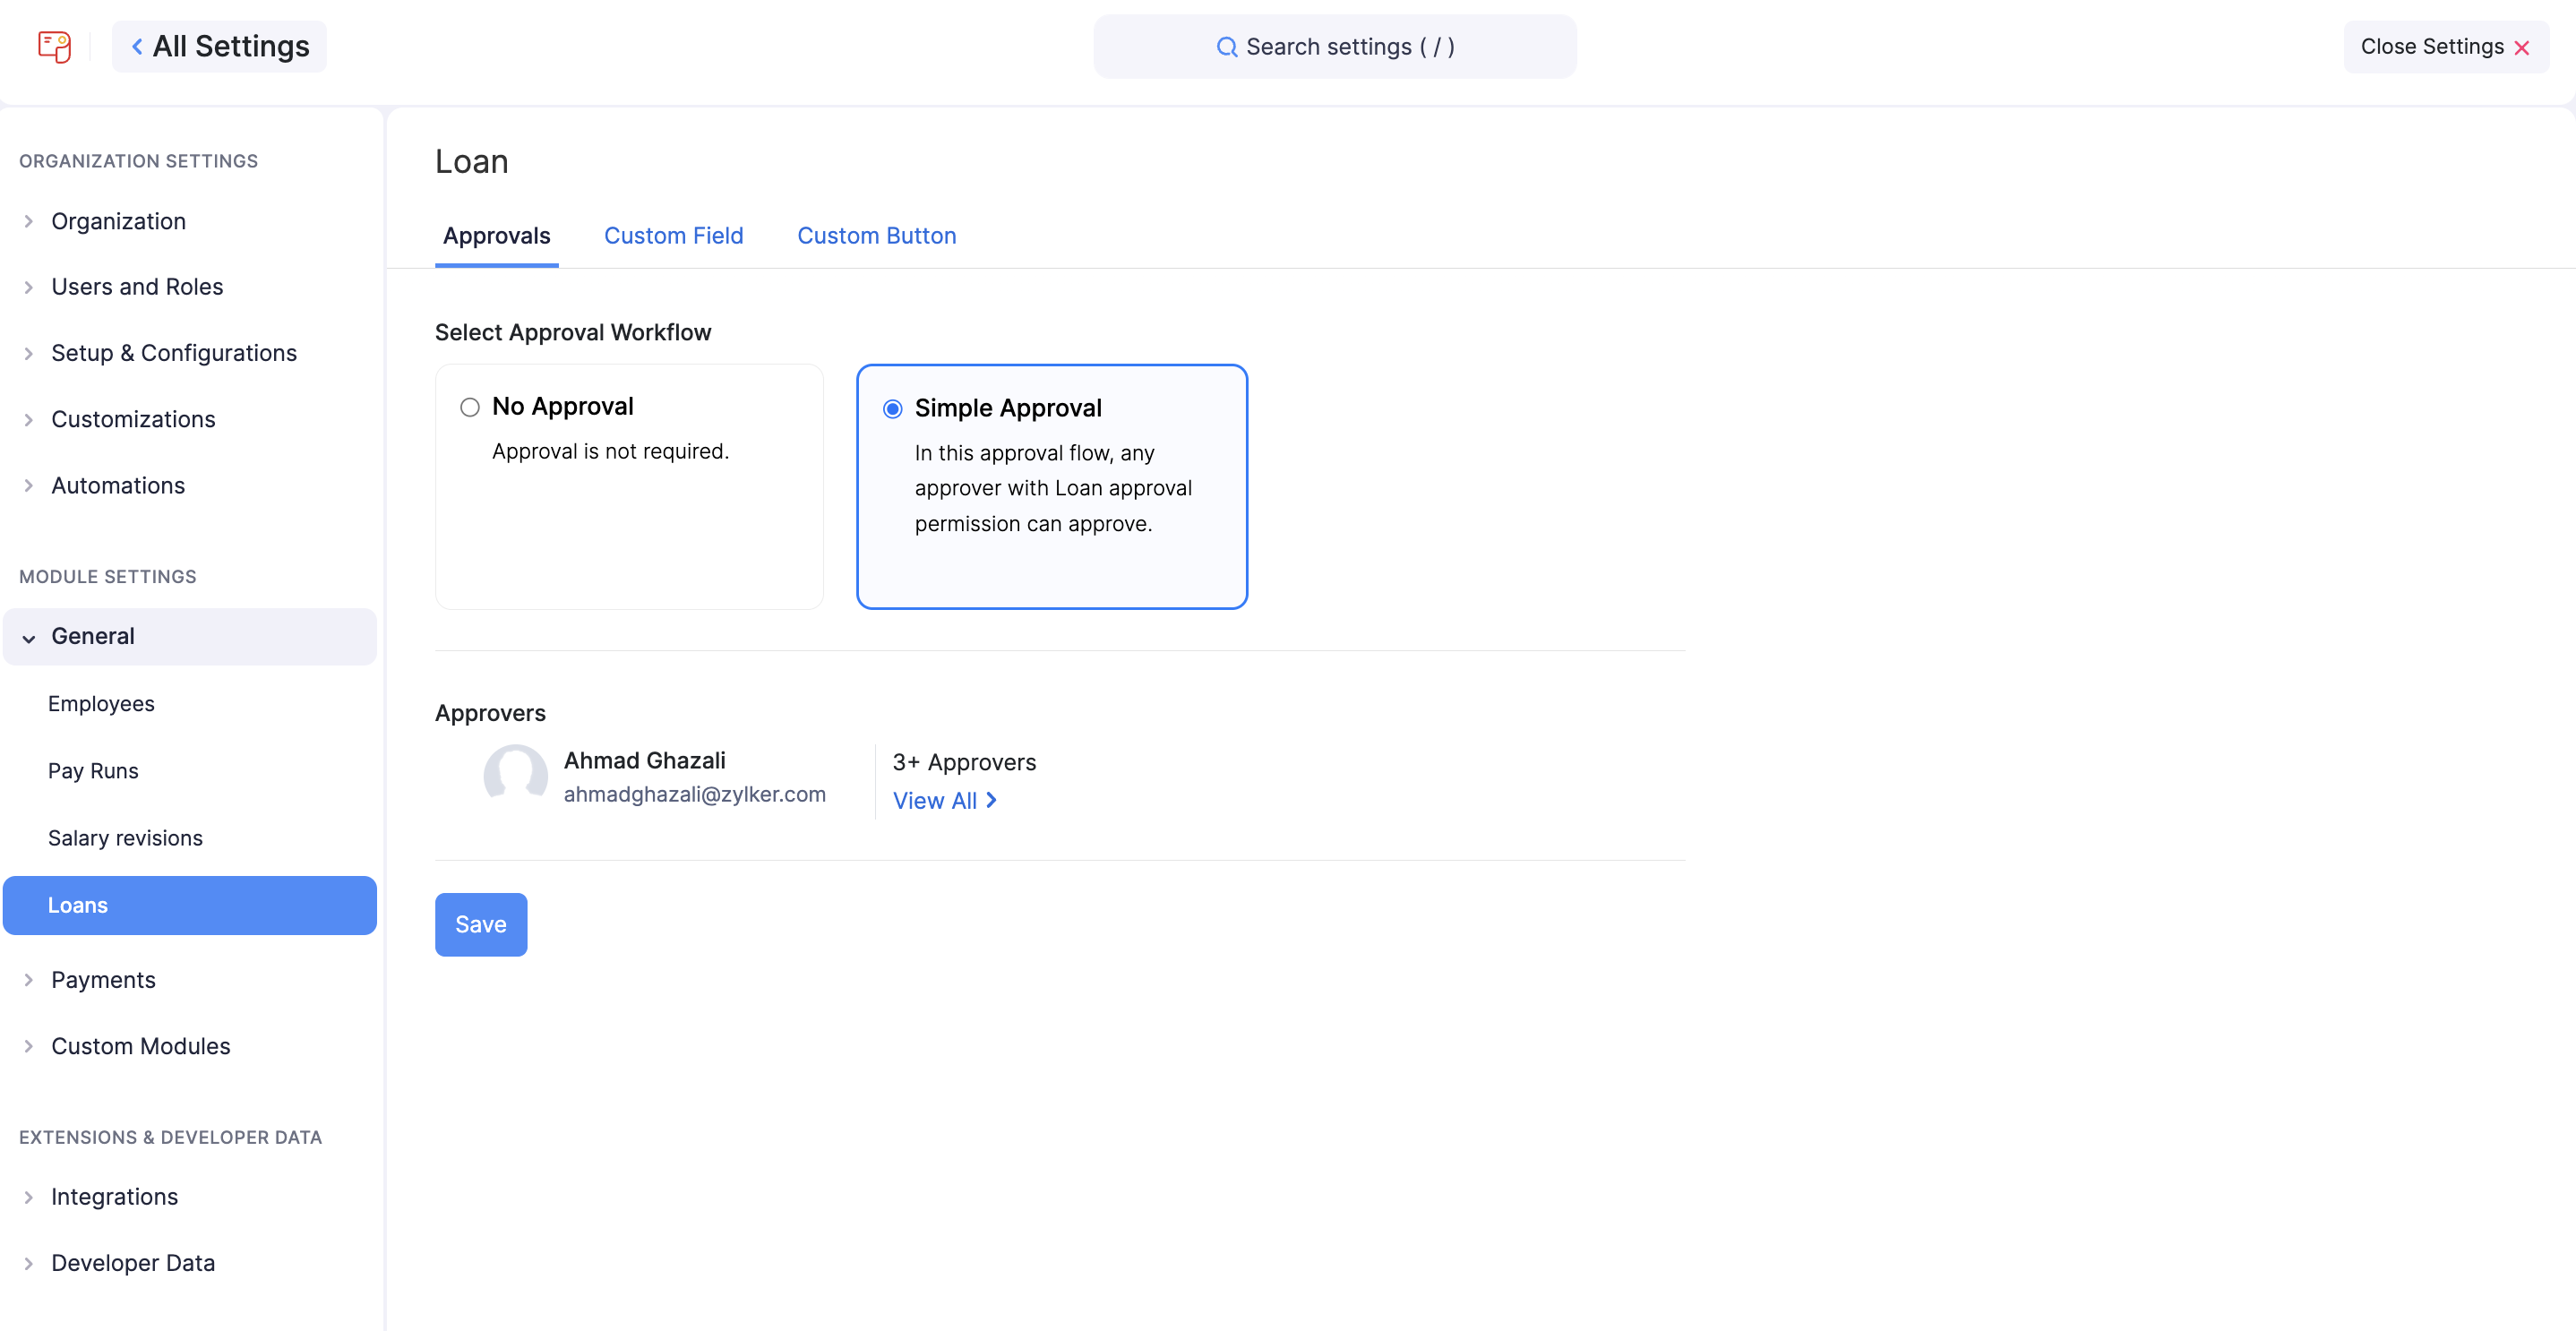
Once applied, any user with relevant approval permissions will be able to approve the pay runs, salary revisions or loans.
Multi-Level Approval
In this approval flow, you can define multiple levels of approvers based on your organization’s hierarchy. A pay run or salary revision will be considered approved only when all approvers in the flow approve it.
Note: You cannot set up multi-level approval for the Loans module.
To set up a multi-level approval flow:
- Go to Settings in the top right corner and select a module under Module Settings.
- Select the module for which you would like to set up multiple levels of approval. It can be pay runs or salary revisions.
- Select Multi-Level Approval.
- Click the Level 1 Approver dropdown and select a user.
- Click Add New Level to add a Level 2 Approver.
- Use the Add New Level button to add multiple levels of approvers.
Pro Tip:
- Reorder approvers by clicking and dragging the dragger icon next to their name.
- Click the delete icon to remove an approver from the flow.
- Click Save.
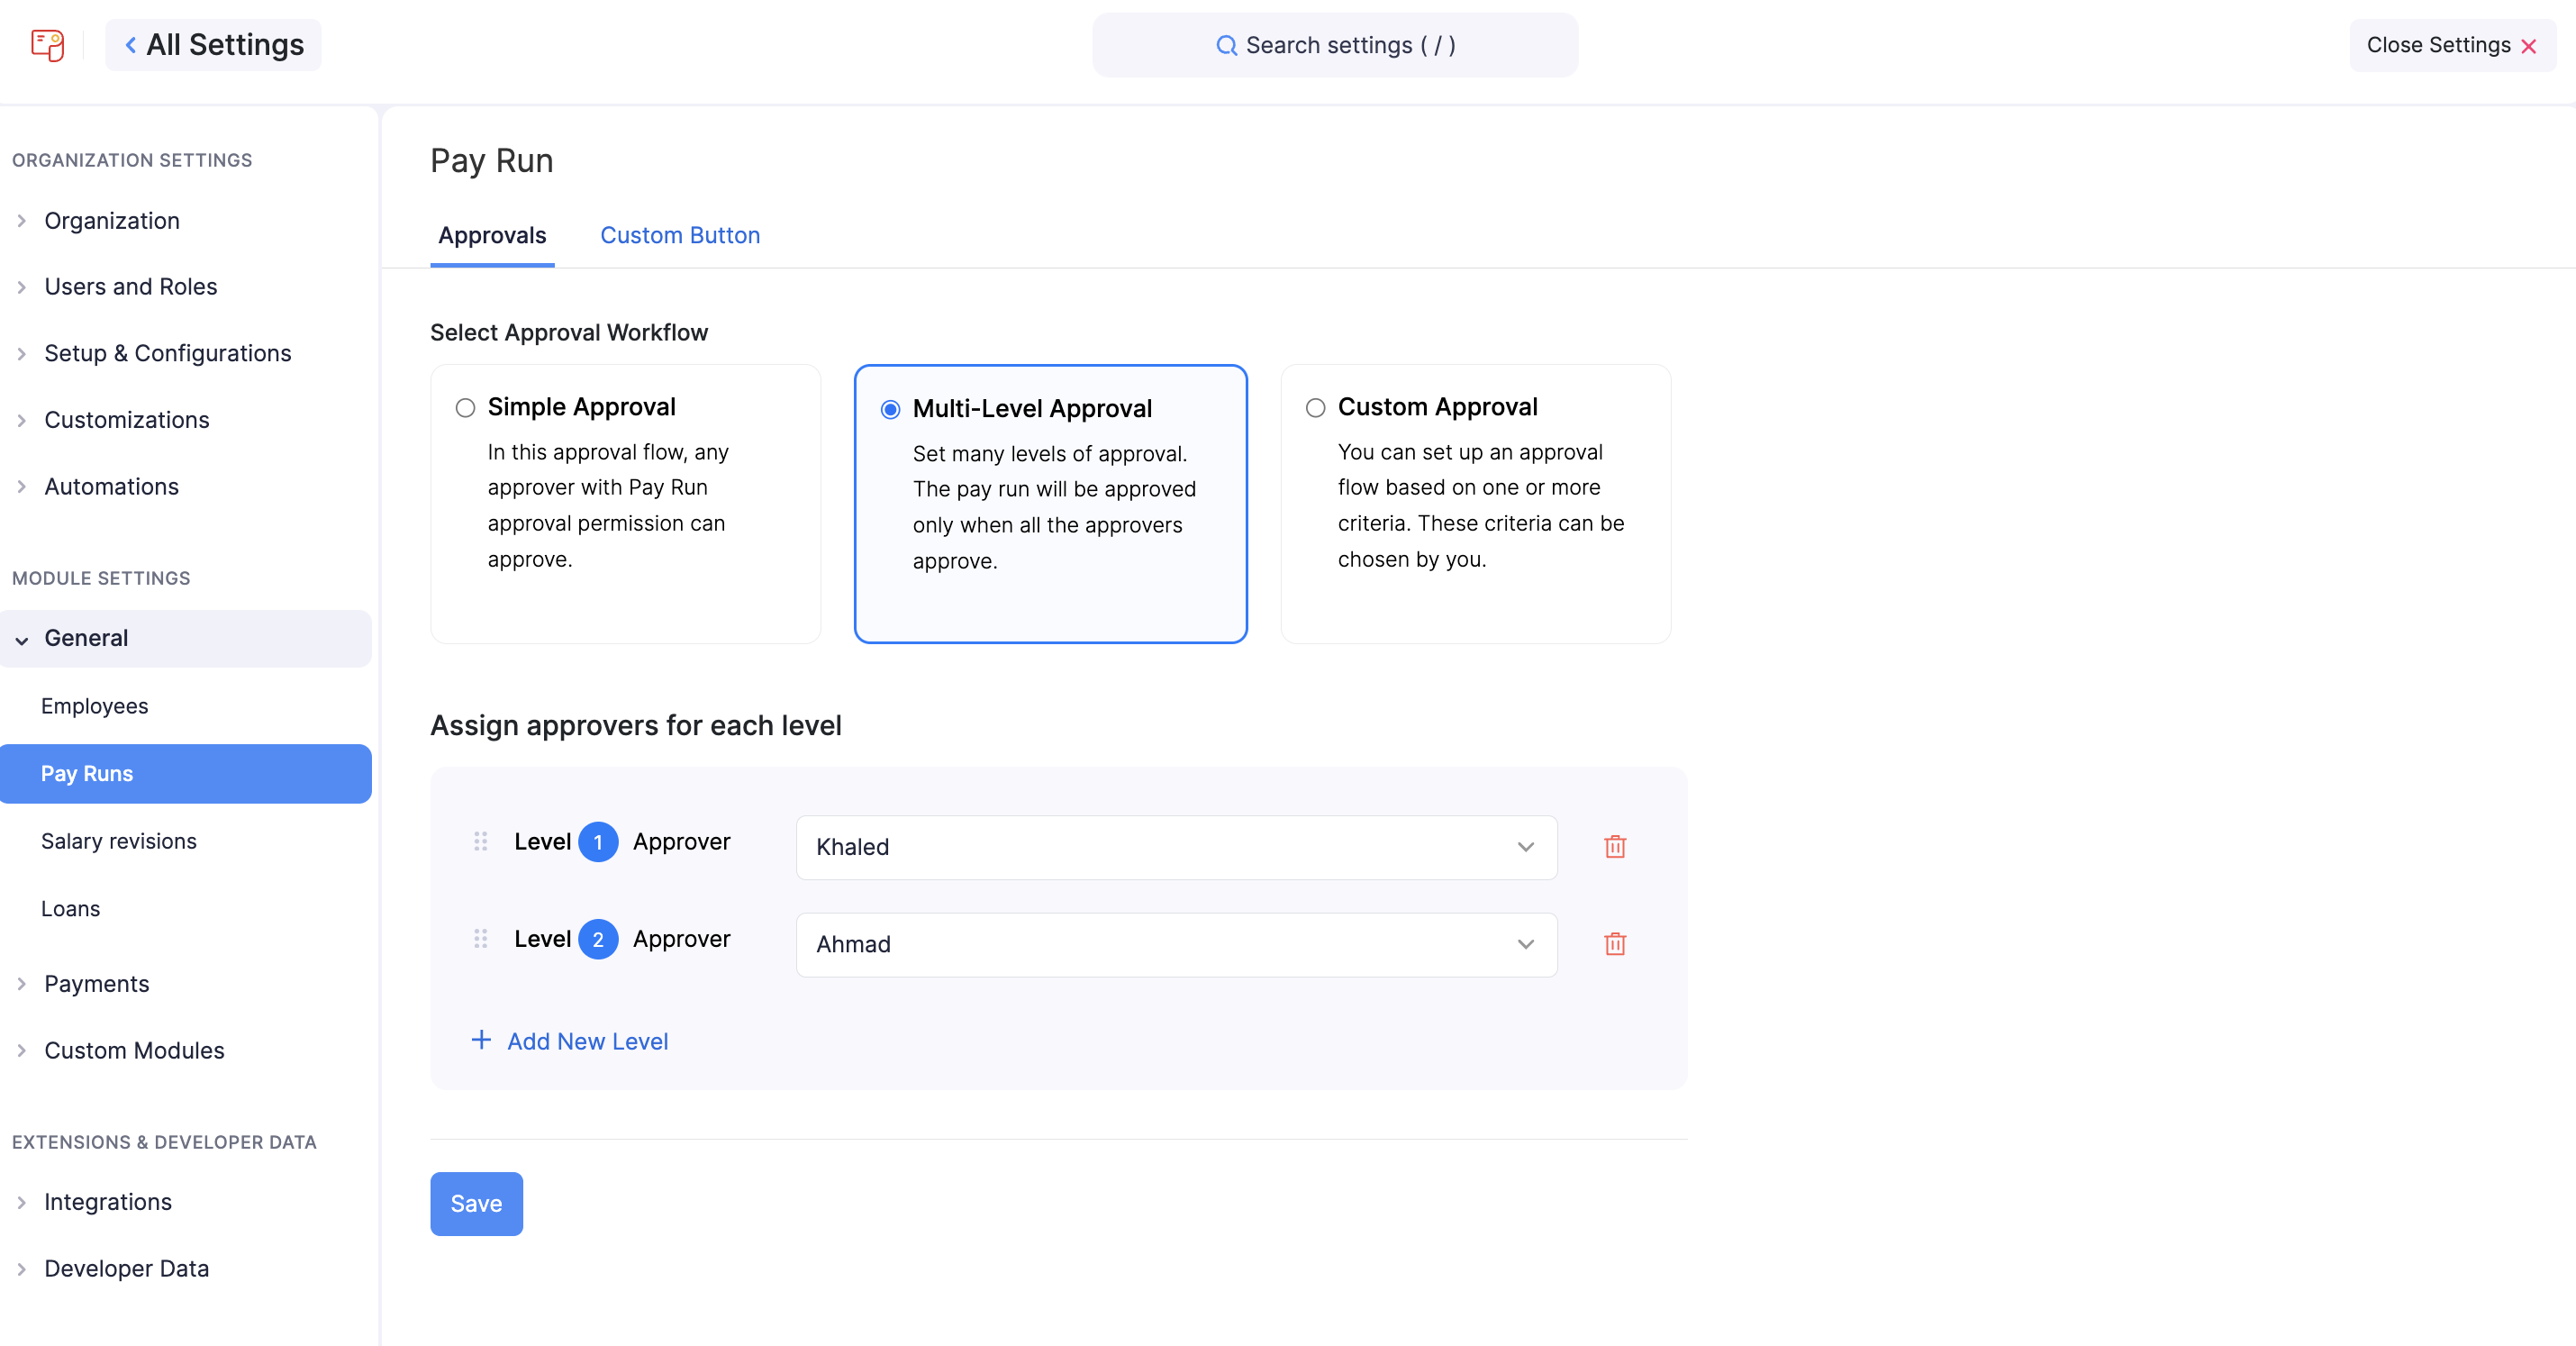
Once applied, only the assigned approvers will be able to approve salary revisions. Approvers can only take action after previous levels have approved the revision. For example:
- A Level 2 Approver can approve only after the Level 1 Approver has approved.
- A Level 3 Approver can approve only after the Level 2 Approver has approved, and so on.
Custom Approval
The Custom Approval flow allows you to configure approval workflows based on specific criteria. Once criteria are defined, you can choose one of the following approval flows:
- Configure Approval Flow: Add multiple levels of approvers when the defined criteria are met.
- Auto Approve: Automatically approve salary revisions when the criteria are met.
- Auto Reject: Automatically reject salary revisions when the criteria are met.
You can set up custom approval for pay runs and salary revisions.
Note: You cannot set up custom approval for the Loans module.
Scenario: Let’s say that in your organization, salary revisions above QAR 5000 require special approval from the Managing Director. You can configure this by setting the criteria as follows:
- When “CTC Amount” >= “QAR 5000”
- Add the Managing Director as an approver.
To set up a custom approval flow:
- Go to Settings in the top right corner and select a module under Module Settings.
- Select the module for which you would like to set up custom approval. It can be pay runs or salary revisions.
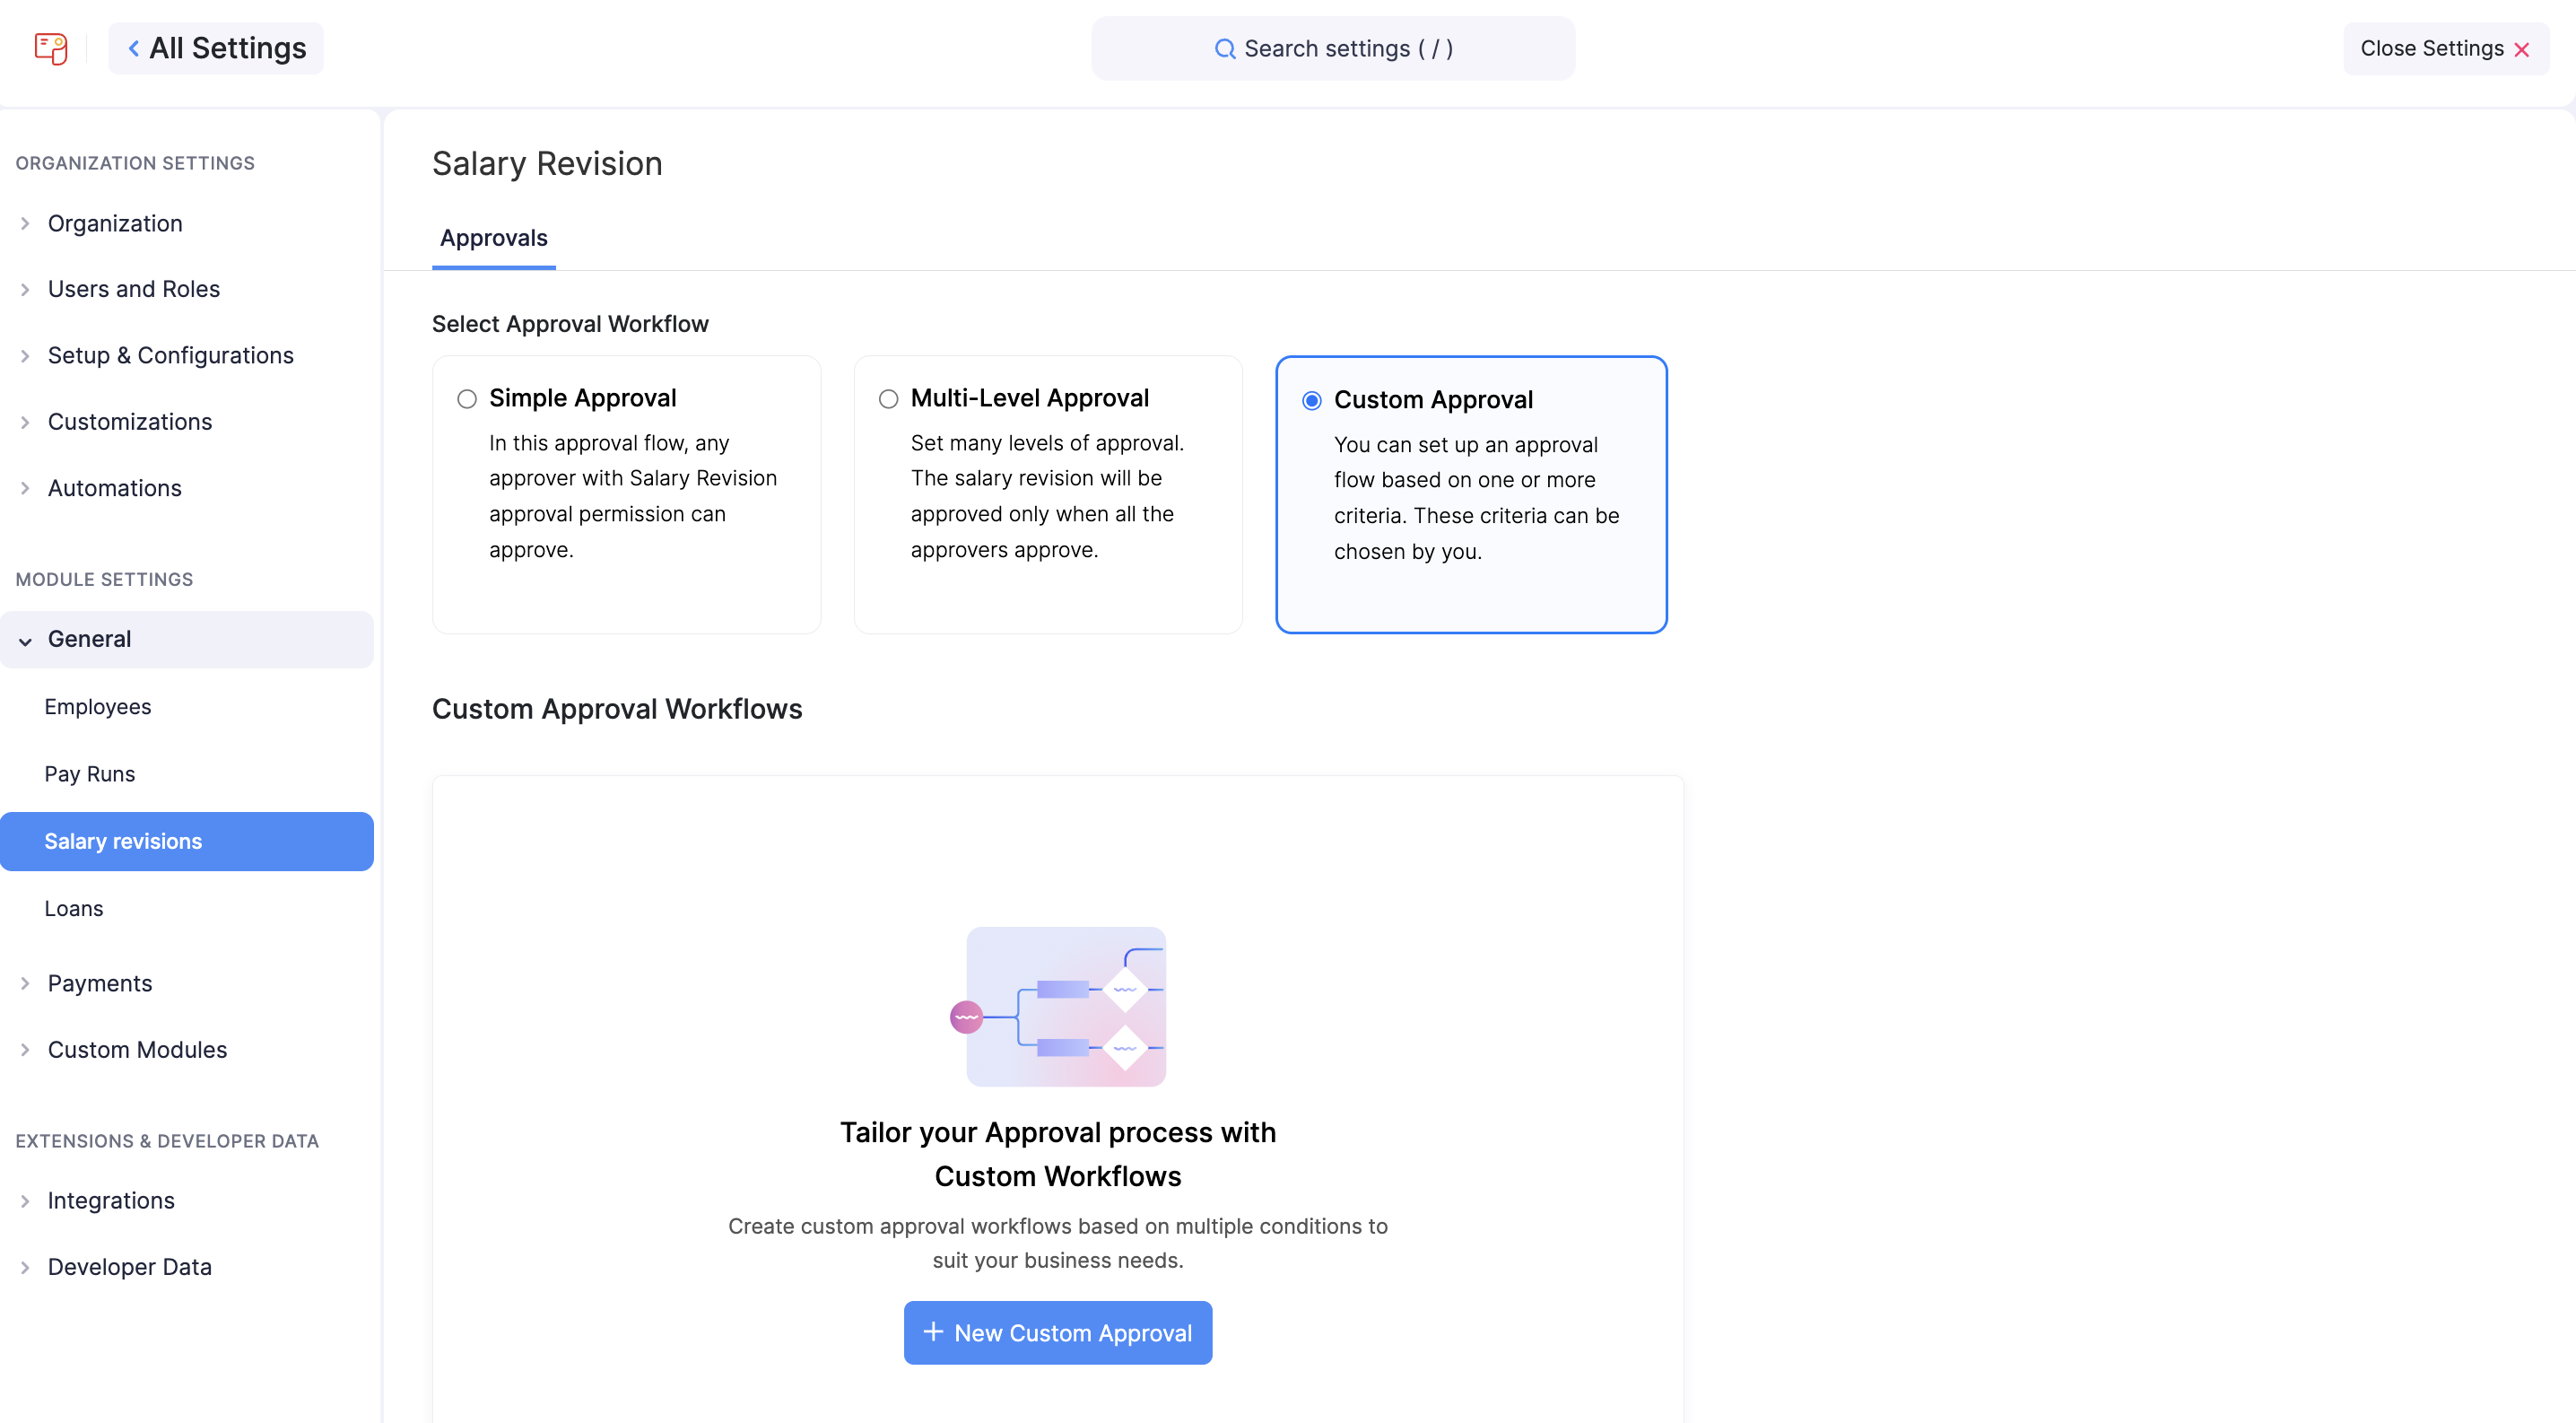
- Select Custom Approval and click + New Custom Approval.
- Enter an Approval Name and Description.
- Define the criteria.
Pro Tip: Click + Add Criteria to define multiple conditions (up to 10 criteria).
- Select one of the following approval flows:
- Configure Approval Flow:
- Select a user to be the Level 1 Approver.
- Click + Add New Level and select users to add multiple levels of approvers.
- Auto Approve
- Auto Reject
- Configure Approval Flow:
- Click Save.

With these approval workflows, you can ensure that all payrolls, loans and salary revisions are processed efficiently while adhering to your organization’s policies.
Custom Fields
Custom fields enable you to include additional information about the employee or a loan. Any detail that is not mandated in the payroll but you want to collect can be collected using custom fields. For example, you can record the nominees of employees or record the Guarantor Name for the loans you issue.
In this document you will learn how to:
- Create a custom field
- Edit a custom field configuration
- Mark a custom field as Inactive
- Delete a custom field
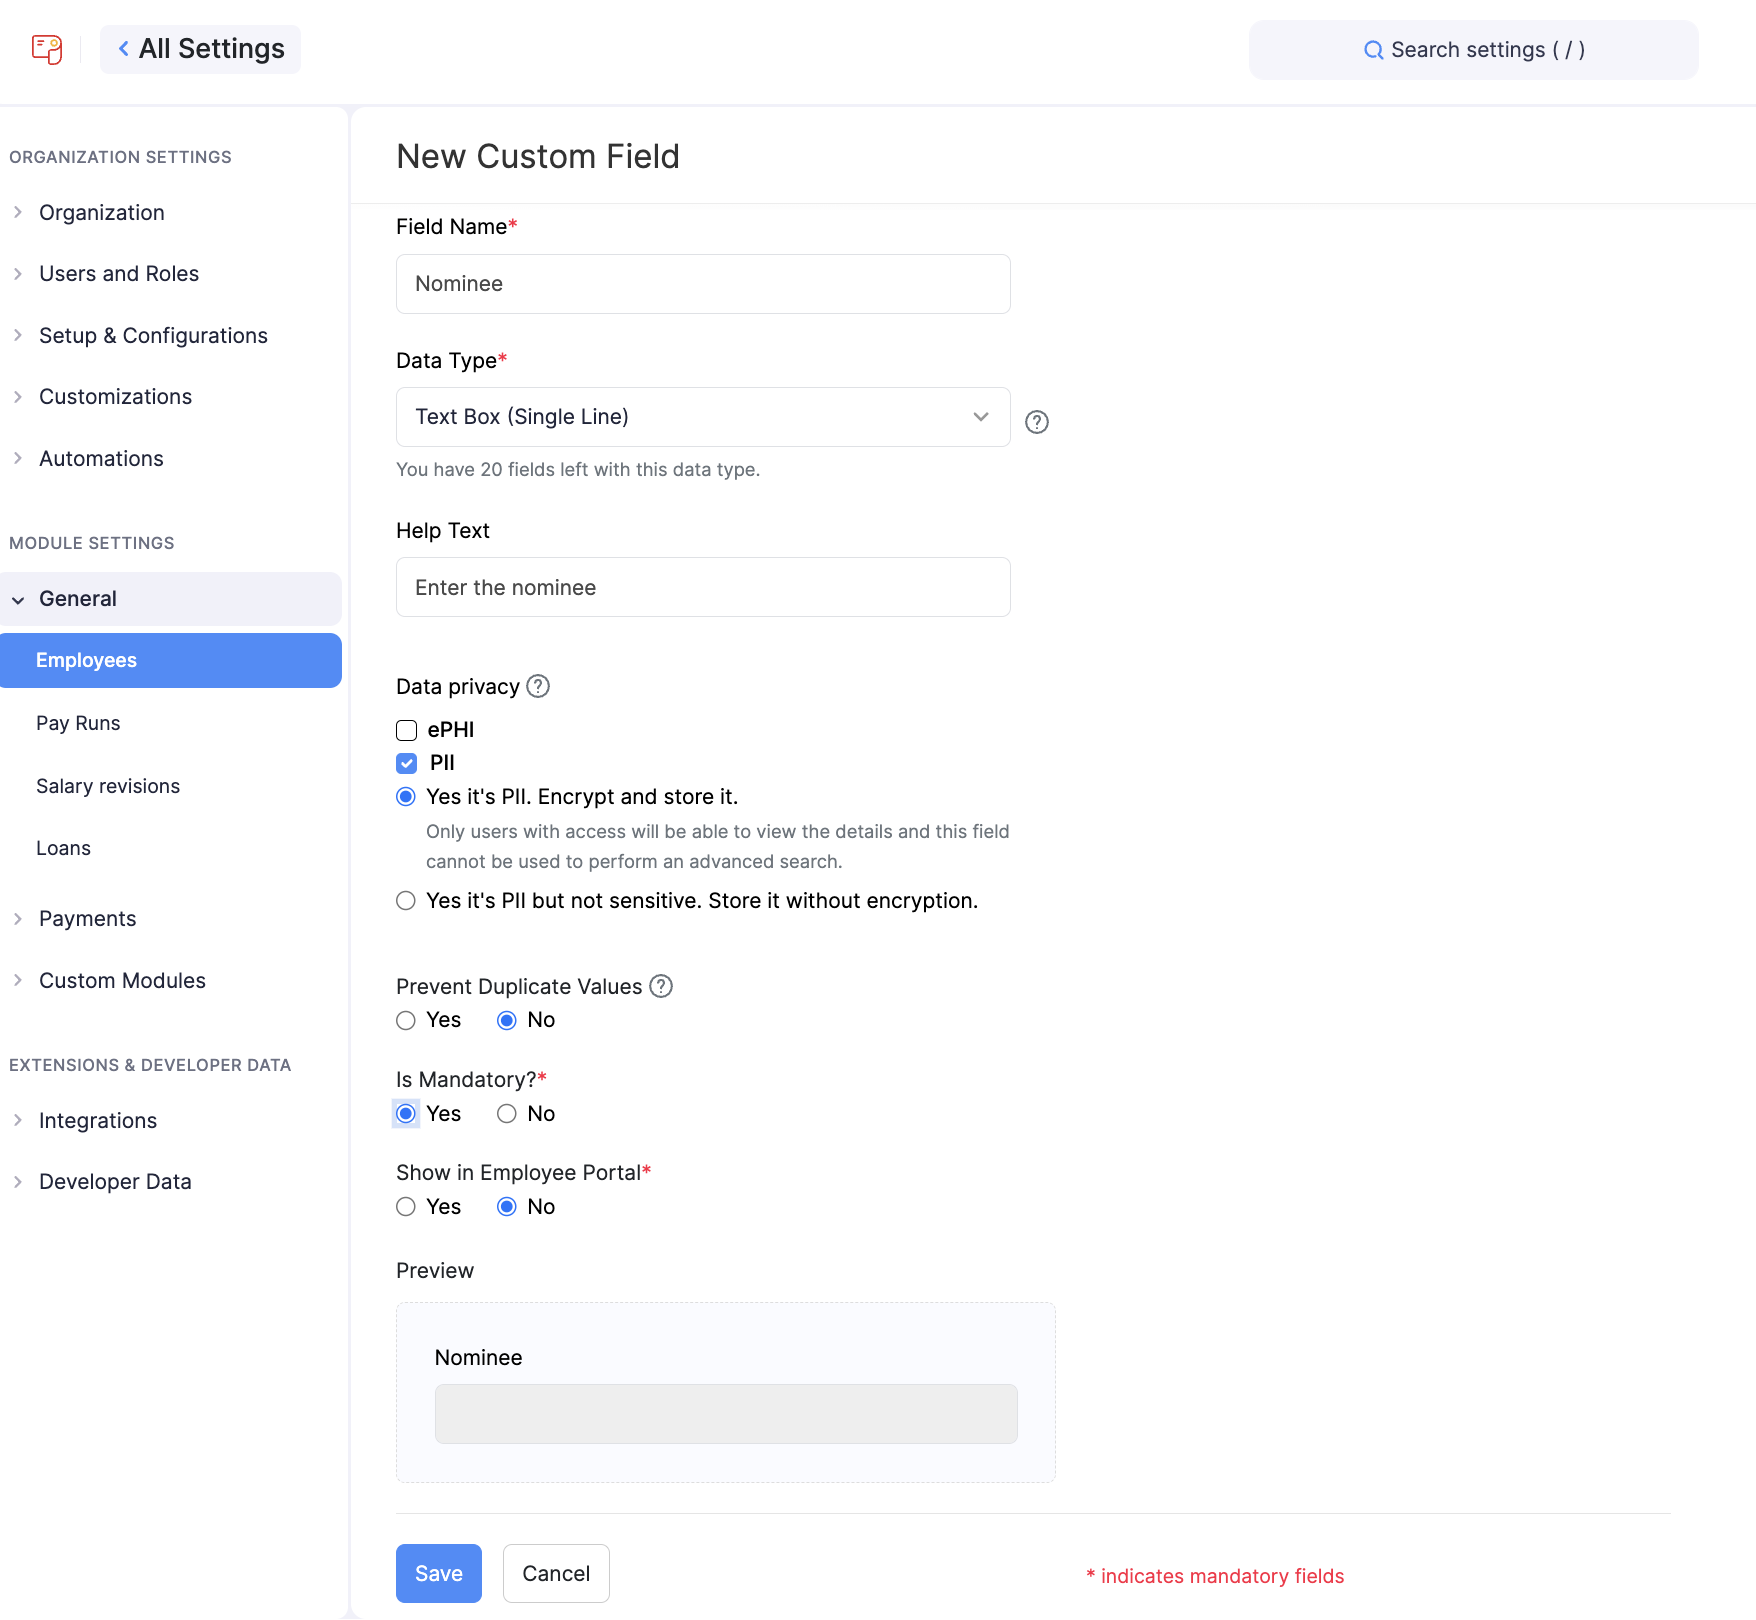
Create a Custom Field
- Go to Settings in the top right corner and select a module under Module Settings.
- Select the module for which you would like to create a custom field. You can create custom fields for the employees and loans module.
- Click Create New or Create Custom Field.
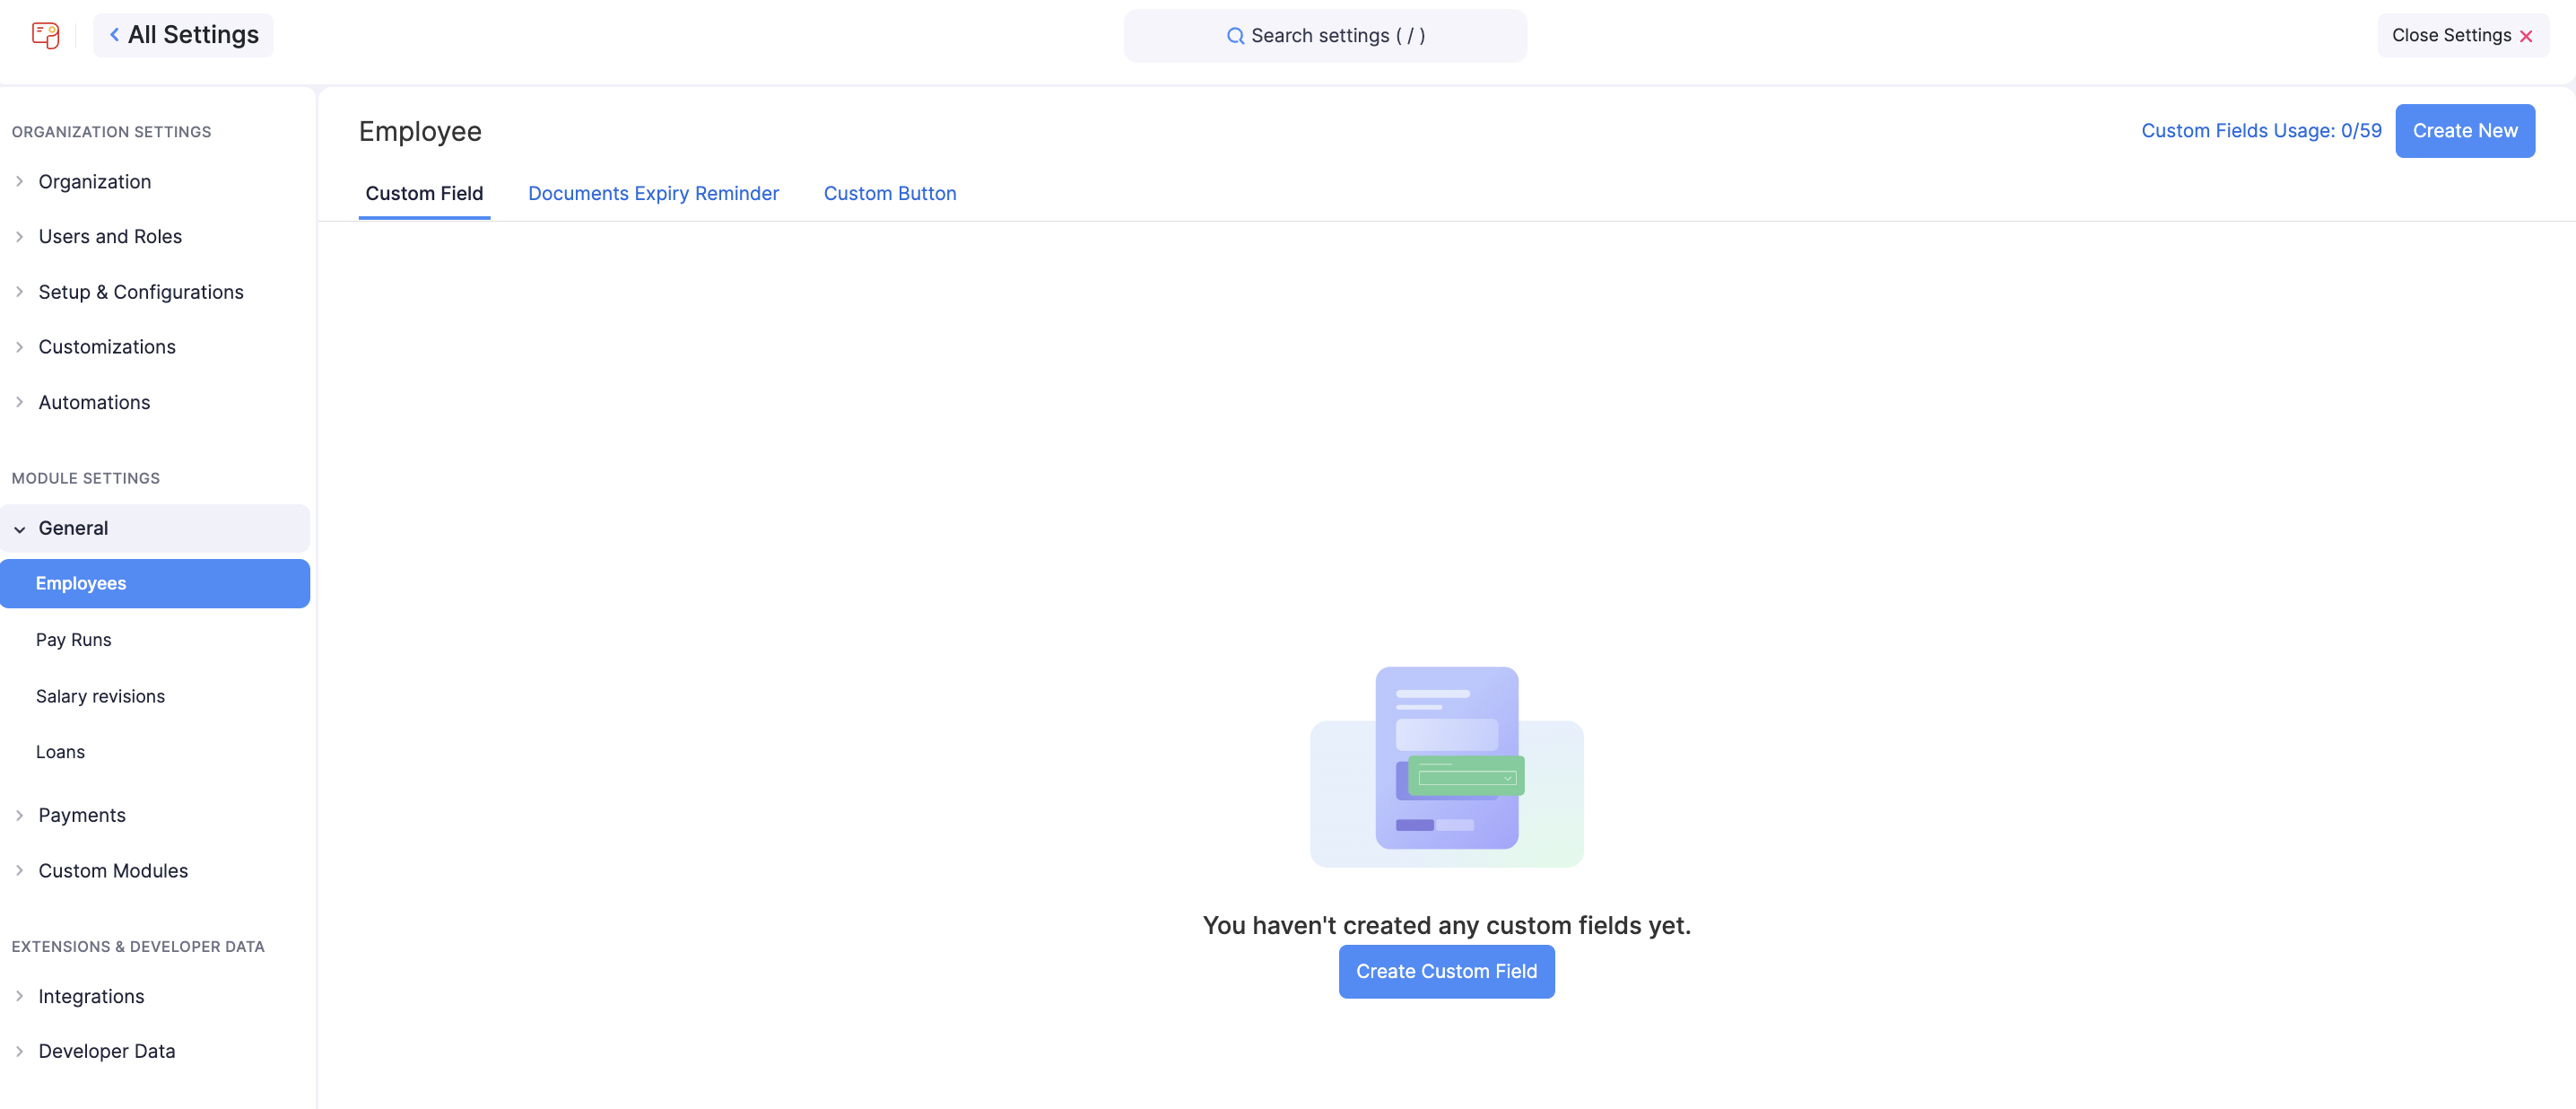
- Enter the Field Name and select the Data Type from the dropdown menu.
- Based on the data type, you will have to fill out the necessary information that will help with filling out the details. Given below are the data types available:
| Data Type | Information Needed |
|---|---|
| Text Box (Single Line) |
|
| Text Box (Multi-line) |
|
| |
| URL |
|
| Phone |
|
| Number |
|
| Decimal |
|
| Amount |
|
| Percent |
|
| Date |
|
| Check Box |
|
| Auto-Generate Number |
|
| Dropdown |
|
| Multi select |
|
| Notes |
|
- Select PII or ePHI based on the information that the user will be entering in this field.
If the information that the user will enter in the custom field is confidential and can be used to identify a person, you can select the PII (Personally Identifiable Information) option to protect the privacy of the users’ data. PII can include phone number, email address, IP address, social security number, etc. You can choose to encrypt and store it if the data is sensitive or store it without encryption if the data is non-sensitive. If the user will enter medical information that can be used to identify a person, select ePHI (Electronic Protected Health Information) and PII. For example, an electronic copy of medical report will be ePHI. You can mark only fields such as Text, Email, URL, Phone, and Date as ePHI. The data will be considered as sensitive so it will be encrypted and stored.
- Check the option to make the field mandatory.
- Check the option to show the field in the Employee Portal.
- Click Save. Now, the field will be available in every employee’s profile.
Edit a Custom Field
To edit the custom field:
- Go to Settings in the top right corner and select a module under Module Settings.
- Select the module for which you would like to edit the custom field.
- Click the More icon next to the field name and select Edit.
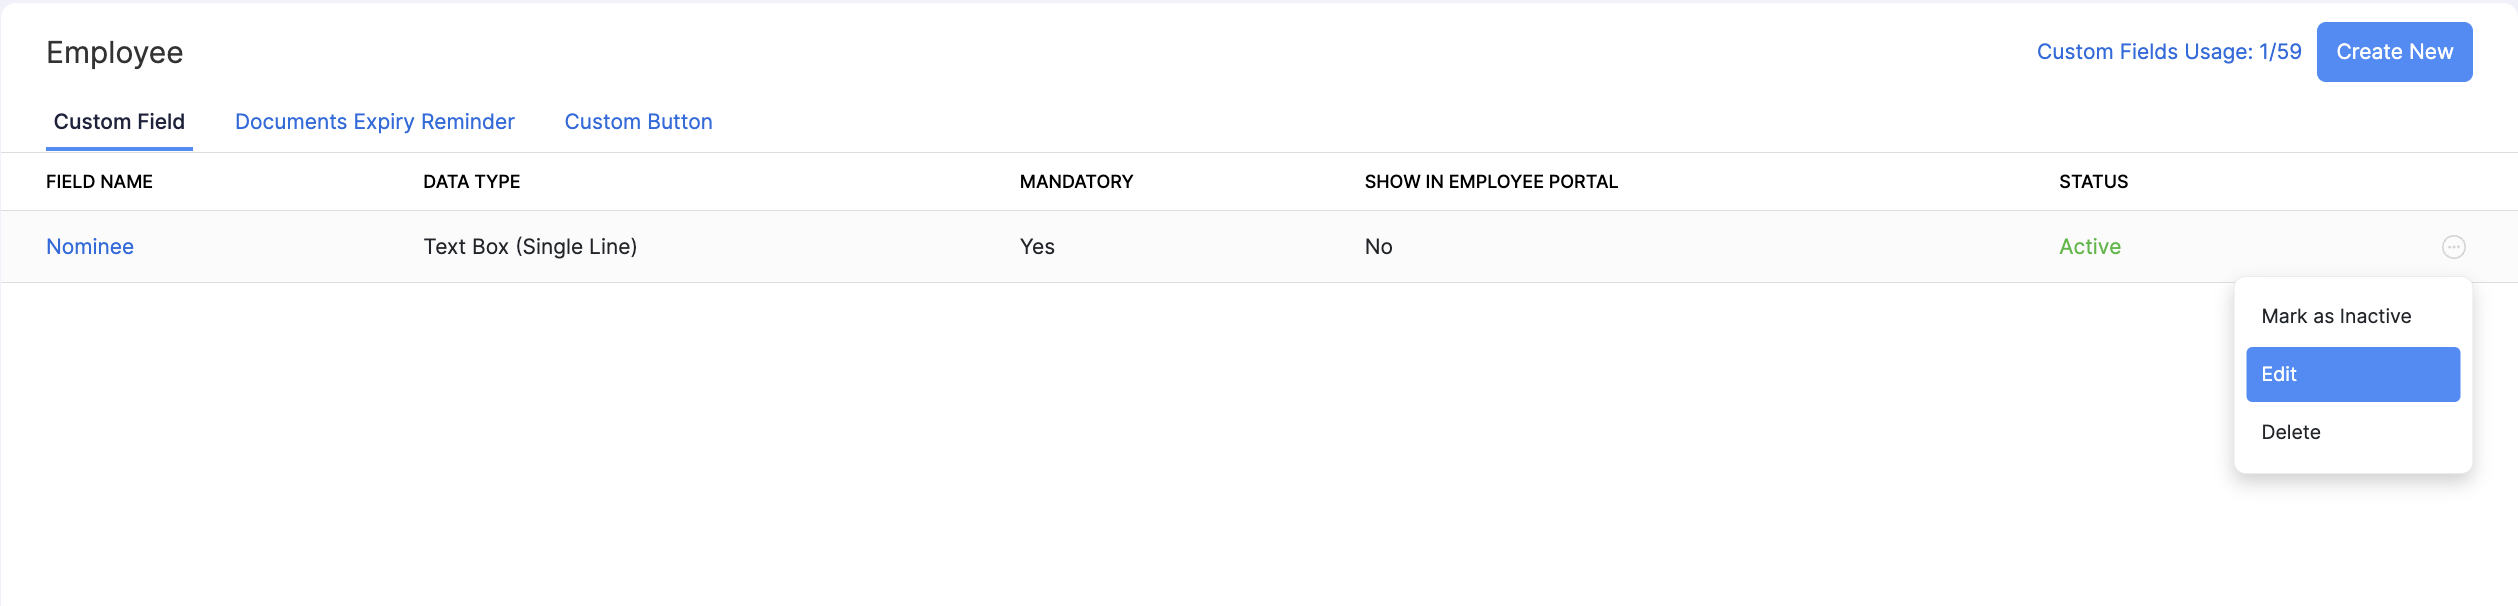
- Make the necessary changes and click Save.
Mark a Custom Field as Inactive
To mark a custom field as inactive:
- Go to Settings in the top right corner and select a module under Module Settings.
- Select the module for which you would like to mark a custom field as inactive.
- Click the More icon next to the field name and select Mark as Inactive.
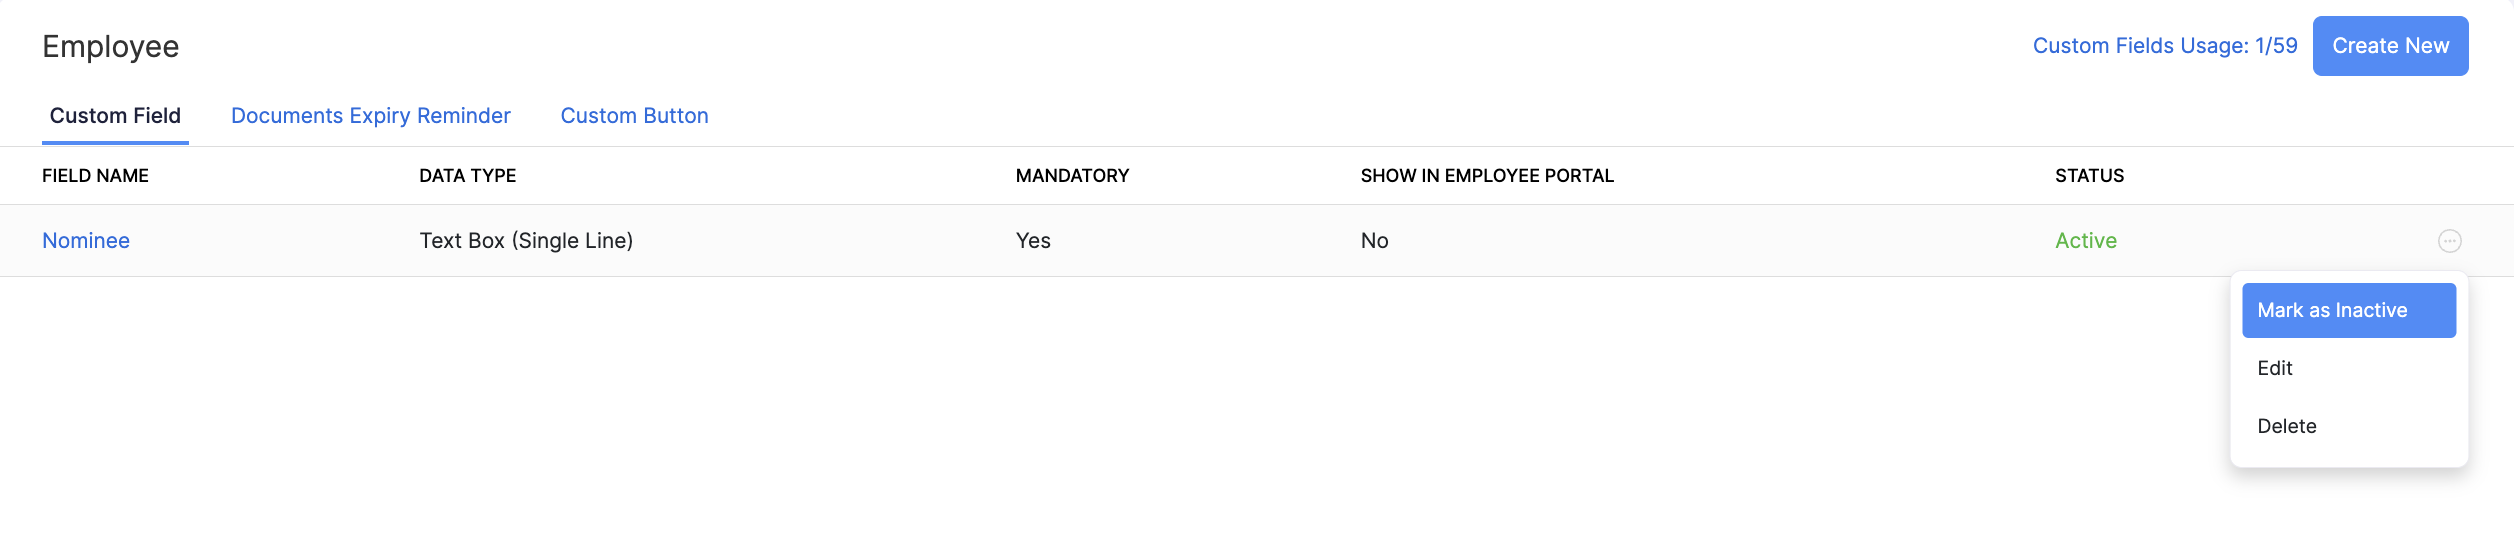
To enable it again, click the More icon and select Mark as Active.
Delete a Custom Field
You can delete a custom field if there is no employee data associated with that custom field. To delete a custom field:
- Go to Settings in the top right corner and select a module under Module Settings.
- Select the module for which you would like to delete the custom field.
- Click the More icon next to the field name and select Delete.
- In the pop-up that opens, select Yes to confirm.
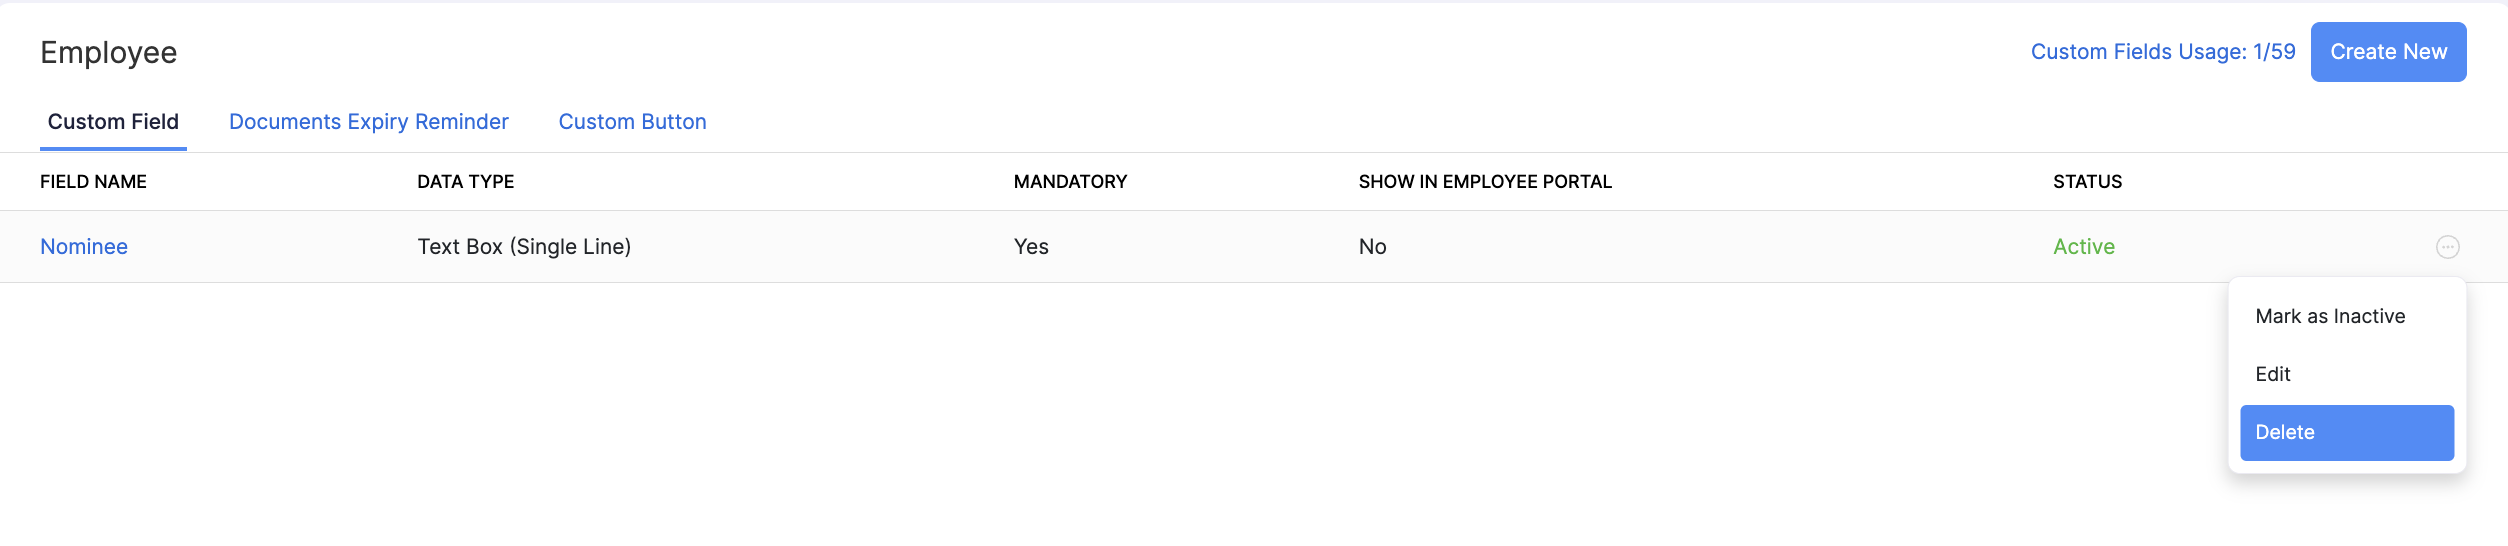
The custom field will be deleted.