


Custom Reports
Custom Reports in Zoho Expense allow you to create personalized reports by selecting the data you want to track and analyze. You can apply filters, group information, and customize the layout to match your business needs, making it easier to gain insights and make informed decisions.
Customize an existing report or build one from scratch, and save it as a custom report for quick access.
Note: The number of custom reports you can create in your organization will differ based on your pricing plan.
Create a New Custom Report
You can create a custom report in two ways. Here’s how:
- Go to Analytics on the left sidebar.
- Click the report you want to customize and create as a custom report.
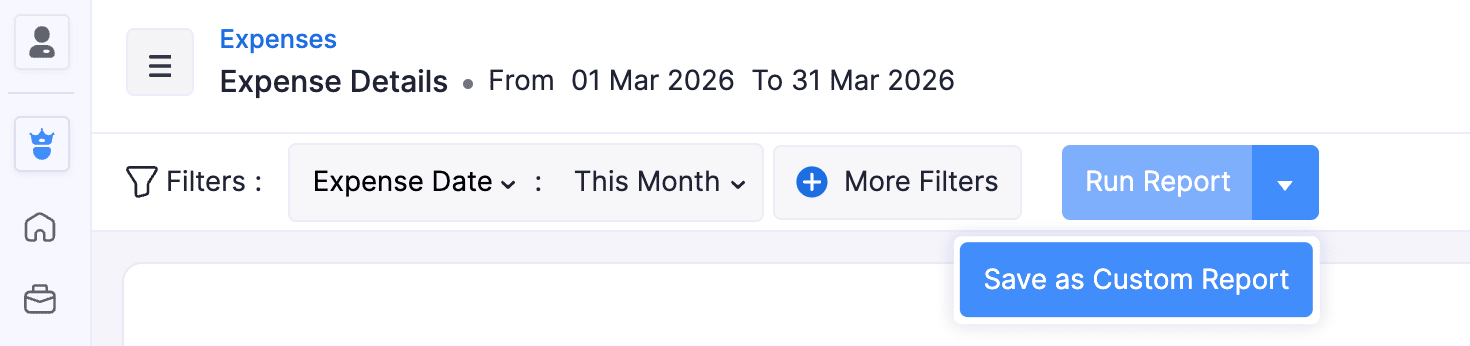
- Click the dropdown next to Run Report.
- Select Save as Custom Report. You can continue from the steps mentioned in the Filters section.
(or)
- Go to Analytics on the left sidebar.
- Click Create Custom Report on the top right corner.
- In the pop-up, select how you would like to create the report.
- Create from existing report: Select an existing report and customize it with filters, columns, layouts, and groupings.
- Create an entirely new report: Build a new report from scratch using modules and applying filters to display the data you need.
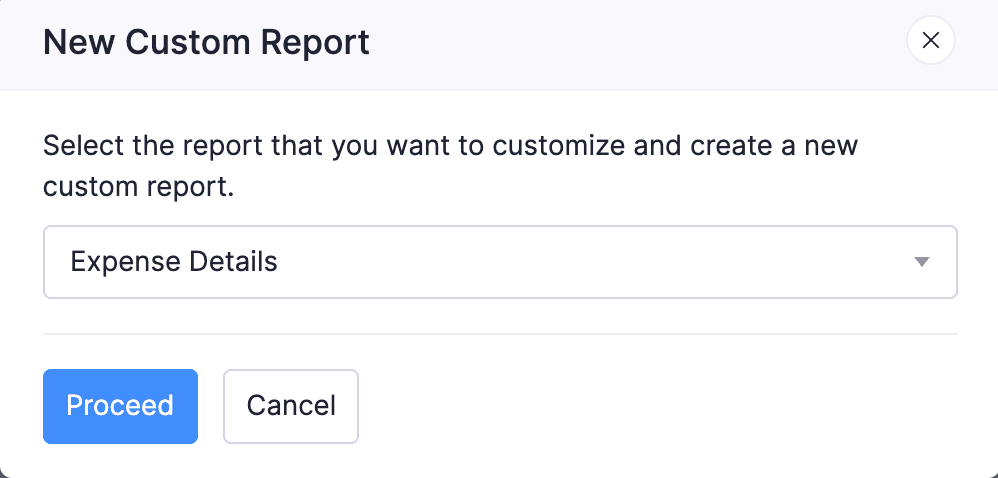
If you’re creating a custom report from an existing report:
- In the pop-up, select a report you want to customize and create as a custom report.
- Click Proceed.
Filters
In the Filters section, you can customize your report based on the following filters:
- Date Range: By selecting a date range, you can generate the report for a specific week, month, quarter, or year, or set a custom duration.
- Group By: Select the parameter by which you want to group this report.
- Apply Filter Criteria: Set criteria to display information based on specified conditions.
Show/Hide Columns
In this section, you can customize the columns displayed in your report. Here’s how:
- Go to the Columns Hidden section, hover your cursor over the column you want to add, and click the + icon next to it. It will be moved to the Columns Shown section. In the Columns Shown section, you can view the existing columns of your report.
- In case you do not want to display certain columns, go to the Columns Shown section, hover your cursor over the column you want to remove, and click the - icon next to it. It will be moved to Columns Hidden.
- Click Next.
Report Layout
In the Report Layout section, you can configure the layout of your report using the following fields:
Notes:
- The report layout customizations will be applied only to exported files and print.
- You can also configure report layout for export and print by clicking the More icon next to Create New Report at the top right corner of the page, and select Configure Report Layout.
- Table Density: This option affects the size of the rows in the report that is printed or exported. You can select from three options: Classic, Compact, and Super Compact.
- Table Design: Select the design of the table in the report that is printed or exported. You can select from four options: Default, Bordered, Alternate Rows, or Alternate Columns.
- Check the Re-size the table and its font automatically to fit the content within the table checkbox.
- Paper Size: Based on the medium where this would be printed, you can select either A4 or Letter sizes.
- Orientation: Select either Portrait or Landscape based on how you’re displaying the report.
- Font Family: This is the font that will be used to display content in this report. A note will appear under the selected font explaining which language it’s best suited for.
Pro Tip: If you are using Arabic, Hebrew, or other right-to-left languages, we recommend using Dynamic Font.
- Margins: The margins of the reports determine the distance between the report’s content and the edges of the medium on which it is printed.
- Click Next.
Report Preferences
In this section, you can configure the name, description, and share permissions of the report.
- Enter the Report Name.
- Enter a name for the report in the Name in Export field, which will be the report’s name when it is exported.
- In the Configure Permissions section, configure who can view, export, or schedule the custom report. You can find different share options such as:
- Only Me: Only you will be able to view, export, or schedule the custom report.
- Only Selected Users & Roles: Only the selected users will be able to view, export, or schedule the custom report. Select the user from the dropdown and click Add User.
- Everyone: Everyone in the organization will be able to view, export, or schedule the custom report.
- Click Save Custom Report. All the customizations made will now be saved as a custom report in My Reports.
If you’re creating an entirely new report:
- In the pop-up, select a report you want to customize and create as a custom report.
- Click Proceed.
- Select a Parent Module from the dropdown.
- Click the + icon to add a Child Module.
- Select a Child Module from the dropdown. Click the Delete icon to remove the selected Child Module.
Note: By default, the Show Related Records Only option will be selected. This will display only the transactions related to the Parent Module you’ve selected. To view all transactions, click the Edit icon next to the field and select Show All Records. This will display all your transactions regardless of the selected Parent Module.
- Click Next. Follow the steps in Filters, Show/Hide Columns, Report Layout, and Report Preferences to complete your report setup.
Schedule Custom Report
You can schedule the custom reports to be generated automatically and sent to multiple users at a time. You can set the frequency at which the reports must be generated and select the users to whom the reports should be sent as an email.
- Go to Analytics on the left sidebar.
- Navigate to My Reports on the left pane.
- Under the My Reports tab, click the custom report you want to schedule.
- In the custom report details page, click the Schedule icon at the top right next to Export.

- Choose how frequently you want to generate and send the custom reports (Weekly, Monthly, Quarterly, or Yearly).
- Provide a date and time at which you want to generate your custom report.
- Select the users to whom you want to send the scheduled custom reports in the Email Recipients dropdown.
- In case you want to send these scheduled reports to people who are not a part of your Zoho Expense organization, enter their email addresses separated by commas in the Additional Recipients section.
- Choose the format, such as CSV, XLS, or PDF, in which you want your report to be attached to the email.
- Click Save to schedule the custom report. The report will be sent to the selected users at the scheduled time.
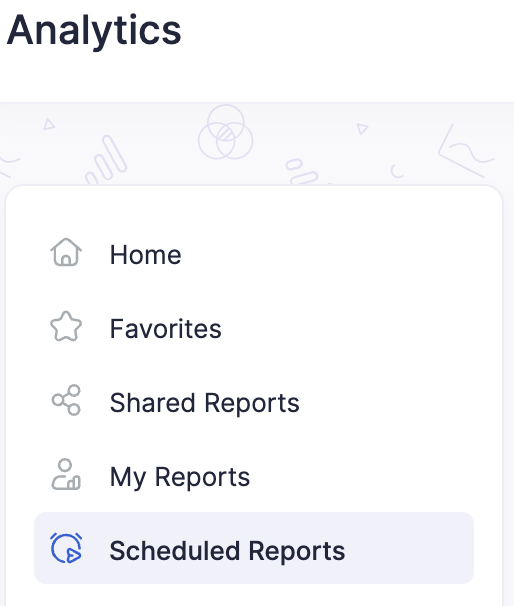
The scheduled reports will be displayed under Scheduled Reports in Analytics.
Clone Custom Report
You can clone an existing custom report and create a new one without having to set it up from scratch. The cloned report will include all the settings of the original report, which you can then modify as needed.
Note: You can also clone the custom reports of other users in the organization from Shared Reports and Other User Reports.
To clone a custom report:
- Go to Analytics on the left sidebar.
- Navigate to My Reports on the left pane.
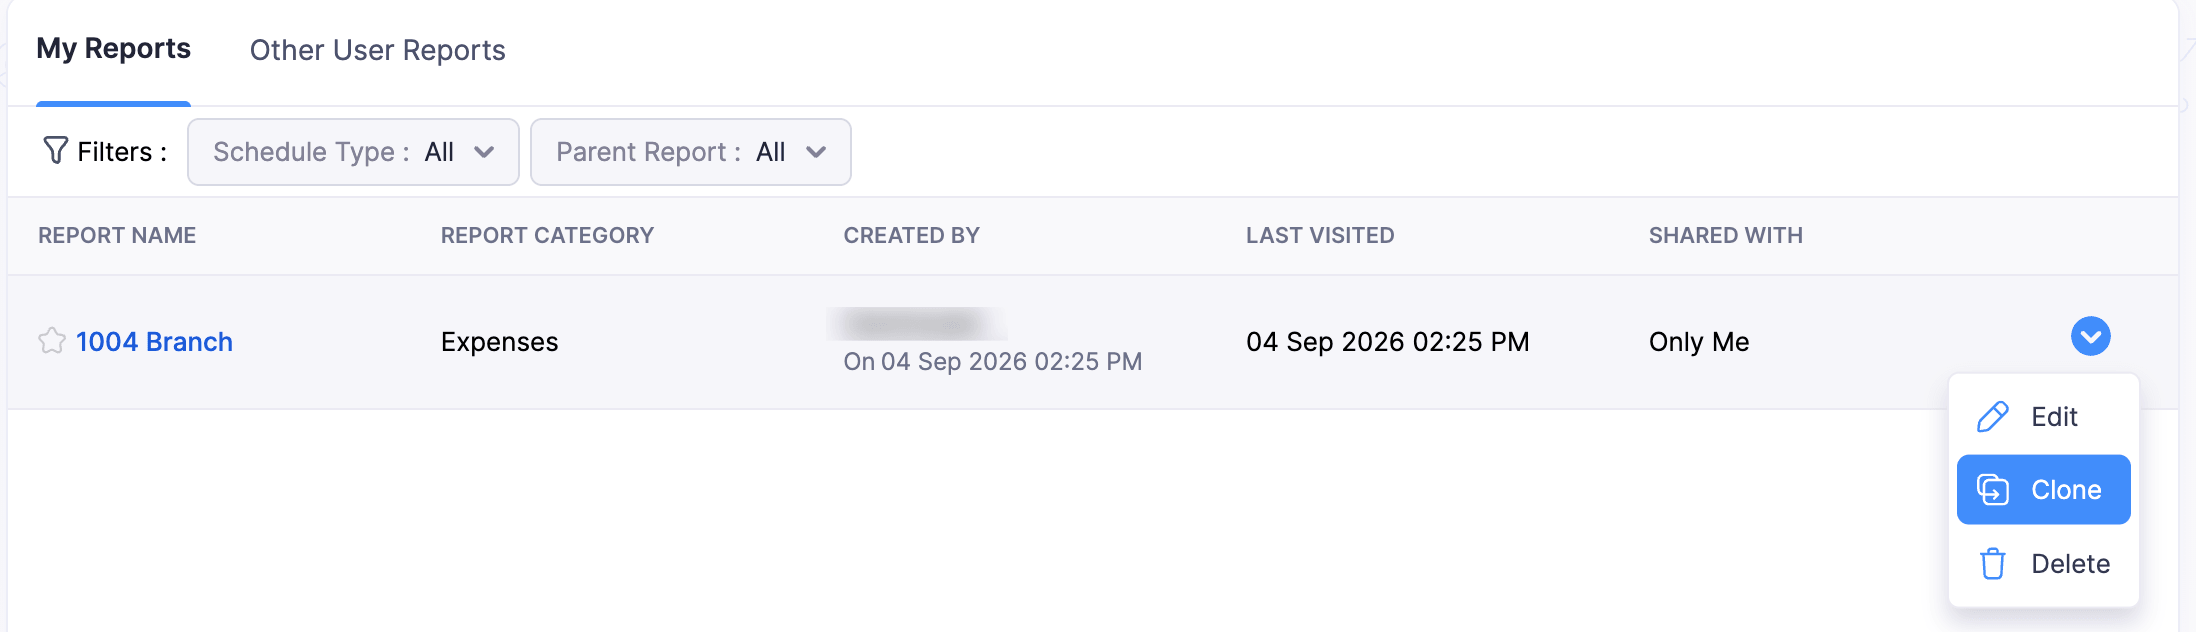
- Under the My Reports tab, click the dropdown at the end of the custom report.
- Select Clone. Make the necessary changes.
- Click Save Custom Report.
Edit Custom Report
Once you’ve created a custom report, you can edit it later if required.
Note: You can also edit the custom reports of other users in the organization from Shared Reports and Other User Reports.
To edit a custom report:
- Go to Analytics on the left sidebar.
- Navigate to My Reports on the left pane.
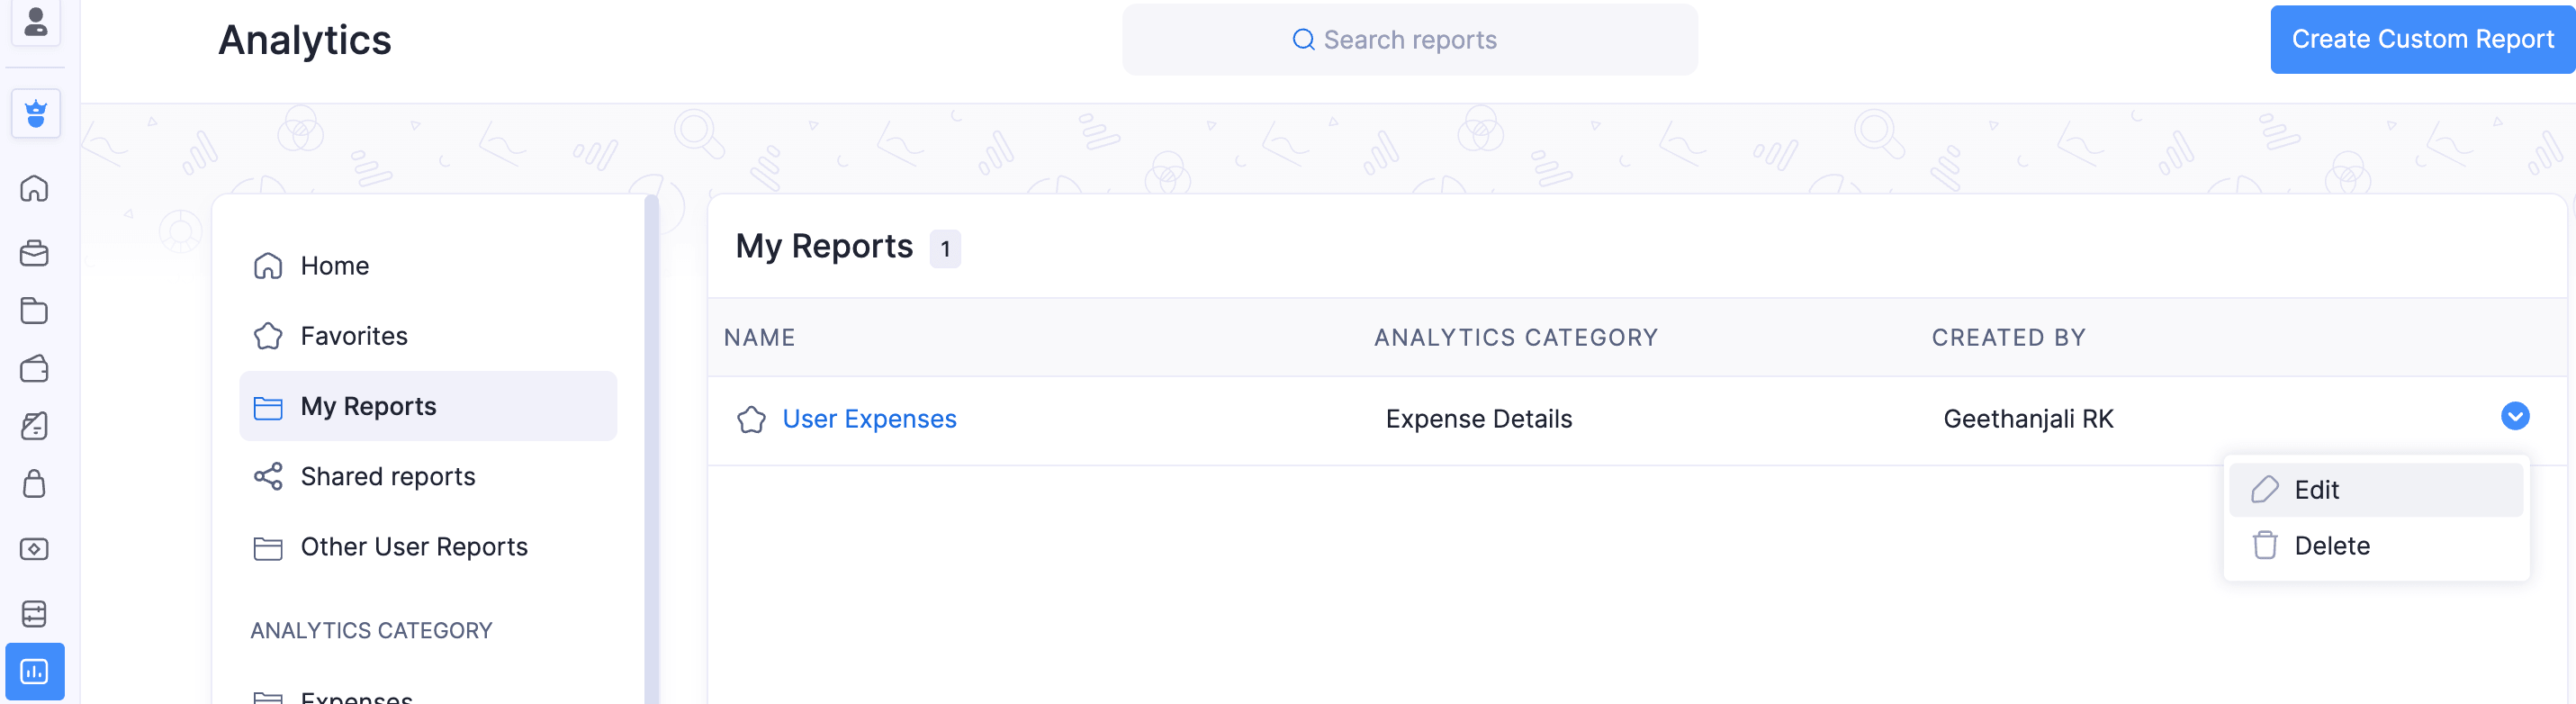
- Under the My Reports tab, click the dropdown at the end of the custom report.
- Select Edit.
(or)
Click the custom report you want to edit and click Edit Custom Report at the top left corner.
- Make the necessary changes and click Save Custom Report.
Delete Custom Report
If you no longer need a custom report, you can delete it.
Note: You can also delete the custom reports of other users in the organization from Shared Reports and Other User Reports.
To delete a custom report:
- Go to Analytics on the left sidebar.
- Navigate to My Reports on the left pane.
- Under the My Reports tab, click the dropdown at the end of the custom report.
- Select Delete.
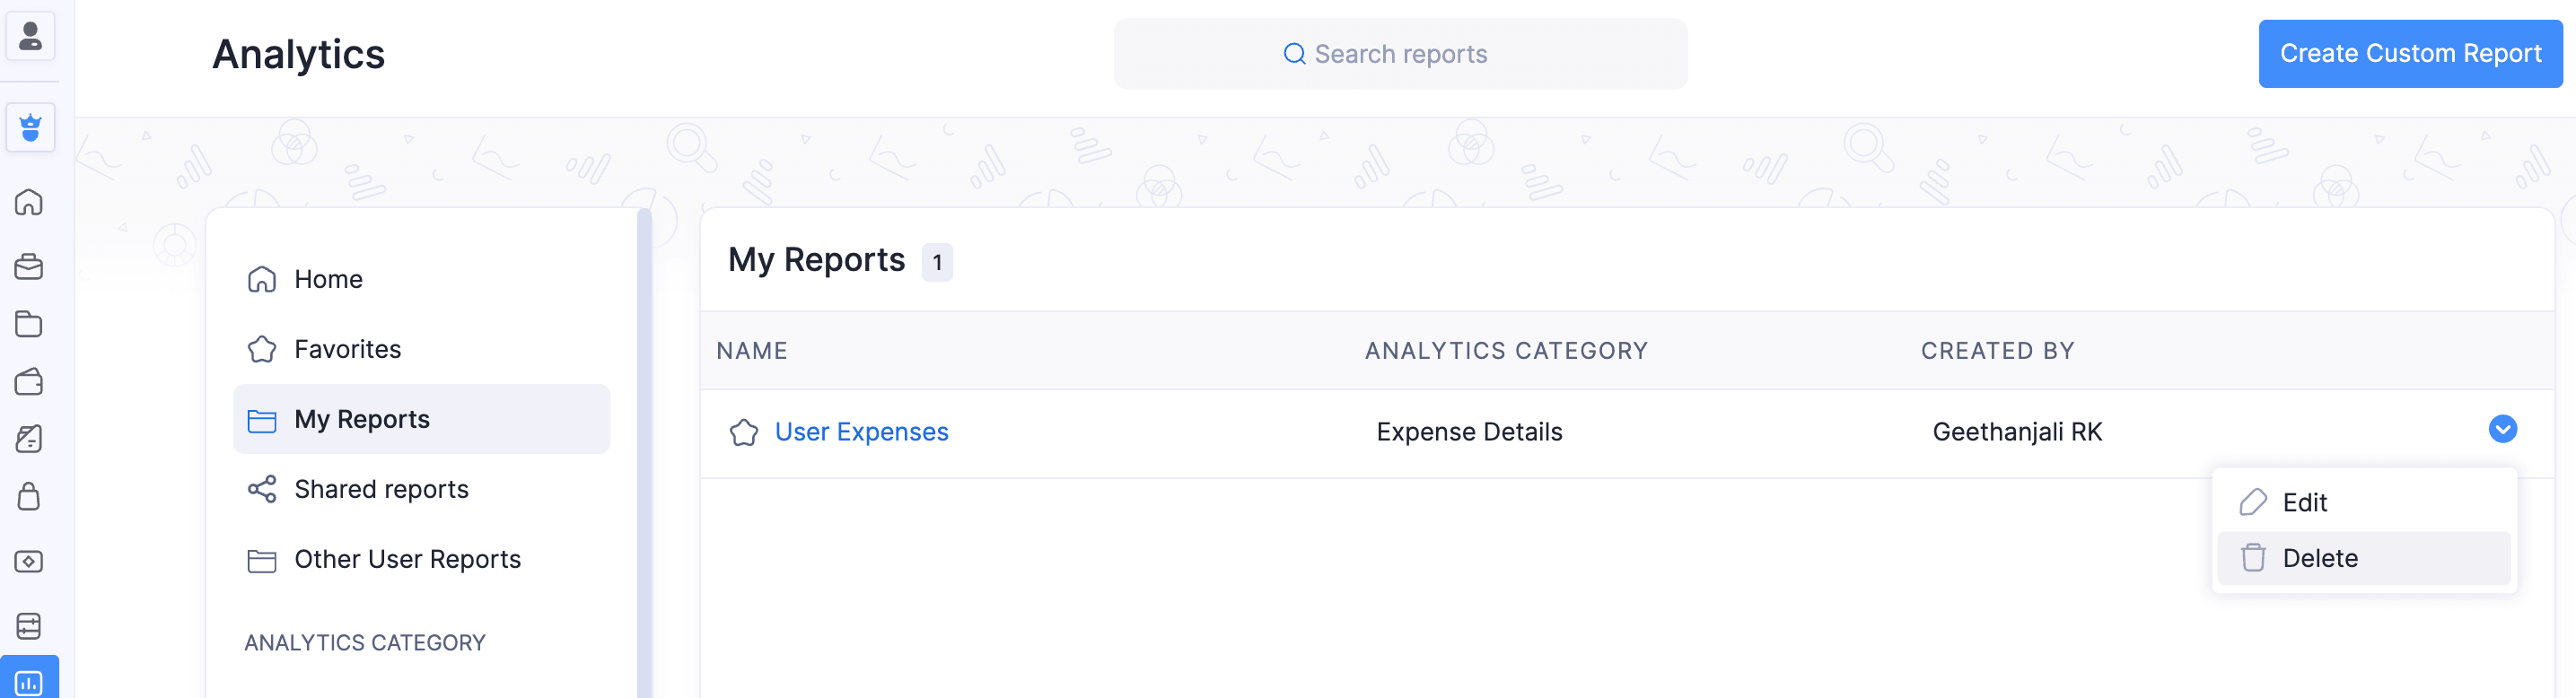
- In the pop-up, click Delete again to confirm your action.
Export Custom Report
In Zoho Expense, you can export your custom report in any of the following formats:
- CSV
- XLS or XLSX
To export a custom report:
- Go to Analytics on the left sidebar.
- Navigate to My Reports on the left pane.
- Under the My Reports tab, click the custom report you want to export.
- Click the Export dropdown at the top right corner of the page. Select the format, such as PDF, XLS, XLSX, or CSV, in which you want to export your custom report. You can also export your custom report to Zoho Sheet and make use of the customizations available in Zoho Sheet.
- If you want to protect this file with a password, mark I want to protect this file with a password and enter a password with at least 6 characters.
- Click the Customize the details in the export file dropdown to update the details to display in the exported file and add any additional information about this report as a note to display it at the footer of the report when it is exported.
Note: You can also configure report layout for export and print by clicking the More icon next to Create New Report at the top right corner of the page, and select Configure Report Layout.
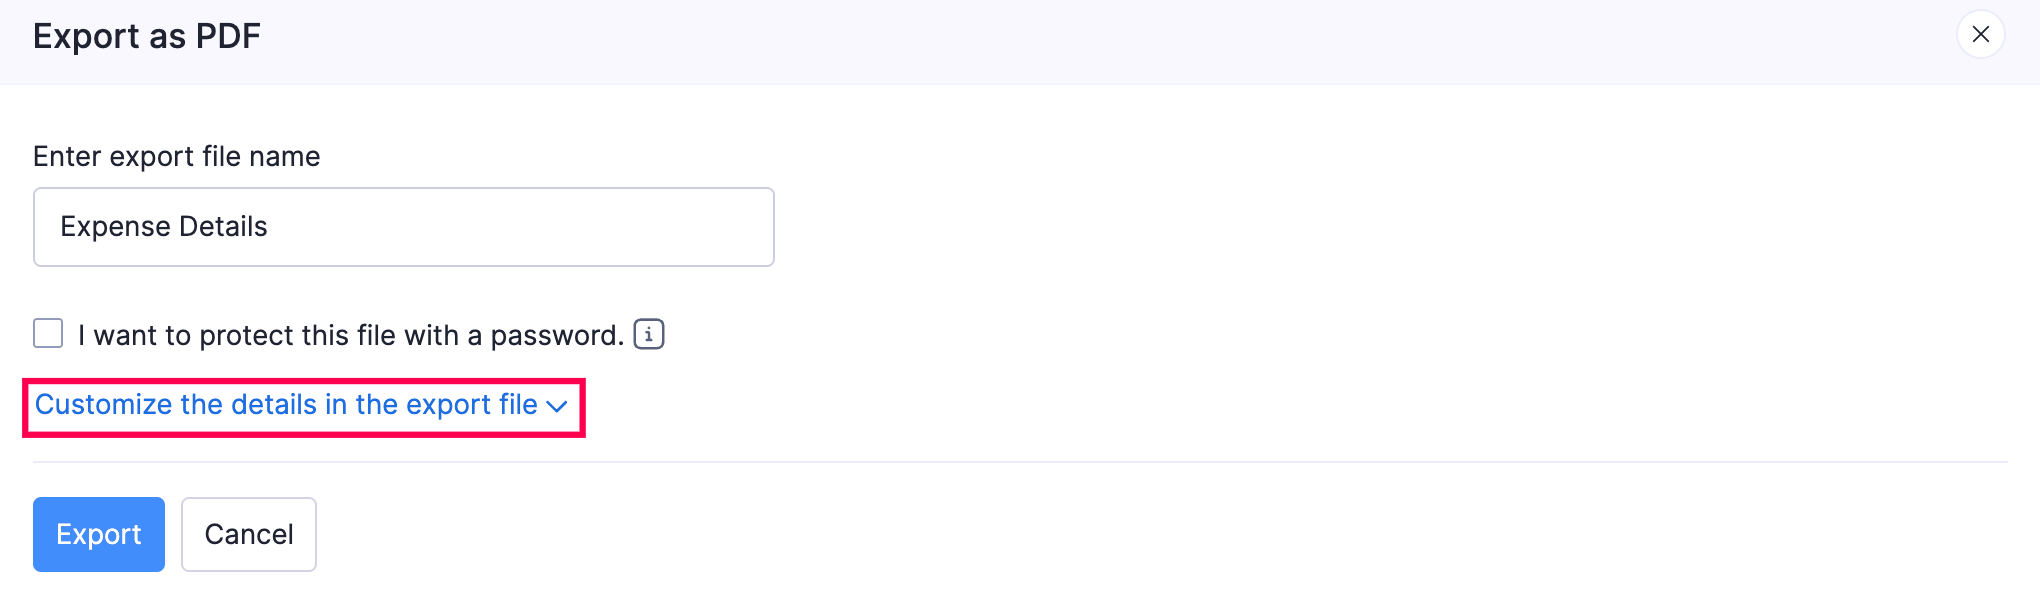
- Click Export to export the custom report.
Mark as Favorite
You can mark a custom report as a favorite to pin it under the Favorites tab for quick access. Here’s how:
- Go to Analytics on the left sidebar.
- Navigate to My Reports on the left pane.
- Under the My Reports tab, click the Star icon next to the report you want to mark as favorite. The report will be added to favorites.
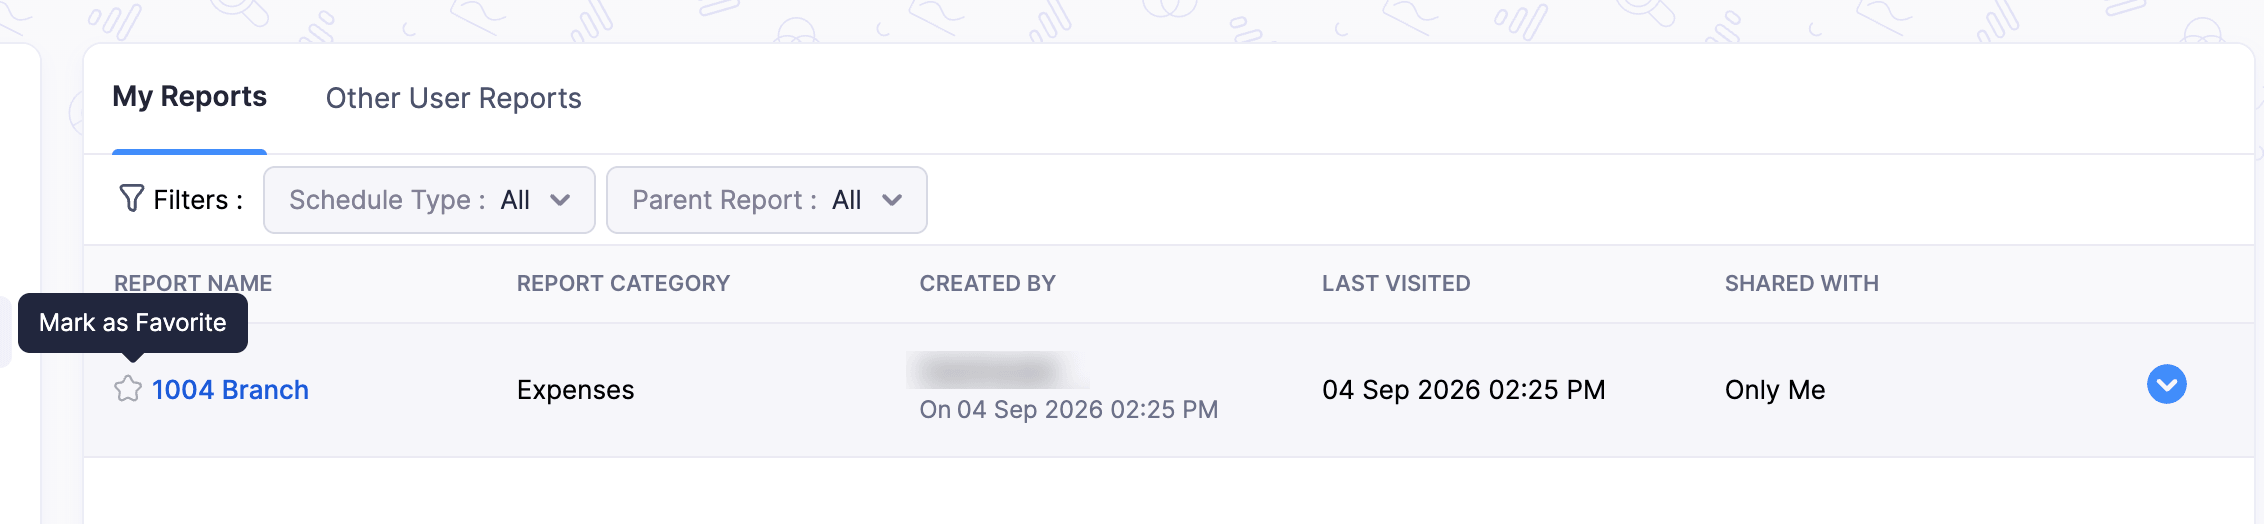
To remove it from favorites, click the Star icon again.
Other User Reports
You can manage the custom reports added by other users in your organization. You can Edit, Delete, and Clone the custom reports of other users in the organization.
To view other user reports:
- Go to Analytics on the left sidebar.
- Navigate to My Reports on the left pane.
- Under the Other User Reports tab, you can view and manage the custom reports created by other users in your organization.

- You can also narrow down the reports using the following filters:
- Schedule Type: Filter reports by All, Active, or Inactive users.
- Parent Report: Filter by All or a specific parent report.