Summary
Zoho POS allows users to manage multiple businesses using the same credentials. Users can create and connect more than one business and manage them separately by switching between these businesses with the same account. This comes in handy when the user owns multiple businesses under different departments with varying inventory, target audience, marketing, and more, and wants to manage them all together.
Imagine a scenario in which you own multiple businesses in different departments. Since you can't monitor all of these businesses at the same time, you hired managers for each of them who run their businesses independently and report to you.
In addition to the day-to-day operations run by these managers, you are responsible for the major decisions, such as business expansion, employee management, and so on, for all these businesses. To make informed decisions on these matters, you need to access these businesses from time to time to see their reports and understand their growth. However, you wnat to be the only individual who has access to the reports of these businesses, with managers only having access to their respective businesses.
To manage multiple businesses with this type of user access limitation, you can create and maintain different accounts for each of these businesses. However, the problem with this approach is that you need to remember the credentials for all your businesses at once, and you can't switch between your businesses swiftly, as they are registered with separate accounts. This means you can only access businesses by logging in with their registered credentials, and only one business can be accessed at a time. If you want to access the other business, you need to log out of the existing one and log in to the business with its registered credentials.
Create and manage multiple businesses with the same account
This solution overcomes the issues with the previous approach and allows you to create multiple businesses with the same credentials. All of the businesses that you're a part of will be included in your account, making it easy for you to switch between them to access the data and generate reports. In this approach, every Business is accessible to the associated users, giving you complete control over who has access to your businesses.
Notes
New businesses will begin with a premium trial plan for the full experience, with the option to upgrade at any time.
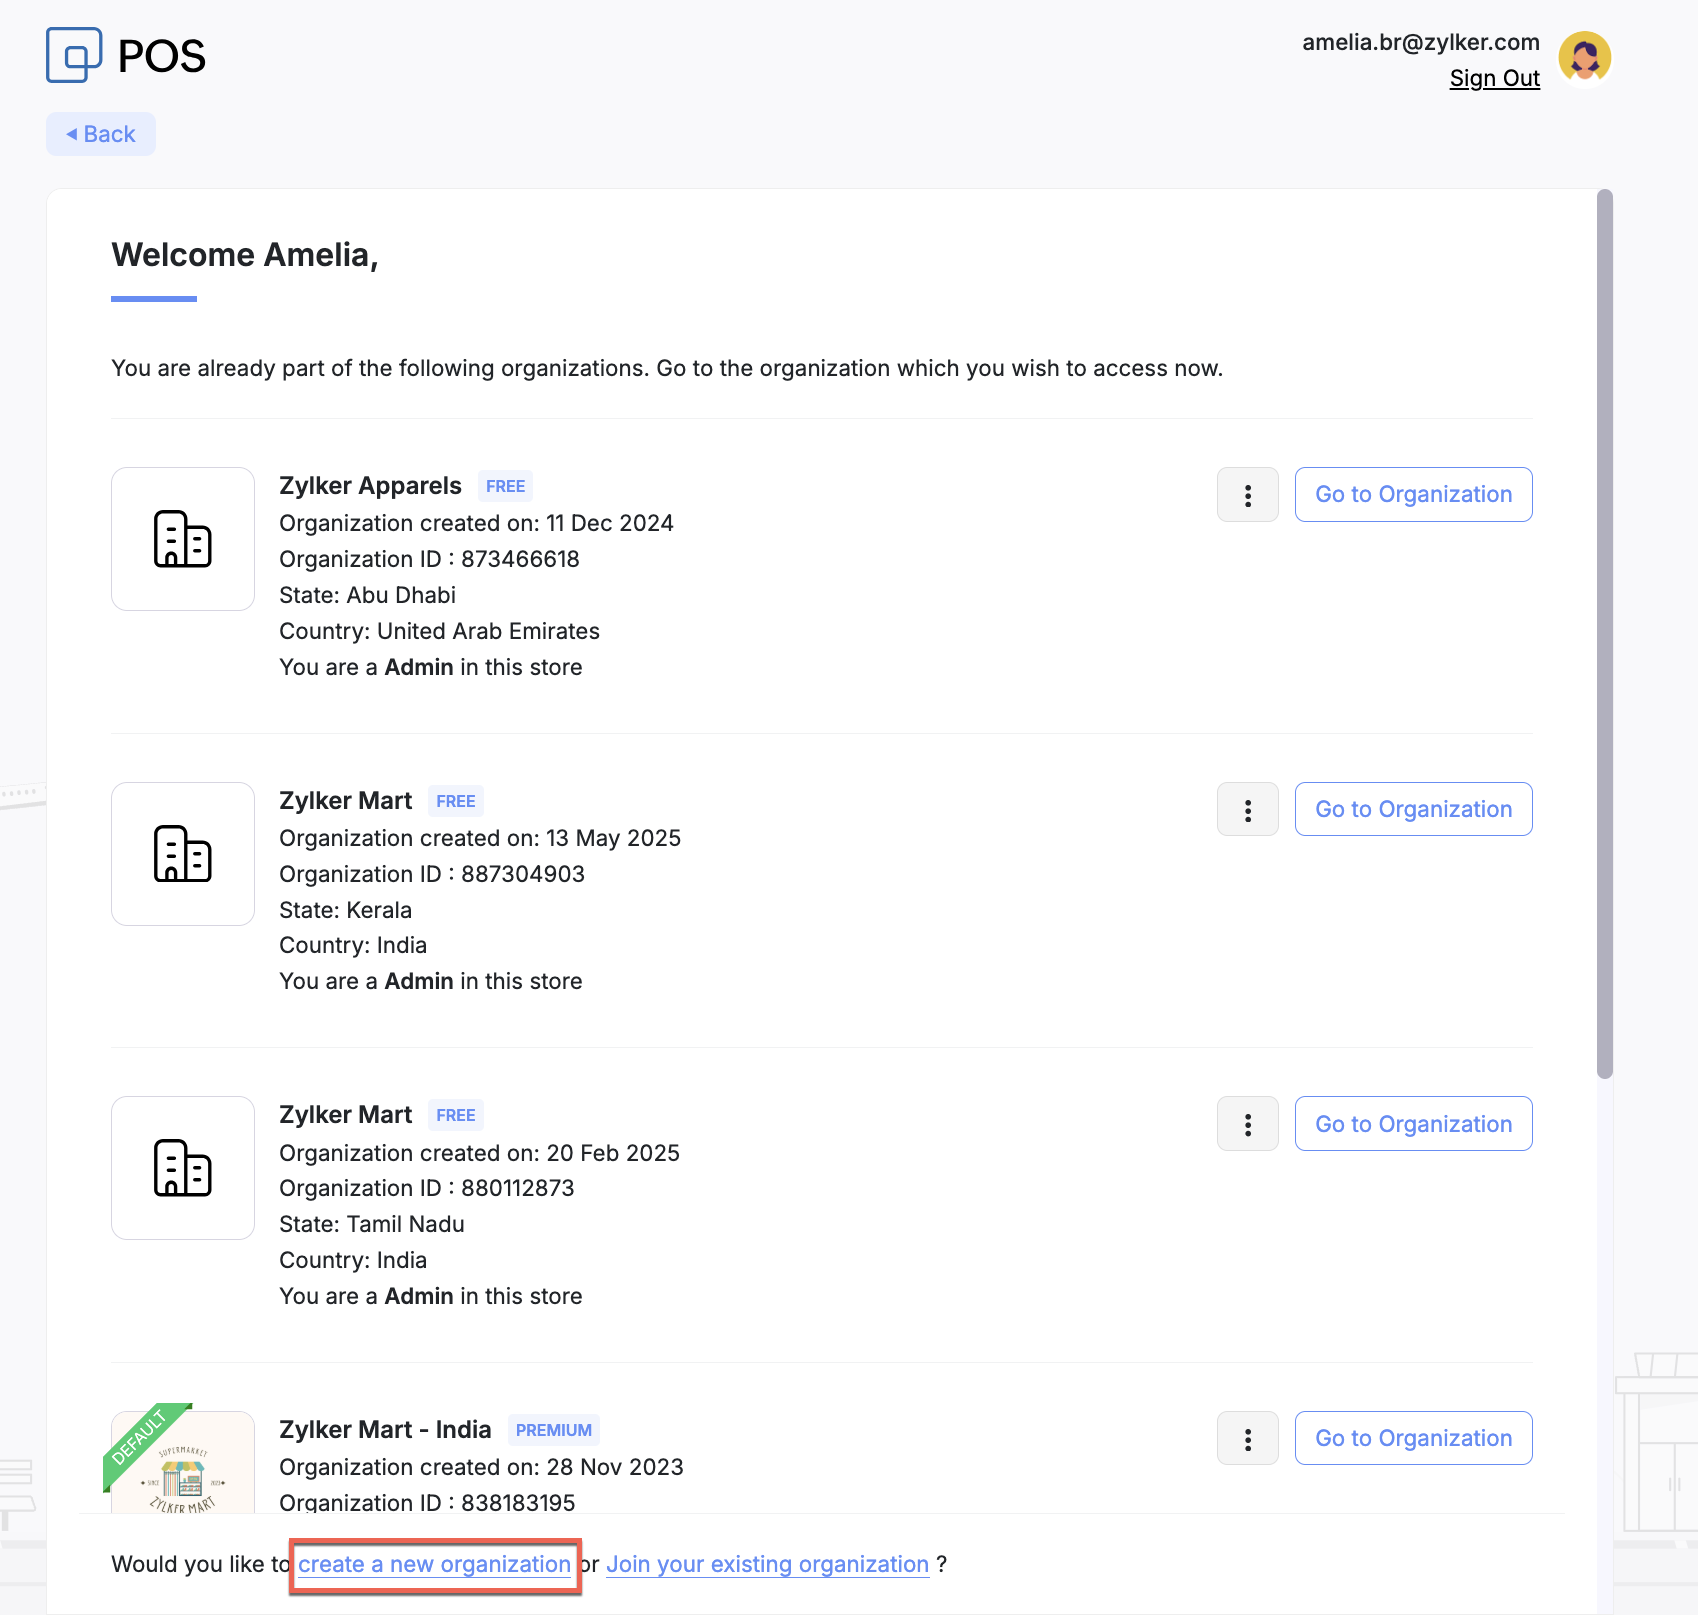
Create a new business from the existing one
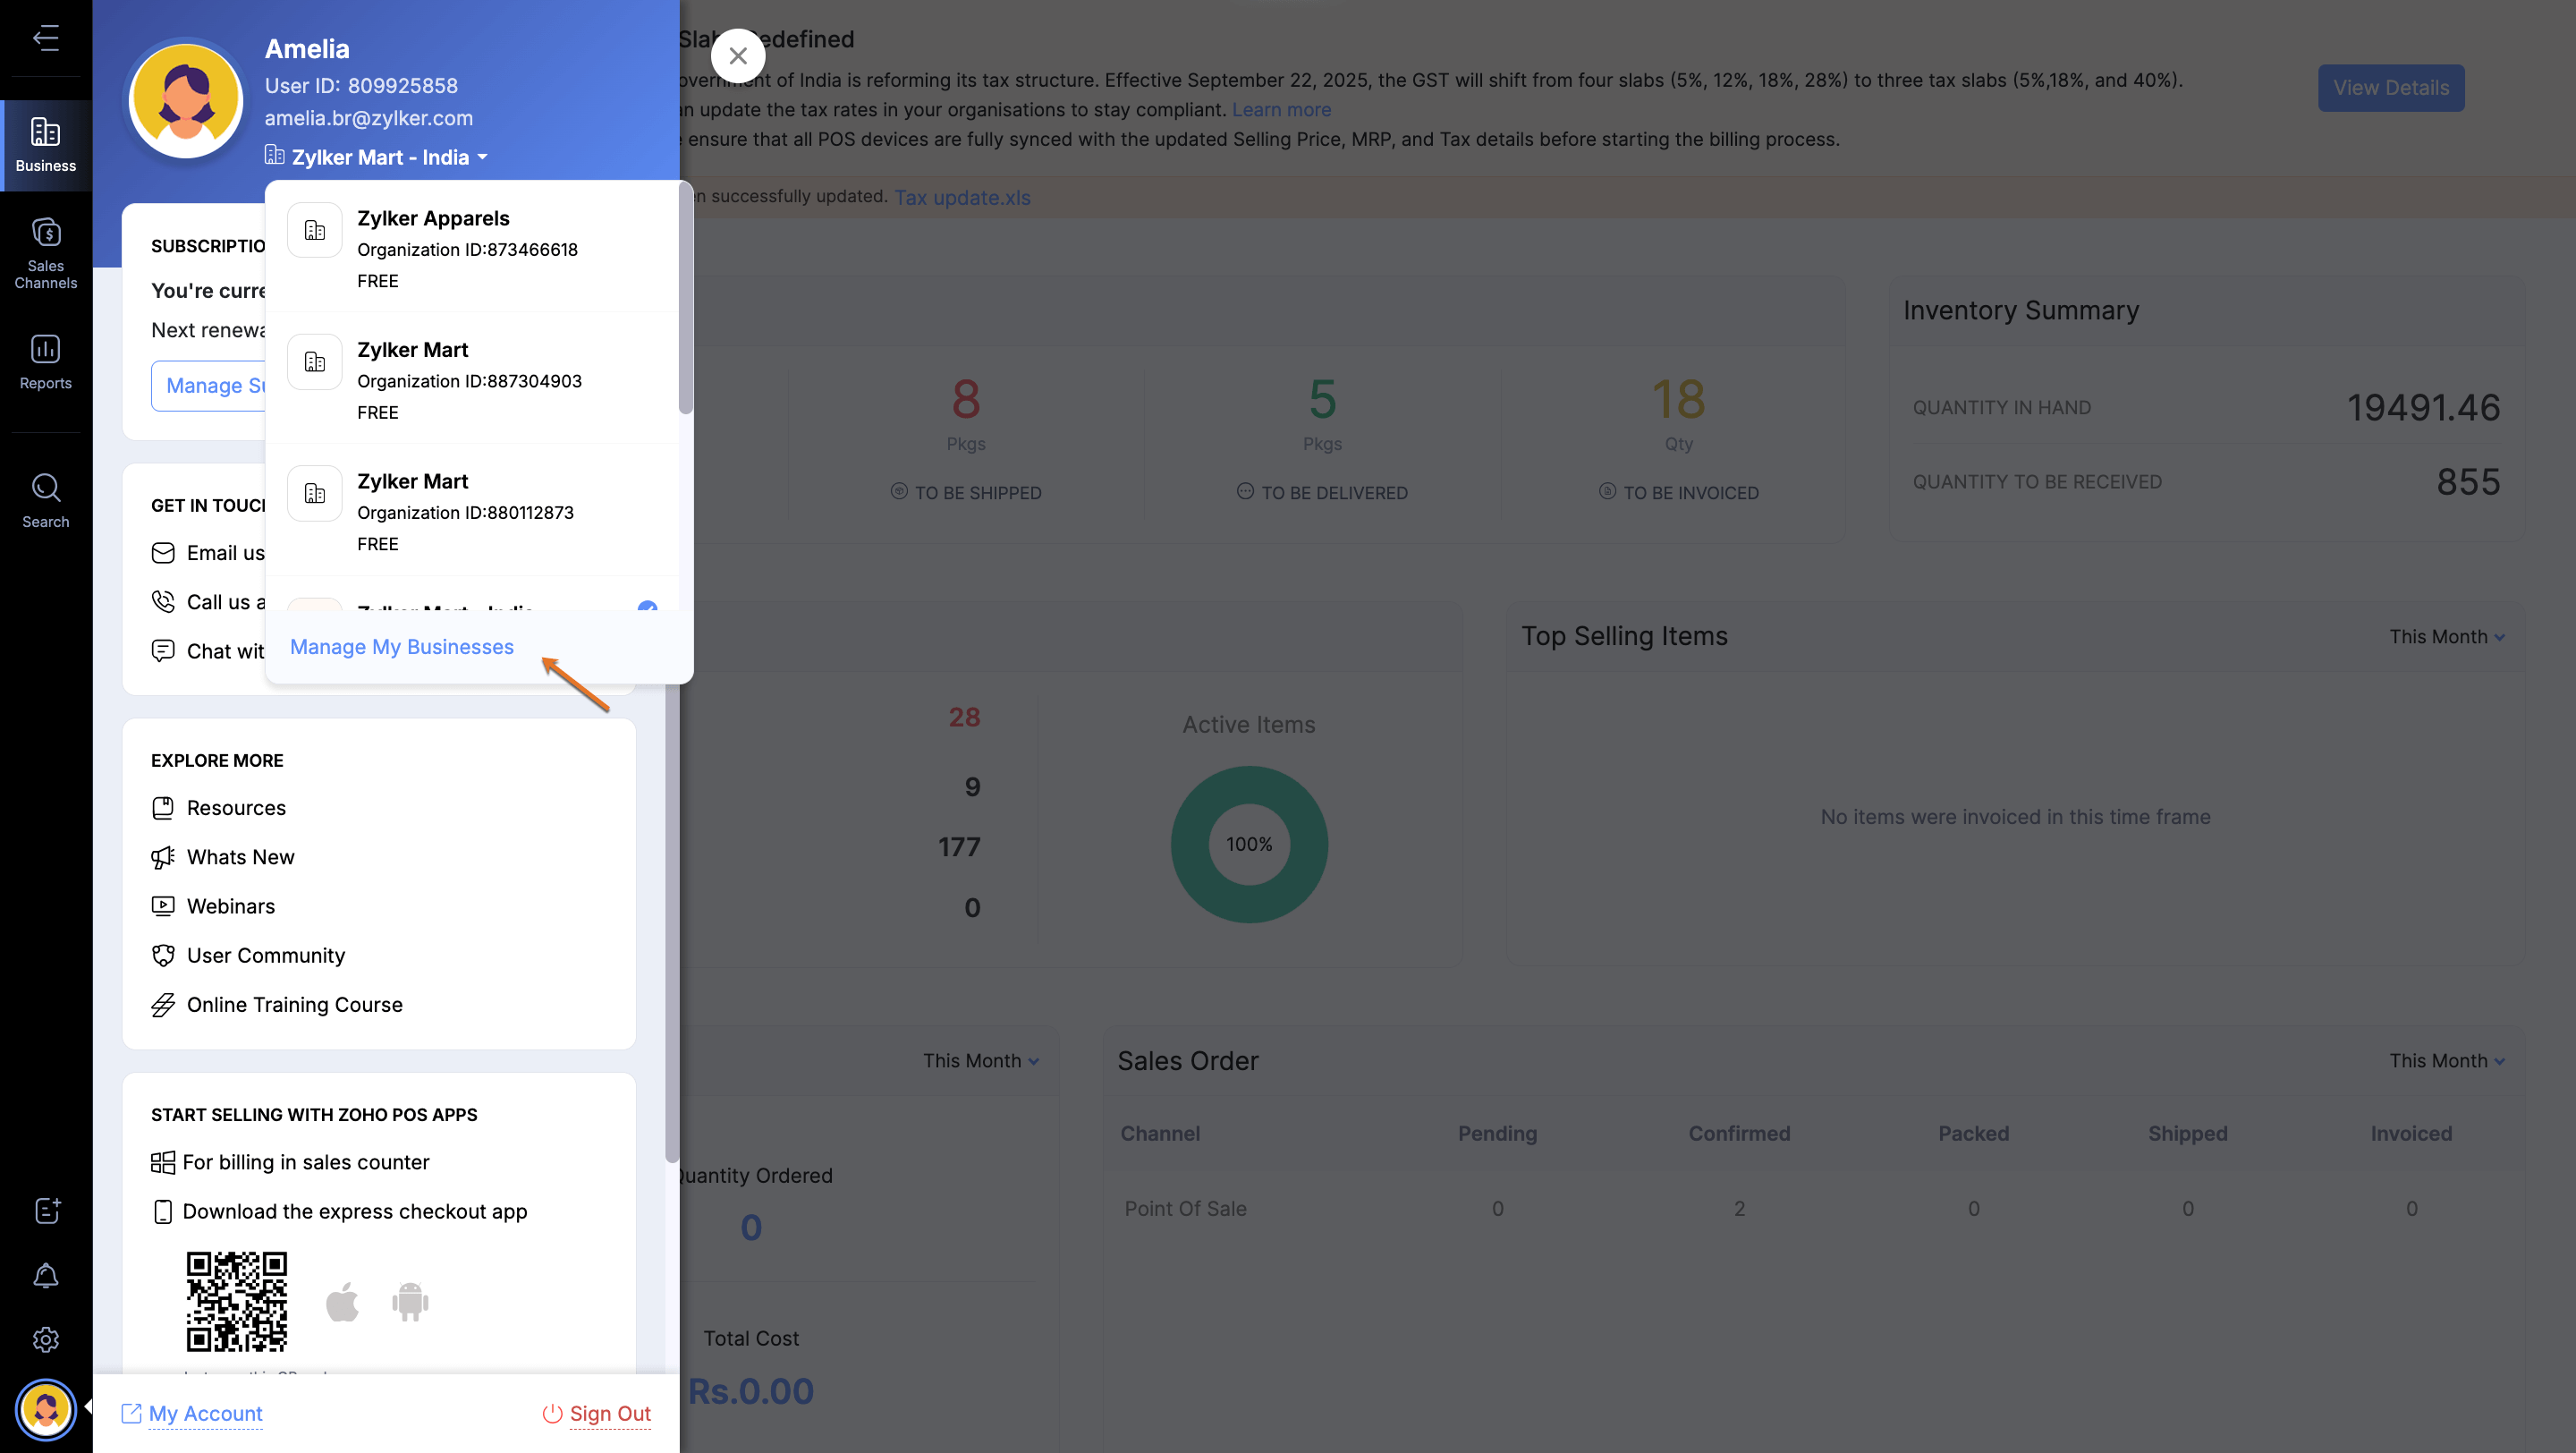
Navigate to My Profile > My Businesses and click Manage.
In the page that follows, click Create a New Business.
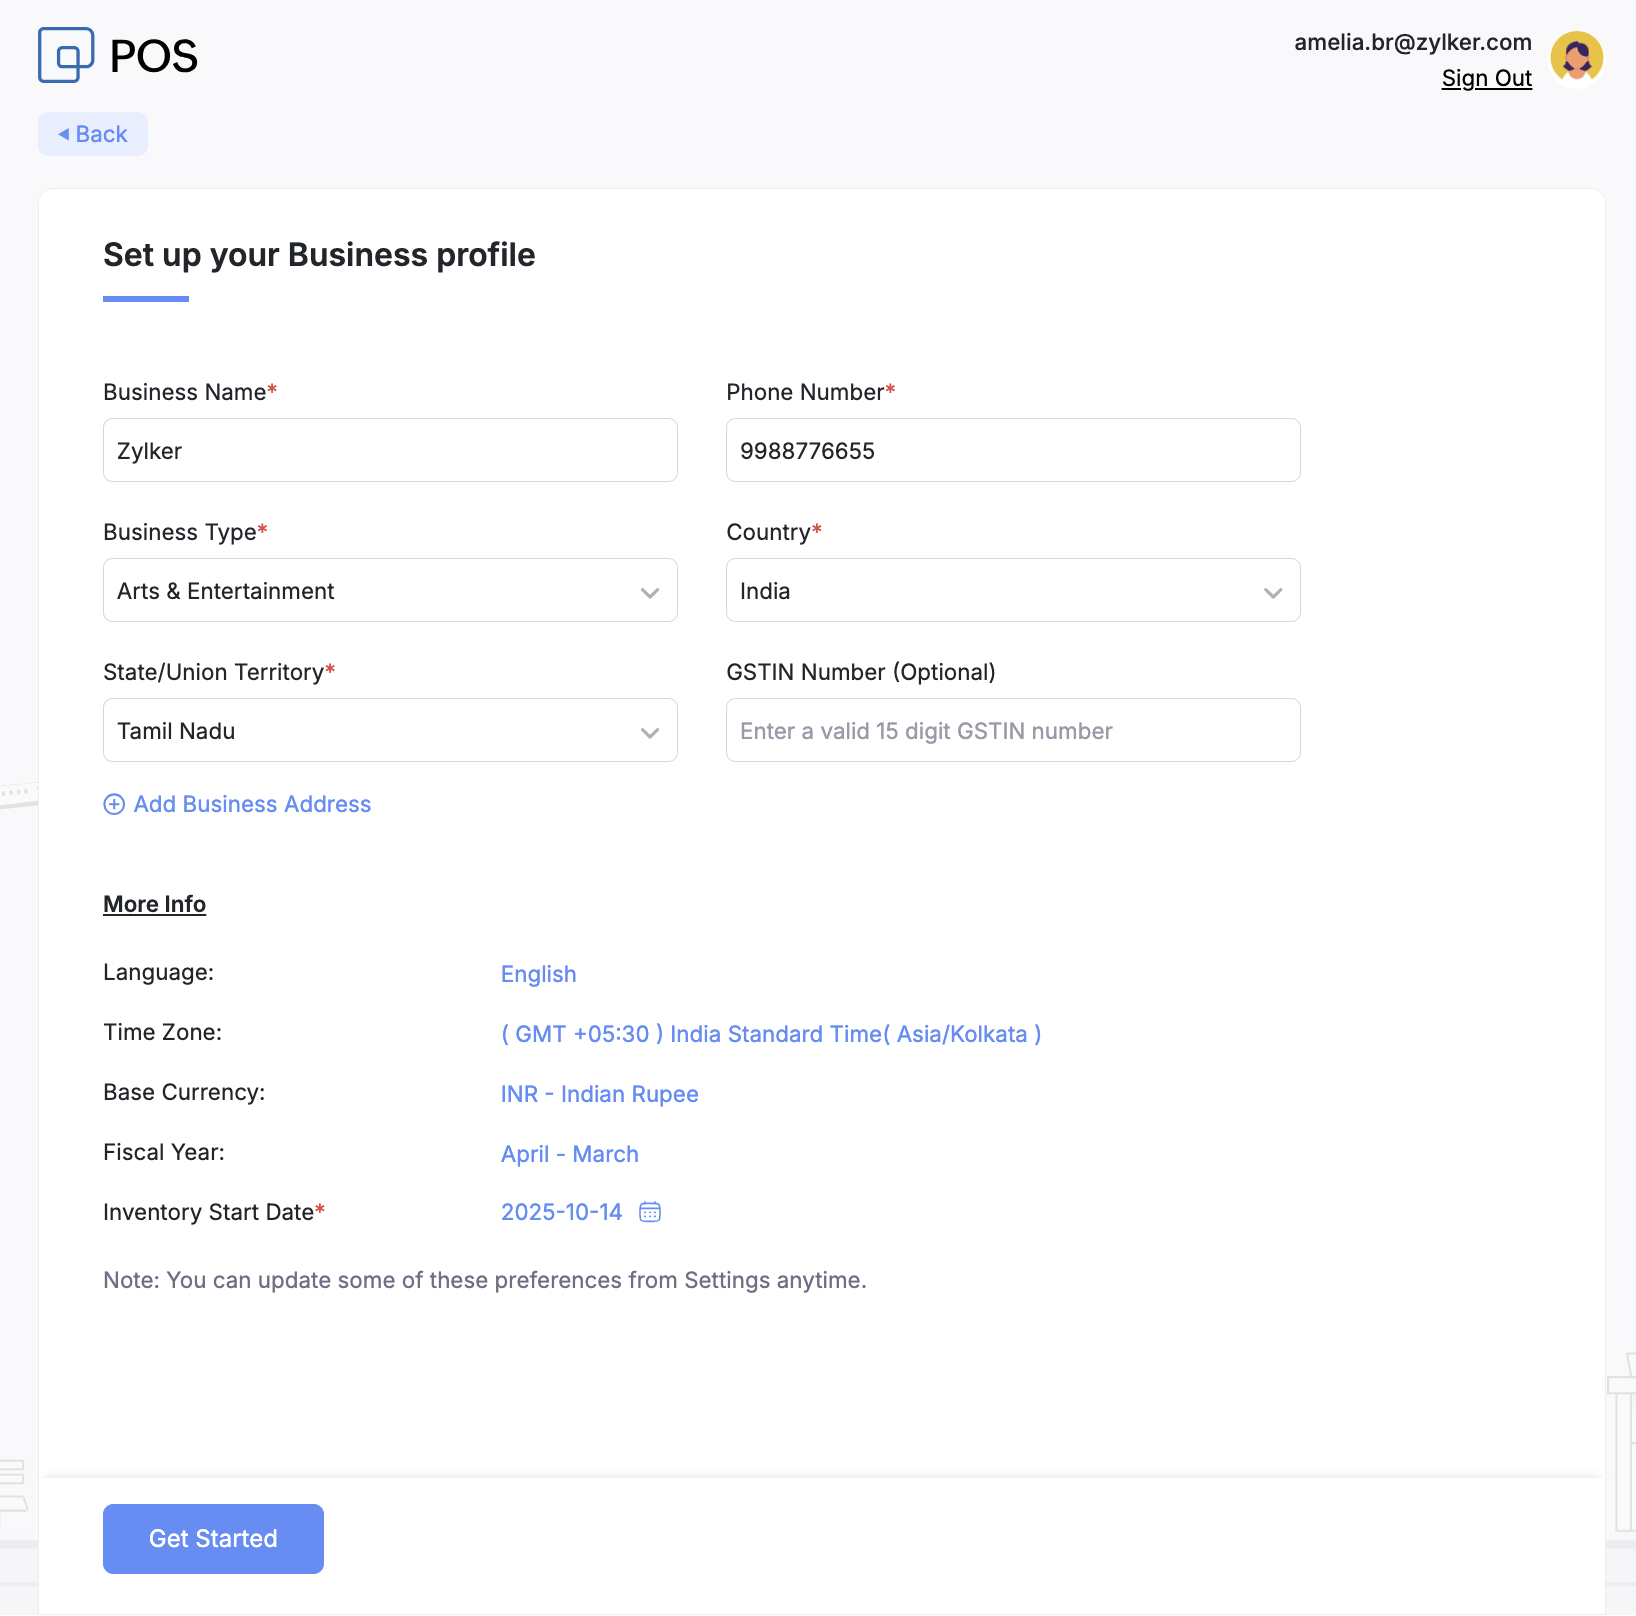
Enter the required details and click Get Started.
Link your existing business
If you already have a business in Zoho's Finance products (Inventory, Expense, Books, Billing, Checkout, Practice, and Payroll) and require a POS solution, you can connect your business with Zoho POS. Once you link this business to Zoho POS, all of your existing data from similar modules, including its preferences, will be synced with Zoho POS.
For example, imagine a scenario where you use Zoho Inventory for a wholesale business, and in its retail part, you want to use Zoho POS. Once you link this business to the Zoho Inventory with Zoho POS, all the similar modules like sales, inventory, purchase, and more will get synced with Zoho POS. After that, any items added to the inventory module, invoices created under the sales module, or vendors added under the purchase module will be synced with Zoho POS and vice versa. This allows you to manage these businesses together and generate reports for GST filing and other purposes.
Navigate to My Profile > My Businesses and click Manage.
In the page that follows, click Join your existing business?
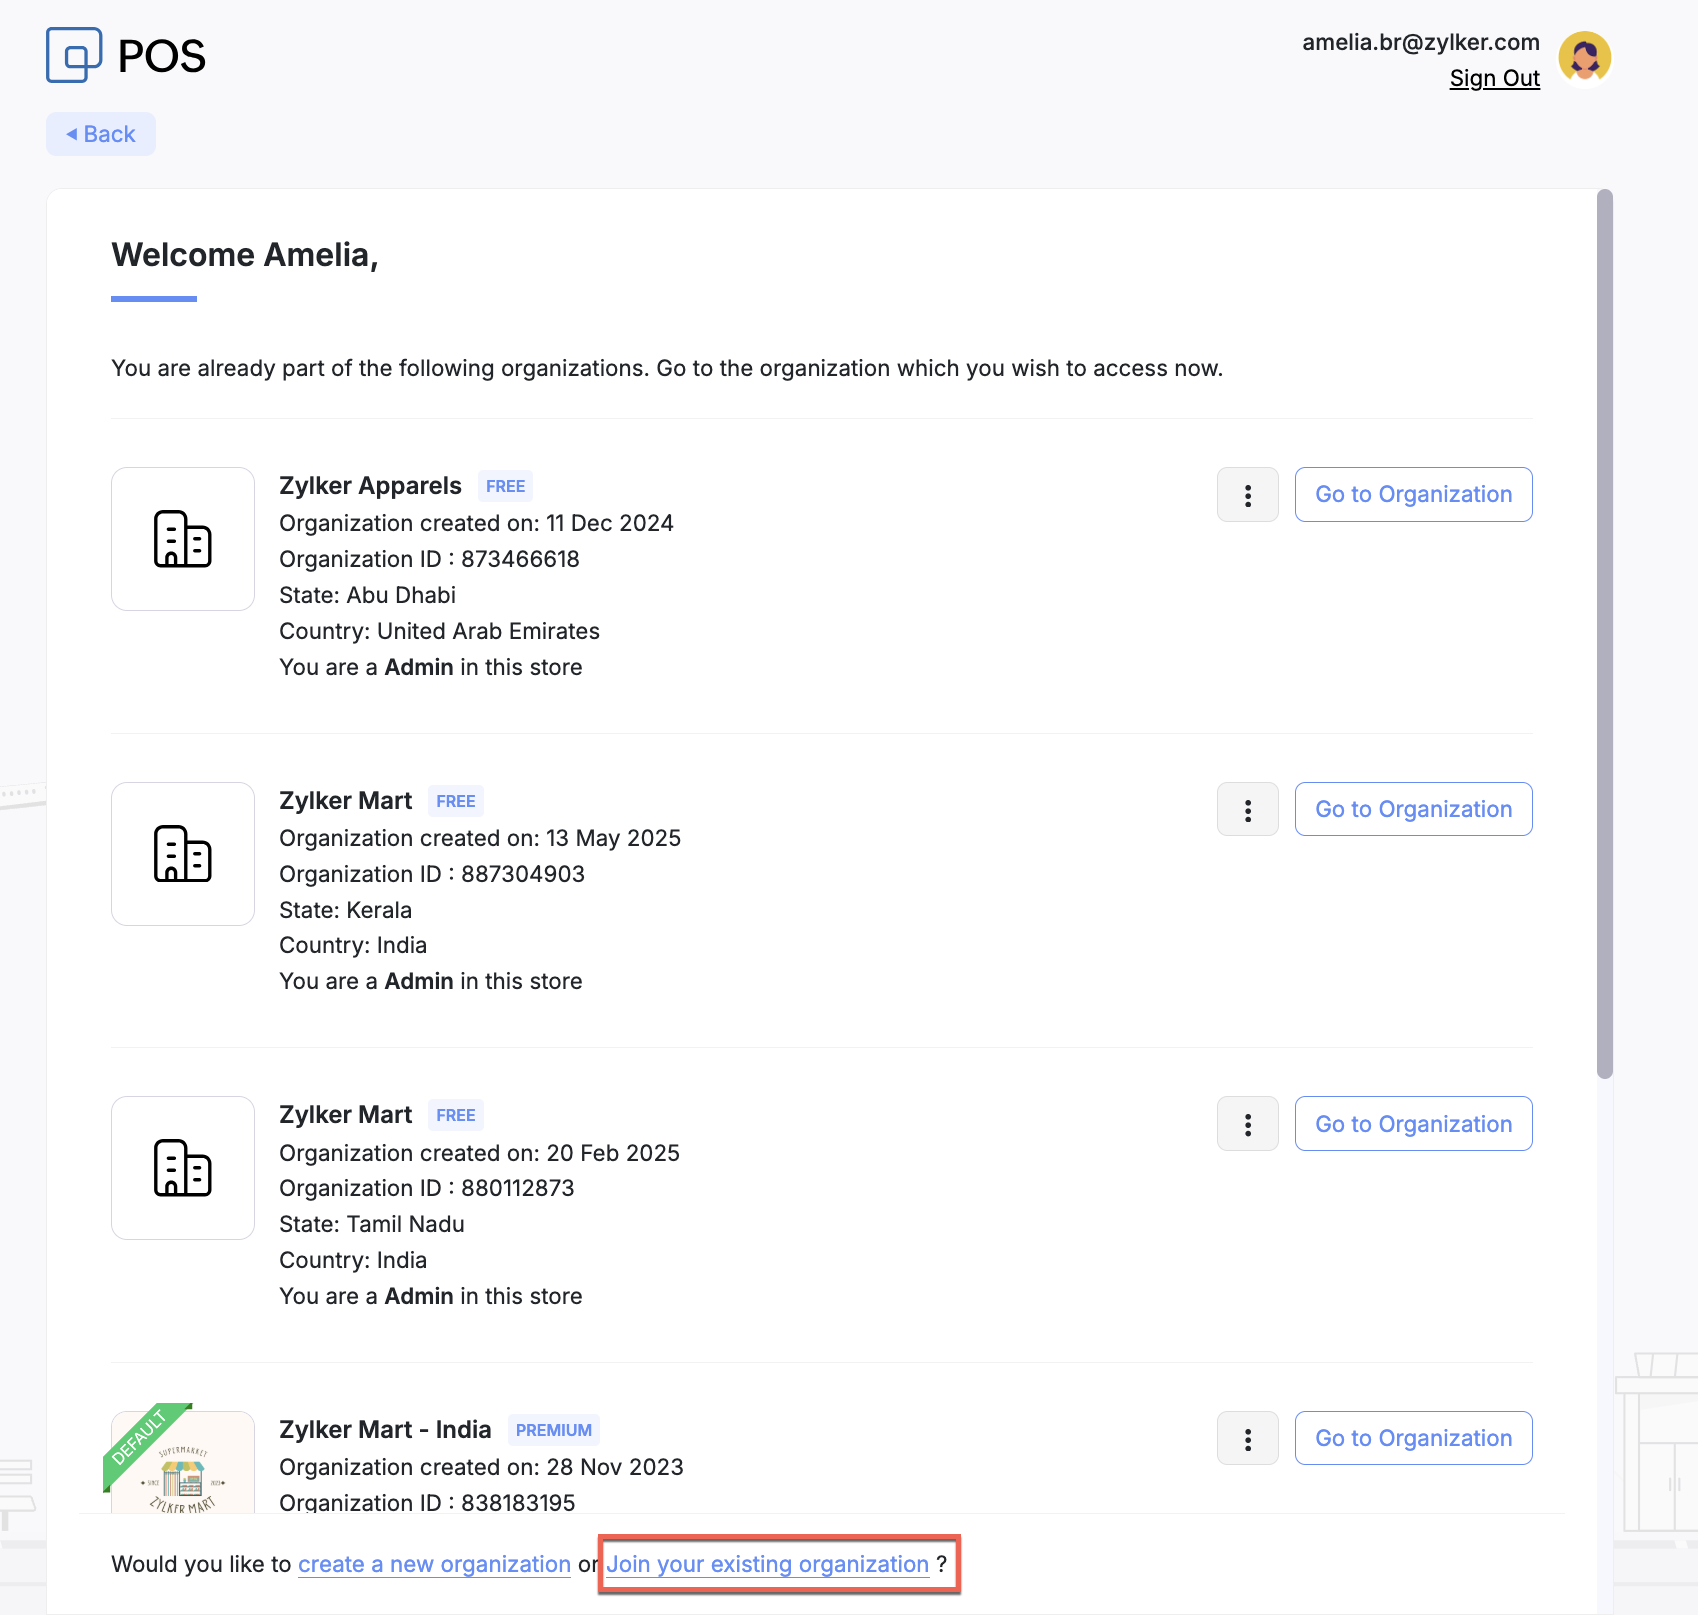
In the Join your existing businesses page, confirm your business and click Join.

In the Set up your Business profile pop-up, enter the required details and click Get Started.

Switching between businesses
Once you've created the new business, you'll be able to view and switch to it without having to log out from the existing business. You can switch to it in two ways
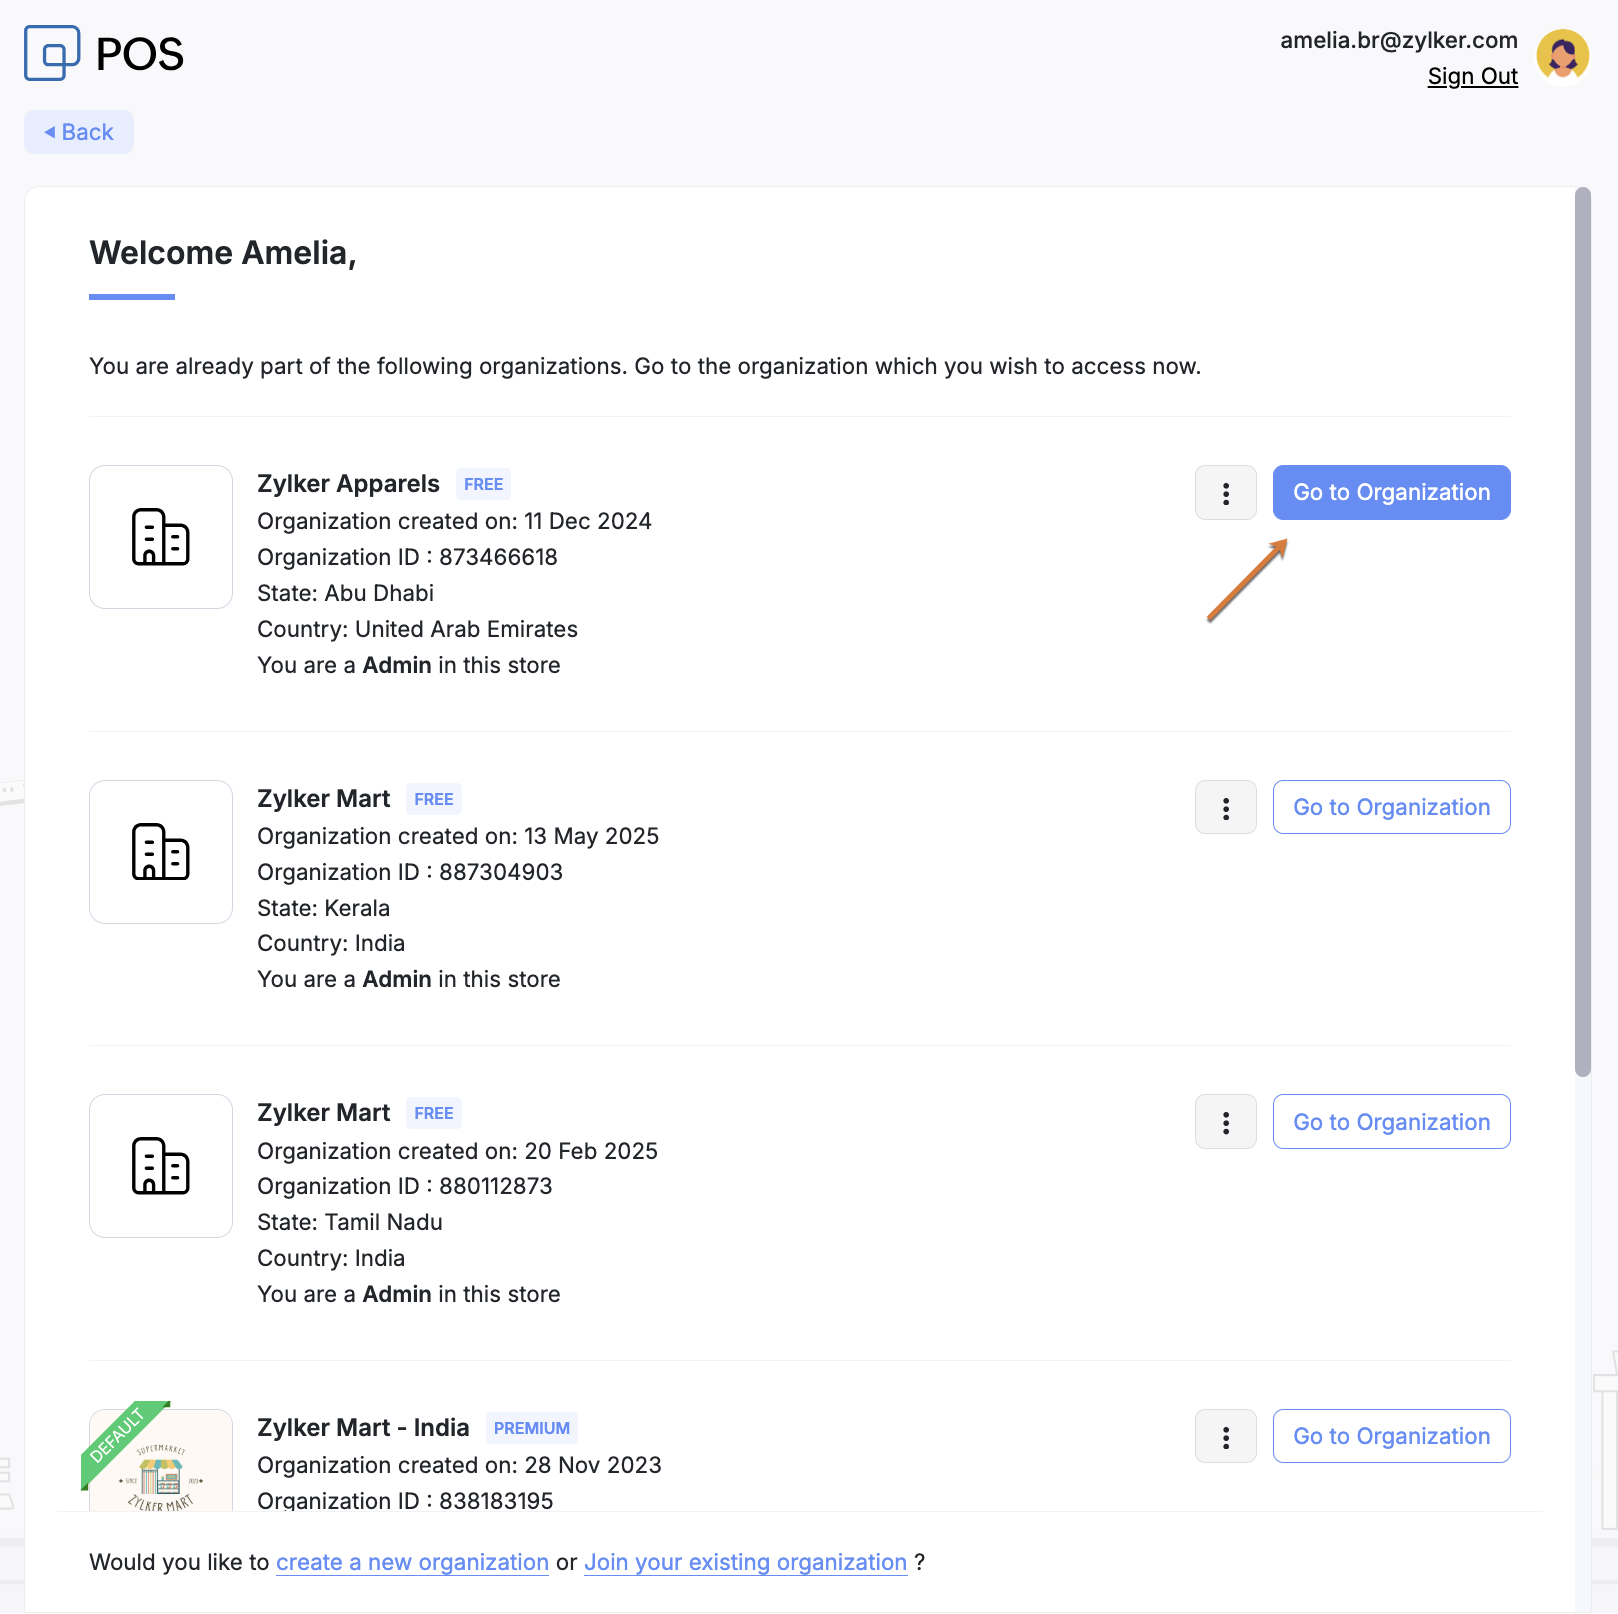
Navigate to My Profile > My Businesses and click on the business that you want to access.

Navigate to My Profile > My Businesses and click Manage.
Choose the business that you wish to access and click Go to Store.
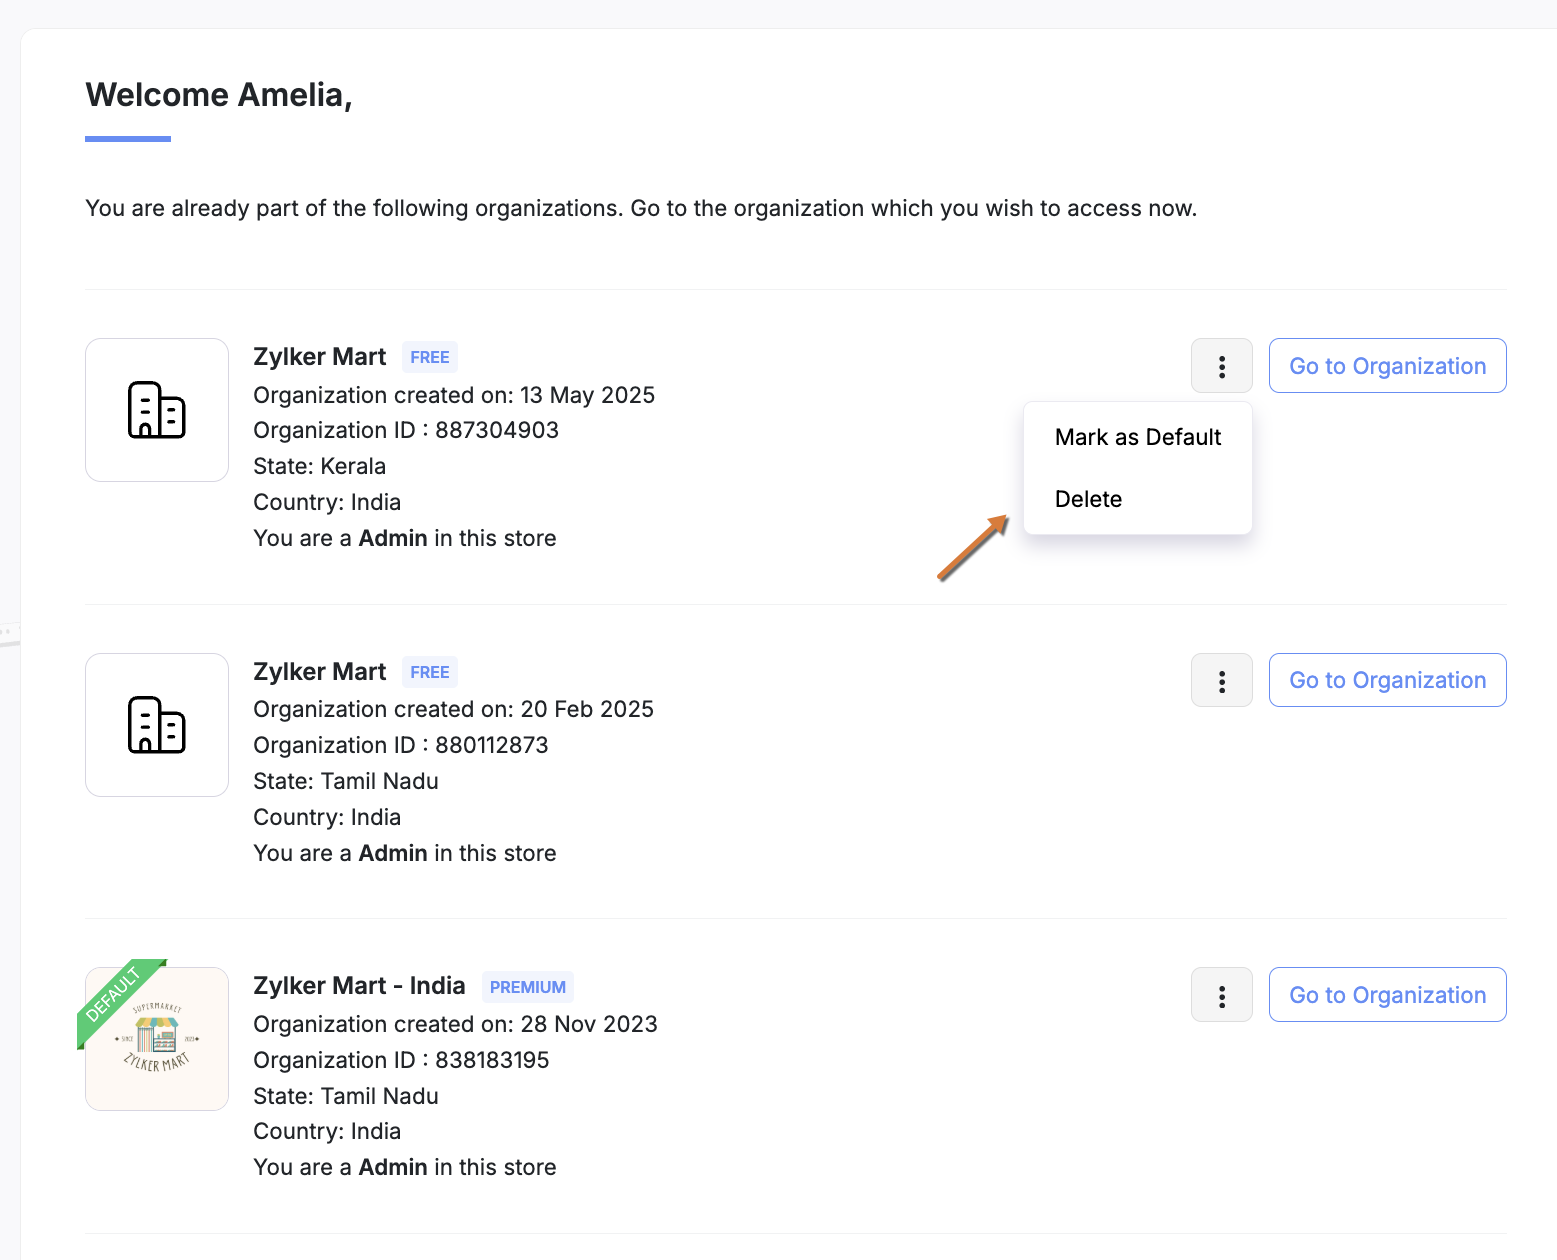
Mark as default business
You can set the business you frequently visit as your default Business. When you set a business as default, you will be directed to it every time you log in with your credentials.
Navigate to My Profile > My Businesses and click Manage.
Choose the business that you wish to access and click the icon next to the Go to Store option and select Mark as Default.

Delete your business in Zoho POS
The Business/Organization created in Zoho POS can be deleted by the admin, i.e. the user who created the organization. This action deletes all the data present in the business, and it's recommended to take a backup before deleting the business entirely.
Note:
Businesses in the Standard, Professional, or Premium version of Zoho POS have to be downgraded to the Free version before deleting.
All other admins, apart from the one who created the business, should be removed before deleting.
To delete a business
Click the Profile icon at the bottom left corner of your window.
Select the drop down next to the Business name and click Manage My Businesses.
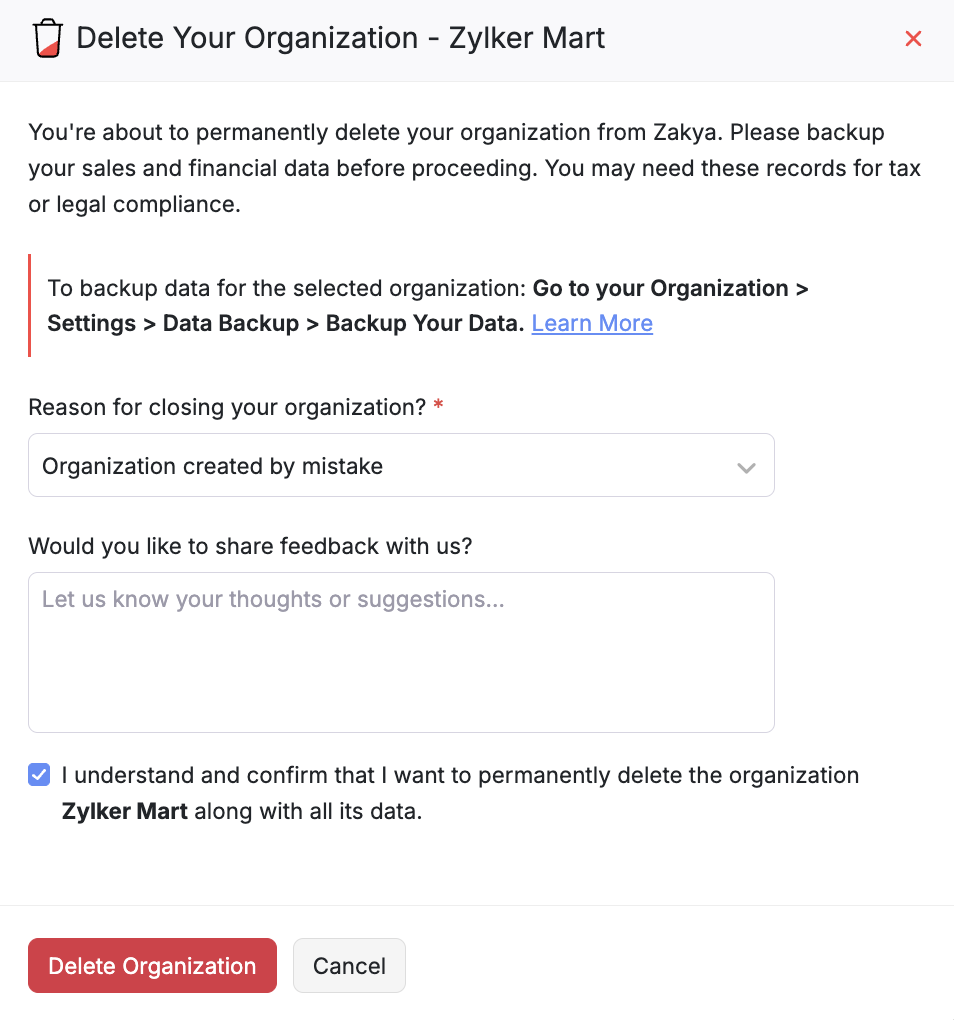
Click More > Delete.
In the Delete your organization popup, do the following:
Select the Reason for closing your organization from the drop down list.
Enter the feedback.
Select the consent checkbox and click Delete Organization.
Enter your account password in the Verify your identity page.
Click Confirm Password.