Summary
Once a Sales Order is created, multiple actions can be performed to ensure your business has smooth sailing. For any sales order generated, one of the crucial steps is to record a payment for it. A Sales Order without a payment status cannot be included in the sale transaction that occurred, and it will not have any impact in the physical stock purchased and stored.
Creating a new sales order
Open the Zoho POS POS web application.
Go to Business > Sales > Orders.
Click on +New and select either Create Sales Order or Create Sales Order (Pre GST).

On the New Sales Order page, fill in the required details.
Select a customer name from the drop-down or add a new customer by clicking on +New Customer.

Walk-in customer: When information about the customers is not captured in the POS at the store, they will be classified as a walk-in customer. These are the ones who visit your store for the first time, purchase the essential items, and check out with the cashier.
Enter the GST treatment, place of supply, and tax preference, and click Save.
On selecting the name of the customer, the GST treatment associated with that customer will be automatically linked.
If a customer hasn't been configured with a GST treatment, it can be done by clicking on the pencil icon next to the customer.

The Sales Order# will be auto-generated. To modify this manually or to add a Sales Order#, click on the Settings icon and edit accordingly.
The sales order date will, by default, be the date on which the order is created, but it can be customized according to your needs.
Fill in the Terms and Conditions, Customer Notes fields. A default note can also be set for these fields through sales order preferences.
Add the items required, mention discounts and price lists, if any, and click Save and Send to generate a new sales order or click Save as Draft to save the Sales Order as a draft or click Save and confirm to send the send order without sending e-mails to confirm the order. A sales order can also be created via Quick Create. To do so, click Quick Create in the side bar and go to +Order.


In Sales Orders, you can track serial and batch numbers in either Invoices and Credit Notes or Packages and Return Receipts. This can be done by clicking Inventory Tracking at the bottom of the Sales Order page.
Note
This setting will be applied only to the sales order in discussion. To configure tracking preferences for all sales orders, go to Settings > Preferences > Items.
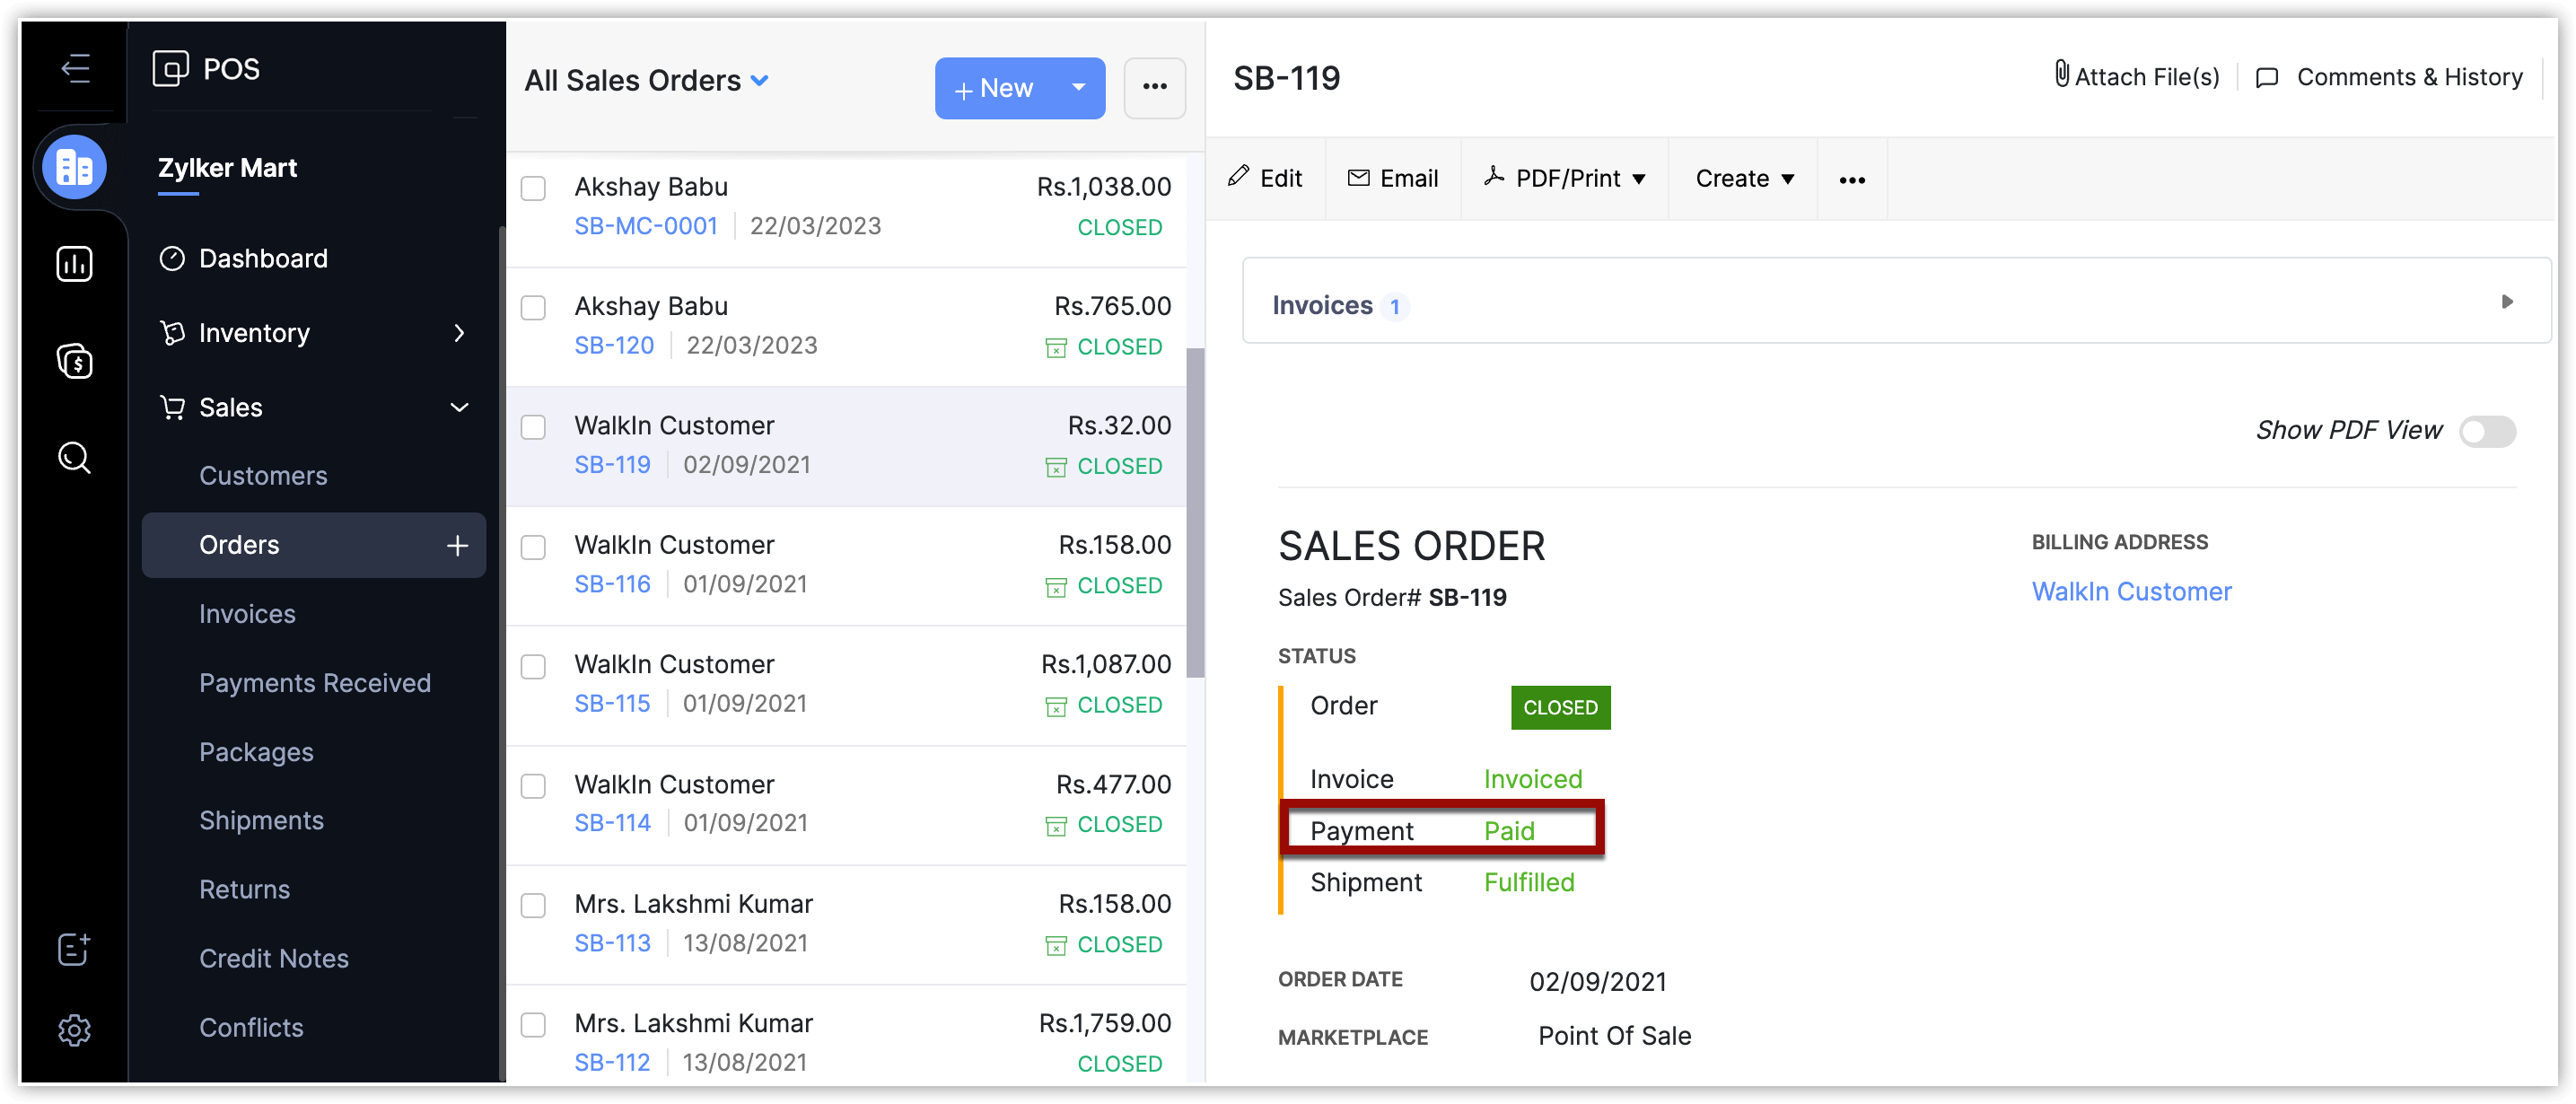
Status of payment in sales orders
The information about the status of payment or refund for a sales order will be displayed in the sales order using any one of the below mentioned terms.
It has the following stages:
Unpaid: The payment for the sales order is yet to be done by the customer.
Partially Paid: The customer has paid only a portion of the total amount that is to be paid to the seller.
Paid: The total amount was paid by the customer.
Refund Pending: When the amount is to be refunded to the customer by the seller upon returning items.
Partially Refunded: The seller has refunded only a portion of the total amount that is to be paid to the customer.
Refunded: When the total amount for the items returned by the customer is refunded by the seller.

Note
The refund status will be mentioned in the corresponding return orders and will not be mentioned in sales orders.
Editing a sales order
A sales order might have certain iterations and, in order to keep up with the changes, it can be edited in a click. To do so:
Open Zoho POS POS web application.
Go to Business > Sales > Order.
Select the sales order that needs editing, click Edit in the top bar.
Make the required changes and click Save.

Attaching files to a sales order
A business transaction might have occurred during a sale, with a discount, or might have been purchased using a coupon or coupon code. All of these external details might not have been added in the sales order or these documents could be added for documentation. Either way, to attach files to a sales order:
Open Zoho POS POS web application.
Go to Business > Sales > Order.
Select the sales order to which files are to be attached, click Attach File(s) in the top bar.
Click + and start attaching files.

Cloning a sales order
When a customer wants to repeat the same order more than once, cloning the sales order will make the job easier and quicker. However, sales orders placed in a marketplace which includes the POS, OrderApp, Direct Sales, Shopify, Zoho Commerce etc., cannot be cloned. To clone a sales order:
Open Zoho POS POS web application.
Go to Business > Sales > Order.
Select the sales order that needs editing, click on the three dots in the top bar and select Clone.
This will create an identical copy of the original document except for the date. Click Save.

Printing a sales order
When a customer requests a printed copy of the sales order:
Go to the specific sales order, click PDF/Print in the top bar.
Preview the document and click Print.

Sales orders in PDF
In cases where the sales order has to be shared, sharing it as a PDF is the most convenient way. To do so:
Go to the specific sales order, click PDF/Print in the top bar.
Select PDF and the document will be downloaded automatically.

Deleting a sales order
A sales order has to be a confirmed order or a draft without an invoice or packaging. Without meeting this criteria, a sales order cannot be deleted. To delete a sales order:
Go to Business > Sales > Orders.
Select the sales order which has to be deleted, click on the three dots in the top bar.

Click Delete.
Marking a sales order as void
A sales order that has become redundant and will not be raised as an invoice can be marked as void. A sales order which has an invoiced raised against it or if its paid for, can't be voided.
Go to Business > Sales > Orders.
Select the sales order which has to be voided, click on the three dots in the top bar and click Void.
Enter the reason for voiding it in the pop-up and click Void it and then click Proceed.

Importing a sales order
When a business has been up and running for a while, they might have previously generated sales orders. Zoho POS's motto of making sales easier comes into play here. Upon installing Zoho POS POS, business owners can import all their previous sales orders with the click of a button. To do so:
Open Zoho POS POS web application.
Go to Business > Sales > Orders.
Click on the three dots in the top-right corner and select Import Sales Order.
Configure it by uploading a file in CSV, TSV, or XLS format and select a character encoding from the drop-down menu.
Click Next to move to the Map Fields section.
Select the fields accordingly and map the fields.
Click Next to move to the Preview section where the number of unmapped fields, and number of skipped rows can be viewed.
Once done with a final check, click Import.

Exporting a sales order
When a business is changing POS applications or when it wishes to transfer the current sales order to a new record, exporting them is the way to go. It ensures there is no data loss and secures all crucial information. To do so:
Open Zoho POS POS web application.
Go to Business > Sales > Orders.
Click on the three dots in the top-right corner and select Export Sales Order.
Configure it by clicking Select Module, select the period of time for which the sales order is to be exported, filter by order date as required, select the file, and click Export.

Emailing a sales order
A sales order can be sent to the customer via email when it is generated. However, it can also be emailed later when required. To do so:
Go to Business > Sales > Orders.
Click on the three dots in the top-right corner and select Import Sales Order.
Select the sales order that needs to be sent over email, click on the email icon in the top bar.
Preview the email and add additional context if required.
Click Send.
