



Online Store

The Online Store module in Zoho Commerce allows you to customise your online store’s existing theme, add a store logo, provide contact information, and many configure more settings related to your online store.
Note: You have to save and publish the changes for them to be reflected on your online store.
Customize Theme
You can customize your online store’s existing theme as per your requirements. The customization can range from editing each element in a single page to selecting colors that are brand-compliant and so much more.
To do so:
- Click Online Store on the left sidebar.
- Click Customize or click the More Options next to the installed theme and select Customize to open the new theme editor.
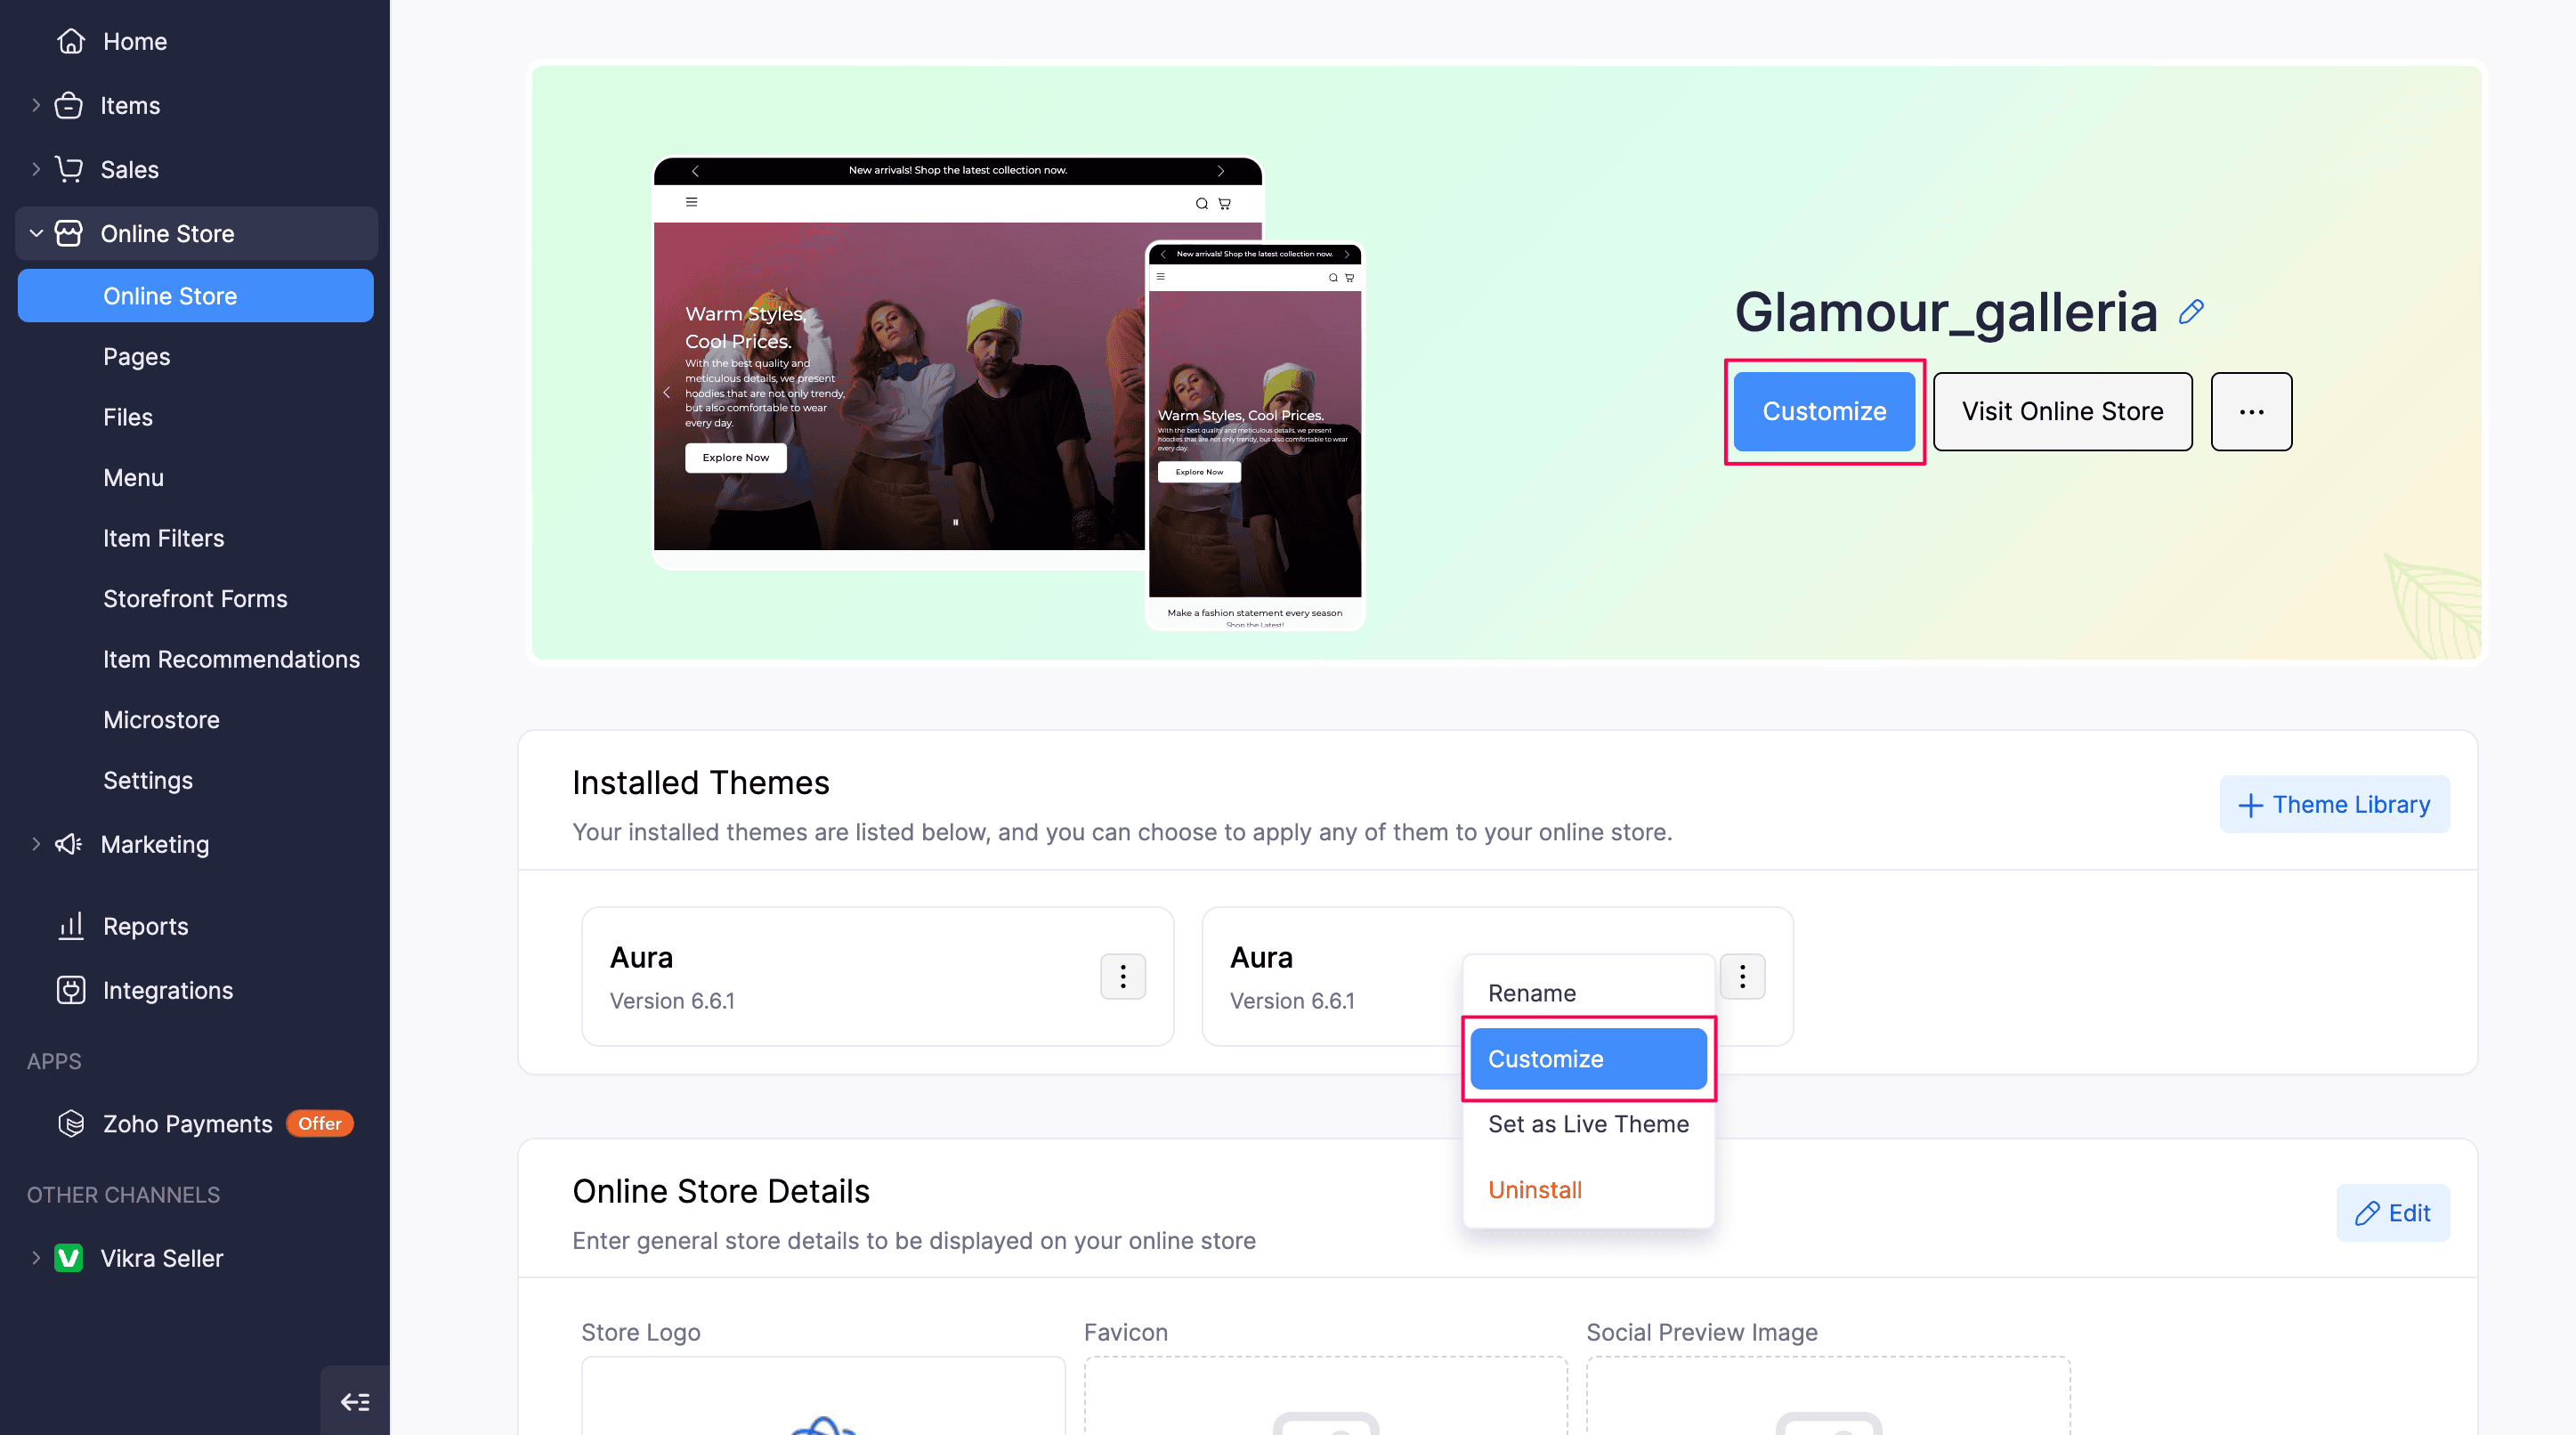
Customization allows you to edit existing elements manually or add new elements to every page. Theme Editor allows you to modify aspects like colors, fonts, images, layouts and text. You can also add new elements. You can also preview all your changes before saving them. For the changes to reflect on your online store, click Save and then Publish to apply the changes.
Installed Themes
The Installed Themes section displays all the themes that are currently installed on your online store. You can choose to apply any of these themes to your online store.
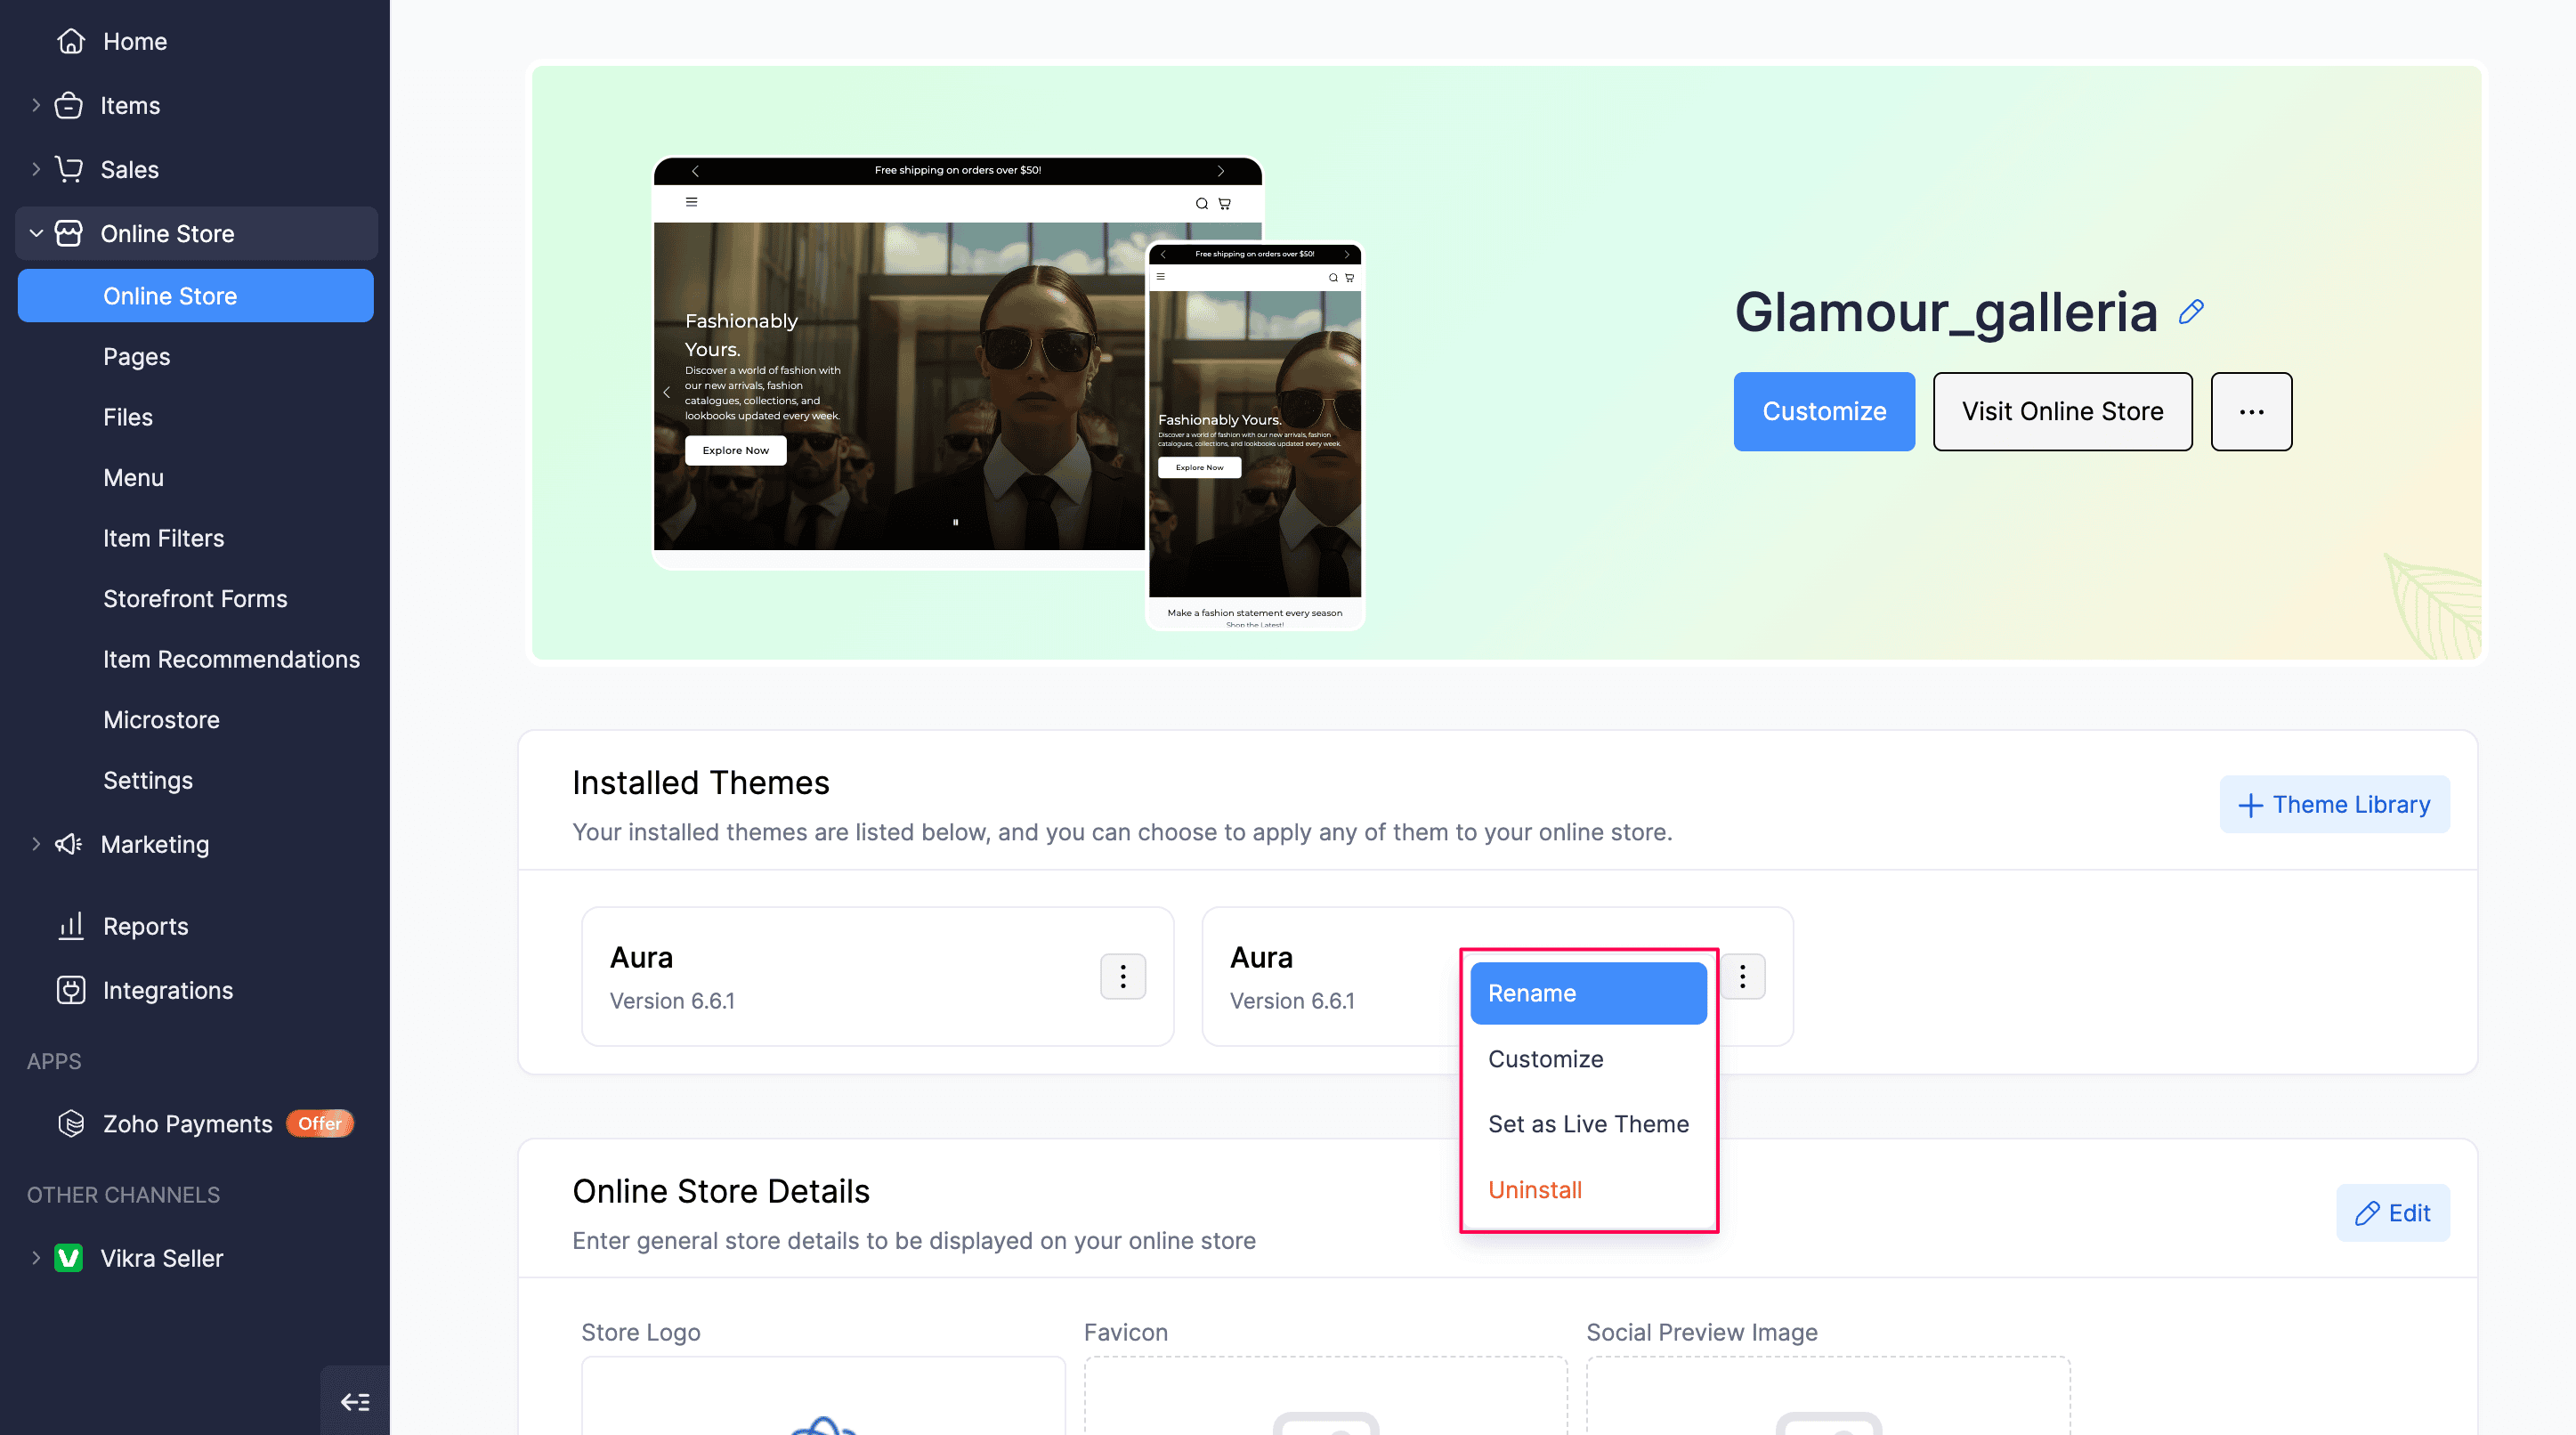
For each installed theme, you can perform the following actions from More Options:
| Action | Description |
|---|---|
| Rename | Change the name of a theme installed from the Theme Library. This option is not available for custom (uploaded) themes. |
| Customize | Open the Theme Editor and modify the theme’s appearance. |
| Download | Download the theme zip file for a custom (uploaded) theme. Use this before you upload a new version to avoid losing your current theme. |
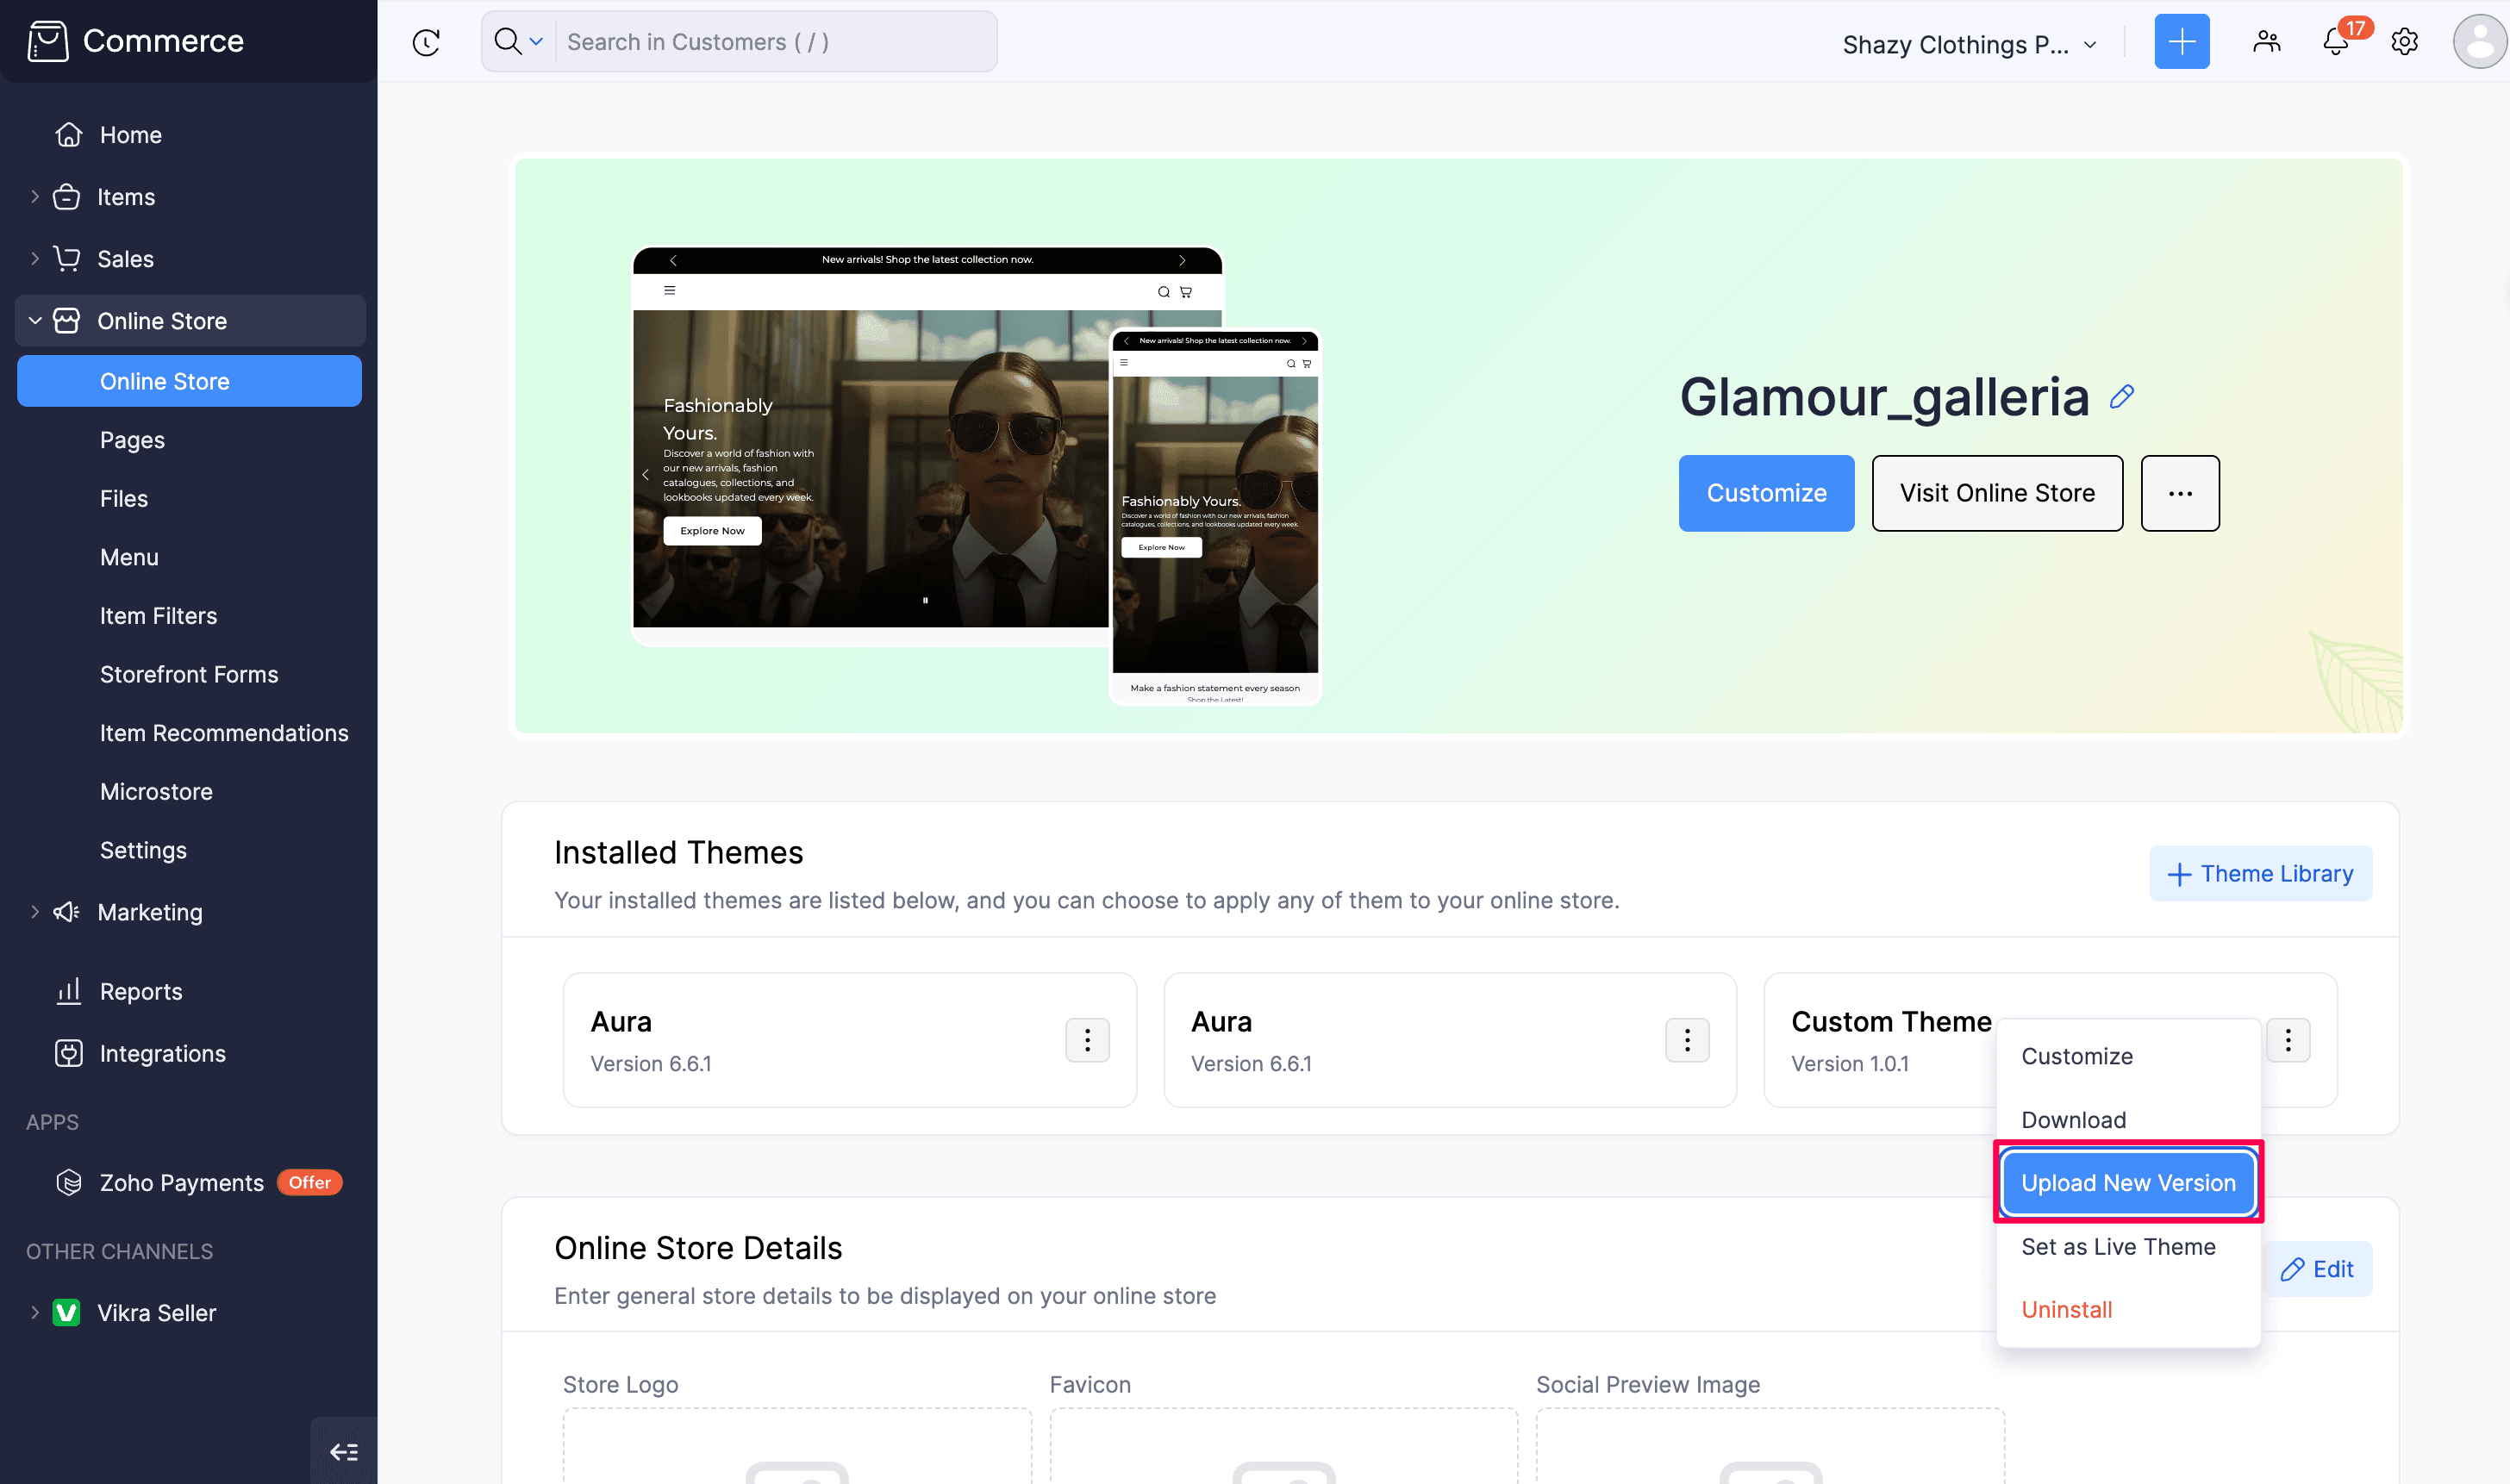
| Upload New Version | Replace a custom theme with a new uploaded zip file. Refer to the upload a new version of a custom theme section for more details. |
| Set as Live Theme | Apply the selected theme to your online store. |
| Uninstall | Remove the theme from your store. |
Note:The Download and Upload New Version options are available only for custom (uploaded) themes. You cannot download or upload a new version of a theme installed from the Theme Library.
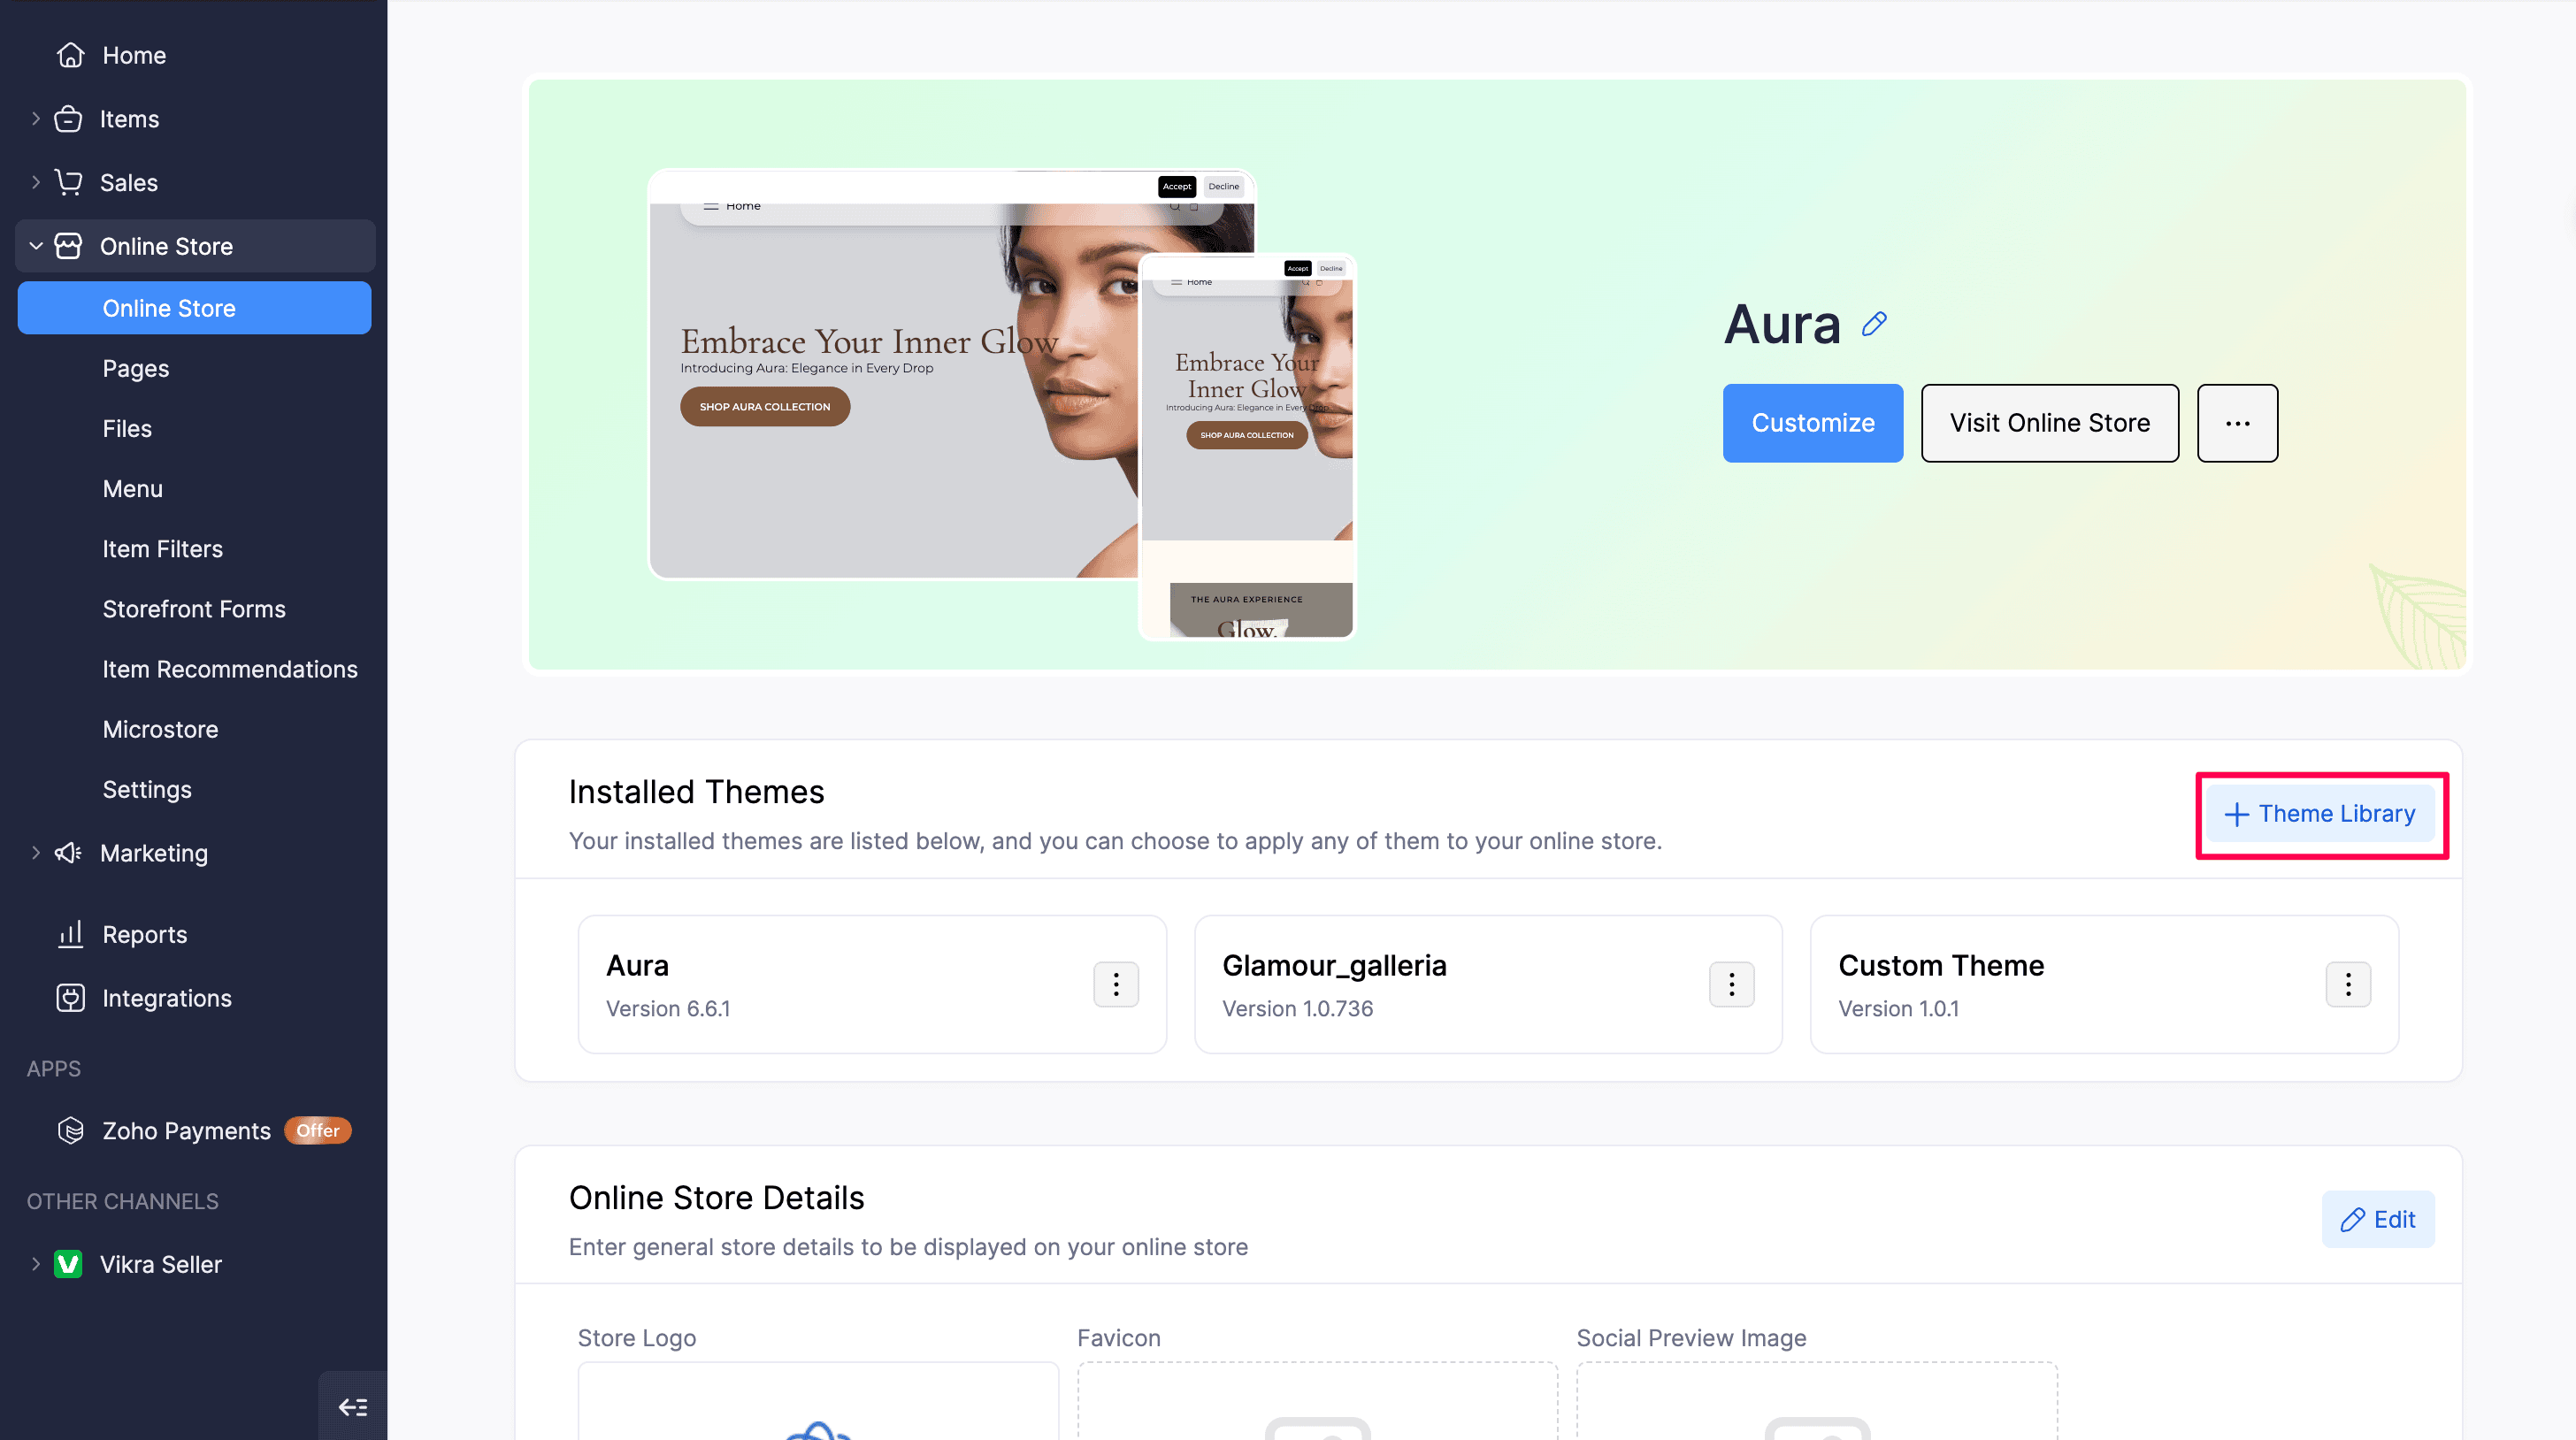
You can also access the Theme Library by clicking the + Theme Library button to browse, install, or upload themes for your online store.
Online Store Details
You can upload Store Logo, Favicon, and Social Preview Image in this section of the module.
| Fields | Description |
|---|---|
| Store Logo | Enter your store’s logo to be shown on your online store, next to your store’s name. You can choose to hide the logo by disabling the Show in Online Store option. The logo should not exceed 500 pixels in dimensions. |
| Favicon | Favicon is a shrunken logo of your store shown in the address bar of the browser. You can upload favicon with the file formats PNG, ICO, and JPG of square dimensions, not exceeding 512×512 pixels in dimensions (width×height). |
| Social Preview Image | Enter a social preview image of your online store. The image will be shown when someone shares your store’s URL externally. We recommend an image ratio of 16:9. |
| Store Name | You can enter your store name here and display it on your online store by enabling the Show in Online Store option. |
| Tagline | Enter a tagline for your online store. Enable the Show in Online Store option to display this under your store’s name. |
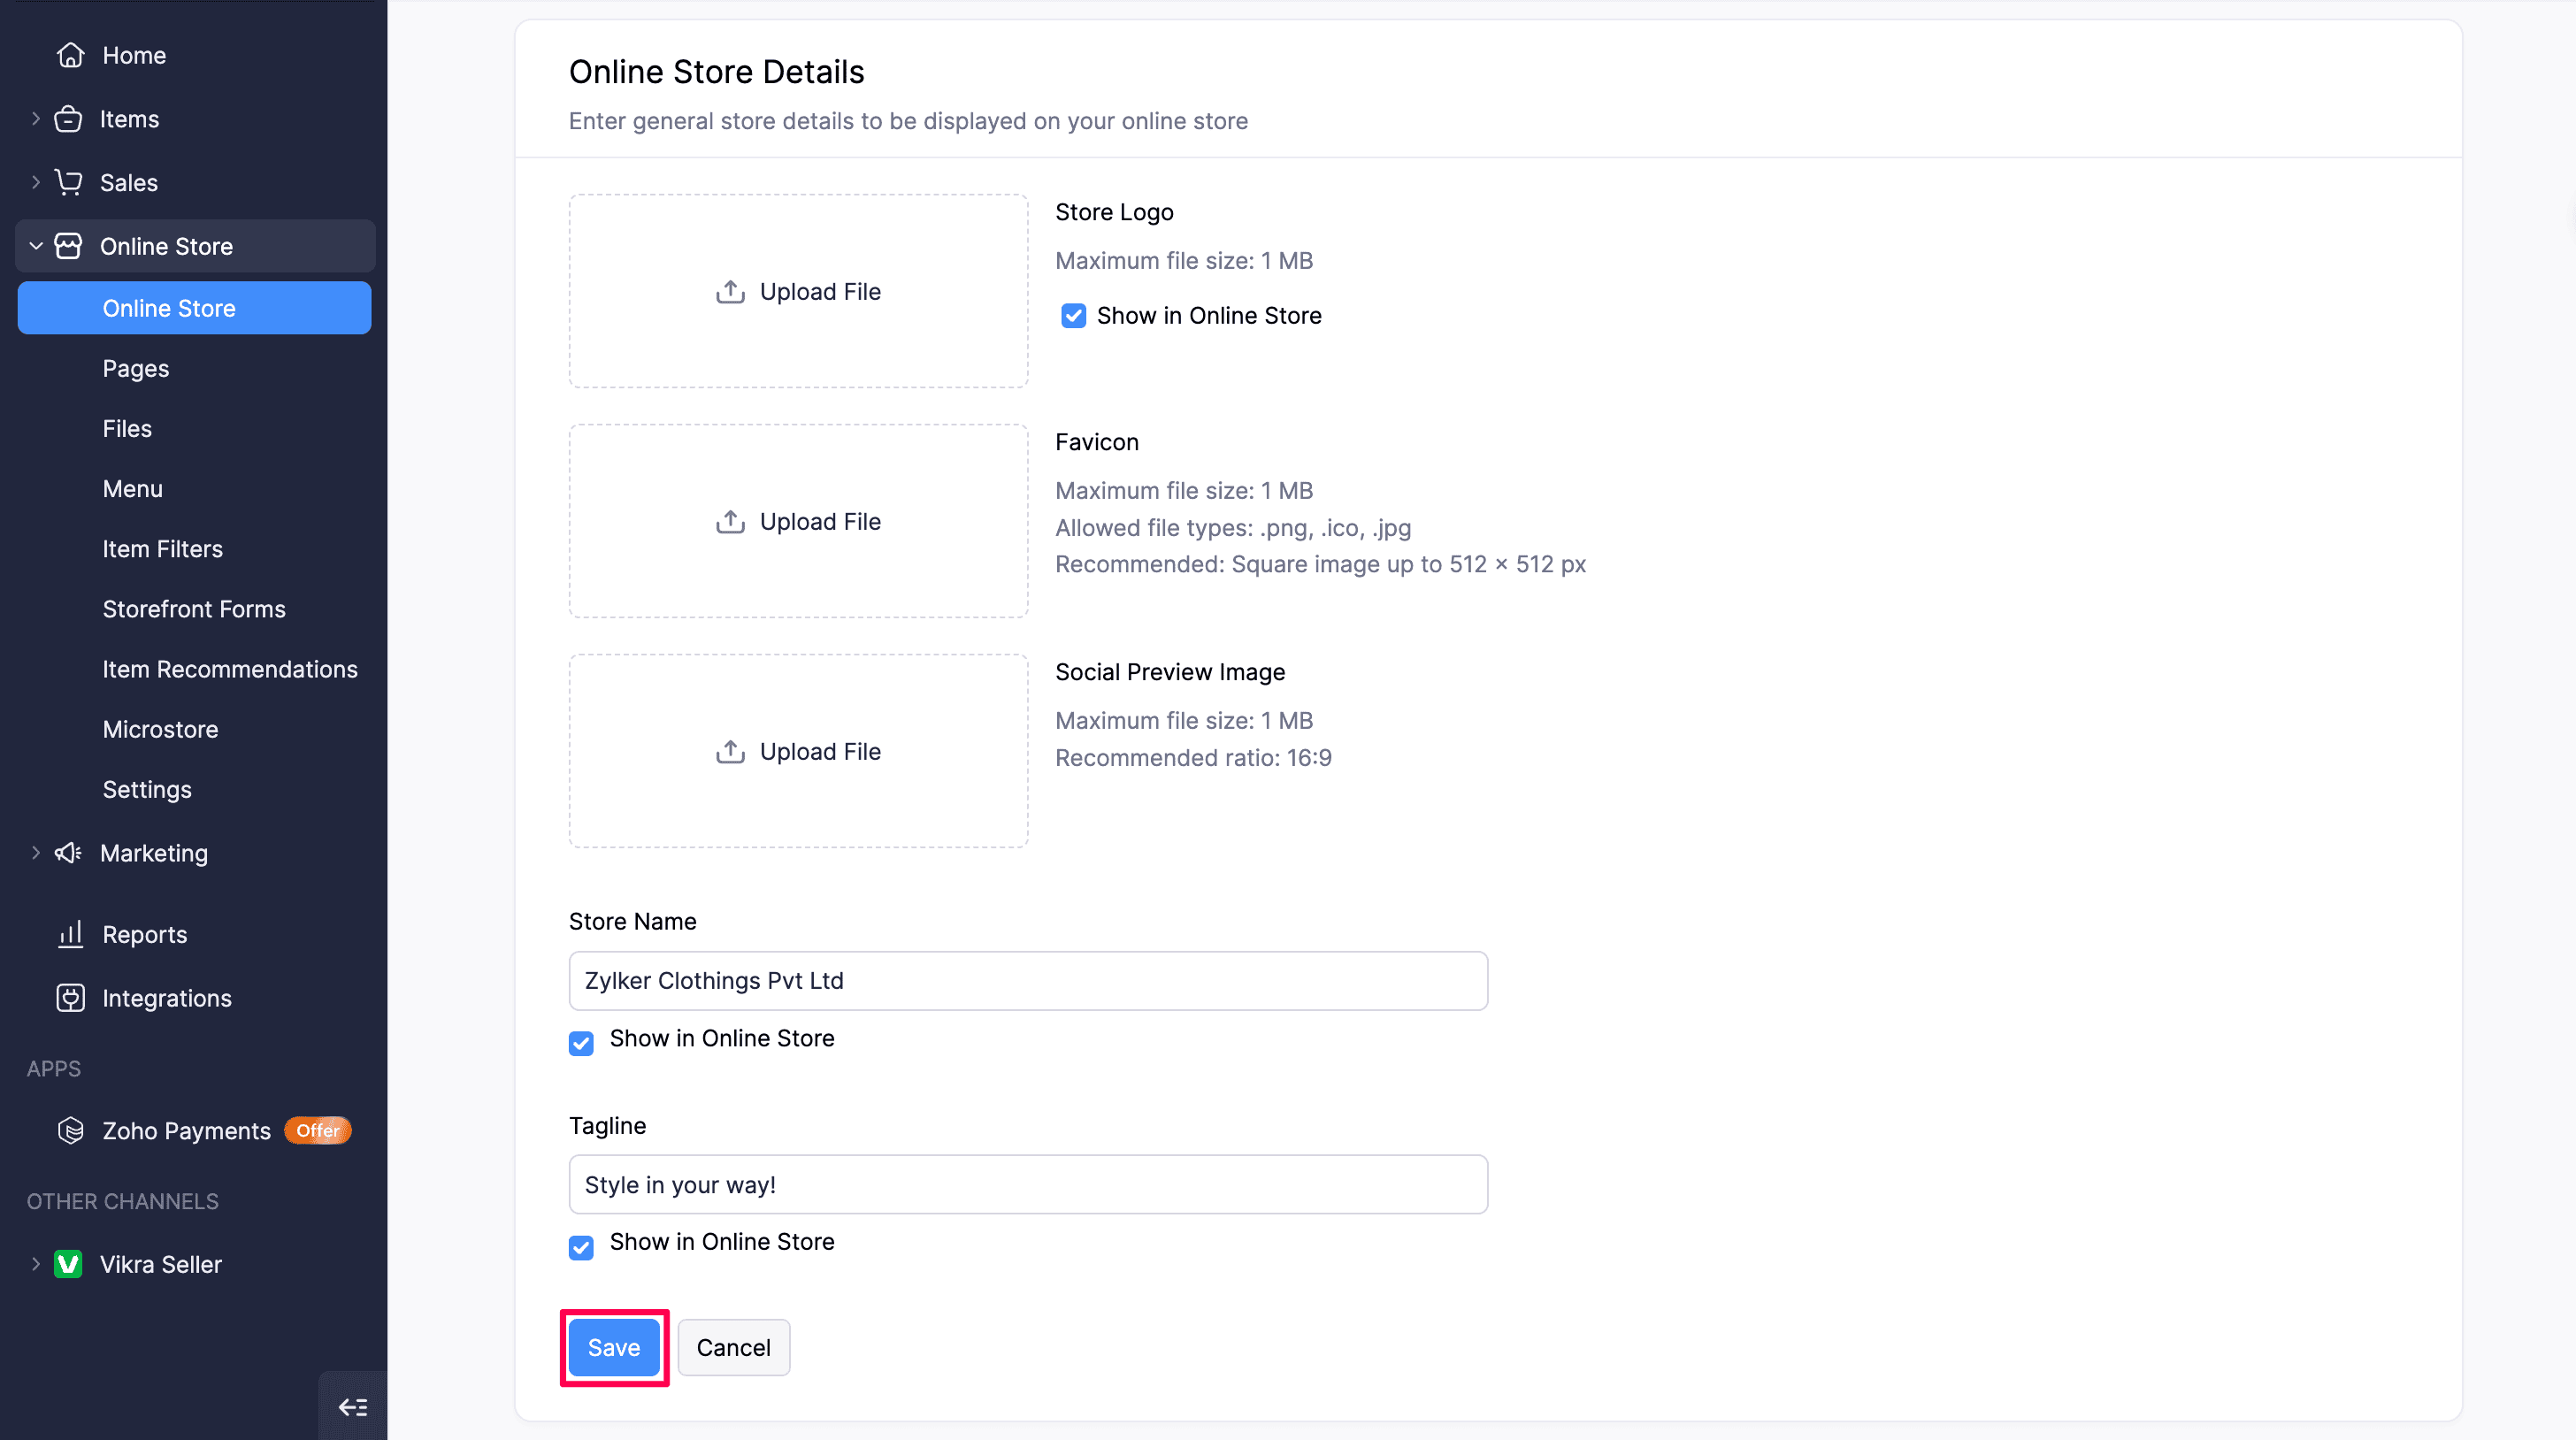
After you have made all the changes, click Save.
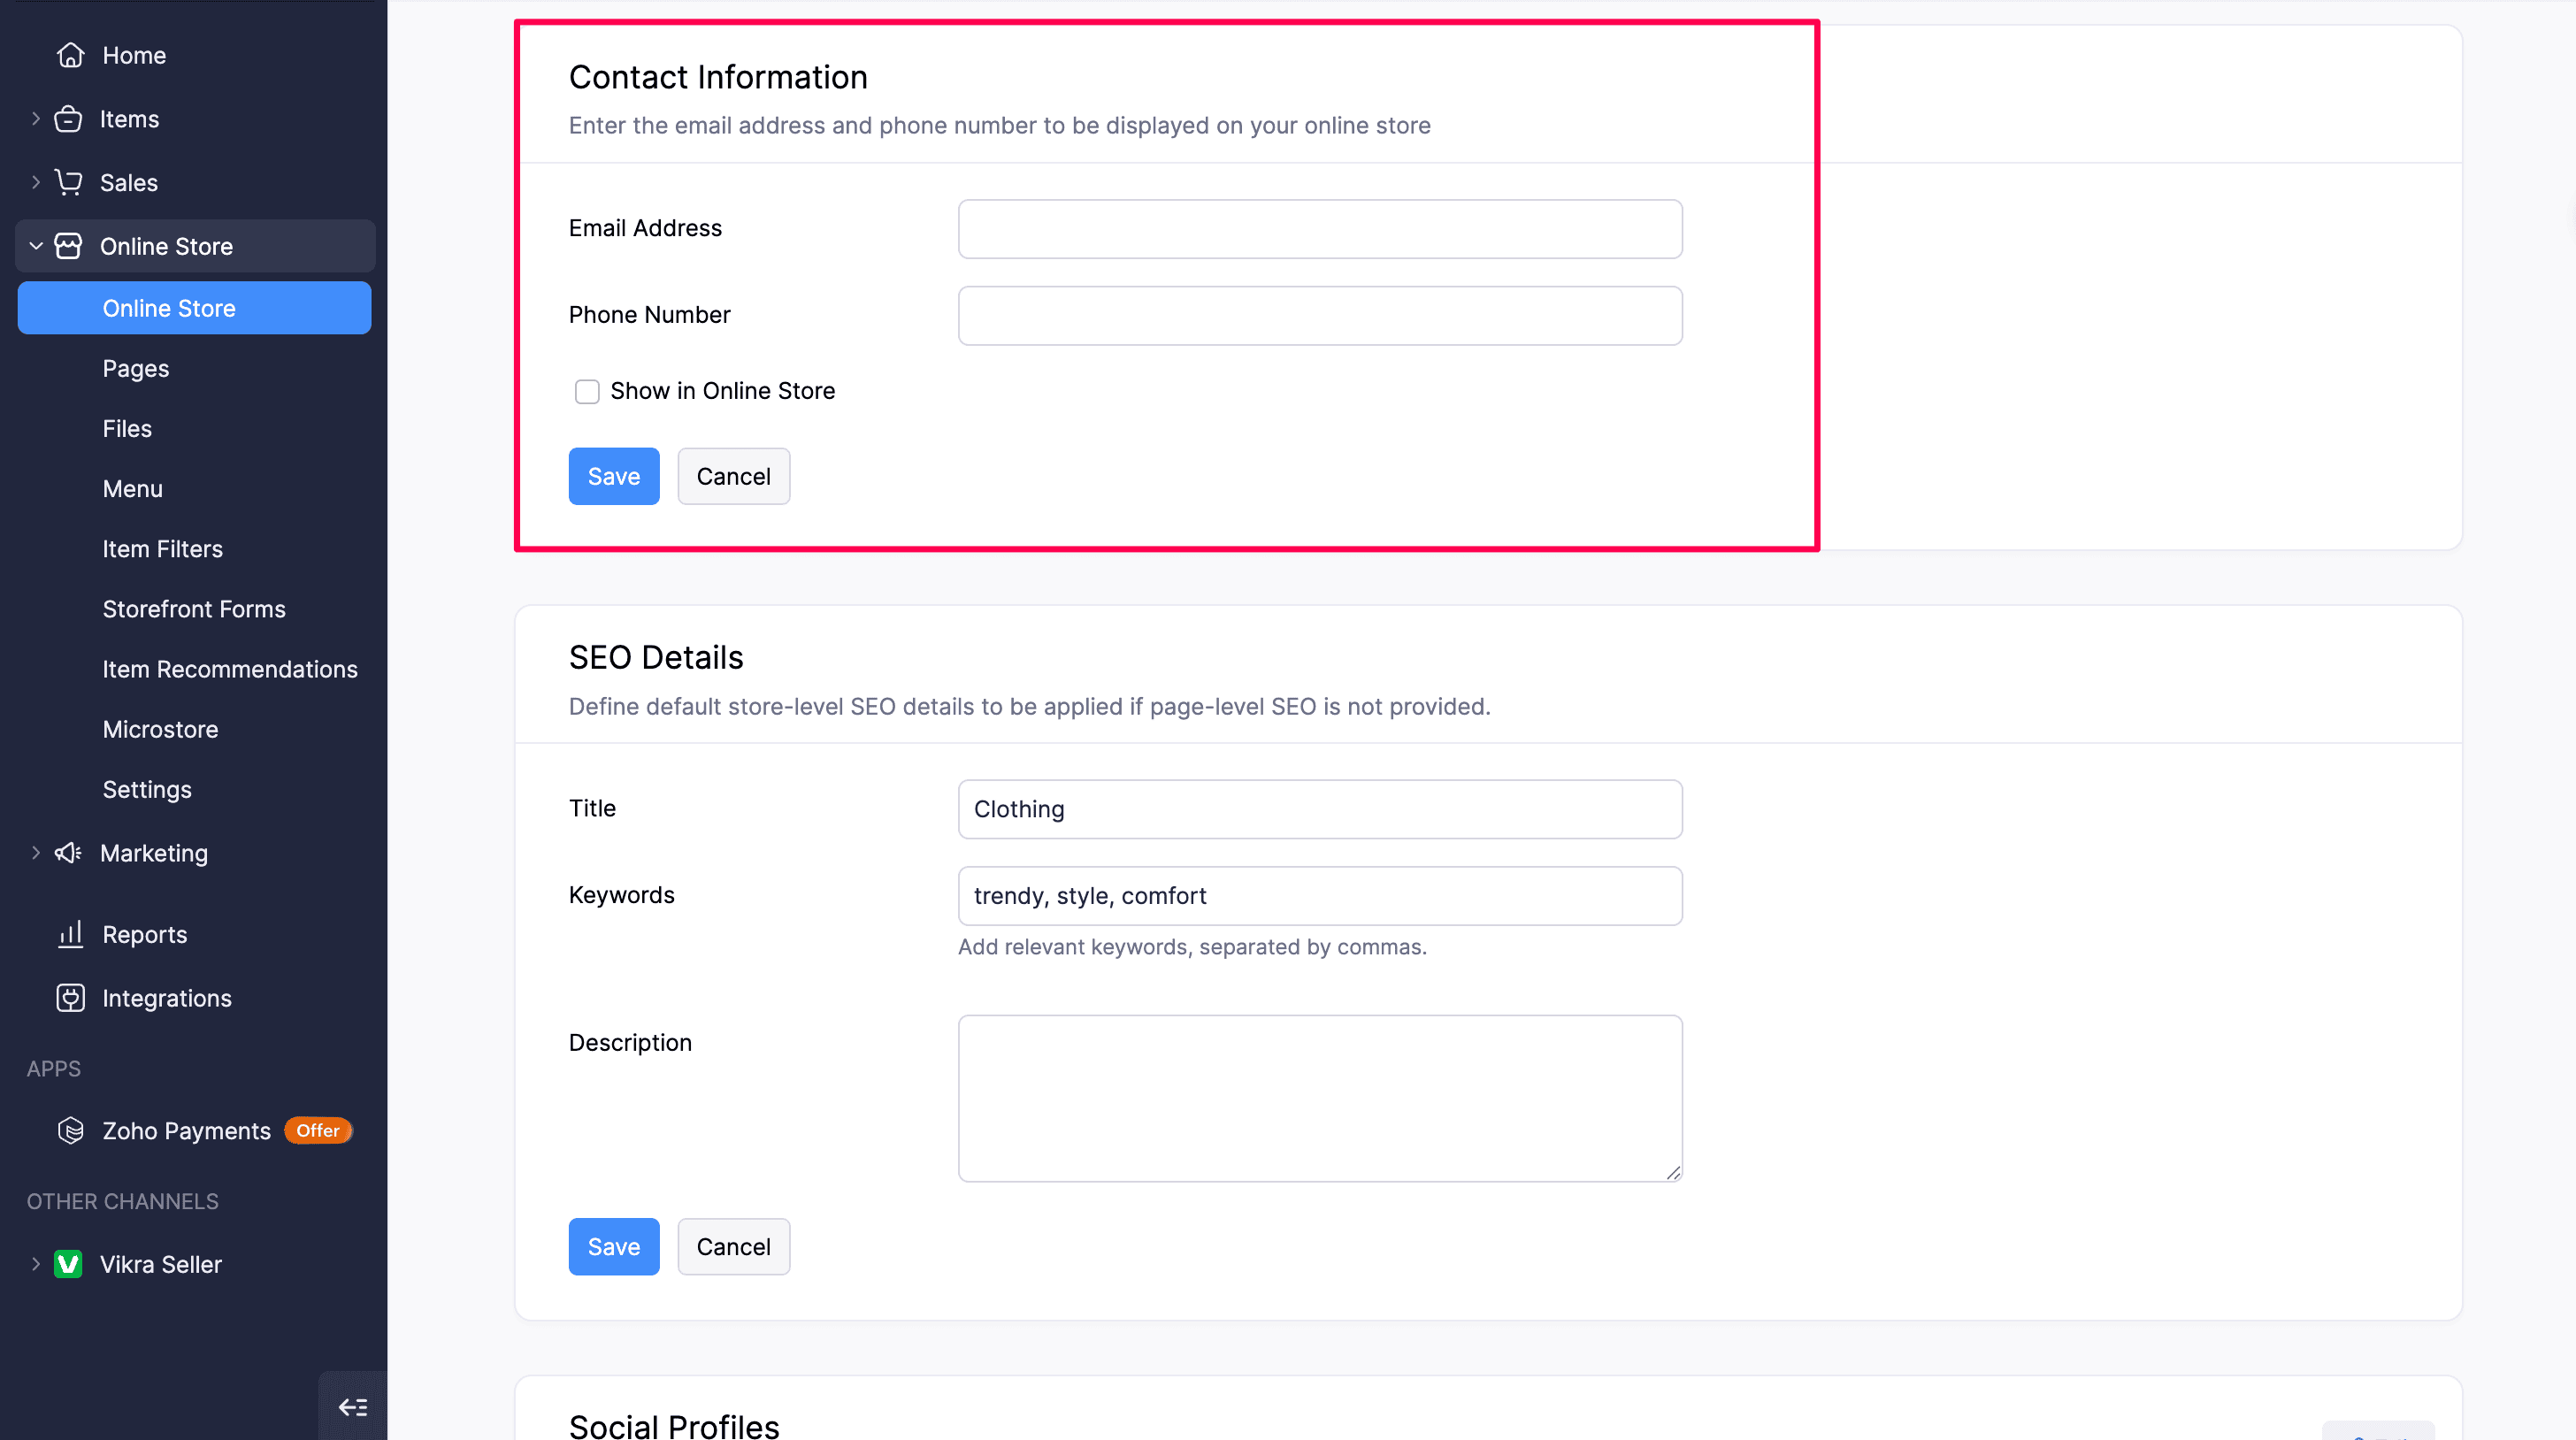
Contact Information
You can enter an email address and a phone number to display it on your online store. This may include the store owner, customer support team, or any other contact of your choice.
Enable the Show in Online Store option to display this in your online store. After you have made all changes, click Save. You can edit the contact information anytime.
SEO Details
The SEO Details section lets you define default store-level SEO details to be applied if page-level SEO is not provided.
To add SEO details:
- Click Online Store on the left sidebar.
- Navigate to SEO Details and click + Add (or Edit if details have already been added).
- Fill in the following fields:
| Field | Description |
|---|---|
| Title | Enter a default title for your online store to be used in search engine results. |
| Keywords | Enter relevant keywords separated by commas to help search engines index your store. |
| Description | Enter a brief description of your online store for search engine previews. |
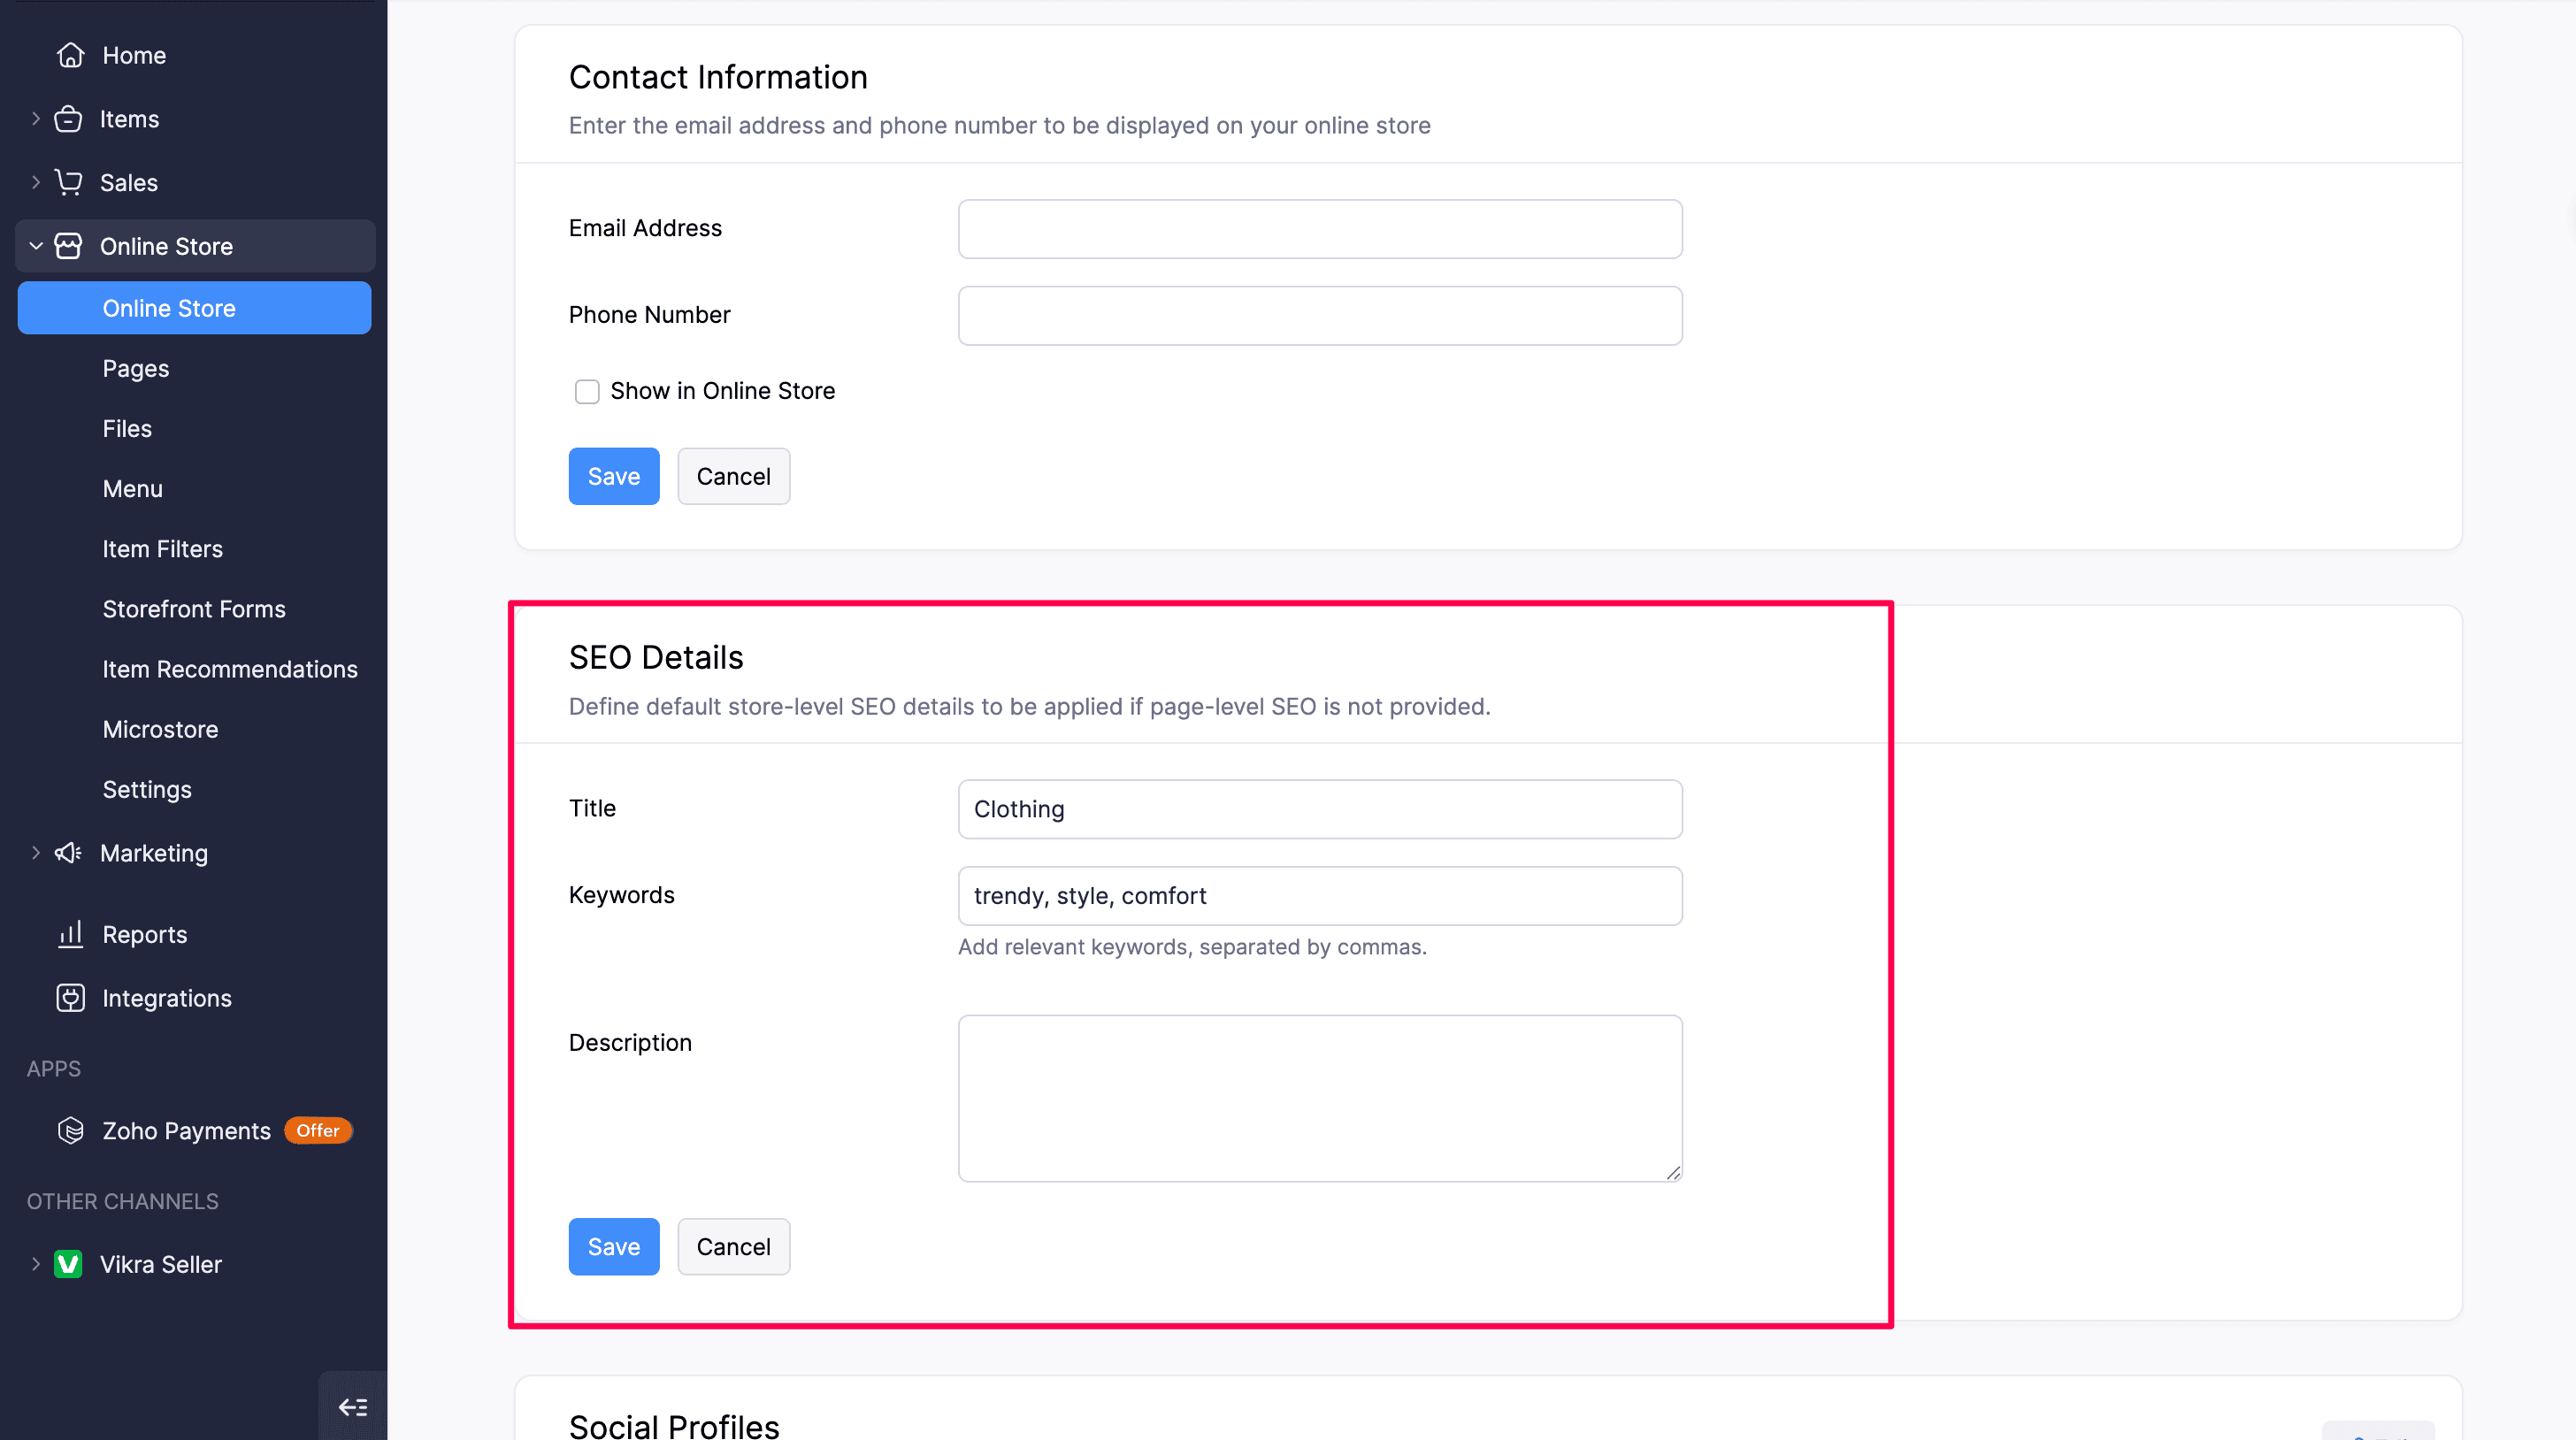
- Click Save to apply your changes, or Cancel to discard them.
Social Profiles
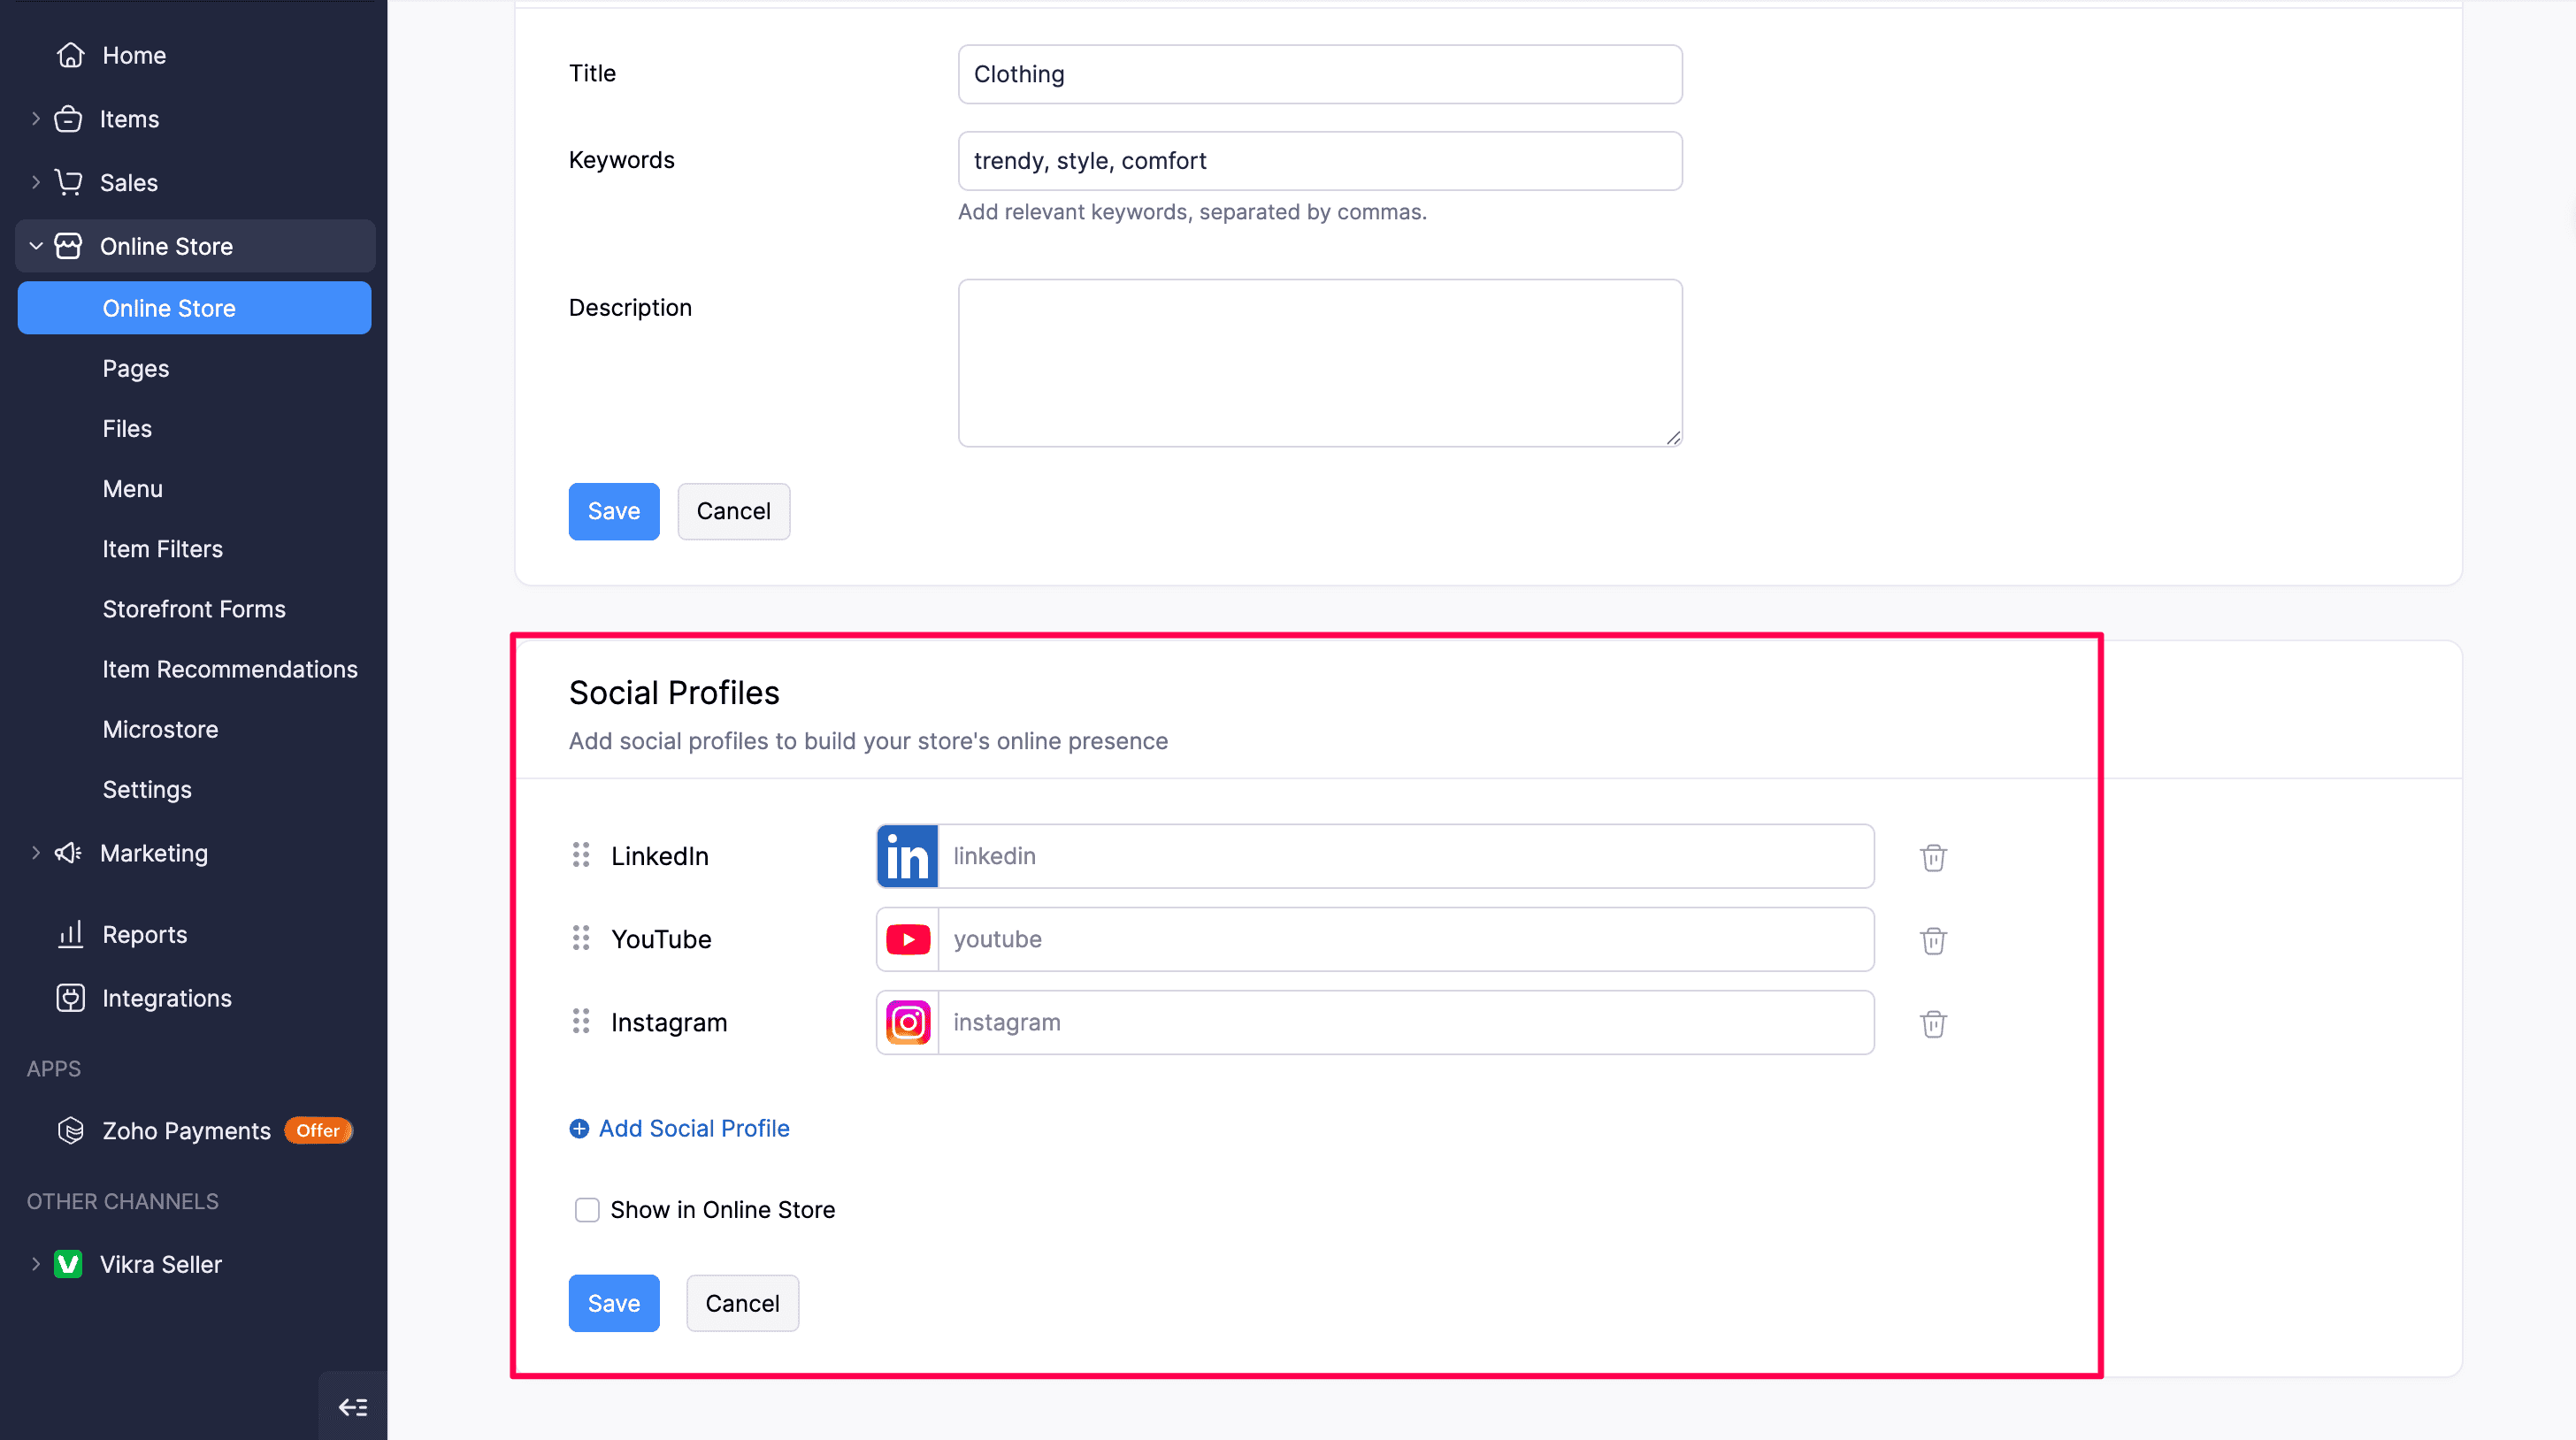
You can link multiple social media handles on your online store. Customers and visitors can then be redirected to the respective social media handle every time they click the social media icon. Here’s how you can add social profiles:
- Click Online Store on the left sidebar.
- Navigate to Social Profiles and click + Add Social Profile.
- Select one or more platforms and enter the URLs.
- Enable Show in Online Store if you want the social profiles to be displayed in your online store.
- Click Save.
More Actions
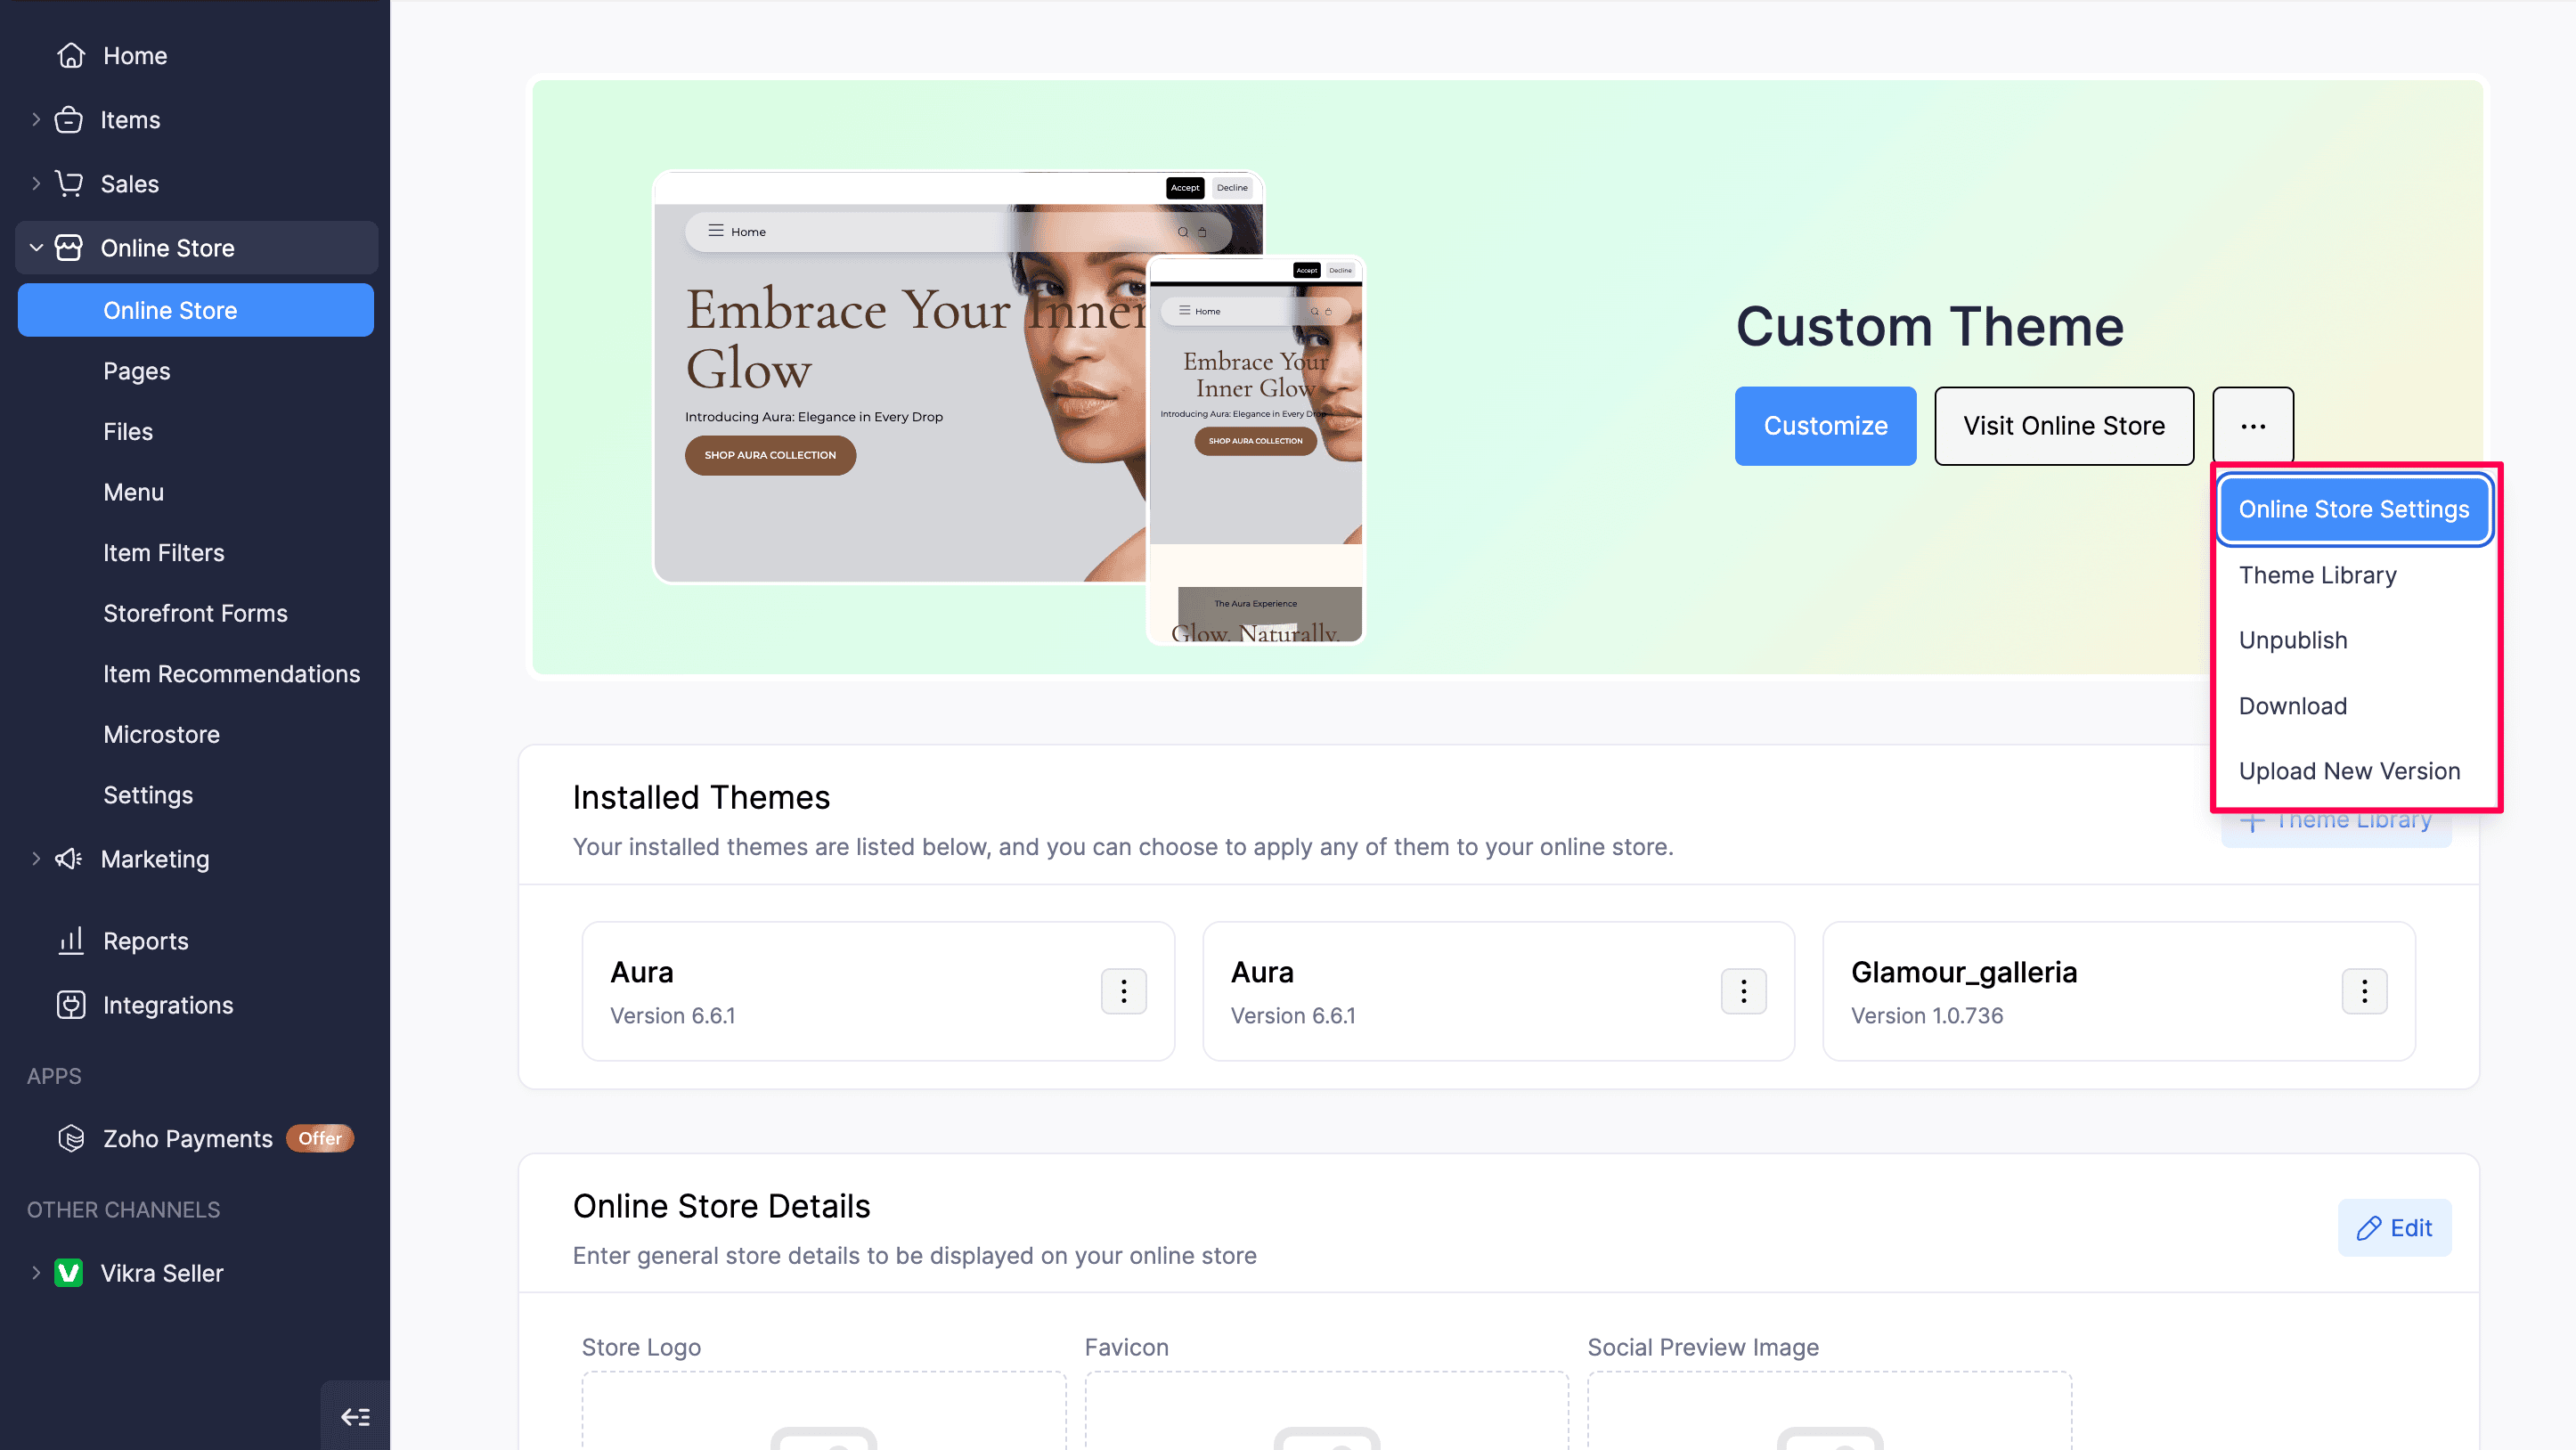
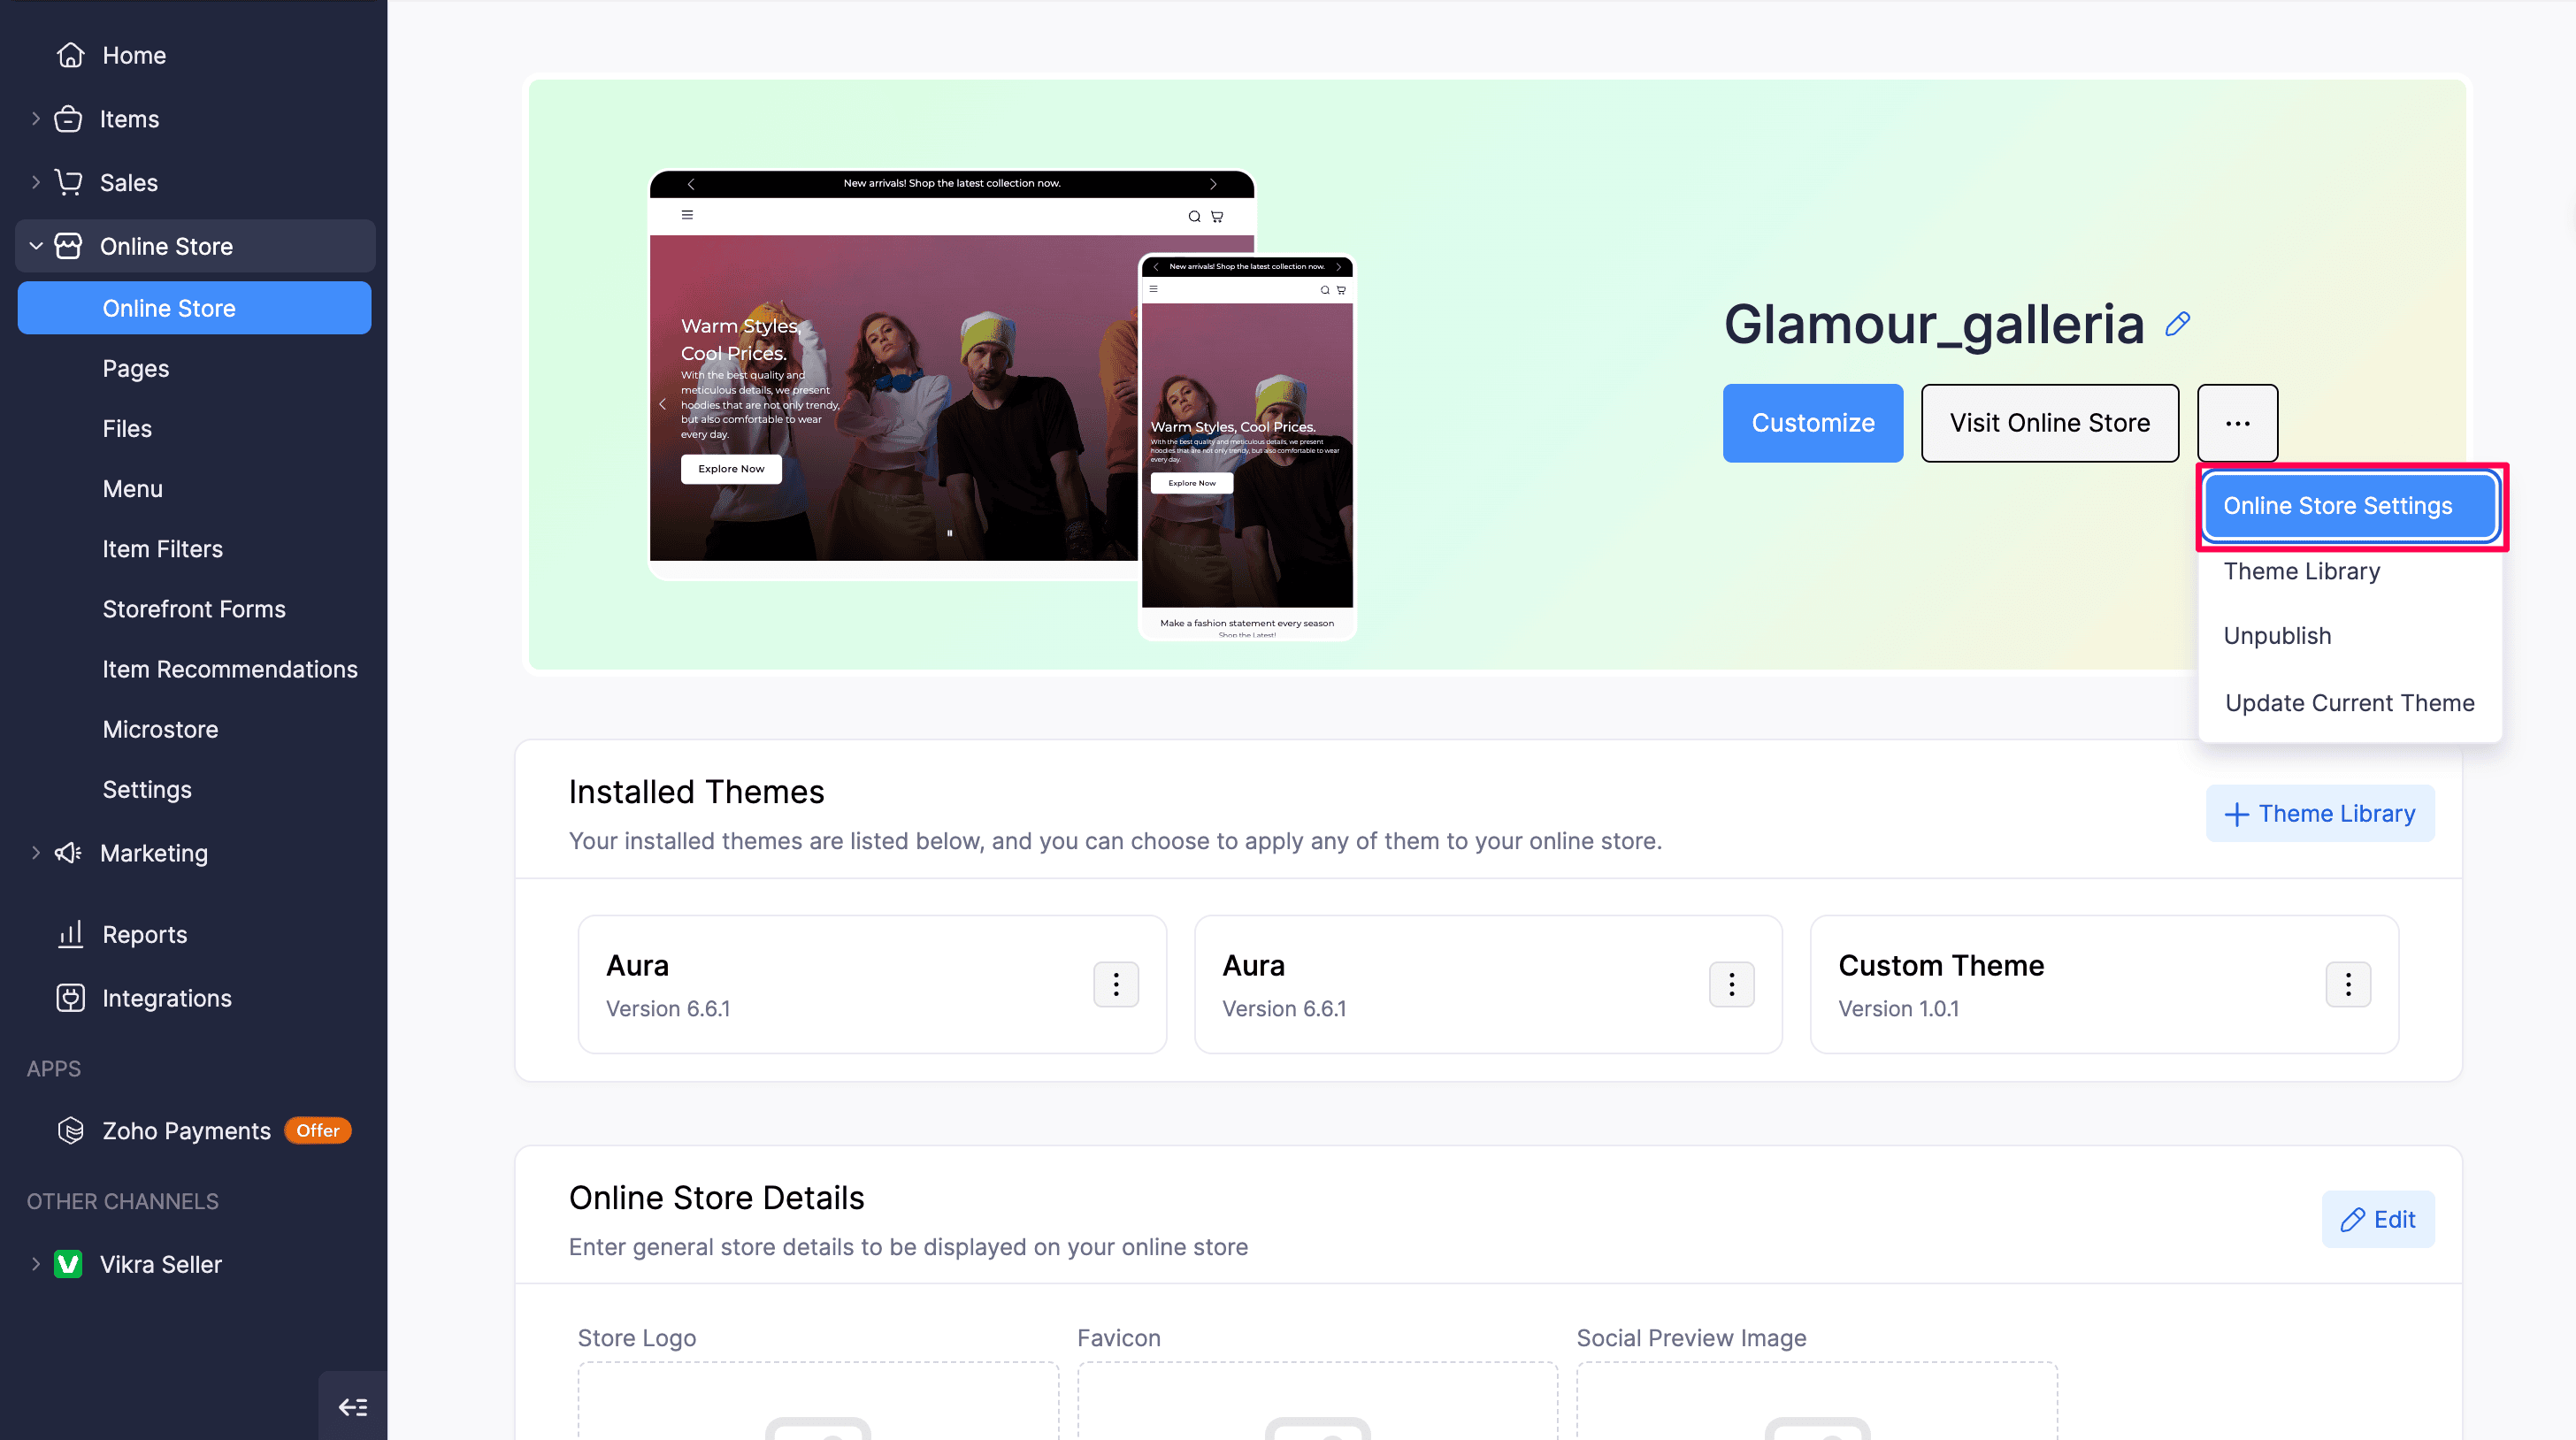
There are several other actions you can perform from the More Options menu next to Visit Online Store. These include:
- Online Store Settings
- Theme Library
- Unpublish Store
- Update Current Theme
Online Store Settings
Selecting Online Store Settings from the More Options menu allows you to configure various aspects of your online store. You will be redirected to the Online Store Settings page, where you can manage settings related to your online store’s functionality, appearance, and user experience. Refer to the Online Store Settings help document for detailed instructions.
Theme Library
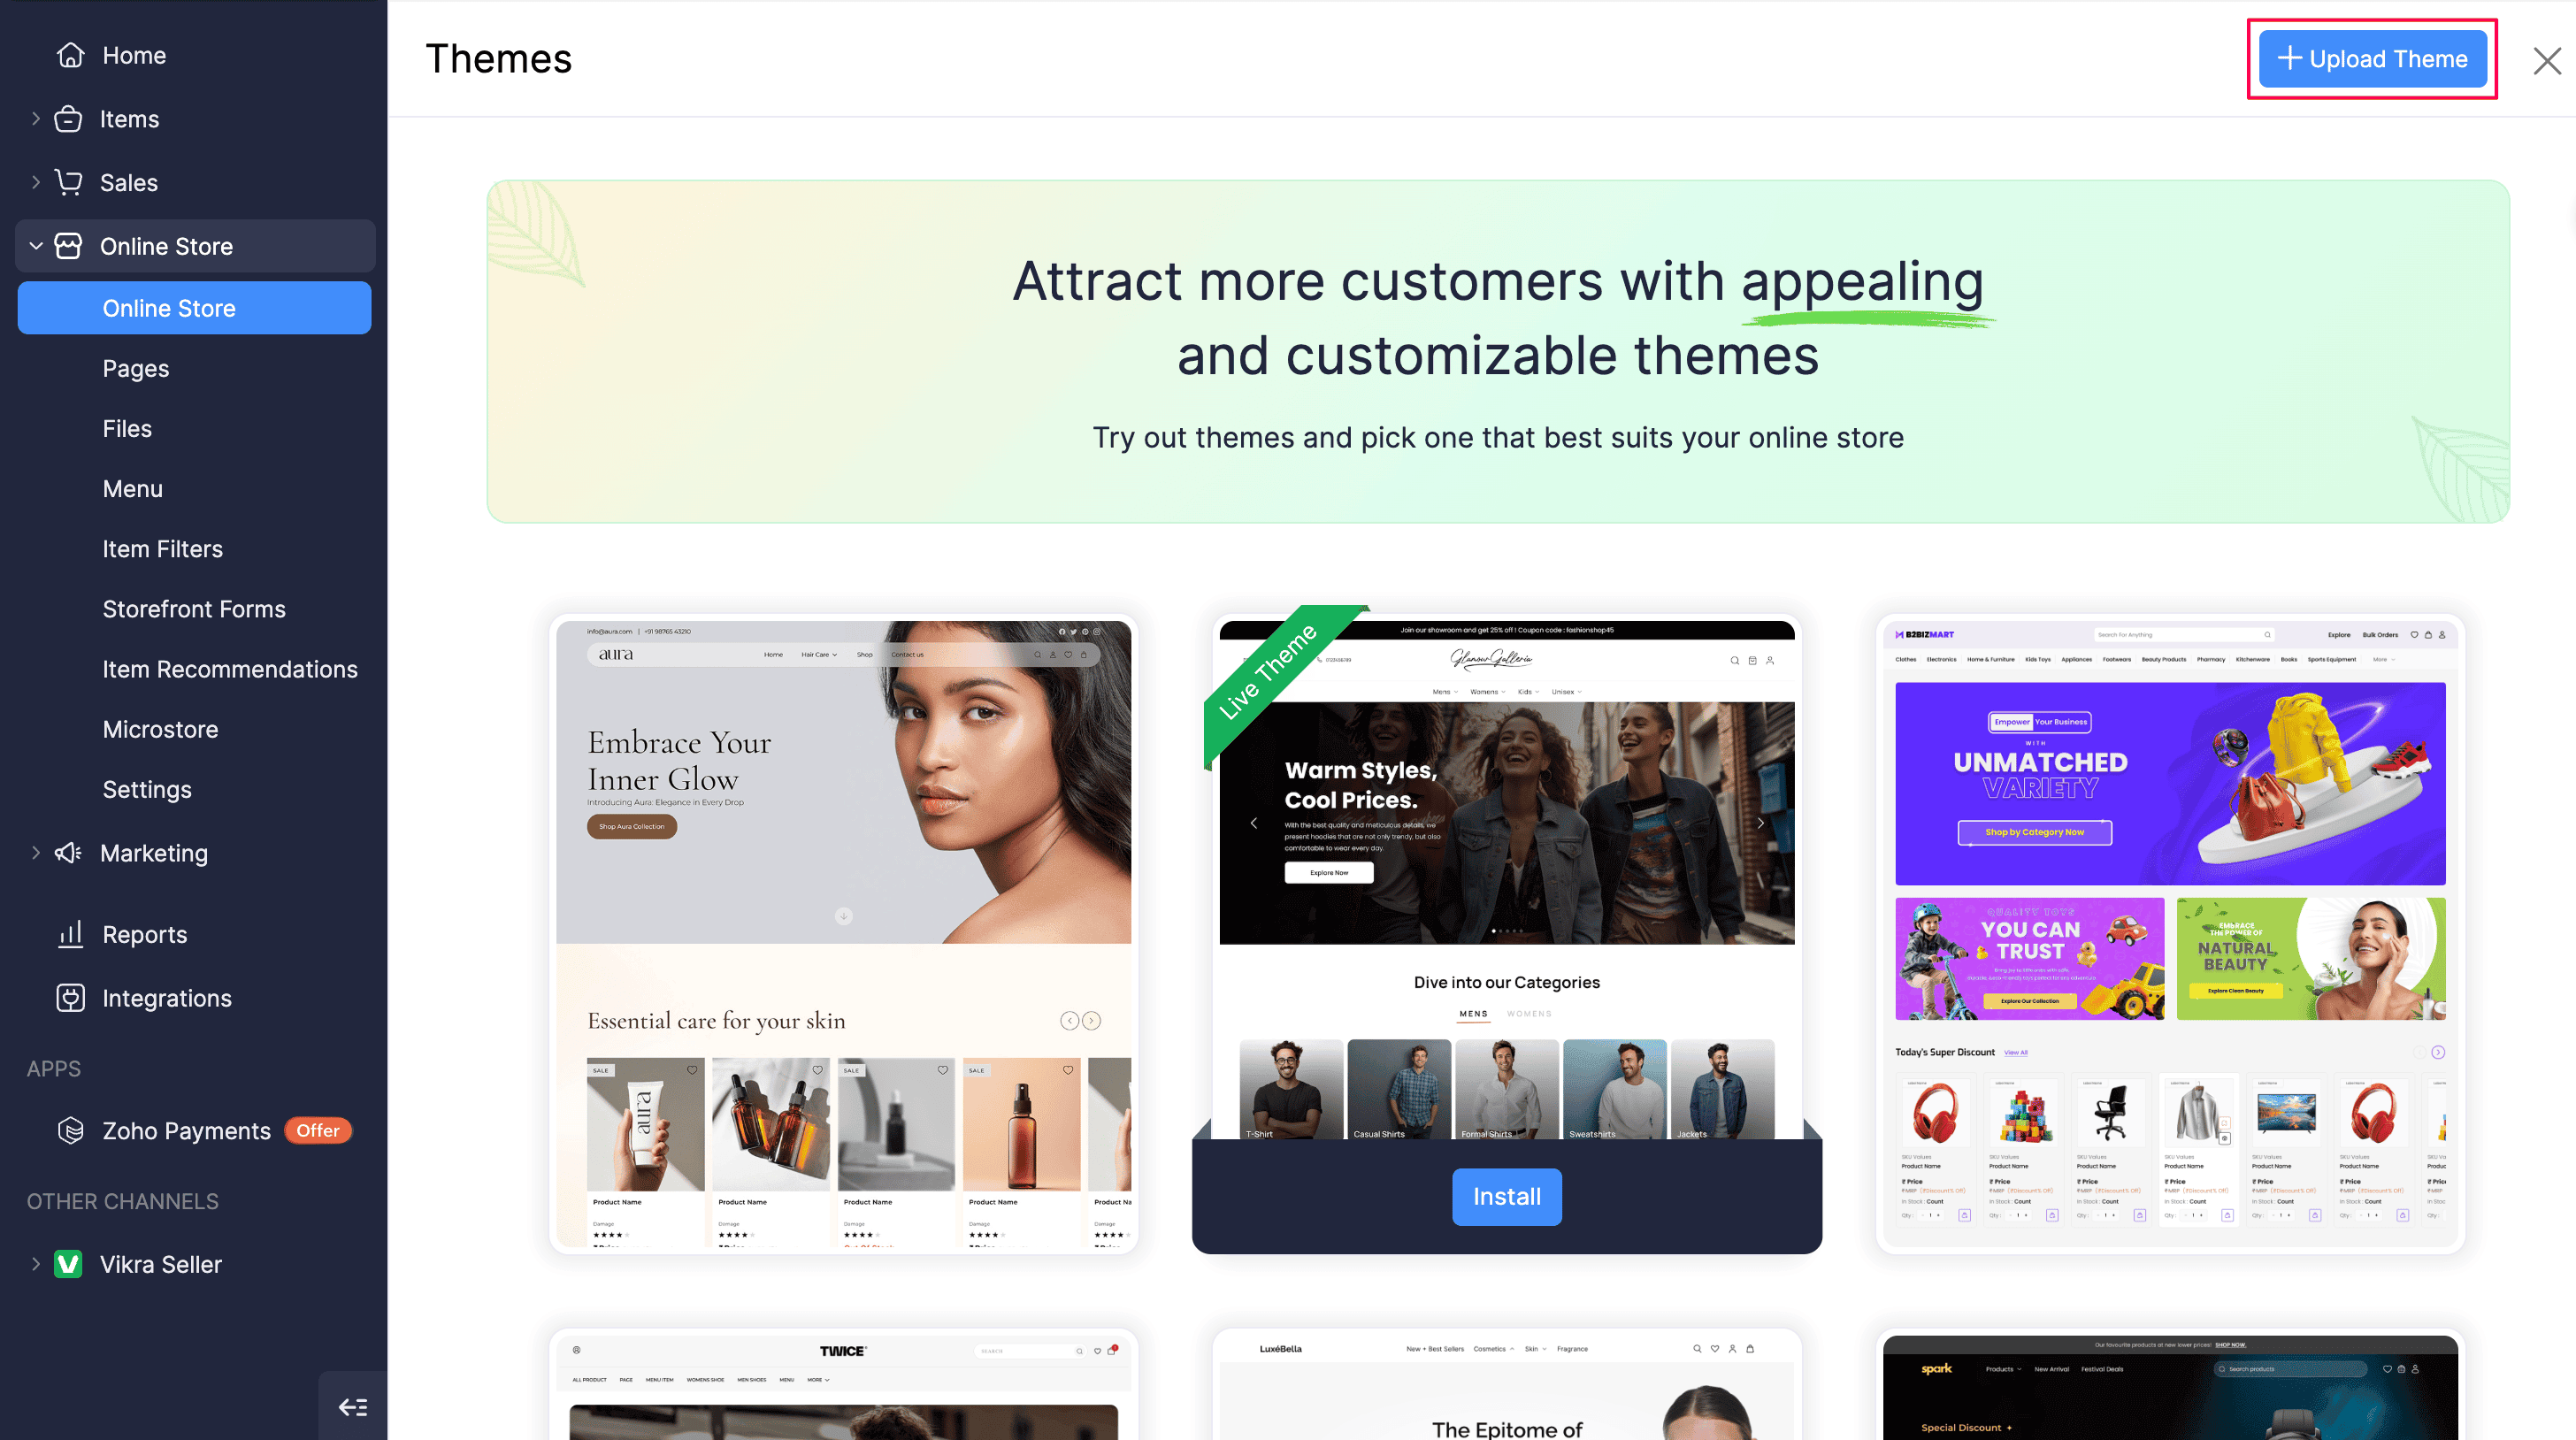
The theme library lists all the online store themes that cater to industries like fashion, beauty, toys, furniture, and many more. You can change your store’s existing theme anytime by trying out any theme from the theme library. You can also upload your own custom theme zip from this page.
Here’s how you can access the theme library:
- Click Online Store on the left sidebar.
- Click More Options next to Visit Online Store.
- Click Theme Library. The available themes will be displayed.
- Hover over the theme you want to use and click Install to start using it as your online store’s theme.
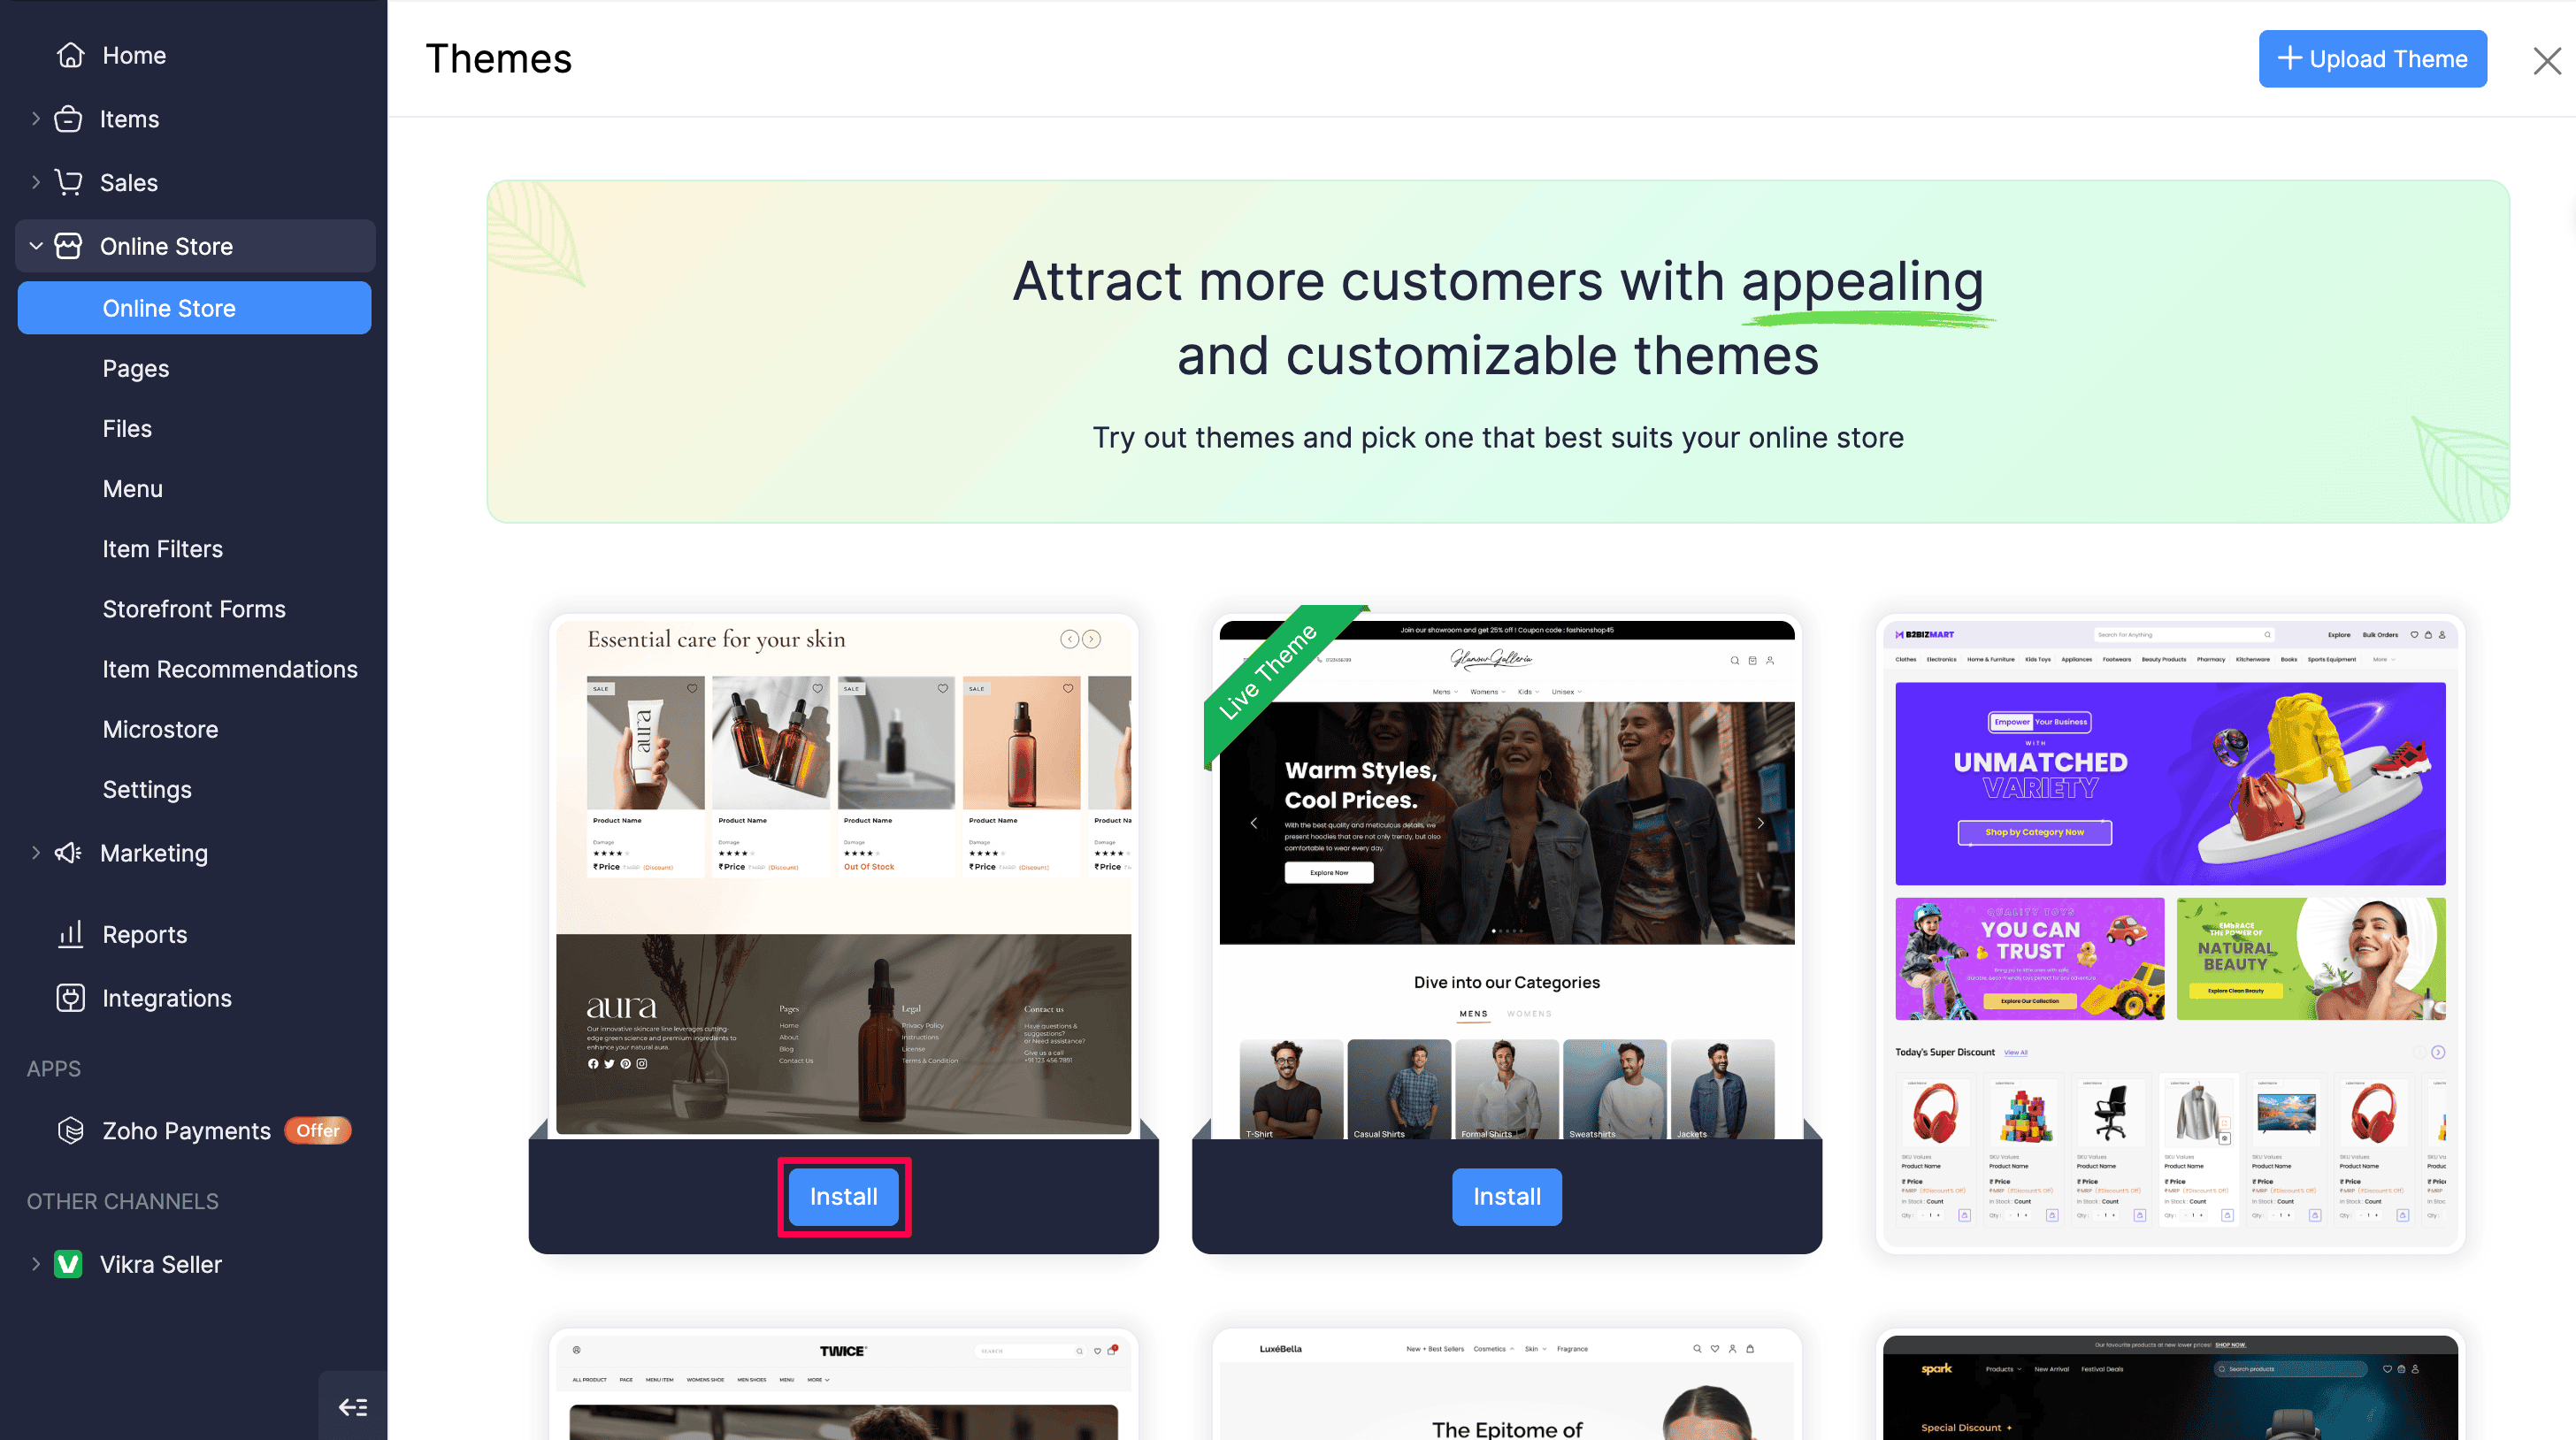
After you install a theme, it appears under Installed Themes on the Online Store page. You can then set it as the live theme or customize it in the theme editor.
Upload a Custom Theme
A custom theme is a theme zip you build yourself (or with a developer) and upload to Zoho Commerce. Unlike themes from the Theme Library, custom themes are managed entirely by you.
To upload a custom theme:
- Click Online Store on the left sidebar.
- Click More Options next to Visit Online Store.
- Select Theme Library.
- Click Upload Theme.
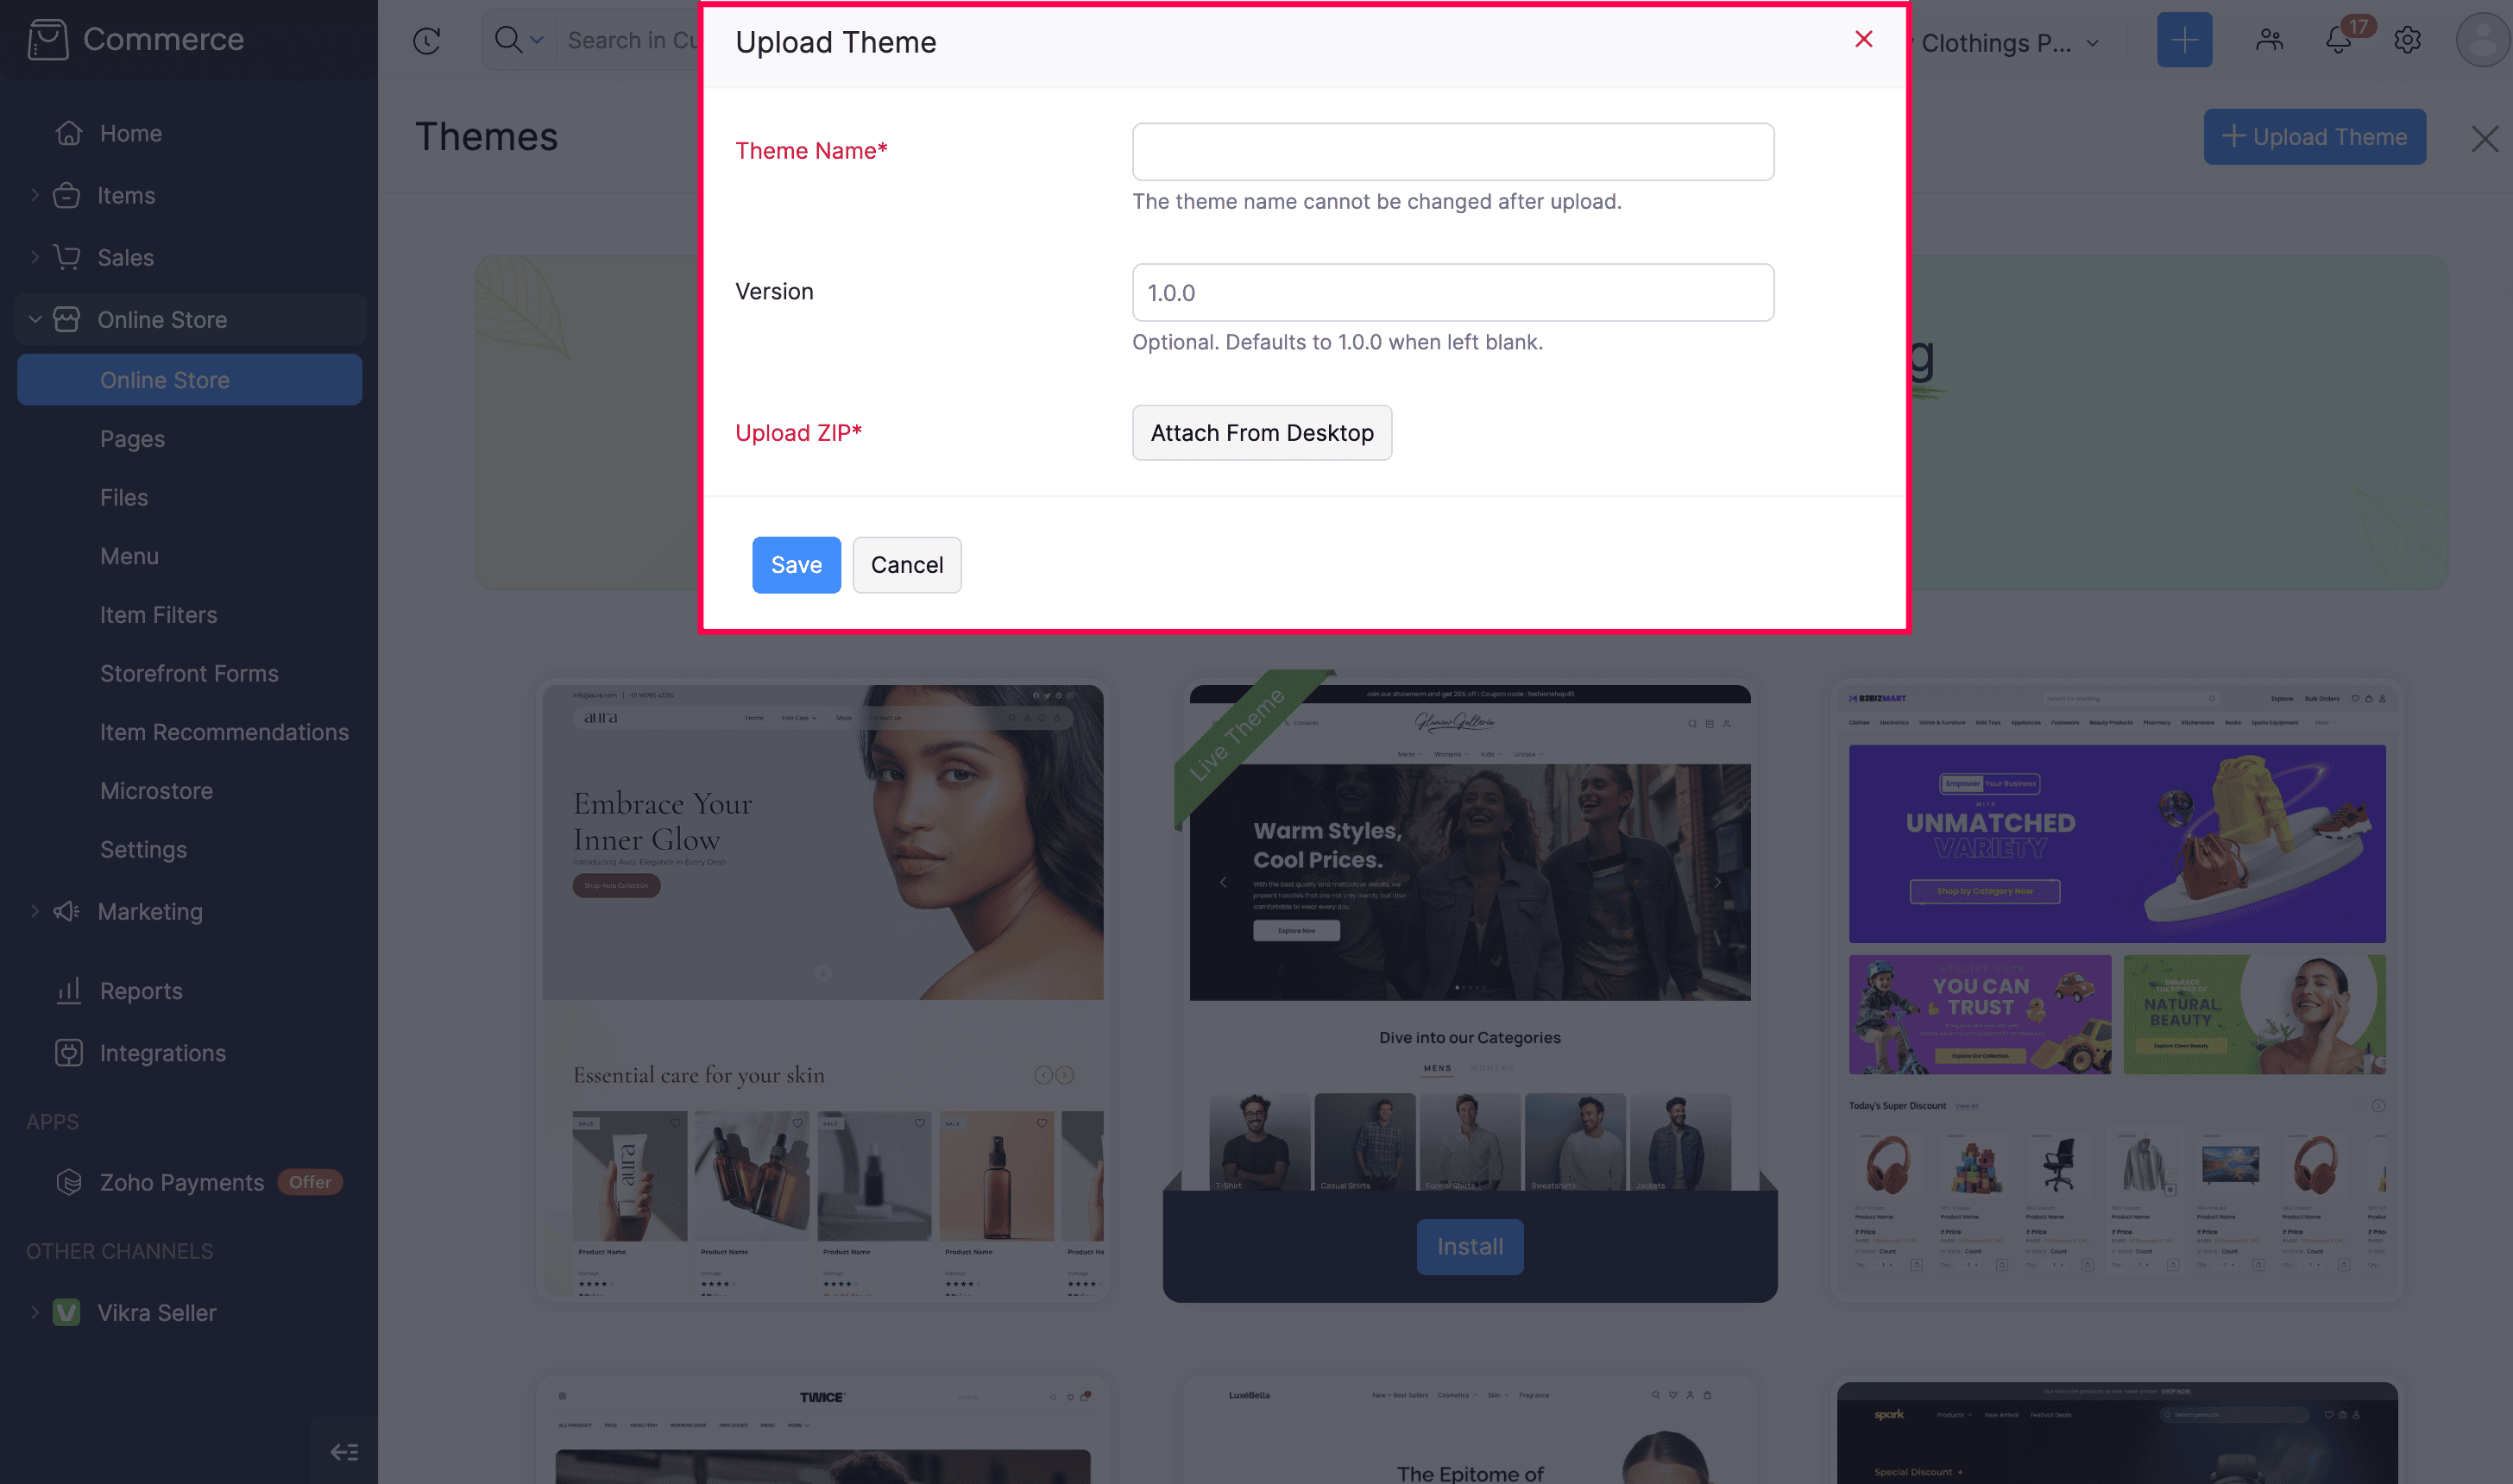
- In the Upload Theme popup, enter the following details:
- Theme Name: Enter a theme name. The theme name cannot be changed after upload.
- Version: Enter a version in a format such as 1.0.0 (major.minor.patch format). This is optional and the default version is 1.0.0.
- Upload Zip: Choose the theme zip file from your desktop or local storage.
- Use Change File to select a different zip file if needed.
- Click Save.
Note: You can install only up to 5 themes. Remove an unused theme before you install another one.
Upload a New Version of a Custom Theme
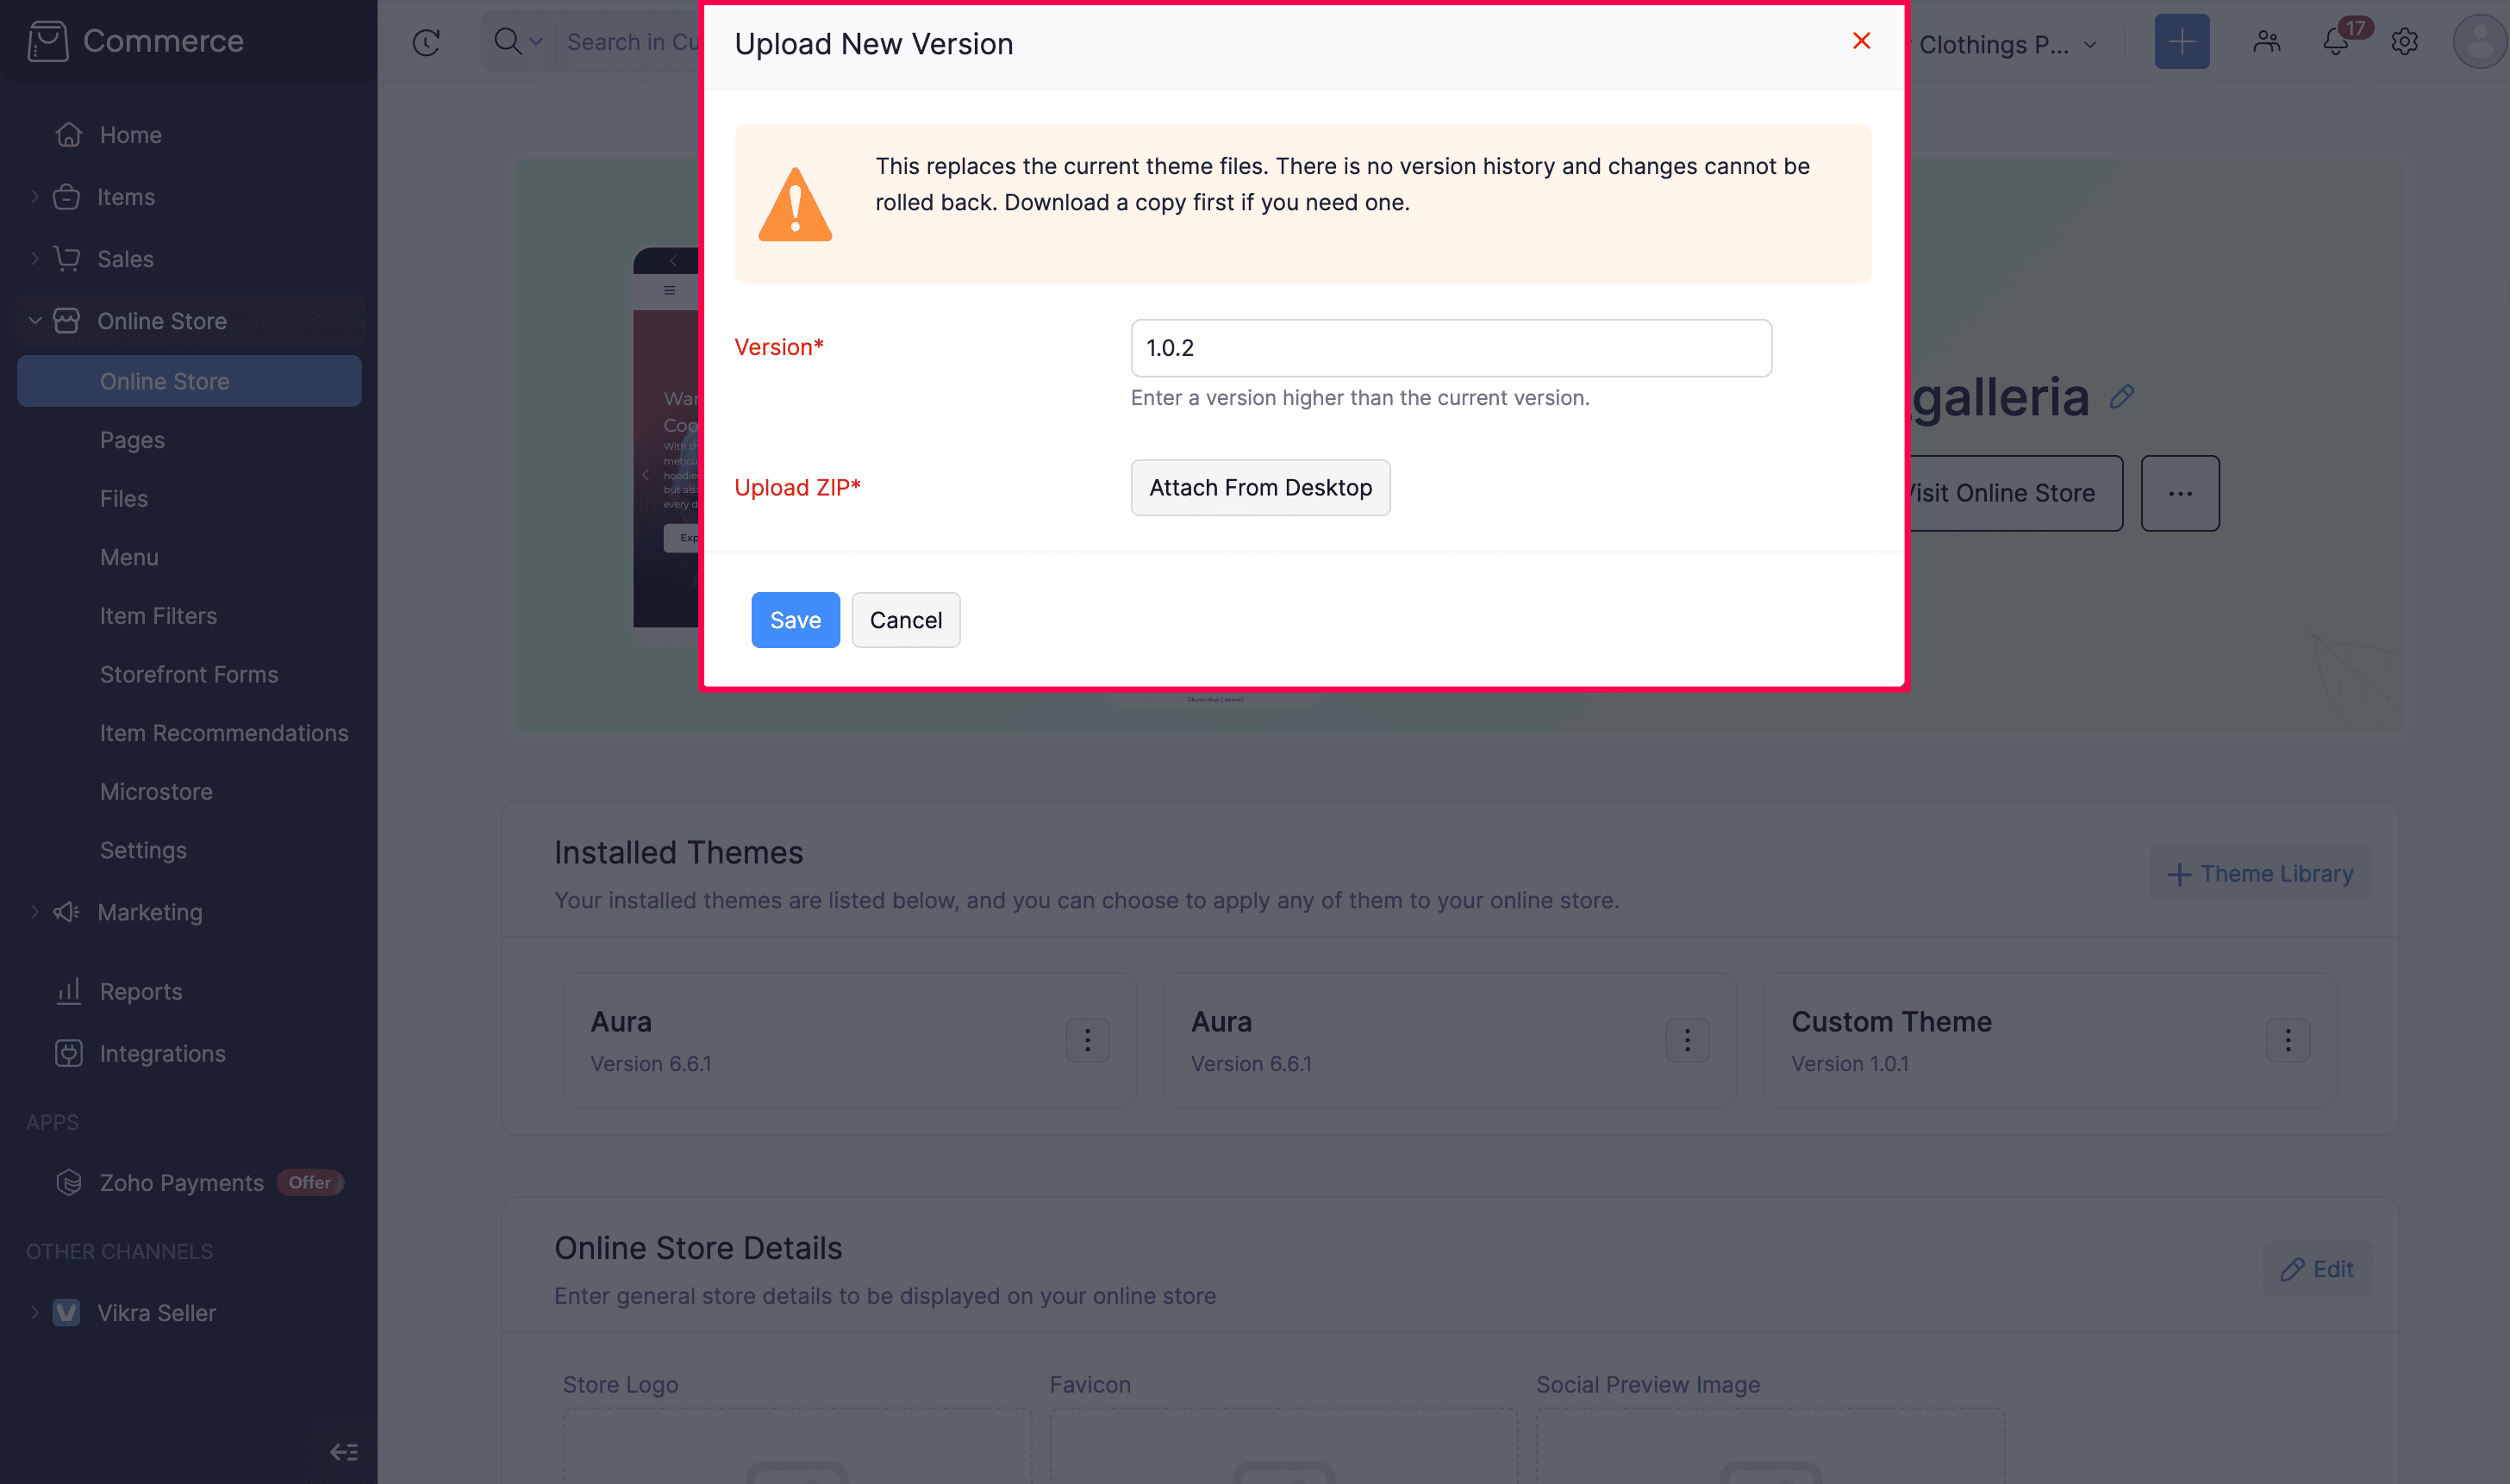
You can upload a newer version of a custom theme after it is installed. Custom themes do not keep prior versions. When you upload a new version, the previous theme zip is replaced and cannot be restored from Zoho Commerce.
This differs from Theme Library themes, where earlier versions are retained by Zoho Commerce and support can help with a rollback if needed.
Warning: Uploading a new version of a custom theme permanently replaces the existing theme files. There is no version history, and the change cannot be rolled back. Always download a copy of the current theme before you upload a new version.
To download the current custom theme:
- Click Online Store on the left sidebar.
- Under Installed Themes, click More Options next to the custom theme.
- Click Download.
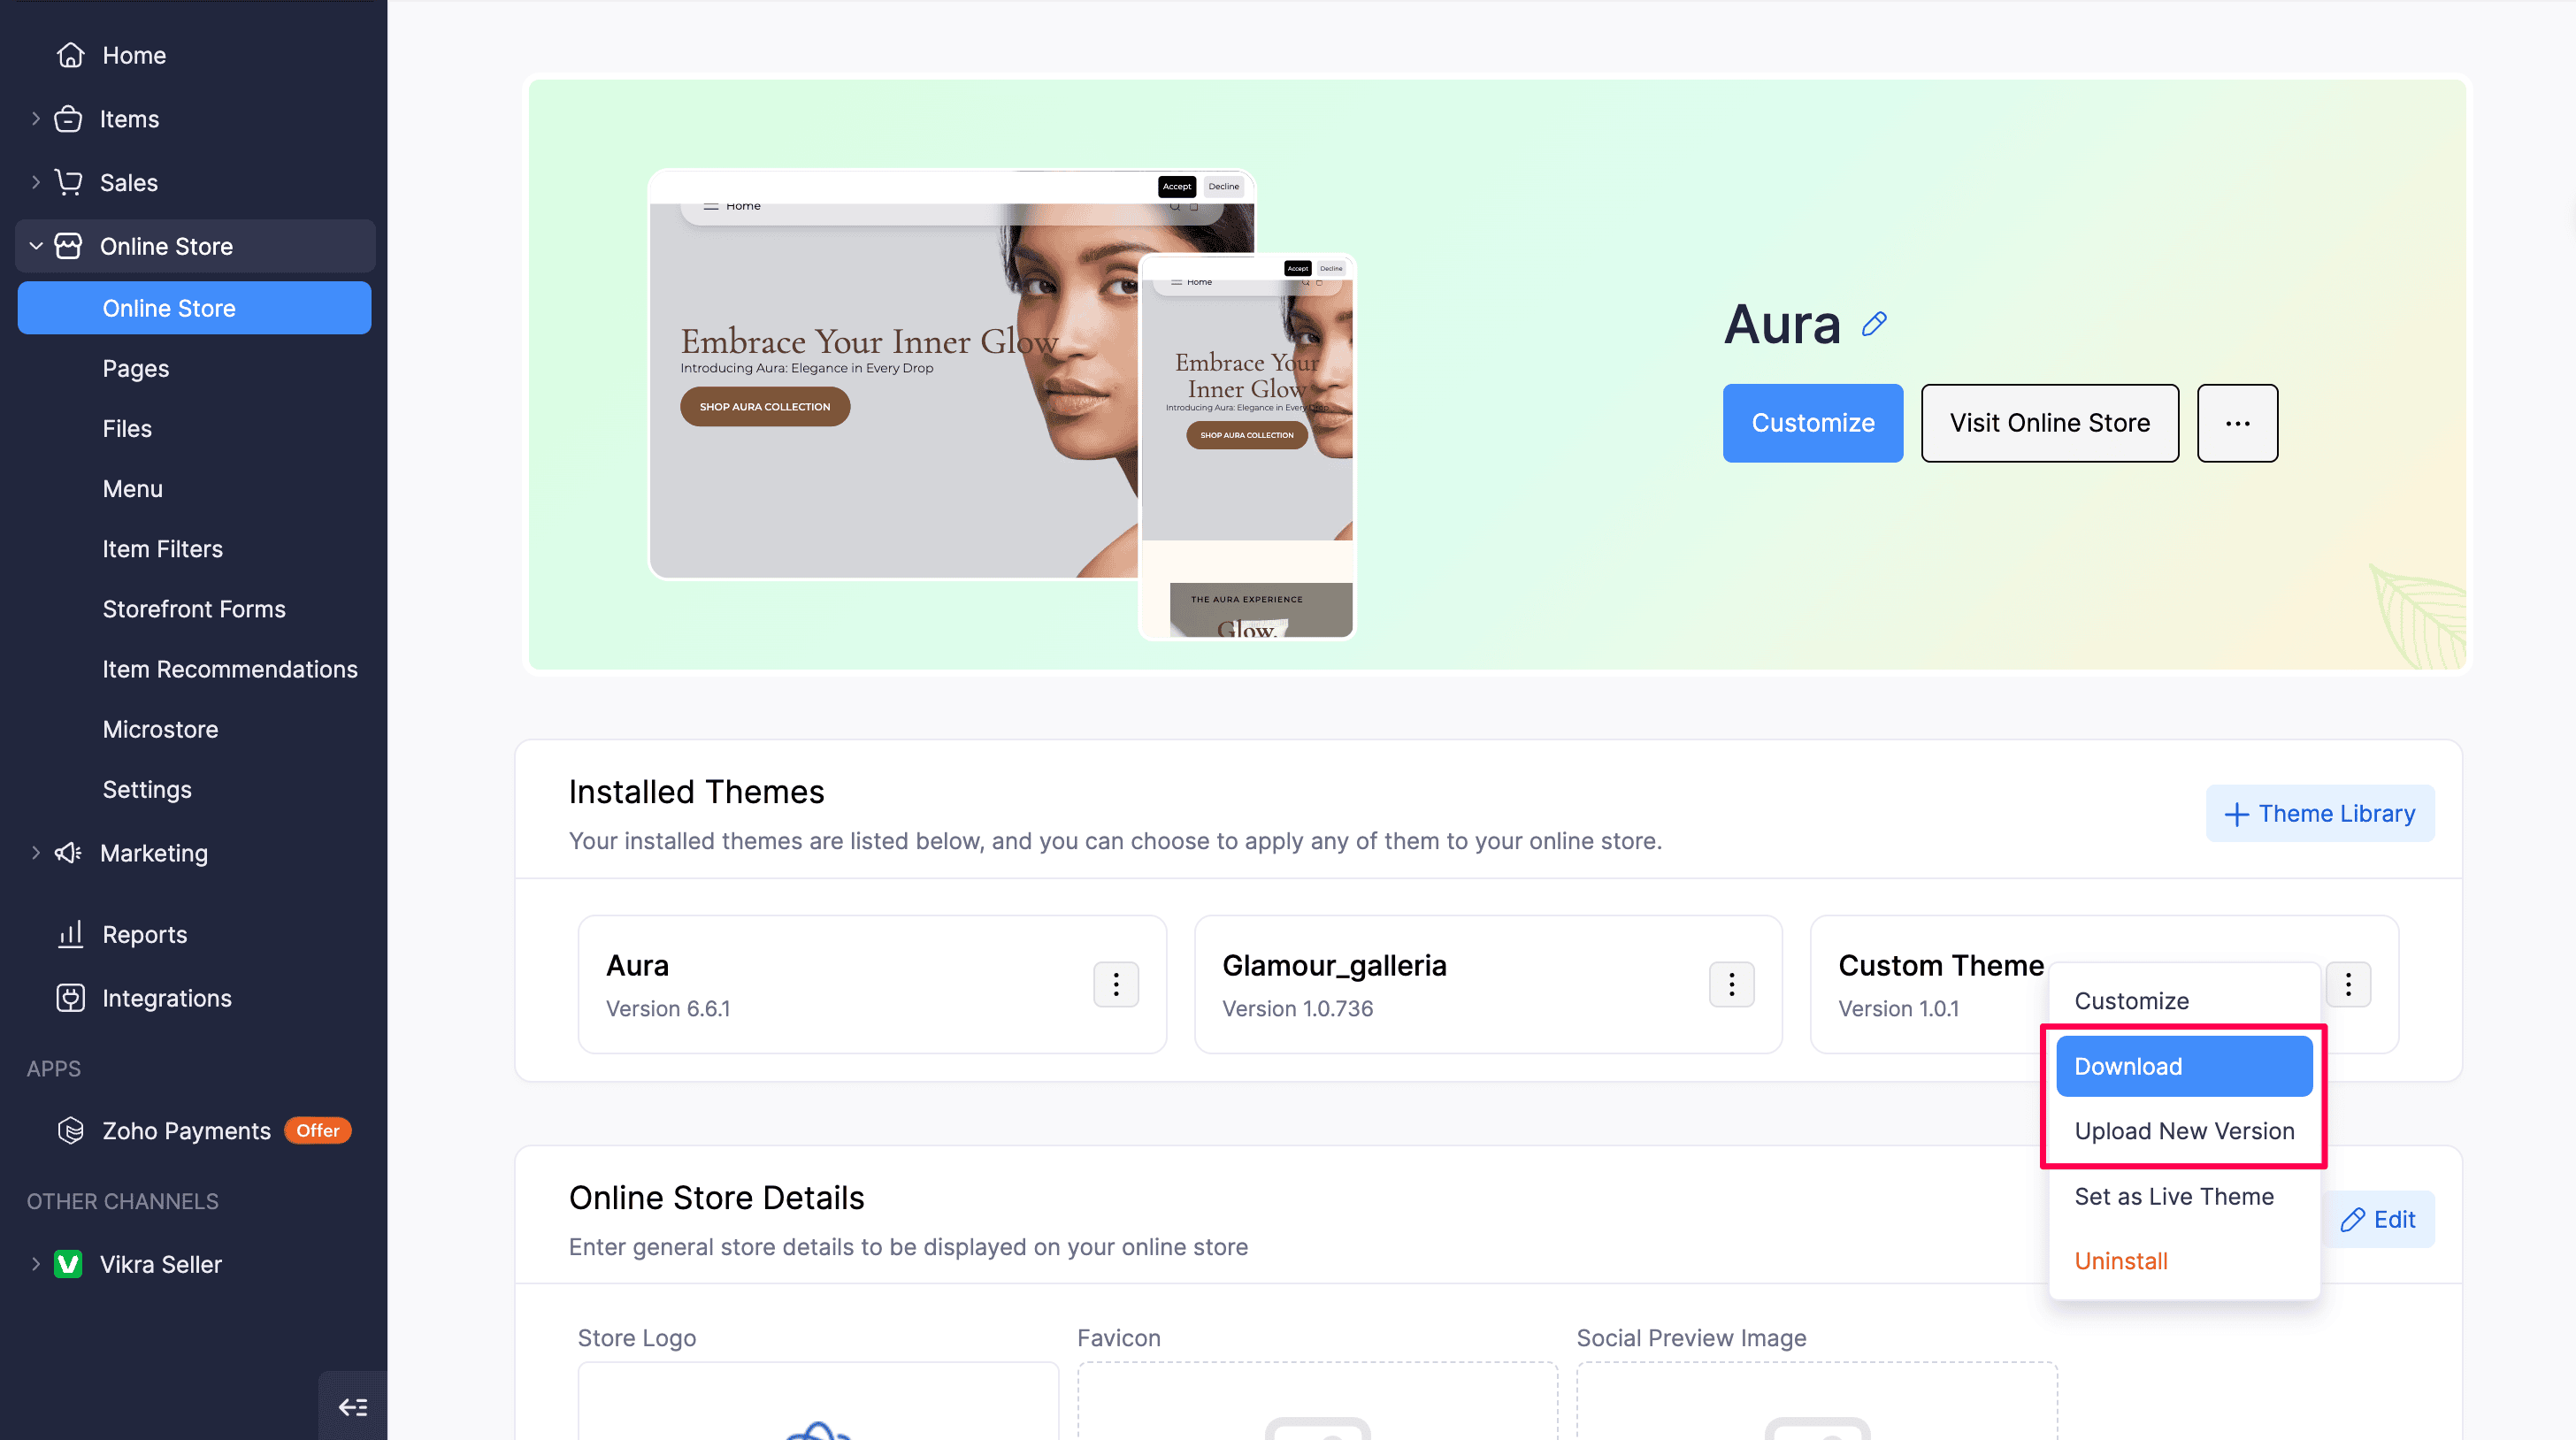
If the custom theme is live, you can also click More Options next to Visit Online Store and select Download.
Pro Tip: Keep a local backup of every custom theme zip you upload. Download from admin is the only way to recover the previous custom theme files before you replace them.
To upload a new version:
- Click Online Store on the left sidebar.
- Under Installed Themes, click More Options next to the custom theme.
- Click Upload New Version.
If the custom theme is live, you can also click More Options next to Visit Online Store and select Upload New Version.
- In the Upload New Version popup, enter a version higher than the current version (major.minor.patch format).
- Choose the new theme zip file.
- Click Save.
Unpublish
You can unpublish your online store temporarily if you wish to. Here’s how:
- Click Online Store on the left sidebar.
- Click More Options next to Visit Online Store.
- Select Unpublish and in the pop-up that follows, click Unpublish.
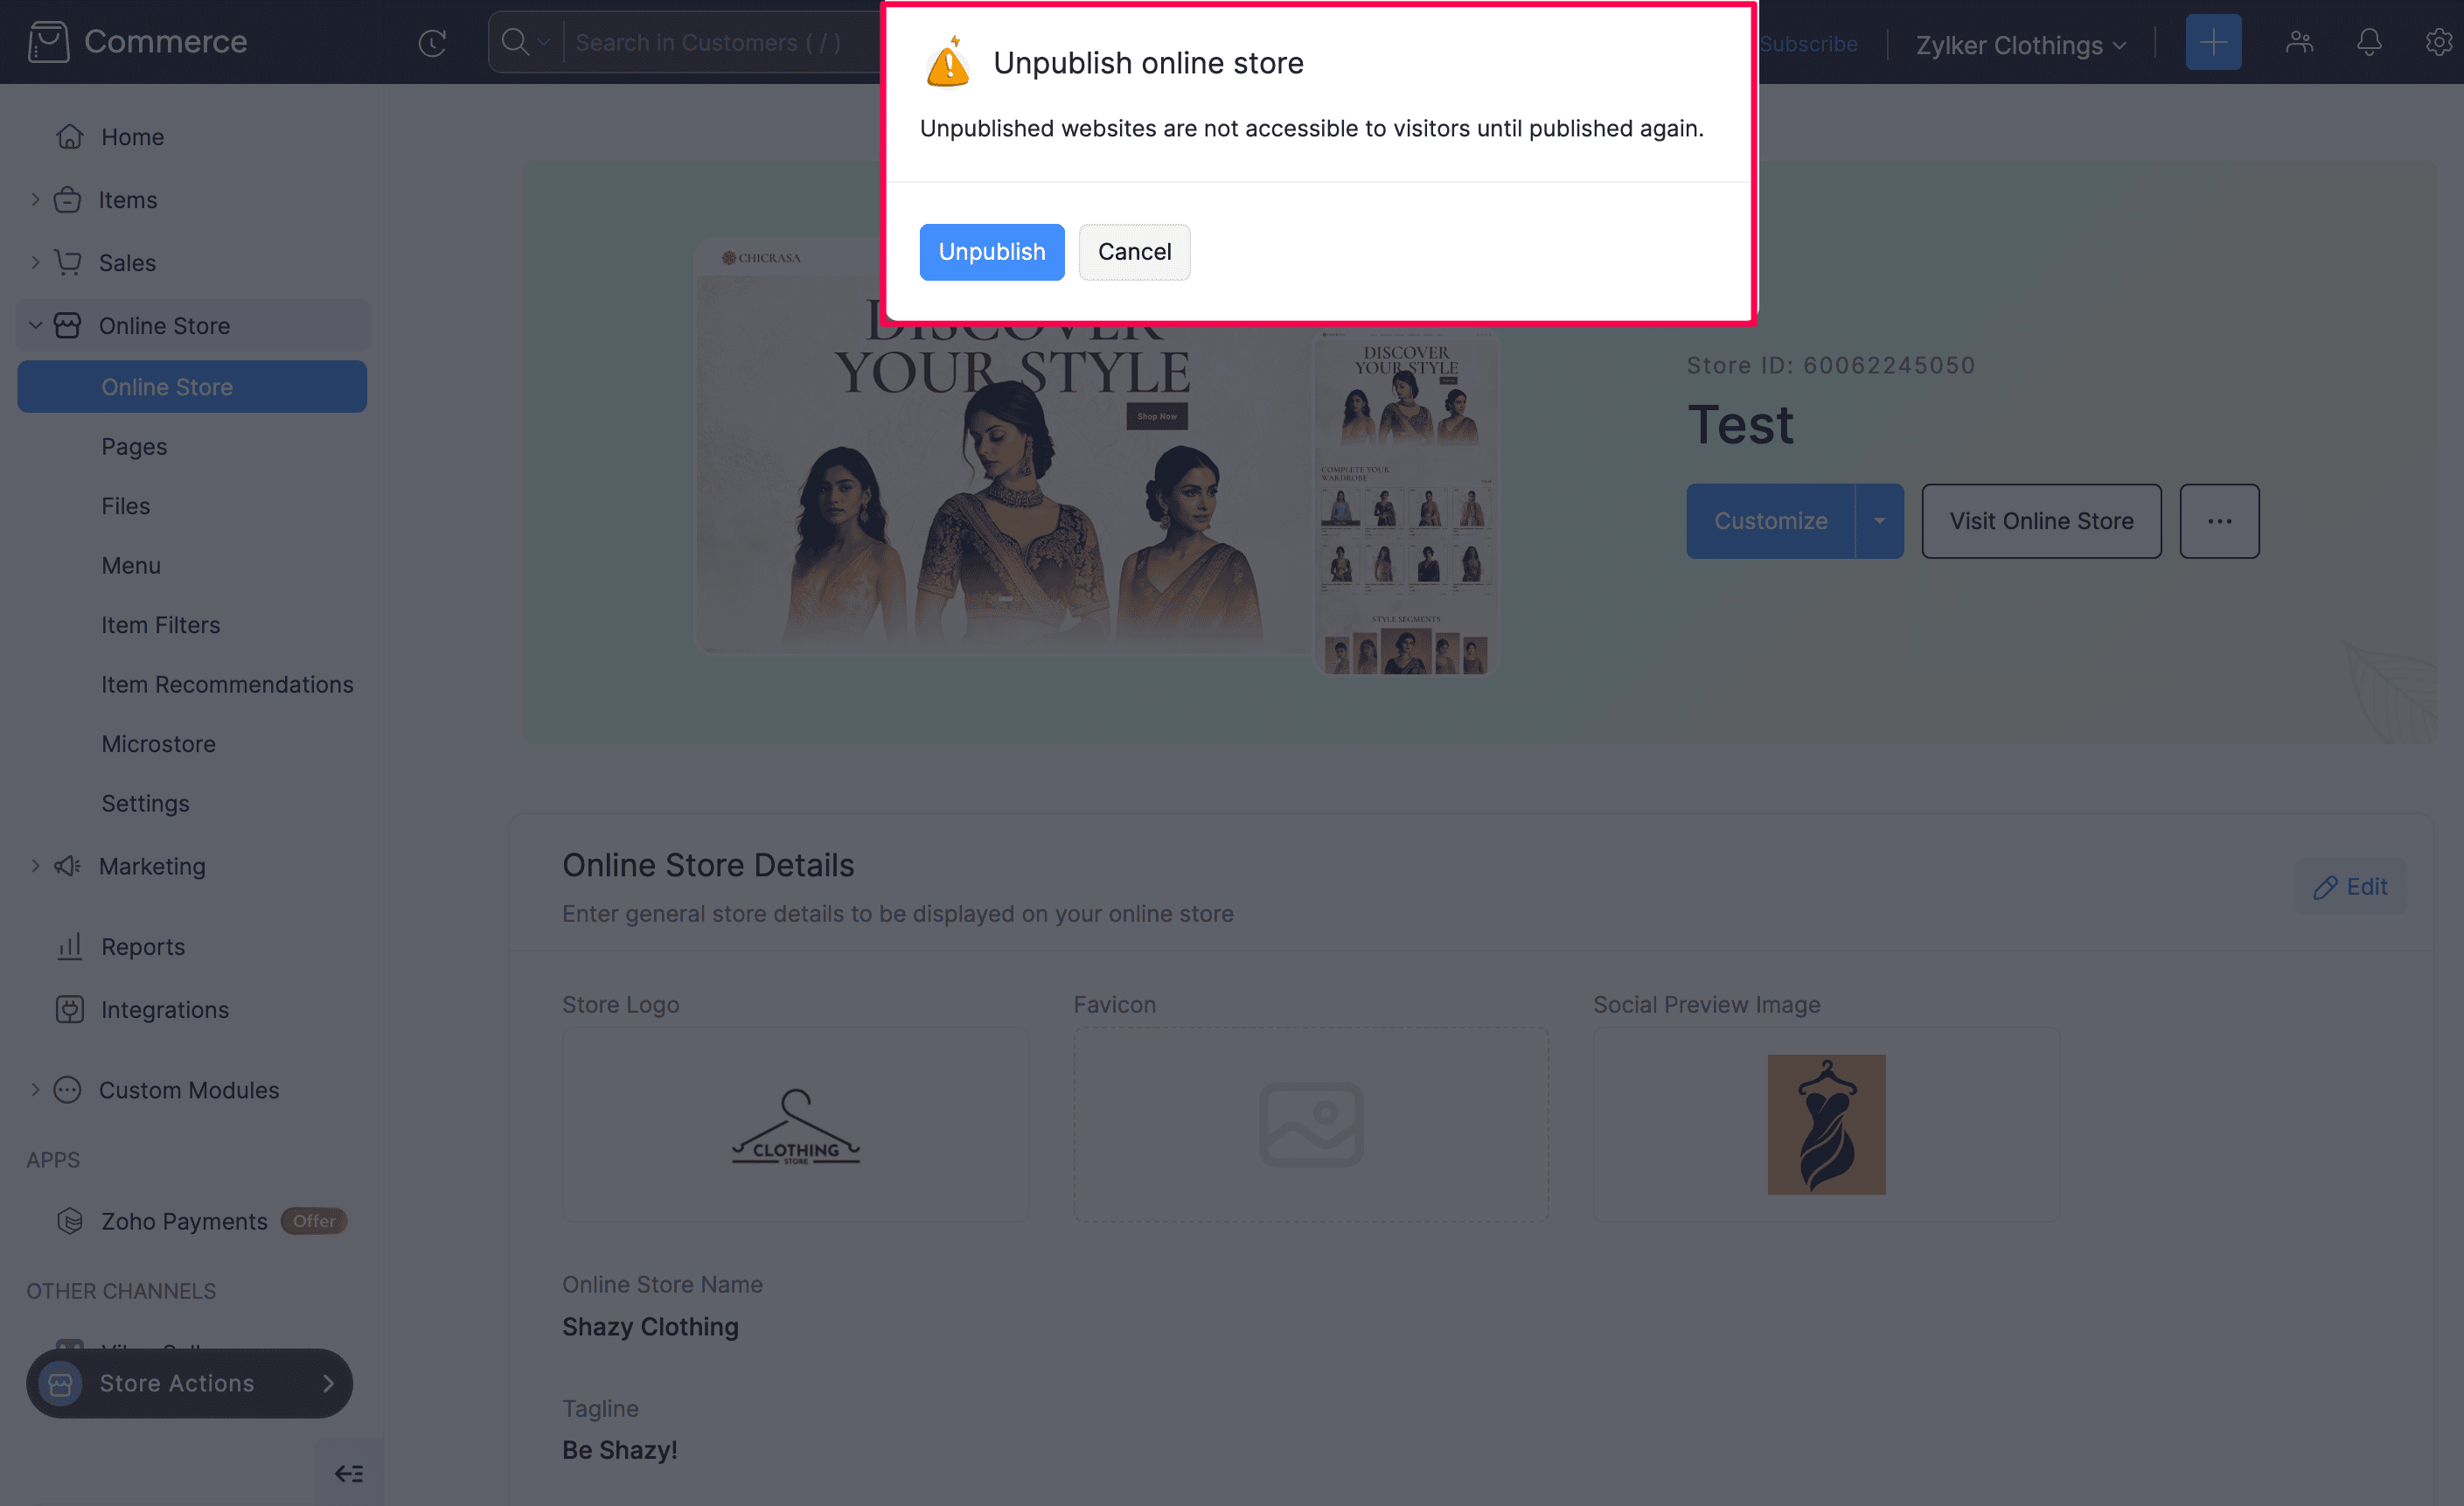
Unpublished stores will not be accessible to anyone until you publish again.
Update Current Theme
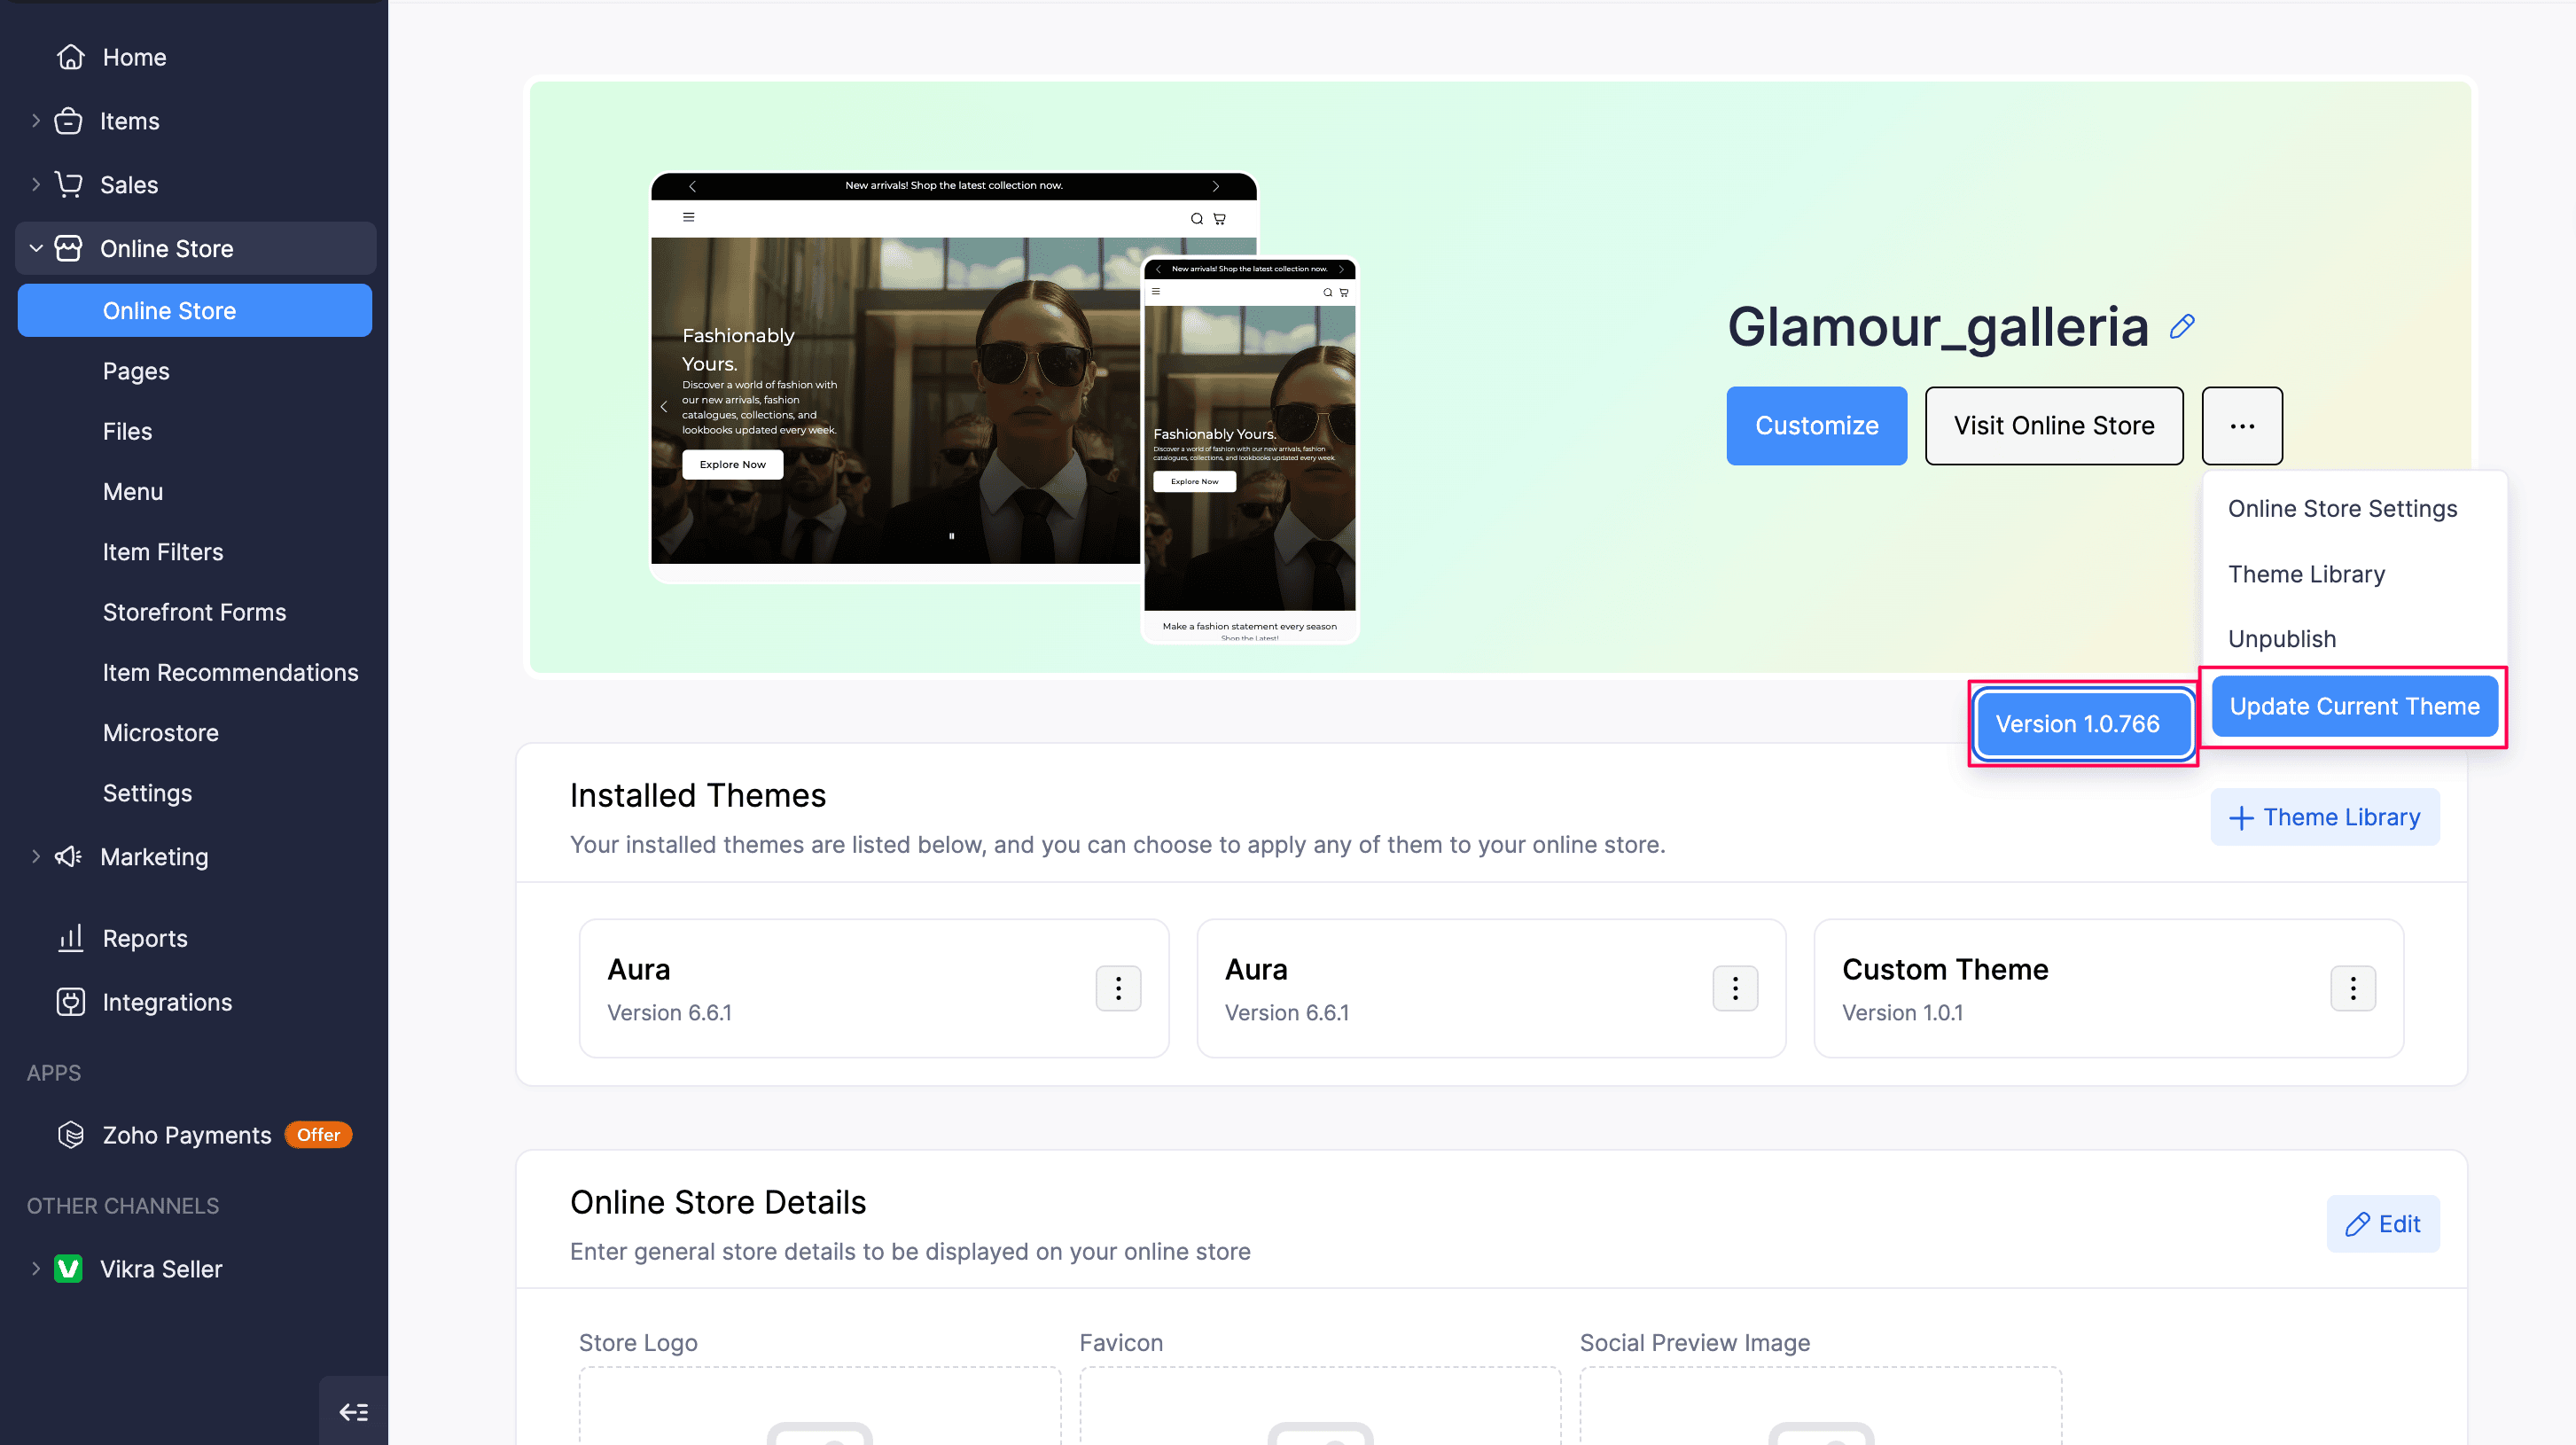
When a new version of a theme you installed from the Theme Library is available, Update Current Theme appears under More Options on the Online Store page. Theme updates are either minor or major. For instance, a minor update may be from version 1.0.0 to 1.1.0, while a major update may be from version 1.2.0 to 2.0.0. The version update depends on your edits and the changes made in the theme editor.
To update your live theme:
- Click Online Store on the left sidebar.
- Click More Options next to Visit Online Store.
- Select Update Current Theme. The versions of the theme available for update are displayed.
- Select the version you want to install.
Minor Updates
The minor update increases the minor version number (for example, 1.0.0 to 1.1.0). Minor updates include non-breaking changes, so you can choose to retain your current edits.
When you select a minor version, the Install template popup appears with two options:
| Option | What happens |
|---|---|
| Retain all pages | Your page content and edits are kept. Only the updated theme styles and files are applied. |
| Start afresh with new template | Your pages and theme styles are reset to the new version defaults. All previous edits are removed. |
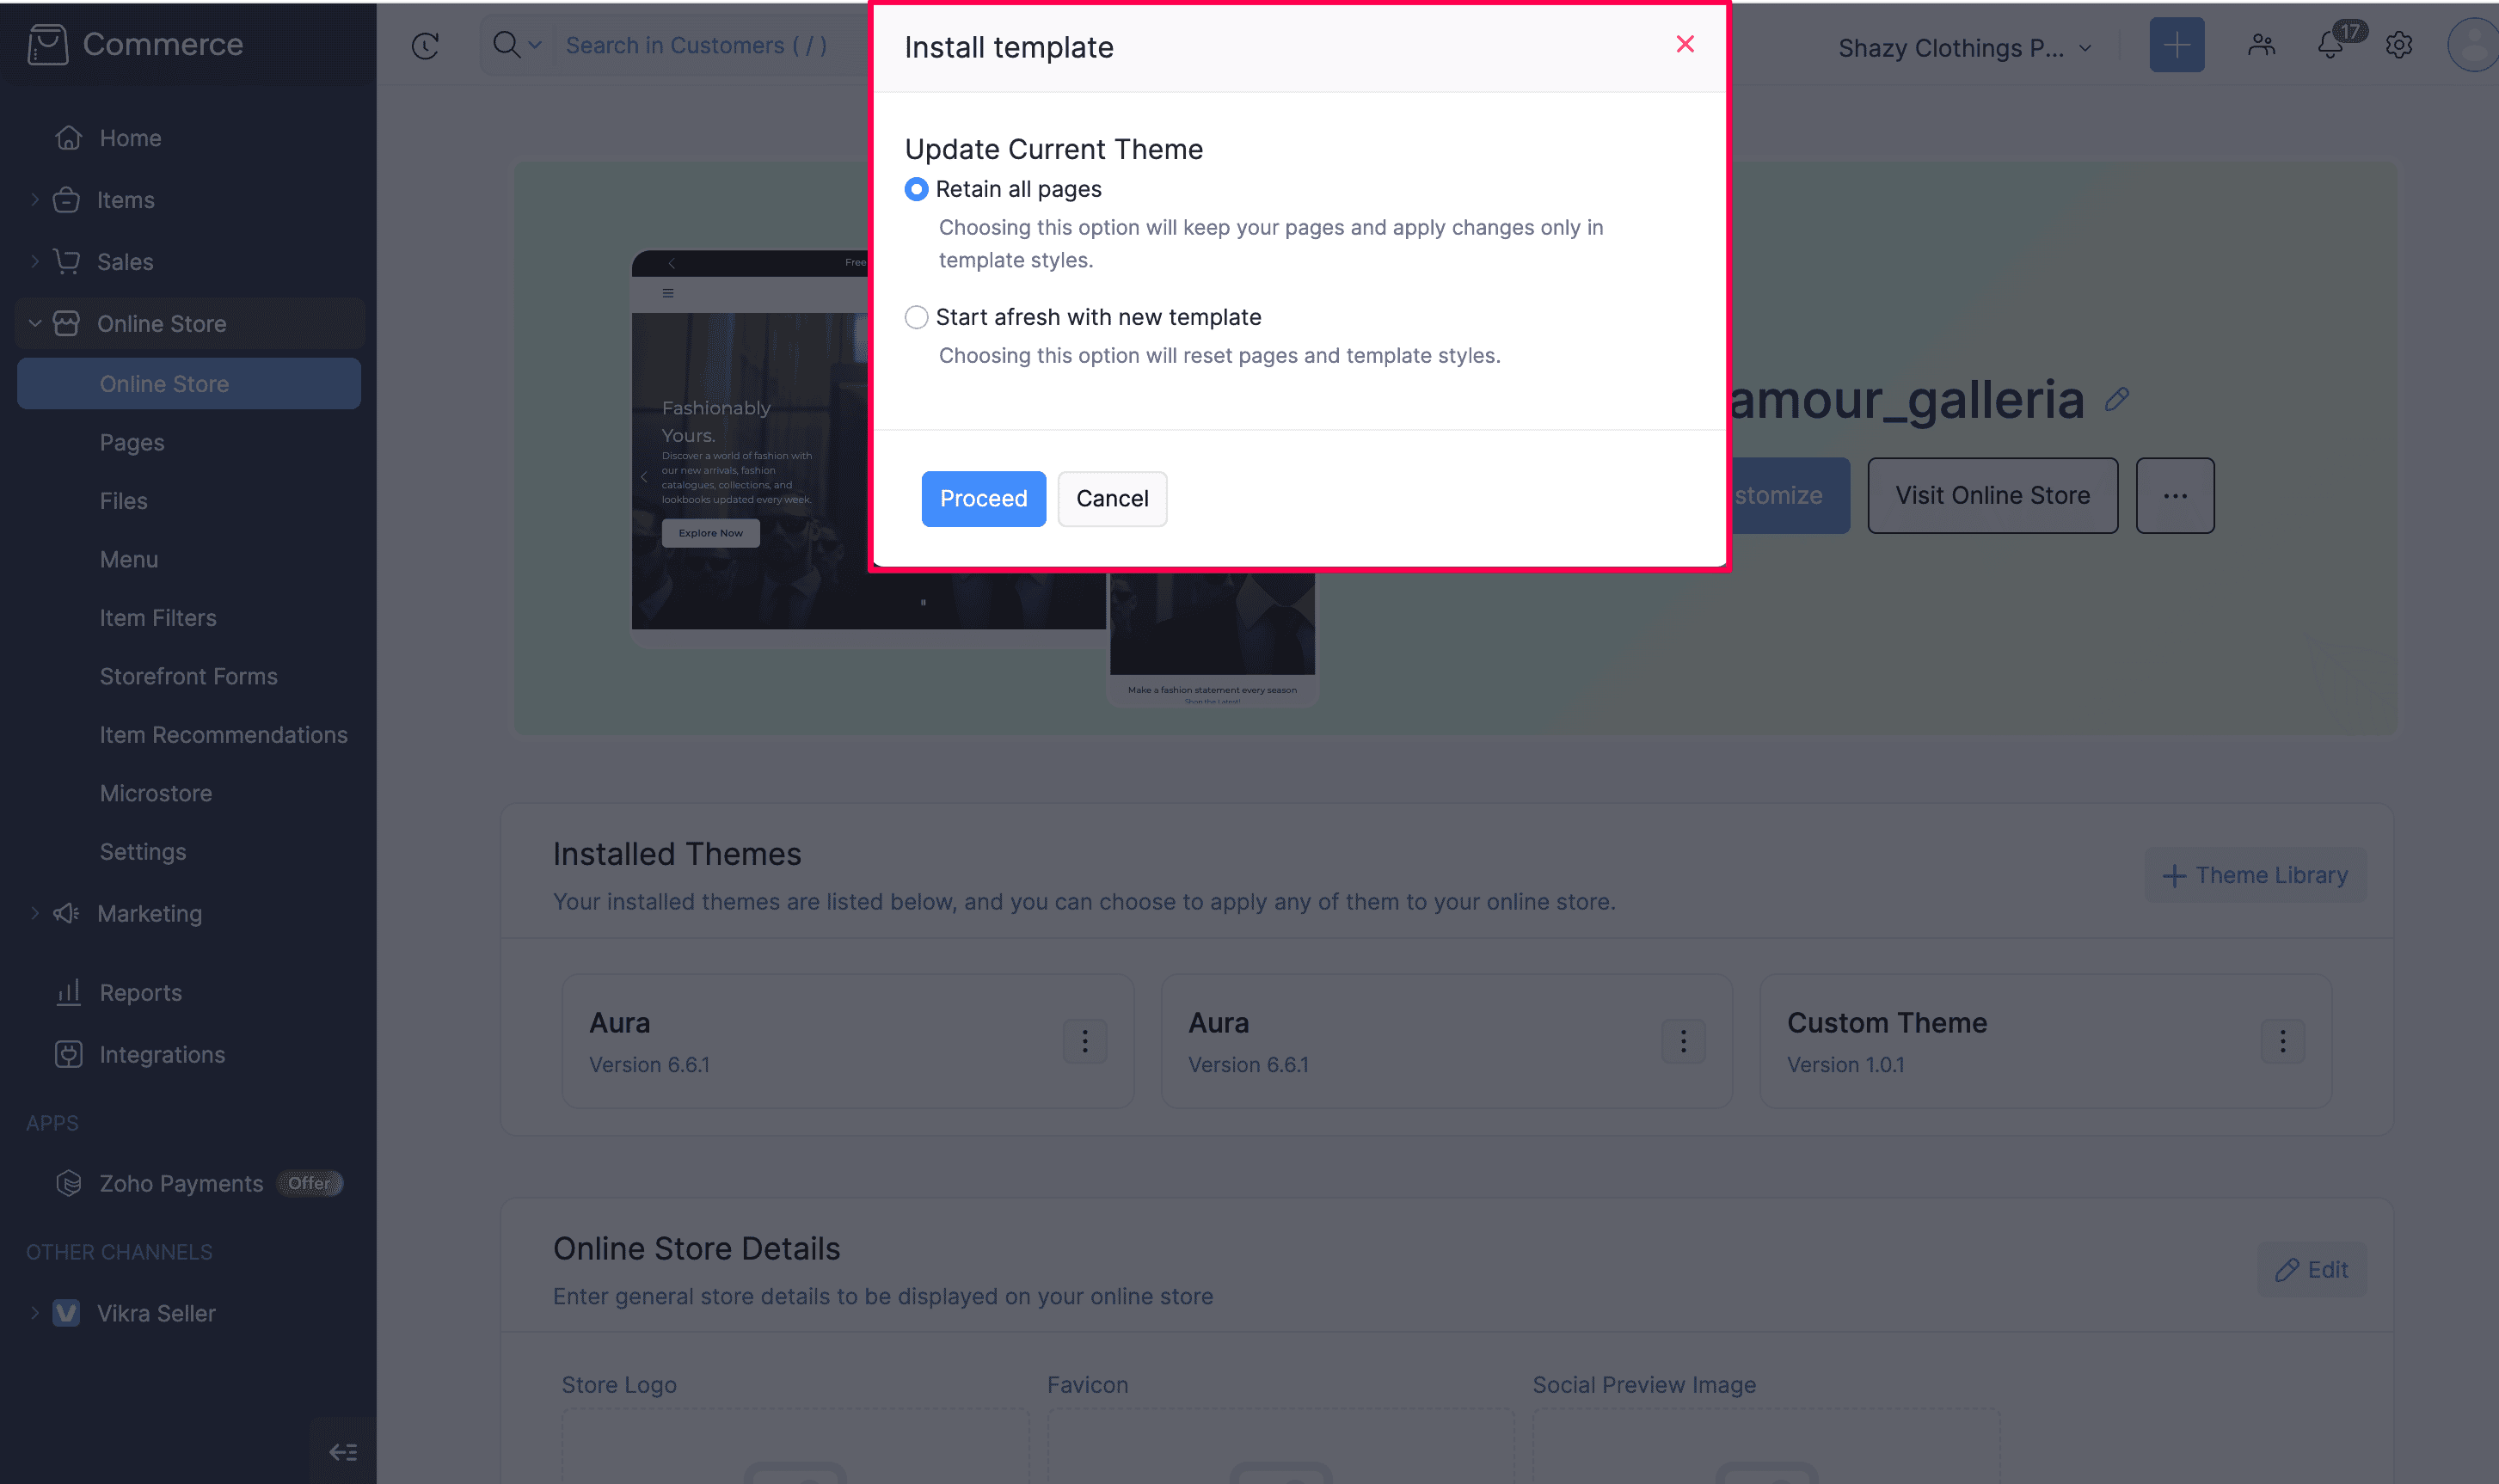
- Choose Retain all pages or Start afresh with new template.
- Click Proceed to install the update, or Cancel to close the popup without updating.
Insight: Choose Retain all pages when you want to keep your customizations. Choose Start afresh with new template only when you are ready to rebuild the online store from the new theme defaults.
Major Updates
A major update increases the major version number (for example, 1.2.0 to 2.0.0). Major updates include breaking changes, so you cannot retain your current edits.
When you select a major version:
- The update popup does not offer a retain option.
- Installing the version resets your pages and theme styles.
- The new theme version is installed with the default layout.
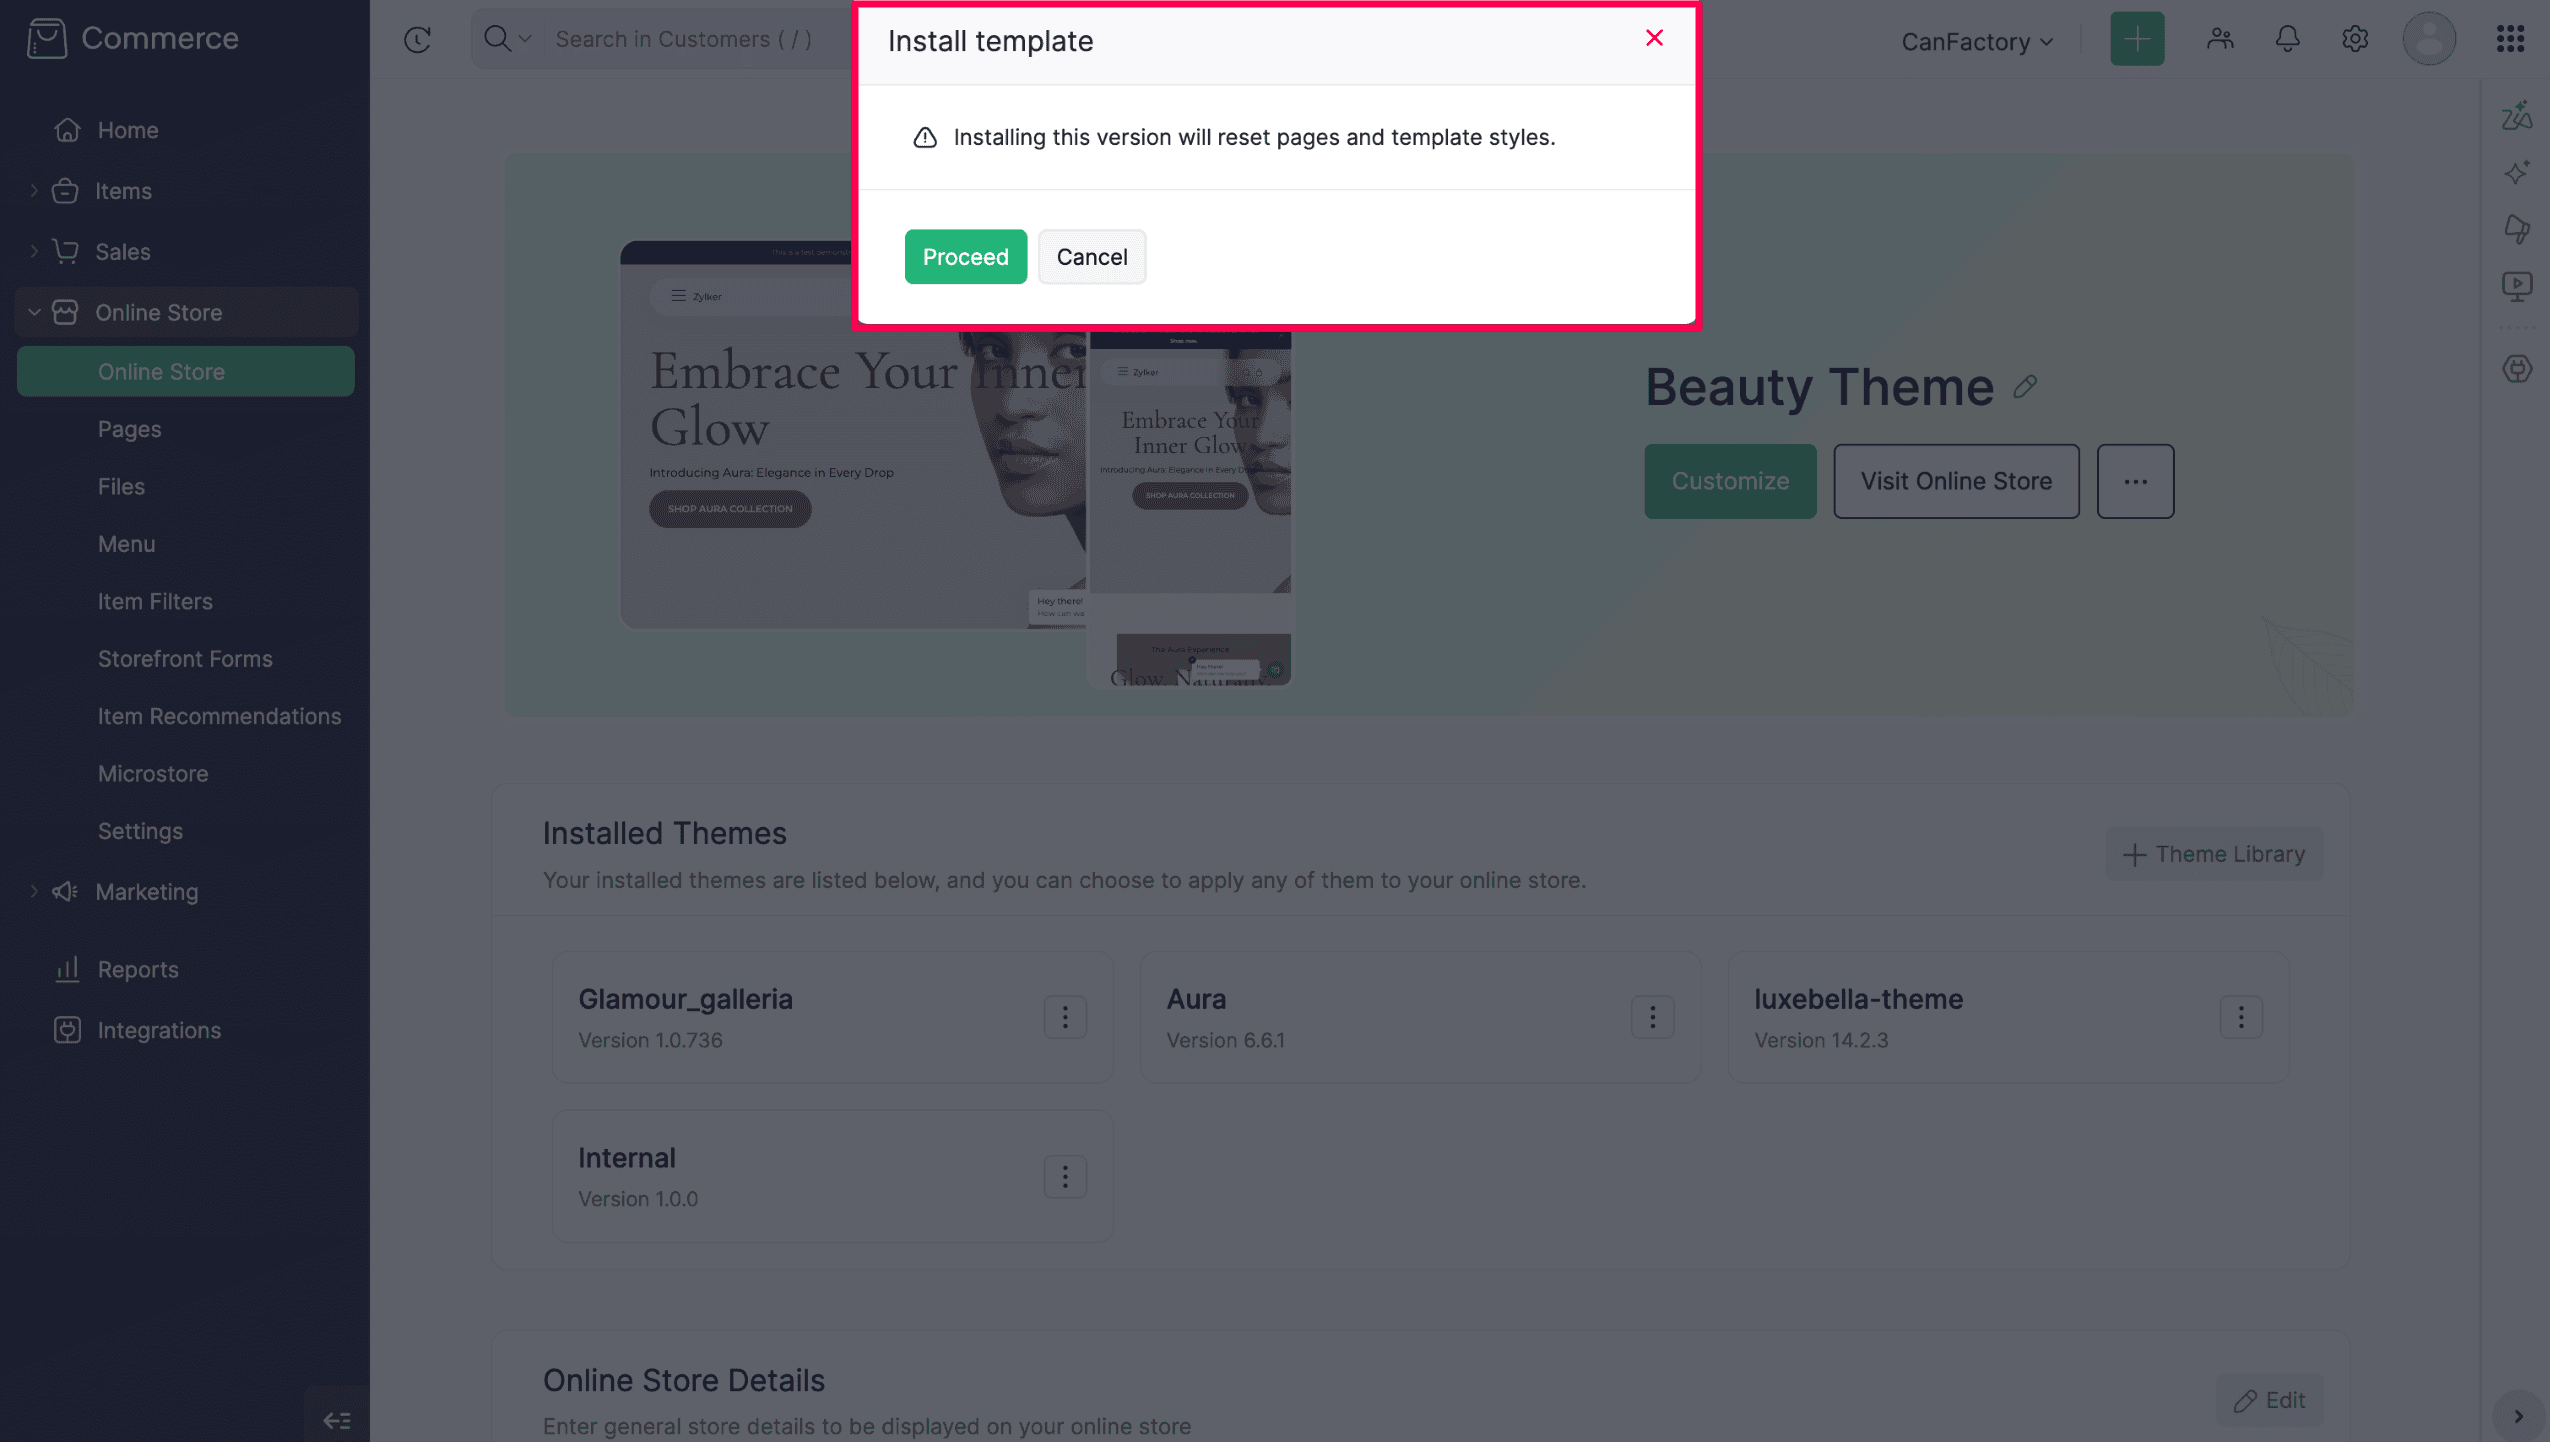
- Review the warning in the popup.
- Click Proceed to install the major update, or Cancel to keep your current version.
Warning: A major theme update permanently removes your current page edits for that theme. Review your online store carefully before you proceed. For library themes, previous versions are retained by Zoho Commerce, and you can contact support if you need help rolling back.