
Dimension Prefill Option

The dimension prefill option automatically fills in a shipment’s package dimensions, weight, and item quantity when you ship an order via a third-party carrier. Instead of entering these details manually, you can select a matching package and Zoho Commerce will prefill its dimensions to the shipment, reducing manual effort and errors while creating shipments.
Scenario: Patricia runs an online furniture store and ships orders through an integrated carrier. When a customer orders a study table, Patricia creates a shipment and picks the package that matches the table’s dimensions from the list of live-rate packages. Zoho Commerce prefills the package’s length, width, height, weight, and quantity into the shipment, so Patricia doesn’t have to measure and enter these details manually before generating the shipping label.
How It Works
Dimension prefill relies on the product or package dimensions configured for live shipping rates. Refer to the Configure Package For Live Shipping Rates section for more details.
When you create a shipment via a carrier, Zoho Commerce matches the order’s items to the configured packages and lists them along with their live shipping rates. Selecting a package and clicking Apply Package Details fills the package’s length, width, height, weight, and item quantity into the Package Dimensions section of the shipment automatically. You can still edit the prefilled values if required before generating the shipment label.
Ship Via Carrier
Zoho Commerce supports shipment through third-party carriers, making it easy to deliver orders to customers across the globe. Once integrated, you can create shipments, generate labels, and track deliveries directly from Zoho Commerce, streamlining the entire shipping process.
Prerequisite: Integrate with any one of the shipment carriers listed in Shipping Integration. If you have not integrated with any shipment carrier, you can Ship Manually.
Create New Shipment
To create a new shipment,
- Navigate to the Orders module under Sales.
- Select the confirmed sales order that you want to ship via carrier.
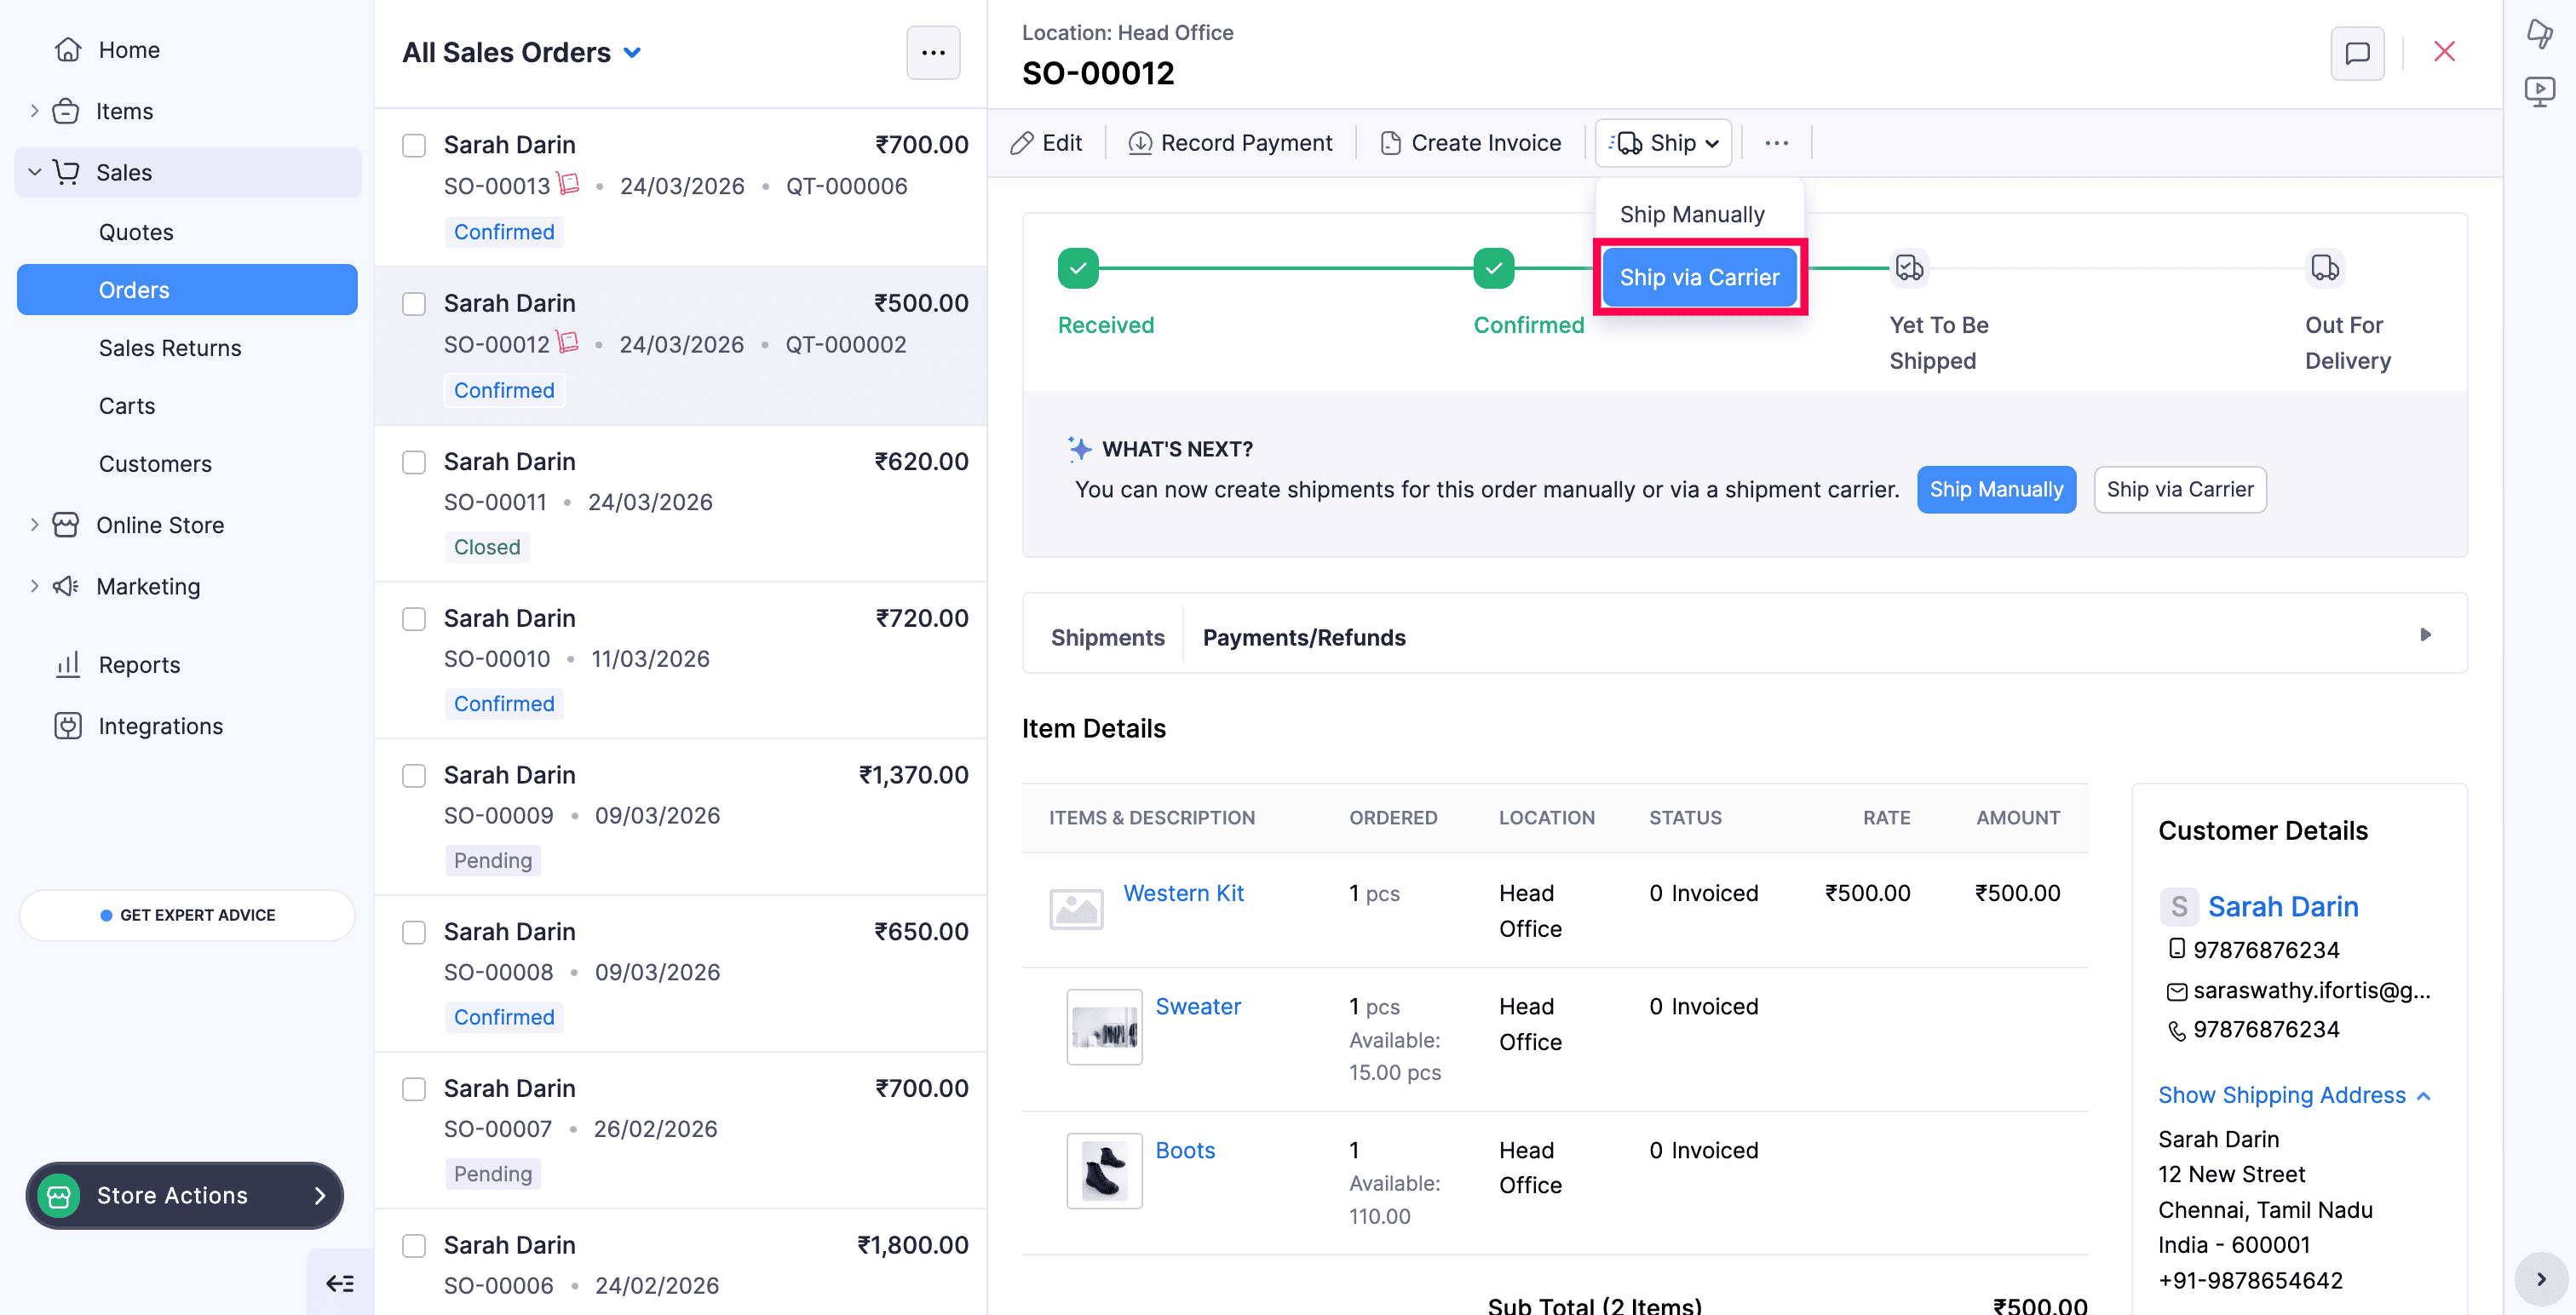
Select Ship via Carrier from the Ship dropdown. (Or) Click Ship via Carrier in the What’s Next section. You will be directed to the New Shipment creation page.
If no shipping carrier is integrated, the popup will be displayed.
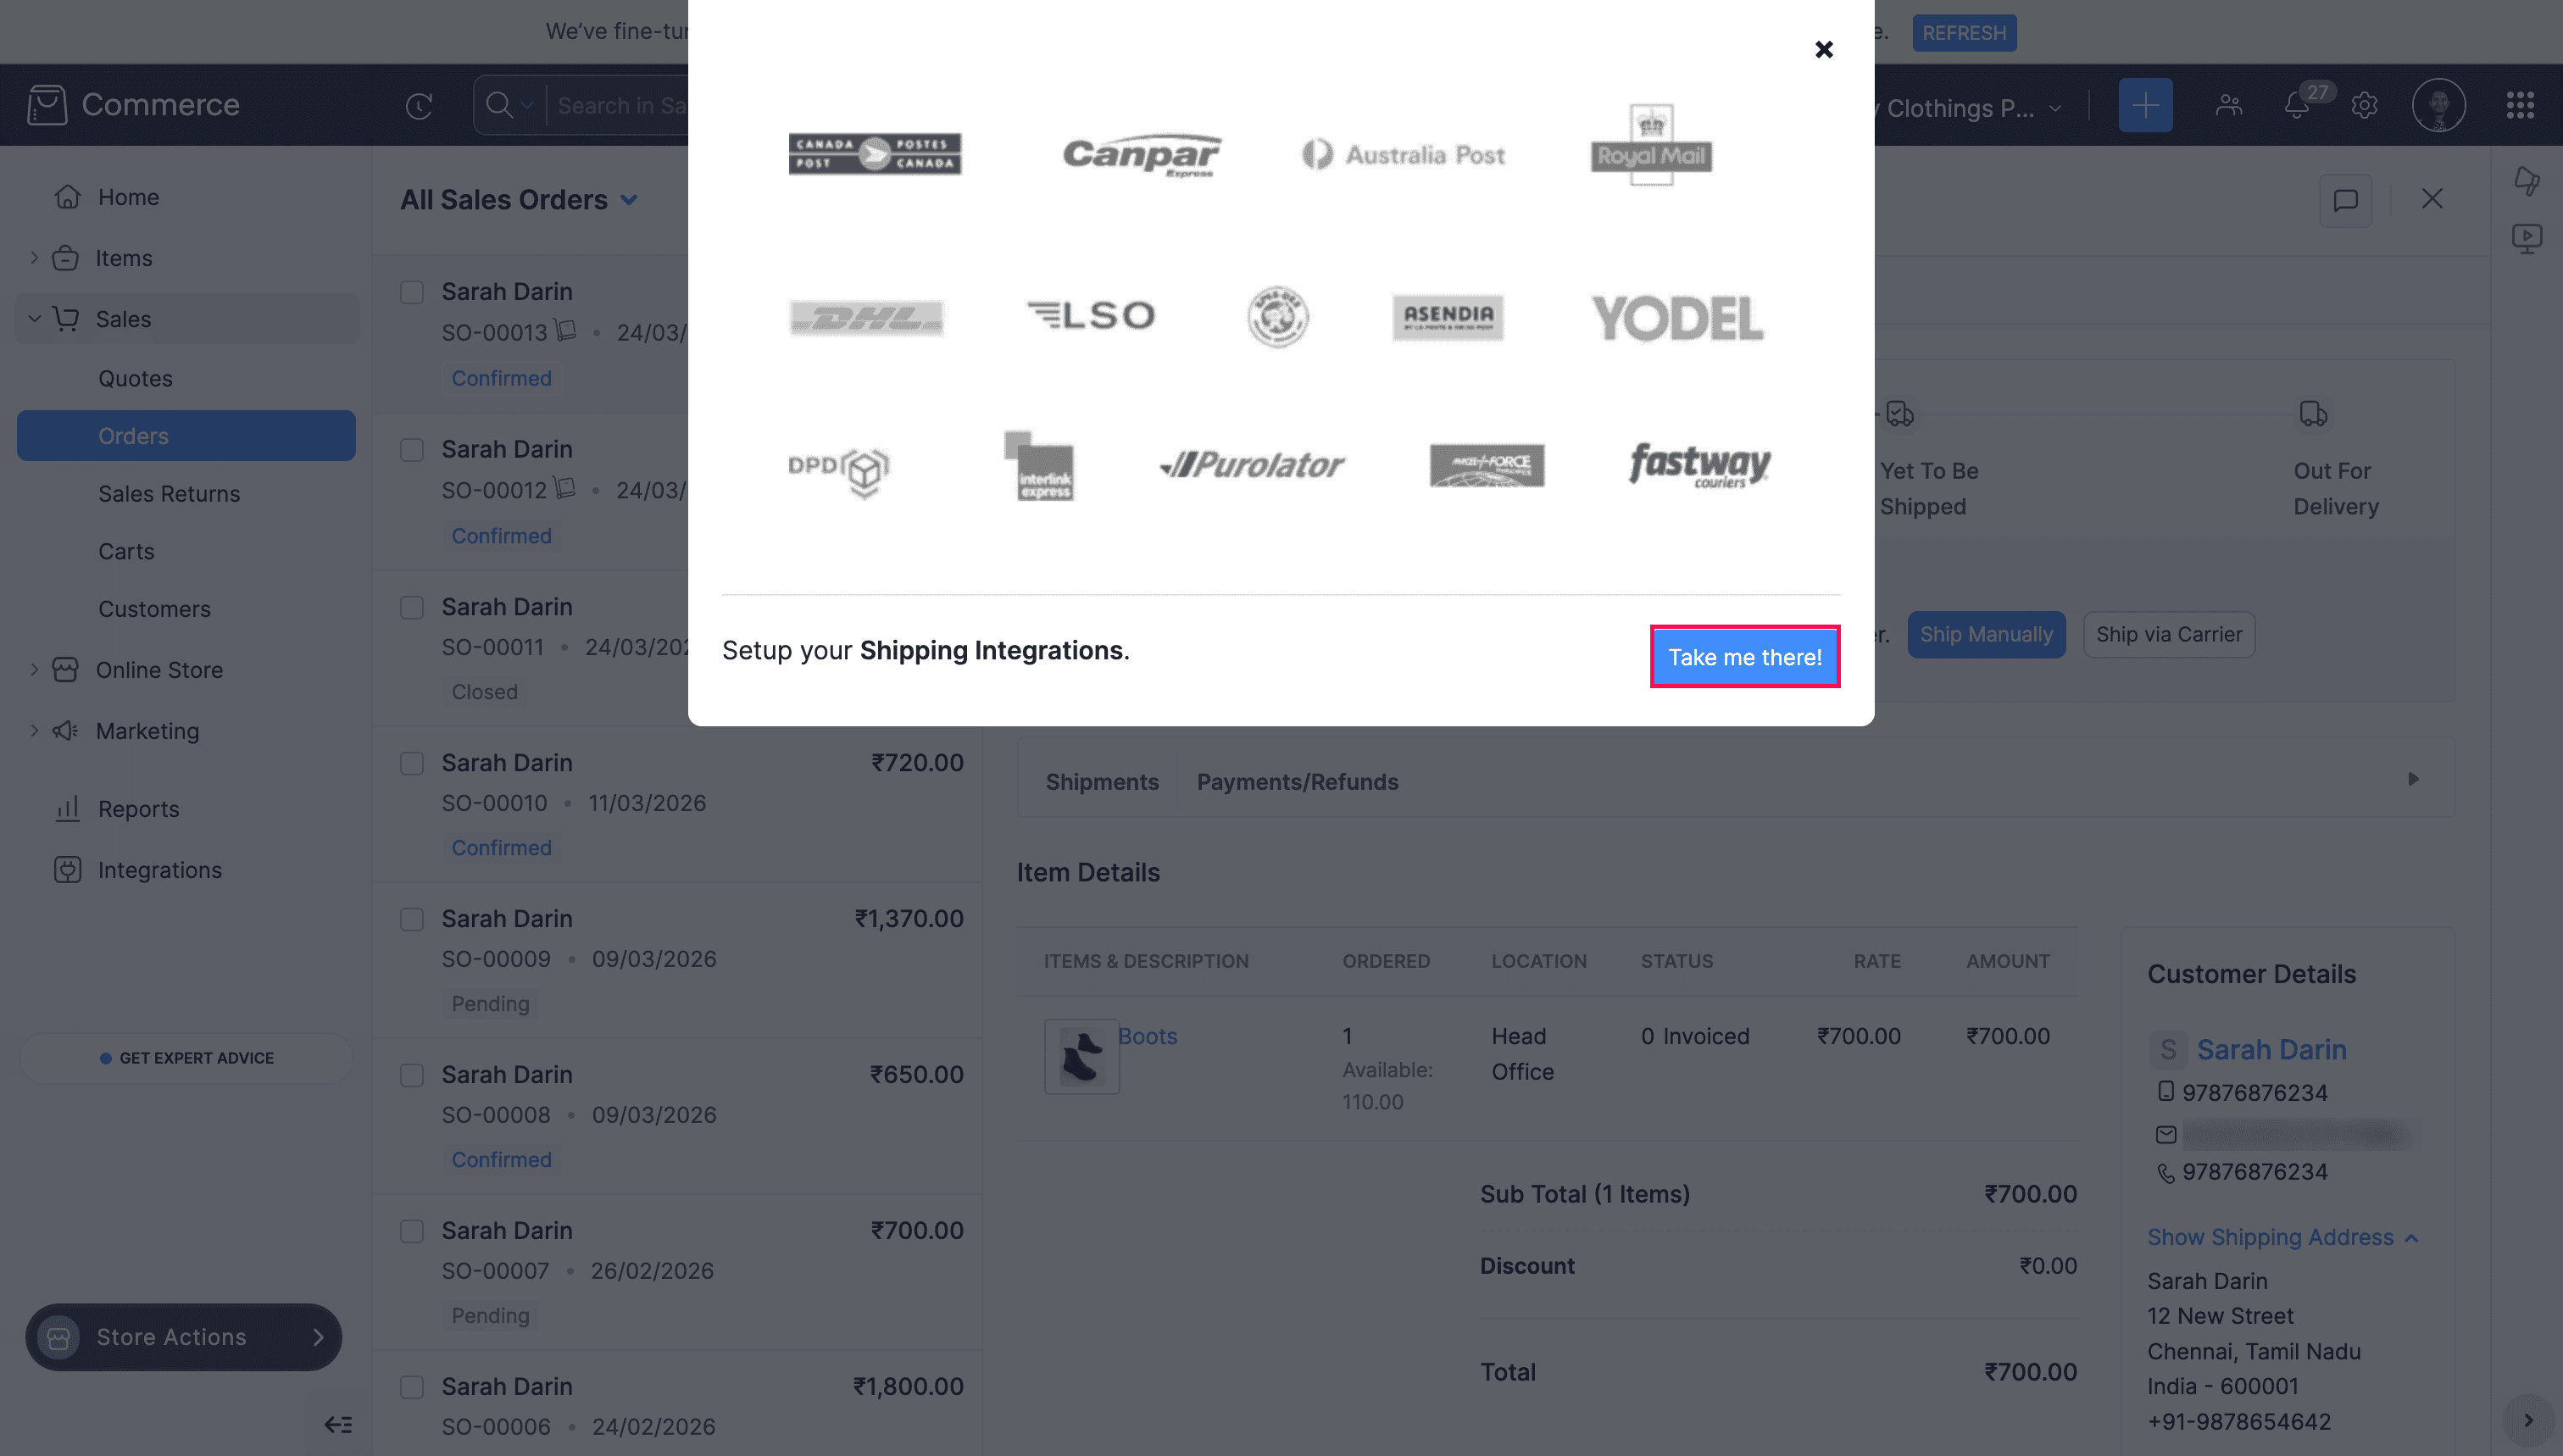
- Click Take me there to integrate shipment carriers. You will be directed to the Shipping Integrations page.
Integrate with any number of shipping carriers listed in the Shipping Integrations page.
Validate Address
In the New Shipment page, validate the address to ship the order via the selected carrier.
To validate address,
- Select the required shipping carrier from the Carrier dropdown.
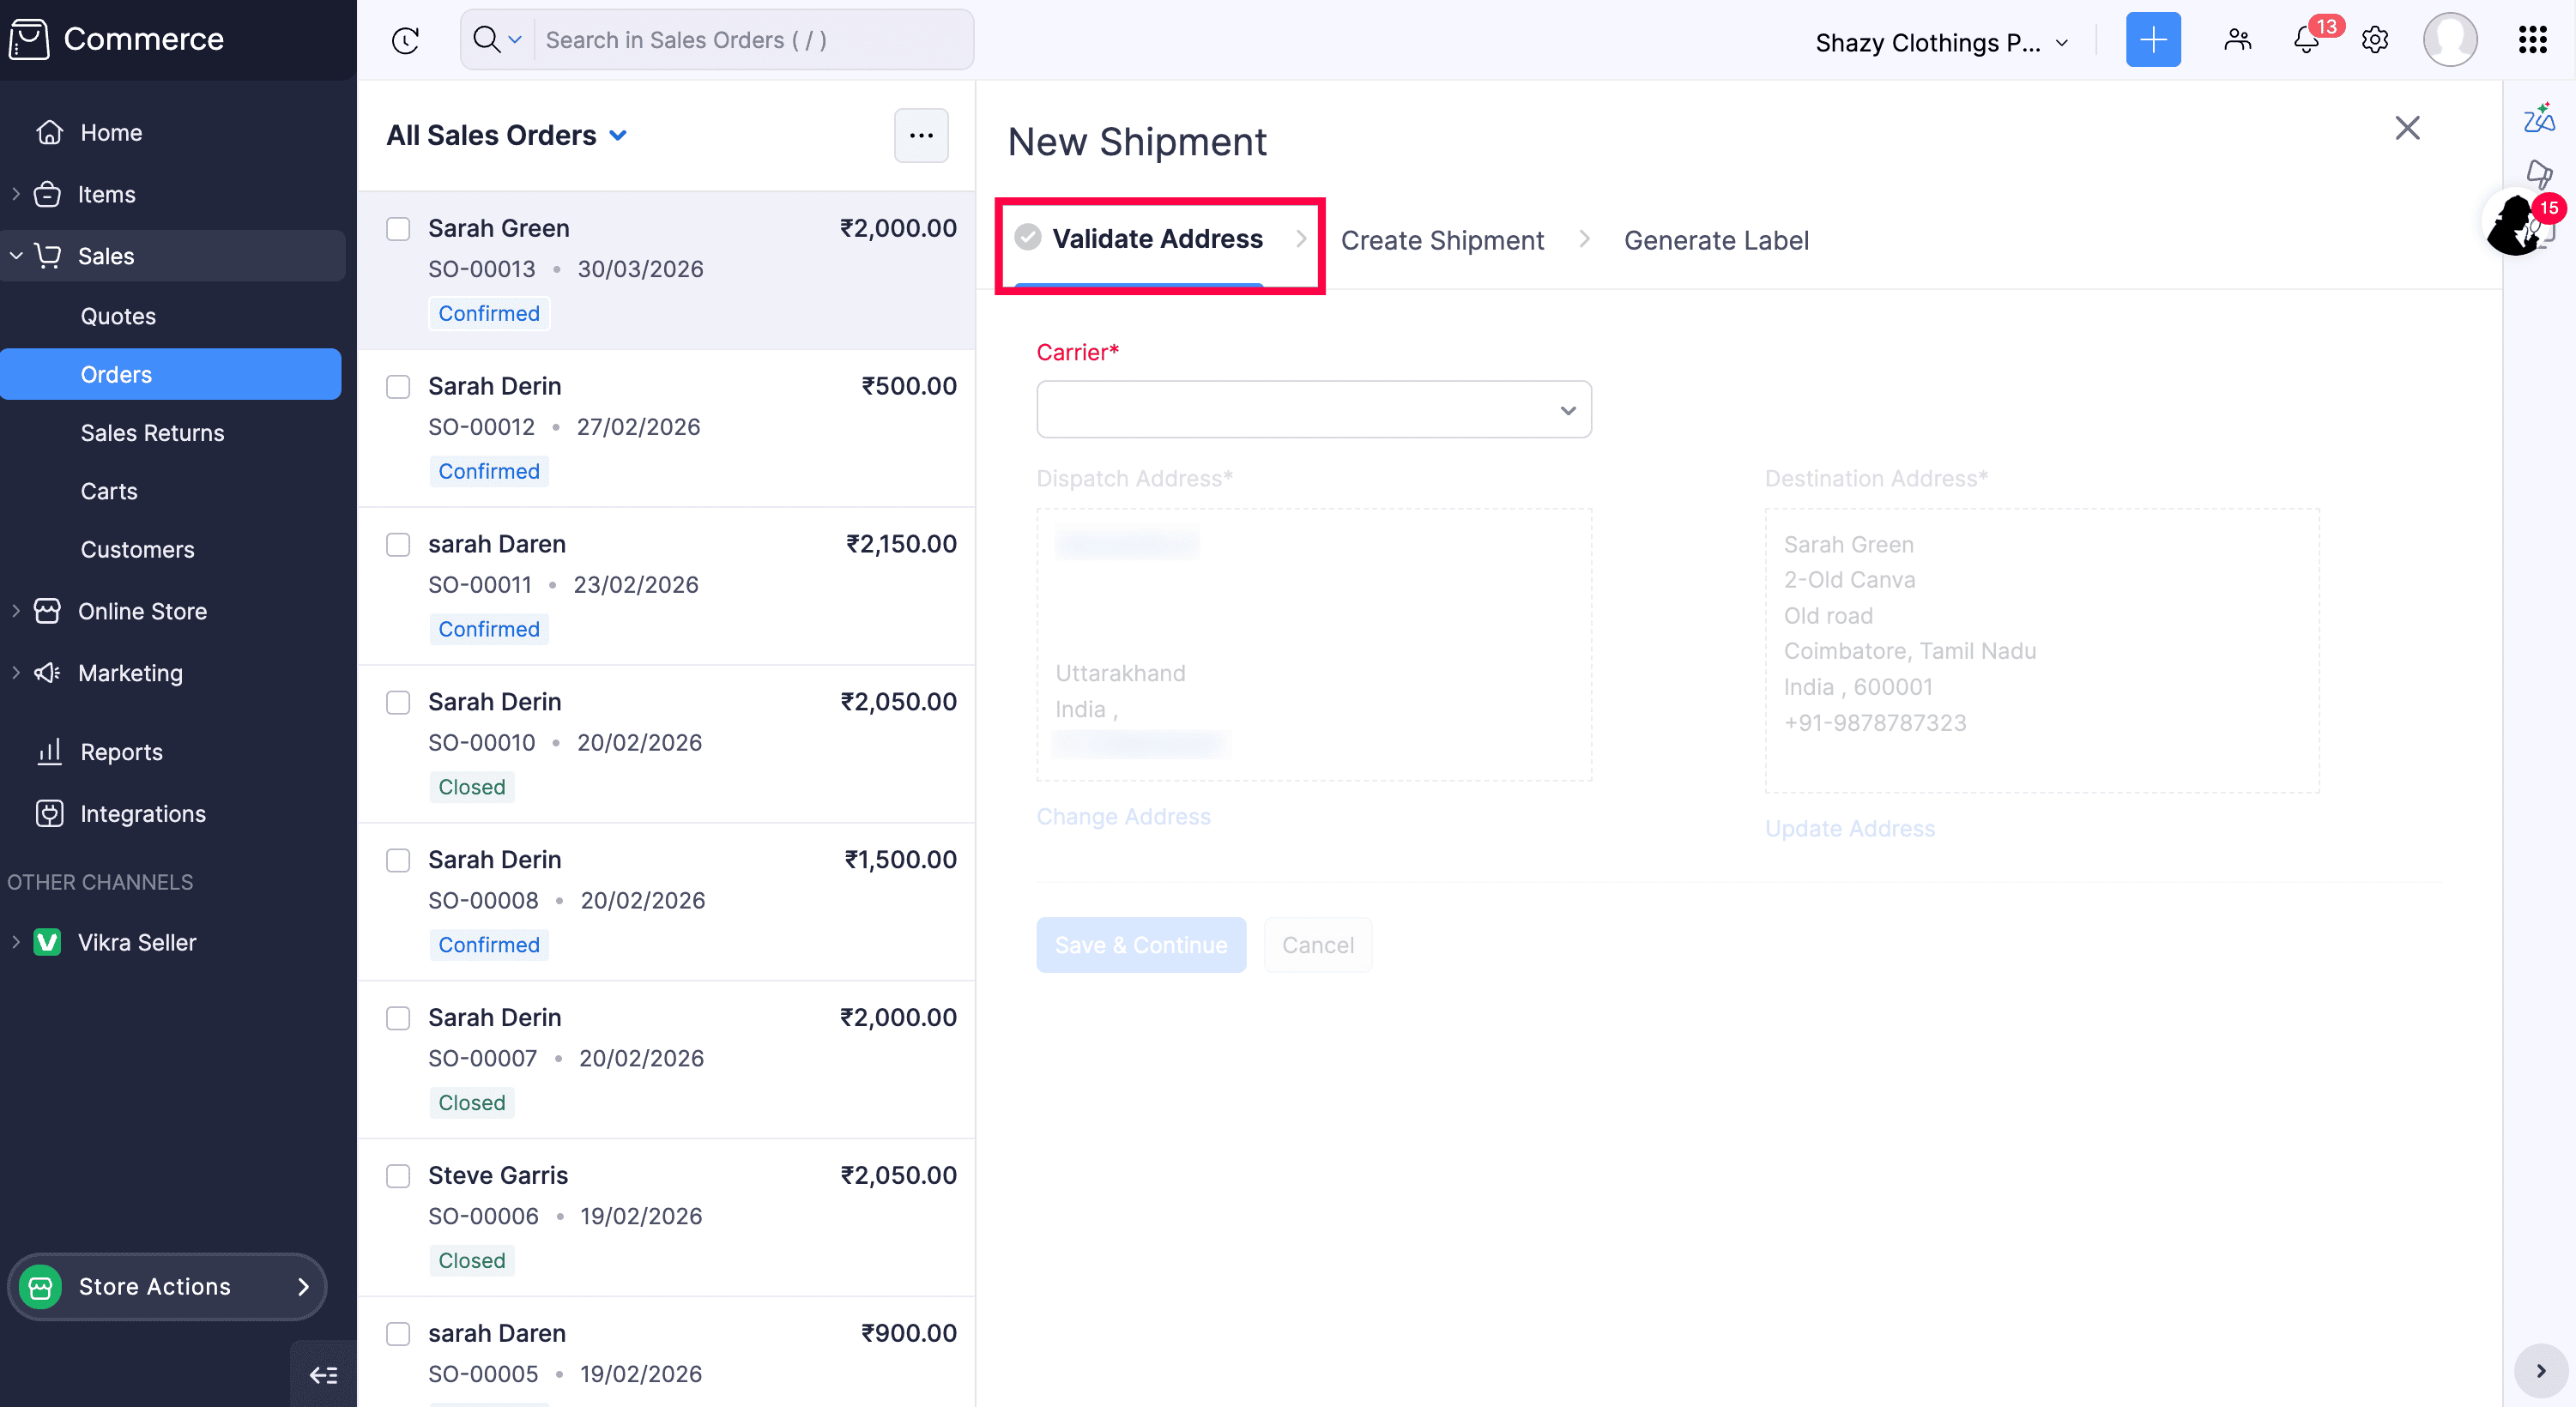
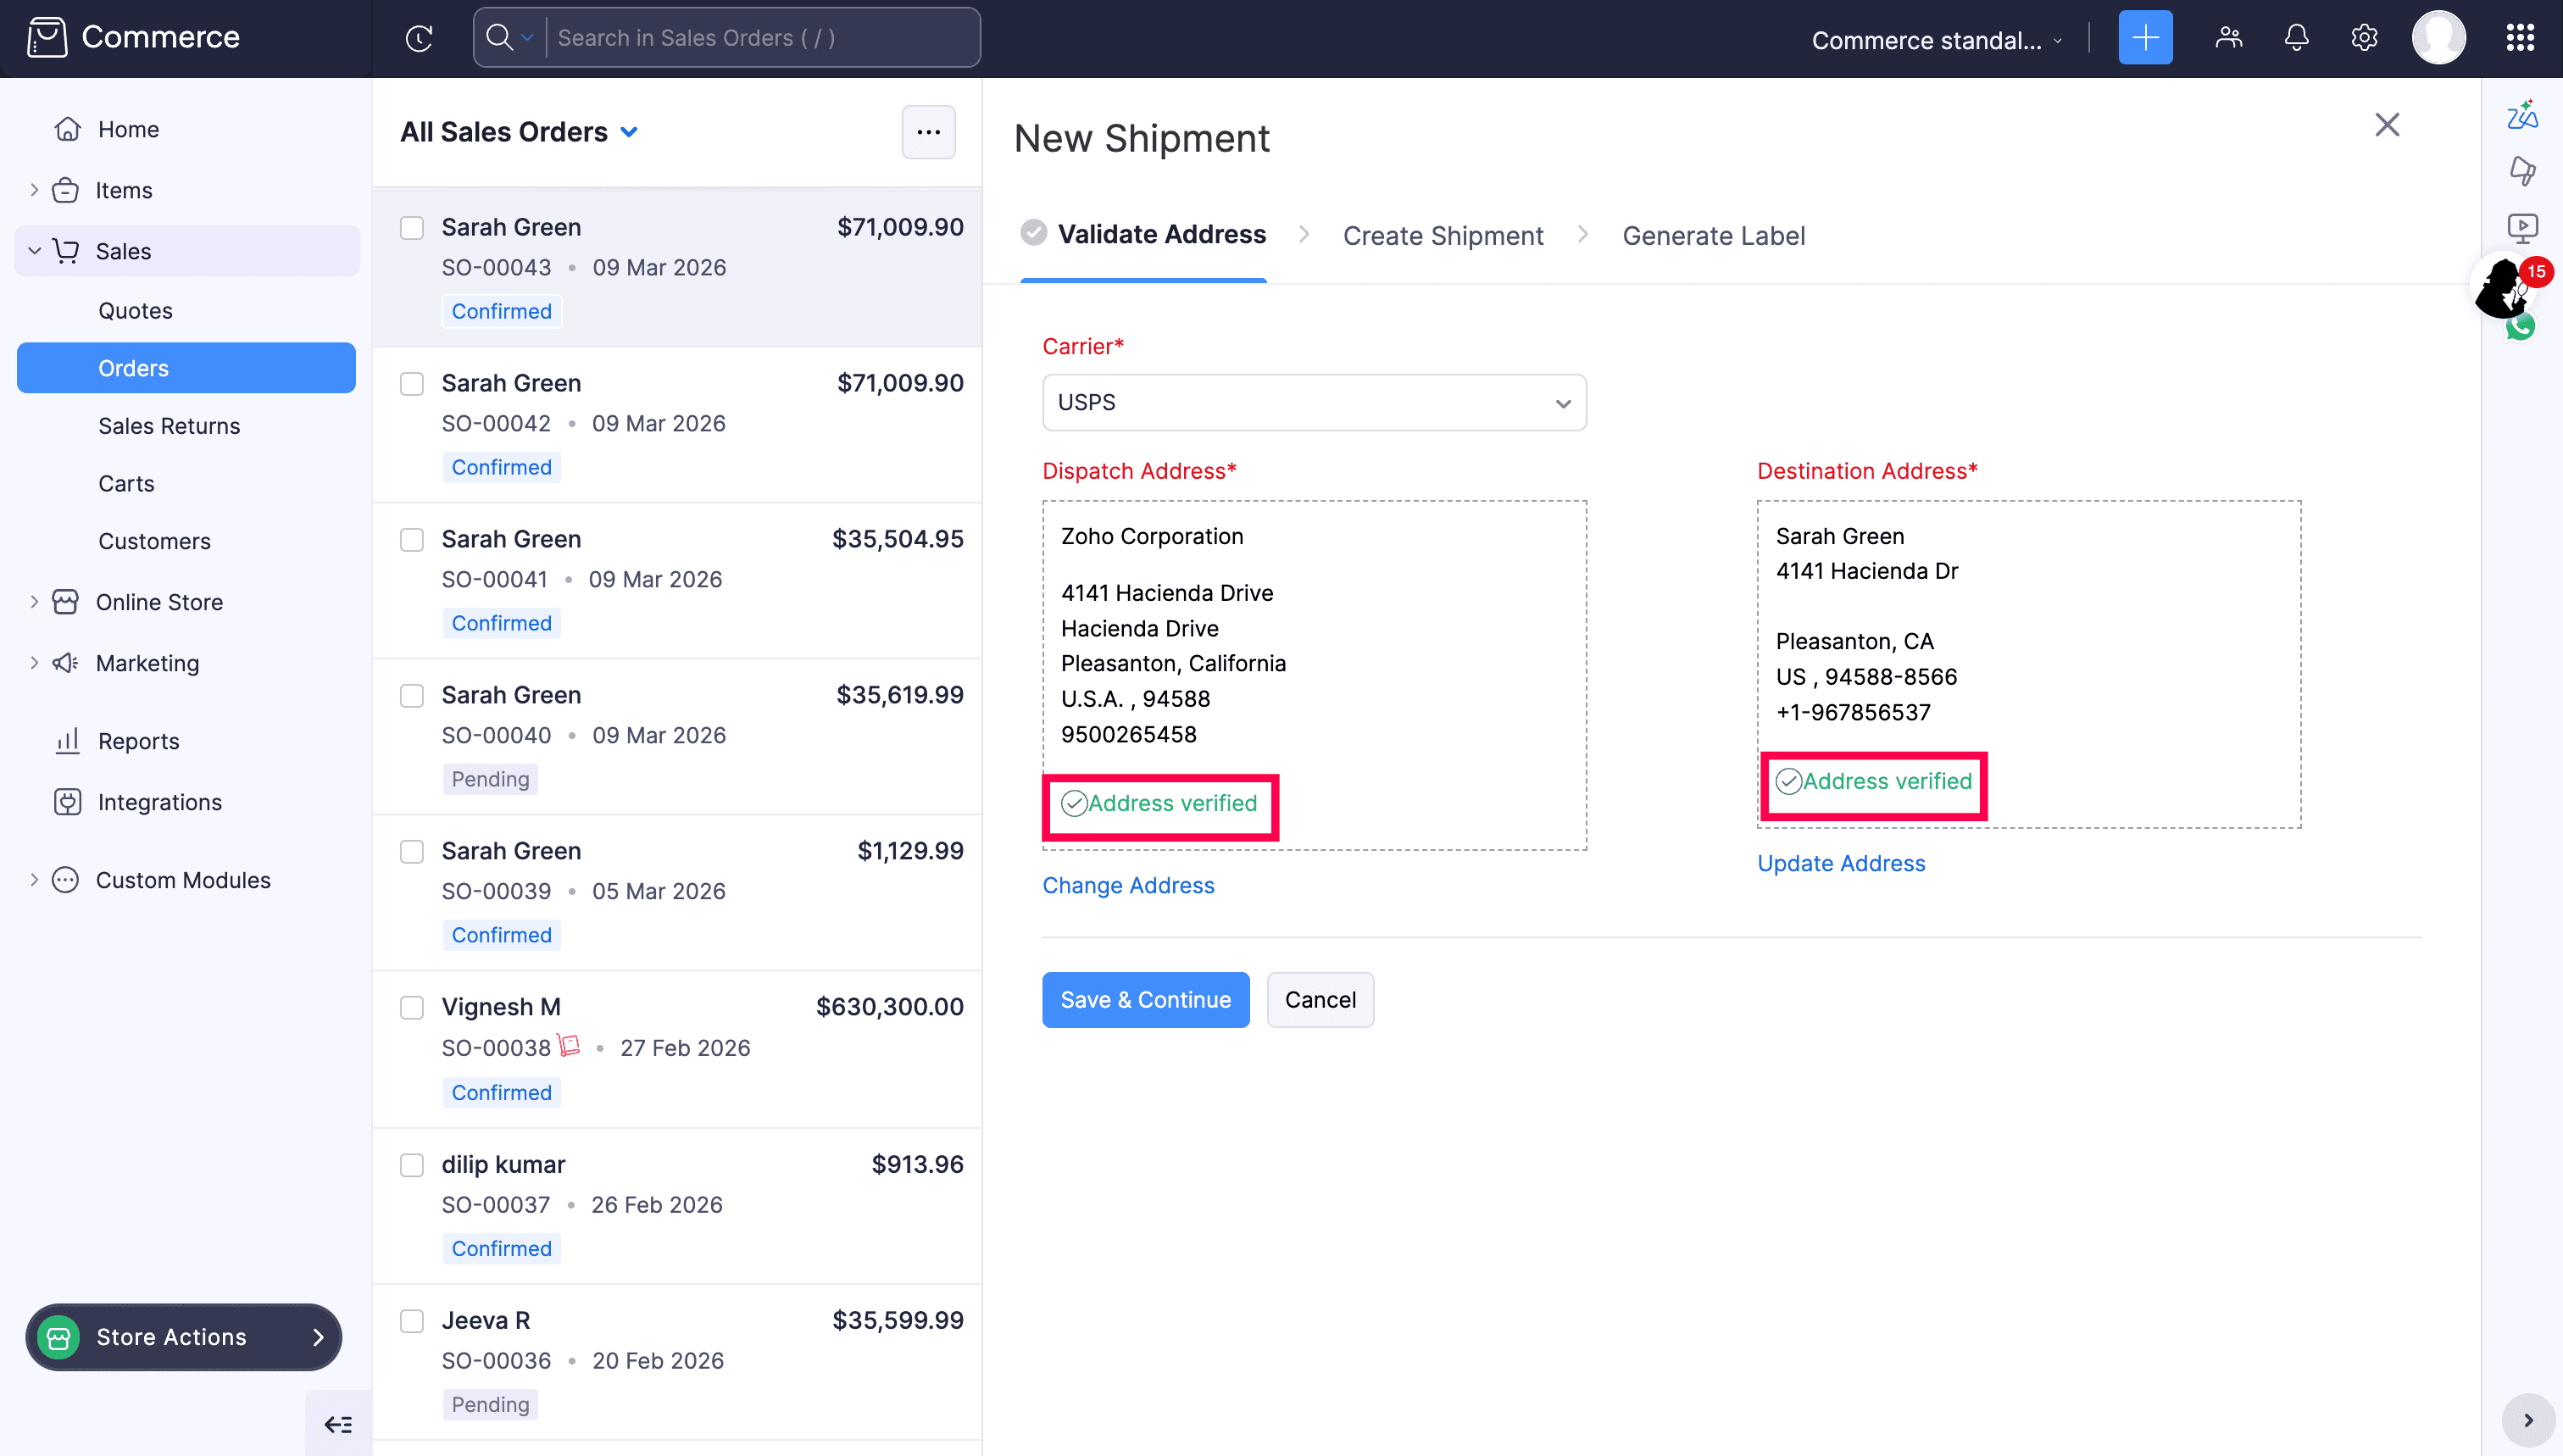
- The Dispatch Address and Destination Address will be prefilled with the organization address and the customer’s address respectively.
- Click Verify Address to validate the address.
Note: The Verify Address option is available only in certain carriers.
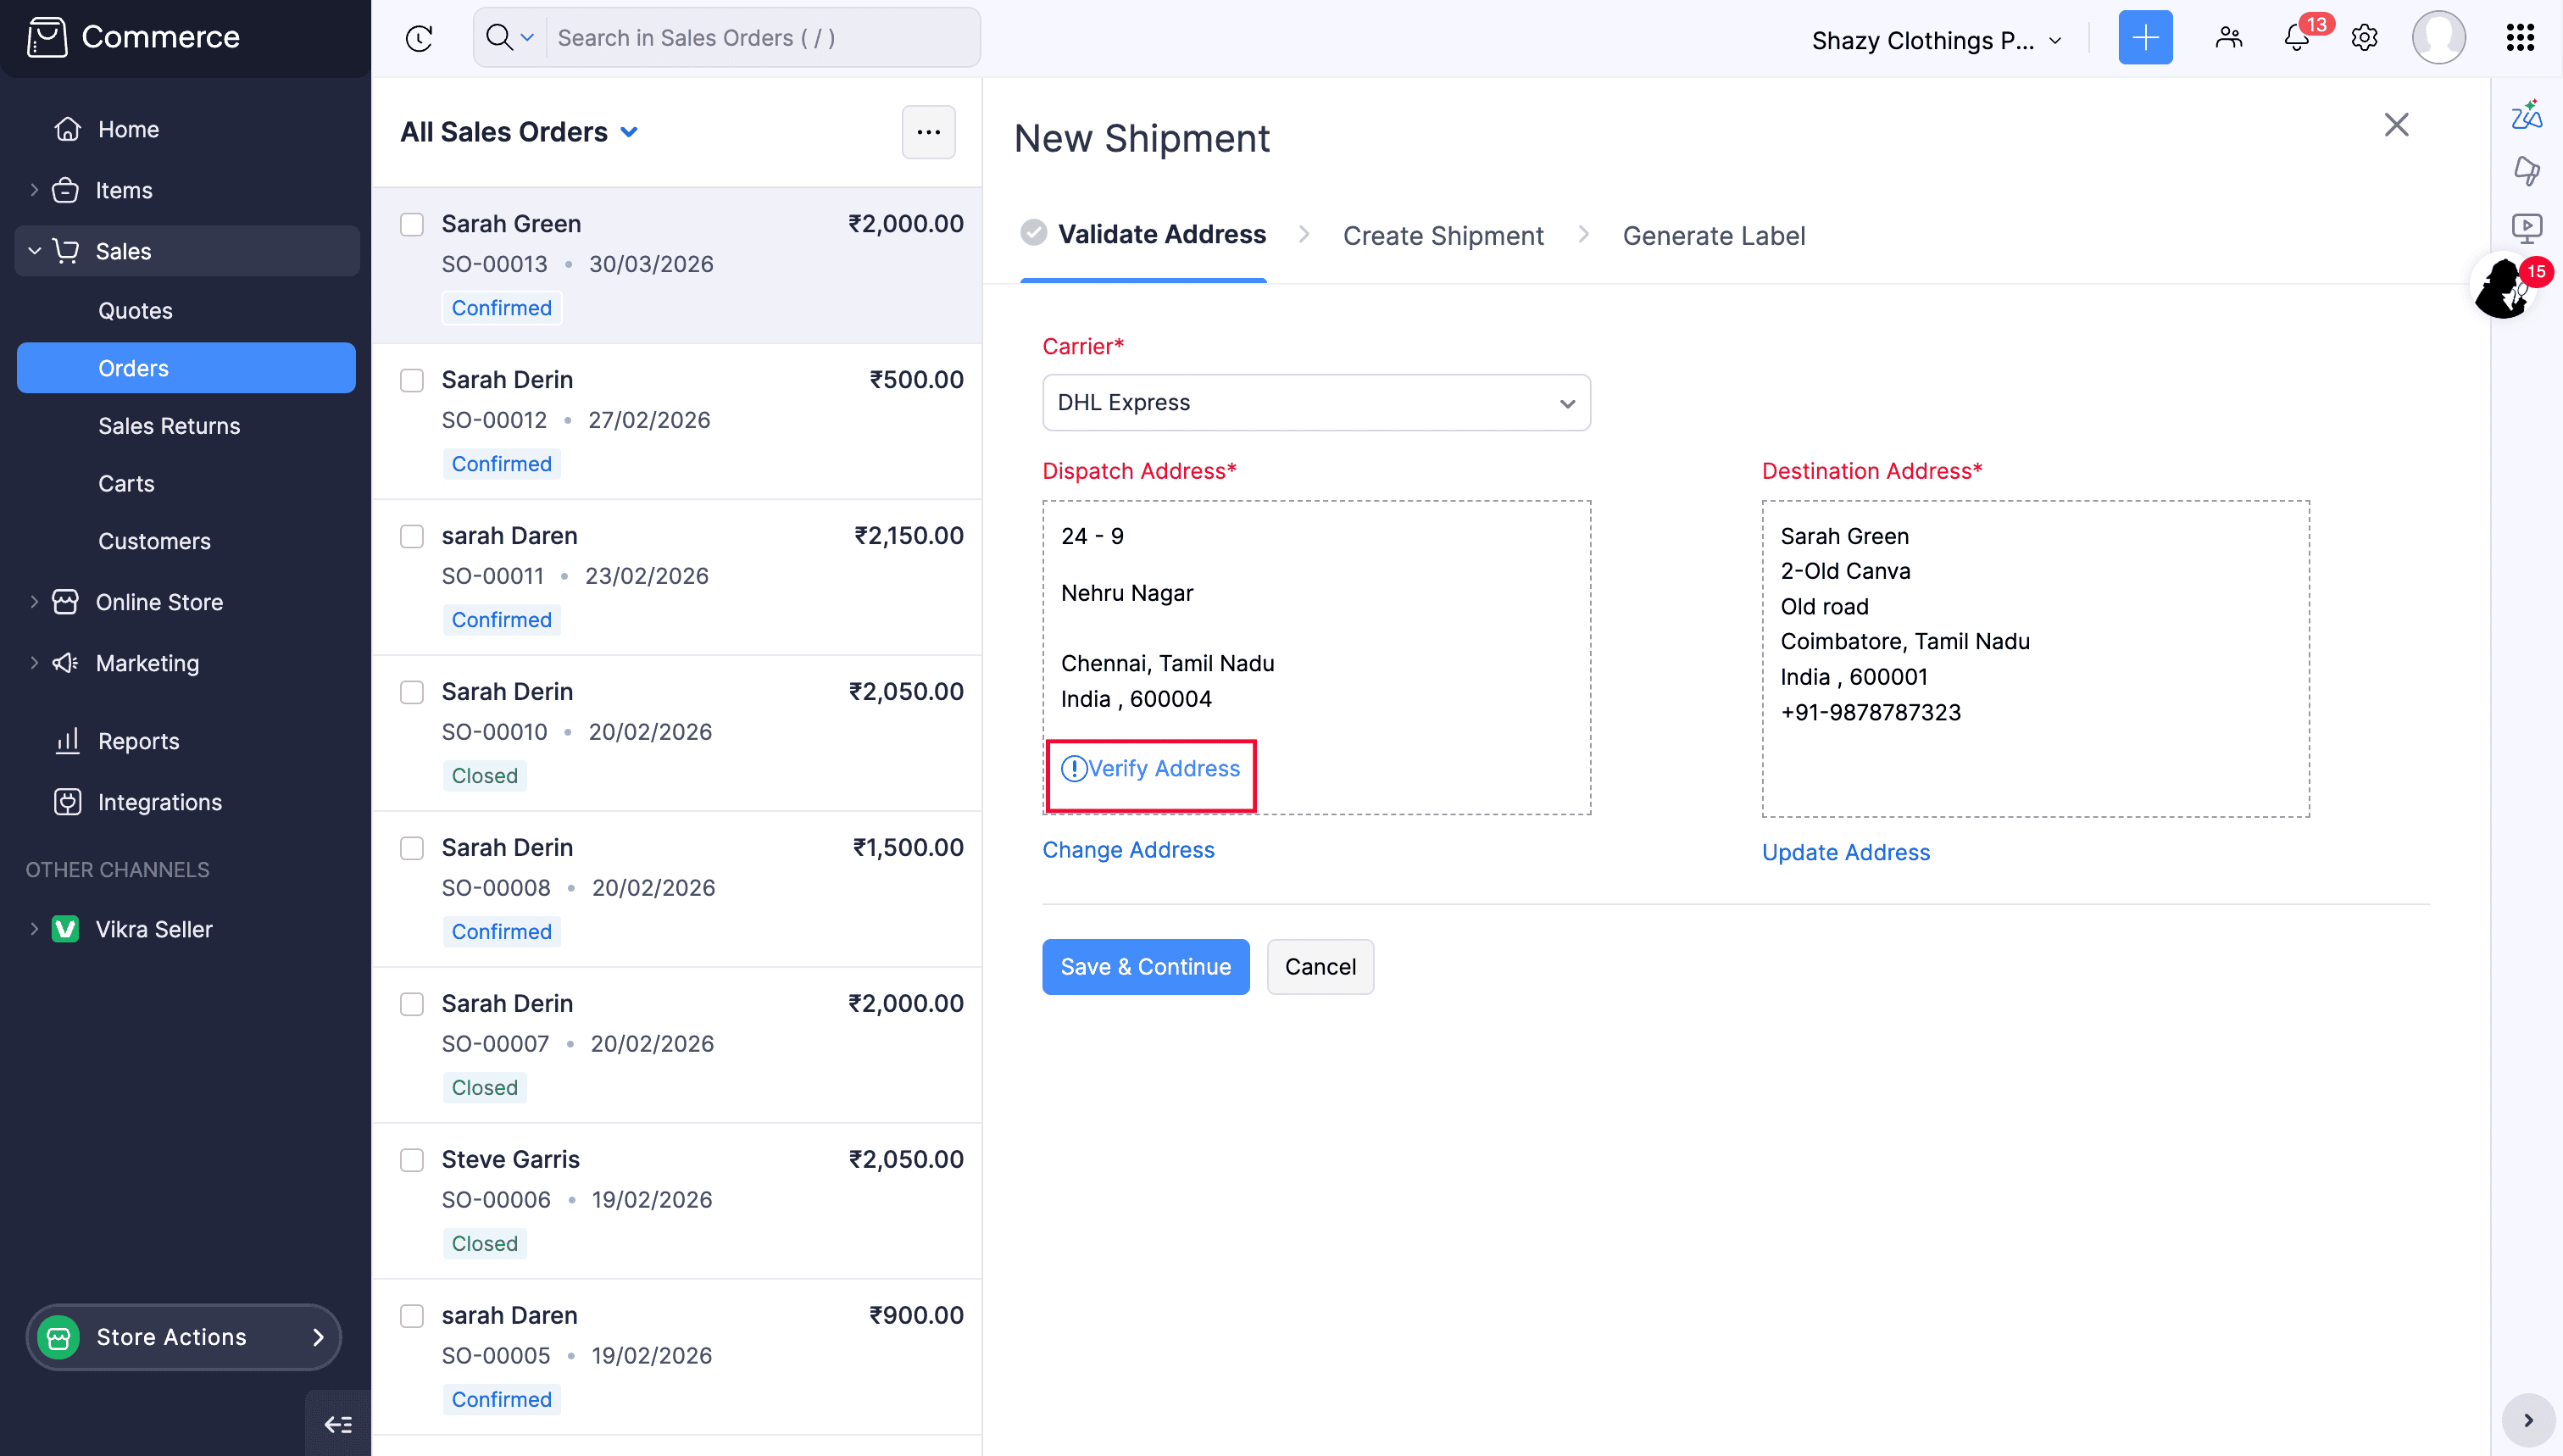
- If you want to ship from a different address, click Change Address to select a different address. All the available organization addresses such as the business and warehouse locations are listed.
- Select the required address to set as the dispatch address.
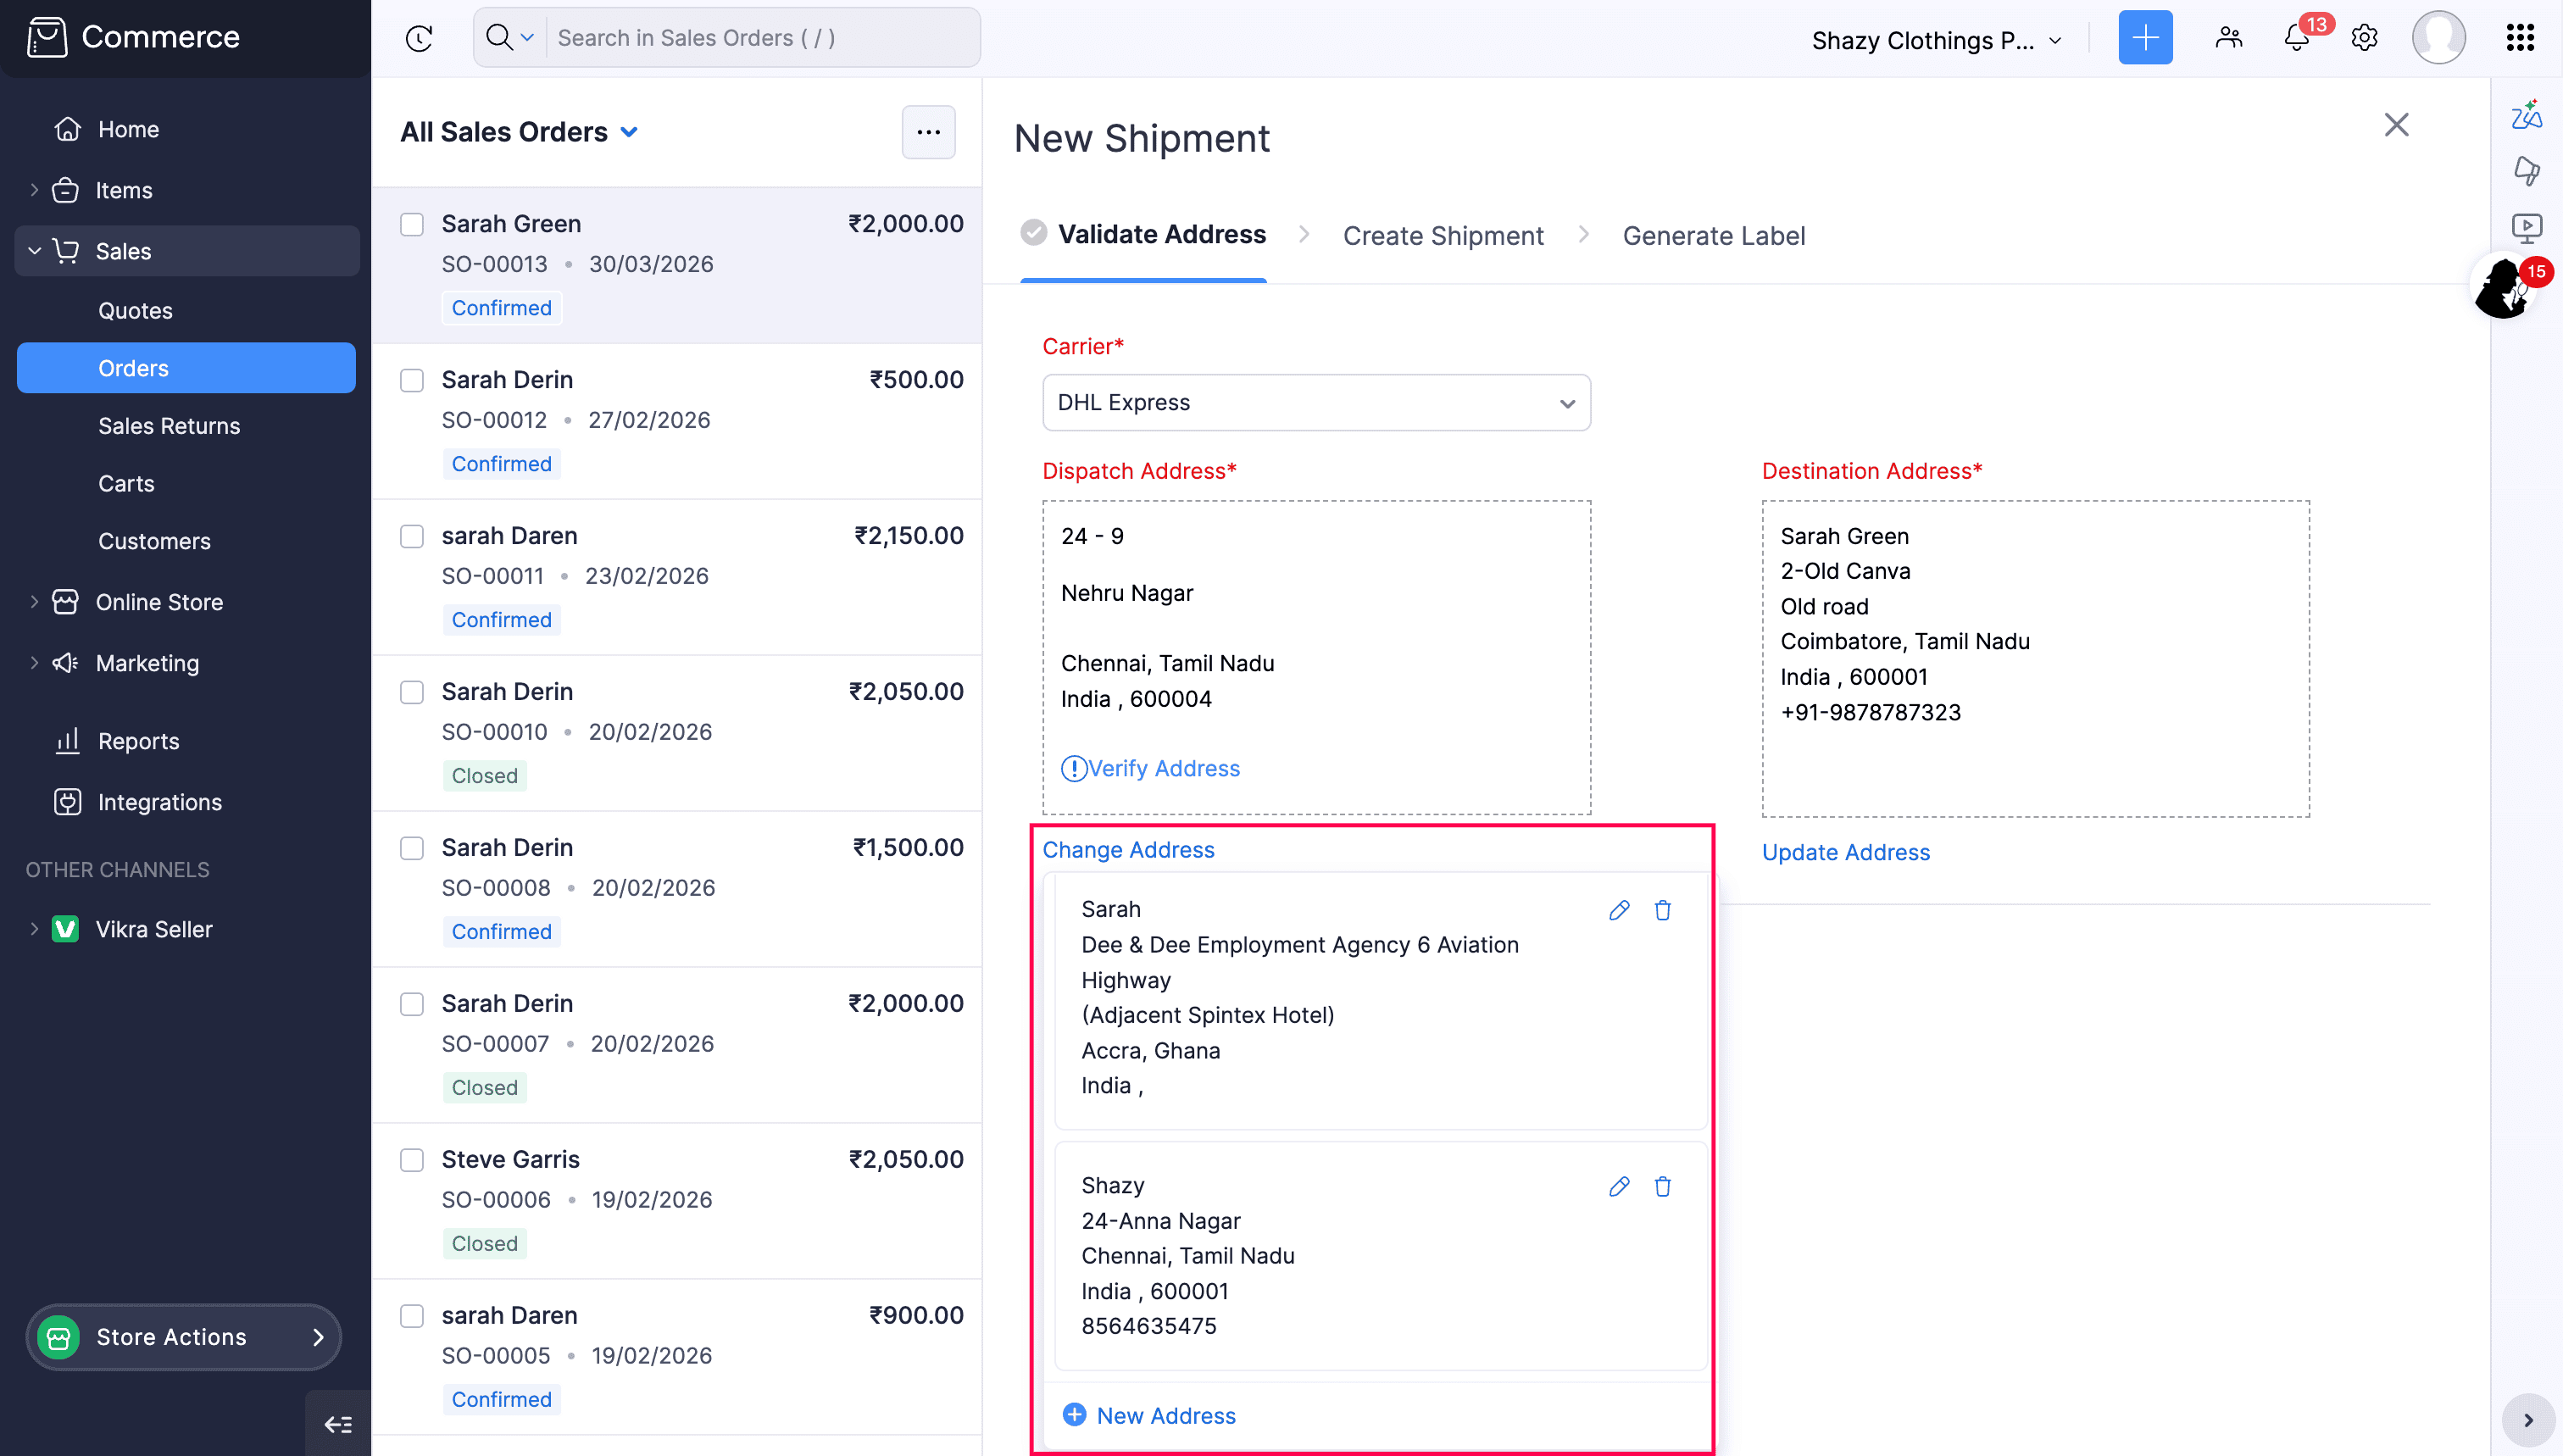
- Click the Edit icon against the respective address to edit it.
- The Delete icon against the address is used to delete an existing address.
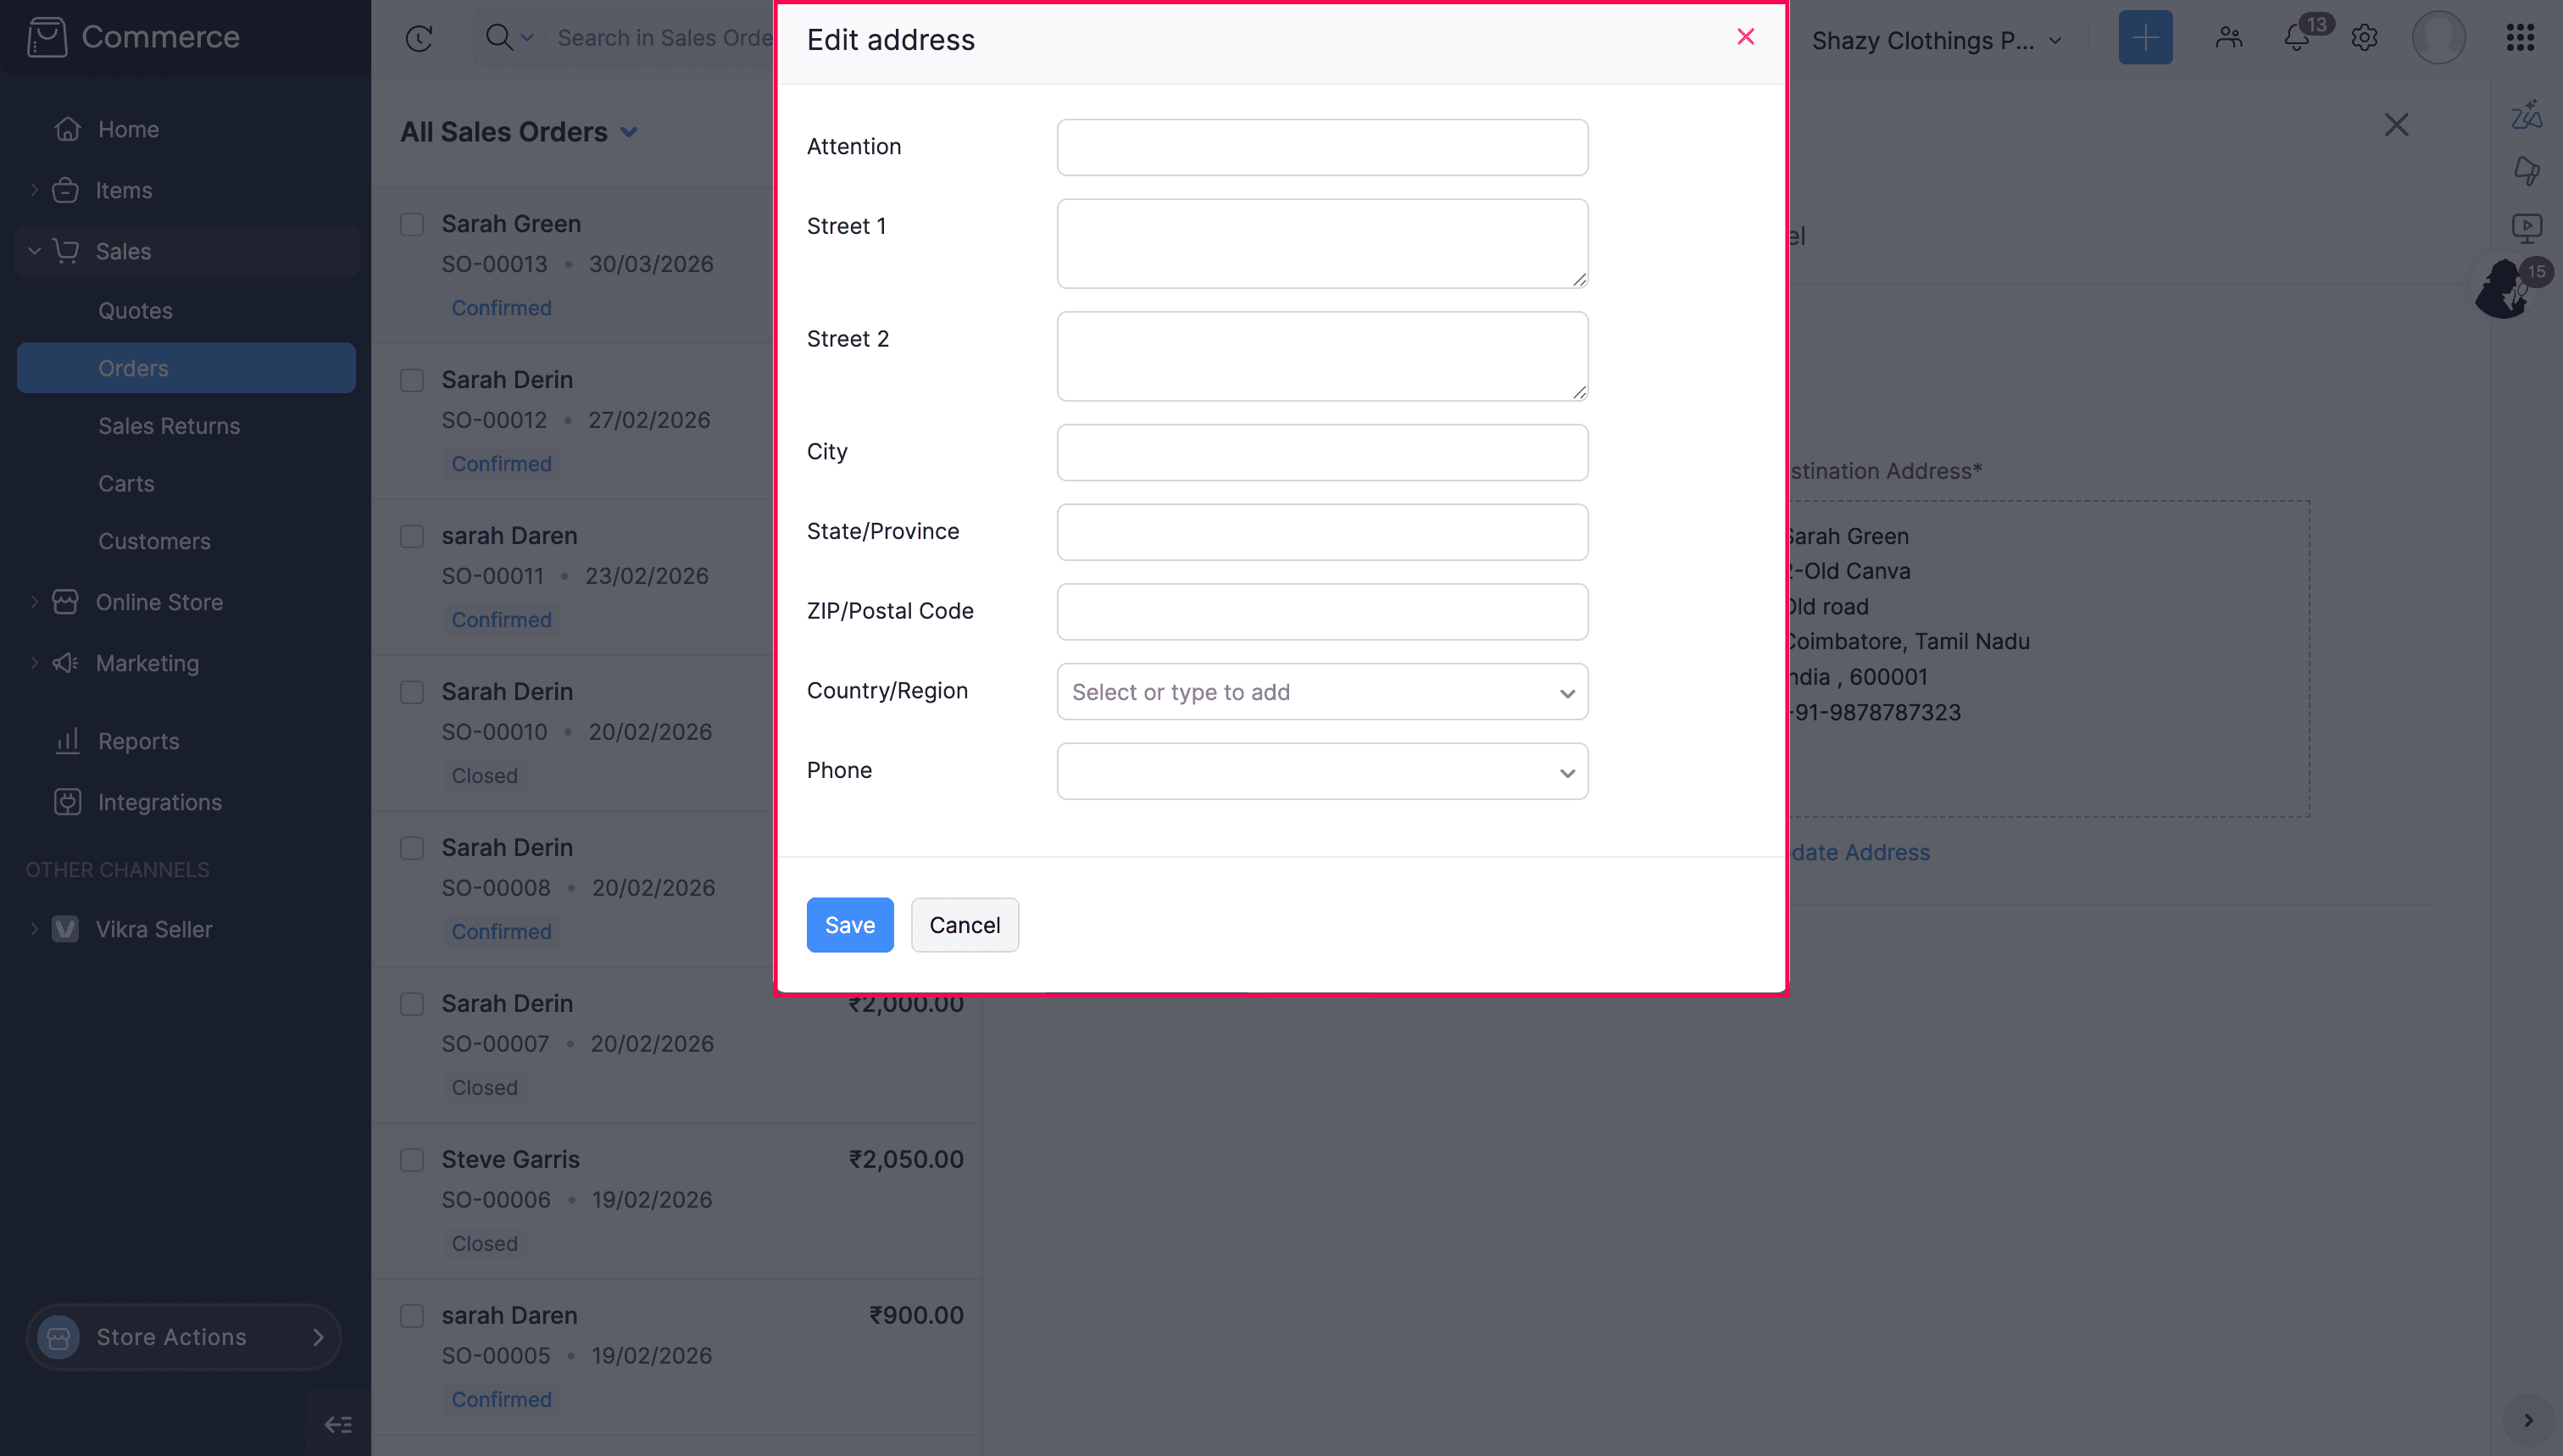
- If you want to add a new address, click New Address. The Edit Address popup will be displayed.
- In the Edit Address popup, enter the new address and click Save.
- In the Destination Address, click Verify Address to validate it.
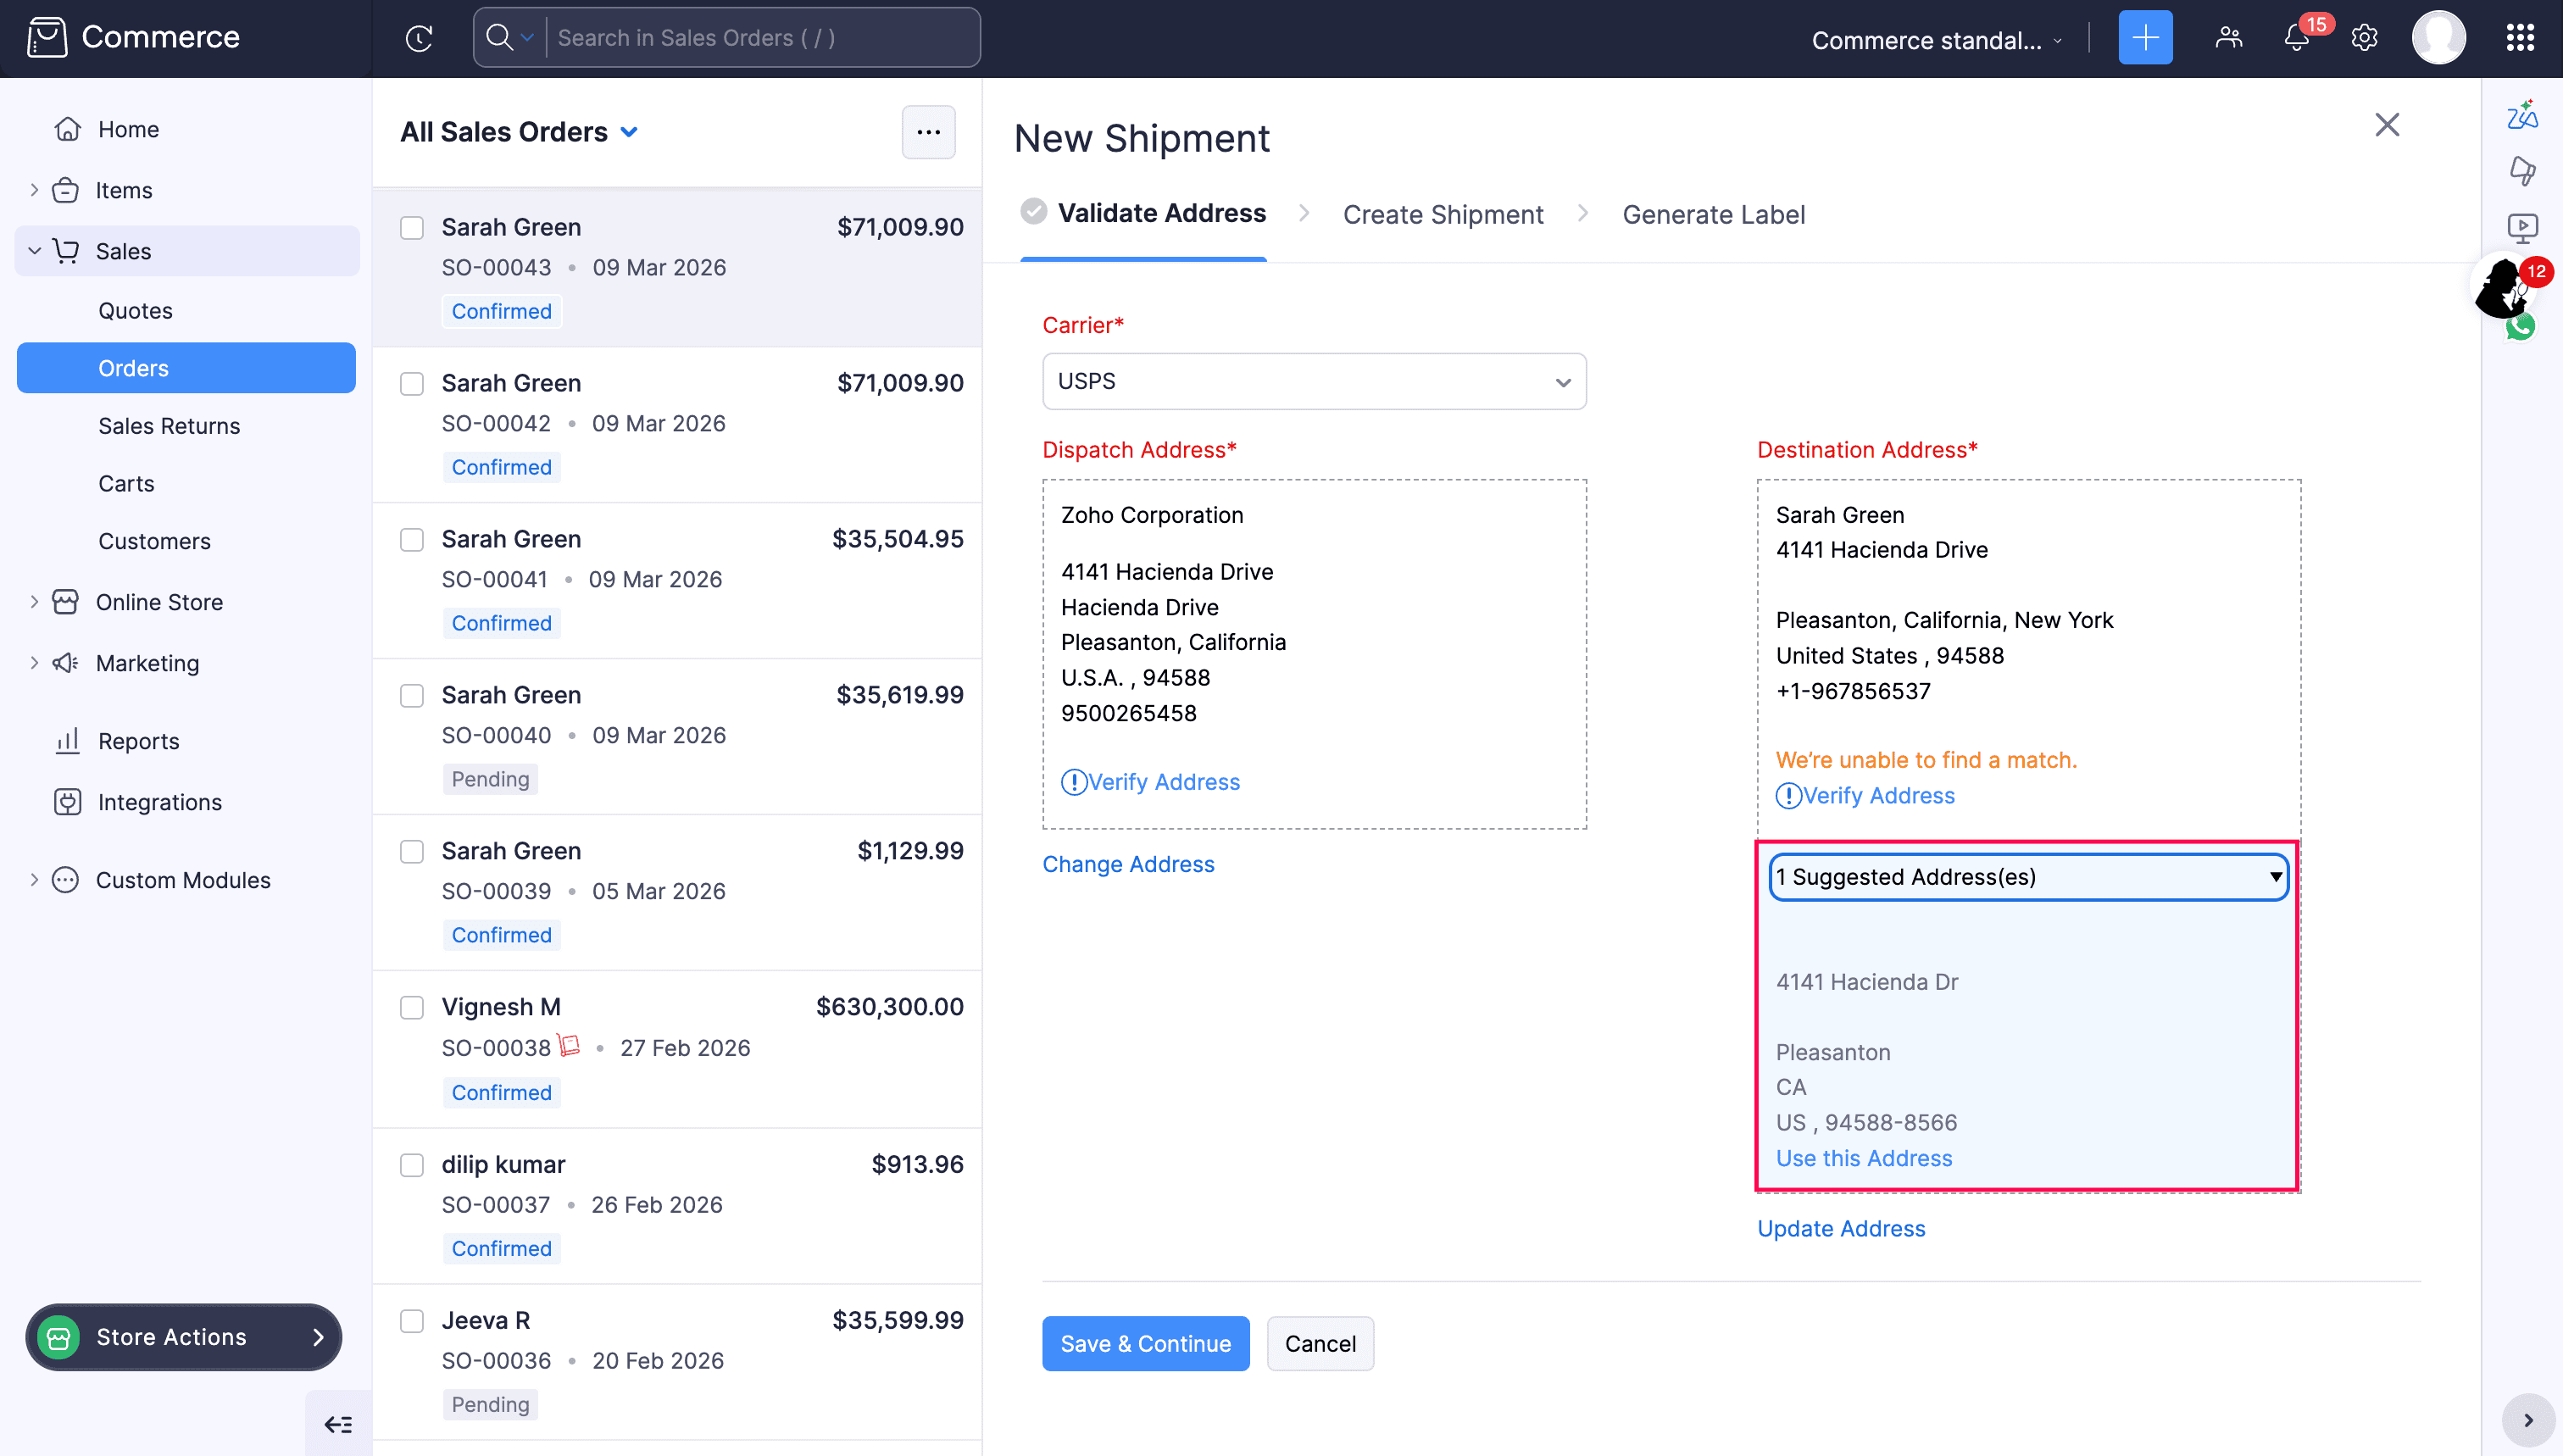
- If the address is not valid, correct address will be suggested.
- Click Use this Address, the Edit Address popup will be displayed with the suggested address.
- Click Copy Address to update the suggested address as Destination Address.
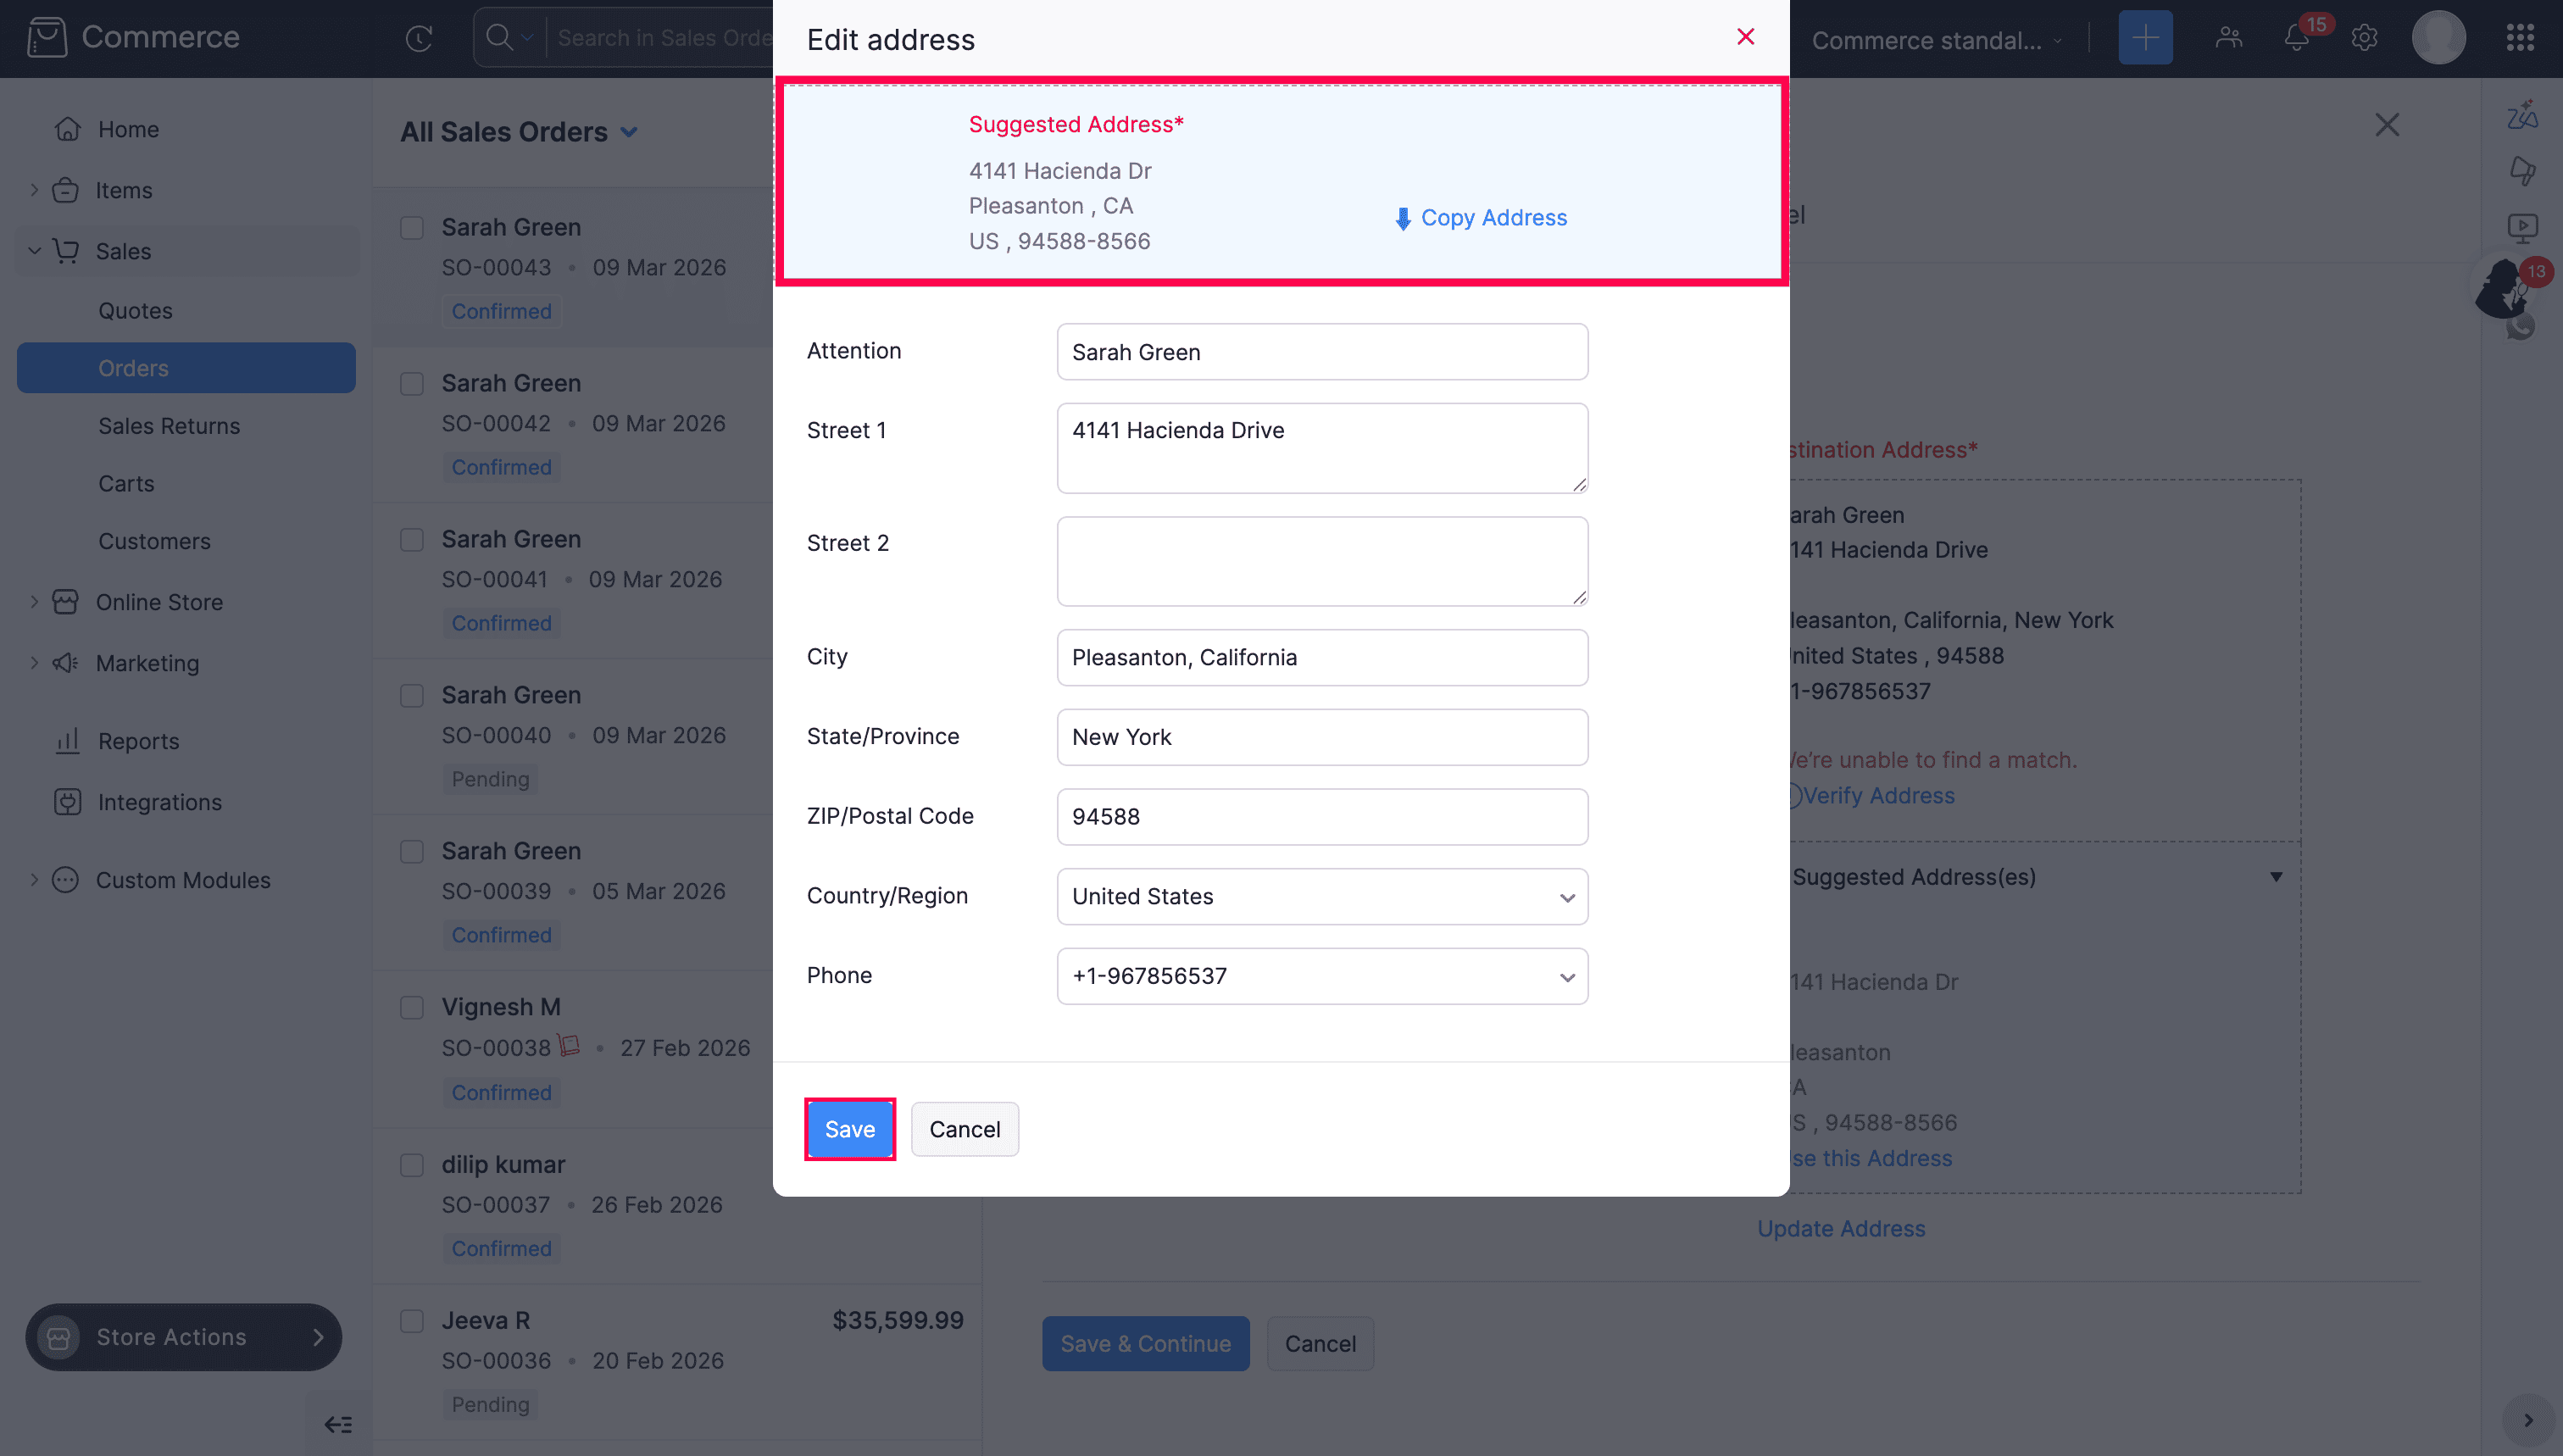
- Click Save.
- Click Save & Continue to proceed with creating the shipment.
Create Shipment
Once the address is verified, the next step is to create a shipment.
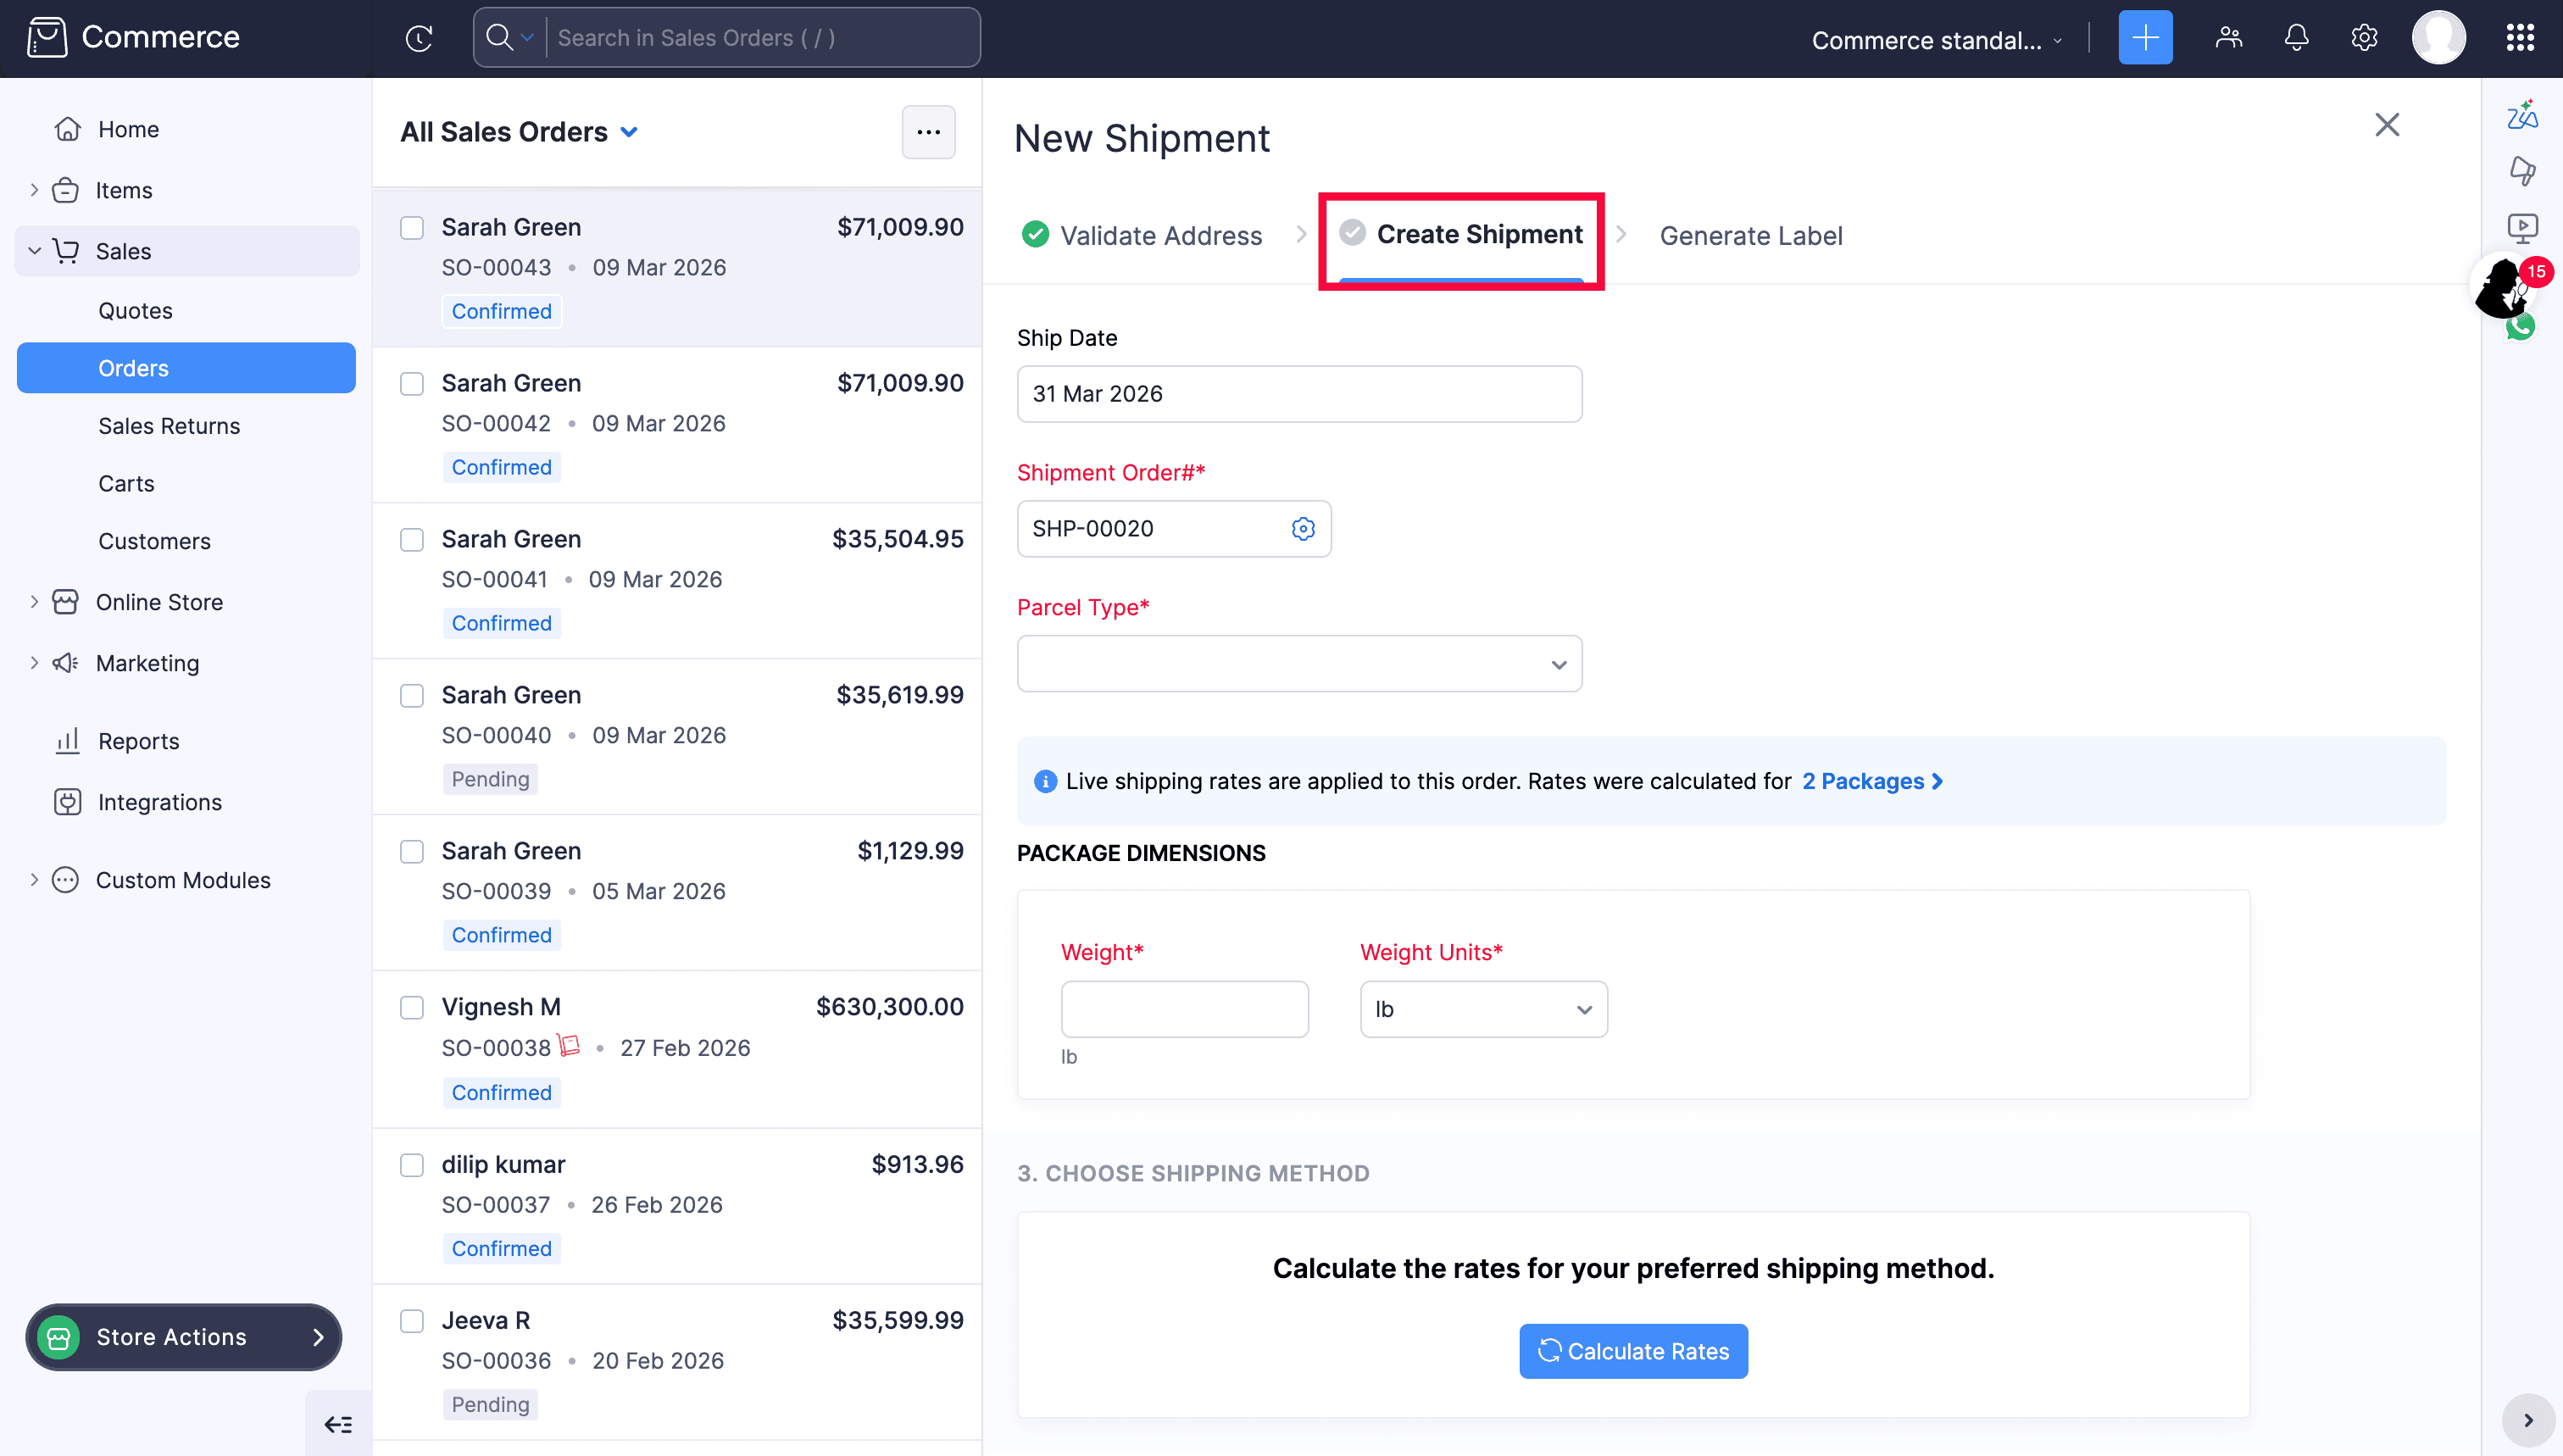
- The Ship Date is auto-filled with the current date.
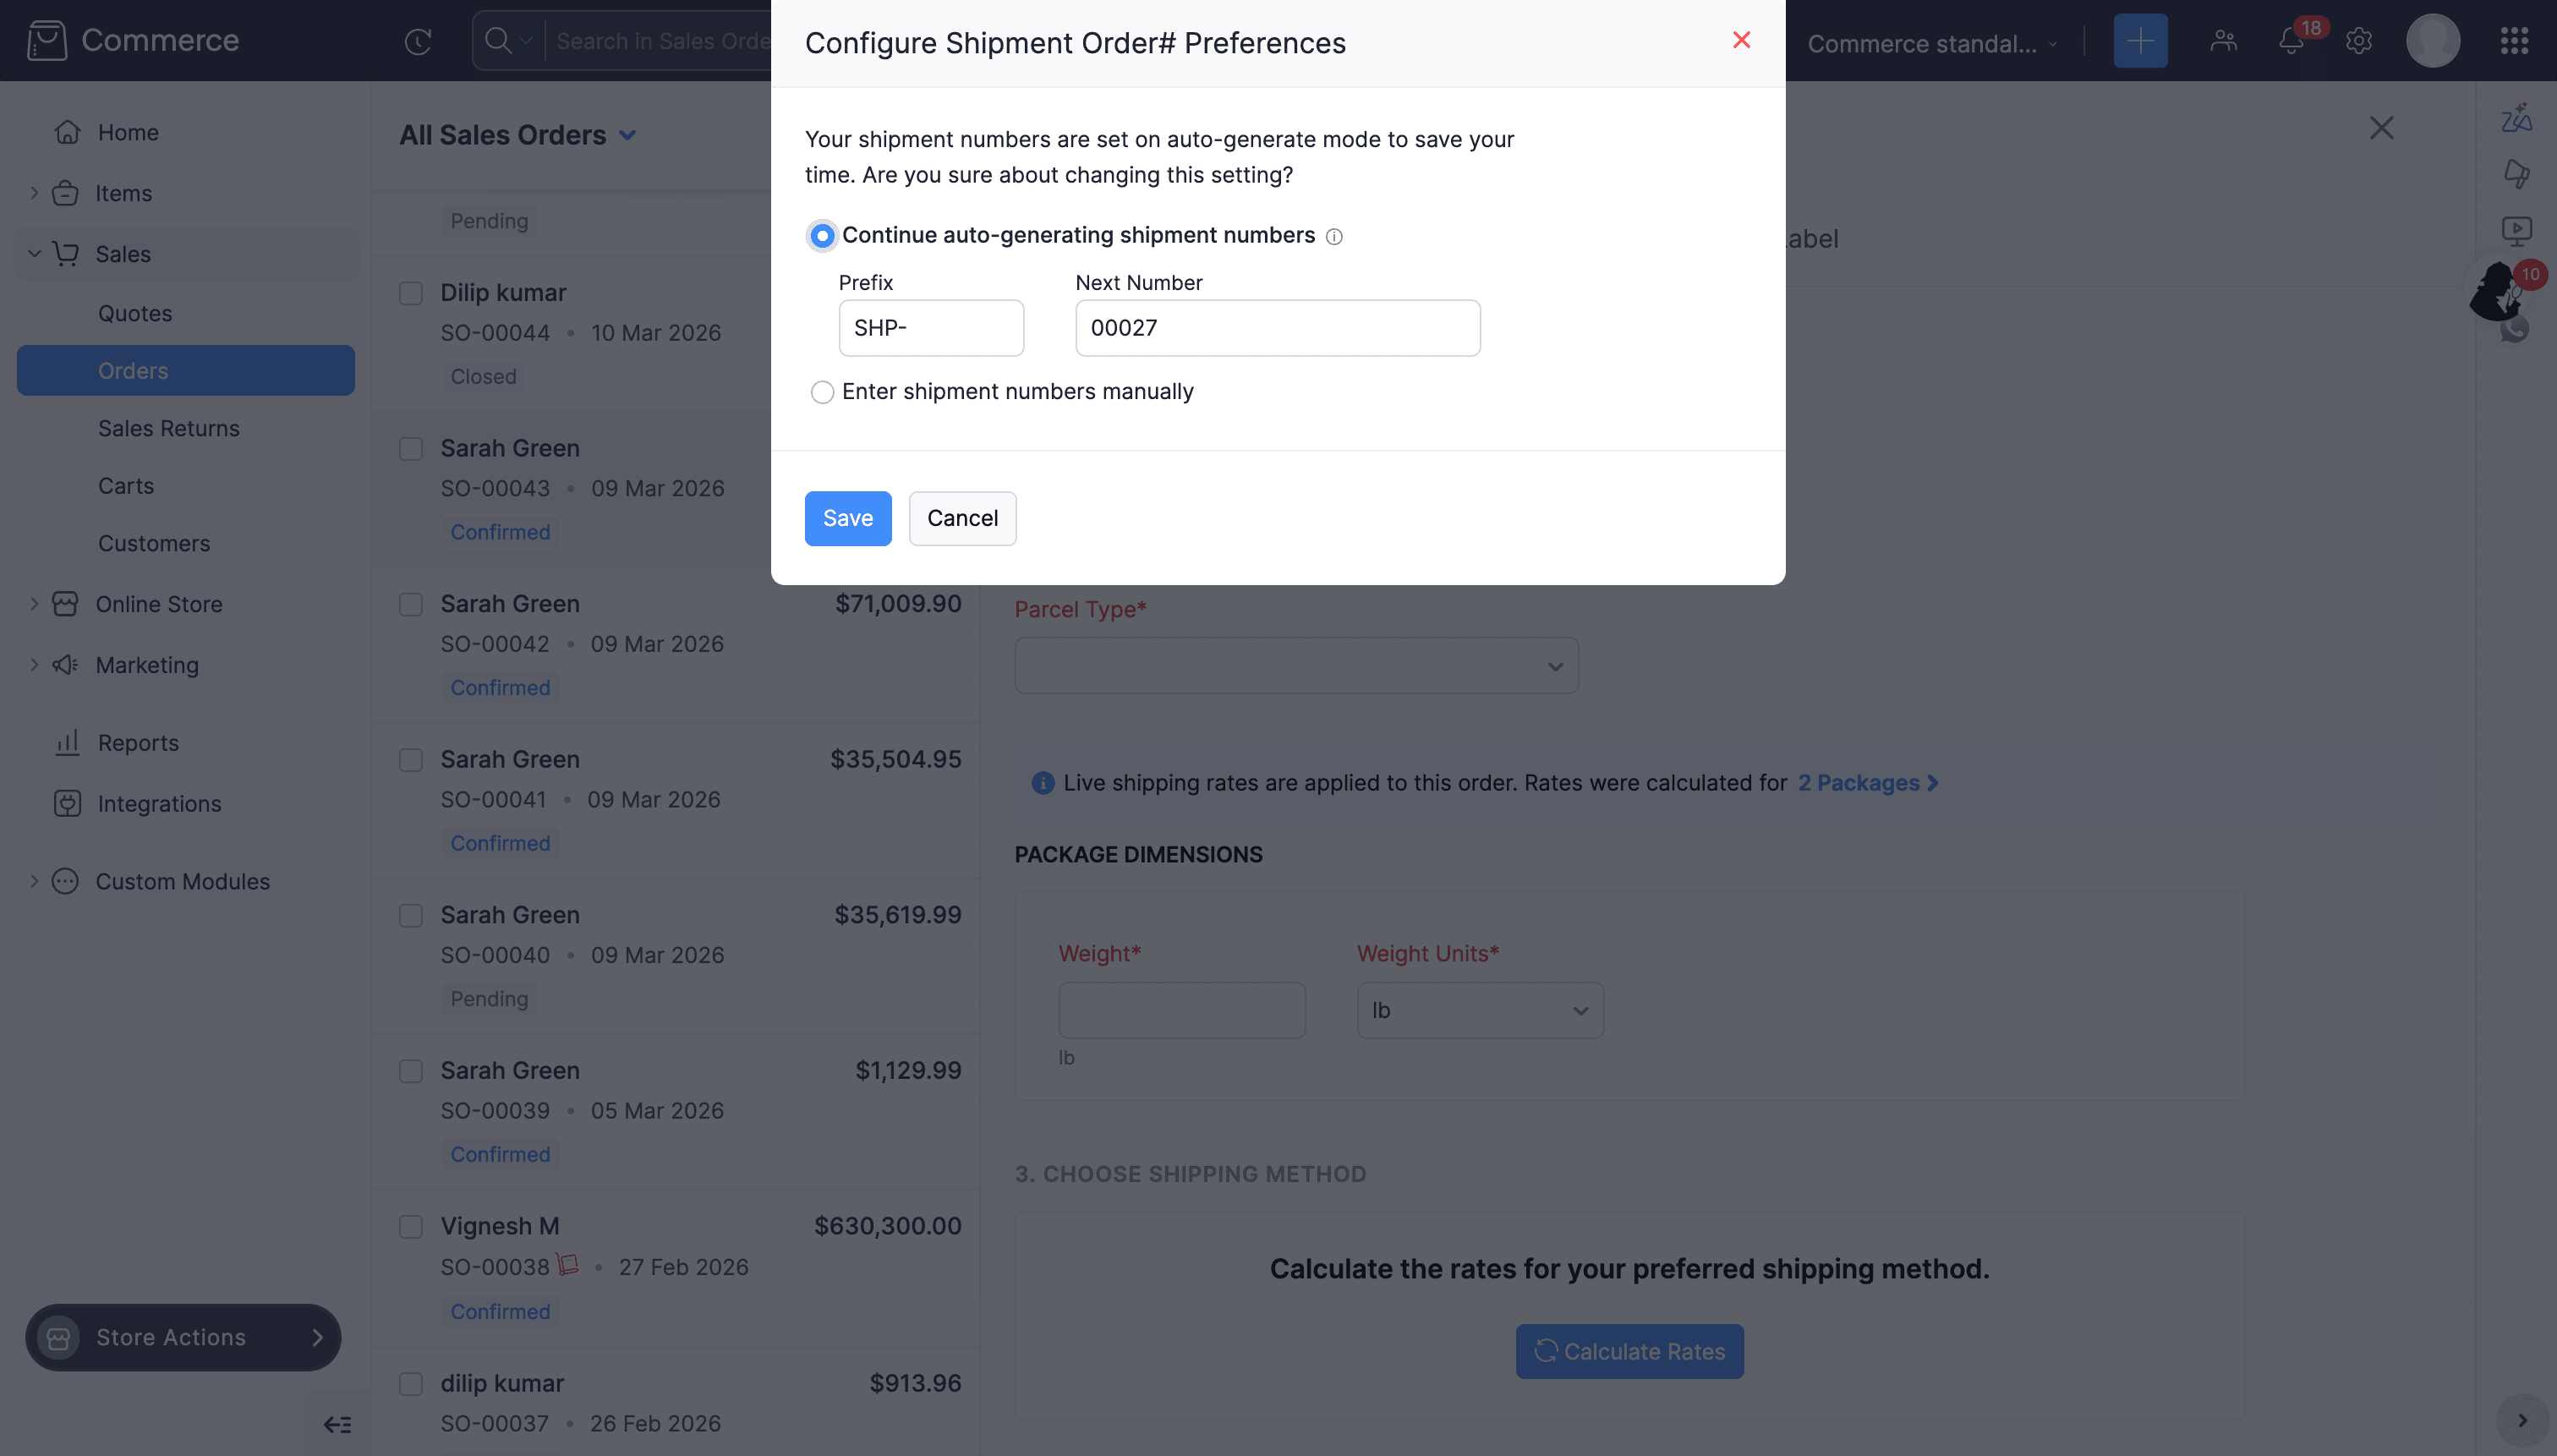
- The Shipment Order number is auto generated. If you wish to edit the shipment order, click the Settings icon in the field.
- In the Configure Shipment Order Preferences popup, select whether to auto-generate shipment numbers or enter manually.
- Continue auto-generate shipment numbers - Enter the Prefix and Next Number, it will be updated in the transaction number series.
- Enter shipment numbers manually - This option allows you to enter the shipment number manually.
- Click Save.
- Select the required Parcel Type for the order shipment from the dropdown.
Dimension Prefill Option
Dimension prefill option is available only if the customer’s order used a live shipping rate. If the customer chose a manual/standard shipping rate instead, the packages and their dimensions will not be listed, and you must enter the package dimensions manually while creating the shipment.
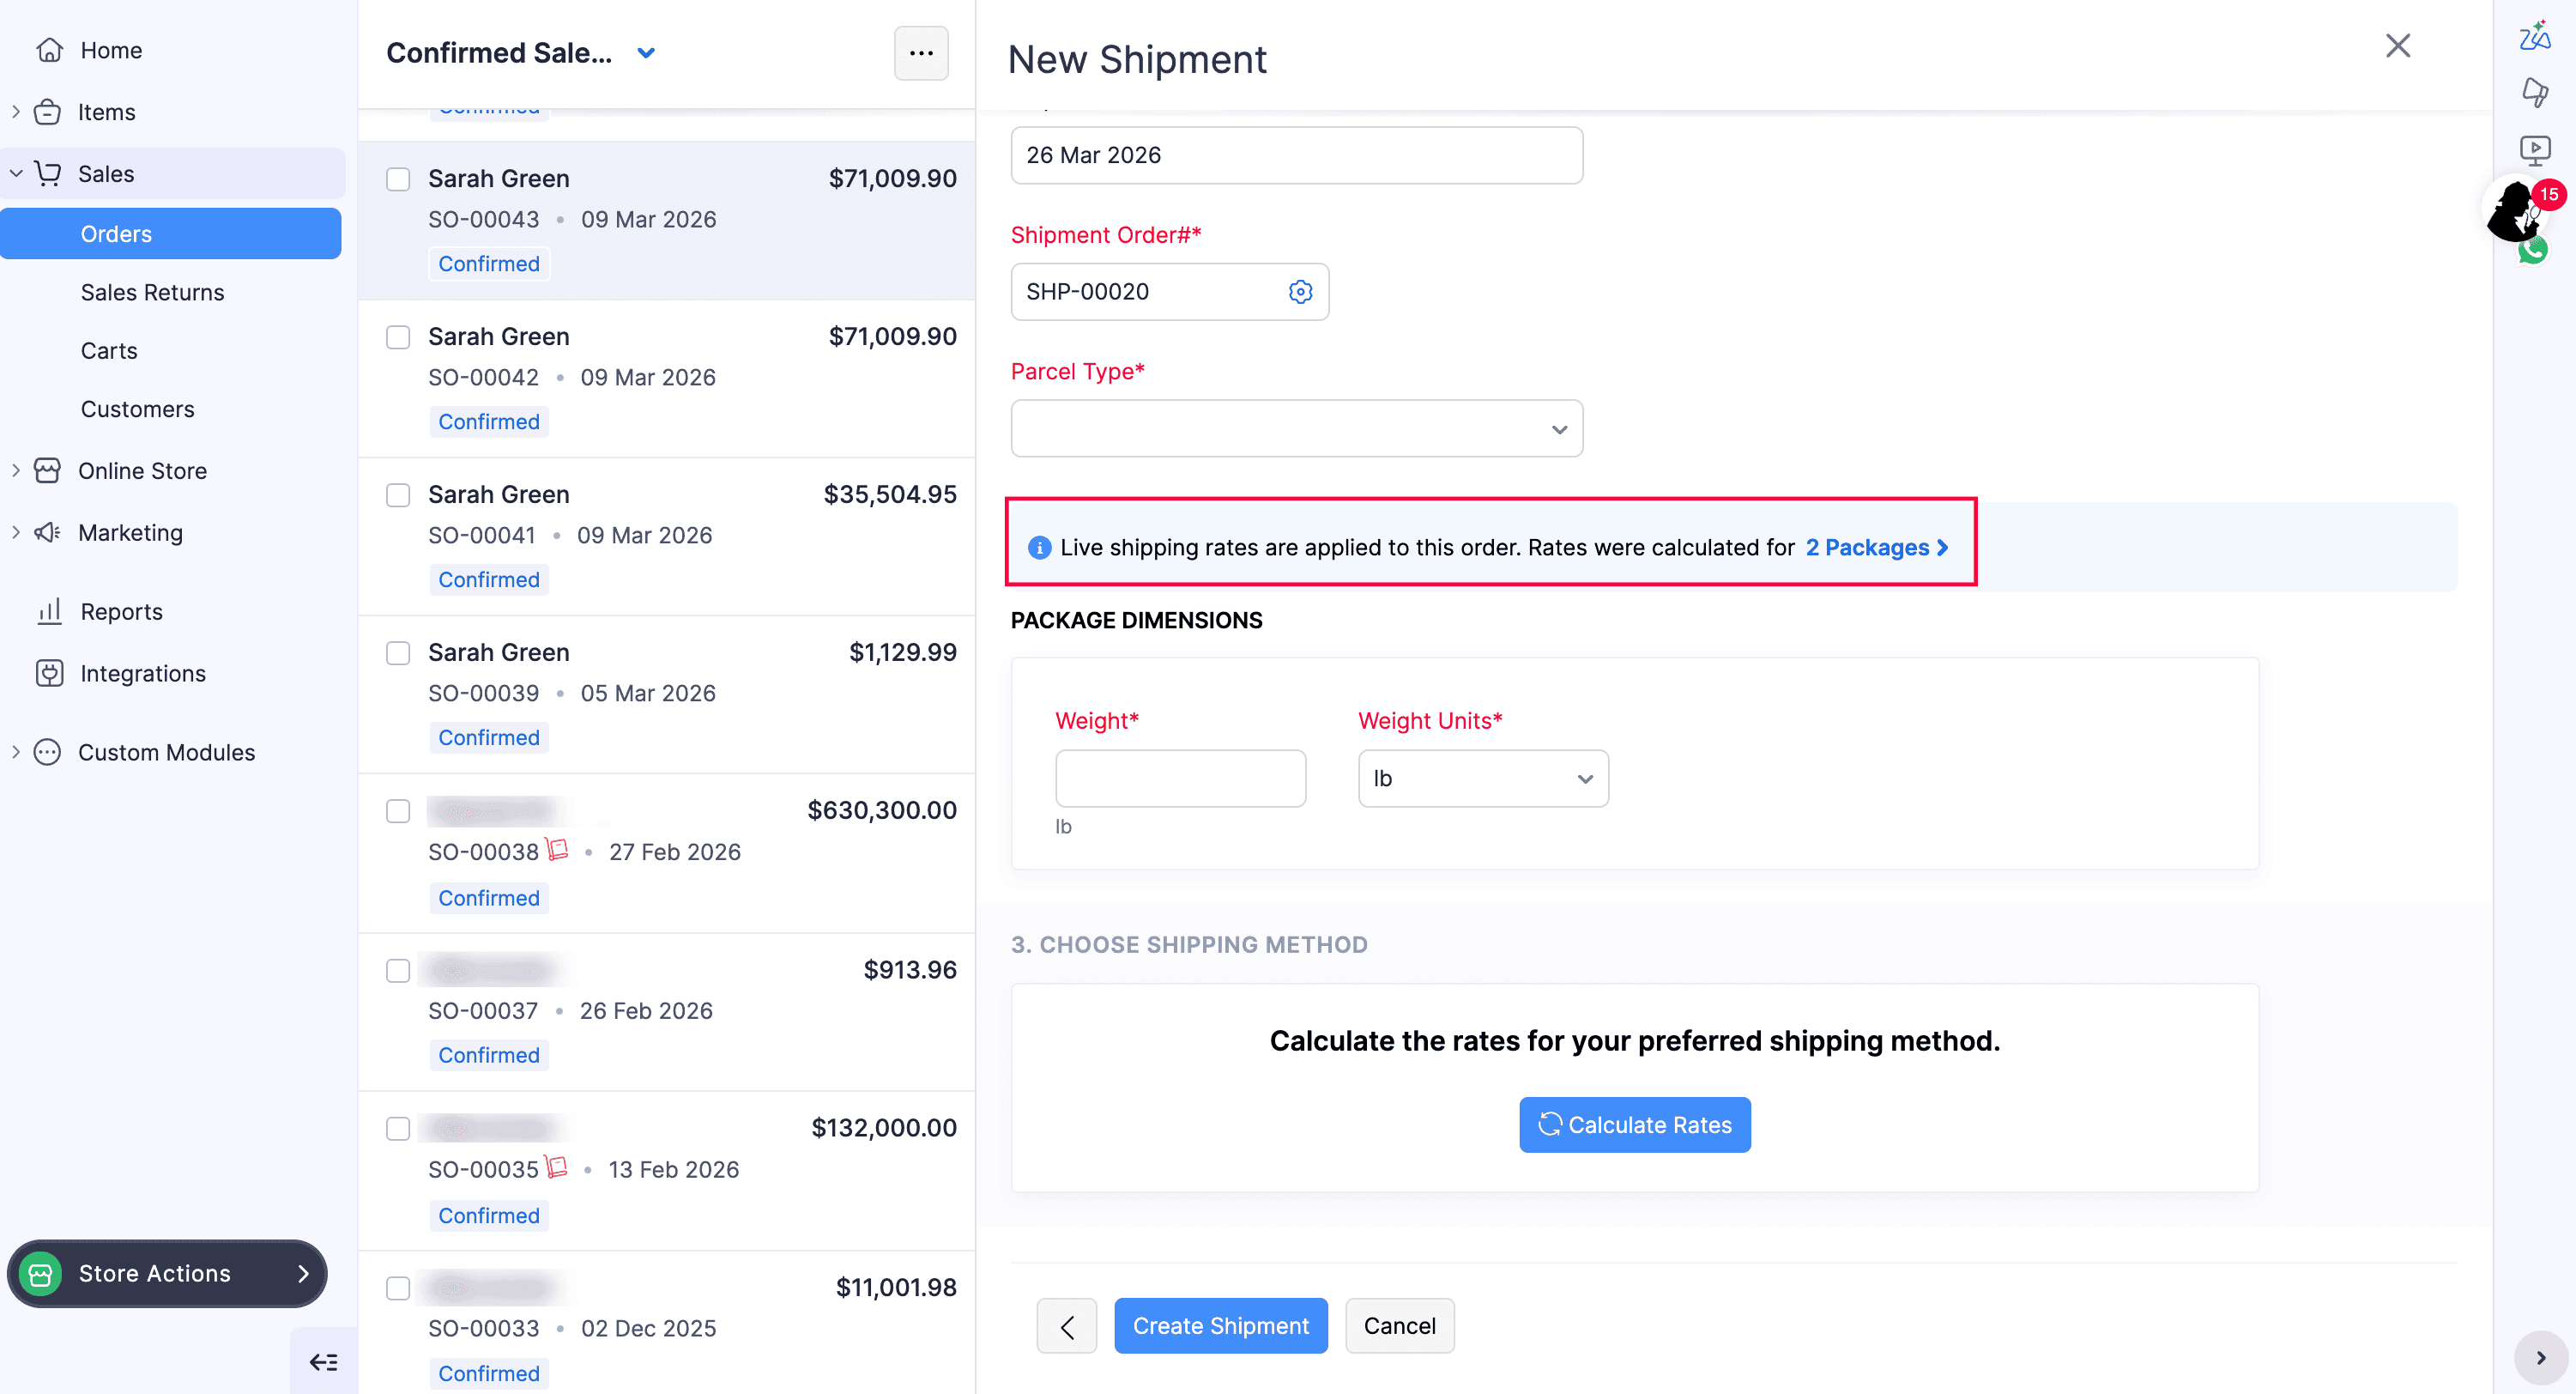
- The packages for which live rates are calculated will be displayed. Click the Packages to view the package details.
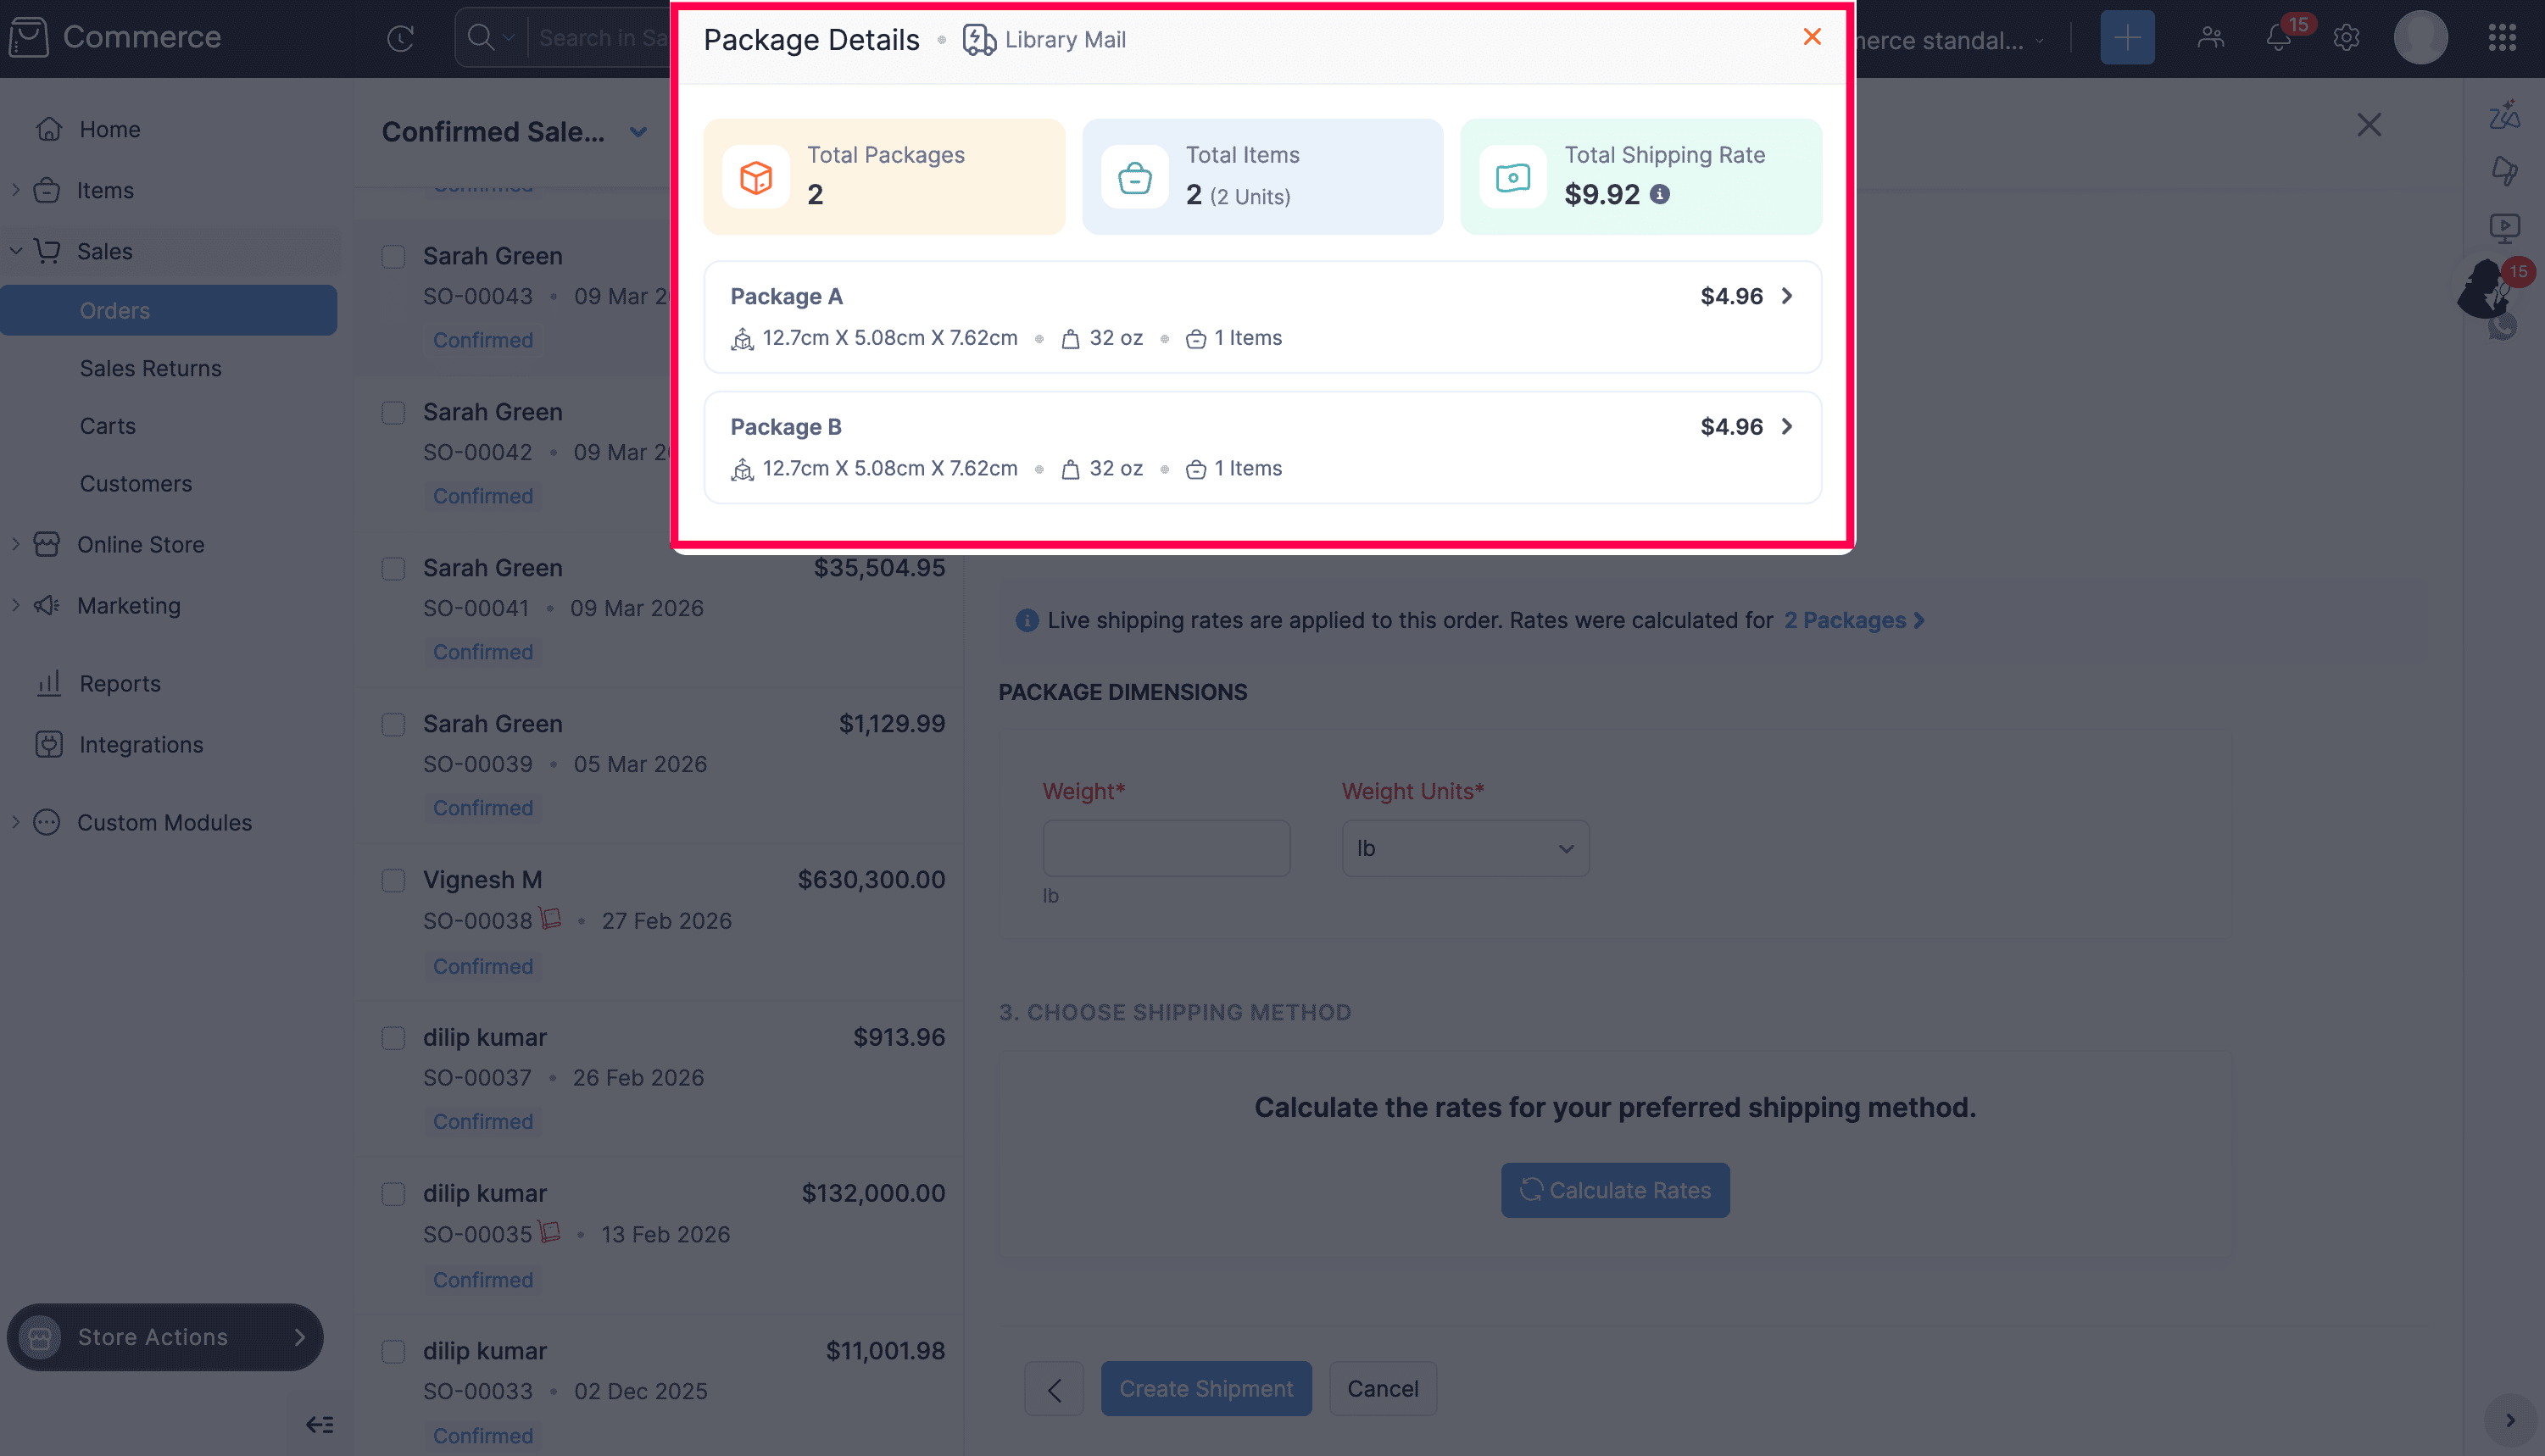
- In the Package Details popup, the details of the packages will be listed with their live shipping rates.
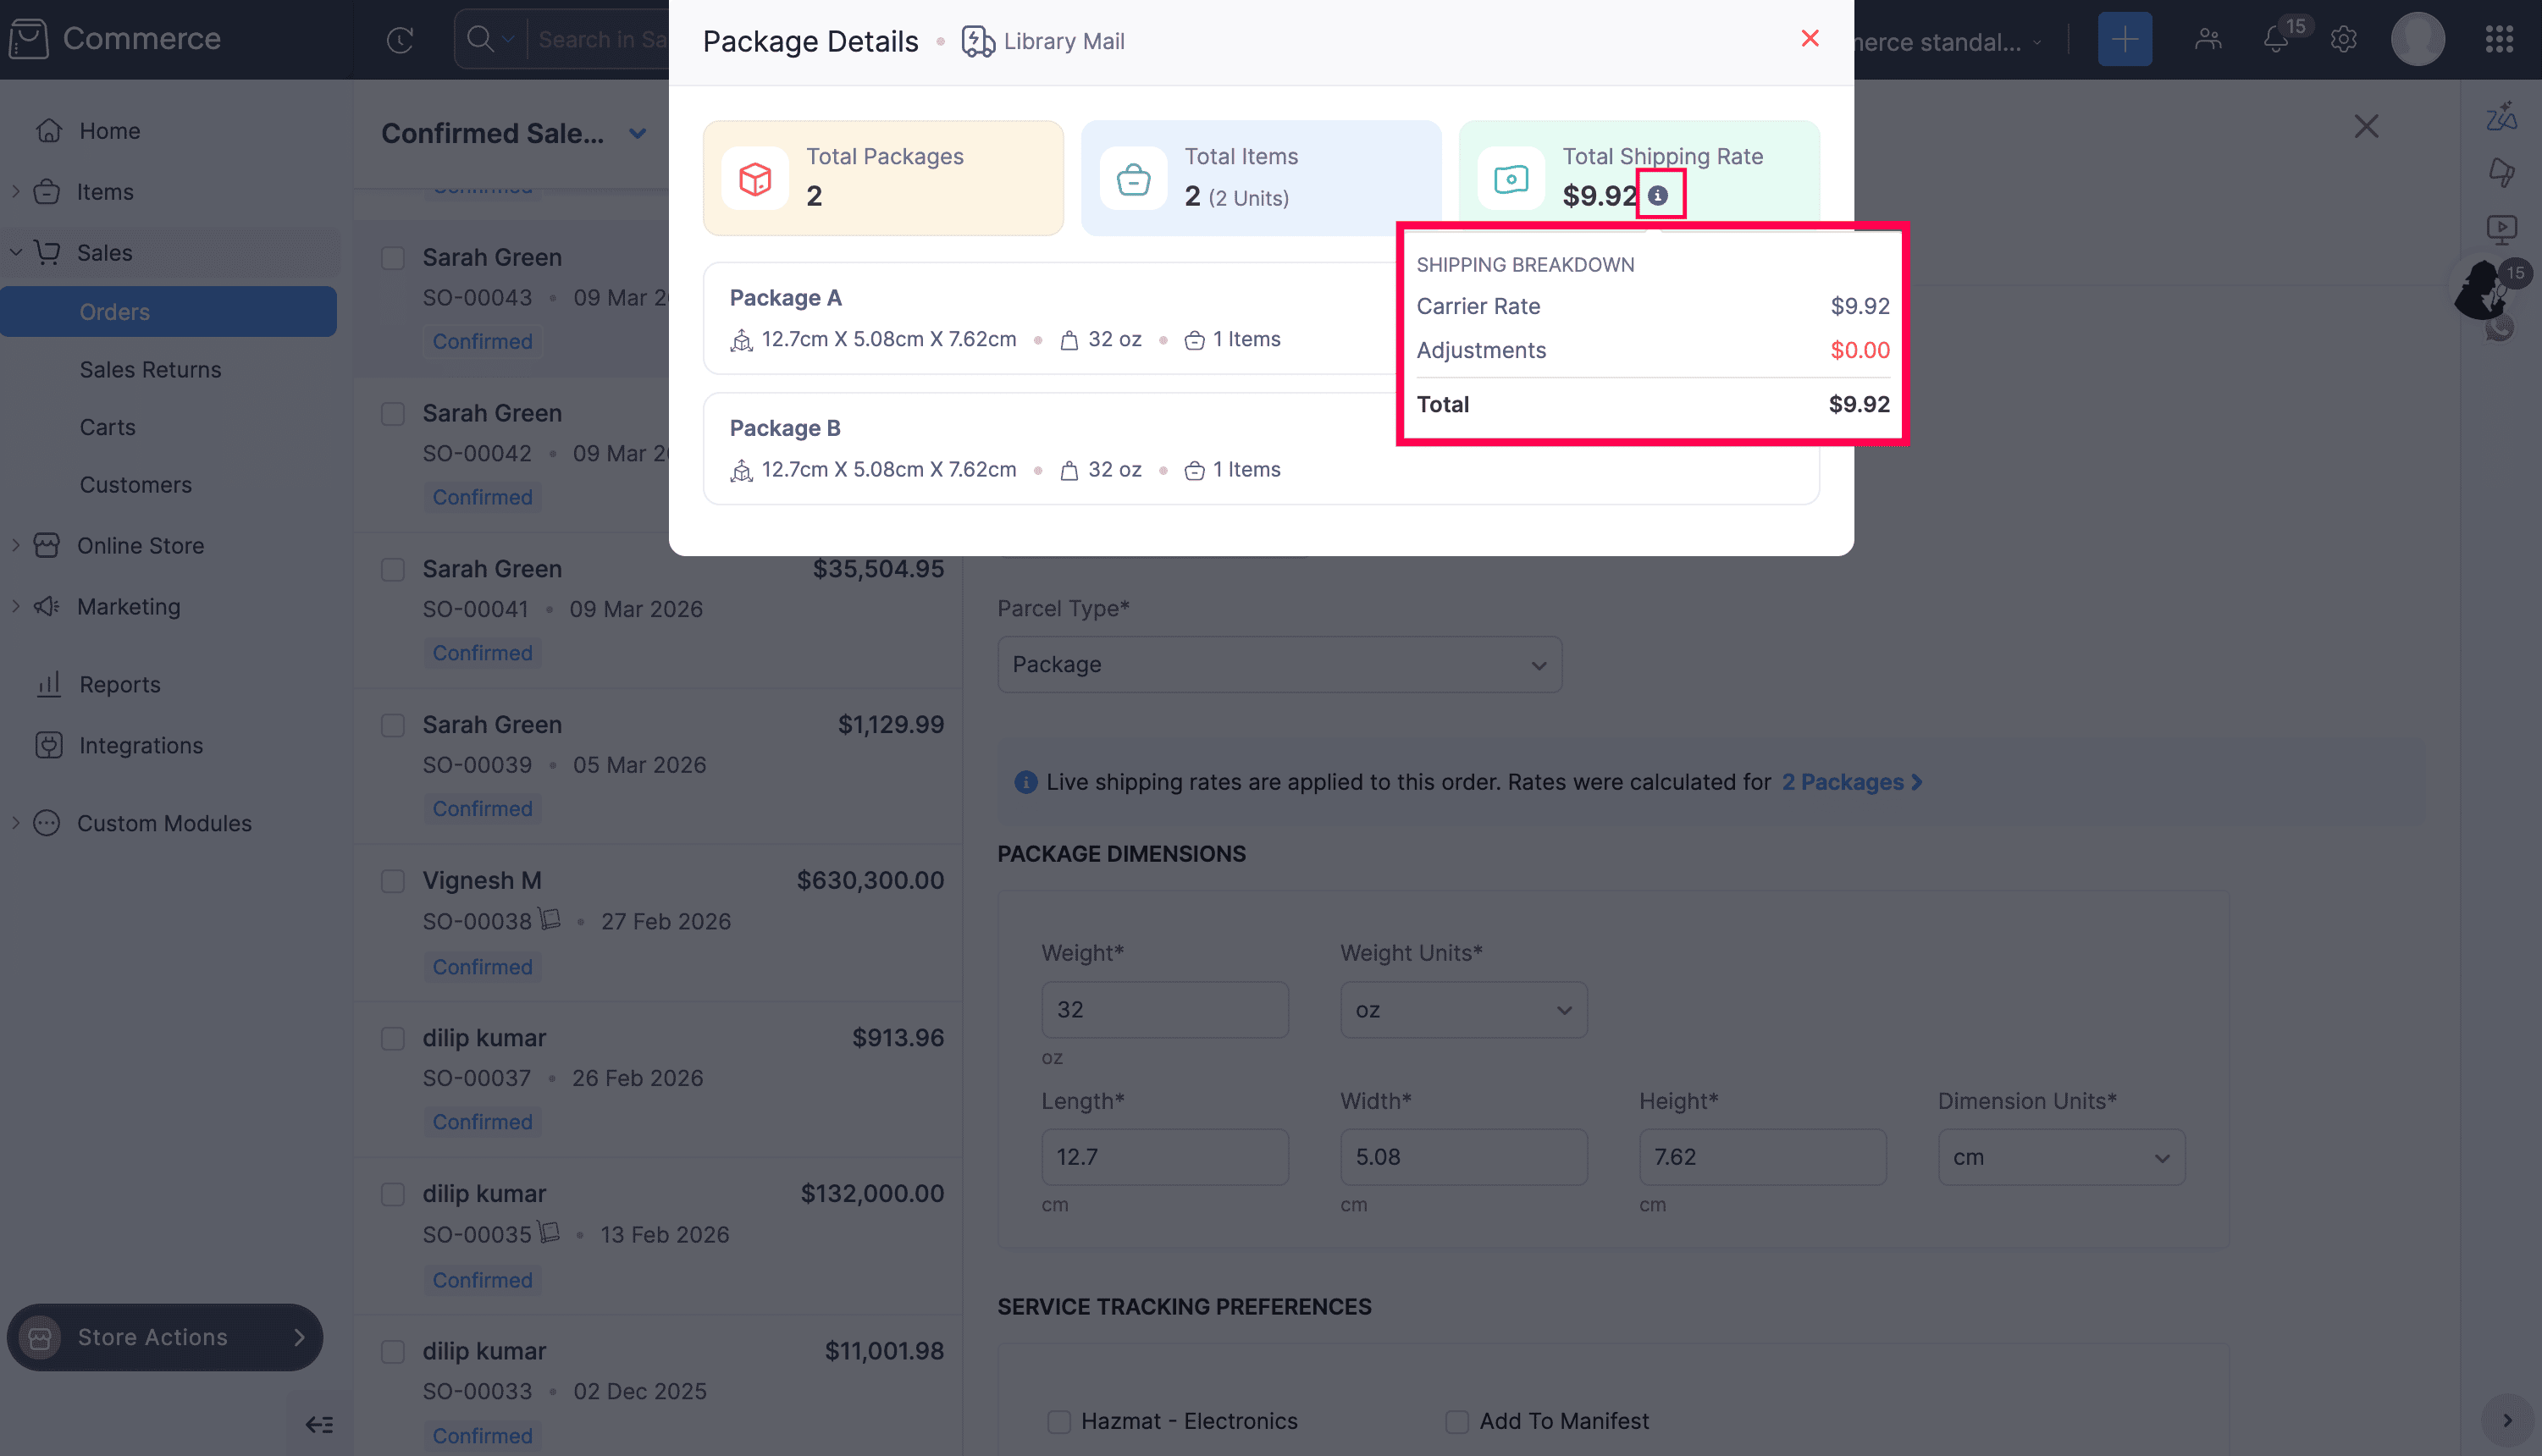
- Click the Info icon in the Total Shipping Rate to view the shipping rate breakdown, displaying the Carrier Rate and Adjustments if any.
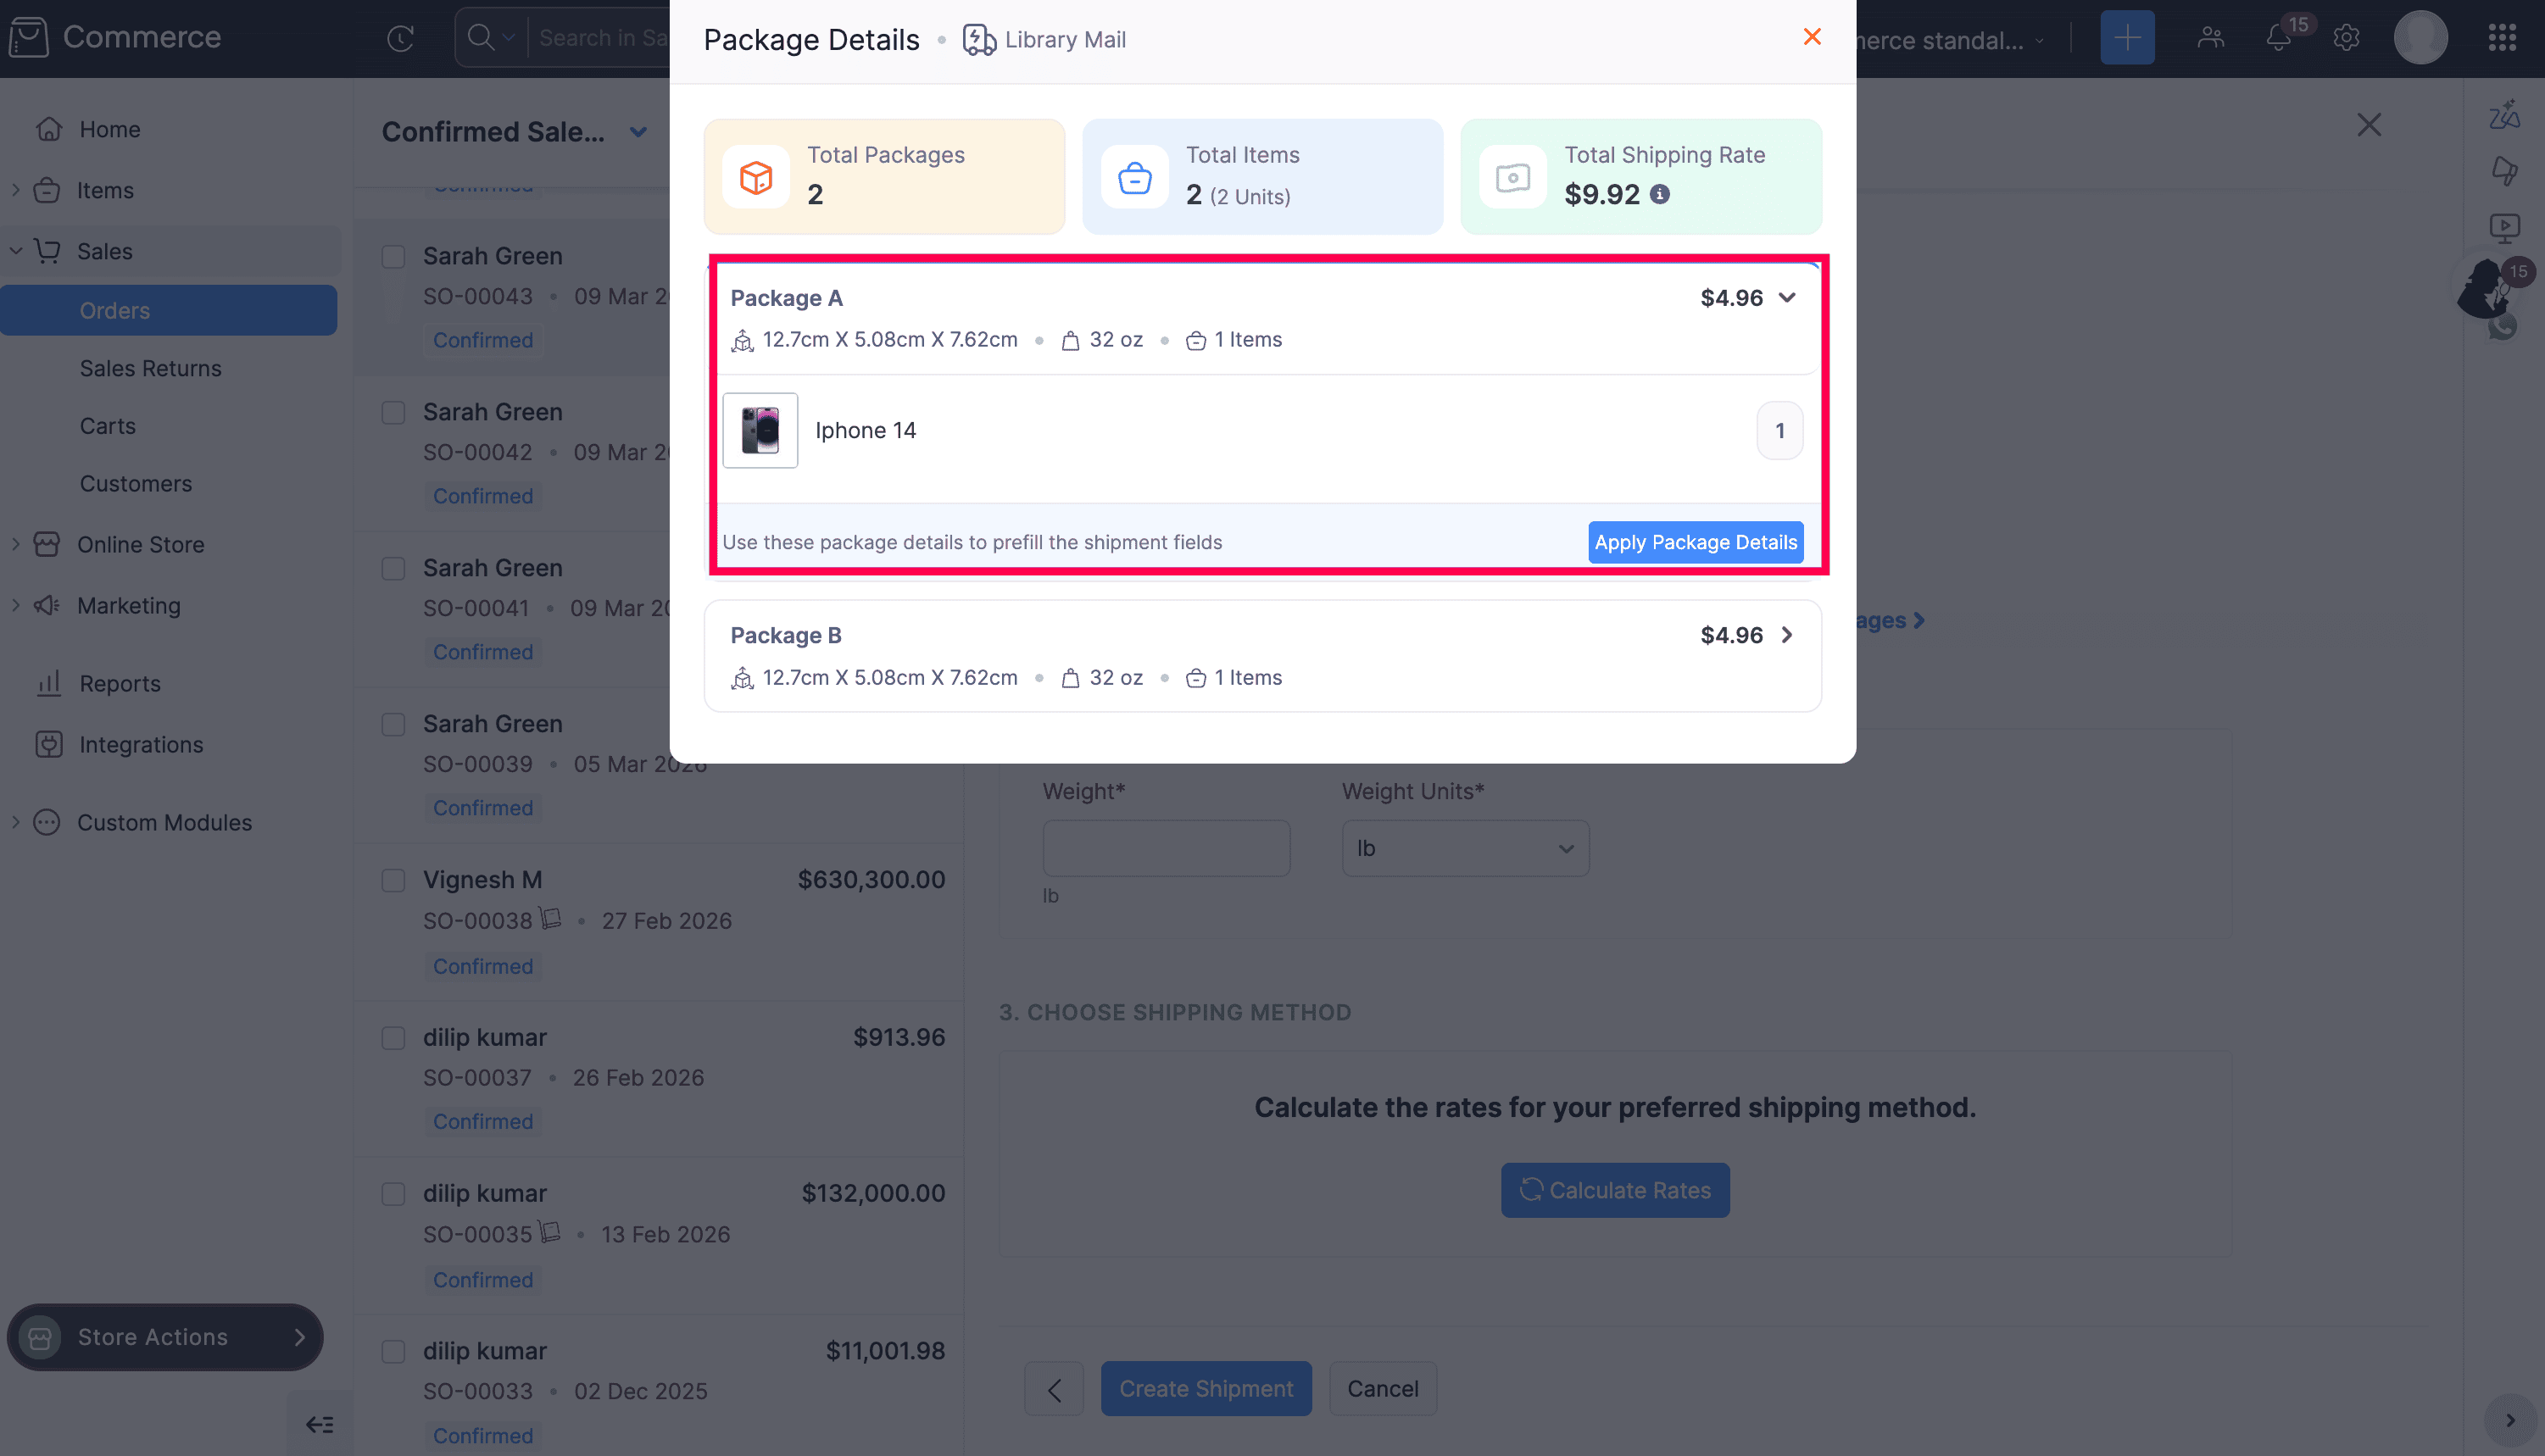
- Select the required package from the list, the provided product dimension, weight and item quantity are displayed.
- Click Apply Package Details to auto-fill the product dimension to the shipment.
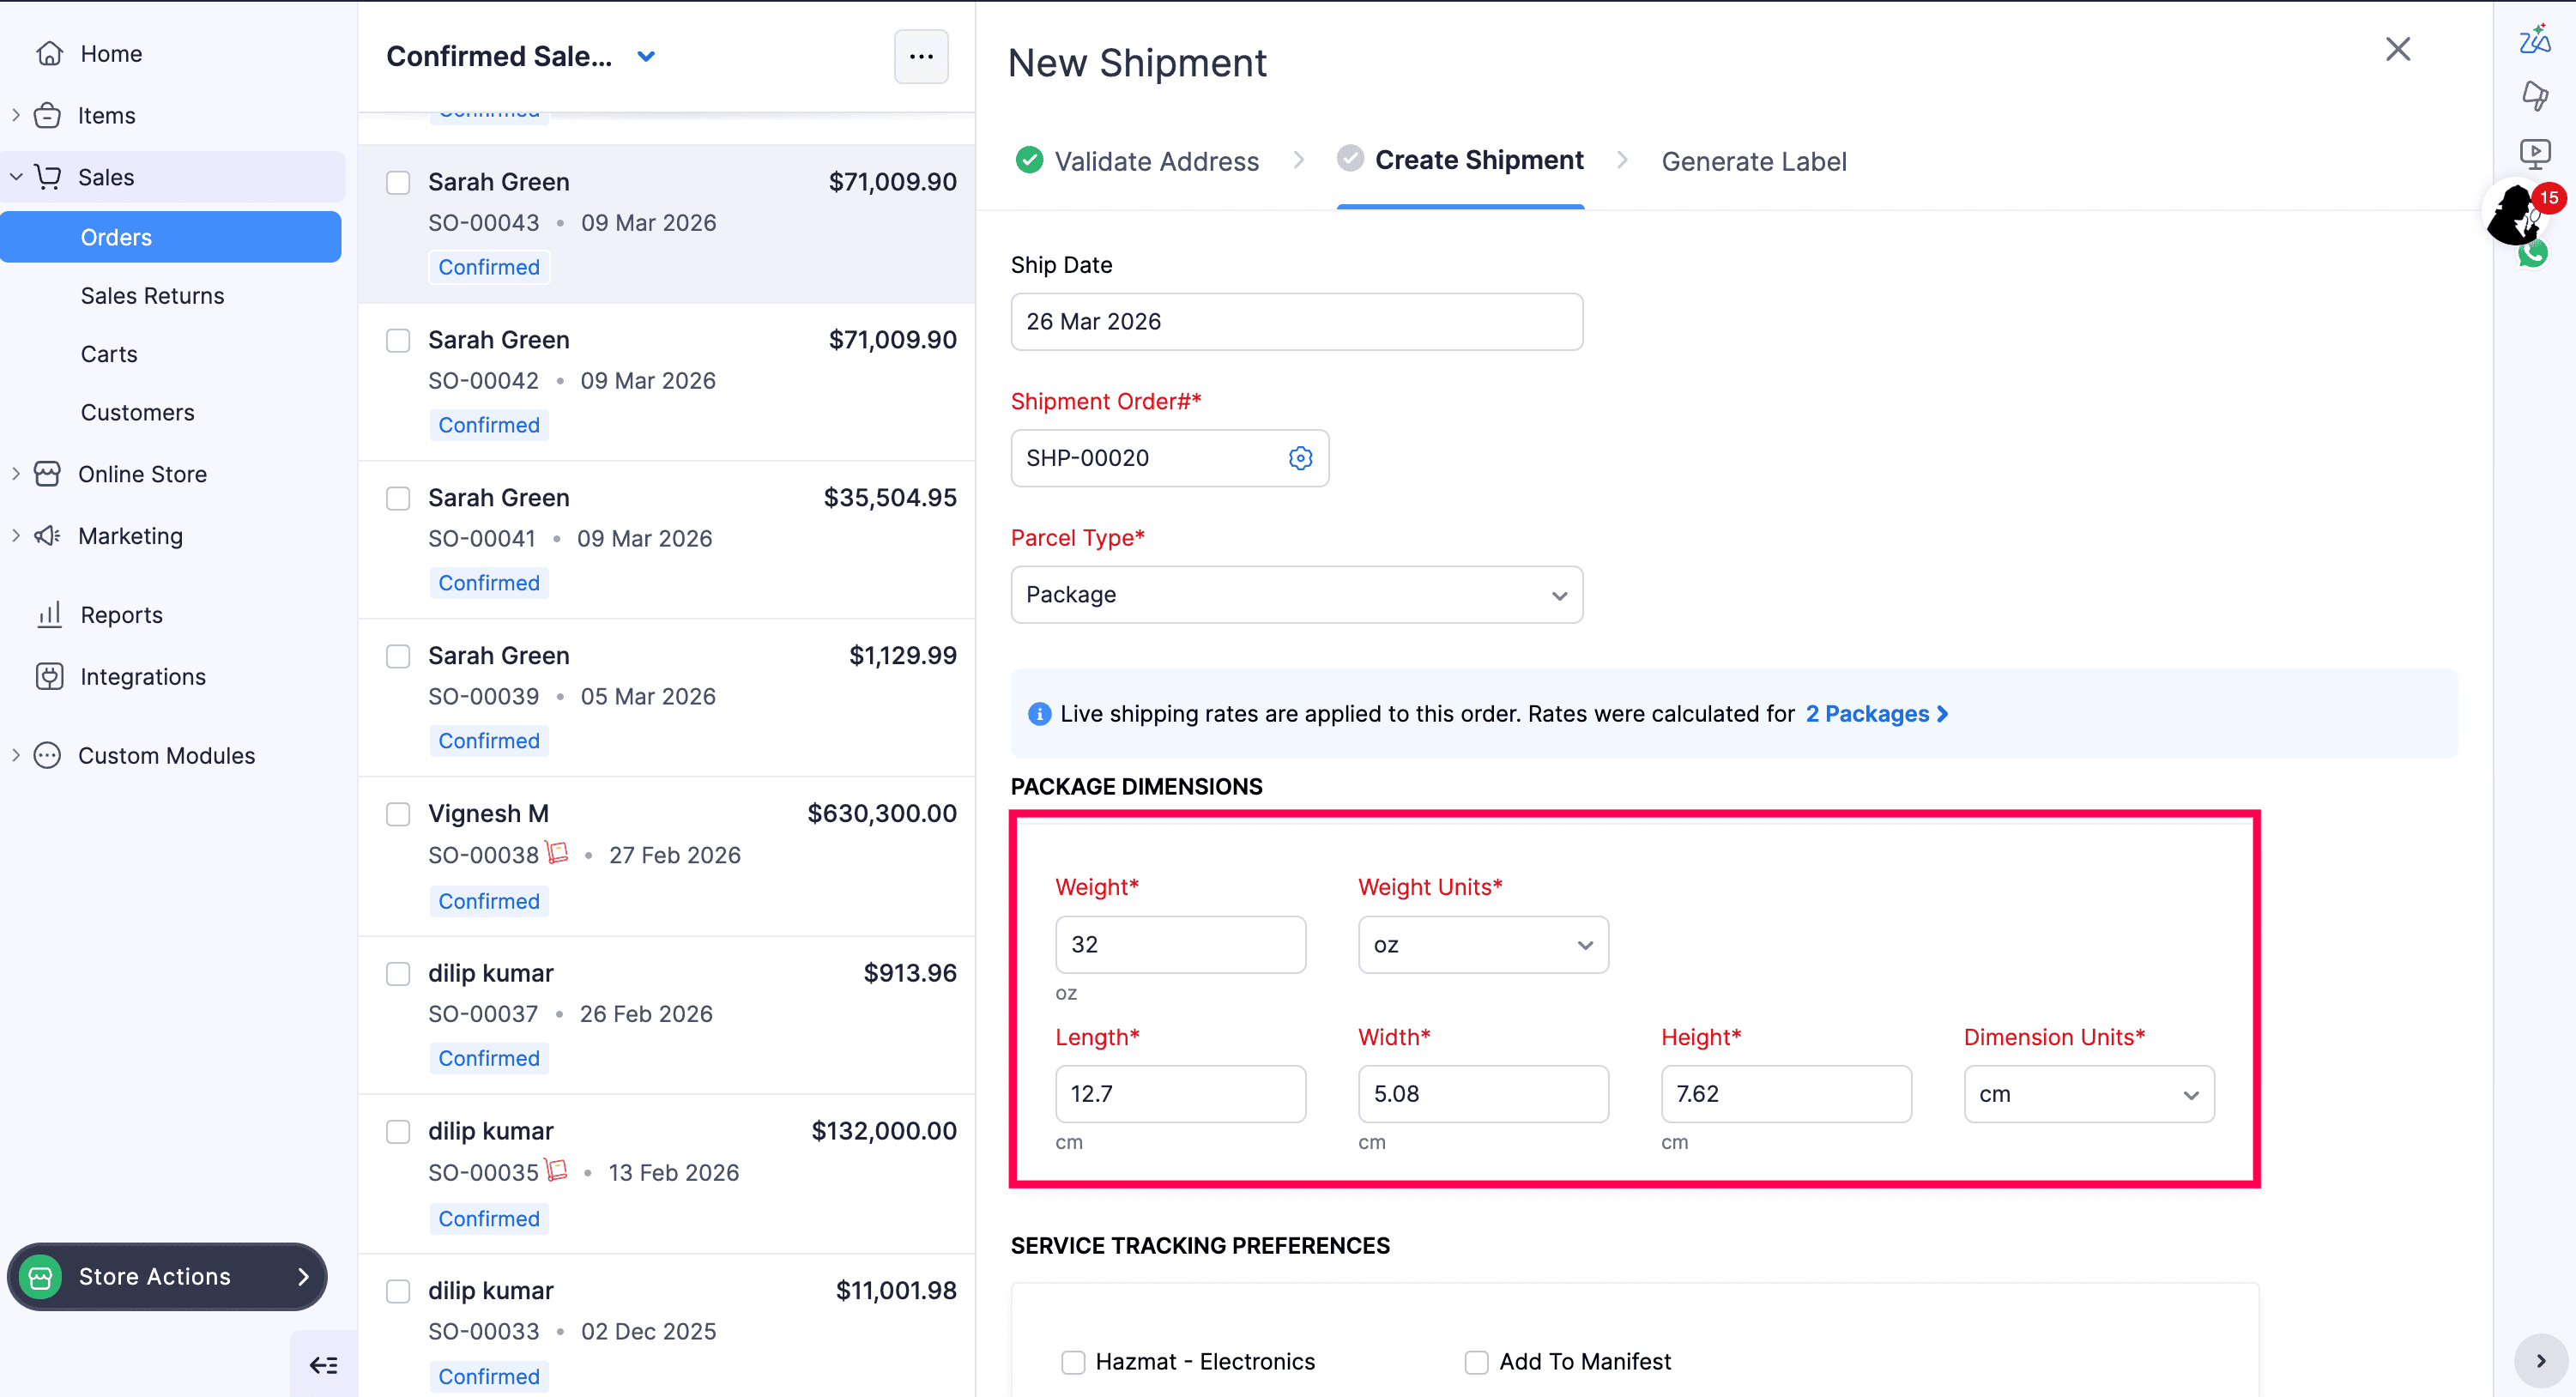
- The selected package details are prefilled in the Package Dimensions section.
Note: The package dimensions are prefilled based on the configured package or product dimensions. You can edit the package dimensions if required.
- Under Service Tracking Preferences, select the Label Format and Label Size from the dropdown.
- Select the required Service Type from the dropdown.
- Select the type of trackable delivery confirmation from the Delivery Confirmations dropdown.
- Fill in the other required fields.
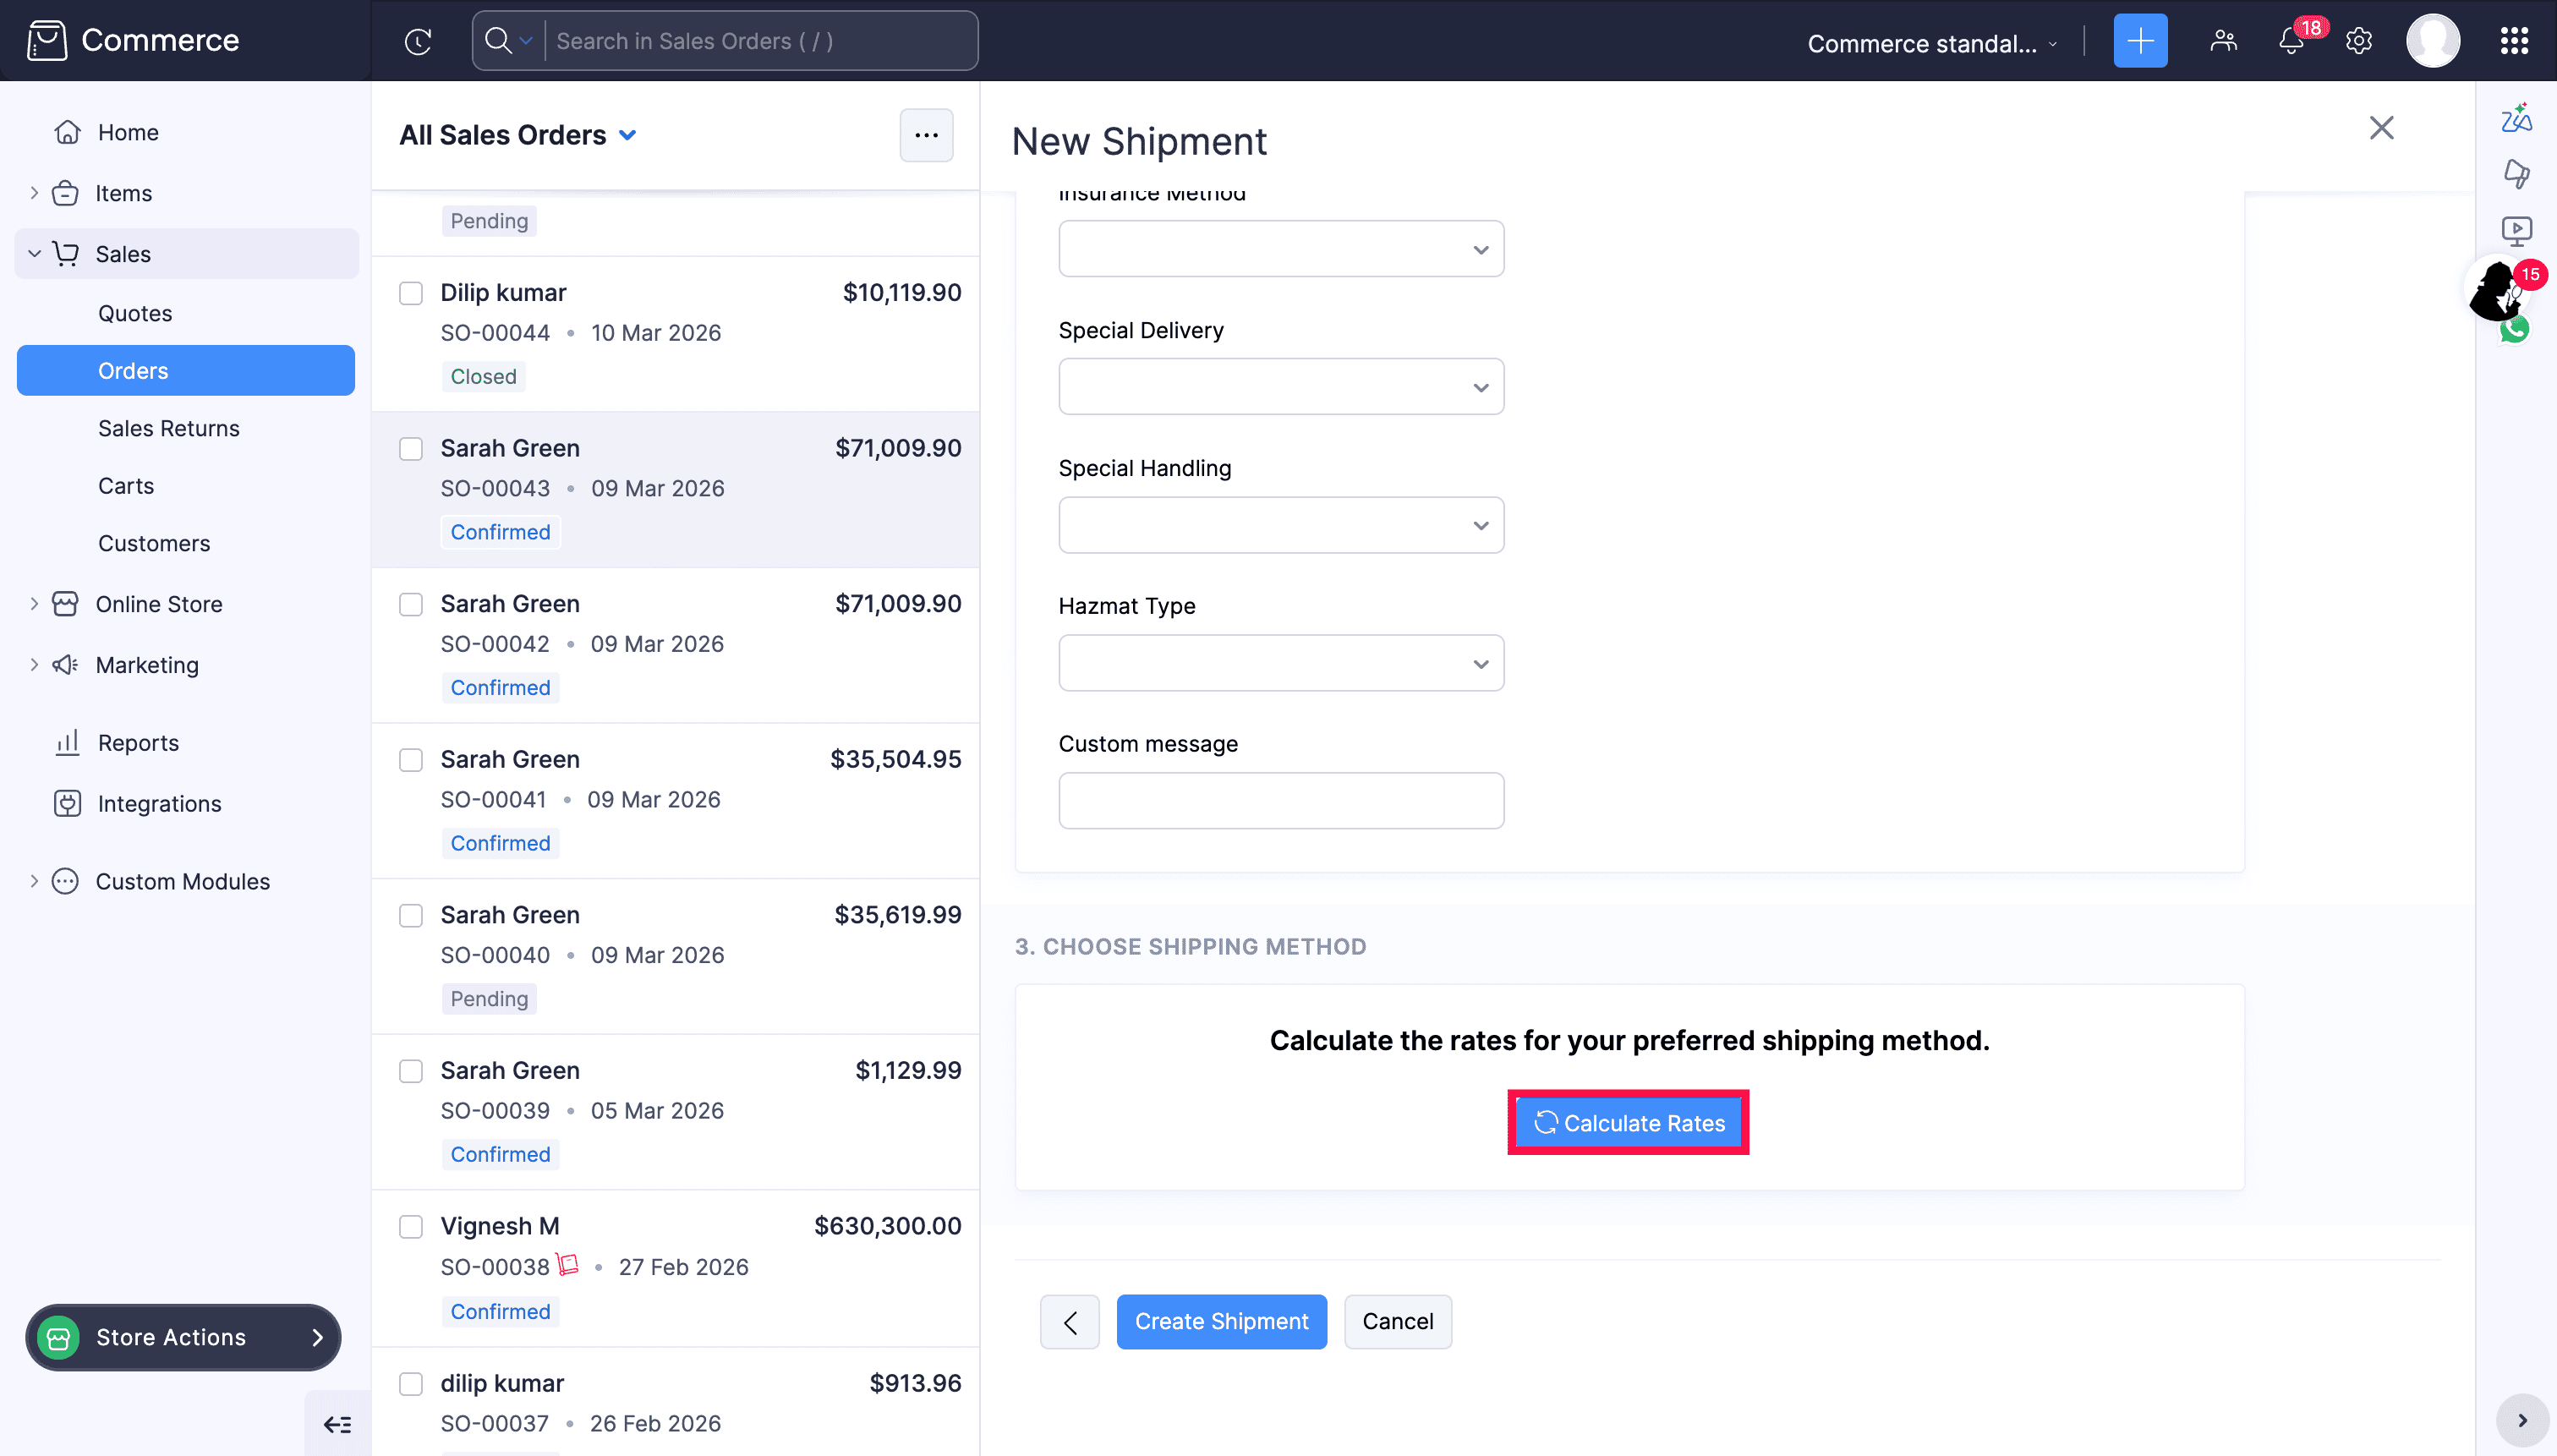
- Under Choose Shipping Method, click Calculate Rates to calculate the live shipping rates.
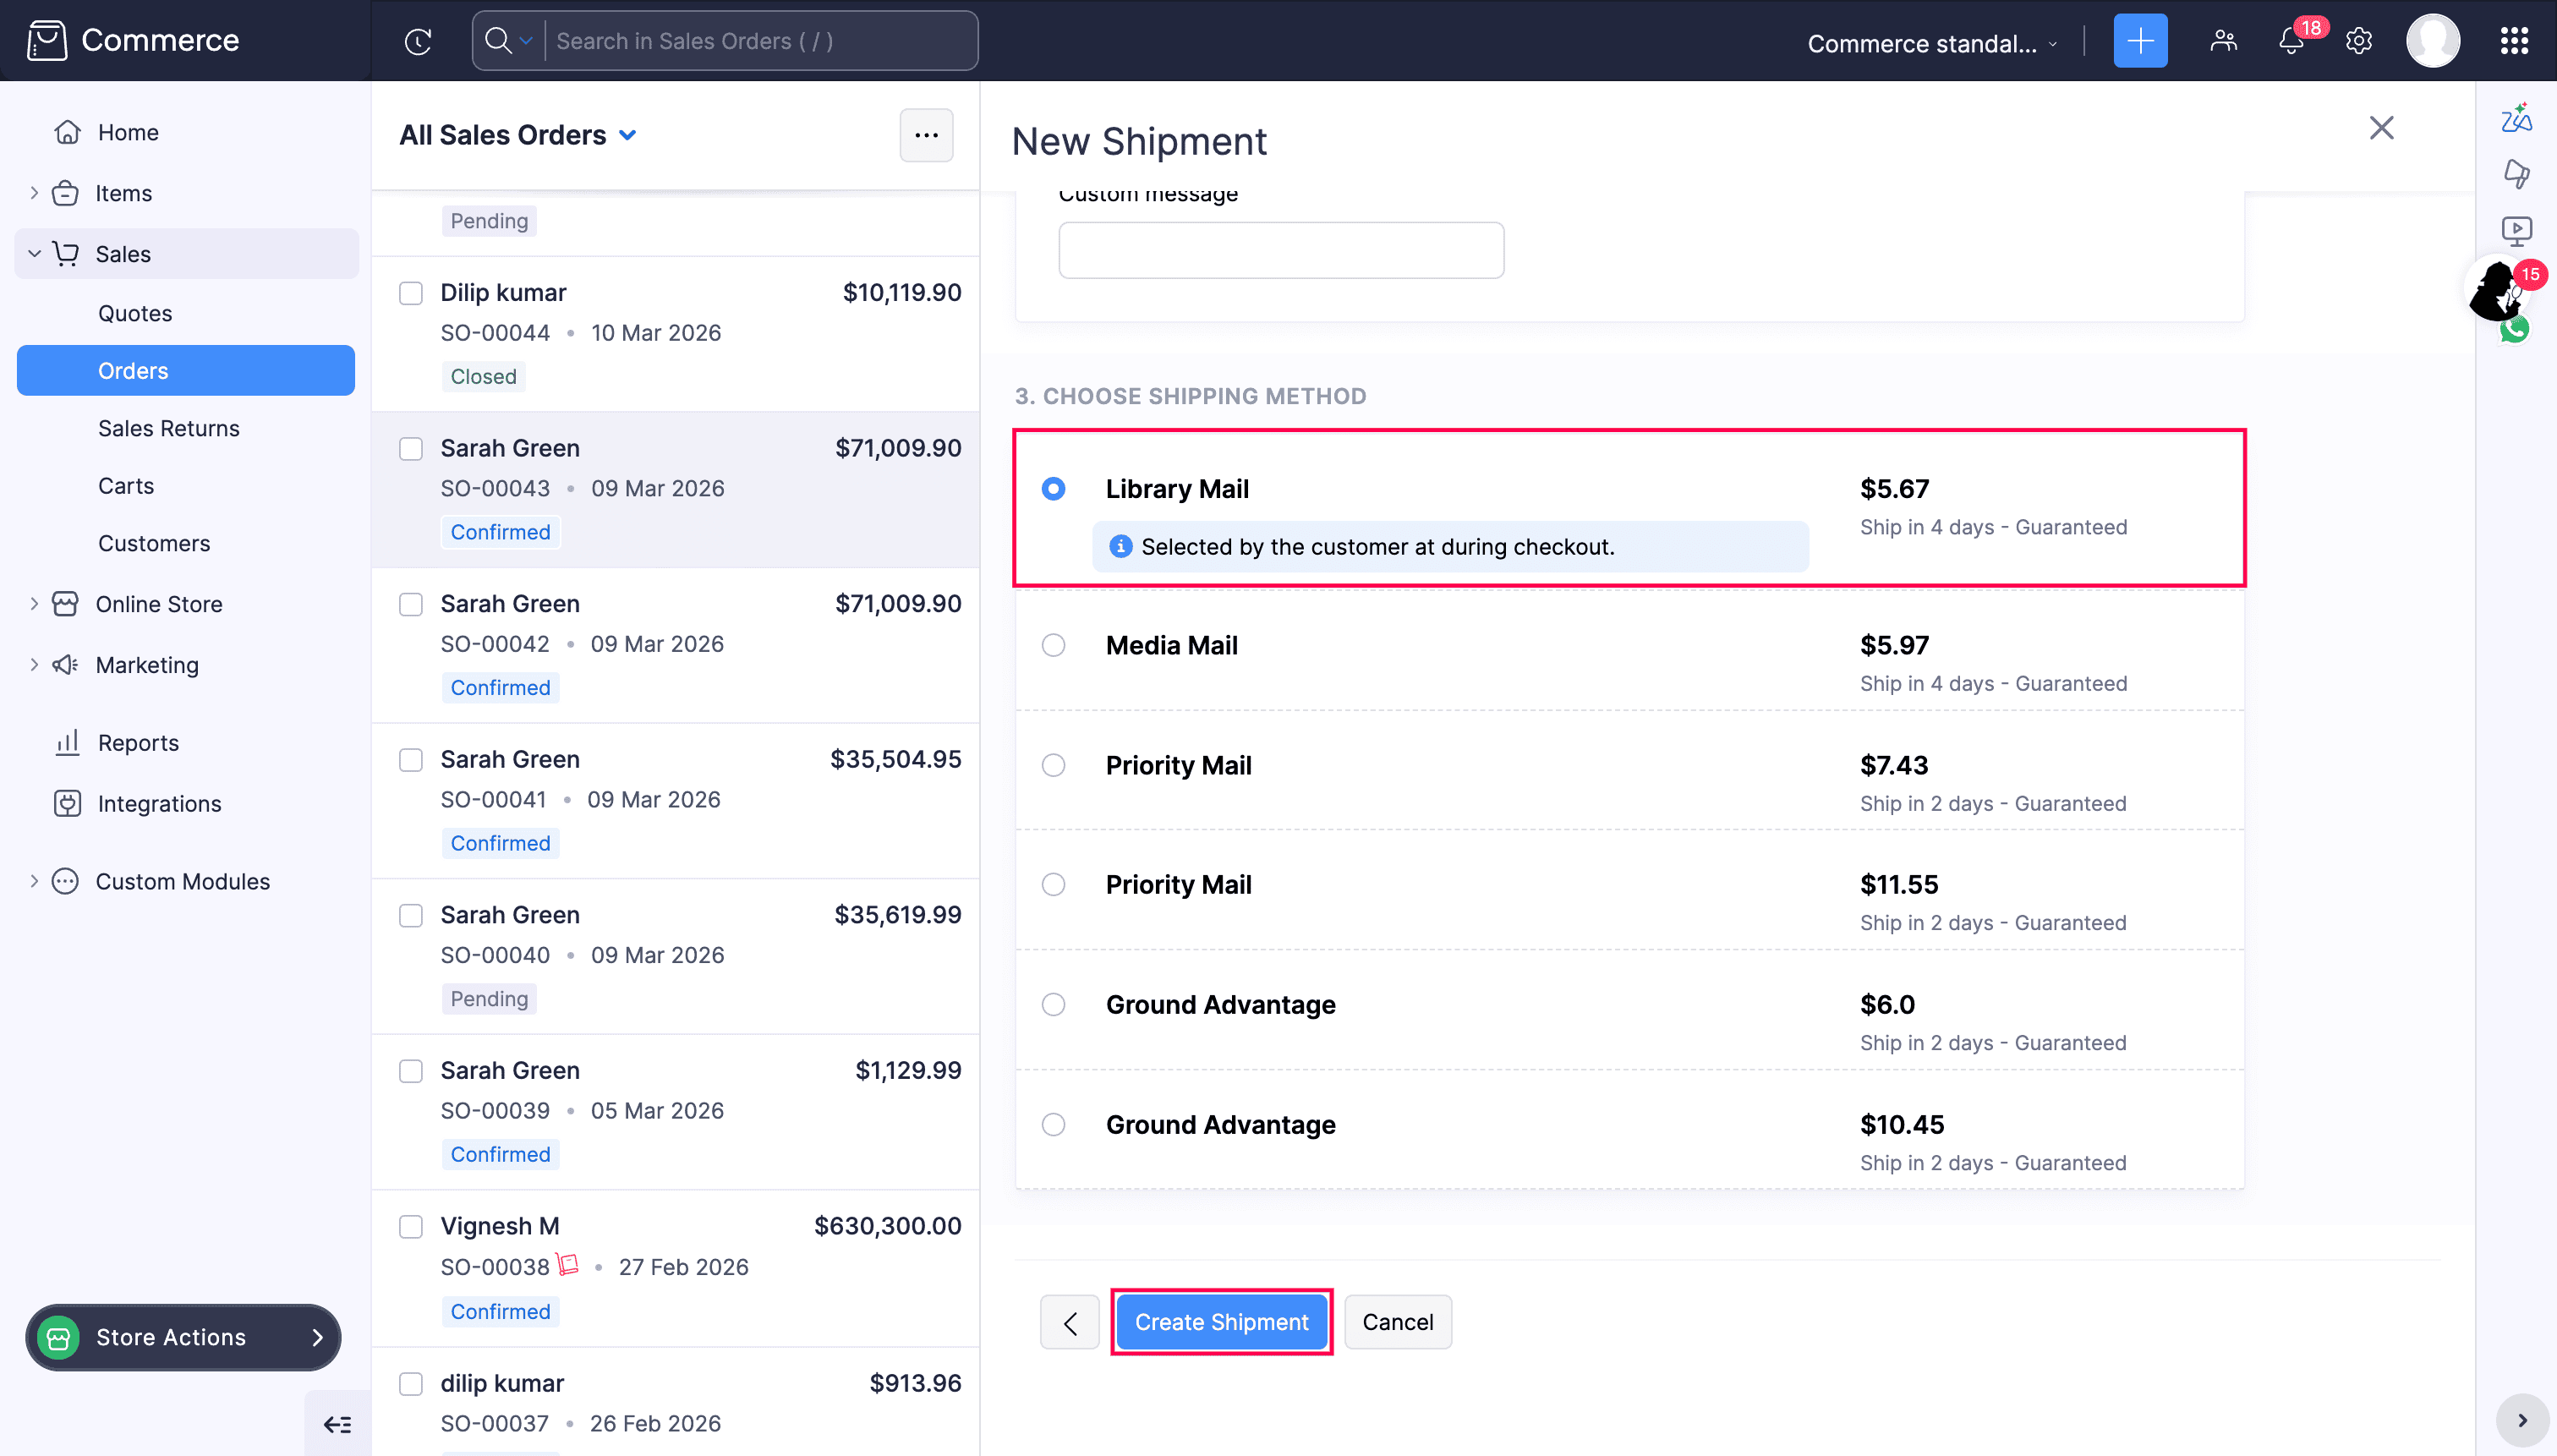
- The shipment selected by the customer will be listed along with the other shipment methods and rates.
- Select the required shipment method and click Create Shipment.
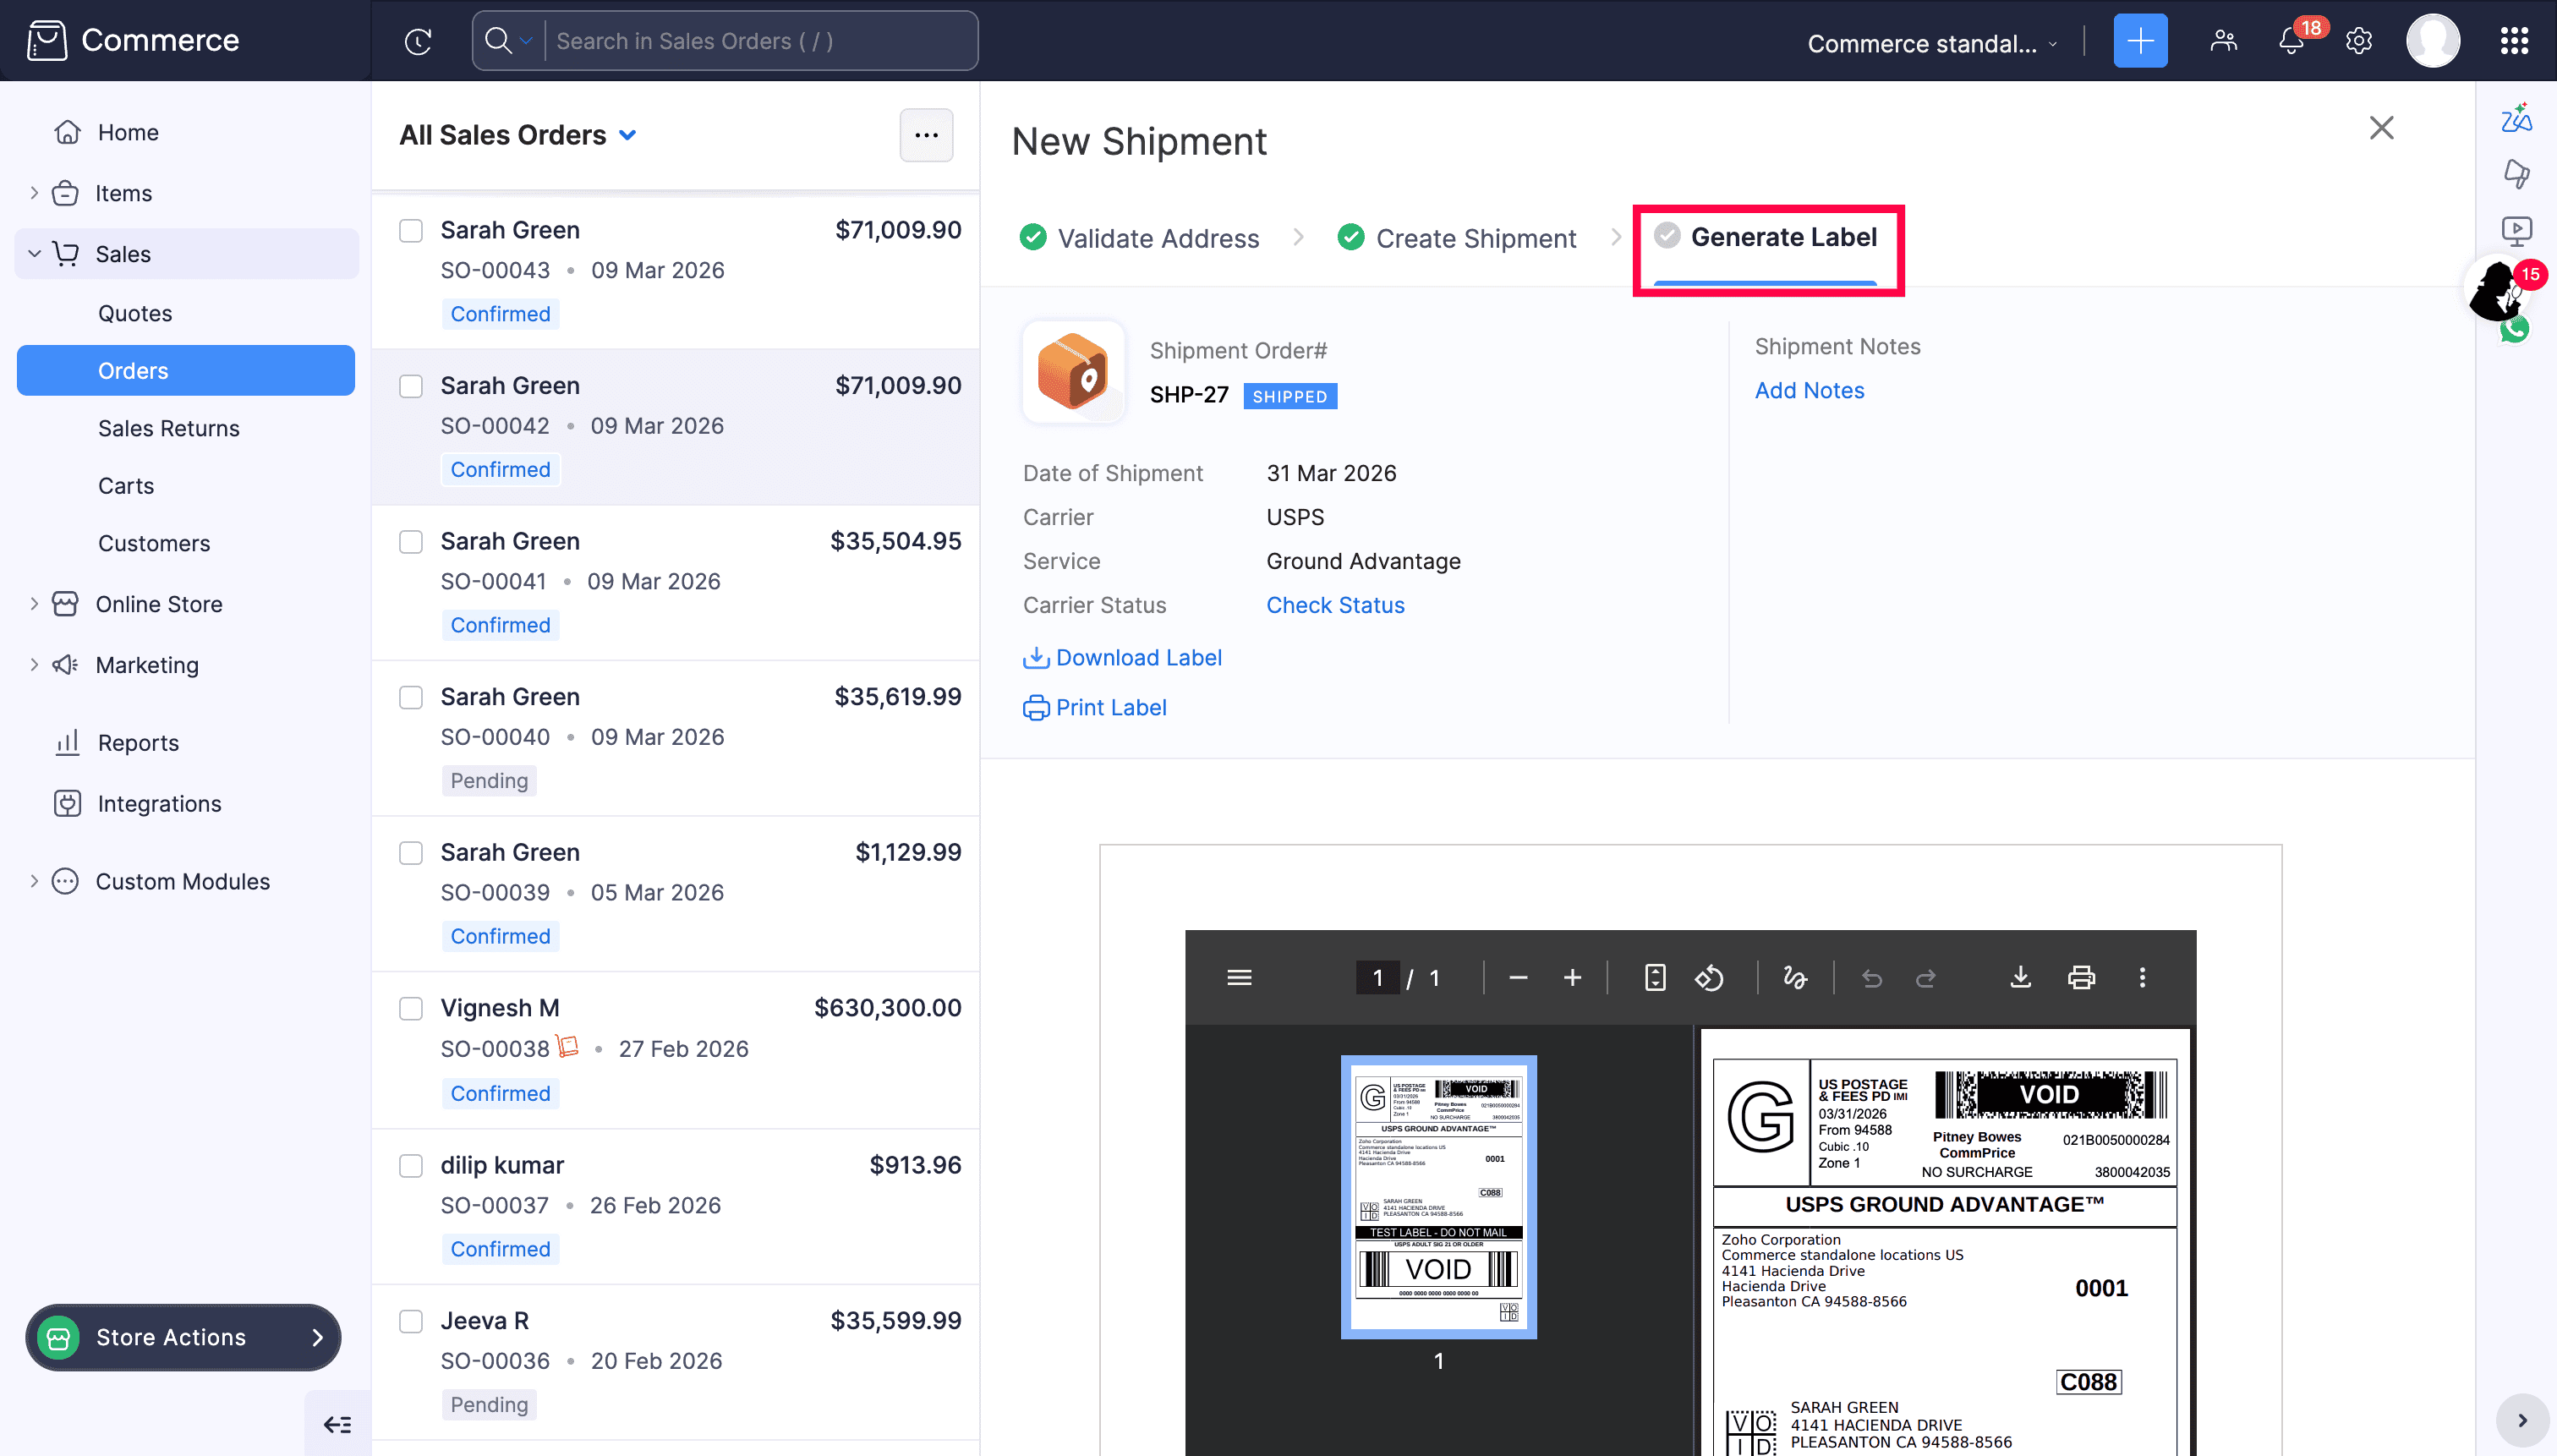
Generate Label
Once the shipment is created, the next step is to generate a shipment label.
- In the Generate Label section, the shipment label will be displayed.
- Click Add Notes under Shipment Notes to enter a note for the shipment.
- Click Print Label to print the shipment label.
- Click the Download Label to export the shipment label.