



Assemblies

Assemblies let you create a finished good (composite item) from its individual component items, such as raw materials or parts, and track the activity of each creation. When you assemble a composite item, the stock of its components is consumed and the stock of the composite item is increased.
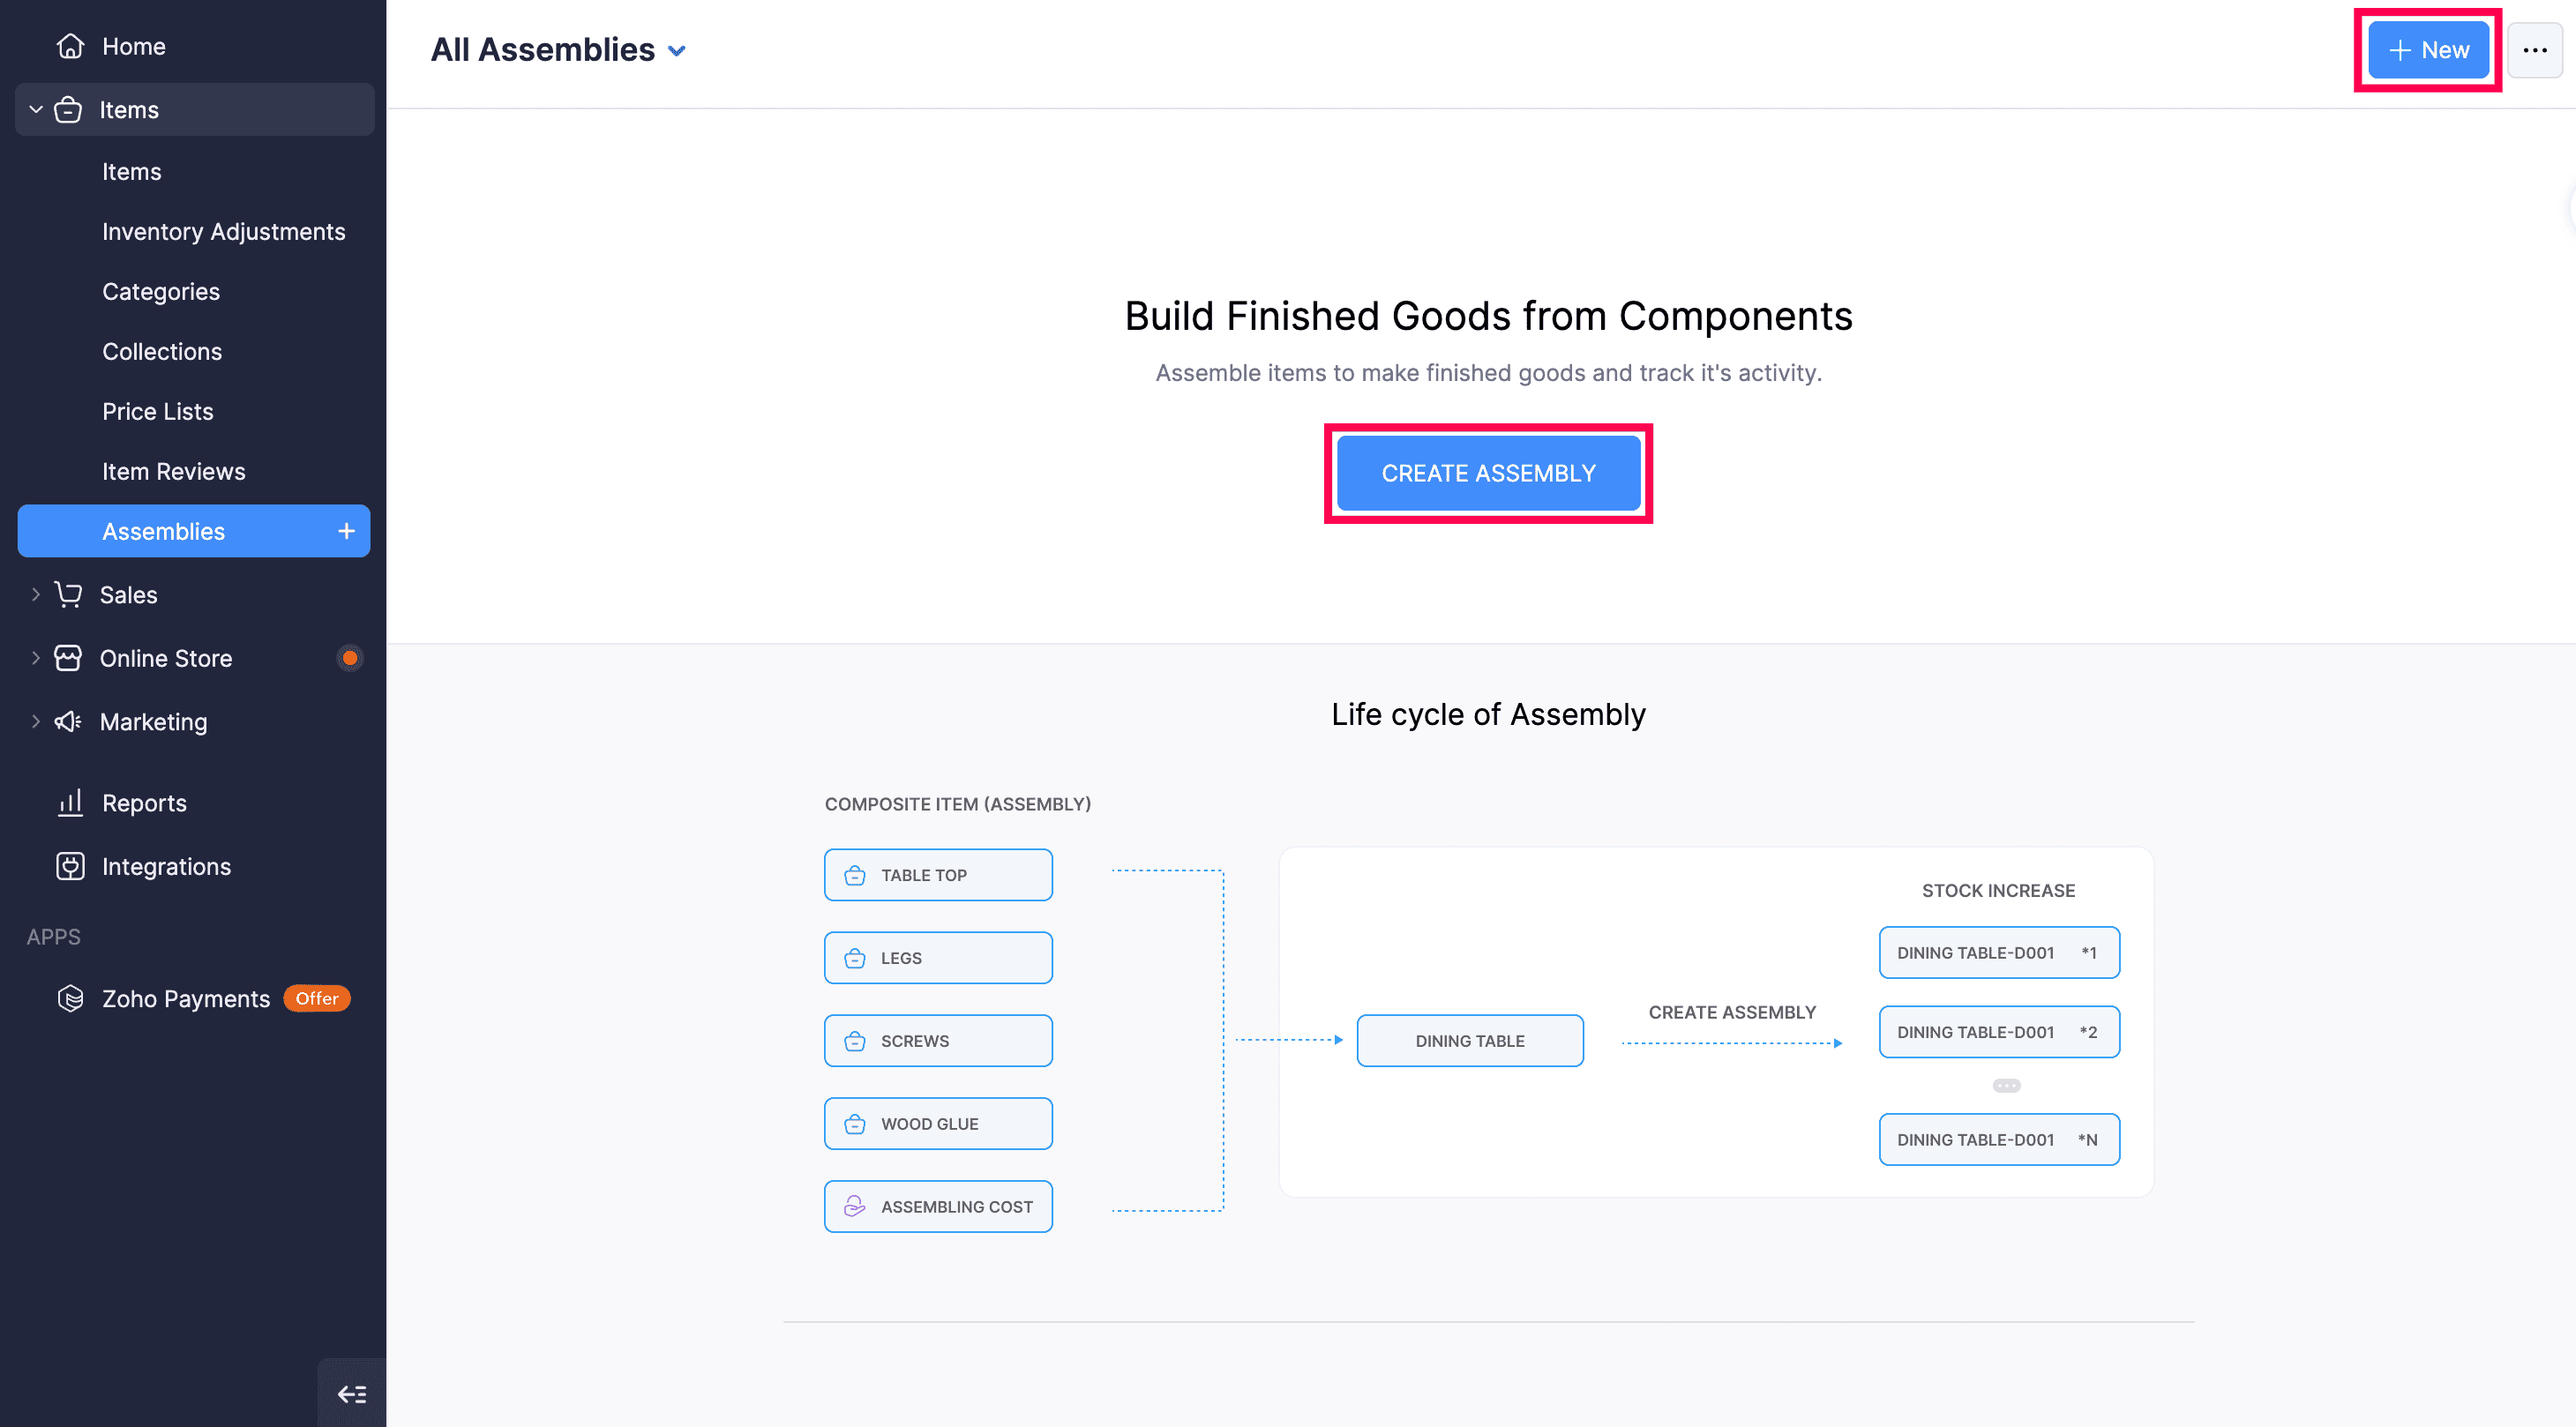
Scenario: Patricia runs a furniture store and sells a Dining Table as a composite item made up of a Table Top, Legs, Screws, and Wood Glue. She also incurs an assembling cost for the labour involved. When Patricia creates an assembly for 2 dining tables, Zoho Commerce deducts the required quantity of each component from stock, accounts for the assembling cost, and increases the stock of the Dining Table by 2.
Prerequisite
Before creating an assembly, you must enable Composite Items and create the composite item you want to build.
- Go to Settings > General > Items.
- Check the Composite Items option under Preferences tab and click Save.
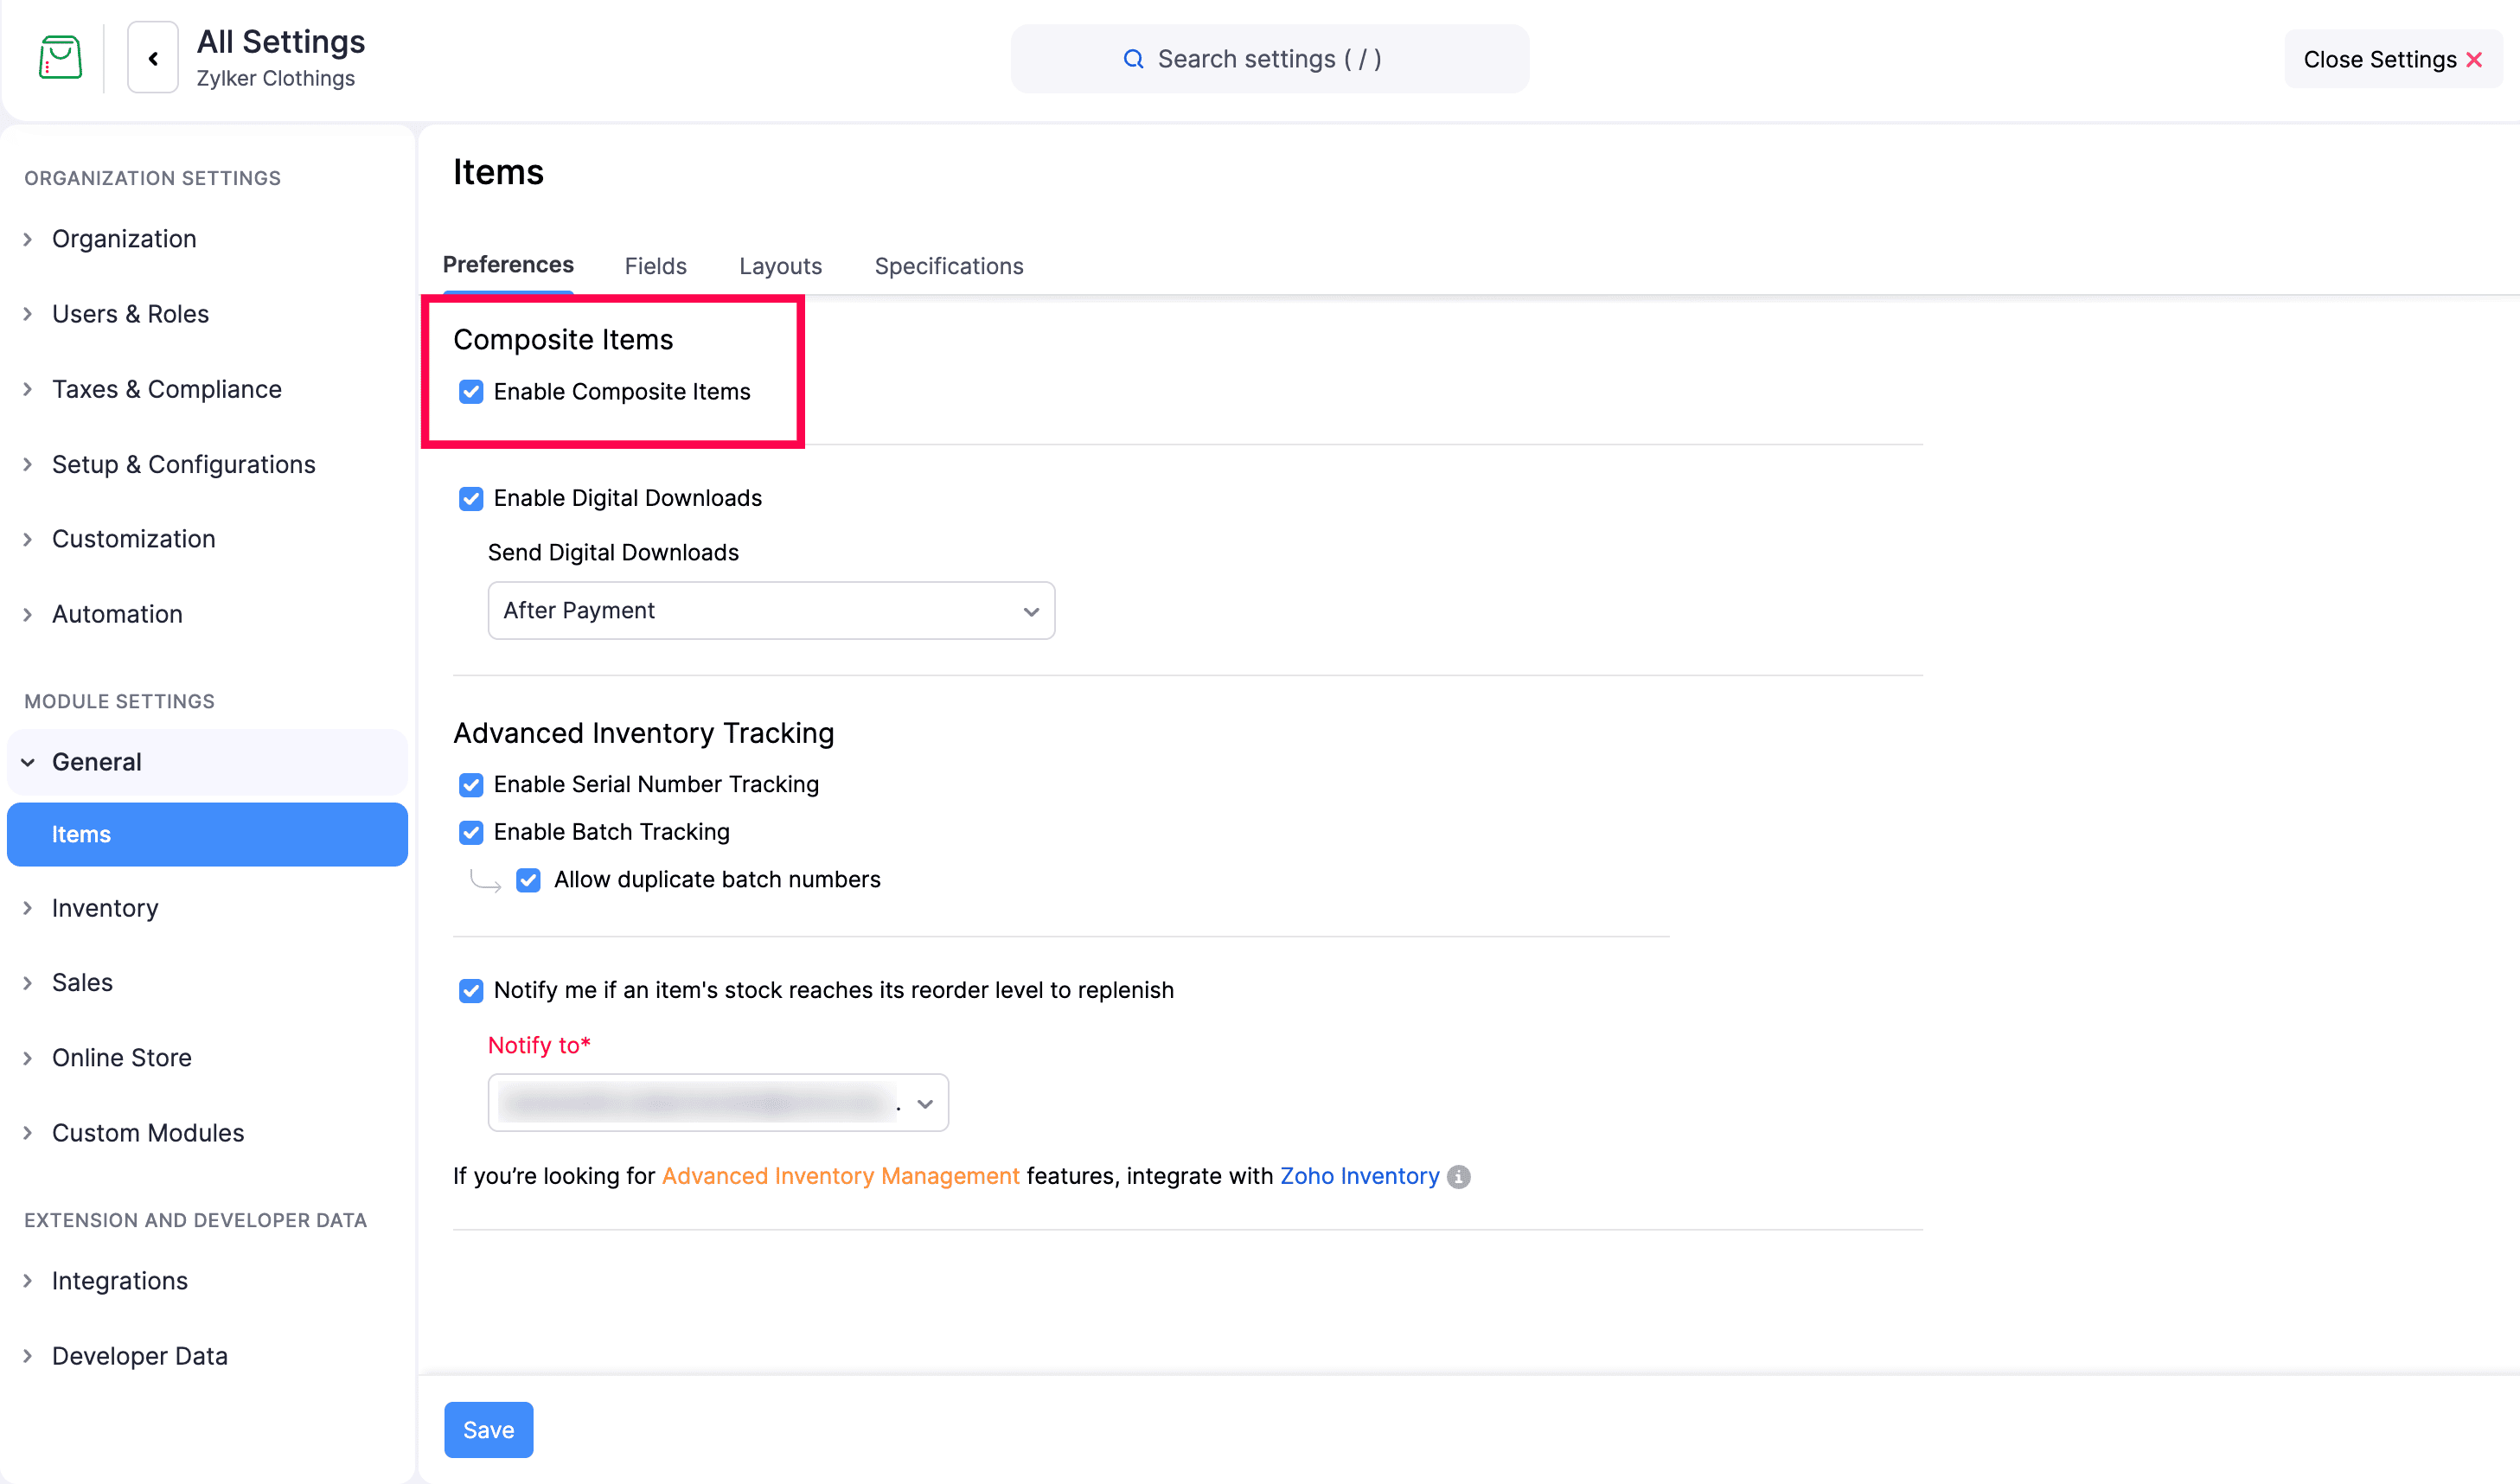
- Create the composite item under Items module in the left sidebar, along with the individual items required to build it.
Life Cycle of an Assembly
An assembly is built from the composite item’s associated items, such as Table Top, Legs, Screws, and Wood Glue, along with any assembling cost incurred. When you create an assembly, these components are consumed and the stock of the composite item, such as Dining Table, is increased by the quantity assembled.
Create an Assembly
To create a new assembly,
- Go to Items > Assemblies.
- Click + New (or Create Assembly if you’re creating your first assembly).
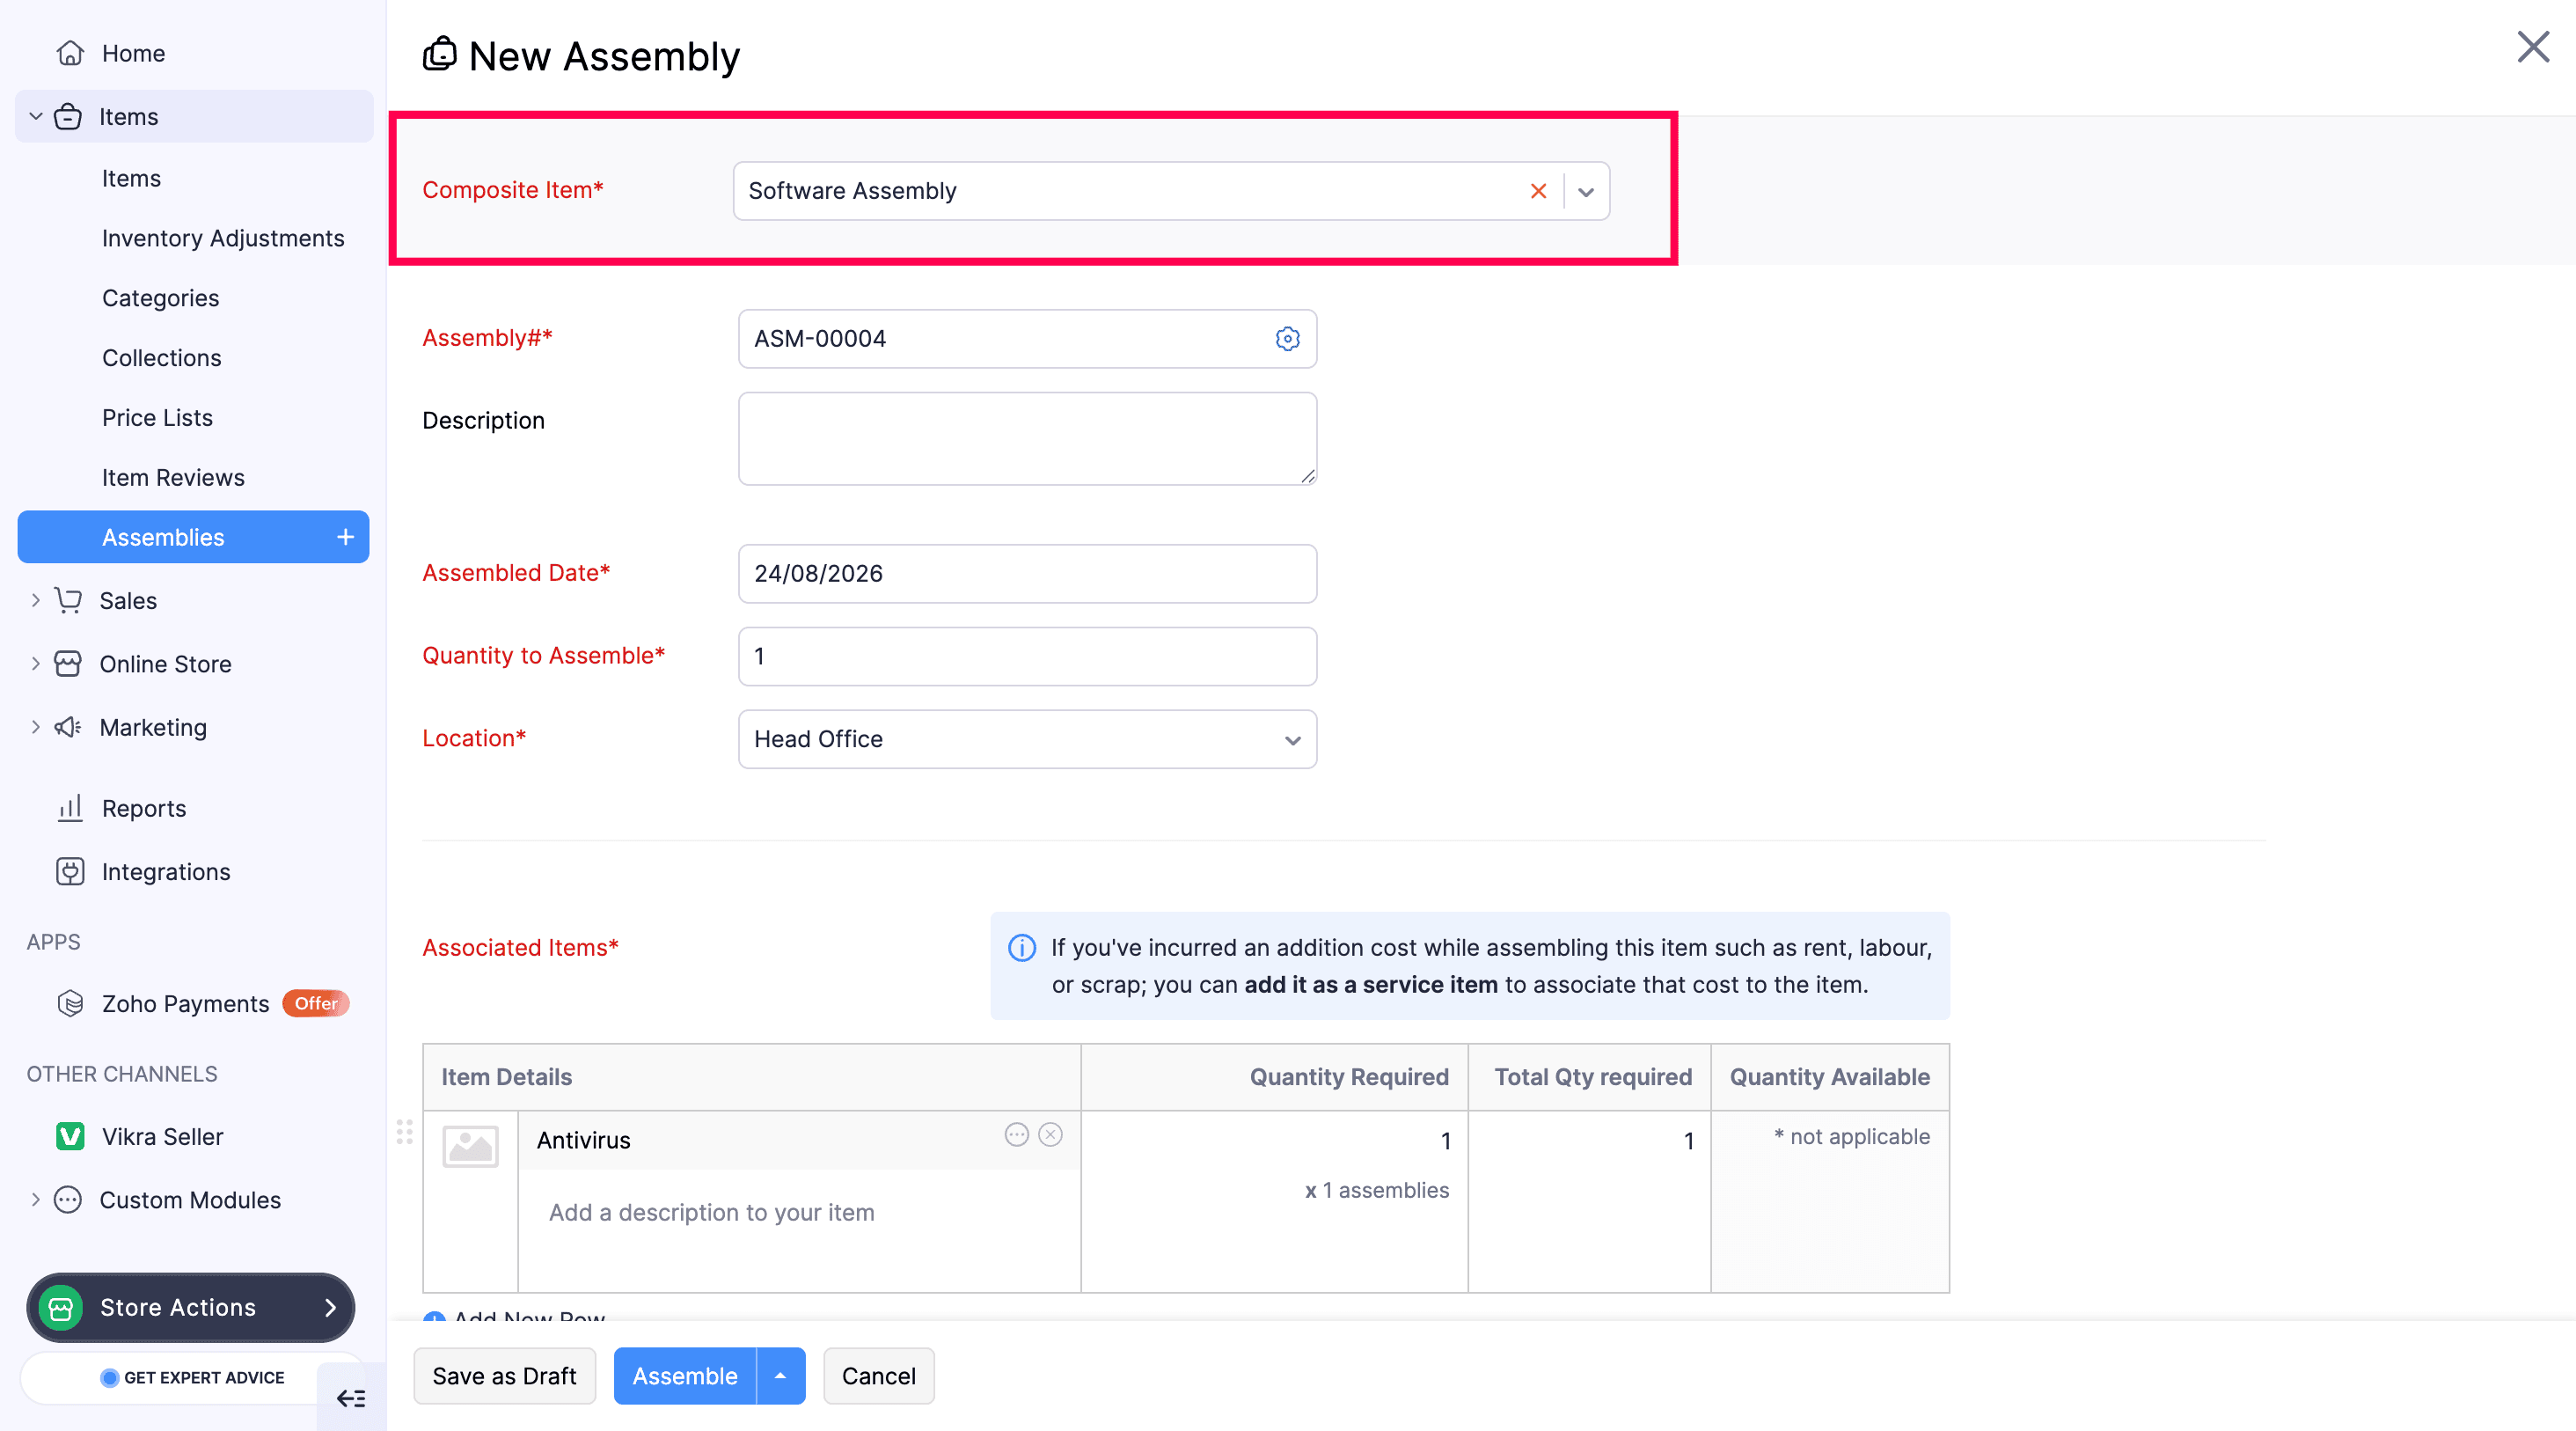
- Select the Composite Item you want to build from the dropdown.
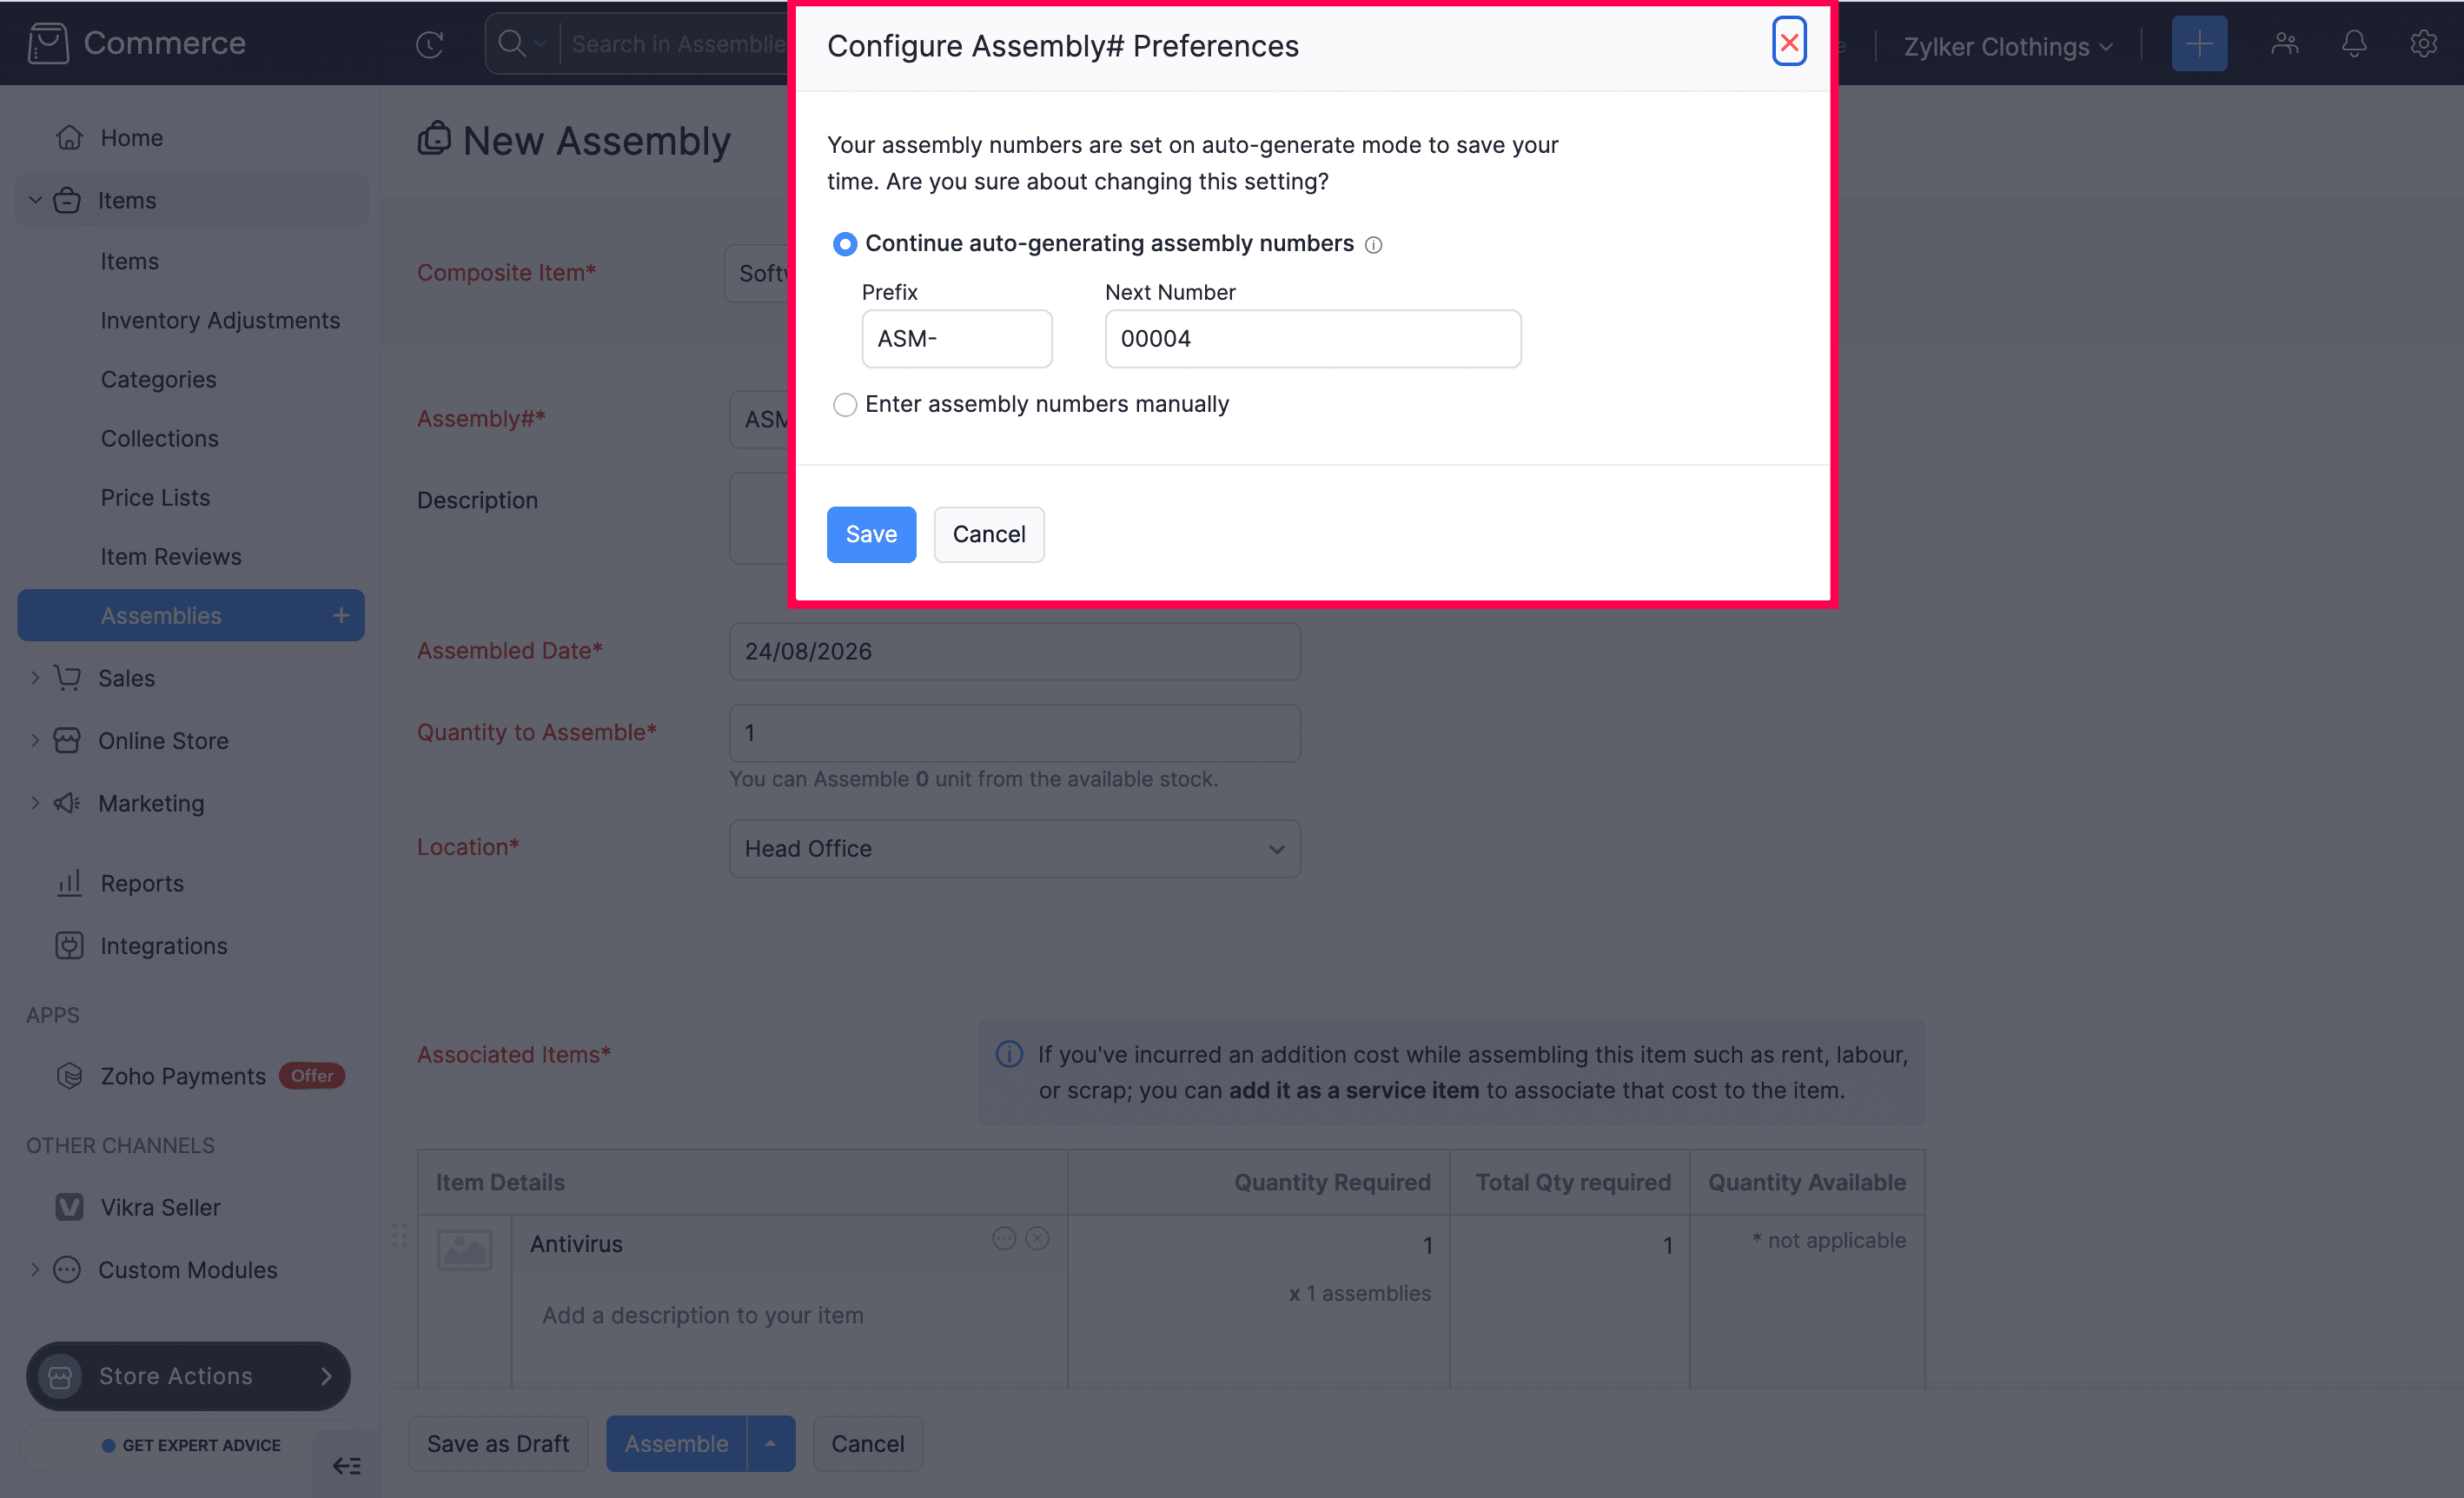
- The Assembly# is auto-generated. To configure the assembly number preferences, click the Settings icon next to the field:
- Select Continue auto-generating assembly numbers to generate numbers automatically. Enter a Prefix and the Next Number to define the number series.
- Select Enter assembly numbers manually if you want to enter an assembly number yourself.
- Click Save to apply the preference.
- Enter a Description for the assembly, if required.
- The Assembled Date and the Quantity to Assemble are automatically populated. You can edit the assembled date and enter the quantity of the composite item you want to build.
- Select the Location where the assembly will be created.
- Under Associated Items, the items required to build the composite item are listed along with the Quantity Required, Total Qty required (based on the quantity to assemble), and Quantity Available in stock.
Note: If you’ve incurred an additional cost while assembling the item, such as rent, labour, or scrap, you can add it as a service item under Associated Services and enter the Quantity Required and Cost per unit to associate that cost with the item.
- Click Add New Row under Associated Items or Associated Services to add more items or services, if required.
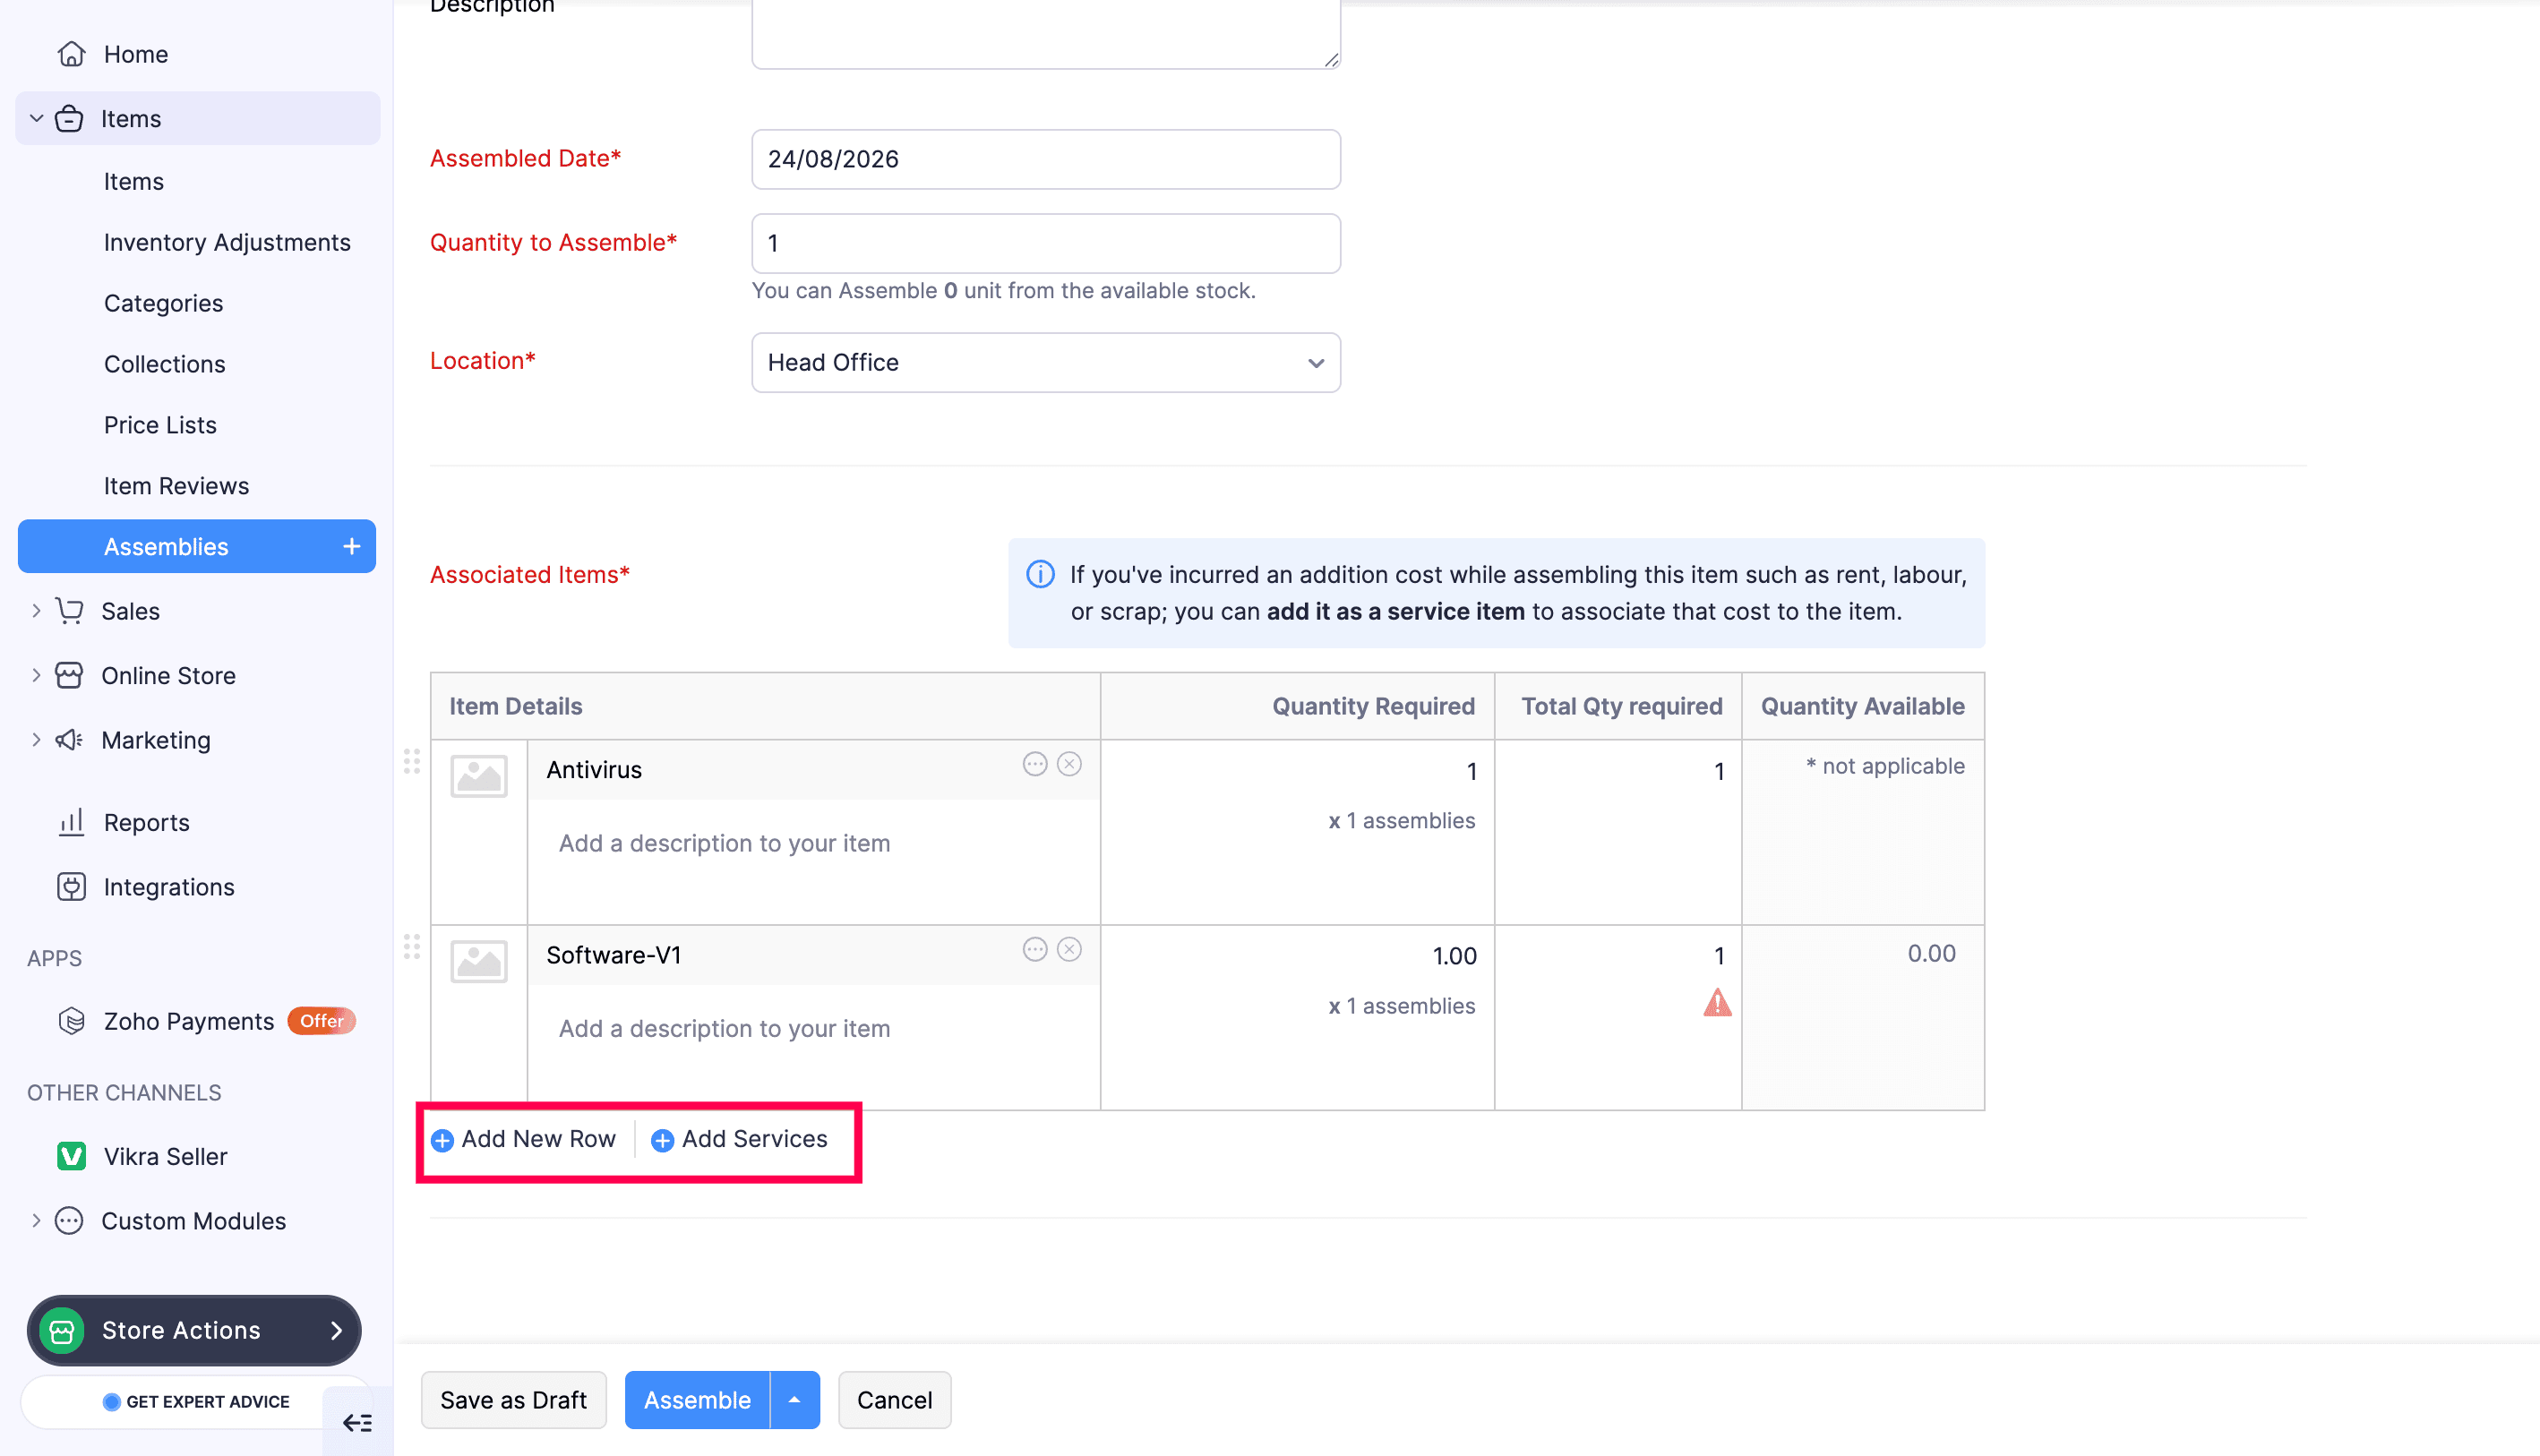
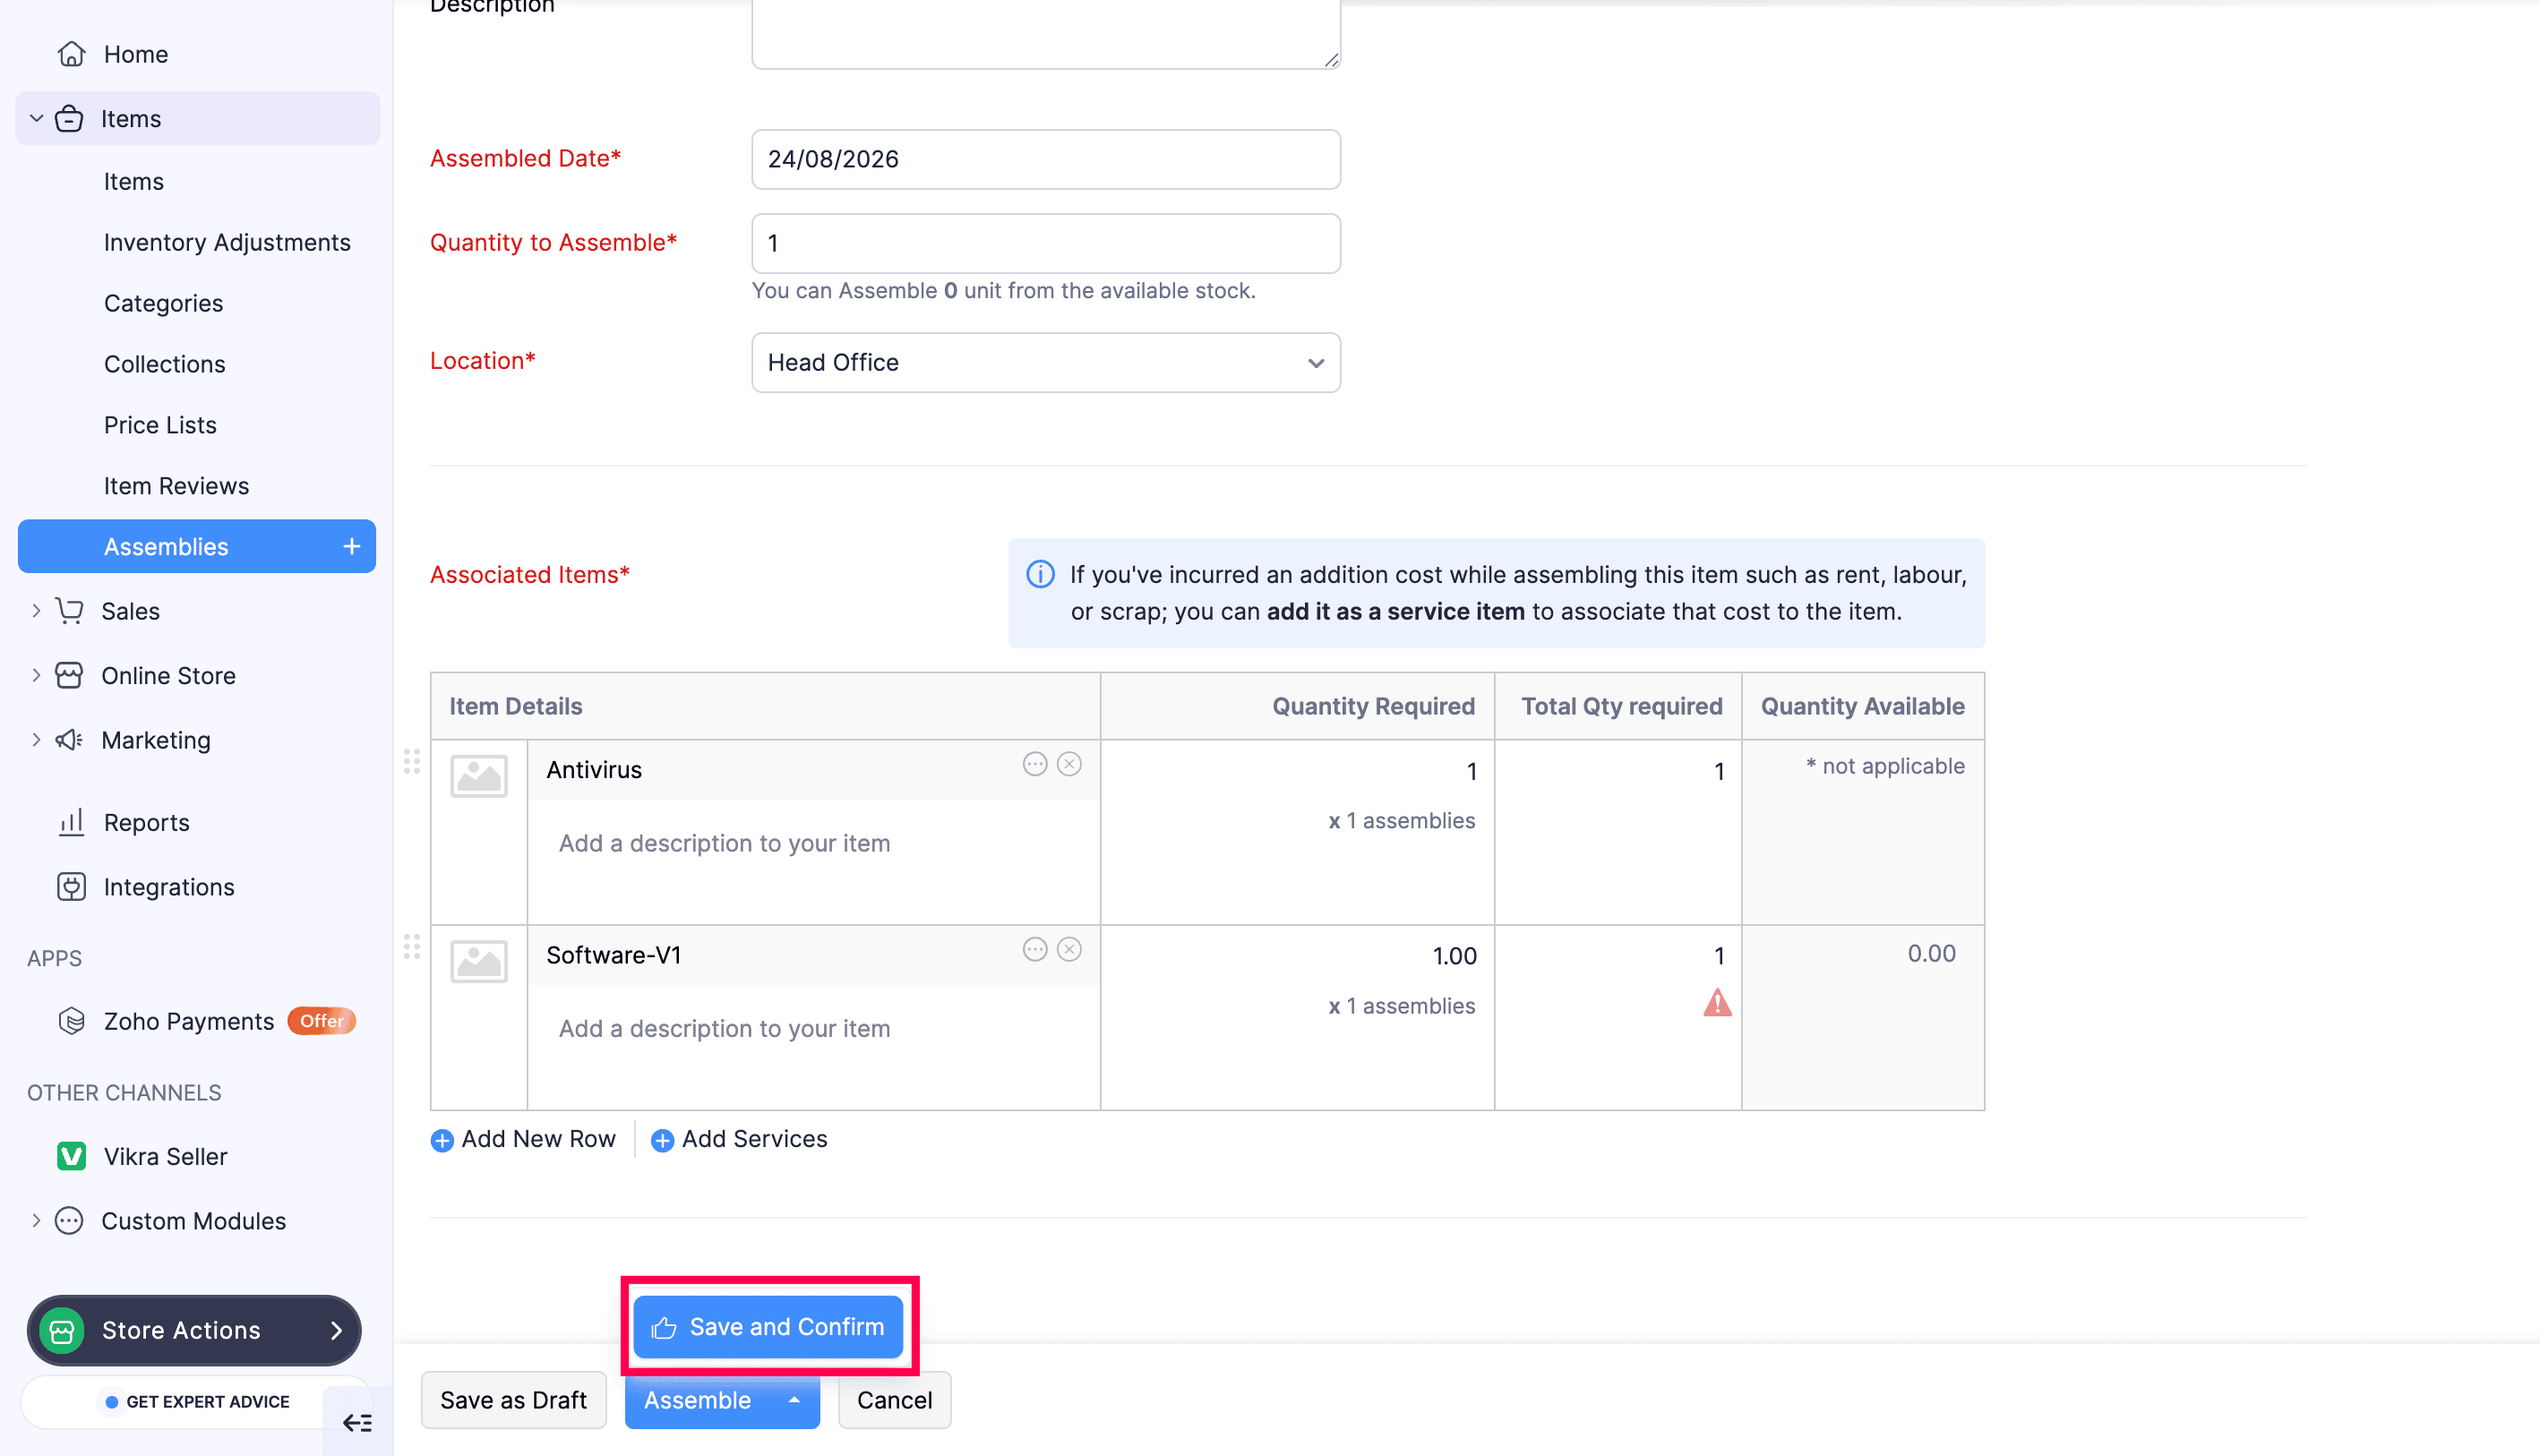
- Click Save as Draft to save the assembly without confirming it, or click Assemble to complete the build and increase the stock of the composite item. Click the dropdown arrow next to Assemble and select Save and Confirm to confirm the assembly without completing it immediately.
Assembly Status
An assembly can have one of the following statuses:
- Draft - The assembly is saved but not yet confirmed. Stock levels remain unaffected.
- Confirmed - The assembly is confirmed and the components are reserved, but the composite item’s stock is not yet increased.
- Assembled - The assembly is complete. The component items are deducted from stock and the composite item’s stock is increased by the assembled quantity.
Manage an Assembly
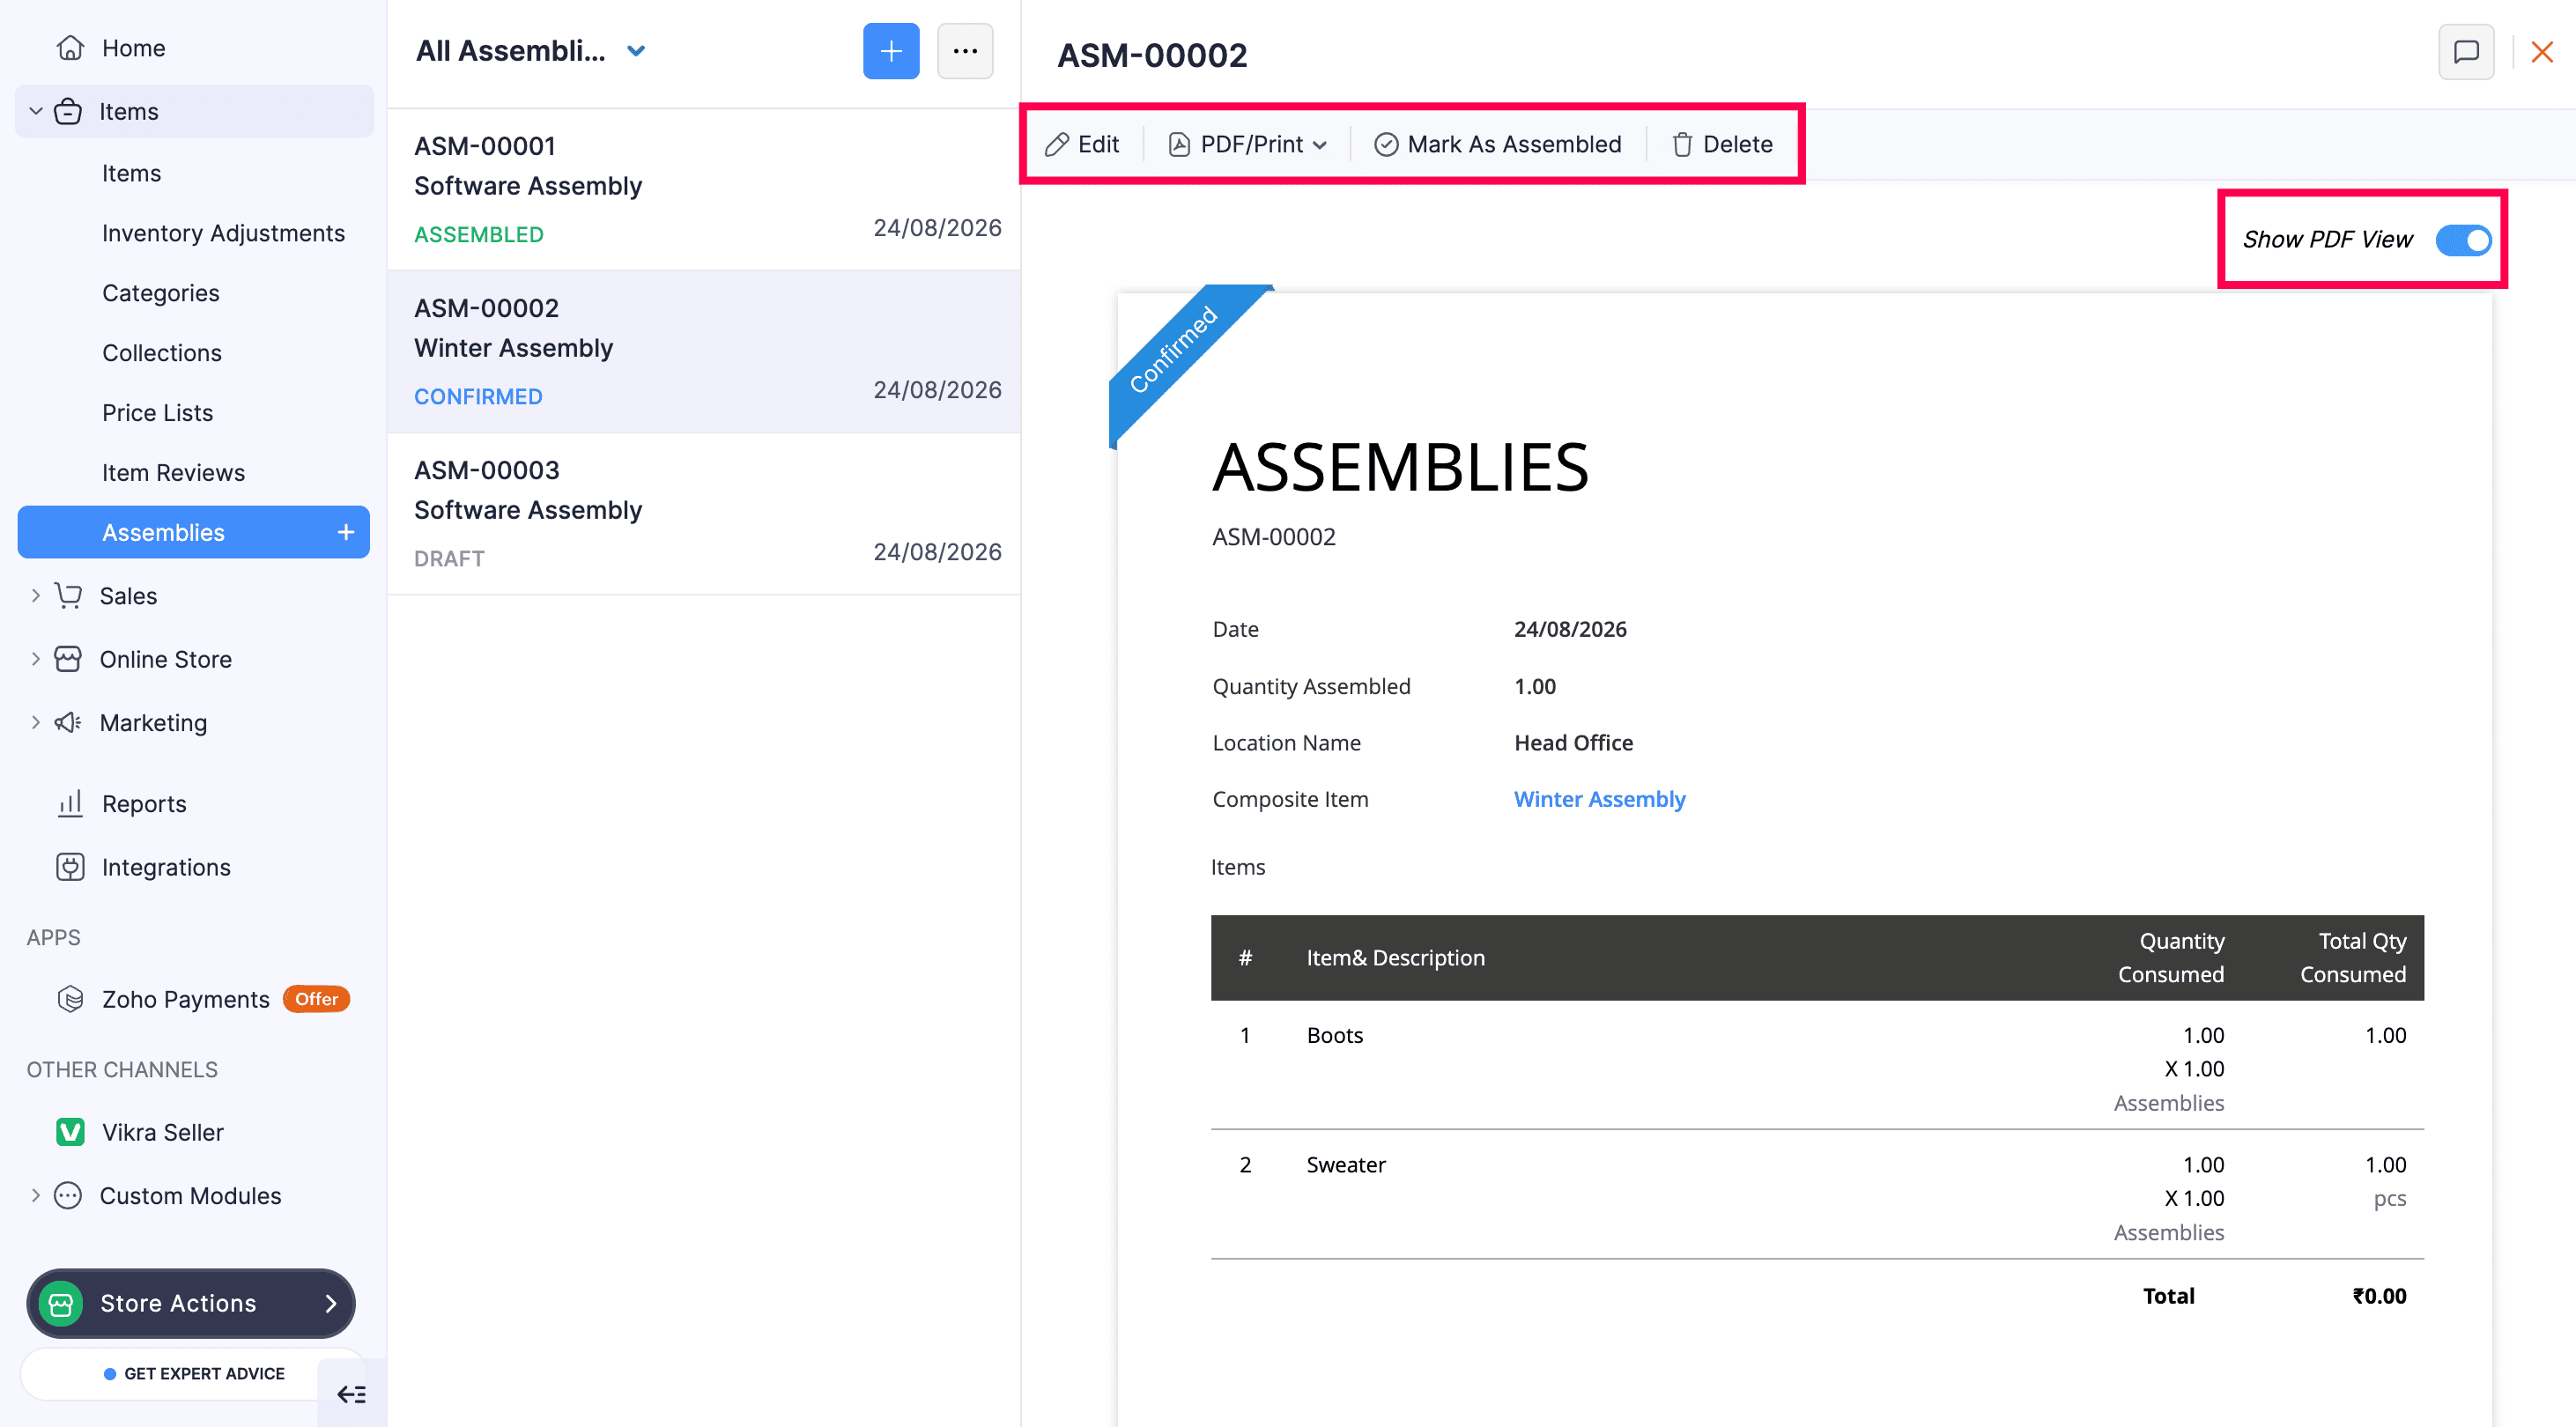
To manage an assembly, go to Items > Assemblies and click an assembly number. You can use the following options on the assembly details page:
- Click Edit to update the assembly details.
- Click PDF/Print to view or print the assembly document.
- Click Mark as Confirmed for a draft assembly. For a confirmed assembly, click Mark As Assembled to complete it and update the stock of its component and composite items.
- Click Delete to delete the assembly.
- Turn on Show PDF View to display the assembly document in the details page.
Comments & History
To add a comment or view the assembly’s activity:
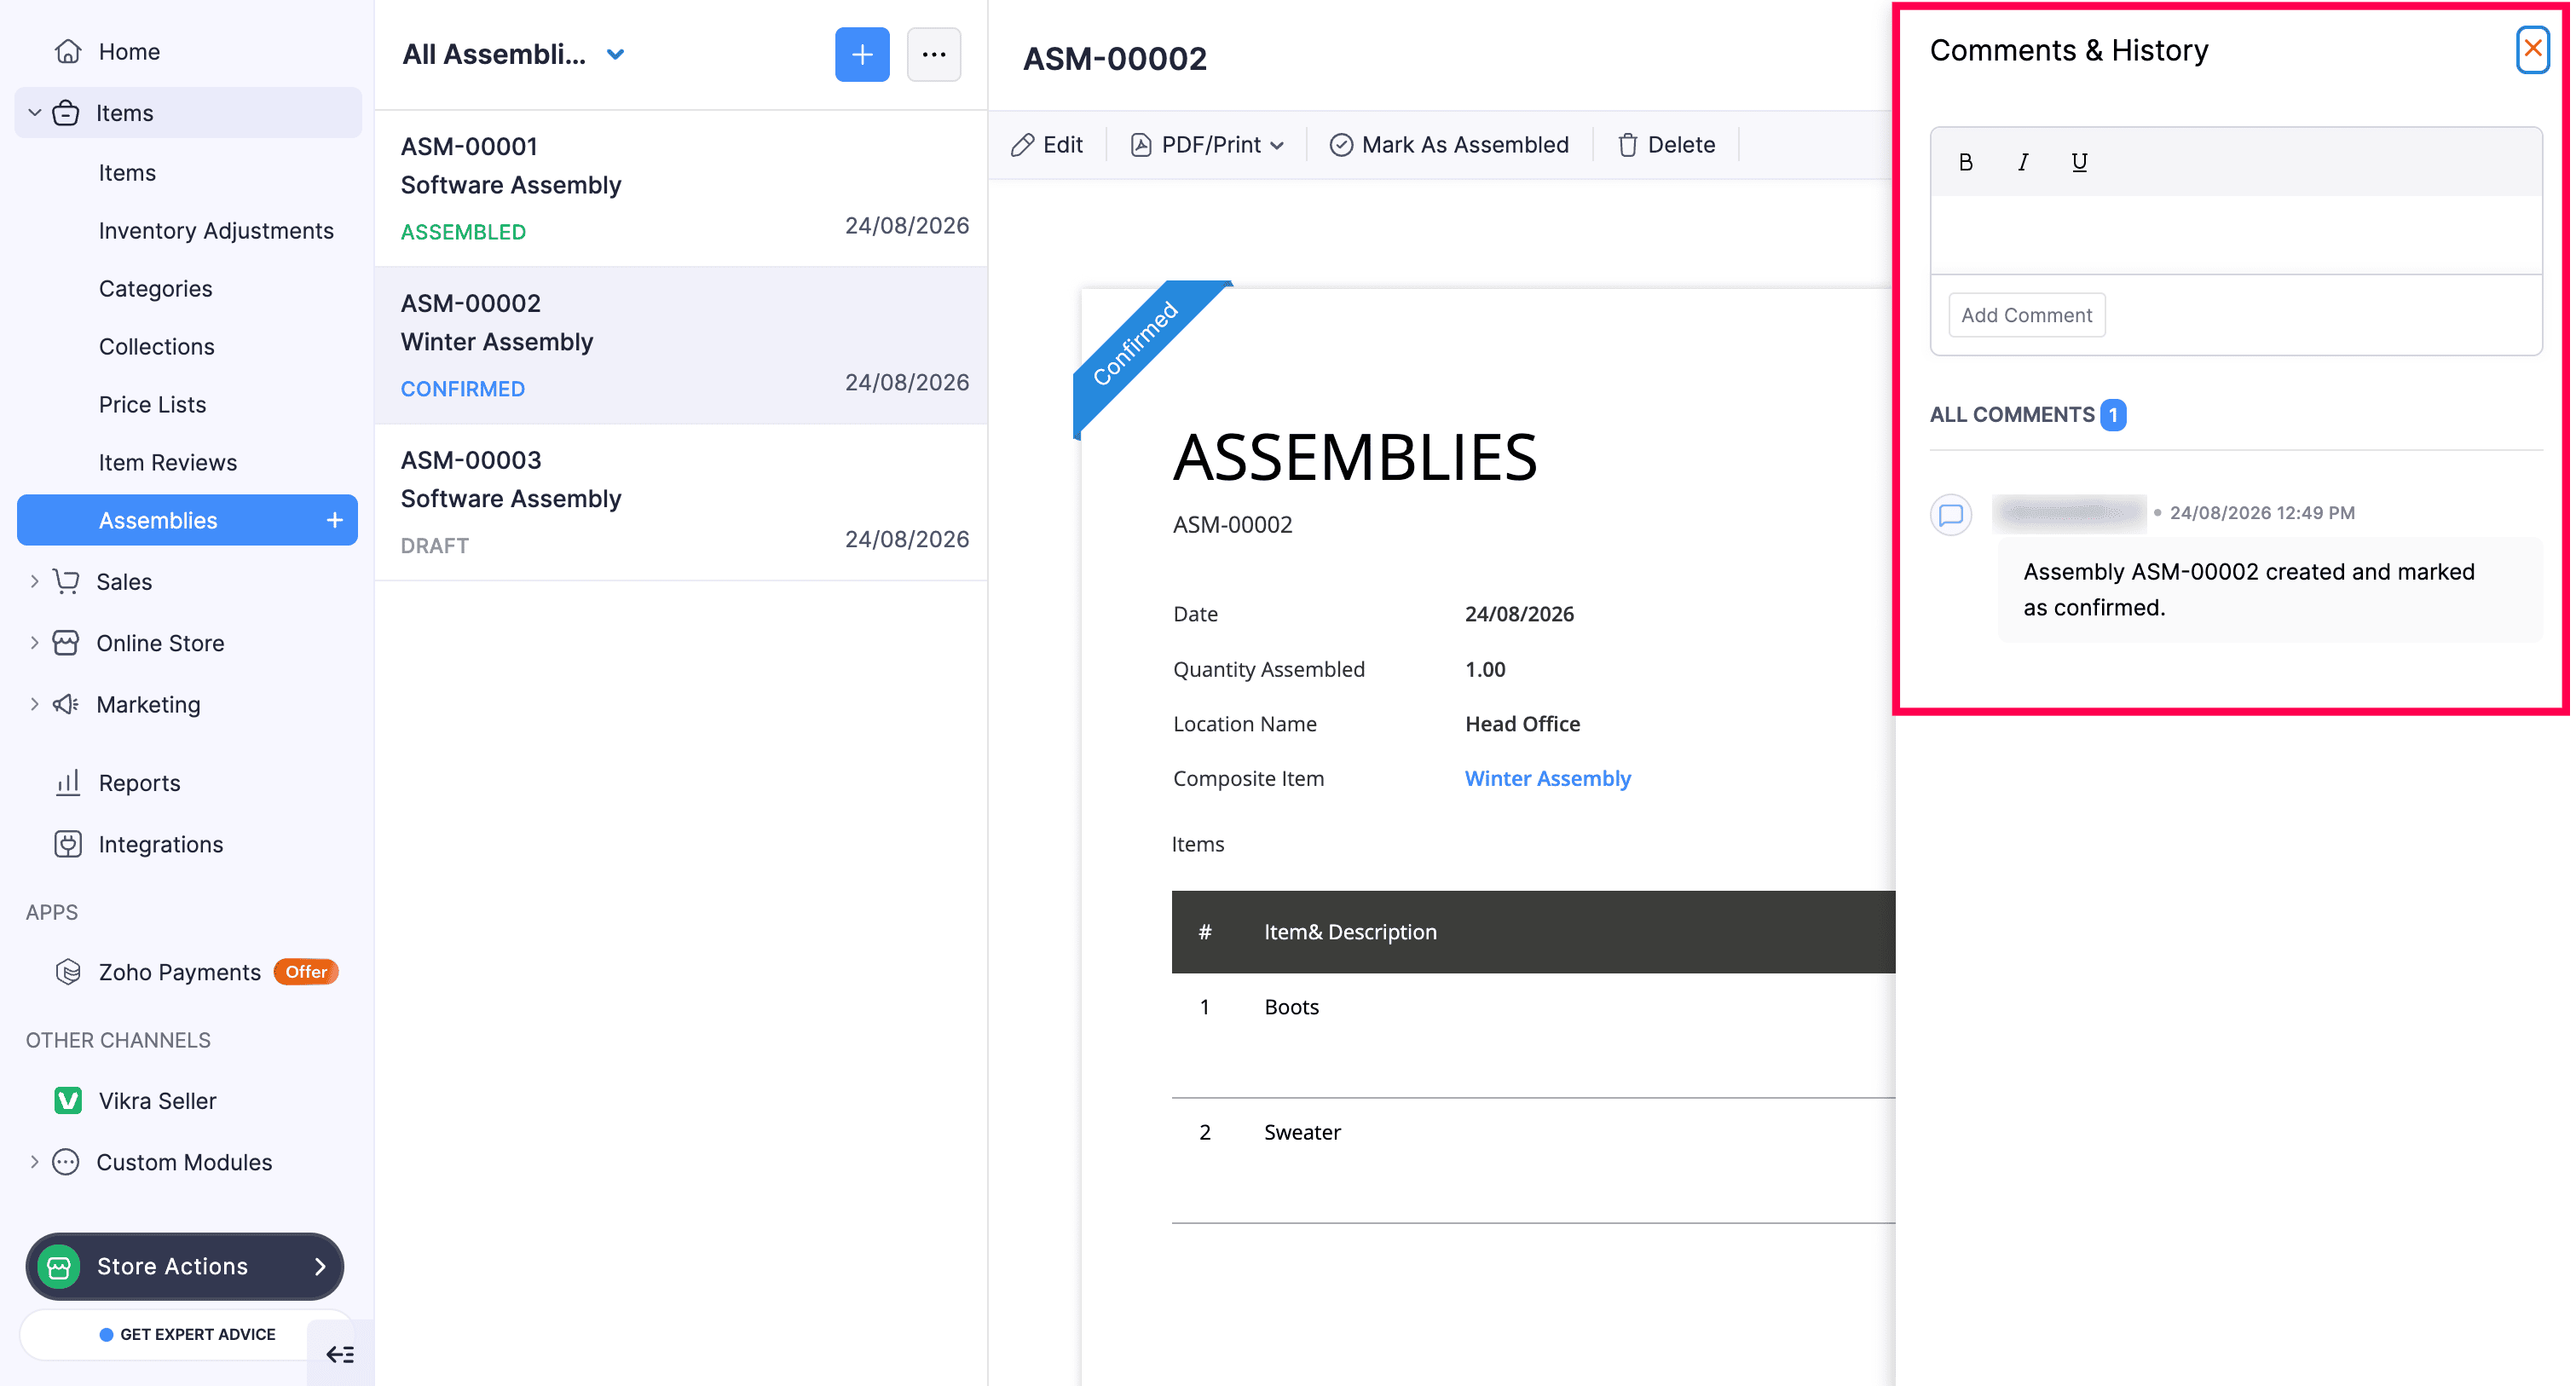
- Click the Comments icon in the top-right corner of the assembly details page, the Comment & History panel will open.
- Enter your comment in the text box and click Add Comment.
- Review the comments and activity recorded under All Comments.
Other Actions
You can sort or refresh the assemblies listed in Zoho Commerce.
Sort Assemblies
To sort the assemblies by a column:
- Go to Items > Assemblies.
- Click the column heading or click More Options > Sort by and select the required sorting option such as Date, Total, or Assembly#.
Refresh the Assembly List
To refresh the assembly records:
- Go to Items > Assemblies.
- Click More Options > Refresh List.