
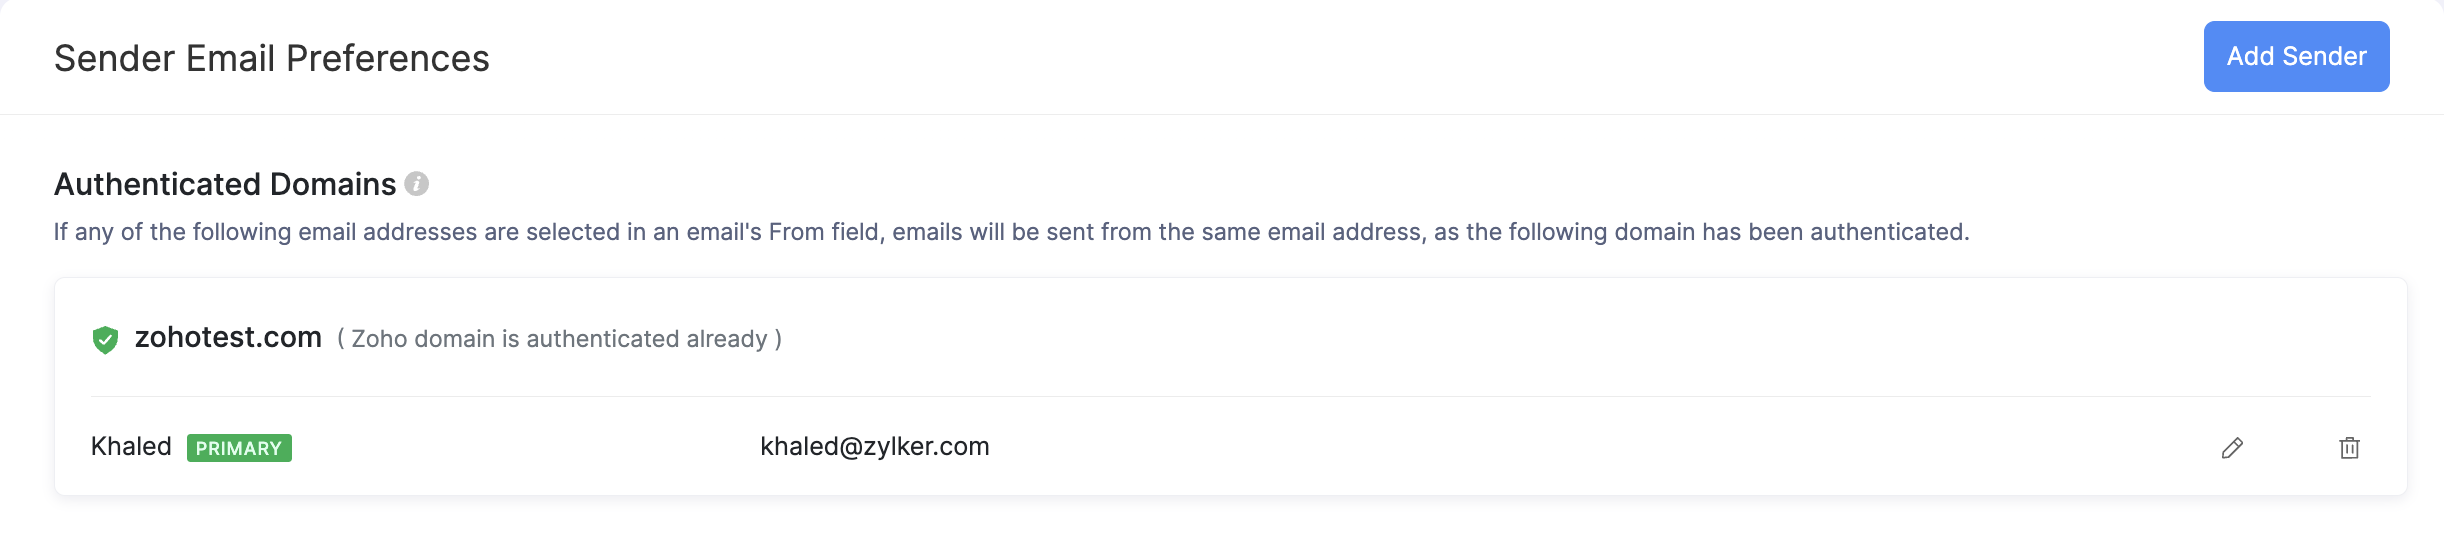
Sender Email Preferences
You can configure the email addresses that are used in the From field of emails sent from our app. However, these emails can sometimes land in your recipient’s spam folder, causing them to go unnoticed. This happens when the email address in the From field of an email belongs to a domain that does not have SPF and DKIM records.
What are SPF and DKIM records?
By adding an SPF (Sender Policy Framework) record to your domain, your recipient’s mail server will be able to verify that our app is sending emails using your email address with your domain’s permission. Without the SPF record, the emails that our app sends on behalf of your domain will mostly end up in your recipient’s spam folder.
DKIM (Domain Keys Identified Mail) is also used for preventing spam and allows the recipient email server to verify whether an email was sent and authorized by the owner of that domain.
DKIM and SPF records are effective in preventing spam when used together. For this reason, our app will consider a domain as authenticated, only if it has both SPF and DKIM records.
Domain Classification
We have classified domains into 3 categories to help you identify the email addresses, which if used in the From field of emails, could cause emails to go to the spam folder.
To find out which category your email addresses belong to, go to Settings in the top right corner and select Sender Email Preferences under Customizations.
The 3 categories that you will find in this page are:
1. Unauthenticated Domains
Email addresses that belong to a domain without SPF and DKIM records will be listed here. If any of these email addresses are selected in the From field of an email sent from Zoho Payroll, the email address in the From field will be replaced automatically with message-service@sender.zohopayroll.com, which is Zoho Payroll’s own email address. This is done to prevent the email you send from landing in the Spam folder.
It’s important to note that the message-service@sender.zohopayroll.com address will only be used in the From address for emails and not the Reply-To address. i.e, your customers will still be able to see your name in their inbox and when they reply, their email will be delivered to your own email inbox.
To use the email addresses under this category in the From field, you must authenticate their domains.
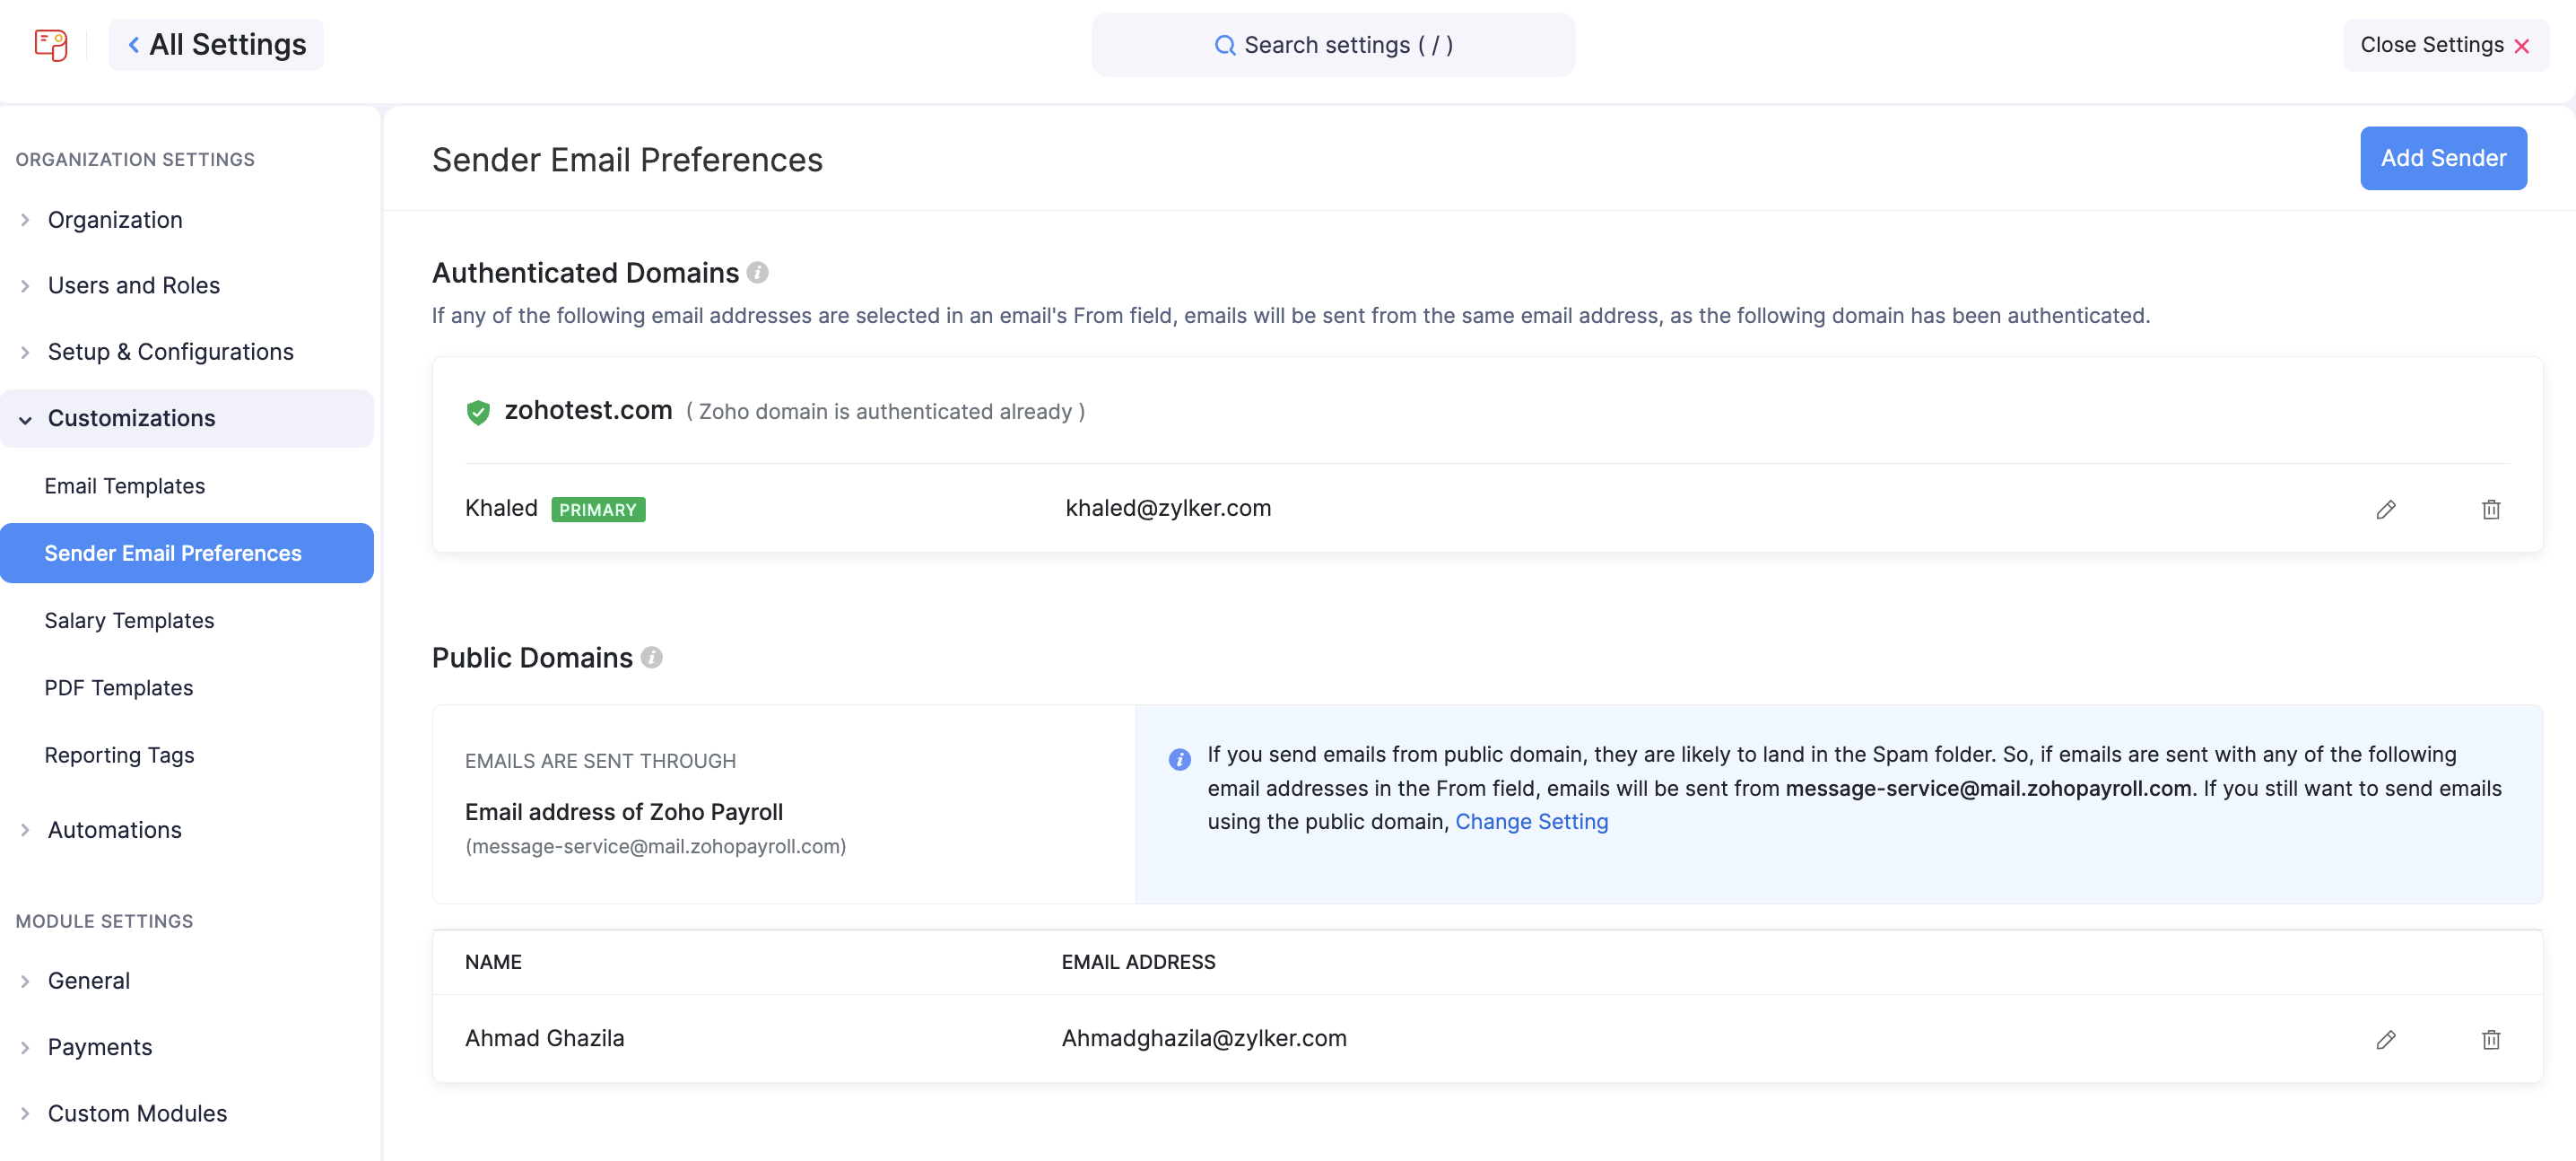
2. Authenticated Domains
Email addresses that belong to a domain with both SPF and DKIM records will be listed here. These email addresses can be used in the From field of emails sent from Zoho Payroll without having to worry about them ending up as spam.
3. Public Domains
If you use an email address that belongs to a public domain, such as Gmail or Yahoo Mail in the From address of emails sent from Zoho payroll, it will be replaced with message-service@sender.zohopayroll.com. This is because SPF and DKIM records cannot be added for public domains and can only be added for domains that you own.
If you still wish to use emails listed in this category in the From address, you can do so by clicking Change Setting. Next, select Sender’s email address in the pop-up that follows and click Save.
Now, email addresses from public domains will not be replaced with message-service@sender.zohopayroll.com.
Warning: We strongly recommend that you use message-service@sender.zohopayroll.com instead of email addresses from a public domain to prevent your emails from ending up in the Spam folder.
Authenticate Domains
Emails listed under the Unauthenticated Domains section can be authenticated by adding SPF and DKIM records for their domains.
To do this:
- Click the Settings icon in the top right corner and select Sender Email Preferences under Customizations.
- In the Preferences pane, click Sender Email Preferences.
- Click Authenticate Now → next to the domain that you want to authenticate.
Now, copy the SPF record from the pop-up that follows, and add it to your domain name provider’s (e.g. Daddy) DNS settings.
Next, copy the Host Name and Value for the DKIM record and add it to the DNS settings of your domain name provider.
Once you’ve added both the SPF and DKIM records, click Validate.
Insight: It will take a while for your newly added records to reflect on the DNS server. If your validation fails, wait for a while and try again. Also, you can continue to use Zoho Payroll while the records are being validated.
A few points to note about adding SPF and DKIM records:
- If an SPF record already exists for your domain, i.e, you’ve added an SPF record for a different service in the past, you must remove v=spf1 from the SPF record before adding it to your domain.
- If you use GoDaddy as your domain name provider, the Host Name for the DKIM record will have to be slightly modified. You will have to remove your domain name alone from the record, before adding it. For example, if the Host Name is 1522406527365._domainkey.patricia.com, you will have to remove your domain name from it and add 1522406527365._domainkey alone.
Now, your domain has been authenticated and it will be listed under the Authenticated Domains category. The emails from this domain can be used in the From address, without having it replaced or worrying about it landing in spam.
Other Actions
You can perform a few other actions from the Sender Email Preferences page.
Mark Primary Contacts
A primary contact is an email address that will be used as the point of contact between your Zoho Payroll’s organisation and Zoho. Updates regarding your Zoho Payroll’s organisation, such as subscription renewals and usage related emails will be sent to this email address.
Also, this email address will be used as default in the From address of emails sent from Zoho Payroll, unless you change it manually while sending an email.
To mark a contact as primary, hover over an email address and click Mark as Primary Contact.

Add New Sender Email Addresses
You will be able to add new sender email addresses and select them when you send emails from Zoho Payroll. To do this:
- Click the Settings icon in the top right corner and select Sender Email Preferences under Customizations.
- Click Add Sender on the top right.
- Add a Name and Email Address.
- Click Save.
Now, a verification email will be sent to the email address that you added. Once the email address has been verified, you will be able to use it in the From field of emails sent from Zoho Payroll.
Insight: Adding an email address this way will only enable the email address to be used for sending emails from Zoho Payroll and is not to be confused with adding users to your organisation.
Resend Verification Emails
As mentioned in the previous section, when you add a new sender email address, a verification email will be sent to that email address. However, if the email was not received, you can resend the verification email. Here’s how:
- Click the Settings icon in the top right corner and select Sender Email Preferences under Customizations.
- Click Resend Email next to an email address that has not been verified yet.
The verification email will be sent again.
Edit/Delete Email Addresses
You can choose to edit or delete your users’ email addresses from Zoho Payroll by clicking the Pencil or Trash icon, respectively, which can be found on the right side of an email address.
Once you delete an email address,it will be removed from the organisation and emails will no longer be sent from that address. However, you can add it again, if necessary.