Building a GoToMeeting Extension
The GoToMeeting extension enables users to schedule meetings, invite users, and keep track of the meetings when they have joined within Zoho CRM. With GoToMeeting you can utilize HD video conferencing and screen sharing. With this extension installed you can keep track of your meetings in just a single place. This guide includes the following topics.
GoToMeeting Extension with ZohoCRM
This extension enables a user to host a meeting or attend the meetings hosted by other users. This extension is created as a third party extension to ZohoCRM such that the ZohoCRM users can host or attend the meetings. A developer can use Zoho developer console to build this extension. Basically a developer needs to know what type user authentication is followed by GoToMeeting.
GoToMeeting extension with ZohoCRM is built with OAuth2.0 type of authentication using Connectors. Connector APIs are created , added with the respective Extension and published.
To create a connector, follow the below steps:
- Navigate to the Zoho Developer Console, and click the Access Console of CRM Connectors.
- Click Create Connector button, located in the Connectors tab in the left pane.
- Fill int he necessary information.
- Connector Name : GoToMeeting
- Description : Creation of connector to conduct meetings online.
- Service name : GoToMeeting
- Sign Up URL : https://www.gotomeeting.com/
- Request Token URL : https://api.citrixonline.com/oauth/authorize
- Access Token URL : https://api.citrixonline.com/oauth/access_token
- Click Save.
- To obtain the Client Id and Client Secret Key, please visit this URL https://developer.citrixonline.com/how-get-access-token-and-organizer-key.
- In the GoToMeeting Credentials page, fill out the Client Id and Client Secret Key obtained through the previous step.
- Redirect URL : https://platform.zoho.com/auth/conns/newcon/redirect
- Click Save.
A connector named GoToMeeting will be created. Using this connector, variouAPIs are built to create, update and delete meetings. After creating connector APIs, the connector must be authorized or re-authorized each time using either the Authorize Connector or Re-Authorize Connector button located in the GoToMeeting connector page whenever the client credentials are updated.
Create Meeting
A Create Meeting connector API allows a developer to schedule a meeting using mandatory information to host a meeting. Several tokens are passed as parameters in the request body to create such a meeting. Set up a Create Meeting connector using the following steps.
- In the Zoho Developer Console, click CRM Connectors.
- Select GoToMeeting connector (located in the left pane).Instructions for creating this connector can be found in the previous section of this article.
- Provide the following information:
- Specify Connector API Name : Create Meeting
- Choose the method type : Enable the option button POST
- Specify the URL : https://api.citrixonline.com/G2M/rest/meetings
- Specify Header fields : Content-Type : application/json
- Request Body : { "subject": "${subject}", "starttime": "${start_time_unix_format}", "endtime": "${end_time_in_unix_format}", "passwordrequired":"${passwordrequired}", "conferencecallinfo": "${conferencecallinfo}", "timezonekey": "${timezonekey}" , "meetingtype": "${type}" }
- Click Create.
- Click Execute.
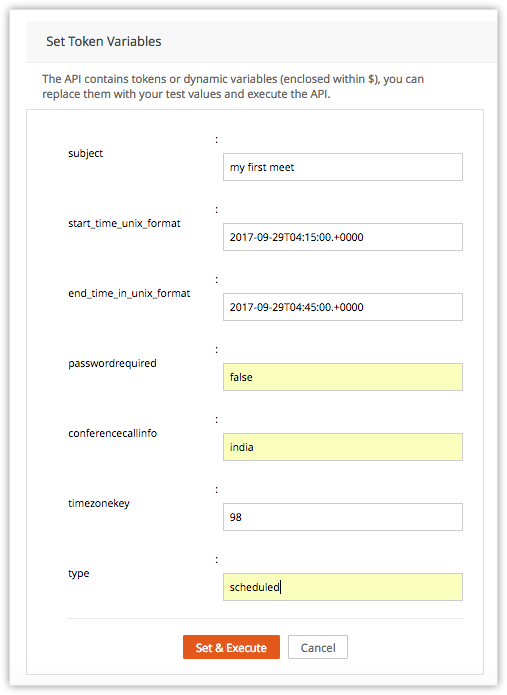
- Enter the input values for the tokens as shown below and click Set & Execute.
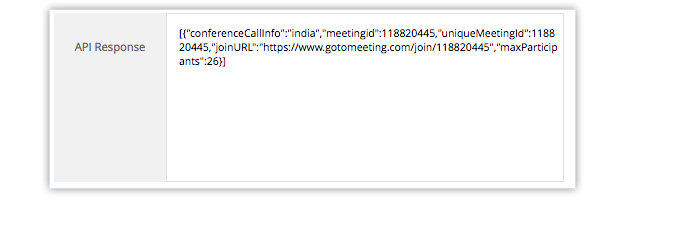
The following API response is created with a generated Meeting ID.


Delete Meeting
A Delete Meeting connector API will delete the scheduled meetings based on the Meeting ID value. The Meeting ID is passed as a parameter to the API in order to delete the respective meeting information. Use the following steps to create this API:
- In the Zoho Developer Console, click CRM Connectors.
- Select the GoToMeeting connector (located in the left pane).Instructions for creating this connector can be found in the previous section of this article.
- Fill in the necessary information,
- Specify Connector API Name : Delete Meeting
- Choose the method type : enable the option button DELETE
- Specify the URL : https://api.citrixonline.com/G2M/rest/meetings
- Specify Header fields : Content-Type : application/json
- Click Create
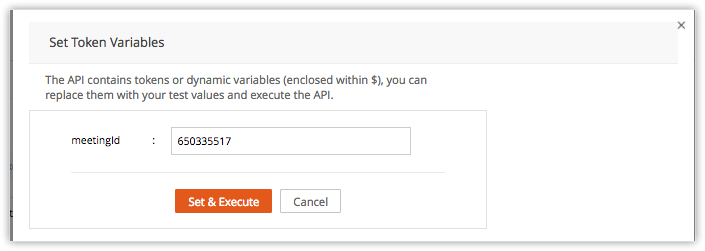
- Click Execute after entering the Meeting ID as shown in the following image.

Upon execution, an empty response will be created, showing that the meeting information has been deleted.
Update Meeting
An Update Meeting connector will modify the meeting information based on the Meeting ID generated. The Meeting ID is passed as a parameter to the API in order to update the respective meeting information. Use the following steps to create this API:
- In the Zoho Developer Console, click CRM Connectors.
- Select the GoToMeeting connector (located in the left pane). Instructions for creating this connector can be found in the previous section of this article.
- Provide the following information,
- Specify Connector API Name : Update Meeting
- Choose the method type : Enable the option button PUT
- Specify the URL : https://api.citrixonline.com/G2M/rest/meetings
- Specify Header fields : Content-Type : application/json
- Request Body : { "subject": "${subject}", "starttime": "${start_time_unix_format}", "endtime": "${end_time_in_unix_format}", "passwordrequired":"${passwordrequired}", "conferencecallinfo": "${conferencecallinfo}", "timezonekey": "${timezonekey}" , "meetingtype": "${type}" }
- Click Create.
- Click Execute.
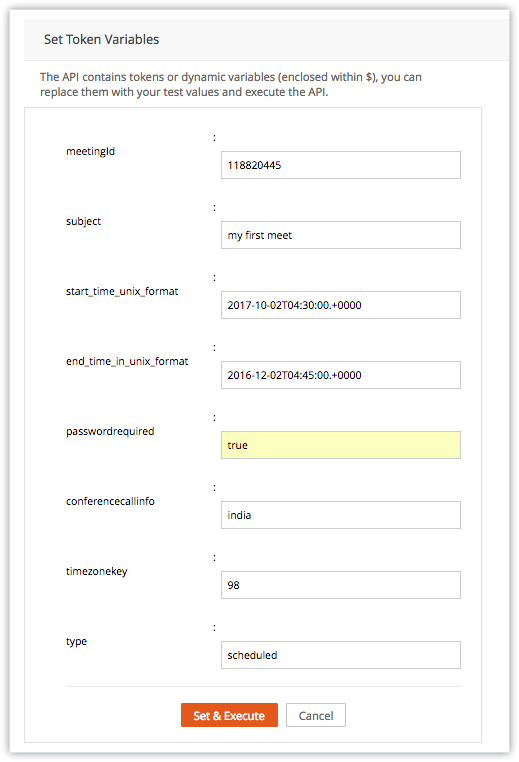
- Enter the Meeting ID that you want to update the meeting information to (as given below) and click Set & Execute.
Upon execution, an empty response will be created with the meeting details of the respective Meeting ID having been updated.

Upcoming Meetings
An Upcoming Meetings connector will display the list of upcoming meeting details that are scheduled on later dates. Use the following steps to create this API.
- In the Zoho developer console, click CRM Connectors.
- From the Connectors page, select GoToMeeting connector (located in the left pane)which is already created through the previous steps.
- Provide the following information:
- Specify Connector API Name : Upcoming Meetings
- Choose the method type : enable the option button GET
- Specify the URL : https://api.citrixonline.com/G2M/rest/meetings
- Specify Header fields : Content-Type : application/json
- Click Create.
- Click Execute.
The following API response will be generated and all the upcoming meeting details will be returned as a response.

Extension definition Procedures
This section covers the Customize and Automate tabs of the Zoho Developer Console. The connector is added to the new extension and can be tested for its features.
Creating a new extension
- Login toZoho Developer Console and click Build Extensions for Zoho CRM
- ClickCreate extension
- Fill in the following information in theCreate Extensionpage
- Extension Name: GoToMeeting
- Unique Namespace: GoToMeeting(Choose a unique namespace which cannot be changed later)
- Short Description: To schedule and reschedule meetings.
- Click Create
Your new extension will appear in the Extensionspage of your Zoho Developers Console.
Add the Connector
- In the Zoho Developer Consoleof the GoToMeeting extension, click CRM Connectors located in the left pane.
- Click the Add Connector button. A dialog box named Add Connector will open.
- Select the GoToMeeting connector from the dropdown list and click Add.
The GoToMeeting connector will be added to the extensions. The Connector APIs will be viewable by clicking View all API's.
Create Custom Buttons
Custom Buttons named Schedule meeting are created in the Leads, Contacts and Accounts modules to create meetings.
- In theZoho Developer ConsoleclickCustomize
- SelectLinks and Buttonstab.
- ClickCreate New Button.
- Provide the following details:
- In which module would you like to create a new button?,SelectContacts
- What would you like to name the button?,typeSchedule meeting
- Where would you like to place the button?,SelectList View Page
- What action would you like the button to perform?,selectInvoke a URL
- In Construct Your URL, enter https://crm.zoho.com/crm/gotomeeting/createmeeting?module=Contacts&rec_id=${Contacts.Contact Id}&rec_name=${Contacts.Email}
- Where do you want to show the content of the button action?,New Window
- Click Save.
Repeat the same steps to place Schedule meeting button in the Leads and Accounts modules by constructing the appropriate URL information.
Create Custom fields in Events Module
- In the Zoho developer console,click Customize in the Left pane.
- Select the Fields tab.
- Select Events from the Module List and click New Custom Field.
- Create the following custom fields in Events : Create Custom Field

Work flow for Delete meeting
- In the Zoho Developer Console, click Automate in the left pane and select Workflow.
- Select the Rules tab and click the Create Rule button
- Fill the details as listed below,
Basic Information
- Module : Events
- Rule Name : Delete meeting
- Description : Delete a meeting using the Meeting ID
- Click Next
Rule Trigger
- Execute Based on : Select A Record Action
- Select Delete and click Next
Rule Criteria
- Select Meeting Id and is not empty from the respective list boxes.
- Click Next
Actions
Under Instant Actions
- Navigate to Call Custom Functions and click +
In the function editor section
- Workflow Custom Function : type DeleteMeeting in the text box provided on select Events.
Write the following custom function given in Deluge script into the editor area and click the Save&Associate button.
gmeetingId = input.event.get("gotomeeting4.Meeting_ID");
  deleteResp = { "meetingId" : gmeetingId.toLong() };
  respMap=zoho.crm.invokeConnector("Gotomeeting.gotomeeting.deletemeeting", deleteResp);
}- Click Execute and enter the Event ID and Meeting ID created through previous steps and Submit.
An empty response will be generated showing that the meeting information with the respective meeting gets deleted. To test this, execute the Delete Meeting connector first, then execute the Upcoming Meeting connector, then check to see if the meeting details have been deleted from the list of scheduled meetings.
Work flow for Update Meeting
- In the Zoho Developer Console, click Automate in the left pane and select Workflow.
- Select the Rules tab and click Create Rule button
- Fill in the details as listed below,
Basic Information
- Module : Events
- Rule Name : Update Meeting
- Description :Update a meeting's information using the Meeting ID
- Click Next
Rule Trigger
- Execute Based on : Select A Record Action
- Select Edit and click Next
Rule Criteria
- Select Meeting Id and is not empty from the respective list boxes.
- Click Next
Actions
UnderInstant Actions
- Navigate to Call Custom Functions and click +
In the Function editor area give
- Workflow Custom Function : type UpdateMeeting in the text box provided on select Events.
Write the following custom function given in Deluge script into the editor area and Click the Save&Associate button.
getEventID = input.event.get("Events.ID");
  getRecordInfo = zoho.crm.getRecordById("Events",( getEventID).toLong());
  meetingId = (getRecordInfo).get("Meeting ID");
  if ((meetingId != null) && (meetingId != ""))
  {
  joinURL = (getRecordInfo).get("Meeting Join URL");
  callInformation = (getRecordInfo).get("Meeting Call Information");
  startTime = (getRecordInfo).get("Start DateTime");
  endTime = (getRecordInfo).get("End DateTime");
  subject = (getRecordInfo).get("Subject");
  meetingType = (getRecordInfo).get("Meeting Type");
  a = startTime.toTime();
  Time = a.toString("yyyy-MM-dd'T'hh:mm:ss'Z'", "Etc/UTC");
  b = endTime.toTime();
  Time1 = b.toString("yyyy-MM-dd'T'hh:mm:ss'Z'", "Etc/UTC");
  passwordrequired = (getRecordInfo).get("Password Required");
  timeZone = (getRecordInfo).get("Time Zone");
  meetingAudioType = (getRecordInfo).get("Meeting Audio Type");
  if (meetingAudioType == "VoIP Only")
  {
  conferencecallinfo = "VoIP";
  }
  else if (meetingAudioType == "Conference Only")
  {
  conferencecallinfo = "Hybrid";
  }
  else if (meetingAudioType == "Both")
  {
  conferencecallinfo = "Free";
  }
  else if (meetingAudioType == "Private")
  {
  conferencecallinfo = "Private";
  }
  updateResp = { "meetingId" : meetingId.toLong(), "subject" : subject, "start_time_unix_format" : Time, "end_time_in_unix_format":
                    Time1, "passwordrequired" :passwordrequired, "conferencecallinfo" : conferencecallinfo, "timezonekey" : timeZone, "type" : meetingType };
  respMap = zoho.crm.invokeConnector("Gotomeeting.gotomeeting.updatemeeting", updateResp);
  info respMap;
  }
Map=zoho.crm.invokeConnector("Gotomeeting.gotomeeting.deletemeeting", deleteResp);- Click Execute
- Enter the Event ID and Meeting ID created through previous steps and choose Submit.
A response will be generated with updated meeting details.To test this, execute the Update Meeting connector first, then the Upcoming Meeting connector, then find the updated meeting details for that respective Meeting ID.