Templates
How Can I...up
Zoho CRM offers templates for a range of document types, including quotes, invoices and emails. However, your particular business model may require a specialized set of templates to operate efficiently. In that case, you can use extensions to expand or refine Zoho's basic offerings. Extension-enabled templates in Zoho CRM are divided into two categories: Email templates and Inventory templates
Email templates
Communicating effectively with customers is crucial to building and maintaining a steady flow of business. To facilitate this, your CRM system can be customized with Email Templates, allowing you to send a single message to multiple recipients. Wth an email template, you can send a mass email to a group of leads/contacts, or you can set up a workflow rule that automatically sends an email notification to a particular CRM user when a specific condition is met.
Create email templates
You can create templates for two main email types: outbound emails to contacts/leads and internal emails to users within CRM. In both cases, you'll create standardized body text and then add field data from your CRM system to personalize the template. Also, each template is bound to a particular record type, so, for example, when you send emails to a group of leads, only the templates created for lead records will be available.
To create an email template
- Select Templates in the left pane and choose Email Template.
- Click New Template.
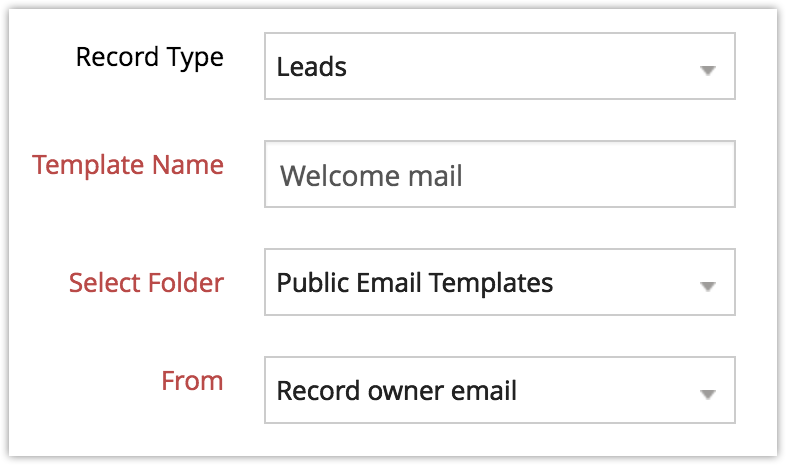
- In the New Templatepage, fill in the following fields:
- Select the Record Type from the drop-down list.
- Enter the Template Name.
- Select the destination folder for your template from the Select Folder drop-down list.
- Add the email address you want to appear in the 'From' field. Replies will also go to this address.
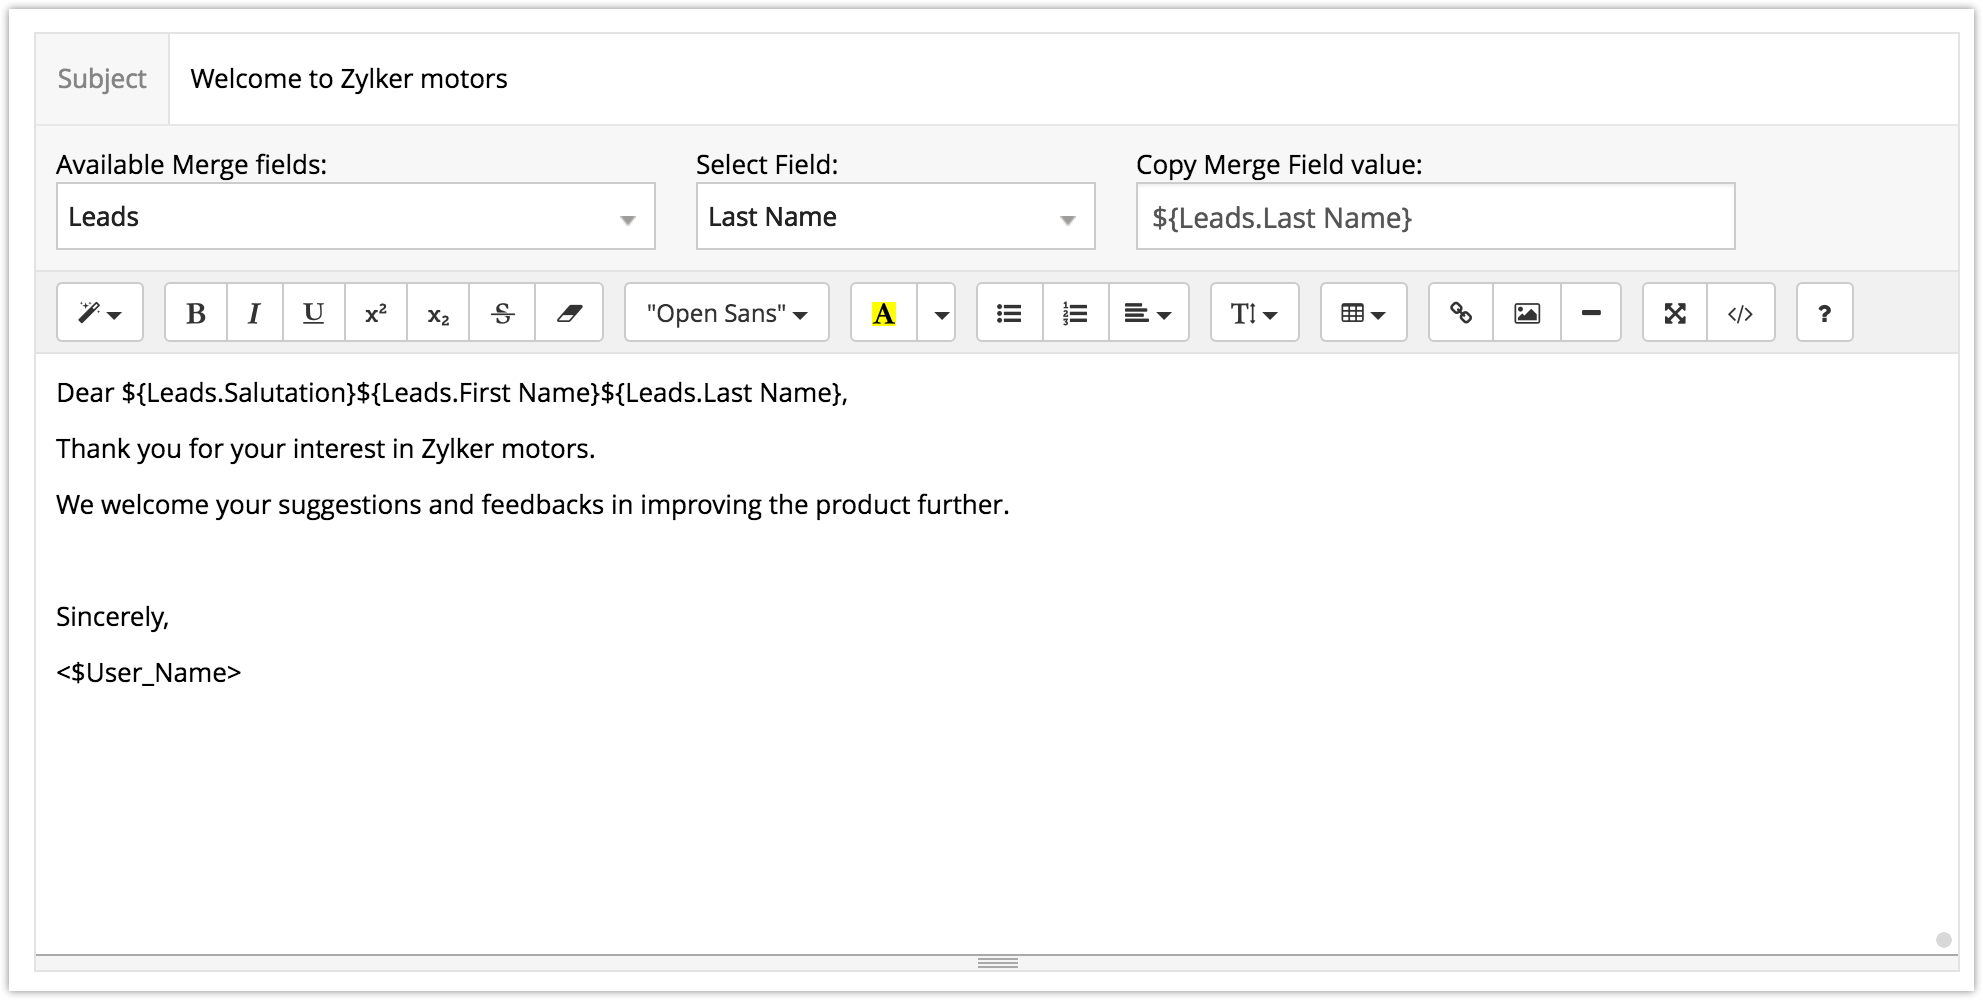
- Add a Subject line for the email.
- You can also attach a file to your email (maximum file size: 3MB).
- In the section labelled Email Template Body, compose the standard text of the email (limit:64000 characters).
- Auto populate your template email with data from your Zoho CRM by incorporating field values from various modules:
- Select the required module from the Available Merge fields drop-down list.
- Select the relevant field name, based on the category (User, Organization, or Specific Module).
- Copy the field (for example, $contacts_firstname) from the Copy Merge Field value and paste it in the body of the email template.
- Click Save.


Note
- You can provide a link to a video in your email template, but you cannot embed the video in the template itself.
- If you are creating an email template for sending emails to leads, you should not merge the contact's related fields.
If you try to merge both fields, you will experience errors while creating the email template.
List of Standard Fields
| Field Name | Description | Data Type |
| Record Type | Displays the record type for the email template | Text box |
| Template Name | Enter the name of the email template. | - |
| Select Folder | Select one of the available folders. | Drop-down |
| From | Enter the email address you want in the 'From' field. Email replies will also be sent here. | Drop-down |
| Subject | Enter the subject to be displayed in the email. | Text box |
| Attachment | Attach file to the email (maximum file size: 3 MB) | - |
Sample Email Template
Thank you for your interest in Zylker motors.
We welcome your suggestions and comments to further improve our product.
Sincerely,
<$User_Name>
Email Output
Thank you for your interest in Zylker motors.
We welcome your suggestions and comments to further improve our product.
Sincerely,
Team Zylker
Create newsletter templates
To improve your customer outreach, you can also create HTML-based newsletter templates. Newsletters are different from your regular emails, in that a regular email is more textually based, while a newsletter is design-based. To include a newsletter in your email template, you will also have to include the newsletter's HTML code.
To create newsletter templates
- Create a newsletter in Adobe Dreamweaver, or any other HTML editor, and upload all images/CSS used in the newsletter design to your website.
- In Zoho Developer console, open the extension you'd like to add the template to.
- Click Templates in the left pane and Email Template from the drop-down.
- The Email Template editor will appear. Click the Code View icon [
 ].
]. - Paste your Newsletter HTML code into the Code View field and click Insert.
- Click Save.
Inventory templatesa
Inventory templates allow you to customize the print layout for your Quotes, Purchase Orders, Sales Order and Invoices. You can edit fields, change the position of the company logo, customize the appearance of the layout and alter the alignment of the items(SKUs).
Create inventory templates
You can create inventory templates to send customized quotes, sales orders, invoices, and purchase orders for customers and your suppliers.
Inventory Modules
There are four standard inventory modules available in Zoho CRM: Quotes, Purchase Orders, Sales Orders, and Invoices. One of these modules will be the primary module for which the inventory template will be created. Each of these primary module can be linked with certain secondary modules as shown below:
| Primary Module | Secondary Modules |
| Quotes | Quotes, Products, Users, Organization, Accounts, Contacts, and Potentials. |
| Purchase Orders | Purchase Orders, Products, Users, Organization, Vendors, and Contacts. |
| Sales Orders | Sales Orders, Products, Users, Organization, Accounts, Contacts, and Potentials. |
| Invoices | Invoices, Products, Users, Organization, Accounts, Contacts, and Potentials. |
Special Instructions
- "Product Name" is a mandatory field in the inventory template. Products can't be listed if you do not enter a value in this field.
- Tags for line items must be inserted between <tbody id="lineItem"> and </tbody> tags.
- You can also merge fields from the Users, Organization, Accounts, Vendors, Contacts, and Potentials modules.
- A default template will be used in Print Preview, export to PDF and send mail functions of Quotes, Orders, and Invoices.
Inventory Template Tags
When creating a template, you can use various tags from Users, Organization, Accounts, Contacts, Potentials, Vendors, Quotes, Sales Orders, Invoices, and Purchase Orders modules.
List of Standard Fields
| Field Name | Tag | Description |
| First Name | ${User.First Name} | Enter the user's first name. |
| Last Name | ${User.Last.Name} | Enter the user's last name. This is a mandatory field. |
| ${User.Email} | Enter the user's email address. This is a mandatory field. | |
| Phone | ${User.Phone} | Enter the user's primary phone number. |
| Mobile | ${Mobile} | Enter the user's mobile phone number. |
| Fax | ${User.Fax} | Enter the user's FAX number. |
| Street | ${User.Street} | Enter the user's primary address. |
| City | ${User.City} | Enter the city where the user lives. |
| State | ${User.State} | Enter the state where the user lives. |
| Zip | ${User.Zip Code} | Enter the user's postal code. |
| Country | ${User.Country} | Enter the country where the user lives. |
List of Organization-Related Tags
| Field Name | Tag | Description |
| Name | ${Organization.Organization Name} | Enter your company name. |
| Phone | ${Organization.Phone} | Enter your company's official phone number. |
| Mobile | ${Organization.Mobile} | Enter your company's mobile number. |
| Fax | ${Organization.Fax} | Enter your company's FAX number. |
| Website URL | ${Organization.Website} | Enter the URL of your company website. |
| Street | ${Organization.Street} | Enter your company's primary address. |
| City | ${Organization.City} | Enter the city in which your company is located. |
| State | ${Organization.State} | Enter the state in which your company is located. |
| Postal Code | ${Organization.Zip Code} | Enter the your company's postal code. |
| Country | ${Organization.Country} | Enter the country where your company's headquarters is located. |
| Company Logo | ${companyLogo} | Upload your company logo, which can be used as header in your quotes, orders, and invoices similar to letterhead. Maximum size: 188X80 pixels. |
| Description | ${Organization.Organization Description} | Add additional information about your company. |
Customize Inventory Template
To customize an inventory template
- In the Extension Details page, click Templates in the left pane and click Inventory Templates from the drop-down option.
- Click New Template.
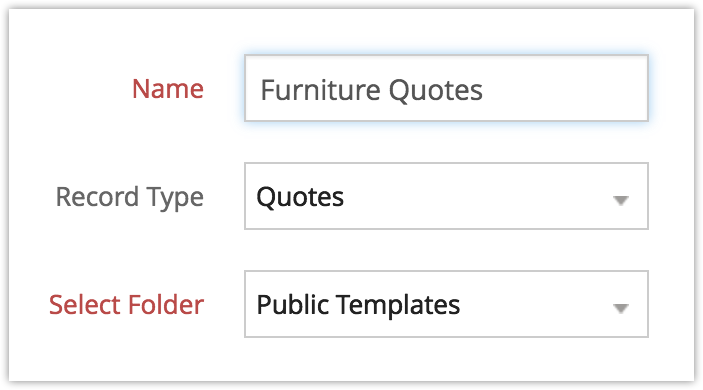
- In the Template Information page, fill in the following fields:
- Enter the Name of the Email template.
- Select the primary module from the Record Type drop-down list.
- Choose the destination folder from the drop-down list labelled Select Folder.
- Select the checbox labelled Set as Default. (Optional)
- In the Email Template Body section, compose the standard text of the email (limit:32000 characters).
- Auto populate your template email with data from your Zoho CRM by incorporating field values from various modules:
- Select the required secondary module from the Available Merge fields drop-down list.
- Select the relevant field name based on the category (User, Organization, or Specific Module).
- Copy the field (for example, $Quotes.Account Name) from the Copy Merge Field value and paste it in the body of the email template.
- Click Save.

Managing a template
Certain actions are common to both email and inventory templates. These actions include - Managing a template folder, Modifying a template, and Deleting a template.
Manage Template Folders
You can create folders to store and organize your templates. This makes it easy to find and share your templates with other CRM users.
To create a new template folder
- Click Templates in the left pane and select the type of template you would like to organize into folders.
- In the [ Templates] page, click New Template Folder.
- In the Folder Details page, enter the Folder Name and add a description.
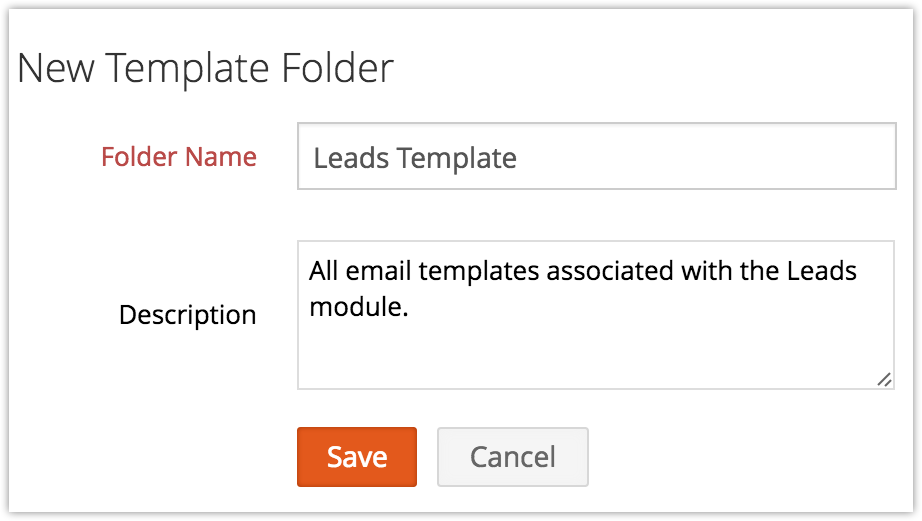
- Click Save.

Modify a template
You can edit or update an existing template by changing the text of merged fields.
To modify a template
- Click Templates in the left pane of the Extension Details page and select the type of template you'd like to modify.
- Click the Edit icon corresponding to the template you'd like to modify.
- In the Edit Email Template page, make the necessary changes and click Save.
Delete a template
Occasionally, you may want to clean out unnecessary or outdated templates from your template folders.
To delete an email template
- Click Templates in the left pane and select the type of template you'd like to delete.
- Click the Delete icon corresponding to the template you'd like to discard.
- Click OK.

