Custom SalesSignal
The SalesSignals feature in Zoho CRM provides real-time notifications of all touch points from your leads, contacts, or potential customers. You can keep track of all the customer interactions across various channels and follow-up with them from one central place, your Zoho CRM account. The SalesSignals notifications are displayed when you click ![]() [the Notifications icon] on the top-right corner of the Zoho CRM home page.
[the Notifications icon] on the top-right corner of the Zoho CRM home page.
Refer Configure and View SalesSignals to know more about the types of SalesSignals displayed in Zoho CRM and when they will be displayed.
You can now use the Zoho Developer Console to create custom sales signals and raise them when receiving notifications from any third-party application too and show them to the sales reps inside Zoho CRM. To achieve this, you need to build an extension using Zoho Developer Console or check out for such extensions that are already available on the Zoho Marketplace.
This document will guide through the step-by-step procedures of creating and raising SalesSignals for both native extensions and third-party integrations.
Define and Raise Signals in Native Extensions
Native extensions are a set of custom features bundled together to extend the functionality of your Zoho CRM system without the influence of any other third-party service. For instance, writing a new custom workflow rule to set up alerts/notifications inside your Zoho CRM, whenever a deal stays dormant in the pipeline for a long period of time (this time period can be defined by the users based on their requirements).
Configuring SalesSignals for native extensions involves two steps:
Define a Signal
The first step is to create and define the SalesSignal in Zoho Developer Console.
To create a SalesSignal
- In the Zoho Developer console homepage, click Extensions for Zoho CRM.
- Click Edit below the extension in which the SalesSignal has to be generated.
- In your Extension's details page, click SalesSignal in the left pane.
- In the SalesSignal page, click Define Signal.
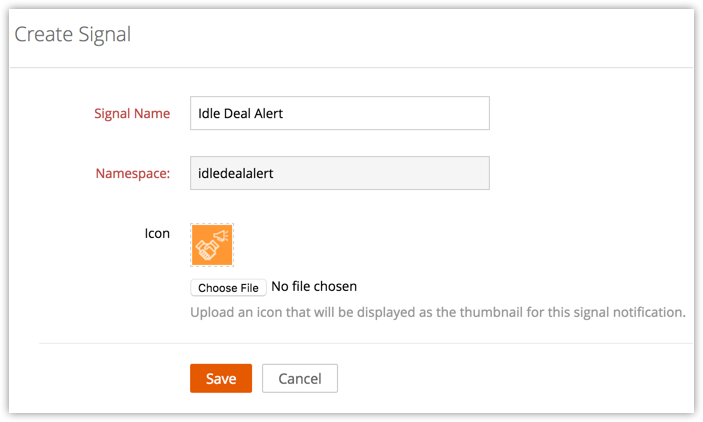
- Provide the following details to define the Signal.
- Signal Name - This is the name that will be displayed in the settings page, where the users can turn on/off the signals.
- Namespace - The unique namespace thay is used to address the signal in any custom function.
- Icon - Favi icon that will shown along with the notification inside Zoho CRM.
- Click Save.

Raise a Signal
You can raise a signal by invoking the deluge task given below. This function can be associated to a scheduler/ custom function so that you get a notification whenever a deal has been dormant in the sales pipeline for a particular period of time. The following sample function can be used to raise a sales signal whenever whenever a deal remains in the Qualification stage for 10 days.
resp = zoho.crm.getRecords("Deals");
for each usersVal in resp
{
id = usersVal.get("id");
time = (usersVal.get("Modified_Time")).toTime();
stage = usersVal.get("Stage");
NumberofDaysinQualification = 10;
NumberofDays = days360(time,zoho.currentdate);
if ((stage == "Qualification") && (NumberofDays.toLong() > NumberofDaysinQualification))
{
flag = 1;
}
if (flag == 1)
{
signalMap = map();
signalMap.put("signal_namespace", "<signal_namespace>");
signalMap.put("email", "<email_present_in_either_lead's_or_contact's_record>");
signalMap.put("subject", "Alert for Deal Stuck in Quialification Stage");
signalMap.put("message", "Your Deal is Stuck. Please look into it. Thanks !");
actionsList = List();
actionMap = map();
actionMap.put("type", "link");
actionMap.put("display_name", "View Potential");
actionMap.put("url", "/crm/EntityInfo.do?module=Potentials&id=" + id);
actionsList.add(actionMap);
signalMap.put("actions", actionsList);
result = zoho.crm.invokeConnector("raisesignal", signalMap);
info result;
}
}
Whenever this signal is raised, you will receive a notification in Zoho CRM as shown below.
Define and Raise signals for Third-party Integrations
Third-party integration extensions allow users to link their Zoho CRM accounts with outside services such as Pandadoc, Google, Zendesk, SurveyMonkey,etc. Now once this integration is achieved, the users might require timely updates of the changes from the third-party service. For example, Consider that you have integrated your Zoho CRM with SurveyMonkey. You have created a survey using SurveyMonkey and sent it to your Customers and Prospects and want to receive timely notifications whenever a customer views your survey or has responded to it. This can be achieved by setting up SalesSignals using Zoho Developer Console.
Define a Signal
To create a SalesSignal for a third-party application
- In the Zoho Developer Console homepage, click Extensions for Zoho CRM.
- Click Edit below the extension in which the SalesSignal has to be generated.
- In your Extension's details page, click SalesSignal in the left pane.
- In the SalesSignal page, click Define Signal.
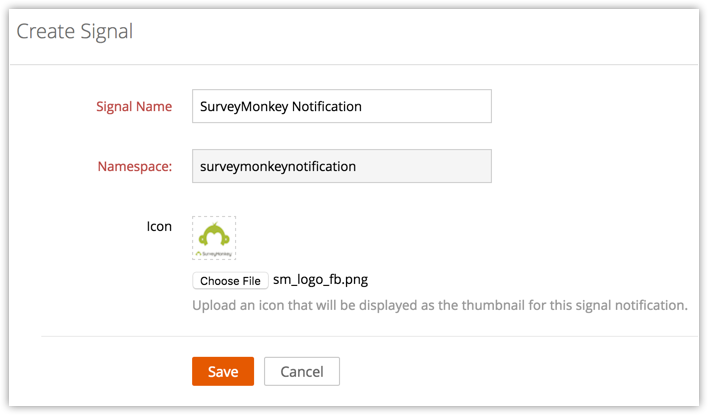
- Provide the following details to define the Signal,
- Signal Name - This is the name that will be displayed in the settings page, where the users can turn on/off the signals.
- Namespace - The unique namespace thay is used to address the signal in any custom function.
- Icon - Favi icon that will shown along with the notification inside Zoho CRM.
- Click Save.

Register a Webhook
Most services provide webhook support for other services to register for notifications when specific events occur in the third-party service. This can be done either manually(if the servcie has a provision to do that) by simply specifying the necessary details or programatically. Inorder to register for the Webhook, you need a Webhook URL.
Standalone deluge functions can be defined and can be exposed as REST APIs. And this REST API generated for the function can be registered as the Web hook URL in a third-party service.
And when this URL gets invoked by the third-party service, the deluge callback function gets executed and the raise signal task added by you will generate a sales signal.
Define a deluge function
So the first step in registering a Webhook is to define a deluge function that can be exposed as REST API. The Syntax to define a function is:
<function_name> (map requestMap)
{
}
All functions exposed as REST APIs will have a map variable defined as the input variable. It contains all the data posted to the API and has three keys defined :
- Parameters
- Headers
- RequestString
Once this function is defined and saved, the REST API URL will be generated. This URL is the Webhook URL that has to be provided to the third-party application. A sample REST API URL pattern is given below,
http://platform.zoho.com/crm/v2/settings/custom_function/<function_name>/execute
After defining the deluge function and obtaining the Webhook URL, you'll have to register the webhook in the third-party service. Before registering the webhook we should know the type of authentication provided by the third-party.
If the third-party service provides token based authentication, a simple POST URL task can be used for this purpose. Refer to POST URL to learn how to write a POST URL script.
If the third-party service uses OAuth 2.0 authentication, you have to create a connector and create an API associated to it. For any third-party service, the API URL and its parameters can be obtained from their developer documentation.
Once this connector API is created, you can write a custom function to invoke the Connector API. Invoking this connector API will be done based on the option provided by the third-party for registering the Webhook. Certain services allow registering the webhook at the record level(whenever a particular record is credited or modified) while some allows at the service level (whenever there is any change in the service).
The webhook_url can be defined using the format given as below,
webhook_url="http://platform.zoho.com/crm/v2/settings/custom_function/<function_name>/execute"
To obtain the apikey value to be used in custom function, use the following code
getmap = { "nameSpace" : "<portal_name.extension_namespace>"};
apiresponse = zoho.crm.invokeConnector("crm.zapikey", getmap);
apikey = apiresponse.get("response");
SurveyMonkey provides the option at record level. So whenever the survey is created in CRM, we have to trigger a workflow which will execute the custom function (which have source code for registering webhook). A sample custom function is given below, using the webhook_url
survey_id = input.surveymonkey_details_.get("surveymonkey.Survey_ID");
crm_signal_webhook_url = webhook_url+"?survey_id=" + survey_id + "&zapikey="+apikey;
map = { "survey_id" : survey_id, "crm_signal_webhook_url" : crm_signal_webhook_url };
response = zoho.crm.invokeConnector("surveymonkey.surveymonkeyconnector.registerwebhook",map);
Write a workflow rule to invoke this custom function whenever a new survey is created using SurveyMonkey in Zoho CRM. With this, the webhook registration is successful.
You can also register a webhook at the time of extension installation by including the function as a Post install Script .
Raising a Signal
Raising a SalesSignal will be done whenever there is a change in the third-party. For example, in SurveyMonkey whenever a user has completed a survey the details of the survey will be pushed to Zoho CRM.
You need to include the following deluge task to push the signal to Zoho CRM. You will get all the details from the third-party service in requestMap variable as explained before.
survey_id=input.requestParamMap.get("survey_id");
response_id=input.requestContentStr.getJSON("object_id");
map={ "survey_id" : survey_id, "response_id" : response_id };
response = zoho.crm.invokeConnector(("surveymonkey.surveymonkeyconnector.getsurveyresponsedetails"),map);
responseObj=response.toString().getJSON("response");
EMAIL=responseObj.getJSON("metadata").getJSON("contact").getJSON("email").getJSON("value");
SUBJECT="Survey Monkey Responded";
MESSAGE="Response from survey monkey";
DETAIL_VIEW_LINK_NAME="View Survey Response";
DETAIL_VIEW_LINK_URL=responseObj.getJSON("analyze_url");
map={ "email" : EMAIL, "subject" : SUBJECT, "message" : MESSAGE, "preview_link_name" : DETAIL_VIEW_LINK_NAME, "preview_link_url" : DETAIL_VIEW_LINK_URL };
return map.toString();