Building a Real Estate CRM
Zoho Developer Console allows developers to transform your CRM into an industry specific CRM solution. A real estate CRM needs to manage comprehensive and comparative details about properties, offer ease in handling Buyer and Client data and provide the convenience of effortlessly pulling out information corelated to one or more module(s). Integration with other real estate specific third party application(s) further enhances the usability of a real estate CRM. Property Pro is a real estate CRM which embodies all these features and much more, thereby giving customers the competitive market advantage.
How Can I...
Setup a CRM application
The first step in building your vertical CRM is to configure certain basic settings and choose the application modules you'd like to include.
To create and setup a new application
- Log in to your Zoho Developer account and click CRM for Verticals.
- In the Vertical CRM page, click Create App.
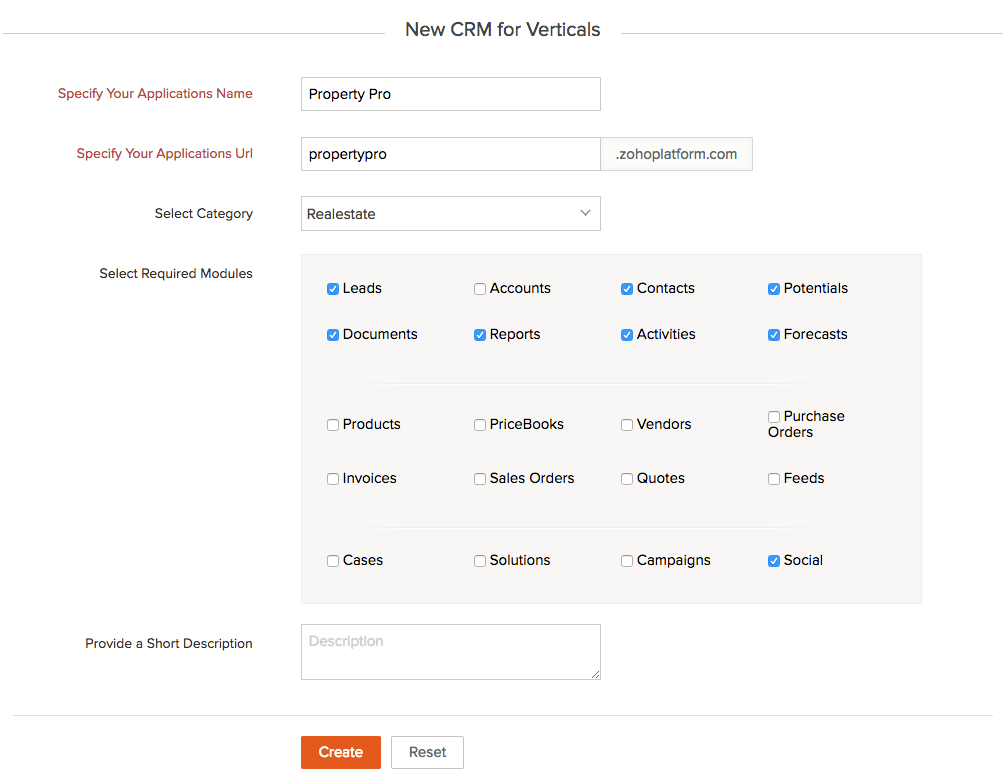
- In the New CRM for Verticals page, input the name of your application, appropriate to the industry, for e.g. "Property Pro" and your URL as "propertypro.zohoplatform.com".
Note: Your URL can be mapped to your custom domain later when you are branding your application. - Select Realestate from the Select Category dropdown.
The category denotes the industry (Automobile, Insurance, Health care, etc.) for which your application is being developed - The modules Leads, Contacts, Potentials, Documents, Reports, Activities, Forecasts and Social alone should be selected. Uncheck the rest of the modules.
- Provide a Short Description about your application.
- Click Create. A new application is created.
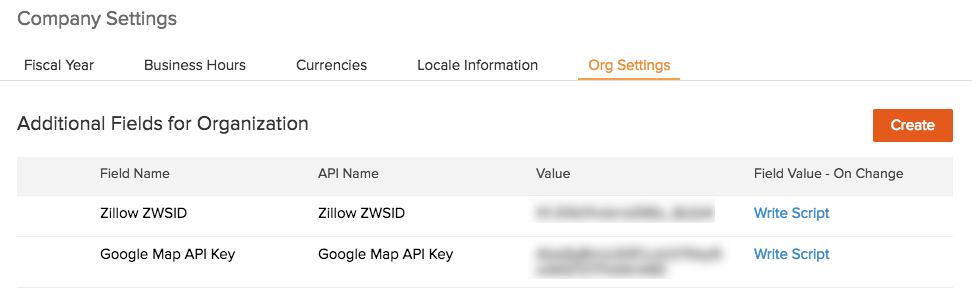
Configure the Organization Variables
- Select your application and click Company Settings in the left pane and click Org Settings.
- Click Create and set up the custom variables:
Rename the preset modules
The preset modules can be renamed to suit the real estate lingo and they can be mapped as explained below:
- Click Modules in the left pane.
- Hover over the module which you want to rename and click 'Rename' as shown below:
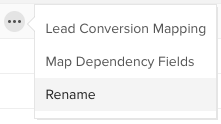
- Provide the module name in Enter Module Name dialog box,
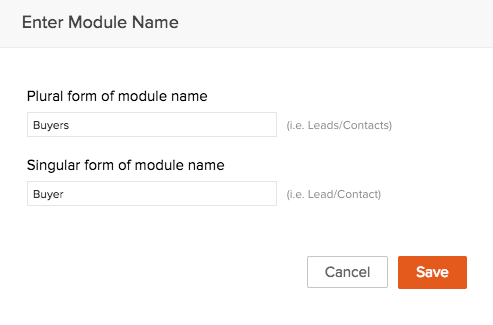
- Some of the preset modules have been renamed as mentioned in the below table.
Sl.No Displayed in tabs as Module Name 1 Buyers Leads 2 Clients Contacts 3 Transactions Deals 4 Activities Activities 5 Tasks Tasks 6 Events Events 7 Calls Calls 8 Dashboards Dashboards 9 Reports Reports 10 Documents Documents 11 Social Social 12 Forecasts Forecasts


Create a Custom Module
- Click Modules in the left pane.
- In the Modules page, click Create New Module.
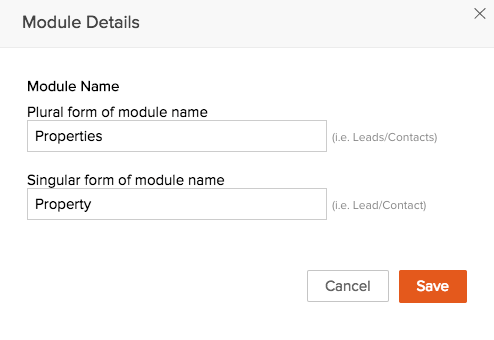
- To enter the module name details, click on the edit symbol [
 ].
]. - Enter the singular and plural form of the module name in the Module Details dialog box as "Property" and "Properties" respectively.
- Click Save Layout.
- Select the profile "Administrator". Users in the selected profile(s) will have access to the custom module.
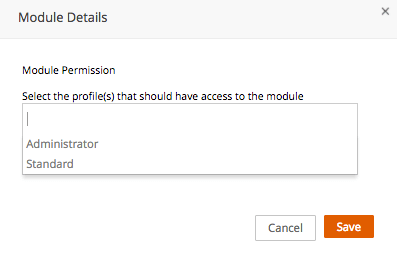
- Click Save Layout.


Add new fields to the new custom module
- Click Modules in the left pane.
- In the List of Modules page, click Properties module.
- In order to add fields into sections, drag and drop the New Section into the layout and rename it. Subsequently, add the fields listed below:
List of sections and Custom fields
Sl.No Field Data Type Property Information (section) 1 Approved Checkbox 2 Year Built Single Line 3 Unapproved Checkbox 4 Year Updated Single Line 5 Parking Type Single Line 6 No of Bedrooms Single Line 7 Rooms Single Line 8 No of Bathrooms Single Line 9 Type of Property Pick List 10 Built up Area Single Line 11 Property Component Multiselect 12 Property Area Single Line 13 No of Floors Single Line 14 Basement Single Line 15 Heating Sources Single Line 16 View Single Line 17 No of Owners Pick List 18 Buyer Lookup 19 Transaction Lookup Pricing Information 20 CMDA Approval Single Line 21 Maintenance Cost Single Line 22 Property Approx Price Single Line 23 Zestimate Single Line Address Information 24 Street Single Line 25 City Single Line 26 State Single Line 27 Zip Code Single Line 28 Country Single Line Neighbour Information 29 Neighbourhood Pick List 30 Elementary School Lookup 31 Middle School Lookup 32 District School Single Line Unused Section (preset fields) 33 Property Owner Single Line 34 Created By Single Line 35 Modified By Single Line
Add a Custom Function
Fetch Properties Rule - Custom Function
Whenever a new buyer is added into the CRM system, details about properties in the buyer's preference location are fetched and displayed in the 'Properties' module.
To create the Fetch Properties custom function, perform the following:
- Click Automate in the left pane.
- Select Workflow
- Under Rules tab, click Create Rule.
- Provide the following details:
- Basic Information
- Module: Buyers
- Rule Name: Fetch Properties
- Provide a Description
- Rule Trigger
- Execute based on: Select A Record Action.
- Select Create.
- Click Next.
- Rule Criteria
- Select All Records.
- Click Next.
- Under Actions, click [
 ] in Call Custom Functions.
- The Deluge Scripting Editor gets opened.
- Function Name: CreateProperties
- Copy the below code into the editor:
LeadId= input.buyer.get("Leads.ID");
datamap = map();
datamap.put("module","Leads");
datamap.put("id",LeadId);
resp = zoho.crm.invokeConnector(("crm.get"), datamap);
respMap =(resp.get("response")).toMap();
users = respMap.get("data");
temp = users.subString(1,(users.length()-1));
usersVal = temp.toMap();
street = usersVal.get("Street");
city = usersVal.get("City");
state = usersVal.get("State");
street1 = street.replaceAll(" ",("+"),false);
street2 = city +"%2C+"+ state;
zwsId = zoho.crm.getOrgVariable("Zillow ZWSID");
detail = getUrl("http://www.zillow.com/webservice/GetSearchResults.htm?zws-id="+ zwsId +"&address="+ street1 +"&citystatezip="+ street2);
zpid = detail.executeXPath("/SearchResults:searchresults/response/results/result/zpid/text()");ZillowPropertyId= zpid.toLong();
newDetail = getUrl("http://www.zillow.com/webservice/GetComps.htm?zws-id="+ zwsId +"&zpid="+ZillowPropertyId+"&count=5");
newzpidsList = newDetail.executeXPath("/Comps:comps/response/properties/comparables/comp/zpid/text()").toList("-|-");
for each newzpids in newzpidsList
{
detail = getUrl("http://www.zillow.com/webservice/GetUpdatedPropertyDetails.htm?zws-id=" + zwsId + "&zpid=" + newzpids);
zpid1 = detail.executeXPath("/UpdatedPropertyDetails:updatedPropertyDetails/response/editedFacts/useCode/text()");
zpid2 = detail.executeXPath("/UpdatedPropertyDetails:updatedPropertyDetails/response/editedFacts/bedrooms/text()");
zpid3 = detail.executeXPath("/UpdatedPropertyDetails:updatedPropertyDetails/response/editedFacts/bathrooms/text()");
zpid4 = detail.executeXPath("/UpdatedPropertyDetails:updatedPropertyDetails/response/editedFacts/finishedSqFt/text()");
zpid5 = detail.executeXPath("/UpdatedPropertyDetails:updatedPropertyDetails/response/editedFacts/lotSizeSqFt/text()");
zpid6 = detail.executeXPath("/UpdatedPropertyDetails:updatedPropertyDetails/response/editedFacts/yearBuilt/text()");
zpid7 = detail.executeXPath("/UpdatedPropertyDetails:updatedPropertyDetails/response/editedFacts/yearUpdated/text()");
zpid8 = detail.executeXPath("/UpdatedPropertyDetails:updatedPropertyDetails/response/editedFacts/numFloors/text()");
zpid9 = detail.executeXPath("/UpdatedPropertyDetails:updatedPropertyDetails/response/editedFacts/basement/text()");
zpid10 = detail.executeXPath("/UpdatedPropertyDetails:updatedPropertyDetails/response/editedFacts/roof/text()");
zpid11 = detail.executeXPath("/UpdatedPropertyDetails:updatedPropertyDetails/response/editedFacts/view/text()");
zpid12 = detail.executeXPath("/UpdatedPropertyDetails:updatedPropertyDetails/response/editedFacts/parkingType/text()");
zpid13 = detail.executeXPath("/UpdatedPropertyDetails:updatedPropertyDetails/response/editedFacts/heatingSources/text()");
zpid14 = detail.executeXPath("/UpdatedPropertyDetails:updatedPropertyDetails/response/editedFacts/heatingSystem/text()");
zpid15 = detail.executeXPath("/UpdatedPropertyDetails:updatedPropertyDetails/response/editedFacts/rooms/text()");
zpid16 = detail.executeXPath("/UpdatedPropertyDetails:updatedPropertyDetails/response/neighborhood/text()");
zpid17 = detail.executeXPath("/UpdatedPropertyDetails:updatedPropertyDetails/response/schoolDistrict/text()");
zpid18 = detail.executeXPath("/UpdatedPropertyDetails:updatedPropertyDetails/response/elementarySchool/text()");
zpid19 = detail.executeXPath("/UpdatedPropertyDetails:updatedPropertyDetails/response/middleSchool/text()");
zpid20 = detail.executeXPath("/UpdatedPropertyDetails:updatedPropertyDetails/response/address/street/text()");
zpid21 = detail.executeXPath("/UpdatedPropertyDetails:updatedPropertyDetails/response/address/zipcode/text()");
zpid22 = detail.executeXPath("/UpdatedPropertyDetails:updatedPropertyDetails/response/address/city/text()");
zpid23 = detail.executeXPath("/UpdatedPropertyDetails:updatedPropertyDetails/response/address/state/text()");
createMap = map();
createMap.put("Basement", zpid9);
createMap.put("No_of_Bathrooms", zpid3);
createMap.put("No_of_Bedrooms", zpid2);
createMap.put("City", zpid22);
createMap.put("CustomModule1_Name", "Zillow Property Id " + newzpids);
createMap.put("District_School", zpid17);
createMap.put("Elementary_School", zpid18);
createMap.put("Built_up_Area", zpid4);
createMap.put("Heating_Sources", zpid13);
createMap.put("Heating_System", zpid14);
createMap.put("Property_Area", zpid5);
createMap.put("Middle_School", zpid19);
createMap.put("Neighbourhood", zpid16);
createMap.put("No_of_Floors", zpid8);
createMap.put("Parking_Type", zpid12);
createMap.put("No_of_Floors", zpid10);
createMap.put("Rooms", zpid15);
createMap.put("State", zpid23);
createMap.put("Street", zpid20);
createMap.put("View", zpid11);
createMap.put("Year_Built", zpid6);
createMap.put("Year_Updated", zpid7);
createMap.put("Zip_Code", zpid21);
createMap.put("Buyer", LeadId);
l = List();
l.add(createMap);
dataMapzz = map();
dataMapzz.put("module", "Properties");
dataMapzz.put("data", l);
response = zoho.crm.invokeConnector("crm.create", dataMapzz);
info response;
}
- Click Save & Associate.
- To save the workflow rule, click Save.
- Basic Information
To ensure correctness of custom function, perform the following:
- Click Automate in the left pane.
- Select Workflow.
- Click Custom Functions.
- Hover over the name of the function 'CreateProperties' and click the edit icon [
 ].
]. - In the Deluge Scripting Editor, click Execute
- Provide the Buyer ID of a record and click Submit.
- The following API response is obtained:

Create a Connected App with Related List widget
- Click Connected Apps in the left pane.
- Click the New Connected App button
- Provide the following details:
- Connected App Name: Property Pro
- Provide Description.
- Choose Hosting: External Hosting
- Specify Base URL: SandBox : "http://localhost:8000/"
- Click Save
To build a Related List widget, the following groundwork needs to be done:
- Download the Zillow Source Code to your desktop and extract the folder.
- Go to https://github.com/ZohoDevelopers/embeddedApp-js-sdk/releases/.
- Download the latest ZohoEmbededAppSDK.min.js and save in the "lib" folder of your source code directory.
- Any file hosting server can be used to host the application.
Note: An example of how the application can be hosted using Python server is given below:
- Go to the website https://www.python.org/download/releases/2.7.6/
- Choose Windows x86 MSI Installer (2.7.6) (sig) to download.
- Once Python is installed, run the server using the following steps:
For Windows:
- Open Command Prompt and go to the location where you had downloaded and kept the unzipped source code for the embedded app.
- Start the Python server in HTTP mode with the following command
- C:Python27/python.exe -m SimpleHTTPServer 8000
For Mac:
- The python module already exists in the mac OS. So you need not download it again. Go to the location where you have saved the source code for the embedded app.
- Open up the Terminal and start Python by executing the following command
- python -m SimpleHTTPServer 8000
- Execute http://localhost:8000 on the browser tab to verify the host from local machine.
You can now view the list of files in the source folder.
To add the Related List widget
- Click Components in the left pane.
- Go to Related List tab in the Components page
- Click Add Widgets under Custom tab.
- In the Create Custom Widget page provide the following details:
- Name: Property Details
- Module: Select Properties
- Resource Path: zillow/html/relatedListSearch.html
- Click Save.
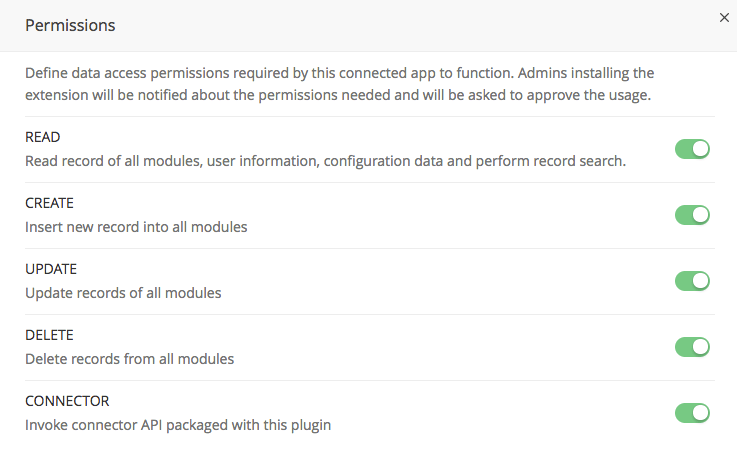
- Provide all Permissions to the connected app by following the below steps:
- Click Connected Apps in the left pane.
- Click the Connected App 'Property Pro'
- Click the Permissions button.

- In the Permissions dialog window, provide all data access permissions.


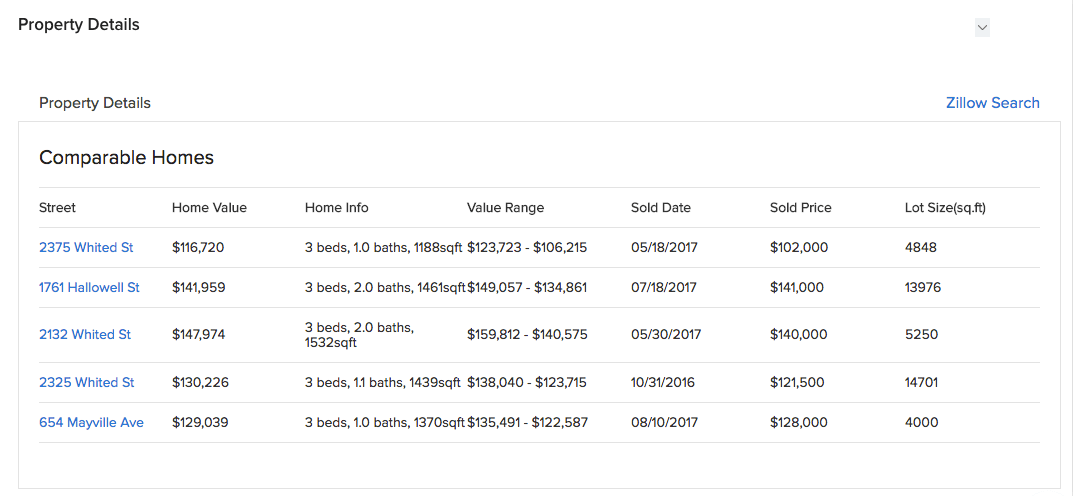
Test the Related List widget in Sandbox
- Click Test your Application located at the top right corner of your application.
- Click Properties module.
- Select a Property record.
- In the left pane, under Related List, click Property Details. You will be able to see the following details: