Portals
How Can I...
A Portal enables you to share selective data in the Vertical Solution with your customers. For example, consider that you've developed a hospital management system using the Vertical Solution for hospital staff use. If you also want to allow patients to view their details online, you can do so using the Portal feature. You can enable the Portal for specific patients and choose what data they have access to by setting permissions. In the Vertical Solution, the portal is only available for the Contacts module. Along with the Contacts module, the customer can view all the module records related to Contacts.
Create a Portal
The steps below describe the procedure for creating a portal:
- Log in to your Vertical Solution application.
- Go to Setup > Channels > Portals and click Get Started Now.
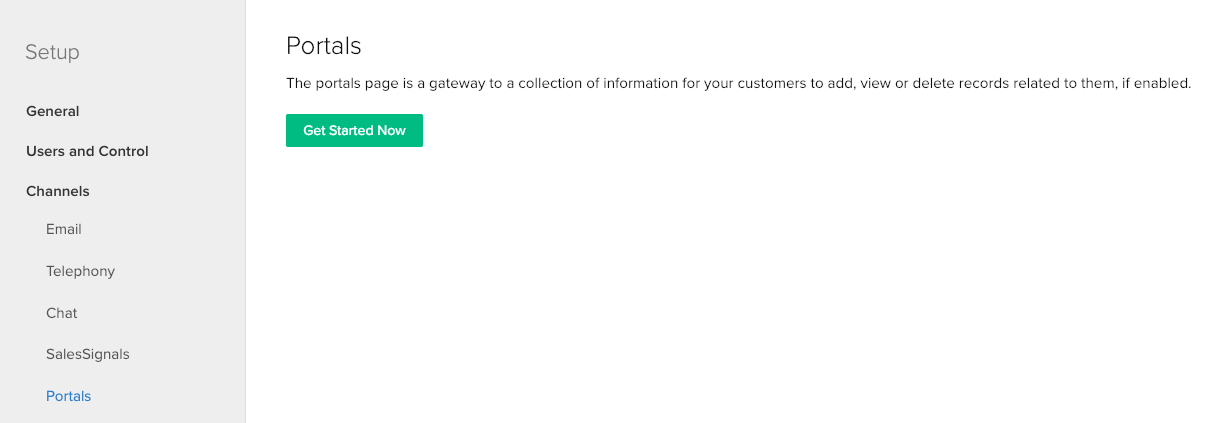
- If required, edit the default portal name and click Configure Now.
Your company name is the default name for the portal.
- In the Portals page, click Next. In this page, the Portal name and URL are displayed.
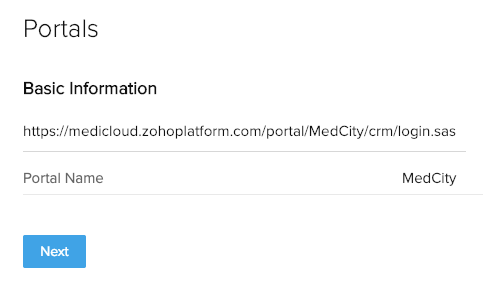
The Portals page will be displayed with the Portal URL. A default portal user type called Client Portal will be created.
Note
- Once created, the portal name cannot be edited
- Once configured, a portal cannot be deleted. It can only be disabled
- Default settings are applied to the default portal user type. This portal user type cannot be deleted. 10,000 users can be added to this type
Configure the Portal Settings
You can decide what data users can view and which operations they are permitted to carry out. You can establish access permissions up to the field level. These configurations are two-pronged:
- Portal Tab settings
- Field Permissions
The steps for configuring the Portal settings are as follows:
- In the Portals page, click the Portal User Type.
- Click Edit next to the Portal Tab Configuration heading.
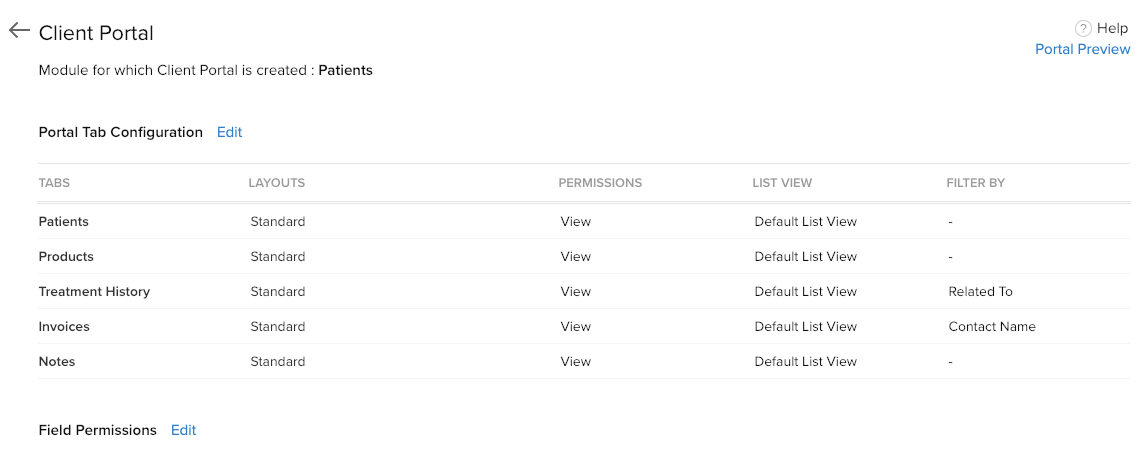
- Select values for the following and click Next.
Tabs: Select the check boxes for the modules and sections to give your portal users access to. The Contacts (renamed as Patients here) module and its related modules will be listed here.
Layouts: Select the layouts of a module to give your Portal users access to.
Permissions: Choose whether or not Portal users can create, edit, view, and delete records.
List View: Choose whether you want Portal users to view records in the Canvas view or the List view.
Filter By: Select the filters in which you want Portal users to view records.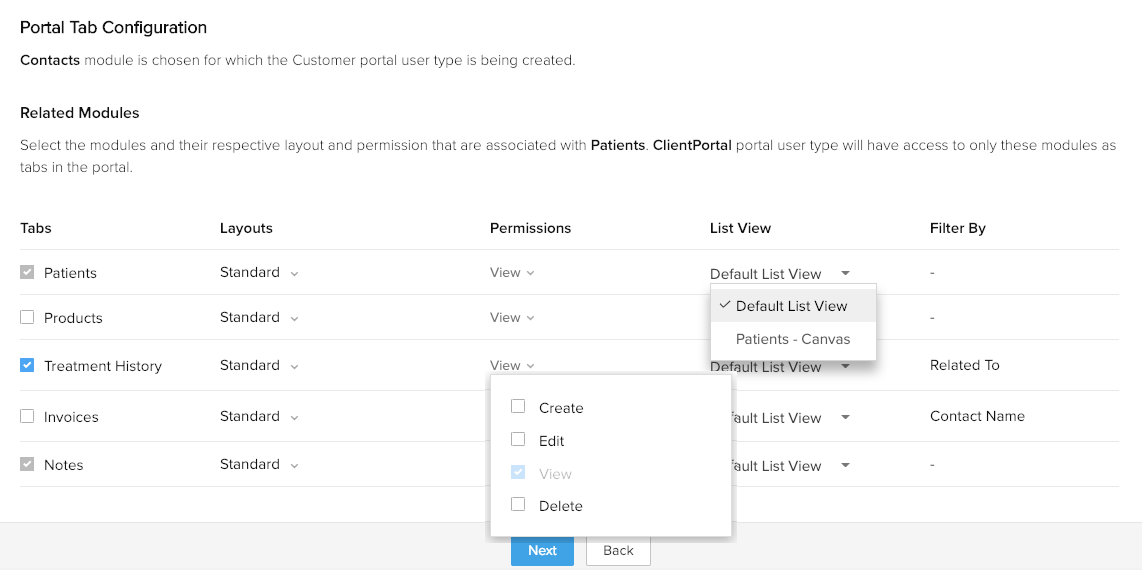
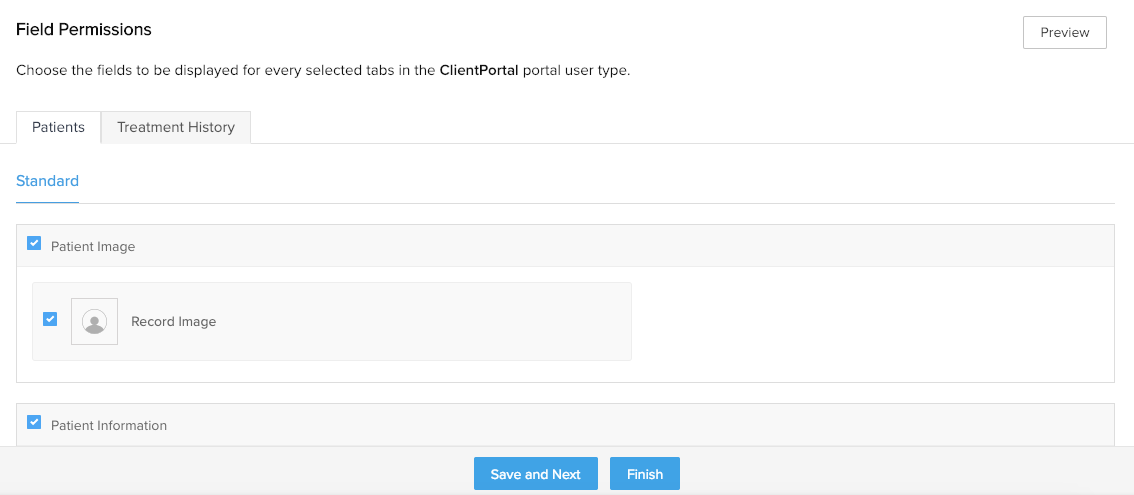
- For each module/section that was selected for access by Portal users (in step 3a), select the fields to be displayed to your Portal users. Click Save and Next to proceed to the next tab, or click Finish to exit.
Preview the Portal
After the Portal Settings are configured, you can preview the portal to see how it will be displayed to your customers. To preview the portal, follow the steps below:
- In the Portals page, click the Portal User Type.
- Click the Portal Preview link located in the top-right corner.
The preview will be displayed in a pop-up as shown below.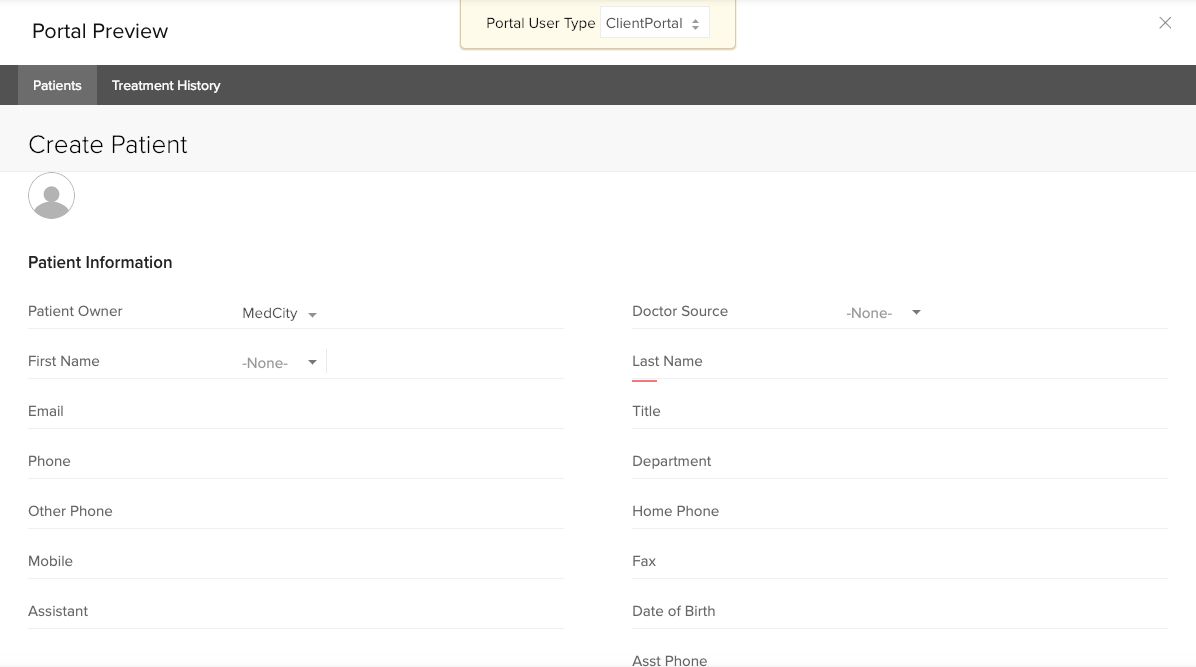
Send Portal Invite to Users
You need to send email invites to users to provide portal access. Before sending out invites, ensure that the portal is enabled (refer screenshot below).

The email invite can be sent as explained below:
- Select the record of the user to whom you want to send the invite. Click the more (...) button on the right-hand corner and select Send Portal Invitation. This option will only be available if an Email address has been provided for the user.
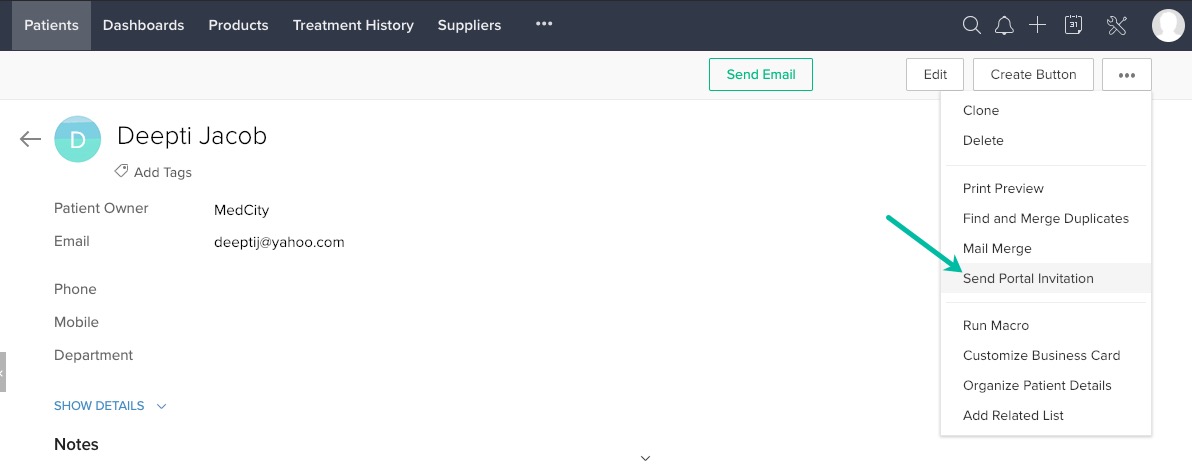
- In the Send Invitation popup, click Invite. The user will receive an email invite (refer screenshot below). After the invite is accepted, a password must be set.
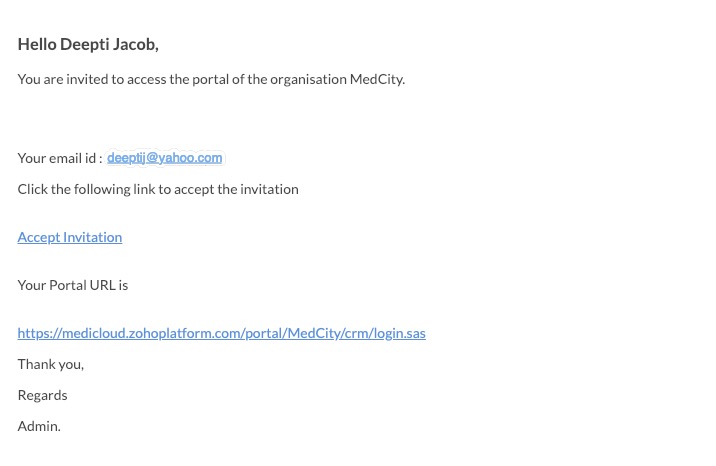
Using the portal URL, the user can view their records and make changes. In our example, the module Patients and its related module Treatment History were enabled for the user. In the portal, these two tabs are displayed to the user.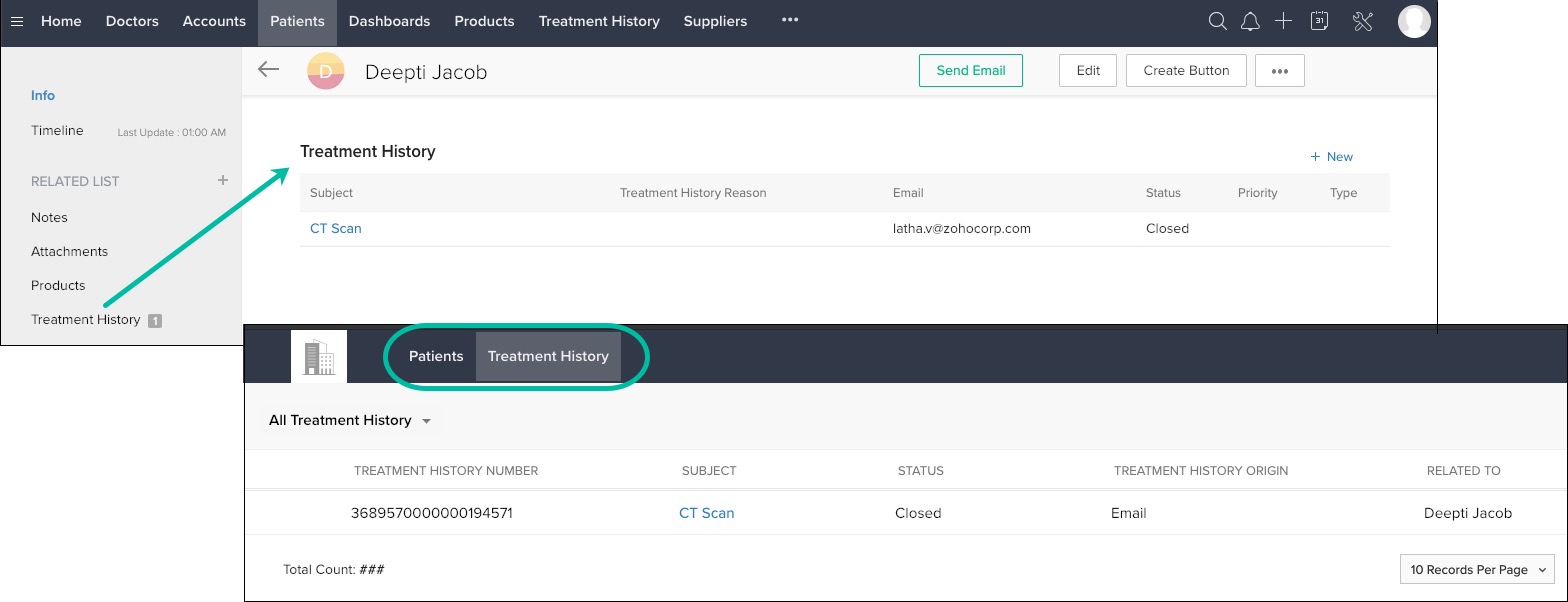
The number of users added to the portal can be viewed in the Portals page.


