Using the Expense Extension
How Can I...
End users who sign up for a Vertical CRM with the Expense integration can use Expense, as explained in the below sections.
Manage the Expense-Vertical CRM Integration Settings
The steps to access and manage the integration settings are as follows:
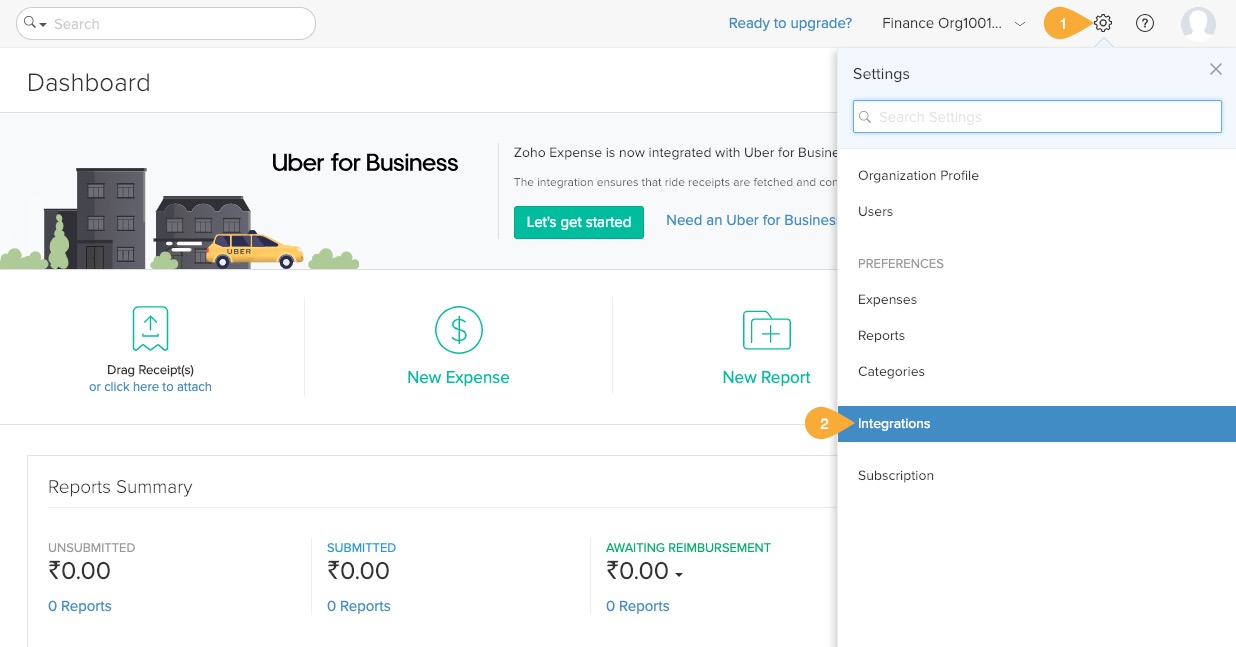
- Log in to Zoho Expense.
- Navigate to Settings > Integrations > Zoho CRM and click Show details.
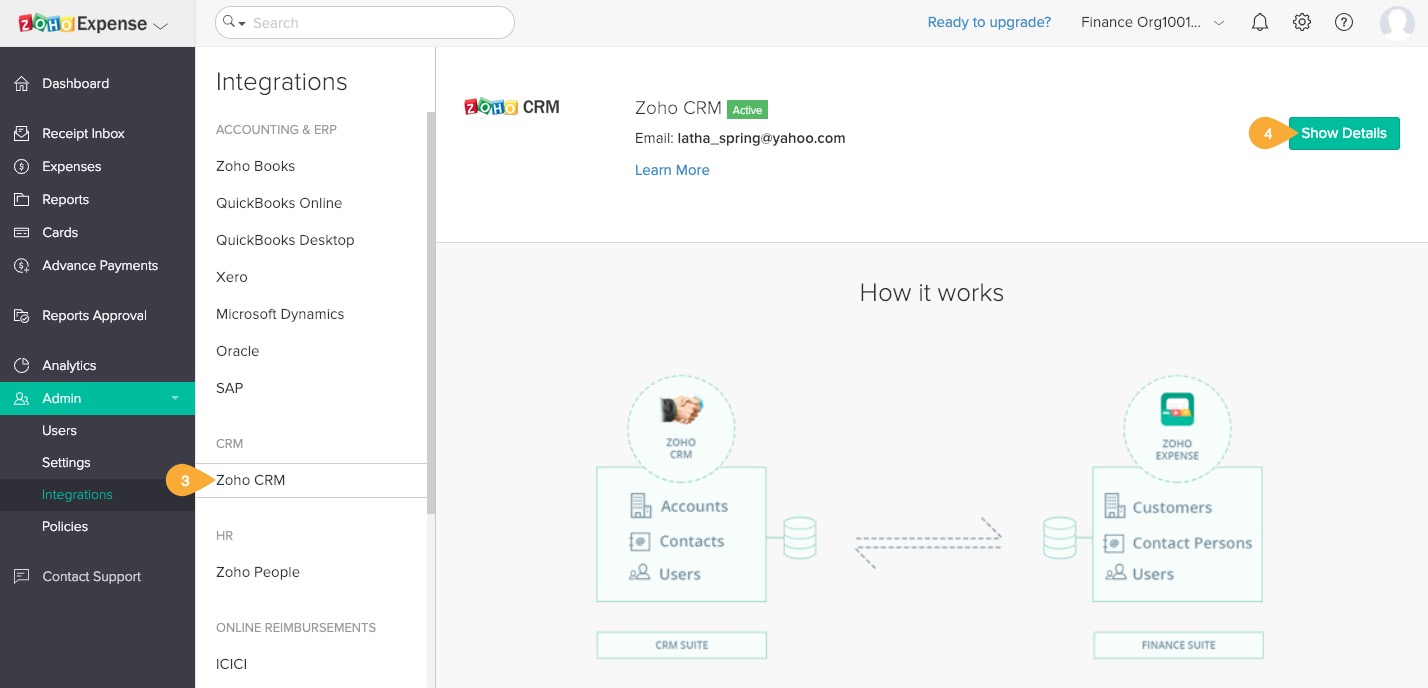
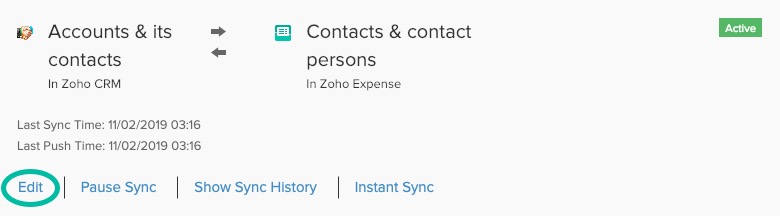
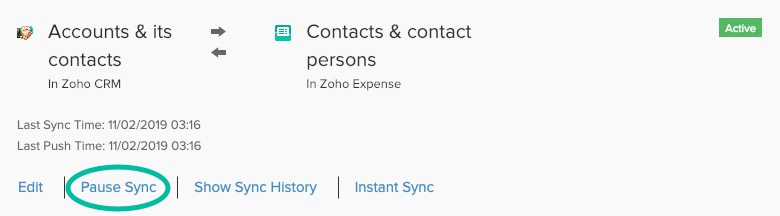
The page will display (refer to the screenshot below) the settings for the integration between Zoho Expense and Vertical CRM. The Edit, Show Sync History, and Instant Sync options can be used for Accounts and Contacts.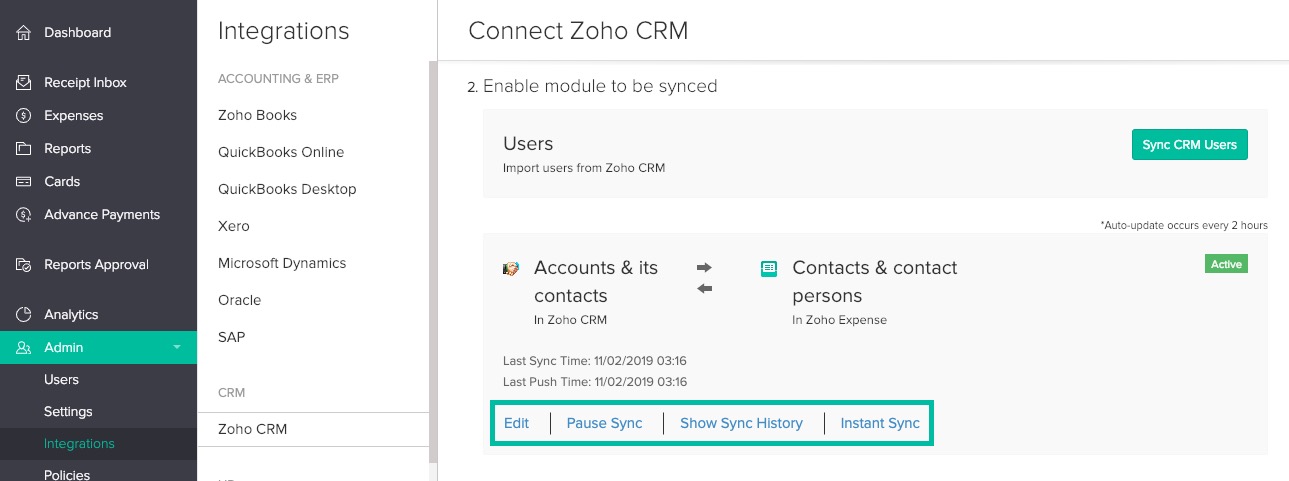


Edit
Click Edit for Accounts & its contacts in the Enable module to be synced section.
Data is synchronized between the Vertical CRM modules and Expense based on the following settings:
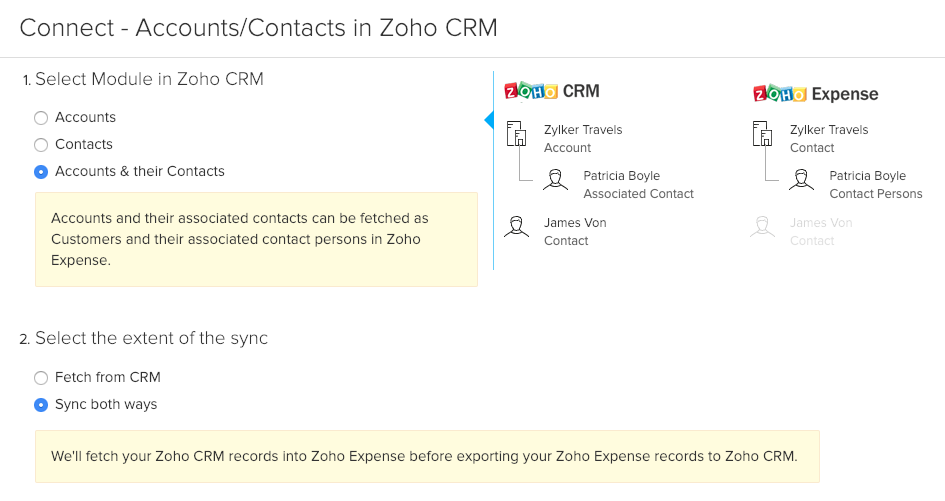
- Select Module in Zoho CRM: Choose the modules from your Vertical CRM to be synced with the modules in Expense.
Accounts: Only the Accounts module from your Vertical CRM will be synced to Customers in Expense.
Contacts: Only the Contacts module from your Vertical CRM will be synced to Customers in Expense.
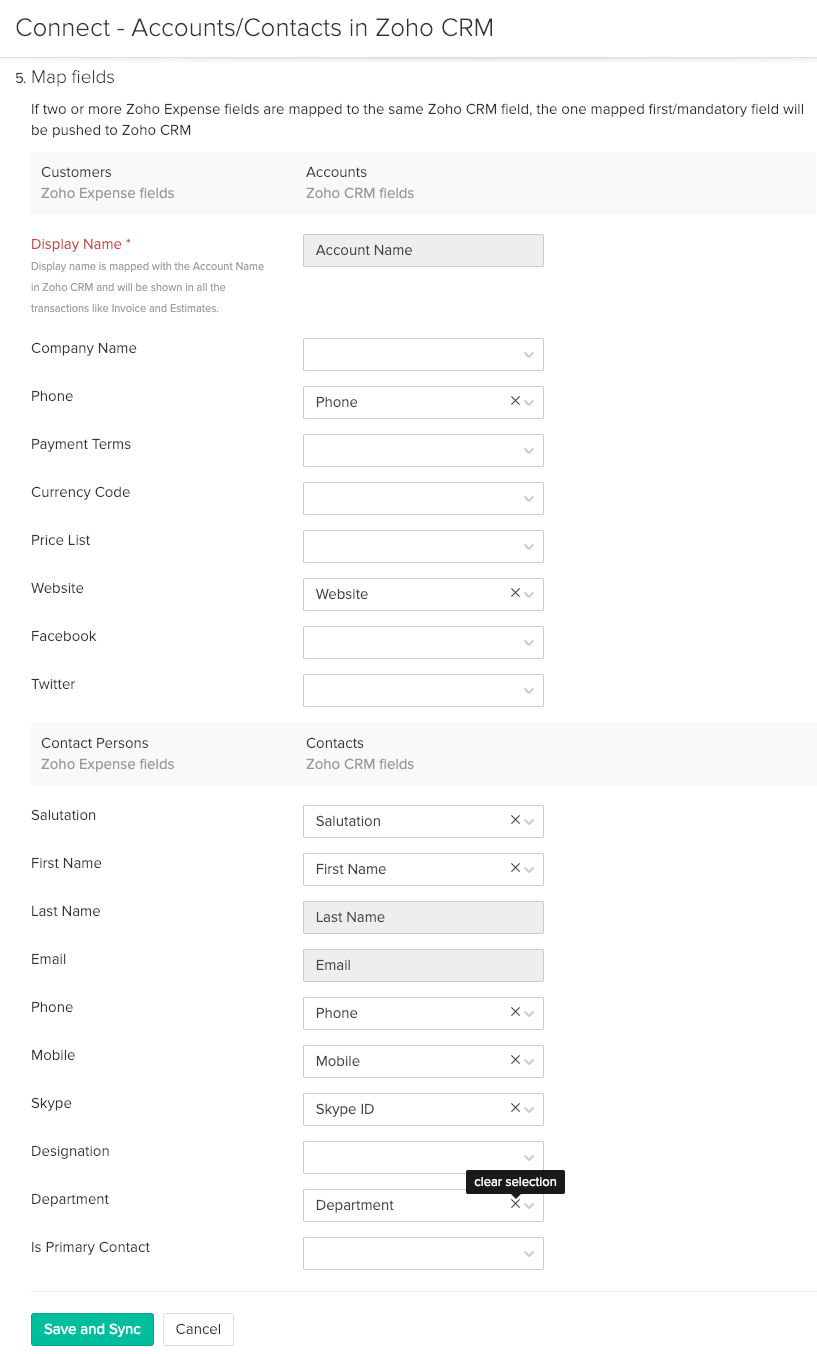
Accounts and their Contacts: Both the Accounts module and the Contacts associated with those accounts will be synced to Customers in Expense. The accounts will be fetched in Zoho Expense as customers. All contacts associated with an account will be fetched in Zoho Expense as contact persons and one contact will be assigned as the Primary Contact (refer to the screenshot below).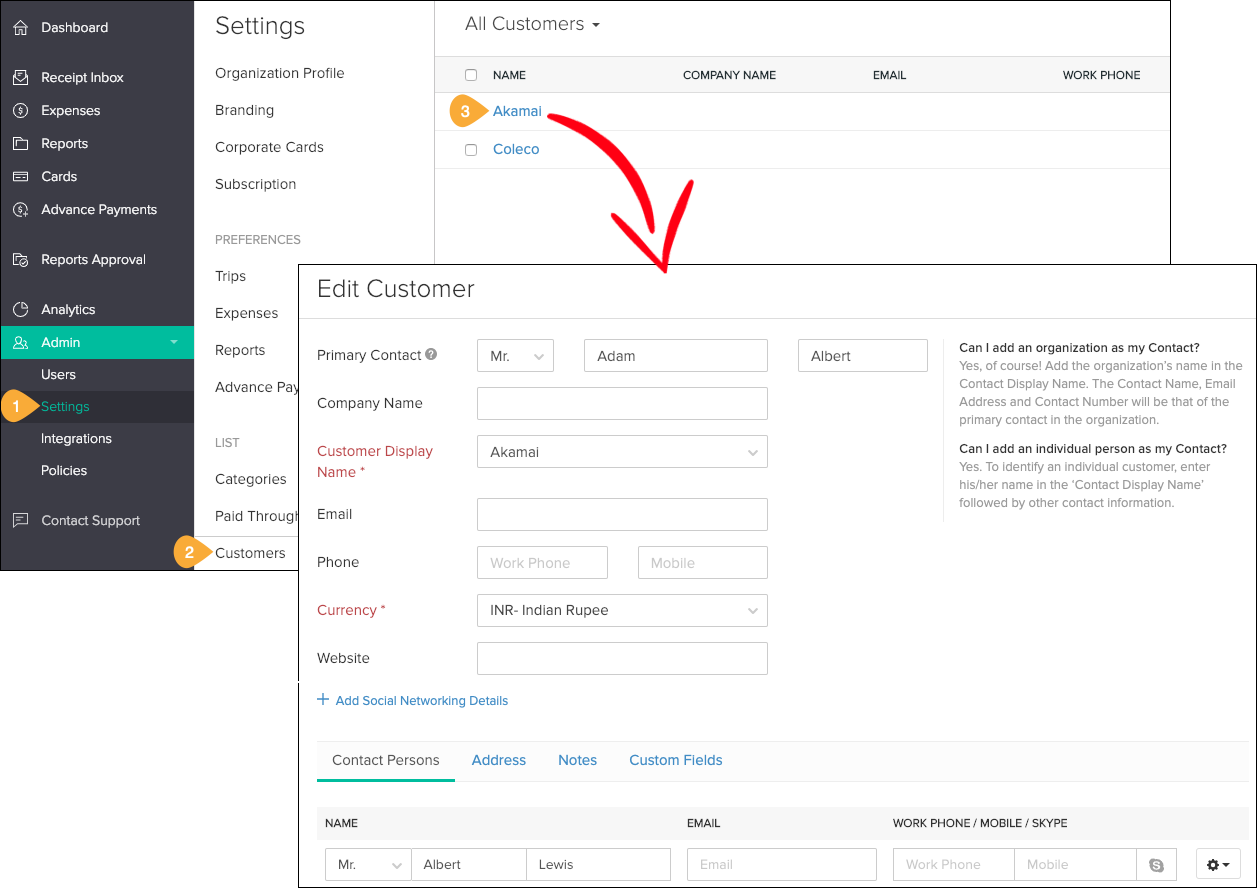
- Select the extent of the sync: Specify whether the records should be synced unidirectionally (only Vertical CRM records to Expense records) or bidirectionally (sync Vertical CRM and Expense records with each other).
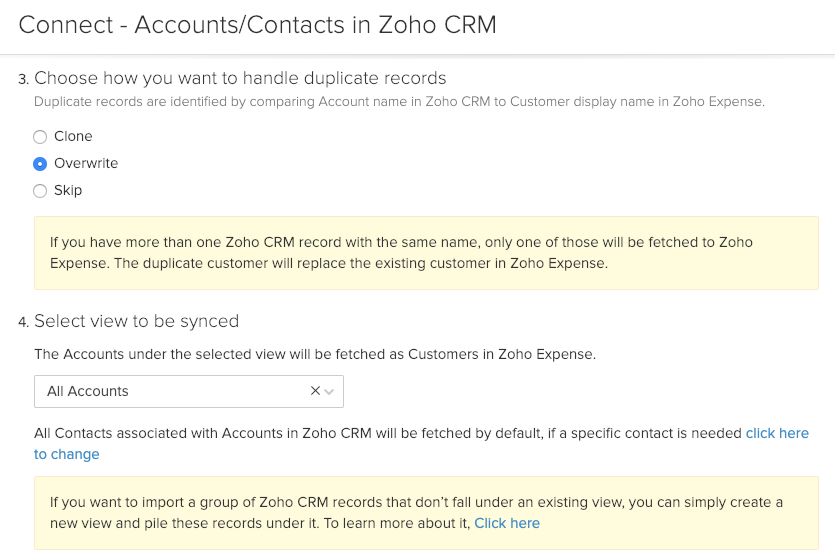
- Choose how you want to handle duplicate records: Specify how duplicate records are to be managed while syncing data between the Vertical CRM and Expense. The options available are Clone, Overwrite, and Skip.
- Select view to be synced: Select a view to fetch the accounts and contacts from in Vertical CRM. Refer to this page to learn how to create and use custom views.
- Map Fields: Map the fields in Vertical CRM fields to fields in Expense. Click Save and Sync after making any changes.


Pause Sync
The synchronization of data between the Vertical CRM modules and Expense can be paused and resumed later. If you have Finance modules enabled in the Vertical CRM integration, you cannot disable or pause the sync.
To disable the Finance modules, navigate to Setup > Marketplace > Zoho > <Vertical CRM> Finance Suite and disable the following modules:
- Invoice, Estimate, Sales Order, and Purchase Order
- Products, Stock Updates, Sales Orders, Packages, Shipments, Invoices, and Purchase Orders
Show Sync History
- Click Show Sync History to view an audit history of the data sync between the Vertical CRM modules and Subscriptions.
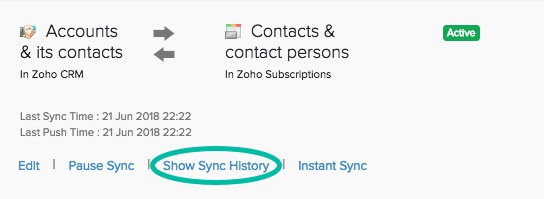
- Details of the last 50 data sync operations will be displayed.
- Errors encountered in pushing data to Vertical CRM and importing data from Vertical CRM can be viewed by clicking Push Error Count and Pull Error Count, respectively.


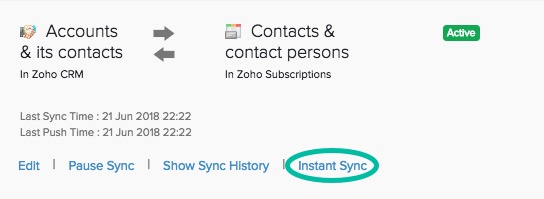
Instant Sync
- Besides the periodic two-hour sync, you can also sync data instantly by clicking Instant Sync.

Working with Expense
The sections below explain the steps for creating expenses and reports and accessing data through the integration.
Create Expenses
You can create expenses from two different places:
- The Zoho Expense tab
- An Account, Contact, and Potential record
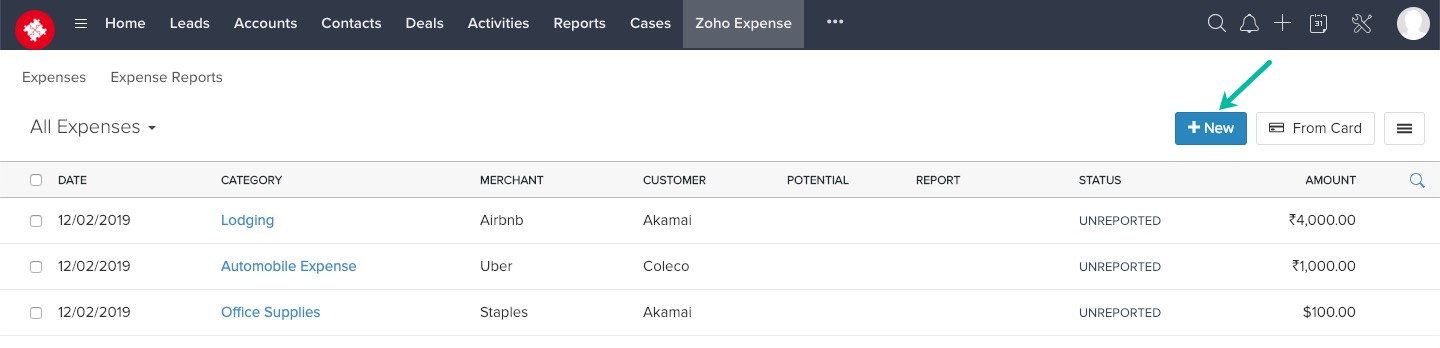
From Expense tab
- Select the Zoho Expense tab in your Vertical CRM.
- Click New in the Expenses section.
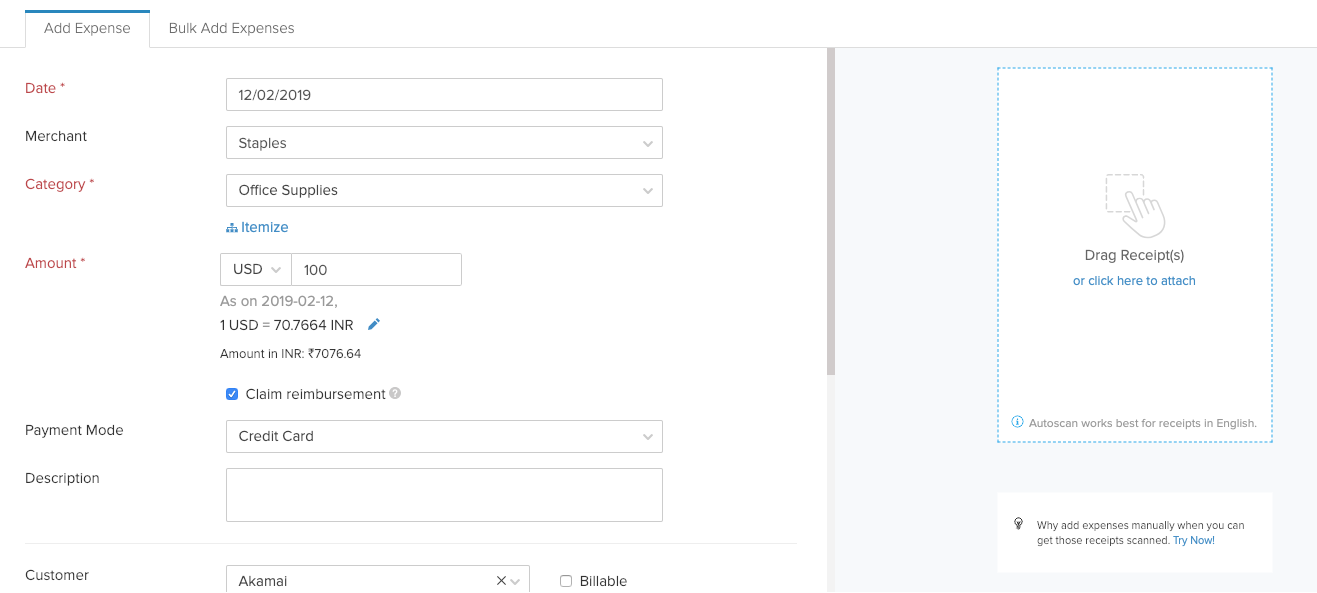
- Enter the following details and click Save:
- Merchant: The vendor who provided the service you are creating the expense for
- Category: The type of expense
- Amount: The monetary value of the expense
- Payment Mode: The method the expense was paid via
- Description: Additional details about the expense
- Customer: The Account ot Contact the expense is for
- Project Name: The name of the project the expense has been incurred for
- Potential: The potential you want to add the expense to
When you choose an account from the Customer dropdown, all the potentials associated with that account will appear in this dropdown. - Add To Report: Add the expense to an already existing report or a new report.
Refer to this section to learn how to create a report.


From Individual records
Expenses can be added from Accounts, Contacts, or Potential records provided these modules are synced with Expense.
- Go the Account, Contact, or Potential record you want to add the expense to.
- Click the Zoho Expense related list in the Accounts, Contacts or Potential View page.
- In the Zoho Expense > Expenses related list, click + New Expense.
- Enter the necessary details (refer to this section) and click Save.
The Customer field will be auto-filled with the account or contact’s name.
The Potential field will also be auto-filled if the expense is created from the Potentials details.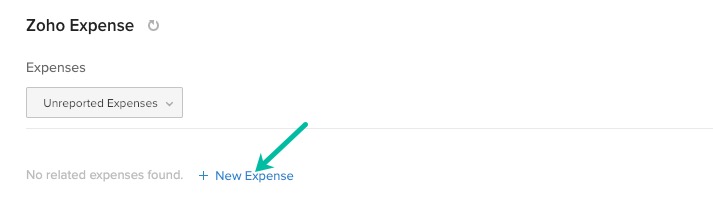

Create Expense Reports
You can create expense reports from two different places:
- The Zoho Expense tab
- An Account, Contact, or Potential record
From the Expense tab
- Select the Zoho Expense tab in your Vertical CRM.
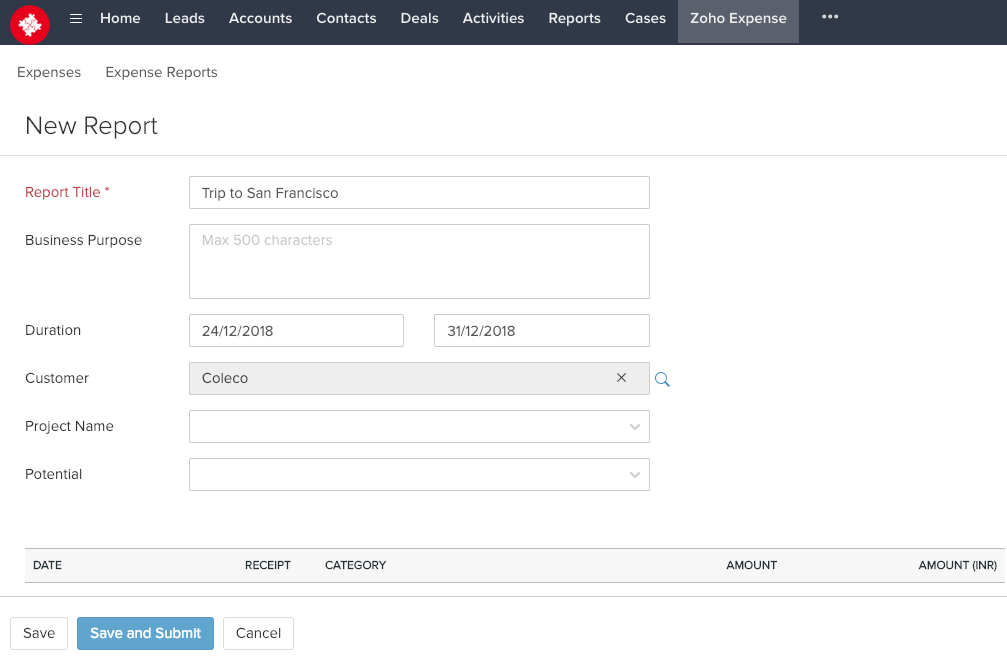
- Select Expense Reports and click New Report.

- Enter the following details and click Save:
- Business Purpose: Details of the business purposes for the expenses included in the expense report (optional).
- Duration: The period during which the expense was incurred.
- Customer: The account or contact to add the expense to.
- Project Name: The name of the project the expense was incurred for.
- Potential: The potential you want to add the expense to.
When you choose an account from the Customer dropdown, all the potentials associated with that account will appear in this dropdown.


From individual records
Expense reports can be added from Account, Contact, or Potential records provided these modules are synced with Expense.
- Navigate to the Account, Contact, or Potential record you want to add the expense report to.
- Click the Zoho Expense related list in the Accounts, Contacts, or Potential View page.
- Under Zoho Expense > Expense Reports related list, click + New Expense Report.
- Enter the required details (refer to this section) and click Save.
The Customer field will be auto-filled with the account or contact’s name.

Delete Expenses
To delete expenses:
- Select the Zoho Expense tab in your Vertical CRM.
- Select the checkboxes for the records that you want to delete and select Delete from the More dropdown.
- Click OK in the confirmation message.
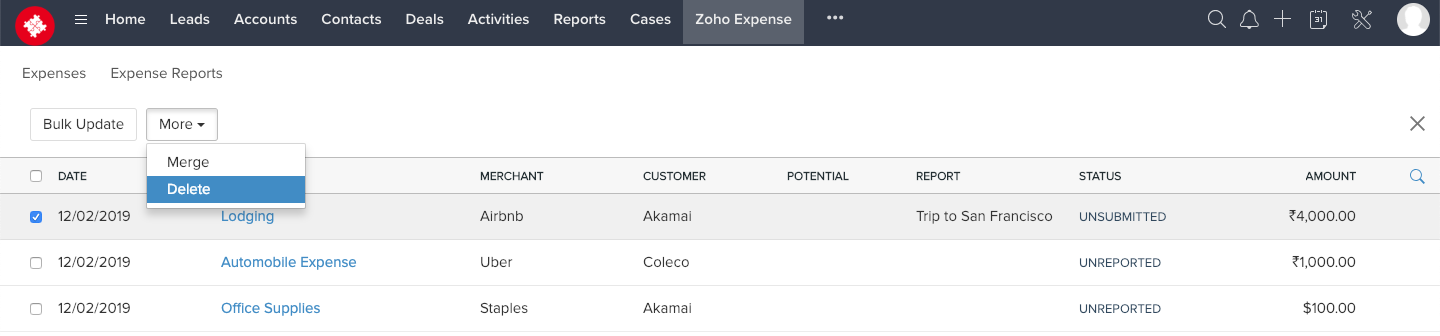

Note: You can delete only unreported and unsubmitted expenses.
Associate Potentials
You can associate potentials with expenses or expense reports while you are creating them. The following setting determines the potentials that will be available to be associated with expenses and expense reports.
- Navigate to Settings > Integrations > Zoho CRM, and click Show Details.
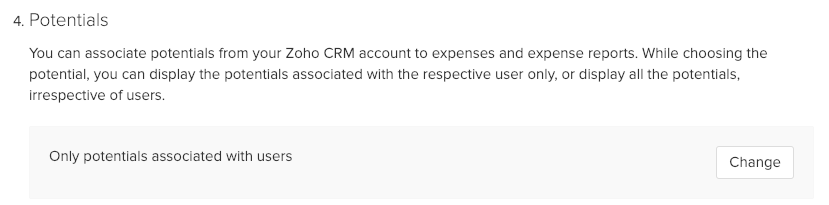
- In the Potentials section, select which potentials will be available to associate with expenses and expense reports. Choose one of the following options by clicking Change:
- Only potentials associated with users
- All potentials
While creating an expense or expense report, when you choose an account from the Customer dropdown, all the potentials associated with that account will appear in the Potential dropdown.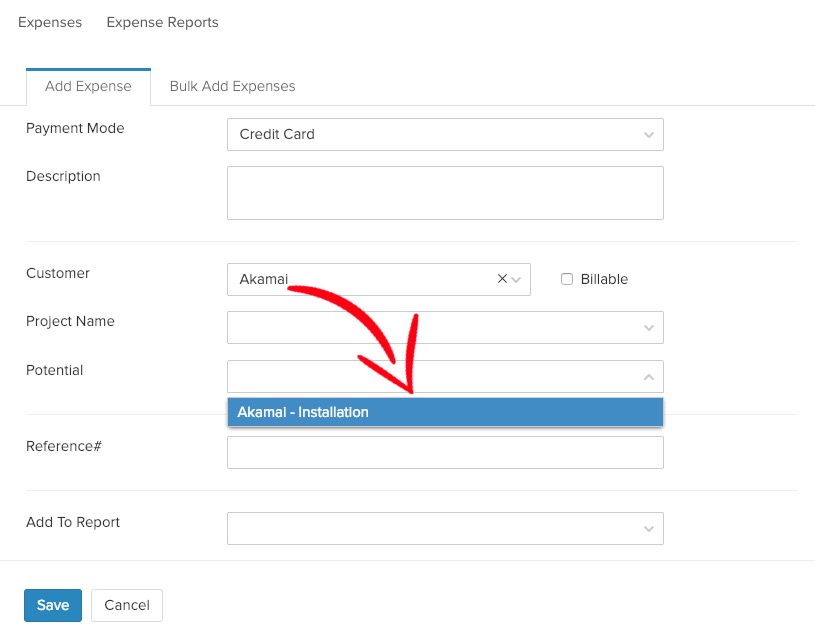


Search Accounts in Vertical CRM
An expense or report can also be created for an account that is not imported from your Vertical CRM application. The option Search in Zoho CRM appears in the list for selecting a Customer for a new expense or report. Any Vertical CRM account can be selected from here.

Import Users from a Vertical CRM
Users can be imported to Expense from a Vertical CRM. To achieve this, do the following:
- Navigate to Settings > Integrations > Zoho CRM and click Show Details.
- Click Sync CRM Users in the Users section in Enable module to be synced.
When you click the Sync CRM Users button, all users from Zoho CRM will be automatically fetched into Zoho Expense. The number of active members imported will depend on your subscription plan. Any remaining members not imported will be marked ‘inactive’. This is updated every 24 hours.
- Besides the periodic 24-hour sync, you can also instantly sync data by clicking Instant Sync or disable the user sync by clicking on Disable Sync.


The list of users imported from the Vertical CRM can be viewed in Expense by clicking Admin in the left hand panel and selecting Users.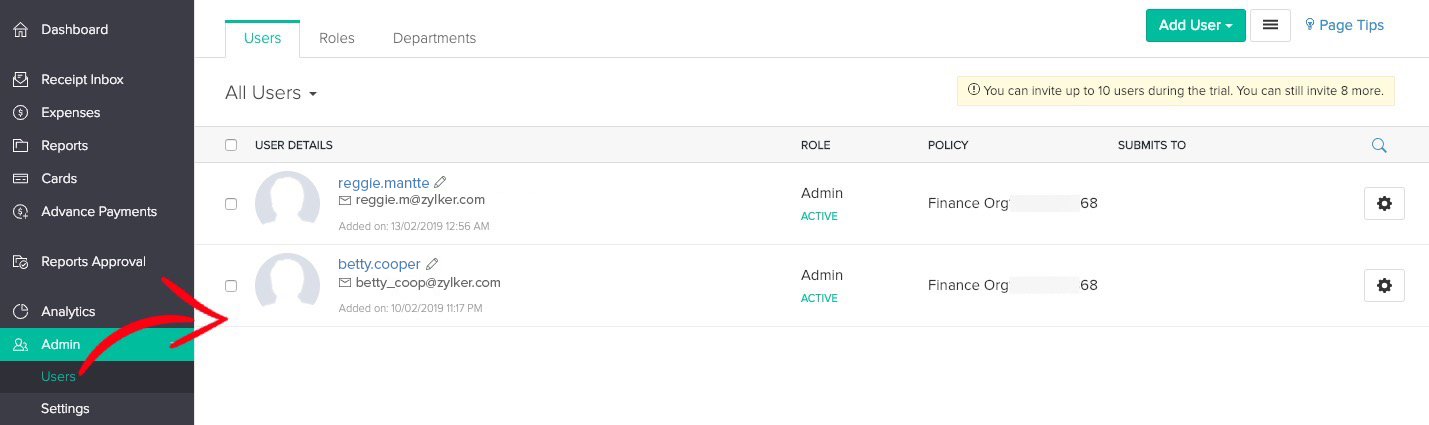


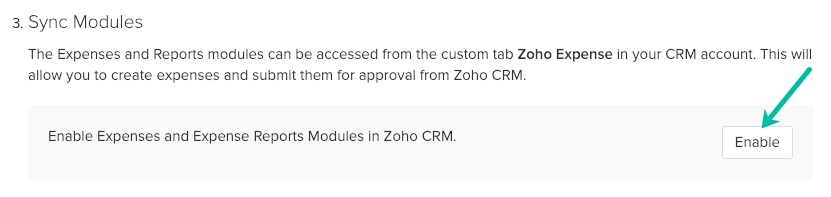
Access Zoho Expense Modules from Vertical CRM
To enable Expense modules Expenses and Expense Reports in your Vertical CRM application:
- Navigate to Settings > Integrations > Zoho CRM and click Show Details.
- In the Sync Modules section, click Enable.
Once enabled, the Zoho Expense tab will be available in your Vertical CRM application. The Expenses and Expense Reports modules will now be available in Vertical CRM under Zoho Expense.