Streamline Responses with Auto-triage & SLAs
Scenario
In many industries, it's important to prioritize incoming tickets based on urgency. Setting up priority levels ensures that support agents can manage tickets efficiently.
A multi-specialty hospital uses a ticket management system to track and manage their internal IT, operational issues, inventory updates, and other issues reported by departments, such as Emergency, Radiology, Pharmacy, Billing, and HR. Tickets raised from various departments can range from crucial information related to patient outcomes to standard administrative tasks.
Problem
In hospital, delays in resolving critical issues can directly impact the patient's life. Without a clear system to distinguish urgent problems from routine ones, IT support may miss time-sensitive issues, resulting in:
Delayed diagnostics or treatment
Breach of compliance and patient safety standards
Overwhelmed support teams during peak times
For example, if a doctor raises concerns that the lighting in the operation room is not satisfactory and needs to be checked, this is an urgent issue that requires immediate attention.
In contrast, if the pharmacy department creates a ticket stating that one of their printers is not working, although it is a valid issue, it does not need to be addressed with the same urgency.
Given the diverse nature of incoming tickets, how can the hospital's support team ensure that time-sensitive, patient-critical issues are prioritized over routine requests?
Solution
Workflow rule to auto-categorize and triage the tickets
Admins can configure workflow rules to assign priority levels automatically as High, Medium, or Low, based on predefined conditions such as ticket subject, department, or keywords. This helps in automating the classification of incoming tickets by urgency without manual intervention.
For example, if the subject contains "ICU," "emergency," or "urgent," then the field should be automatically updated to High.
SLA to define resolution time based on the priority level
Along with workflow rule, admins can use Service Level Agreements (SLAs) to define the expected response and resolution times for each priority level. While workflow rules help categorize tickets by urgency, SLAs provide a time-bound framework until when the ticket should be resolved or first response be sent.
For example, the admin can define SLA policies based on ticket priority:
Priority level is High - First response time should be within 30 minutes and resolution time within 2 hours.
Priority level is Medium -First response time should be within 1 hour and resolution time within 8 hours.
Priority level is Low- First response time should be within 6 hours and resolution time within 48 hours. This provides agents with clear guidelines to not only identify which tickets to prioritize but also how quickly they should aim to resolve different types of issues.
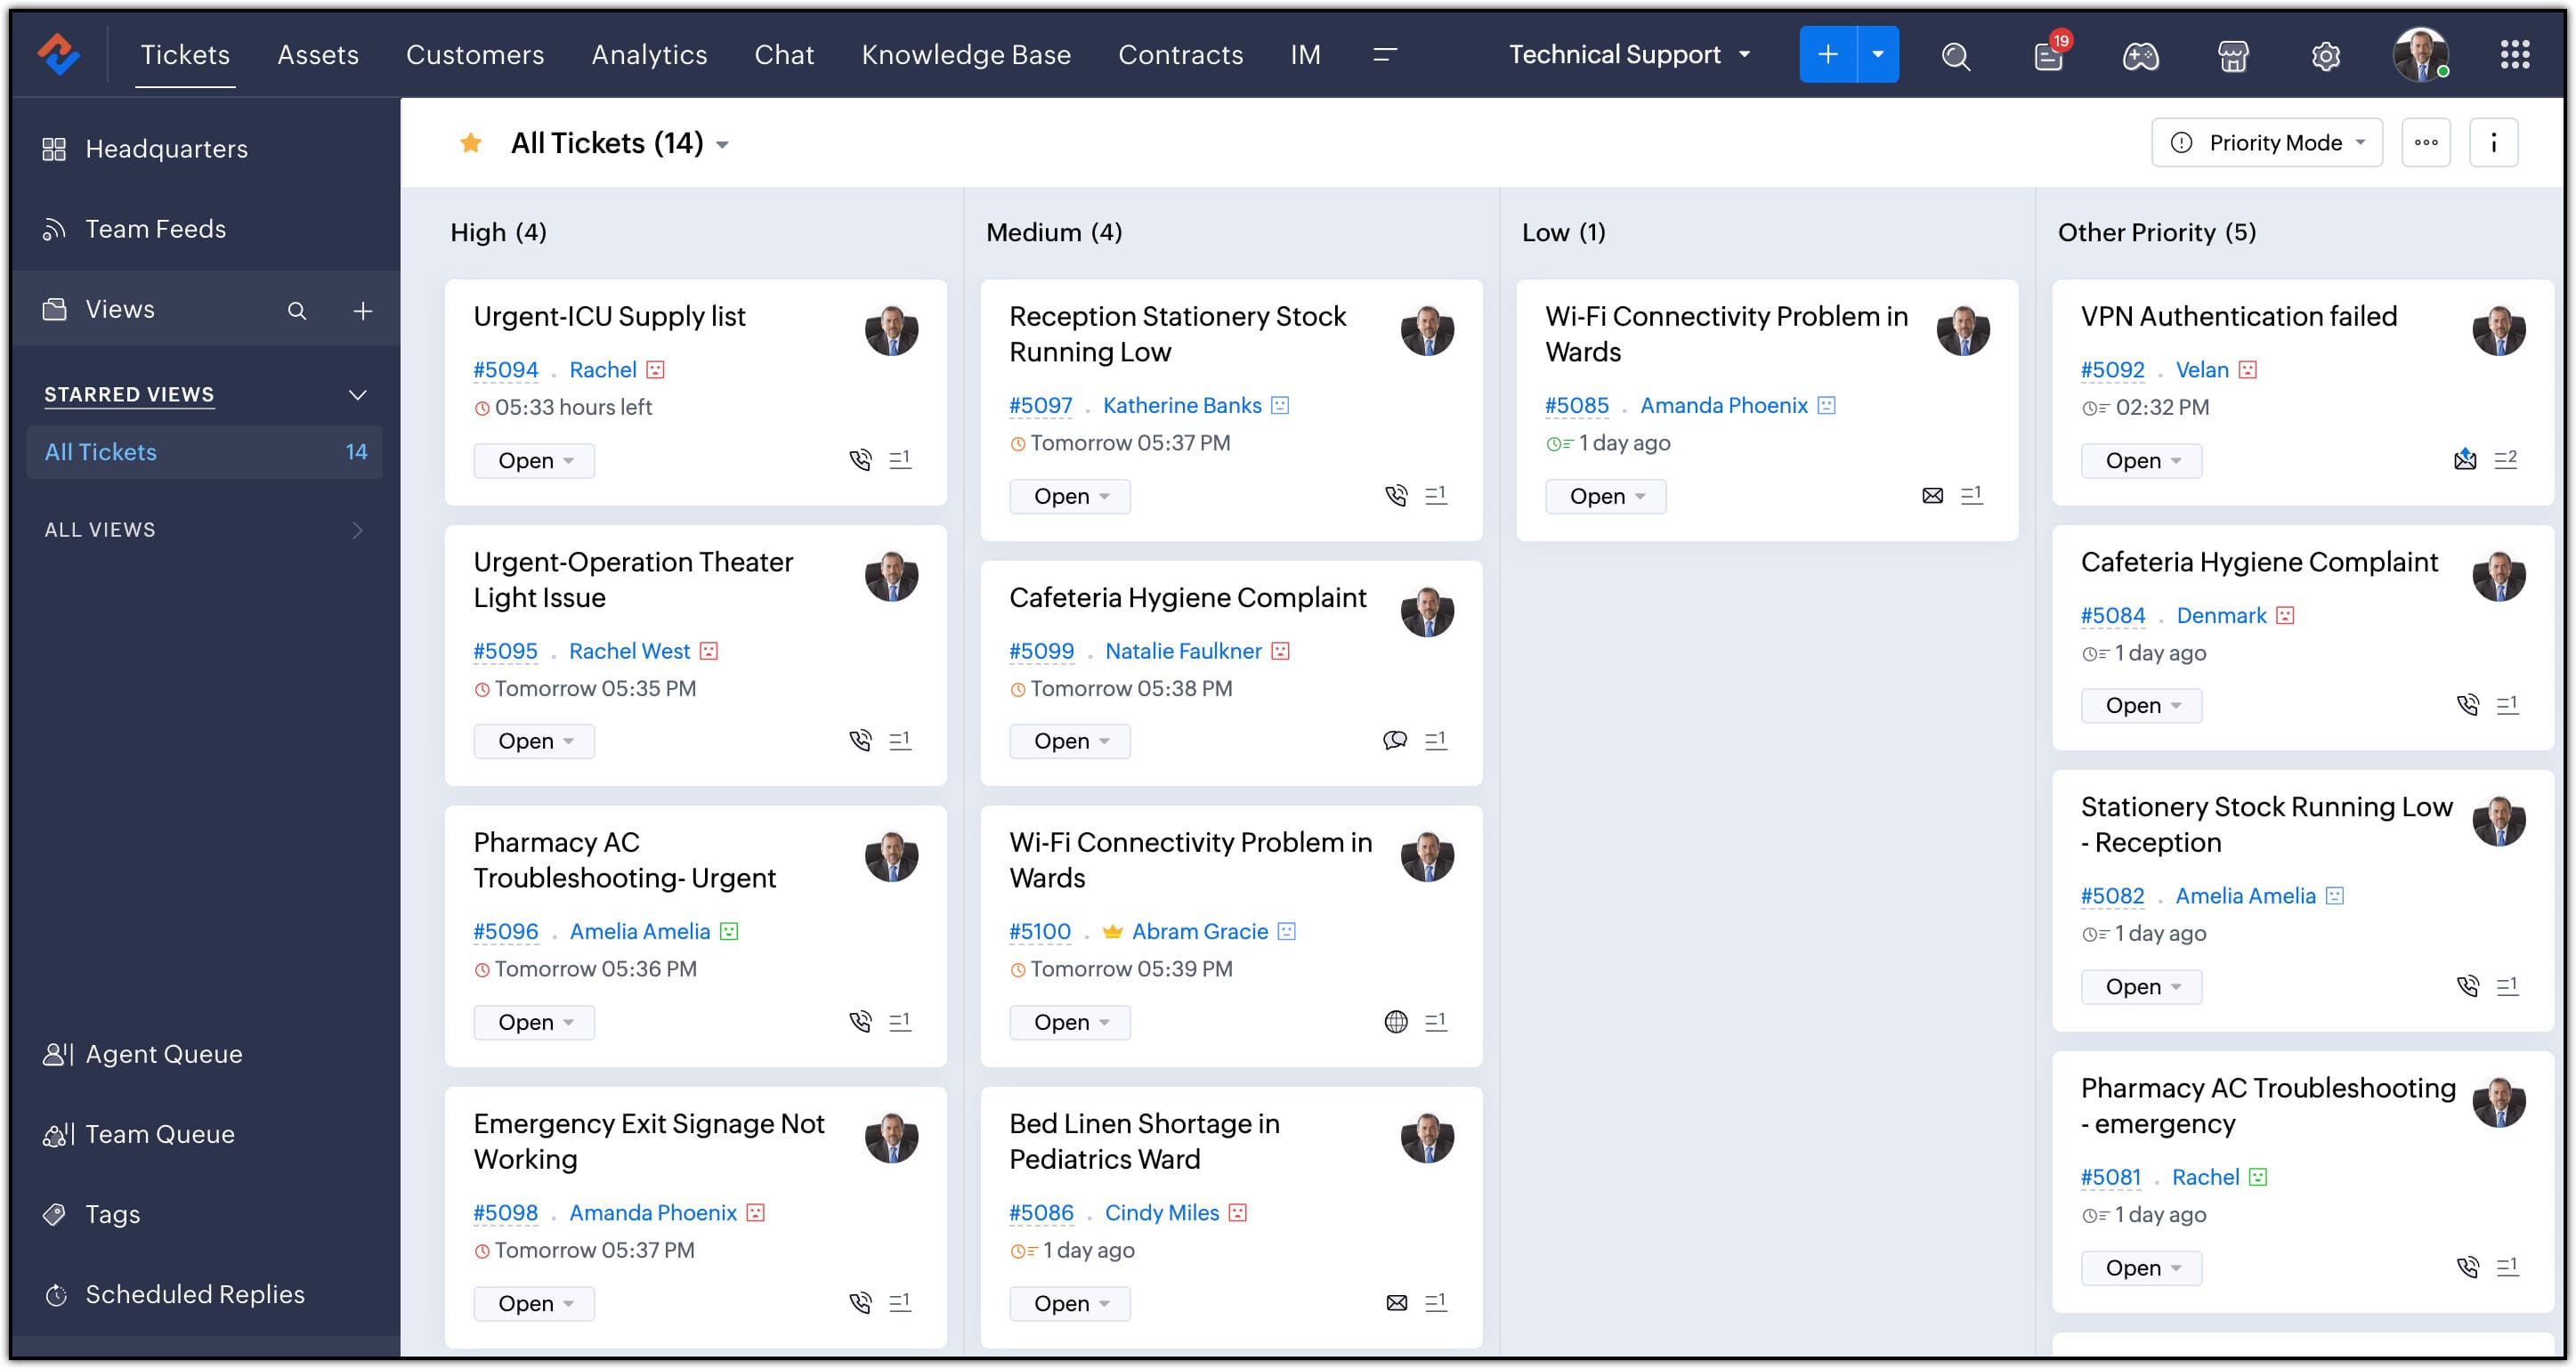
Agents can also get a clear view of their tickets based on priority by enabling Priority Mode in the Tickets module. This makes navigation through the tickets simpler and provides an organized work management for the entire team.
Configuration:
To setup SLA:
- Navigate to Setup > Automation > Service Level Agreement
- In Service Level Agreement page, select the required department from the dropdown and click New SLA
- On the Create SLA page, add the following details:
a.SLA name and description
b.When do you want to create the SLA?
i. Tick - Ticket Create - Click Next
- Click Add Target.
- a.Select the condition for the target as: Priority is High
- b.Respond within: 30 minutes
- c.Resolve within: 2 hours
- d.Operational Hours: Calendar hours
- Click Save
To define your SLA policies for medium and low priority tickets, follow the same steps from step 5. Add Target, with the time defined for each priority.
To create a workflow rule:
- Navigate to Setup > Automation > Workflow > Rules
- Under Rules, click Create Rule
- On the New Workflow Rule page:
- a.Select module as Ticket
- b.Add rule name
- c.Add description
- Click Next
- Under Execute on, click Create
- Click Next
- Under Criteria, select Subject contains ICU, Emergency, Urgent
- Click Next
- Under All Actions, select field updates.
- In field updates, select new.
- Add the following details:
- a.Assignment Value Name and Description
- b.Field as Priority
- c.Value as High
- d.Click Save.
- Click Save.
Output
Once the SLA is defined and workflow rule is created for a department, agents can view their tickets under priority mode in work mode to efficiently access their tickets.
Please note that priority mode is available only from standard edition.
Also read:
- EditionExpress and above
- Key FeaturesSLA, Workflow Rules, Priority Mode
- Profile PermissionHelp Desk Automation