
Webformulare
Webformulare sind öffentliche Formulare, die Sie verwenden können, um Daten von Personen innerhalb und außerhalb Ihrer Organisation zu sammeln. In Zoho Books können Sie Webformulare erstellen und mit benutzerdefinierten Modulen verknüpfen. Sobald Sie ein Webformular veröffentlichen, können Sie dessen URL mit Personen teilen, die dann Informationen einreichen können. Die von diesen Personen bereitgestellten Informationen werden im benutzerdefinierten Modul gespeichert, das mit dem Formular verknüpft ist.
Hinweis: Diese Funktion ist nur in bestimmten Plänen von Zoho Books verfügbar. Besuchen Sie die Preisseite, um zu überprüfen, ob sie in Ihrem aktuellen Plan verfügbar ist.
Szenario: Zylker Electronics möchte Feedback von seinen Stammkunden sammeln, um ihr Geschäft zu verbessern. Um dieses Feedback zu sammeln, nutzen sie die Funktion Webformulare für benutzerdefinierte Module in Zoho Books und erstellen ein Webformular namens Kundenfeedback. Sie teilen die URL des Webformulars mit ihren Kunden, die dann über das Formular Feedback geben.
Erstellen eines Webformulars
Sie können ein Webformular erstellen:
Von der Webformularseite in den Einstellungen
Um ein Webformular von der Webformularseite in den Einstellungen zu erstellen:
- Gehen Sie zu Einstellungen in der oberen rechten Ecke.
- Klicken Sie auf Webformulare unter Entwicklerdaten.
- Klicken Sie auf + Neues Webformular in der oberen rechten Ecke.
- Geben Sie den Namen des Webformulars ein.
- Wählen Sie das benutzerdefinierte Modul aus. Die Informationen, die über das Webformular eingereicht werden, werden in diesem benutzerdefinierten Modul gespeichert. Klicken Sie auf + Neues benutzerdefiniertes Modul, wenn Sie ein neues Modul erstellen möchten. Erfahren Sie, wie Sie ein benutzerdefiniertes Modul erstellen.
- Klicken Sie auf Weiter.
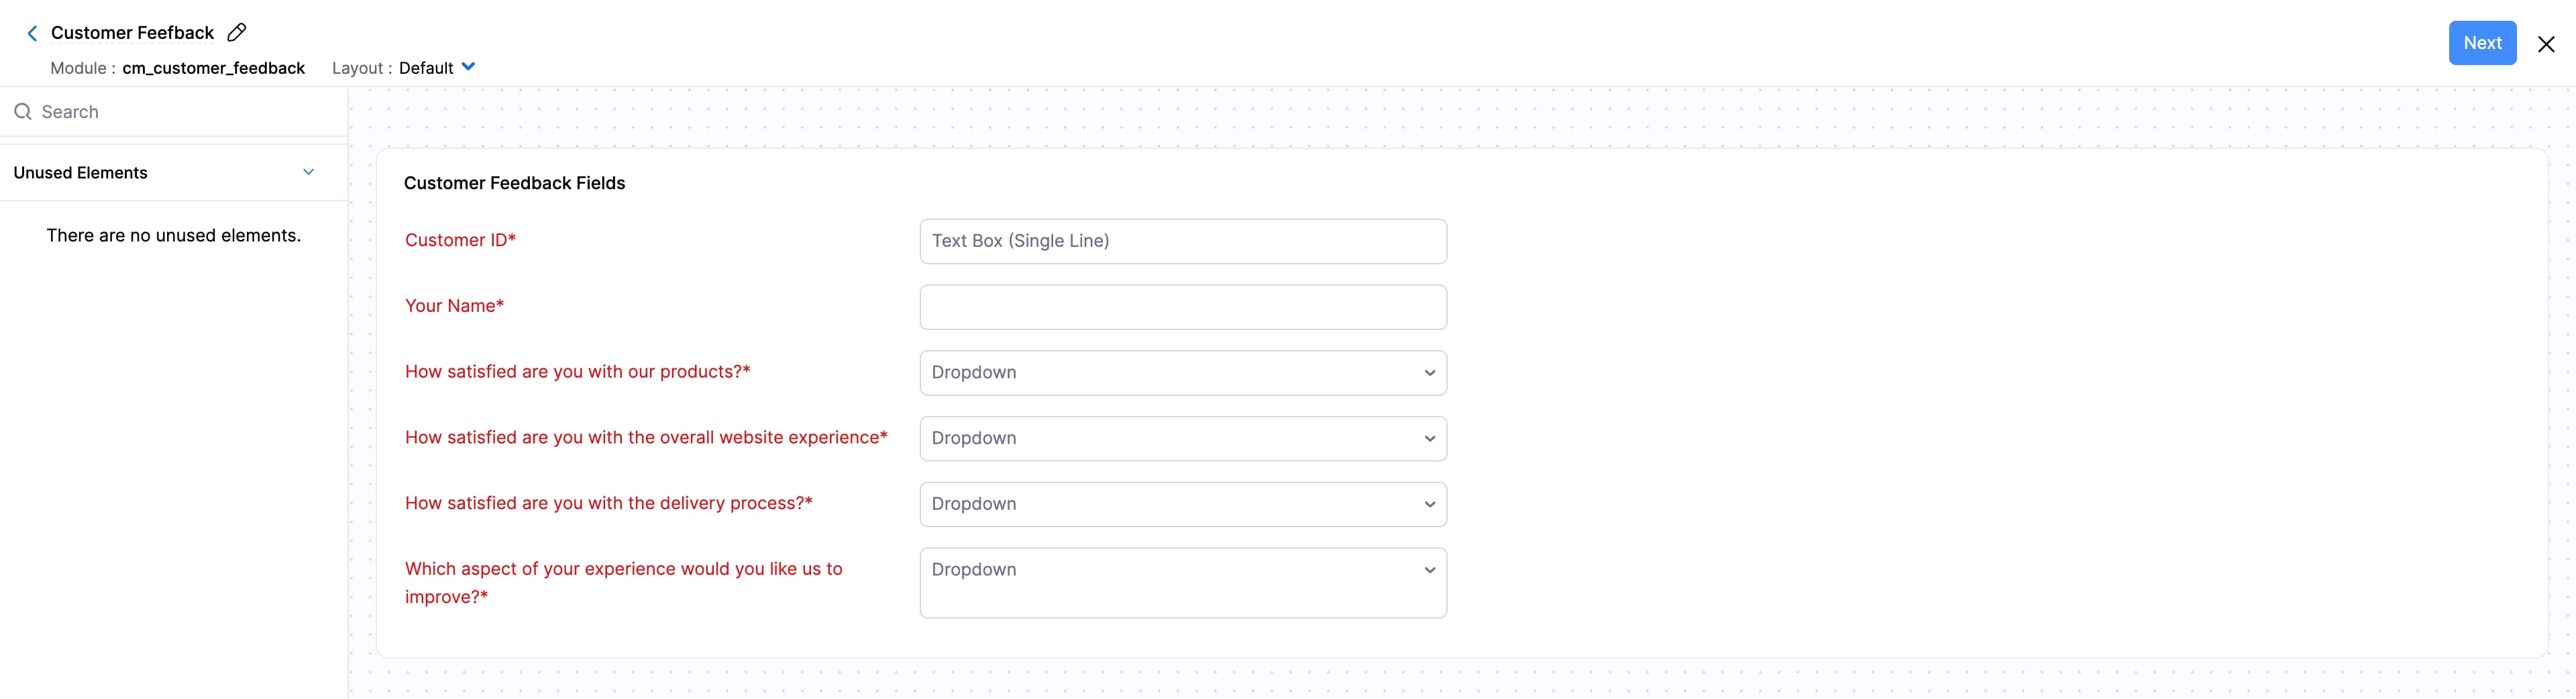
- Das Standardlayout des benutzerdefinierten Moduls wird angezeigt. Wenn andere Layouts verfügbar sind, können Sie das erforderliche Layout aus dem Dropdown-Menü neben Layout in der oberen linken Ecke auswählen.
- Sobald Sie die für das Webformular erforderlichen Felder hinzugefügt haben, klicken Sie auf Weiter.
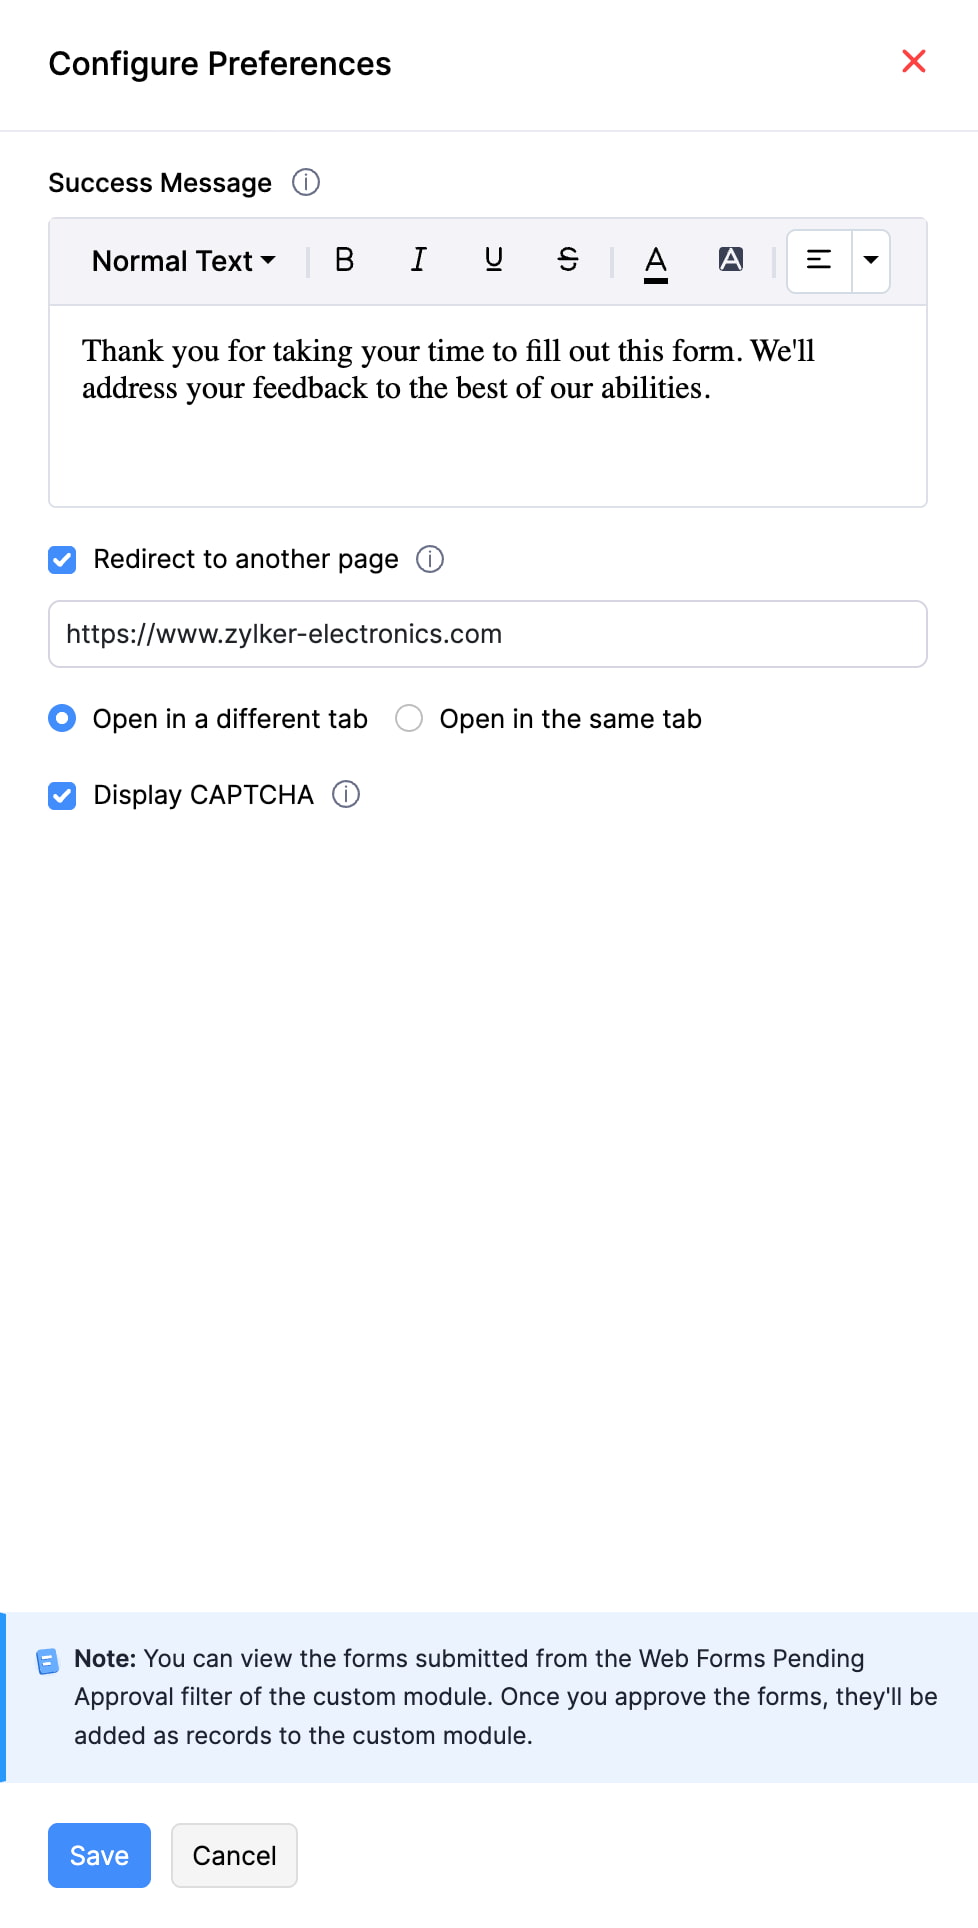
- Füllen Sie Folgendes im Bereich Einstellungen konfigurieren aus:
- Erfolgsmeldung: Geben Sie die Nachricht ein, die angezeigt werden soll, wenn ein Formular eingereicht wird. Sie können den Rich-Text-Editor verwenden, um Ihre Nachricht zu formatieren.
- Weiterleitung zu einer anderen Seite: Aktivieren Sie diese Option, wenn Sie möchten, dass Personen nach dem Absenden des Formulars zu einer anderen Seite weitergeleitet werden.
- Wählen Sie In einem anderen Tab öffnen, wenn die Weiterleitung in einem neuen Tab erfolgen soll.
- Wählen Sie Im selben Tab öffnen, wenn die Weiterleitung im selben Tab erfolgen soll.
- CAPTCHA anzeigen: Aktivieren Sie diese Option, wenn Sie möchten, dass Personen Formulare nur absenden können, nachdem sie das im Formular angegebene CAPTCHA eingegeben haben.
- Klicken Sie auf Speichern.
- Die URL des Webformulars wird im Pop-up angezeigt. Klicken Sie auf Kopieren und Schließen.
- Wenn das Webformular Felder enthält, die sensible Informationen sammeln, wie z. B. Kartendaten, OTP und andere sensible Informationen, wird das Webformular gespeichert, aber Sie können es nicht veröffentlichen. Der Status wird auf Spam aktualisiert. Ein Pop-up mit der Liste der Felder, die zur Erfassung sensibler Daten verwendet werden, wird angezeigt. Klicken Sie auf Zurück, entfernen Sie diese Felder und klicken Sie dann auf Veröffentlichen.
- Wenn Sie auf Abbrechen klicken, können Sie das Webformular nicht veröffentlichen, bis Sie die im Pop-up aufgeführten Felder entfernt haben.
Aus einem benutzerdefinierten Modul
Sie können ein Webformular direkt aus einem benutzerdefinierten Modul erstellen, wenn Layouts dafür erstellt wurden. So geht’s:
- Gehen Sie zu Einstellungen in der oberen rechten Ecke.
- Klicken Sie auf das erforderliche benutzerdefinierte Modul unter Benutzerdefinierte Module.
- Im Tab Übersicht fahren Sie mit der Maus über das erforderliche Layout und klicken auf die Schaltfläche Mehr.
- Klicken Sie im Dropdown-Menü auf Webformular erstellen.
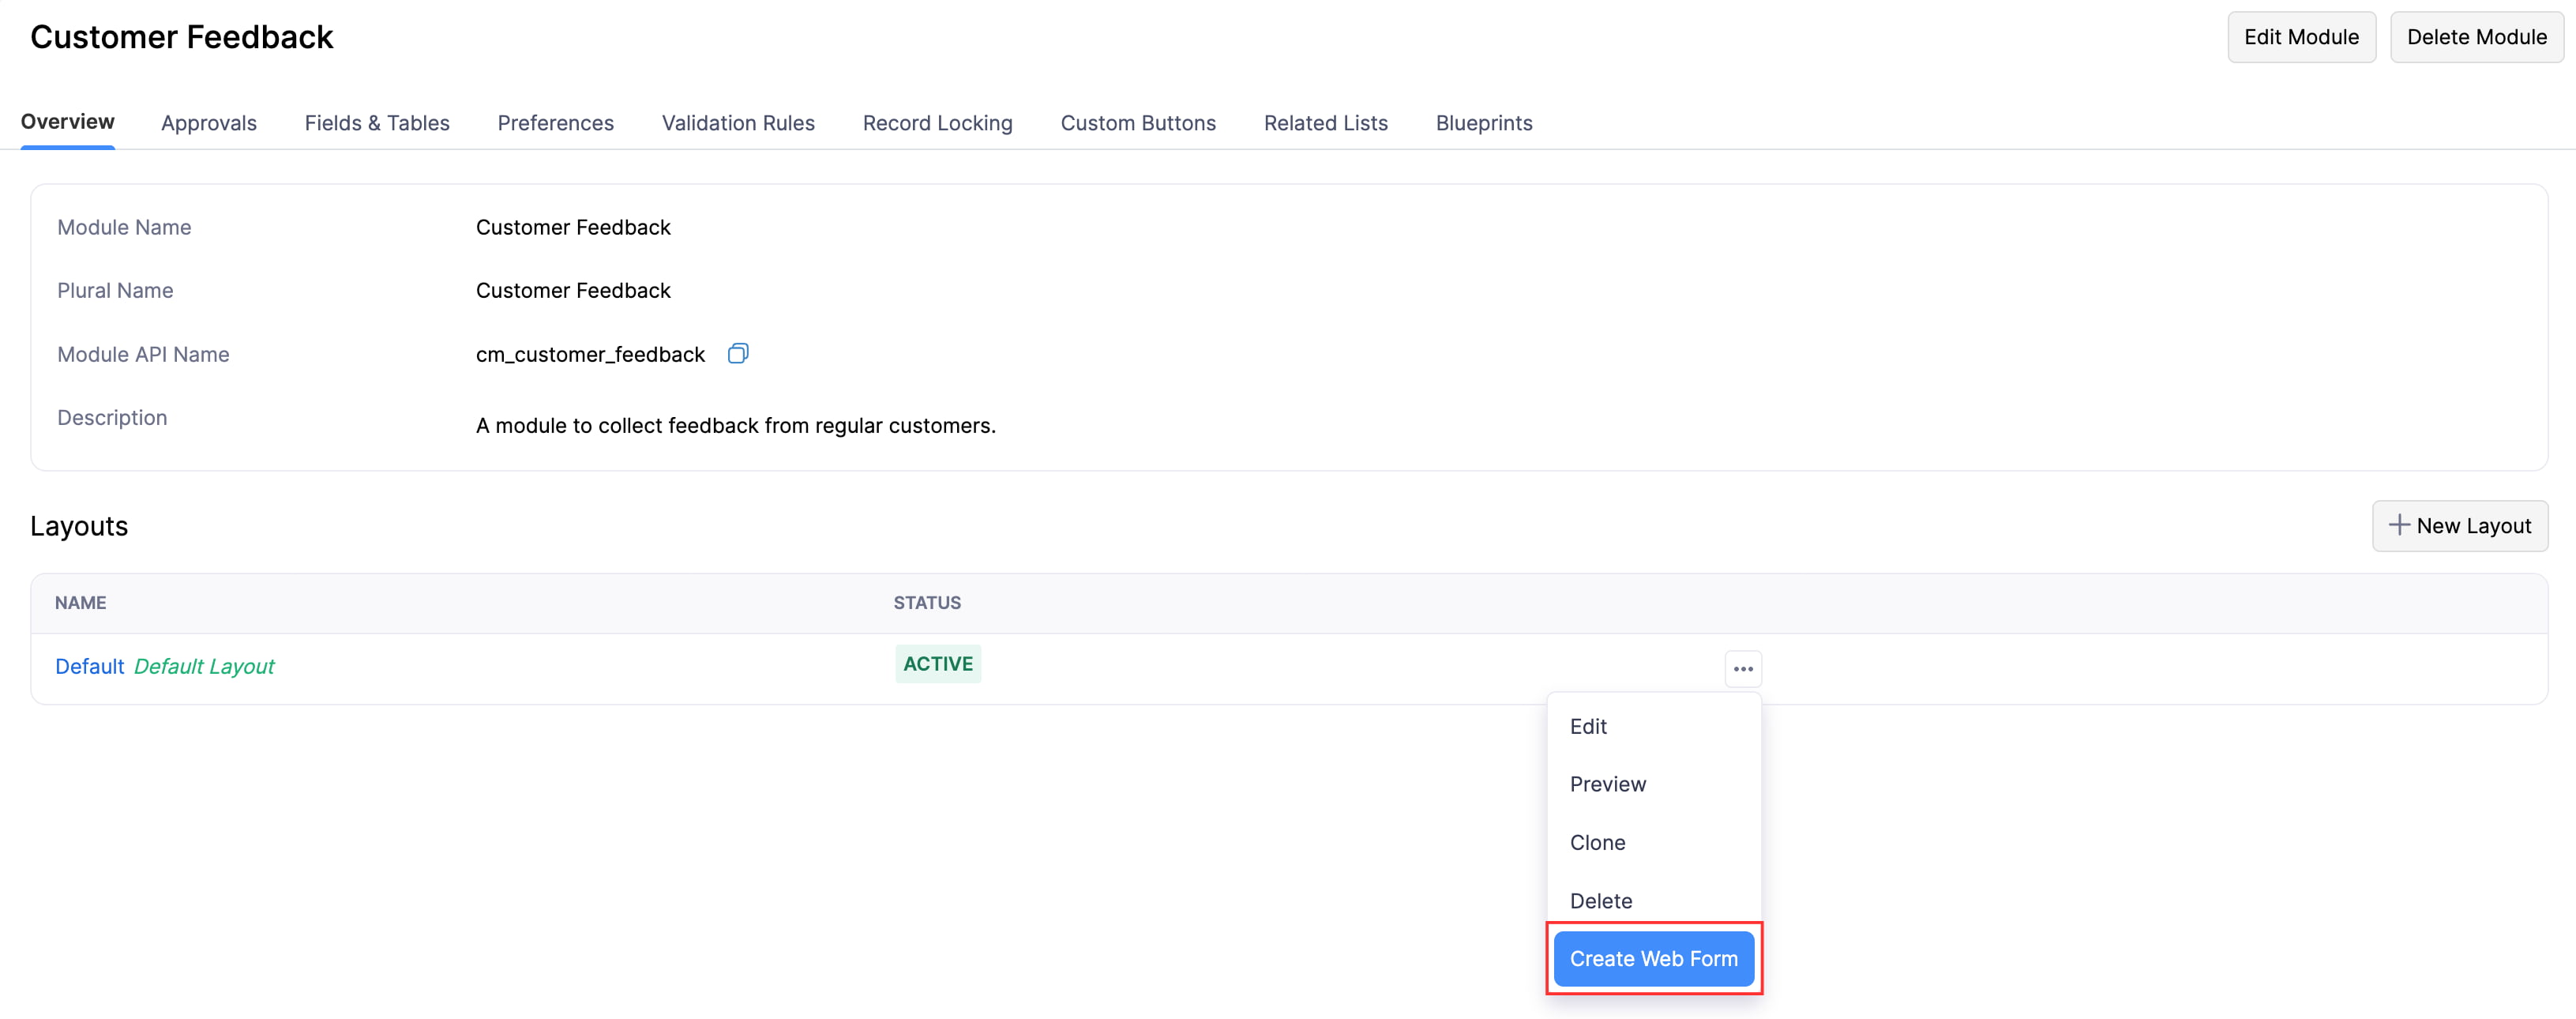
- Fahren Sie ab Schritt 4 des Abschnitts Von der Seite Webformulare in den Einstellungen fort.
Details in einem Webformular ausfüllen
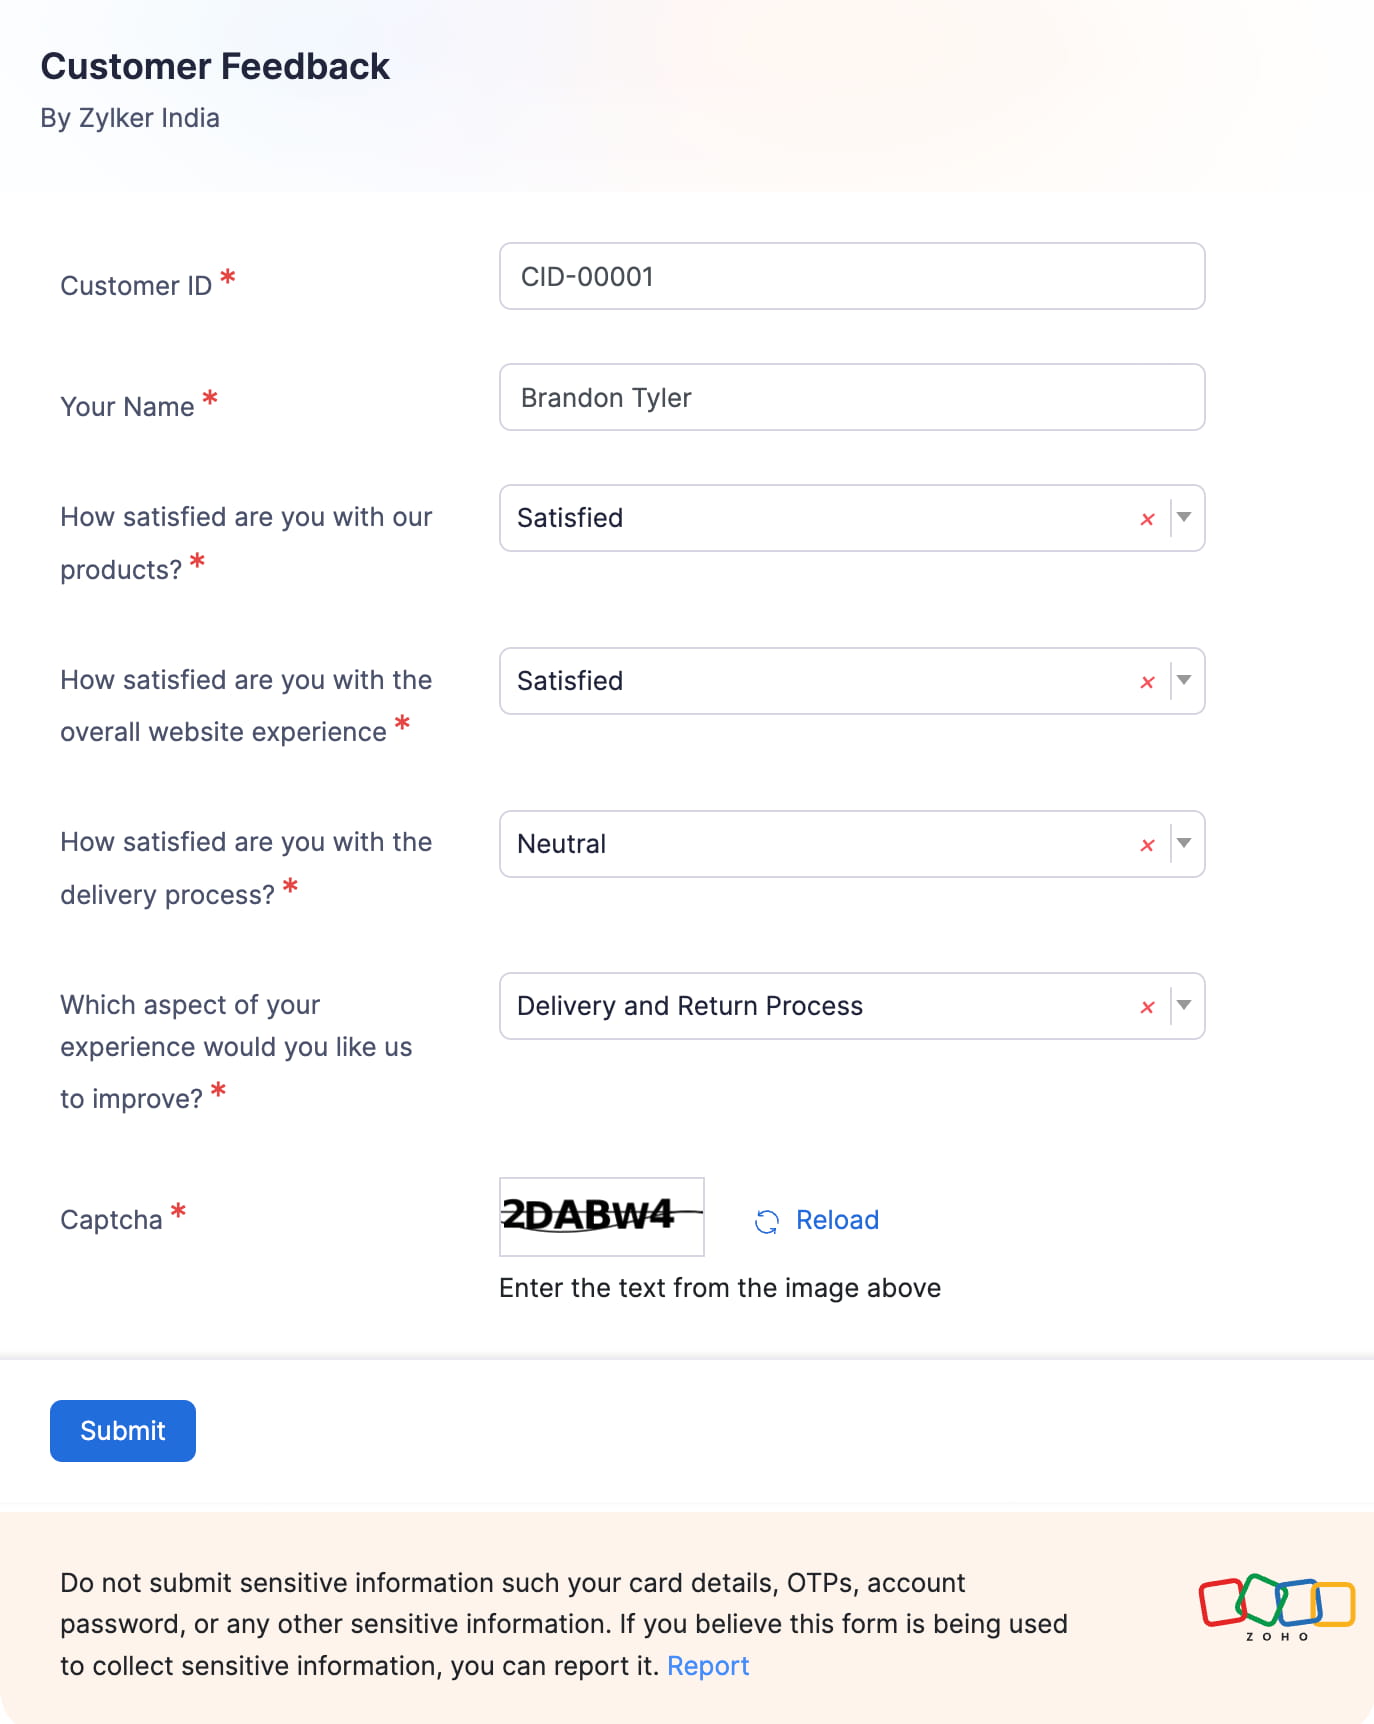
Wenn Sie die URL eines Webformulars erhalten haben, so können Sie die Details ausfüllen und es absenden:
- Öffnen Sie einen neuen Tab in einem beliebigen Browser und fügen Sie die URL des Webformulars ein.
- Füllen Sie die erforderlichen Felder aus.
- Geben Sie das CAPTCHA ein, wenn es angezeigt wird.
- Klicken Sie auf Absenden.
Sie können Werte für Felder im Webformular vorab ausfüllen, indem Sie ein Fragezeichen (?) am Ende der URL anhängen, gefolgt vom API-Namen des benutzerdefinierten Feldes, und dann den Wert nach dem Gleichheitszeichen (=) eingeben. Sie können zusätzliche Felder mit einem kaufmännischen Und (&) hinzufügen. Zum Beispiel: https://books.zohopublic.com/webforms/xxxxxxxxx?cf_customer_name=bailey_miles&cf_order_id=12345.
Ein Spam-Formular melden
Wenn Sie glauben, dass ein Formular verwendet wird, um sensible Informationen zu sammeln, können Sie es melden. So geht’s:
- Klicken Sie auf Melden am Ende des Formulars. Sie werden zur Missbrauch melden-Seite von Zoho weitergeleitet.
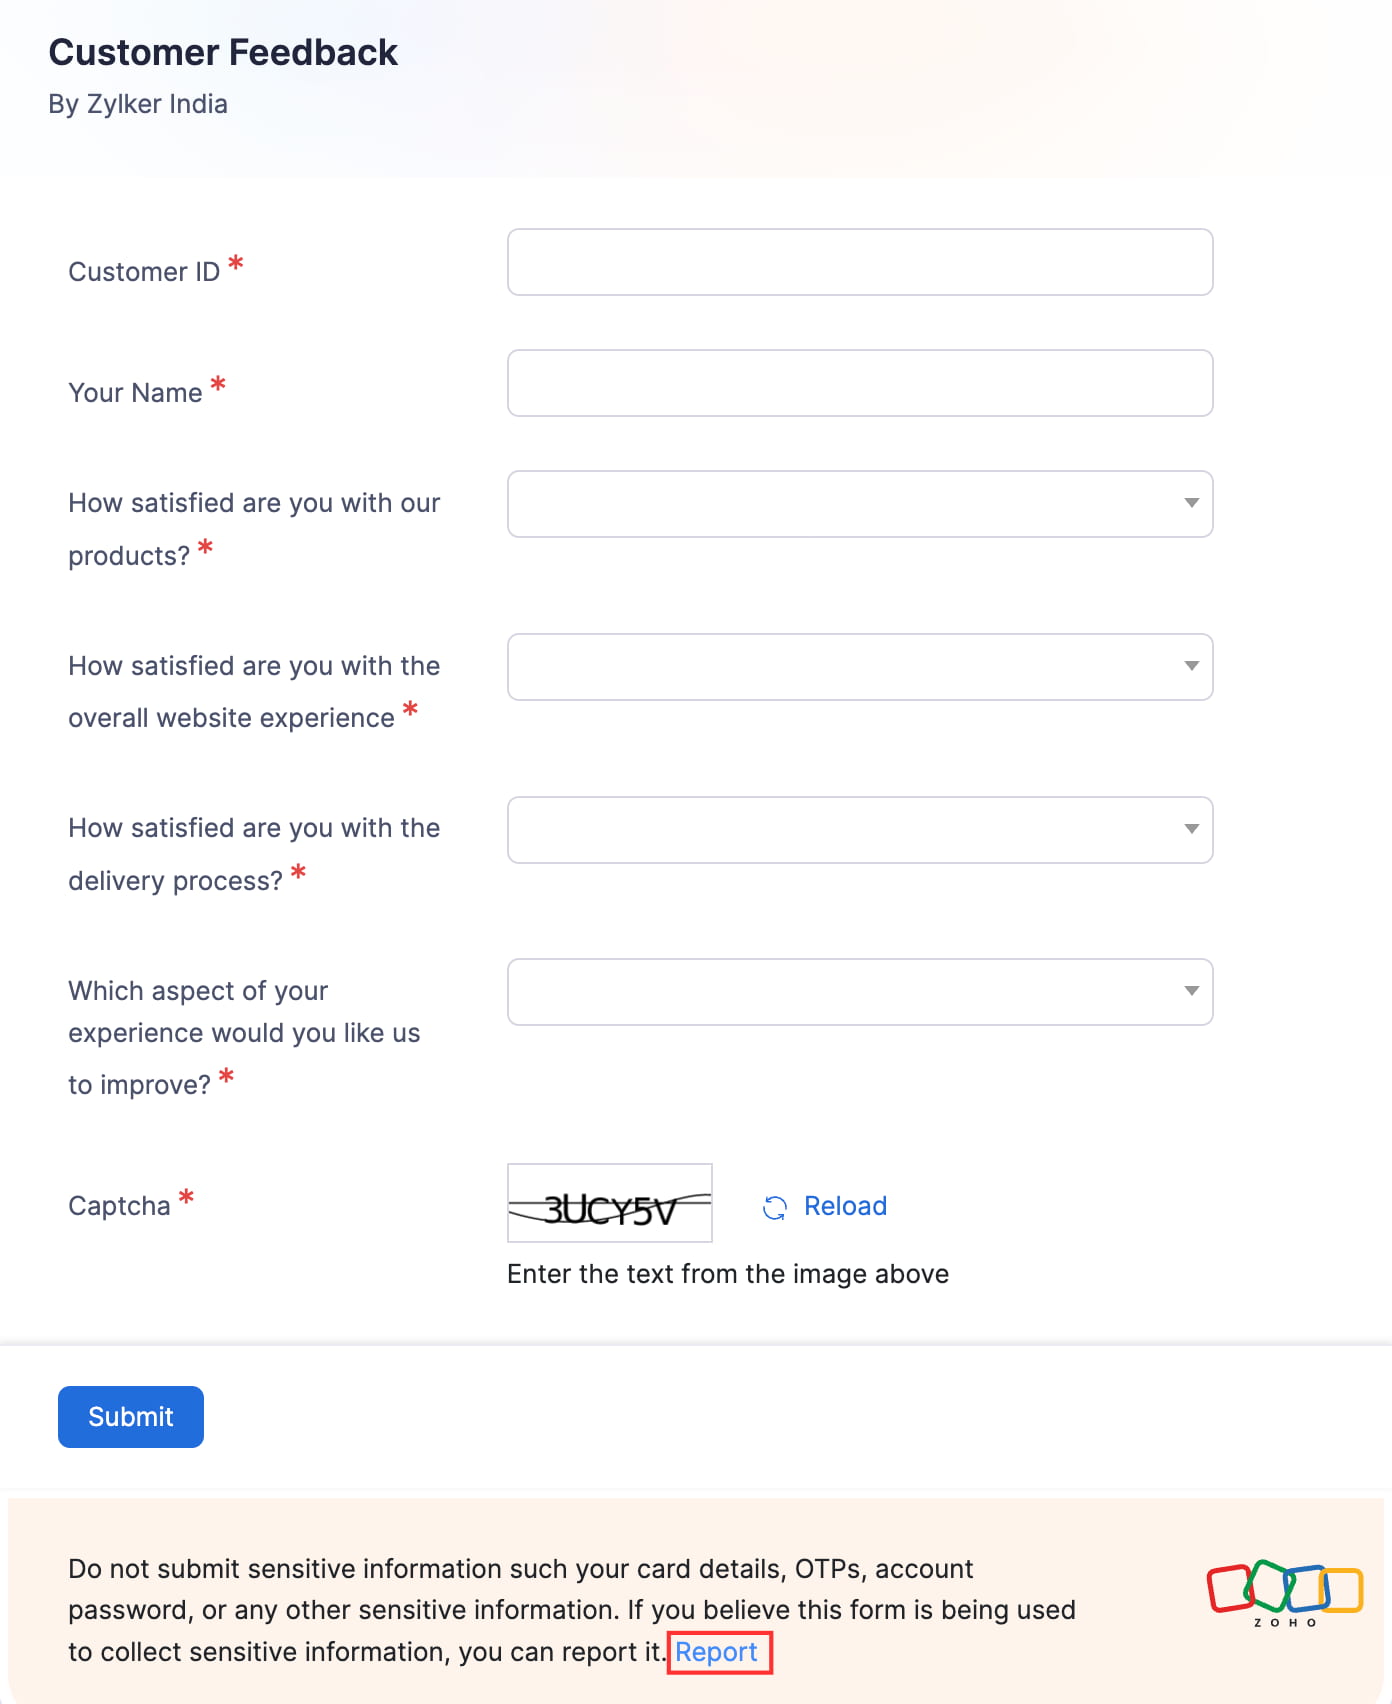
- Füllen Sie die angeforderten Details aus und klicken Sie auf Absenden. Wir werden das Webformular überprüfen und nach der Überprüfung blockieren.
Genehmigen eines eingereichten Formulars
Wenn Personen Formulare über den ihnen geteilten Link einreichen, werden die Einsendungen vorübergehend im zugehörigen benutzerdefinierten Modul gespeichert. Sie müssen diese genehmigen, um sie als Datensätze im benutzerdefinierten Modul hinzuzufügen. So geht’s:
- Klicken Sie auf Benutzerdefinierte Module in der linken Seitenleiste und klicken Sie auf das benutzerdefinierte Modul, das mit dem von Ihnen erstellten Webformular verbunden ist.
- Klicken Sie oben rechts auf Webformulare zur Genehmigung ausstehend.
- Klicken Sie auf die Einsendung, die Sie genehmigen möchten.
- Klicken Sie oben auf Akzeptieren.
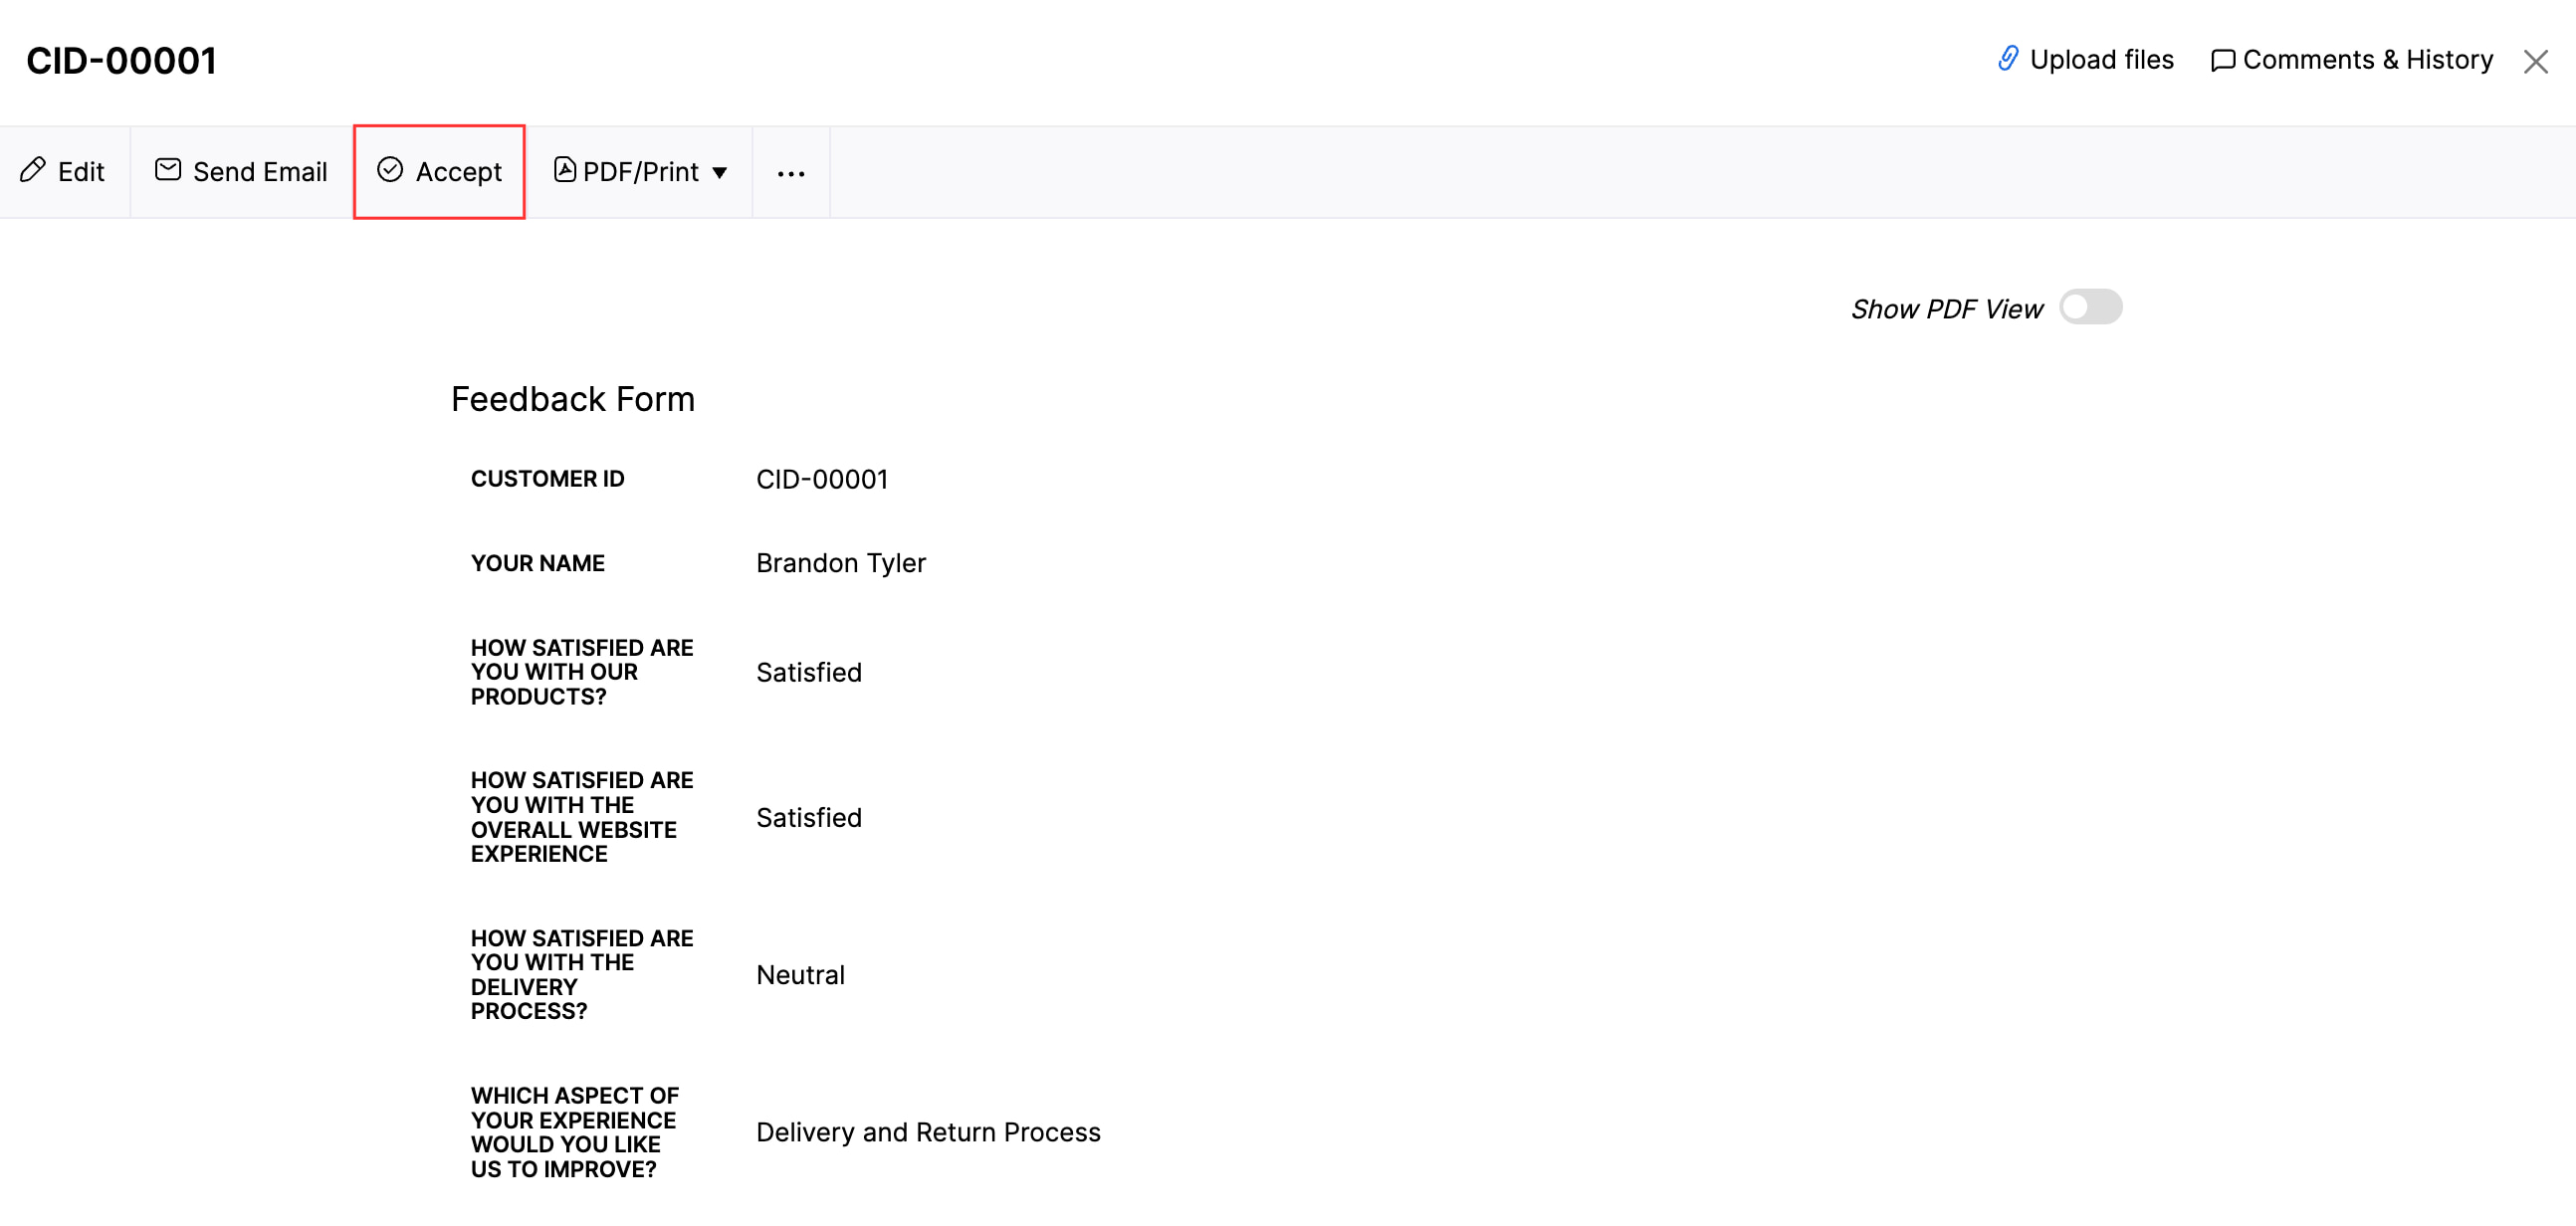
- Klicken Sie im erscheinenden Pop-up auf Ja.
Das Formular wird als Datensatz im benutzerdefinierten Modul hinzugefügt. Sie können es auf der Liste-Seite des benutzerdefinierten Moduls einsehen.
Löschen eines eingereichten Formulars
Wenn Personen Formulare über den ihnen geteilten Link einreichen, werden die Einsendungen vorübergehend im zugehörigen benutzerdefinierten Modul gespeichert. Sie können die Einsendung bei Bedarf löschen. So geht’s:
- Klicken Sie auf Benutzerdefinierte Module in der linken Seitenleiste und klicken Sie auf das benutzerdefinierte Modul, das mit dem von Ihnen erstellten Webformular verbunden ist.
- Klicken Sie oben rechts auf Webformulare zur Genehmigung ausstehend.
- Klicken Sie auf die Einsendung, die Sie löschen möchten.
- Klicken Sie auf das Mehr-Symbol oben und wählen Sie Löschen.
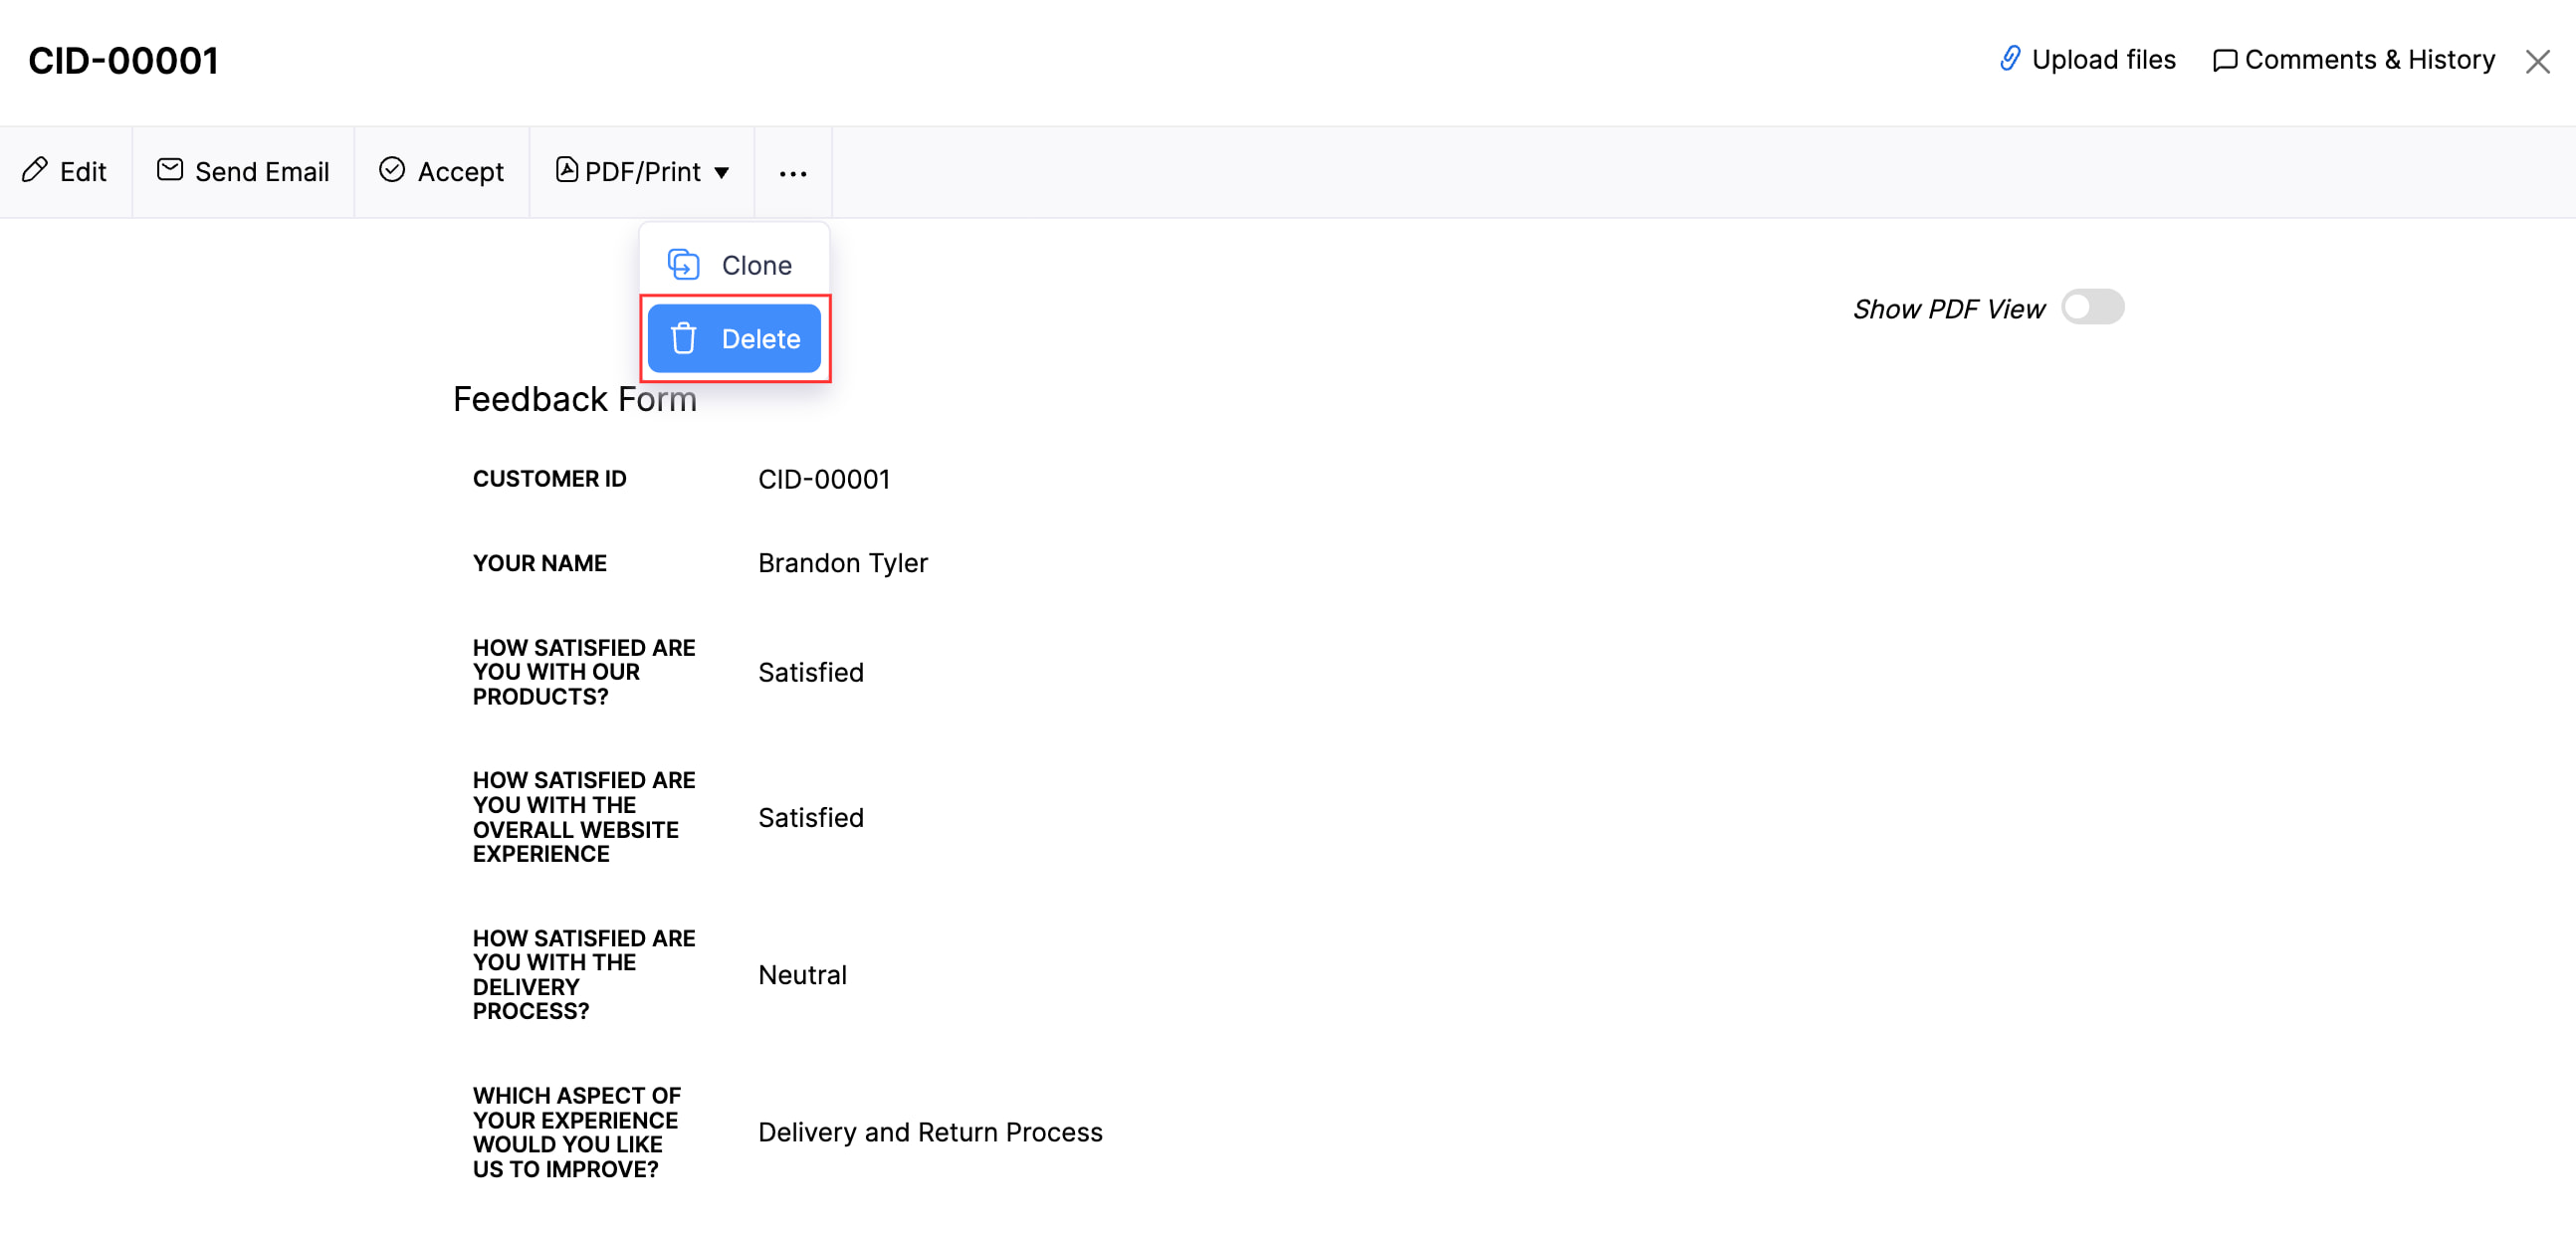
- Klicken Sie im erscheinenden Pop-up auf Fortfahren, um Ihre Aktion zu bestätigen.
Bearbeiten eines Webformulars
Wenn Sie Änderungen an einem Webformular vornehmen möchten, können Sie es bearbeiten. So geht’s:
- Gehen Sie oben rechts zu Einstellungen.
- Klicken Sie unter Entwicklerdaten auf Webformulare.
- Klicken Sie auf das Mehr-Symbol neben dem erforderlichen Webformular und wählen Sie Bearbeiten aus dem Dropdown-Menü.

- Klicken Sie oben rechts auf Layout bearbeiten, wenn Sie die in dem Webformular verwendeten Felder aktualisieren möchten.
- Klicken Sie auf Präferenzen konfigurieren, um die Präferenzen des Webformulars zu aktualisieren.
- Nehmen Sie die erforderlichen Änderungen vor und klicken Sie auf Speichern.
Ein Webformular als inaktiv markieren
Wenn Sie ein Webformular nicht mehr benötigen, es aber nicht löschen möchten, können Sie es als inaktiv markieren. So geht’s:
- Gehen Sie oben rechts zu Einstellungen.
- Klicken Sie unter Entwicklerdaten auf Webformulare.
- Klicken Sie auf das Mehr-Symbol neben dem Webformular und wählen Sie Als inaktiv markieren.

Ein inaktives Webformular als aktiv markieren
Wenn Sie ein inaktives Webformular benötigen, können Sie es als aktiv markieren und wieder verwenden. So geht’s:
- Gehen Sie oben rechts zu Einstellungen.
- Klicken Sie unter Entwicklerdaten auf Webformulare.
- Klicken Sie auf das Mehr-Symbol neben dem inaktiven Webformular und wählen Sie Als aktiv markieren.

Löschen eines Webformulars
Warnung: Wenn Sie ein Webformular löschen, können Personen es nicht mehr verwenden, um Informationen über das Webformular einzureichen. Die Einreichungen, die Sie noch genehmigen müssen, sind jedoch weiterhin verfügbar.
Wenn Sie ein Webformular nicht mehr benötigen, können Sie es löschen. So geht’s:
- Gehen Sie zu Einstellungen in der oberen rechten Ecke.
- Klicken Sie auf Webformulare unter Entwicklerdaten.
- Klicken Sie auf das Mehr-Symbol neben dem Webformular und wählen Sie Löschen aus dem Dropdown-Menü.
- Klicken Sie im Popup, das erscheint, erneut auf Löschen.

Blockierte Webformulare
Wenn jemand, der Ihr Webformular verwendet, es meldet, weil es sensible Informationen sammelt, werden wir Ihr Formular überprüfen und blockieren, wenn es verwendet wird, um sensible Daten zu sammeln. Sie können support@zohobooks.com kontaktieren, um Ihr Webformular zu entsperren.
 Ja
Nein
Ja
Nein
Vielen Dank für Ihre Rückmeldung!