Triggering a Signal through Zoho Flow
Zoho Flow is an integration platform which connects cloud applications. It helps you set up workflows to automate information exchange among the apps you use.
A flow is the combination of a trigger and action(s). The trigger kickstarts the flow, and the actions are tasks executed by the flow. The trigger can be a data update or a scheduled point in time.
Consider an example where we have a flow that triggers a function in Zoho CRM whenever a new ticket is created in Zoho Desk. Let us now look at the steps to trigger a signal in Zoho CRM whenever a ticket is created in Zoho Desk. Here, you can either use the pre-defined Raise Signal as an action block in your flow, or use the triggerSignal integration task in a custom function to trigger the signal.
Creating a Flow using the "Raise Signal" Action
Raise Signal is a pre-defined action that has the entities to trigger a signal from a service and display it in Zoho CRM. All you have to do is, use this action block in your flow and map the fields whose data the third-party service sends with the fields in CRM.
Follow the steps in the Creating a New Signal and create a new signal in CRM.
Go to Zoho Flow. Log in with your Zoho account, if not already. The My Flows section opens.
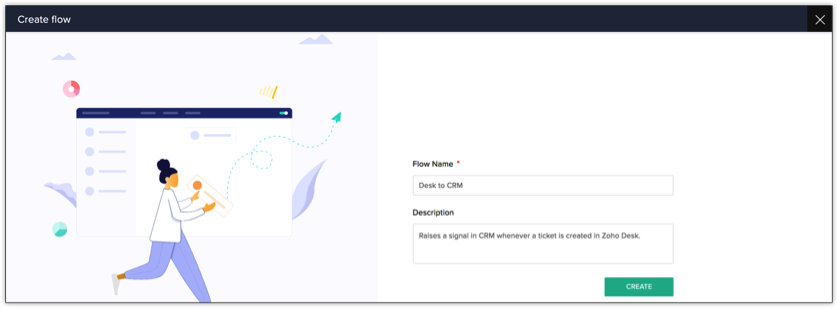
Select CREATE FLOW.
Specify the Flow Name and a description
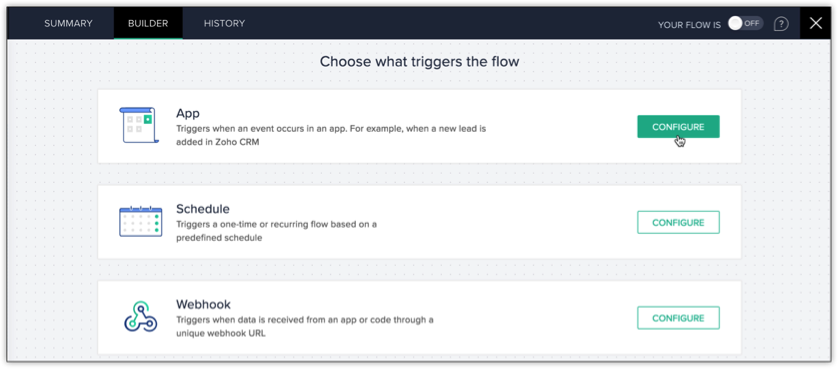
Choose what triggers the flow. In our case, it is the App. Select CONFIGURE to configure the app. Flow displays a list of apps.
Choose Zoho Desk from the list of apps and click NEXT.

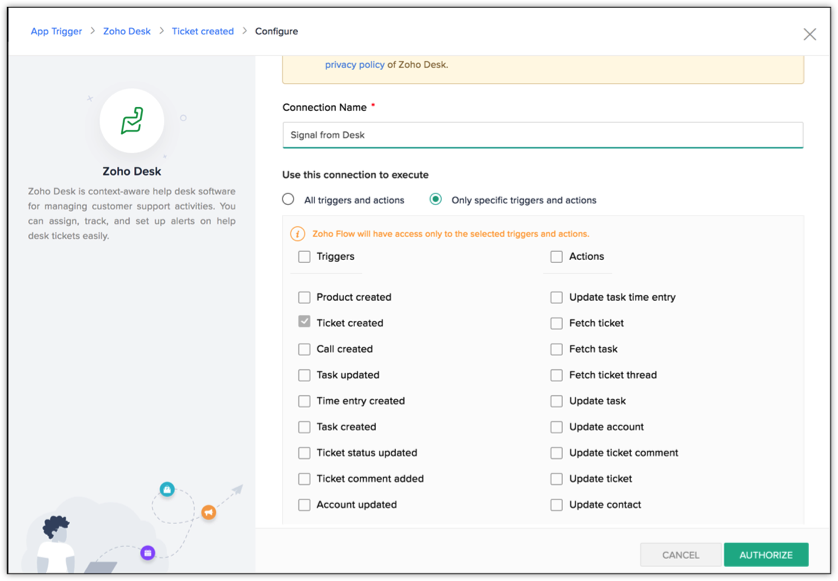
Choose the Zoho Desk Trigger. This trigger executes the flow. In our case, Ticket created is the trigger. Click NEXT.
Create a connection to connect Desk and CRM. Specify the connection’s name (Signal from Desk) and the triggers and actions that execute the connection. Click AUTHORIZE.
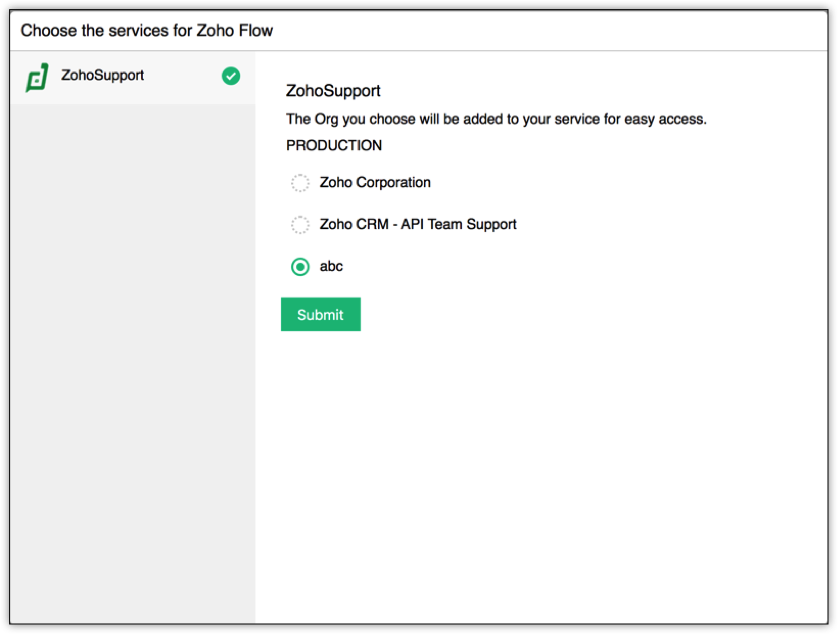
Zoho Flow redirects you to Zoho Accounts. Choose the org and the environment you want Zoho Flow to access data from. Click SUBMIT.
The resultant page displays the user data that Zoho Flow wants to access. Click Accept to grant consent.
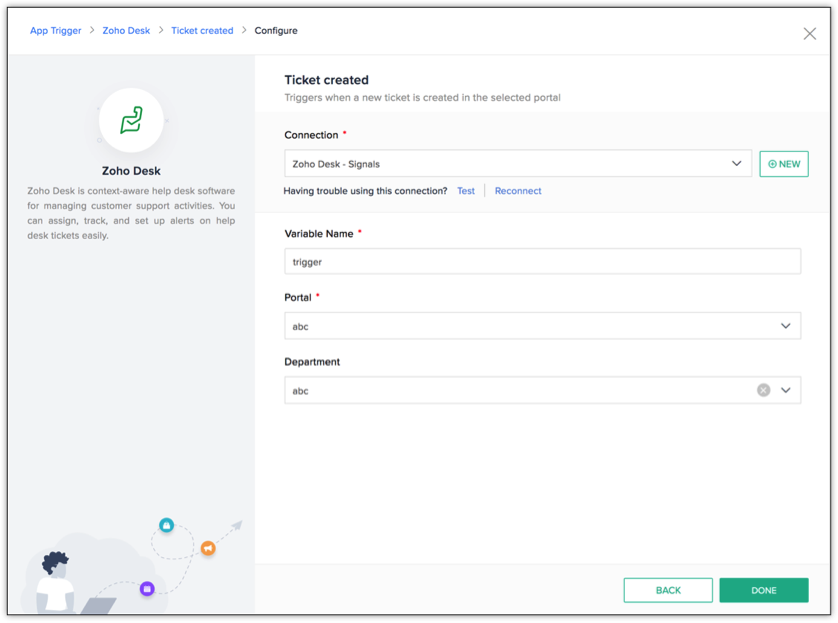
Specify the Variable Name for the trigger and choose the portal and the department. Click DONE.
Zoho Flow’s Builder opens. The builder contains the flow block of Zoho Desk.
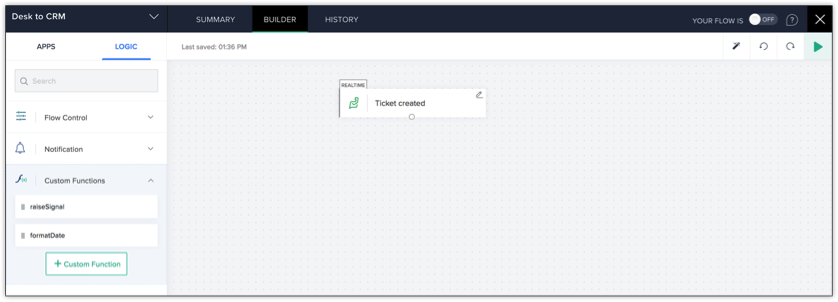
Under the APPS tab, choose the app where you want to send the signal notification to (Zoho CRM, in our case).
In that drop-down, you can see multiple action blocks. Select Raise Signal and drag and drop this in the builder.

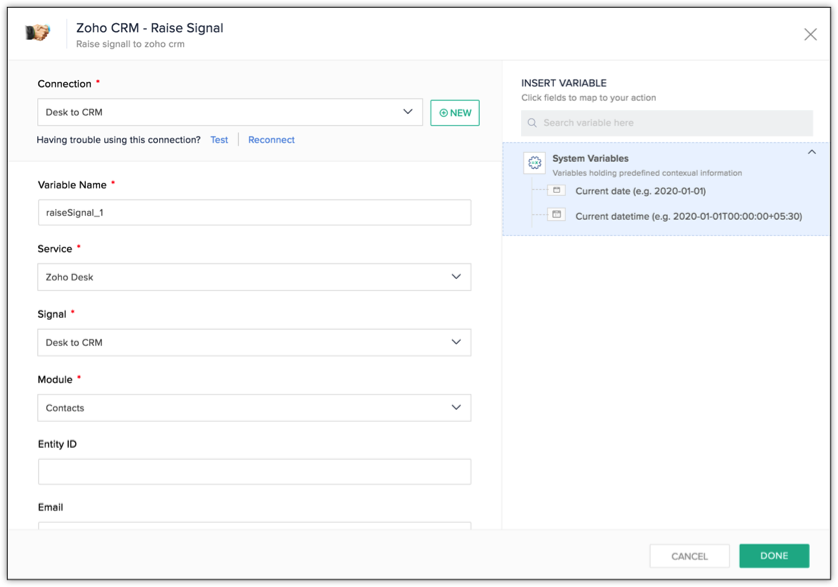
A form opens. The Variable_Name is already populated; you can choose to edit this, too.
Choose the Service where the event occurs (here, Zoho Desk).
Choose the Signal.
Choose the Module. This is the module in CRM where the system checks for information about the lead or contact that triggerd the ticket in Desk.
Specify the Entity ID (record ID) or the Email of the lead or contact that triggers the ticket.
Enter the Subject and Message for the signal notification.
Apart from these system-defined fields, the third-party application may send more information about the event occurrences. You can also capture these information using the custom fields (a maximum of 5 fields are allowed), and send it as a signal information. The data from third party should be mapped in custom field in the <key>:<value> format. Example: average_resolution_time:20minutes.
Click DONE. Your flow is now ready.


Creating a Flow through a custom function
You can use a custom function to trigger the signal when the third-party does not allow you to customize the data it sends in a format that the Signals API accepts.
Use the triggerSignal integration task in your function code to trigger a signal in Zoho CRM. You must pass a constructed map with the details of the notification from the third-party to this integration task.
You must ensure that your function has all required information to trigger a signal. If more information is required apart form the ones that the third-party sends, you must make API calls to the third-party to obtain such information.
Follow the steps 1 to 11 in the previous section.
Click +Custom Function in the left pane to create and associate the function to trigger the signal from Flow.
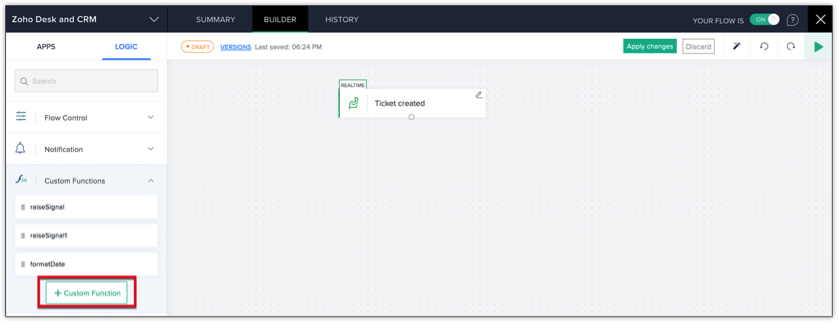
Specify the function name and the input parameters with their data types.
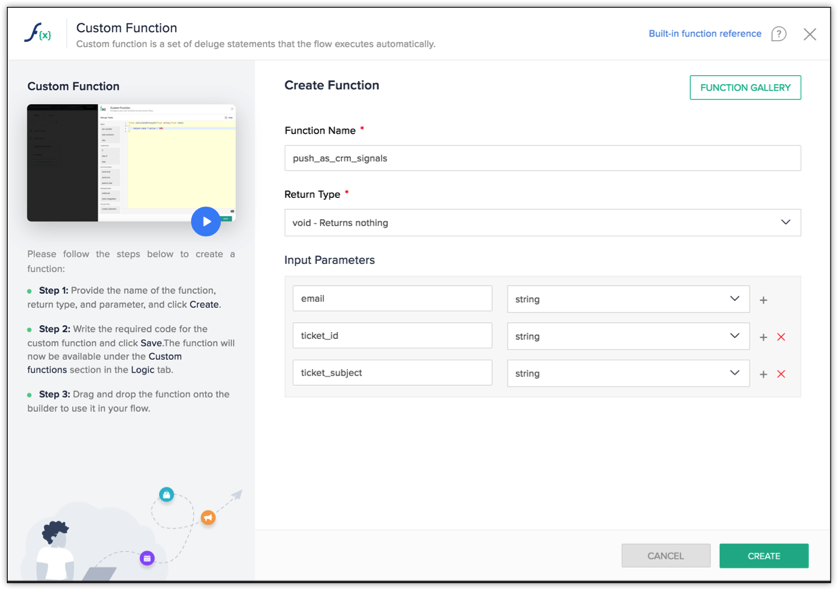
Click CREATE.
Use the below code snippet in your function to trigger a signal when the event occurs. In this function, triggerSignal() is a pre-defined integration task that triggers the signal. You must pass a constructed map with the details of the notification to this integration task.
namespace = "zohodesk_newticketalert"; subject = "New Ticket created #"+ticket_id; message = "New Ticket with "+ticket_subject+ " created in Zoho Desk" + " from " +email; signalMap = Map(); signalMap.put("signal_namespace",namespace); signalMap.put("email",email); signalMap.put("subject",subject); signalMap.put("message",message); result = zoho.crm.triggerSignal(signalMap);
Click SAVE. Use the EXECUTE button to test the correctness of your function.
Drag and drop this function from the left pane to the builder.
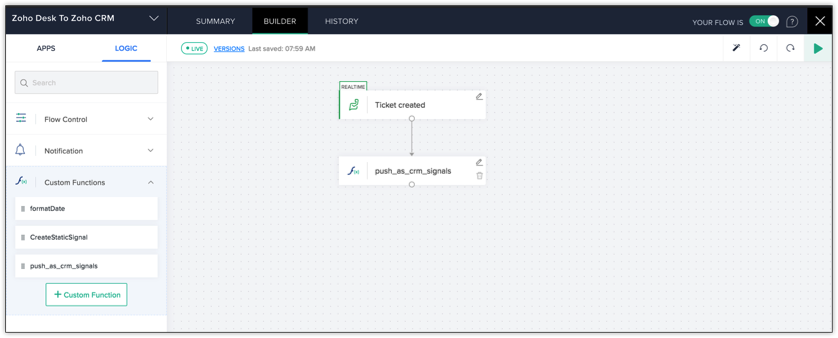
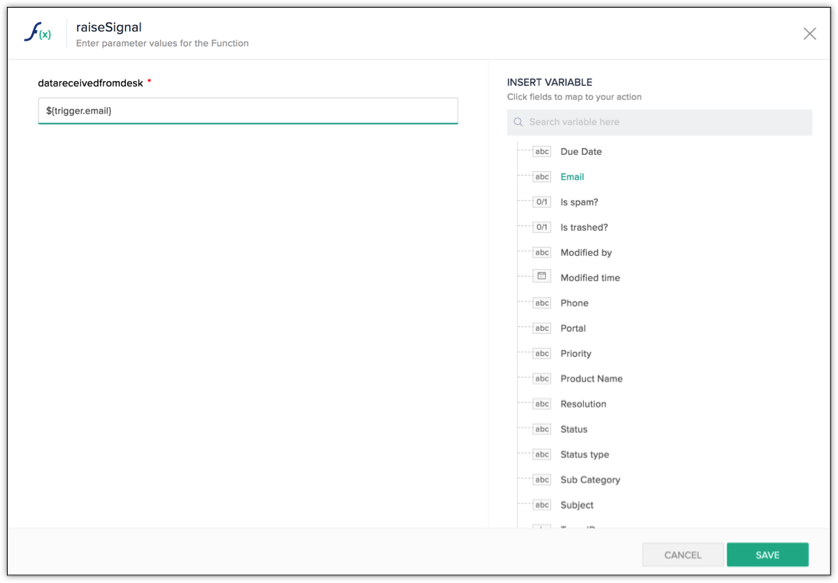
Click the edit icon in the function block inside the builder. This opens the window to map the fields in Desk with the function’s parameter.
Choose the email field as the function takes email of the lead or contact that created the ticket as the value to the parameter. Click SAVE.
Click the play button at the top right corner of the builder to test the flow.


Testing the Flow and Raising the Signal in CRM
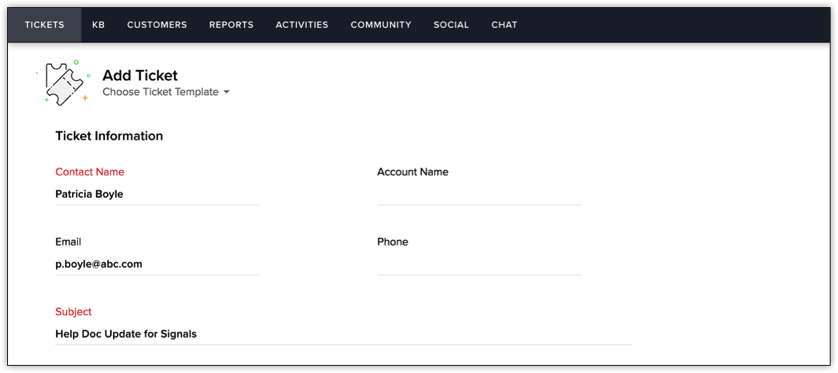
Create a ticket in Desk. Note that the person who creates the ticket must be a contact in CRM. If not, Desk creates a contact in that name with that email ID.
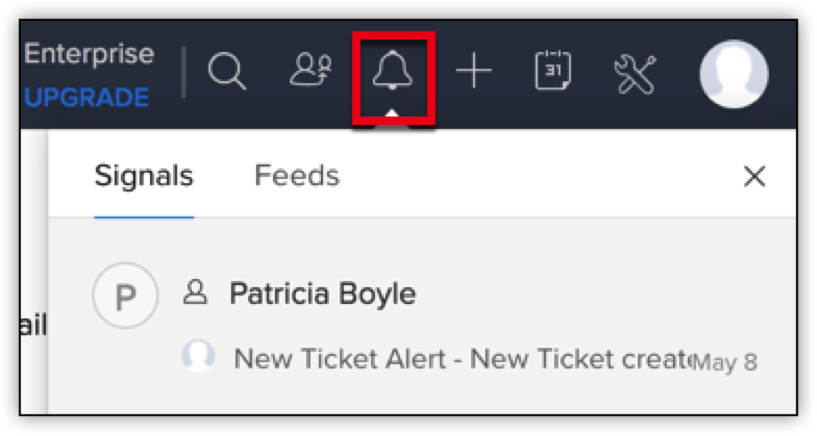
Go to CRM. The bell icon notifies you of a new signal. Click it to open the notification.