Displaying the Signal in CRM
While creating a custom signal, you can choose to display the signal in the default view or as a widget.
The Default View
This is a very basic view of the signal with the data from the function that raises the signal.
The Widget View
Widgets are embeddable UI components that display data from a third-party app as per your requirement. You can write your own HTML and JS code, and use them in CRM to present the data according your needs.
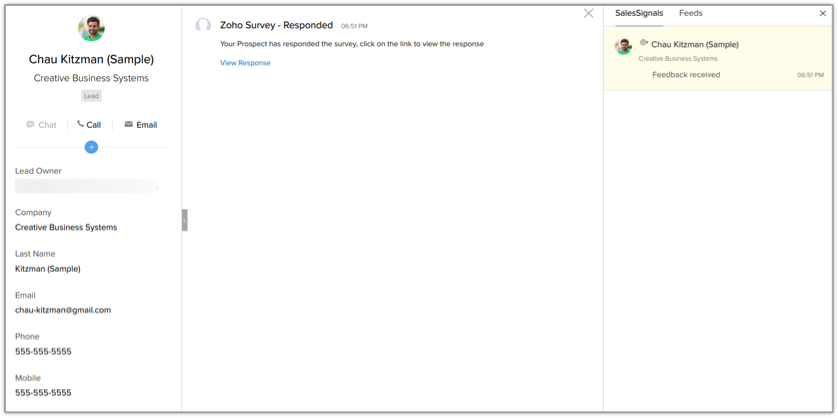
Let us consider an example scenario where we have a survey in Zoho Survey. When a user responds to that survey, a function raises the signal in Zoho CRM and displays the details of the survey in a widget.
Follow the same steps as mentioned in the Creating a New Signal and the Raising a Signal through a Function sections. When you want to display the signal in a widget, choose the option Widget from the View signal details through drop-down.
Creating a Widget
Choose the widget from the list if you already have widgets of the type “Signals”. If not, select Create New Widget.
Specify a name, description, and the hosting type of the widget.
Based on the type of hosting, specify the base URL of the widget (for external hosting) or the index page and upload the file that contains the widget’s HTML (for internal hosting).
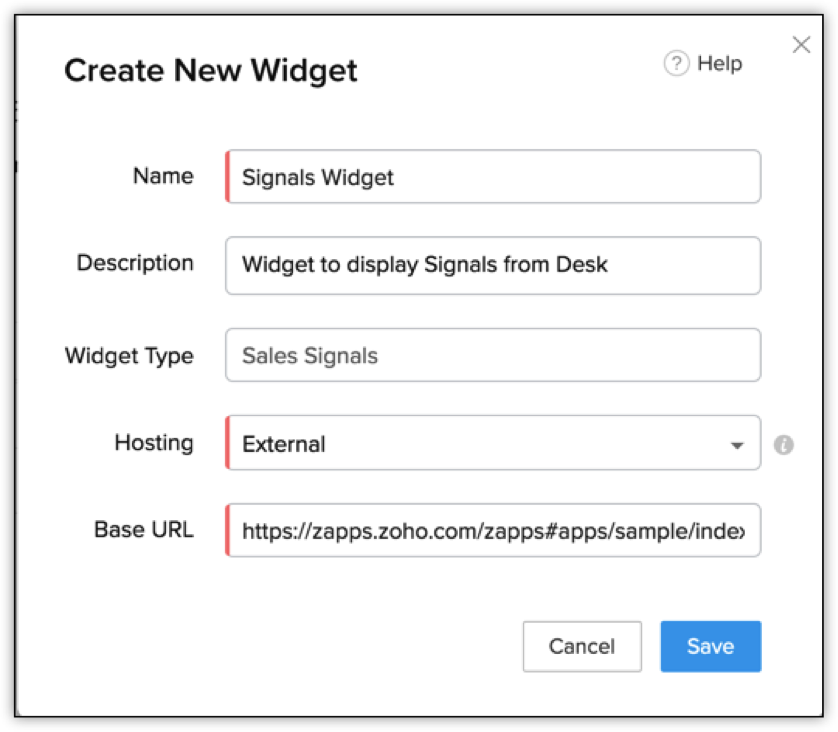
Click Save. The widget will be created and displayed in the Create New Signal pop up.

Here is a sample of how the widget displays a signal in Zoho CRM.

For more details about widgets, refer to Installing the CLI and JS SDK for Zoho CRM.
You must send the details of the signal to the widget through PageLoad.
The PageLoad data contains two keys viz, record and data. The “data” key consists of the response from the survey from the user. In our case, this contains the answers to the survey questions. The widget parses this data and displays it.