Cursor
Configure Zoho CRM MCP servers in Cursor using automatic or manual setup.
Automatic Configuration
Cursor supports one-click setup for Zoho CRM MCP servers.
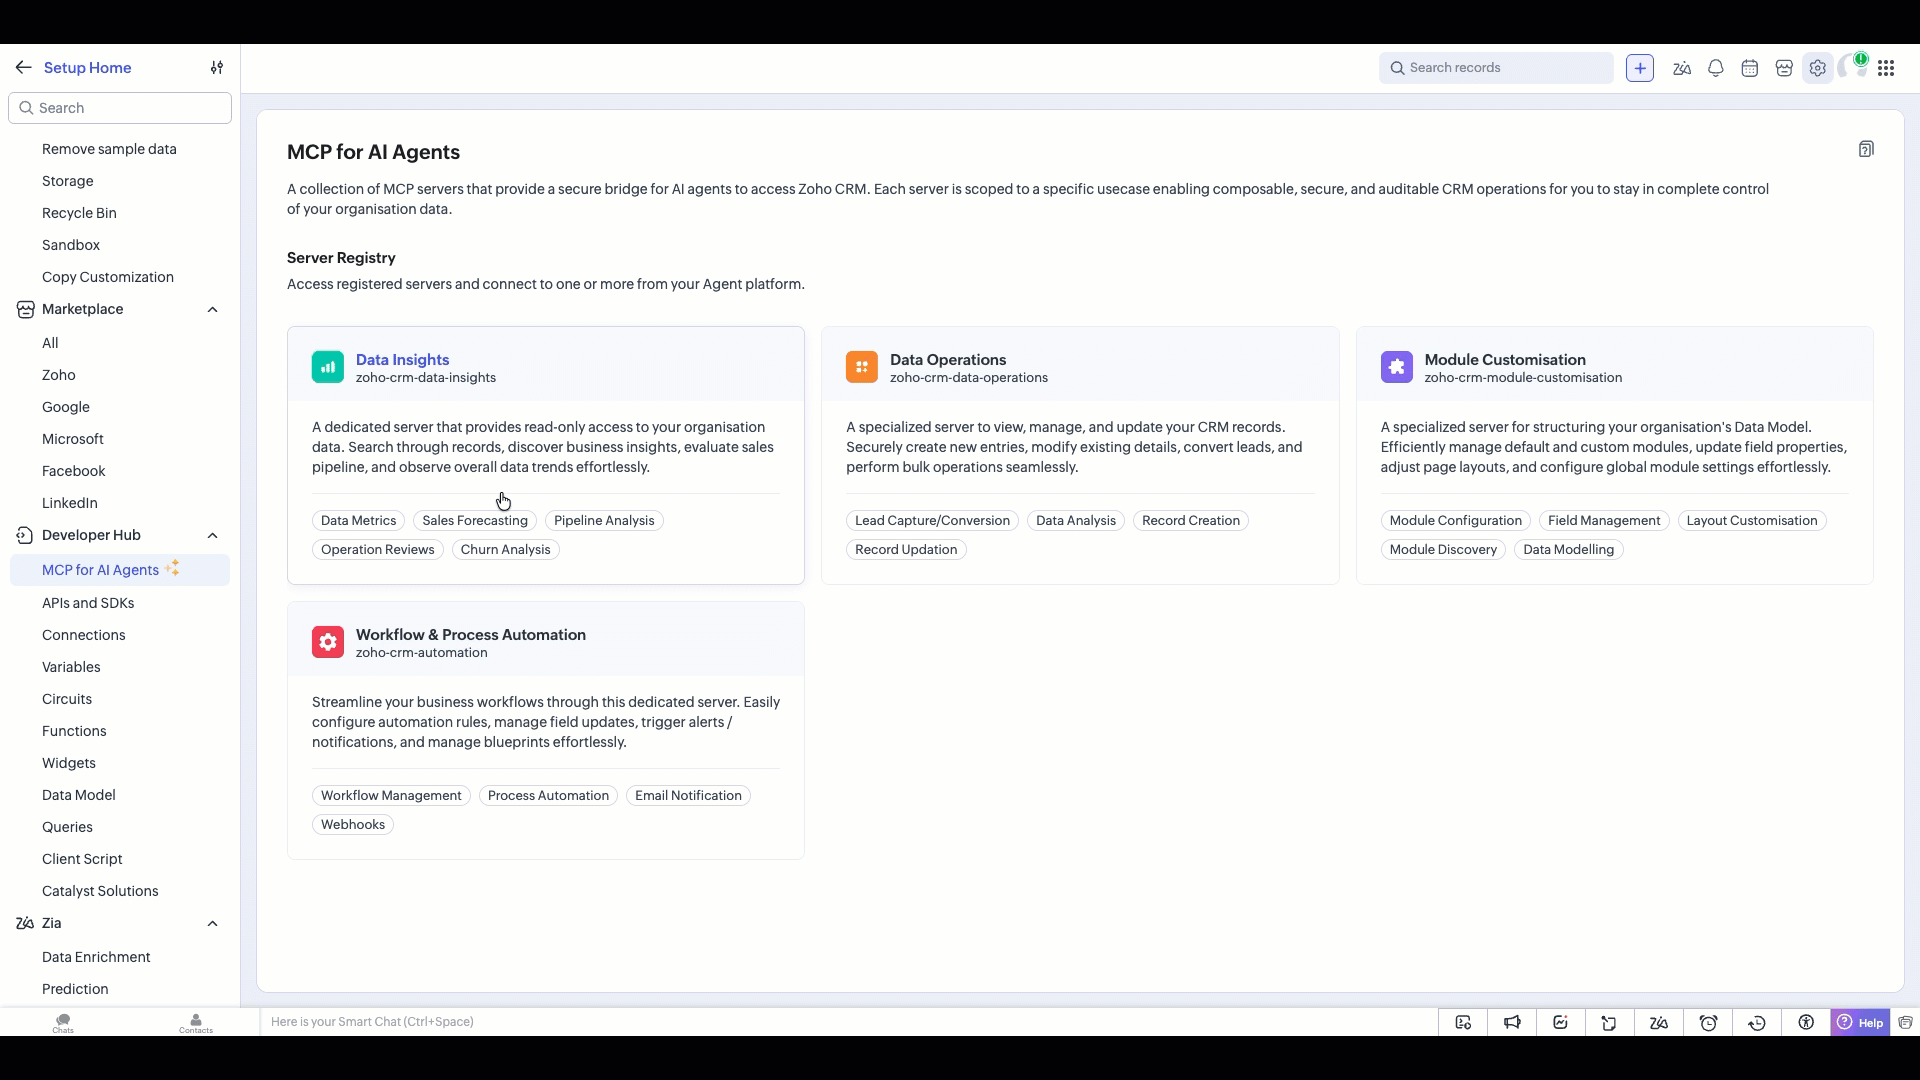
- Login to your Zoho CRM and go to Setup > Developer Hub > MCP for AI Agents.
- Select the required MCP server from the list and click Cursor as the AI tool.
- Click the Install MCP Server in Cursor button. This will open Cursor settings page with the selected server details.
- Click Install to add the server to your IDE.
- Click Connect to authenticate your Zoho CRM organization.
Manual Configuration
Use manual setup if you want more control over configuration.
- Open Cursor and go to Cursor Settings → Tools & MCP
(shortcut: press⌘ Shift Jon macOS /Ctrl Shift Jon Windows/Linux) - Click + Add Custom MCP to open the
~/.cursor/mcp.jsonfile.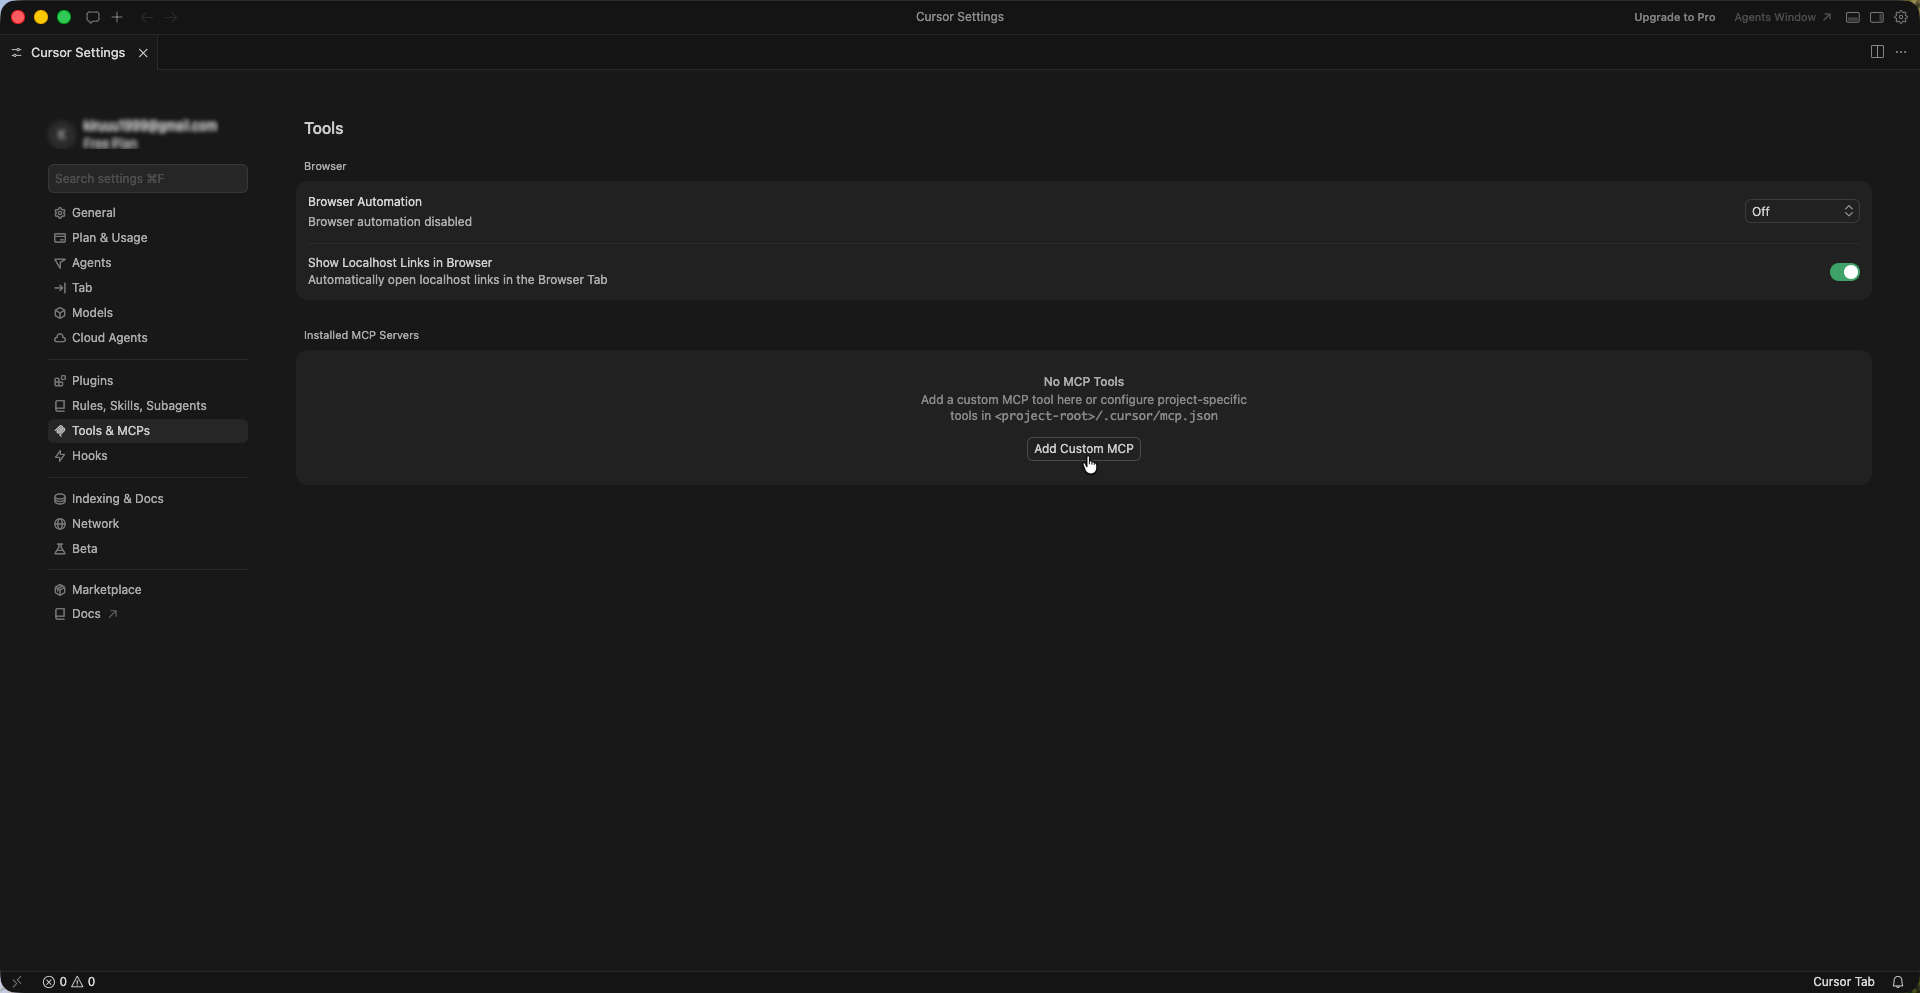
Copy and paste the following configuration for the required server:
{
"mcpServers": {
"zoho-crm-data-insights": {
"url": "https://zoho-crm-data-insights-60065097786.zohomcp.in/mcp/d17dfe13292e0414a929516bb8f8e797/message"
}
}
}{
"mcpServers": {
"zoho-crm-data-operations": {
"url": "https://zoho-crm-data-operations-60065097786.zohomcp.in/mcp/fe46ddbc48fec3713c8754cea8ec9ac5/message"
}
}
}{
"mcpServers": {
"zoho-crm-module-customisation": {
"url": "https://zoho-crm-module-customization-60065097786.zohomcp.in/mcp/8057776f5d548a33b892c533d4278d17/message"
}
}
}{
"mcpServers": {
"zoho-crm-module-customisation": {
"serverUrl": "https://zoho-crm-module-customization-60065097786.zohomcp.in/mcp/8057776f5d548a33b892c533d4278d17/message"
}
}
}Cursor automatically detects the transport type from the URL. No type field is required.
If the file already has other servers, merge this into the existingmcpServersobject.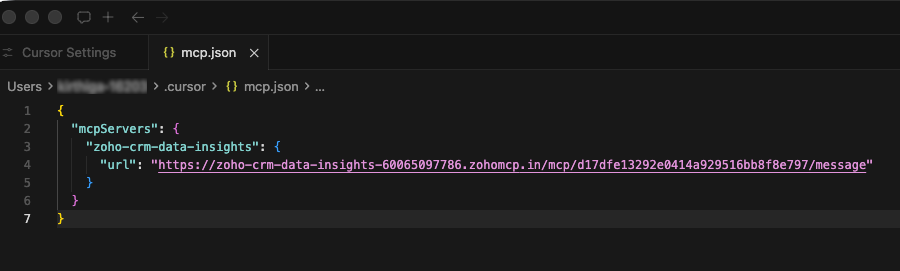
Note
For project-specific setup, create a
.cursor/mcp.jsonfile in your project root instead.- Save the file. Then go to Cursor Settings > Tools & MCP.
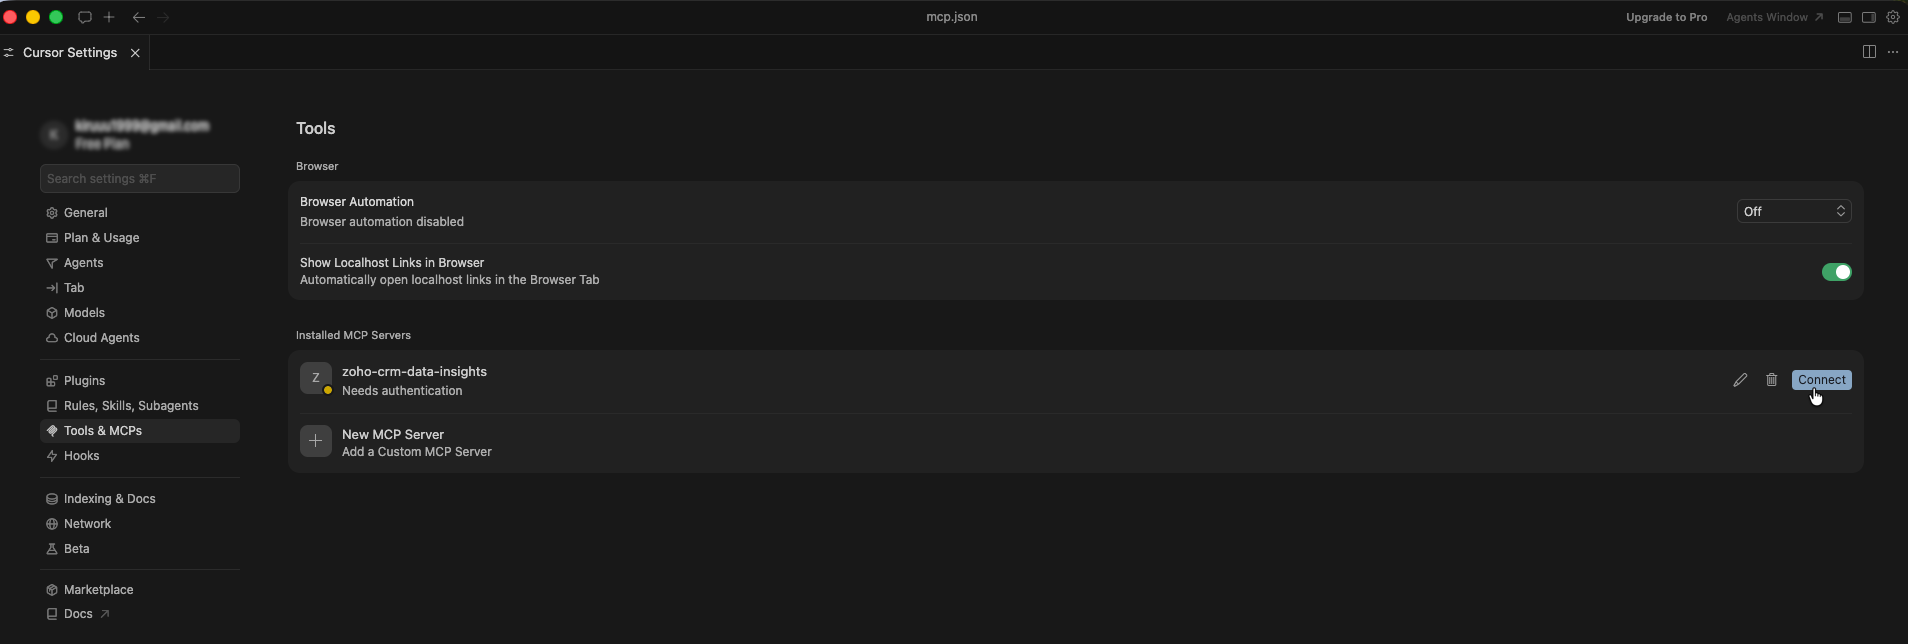
- Click Connect next to the Zoho CRM MCP server to authenticate your CRM organization.


