Verify custom domain of the customer portal
- Edit your app.
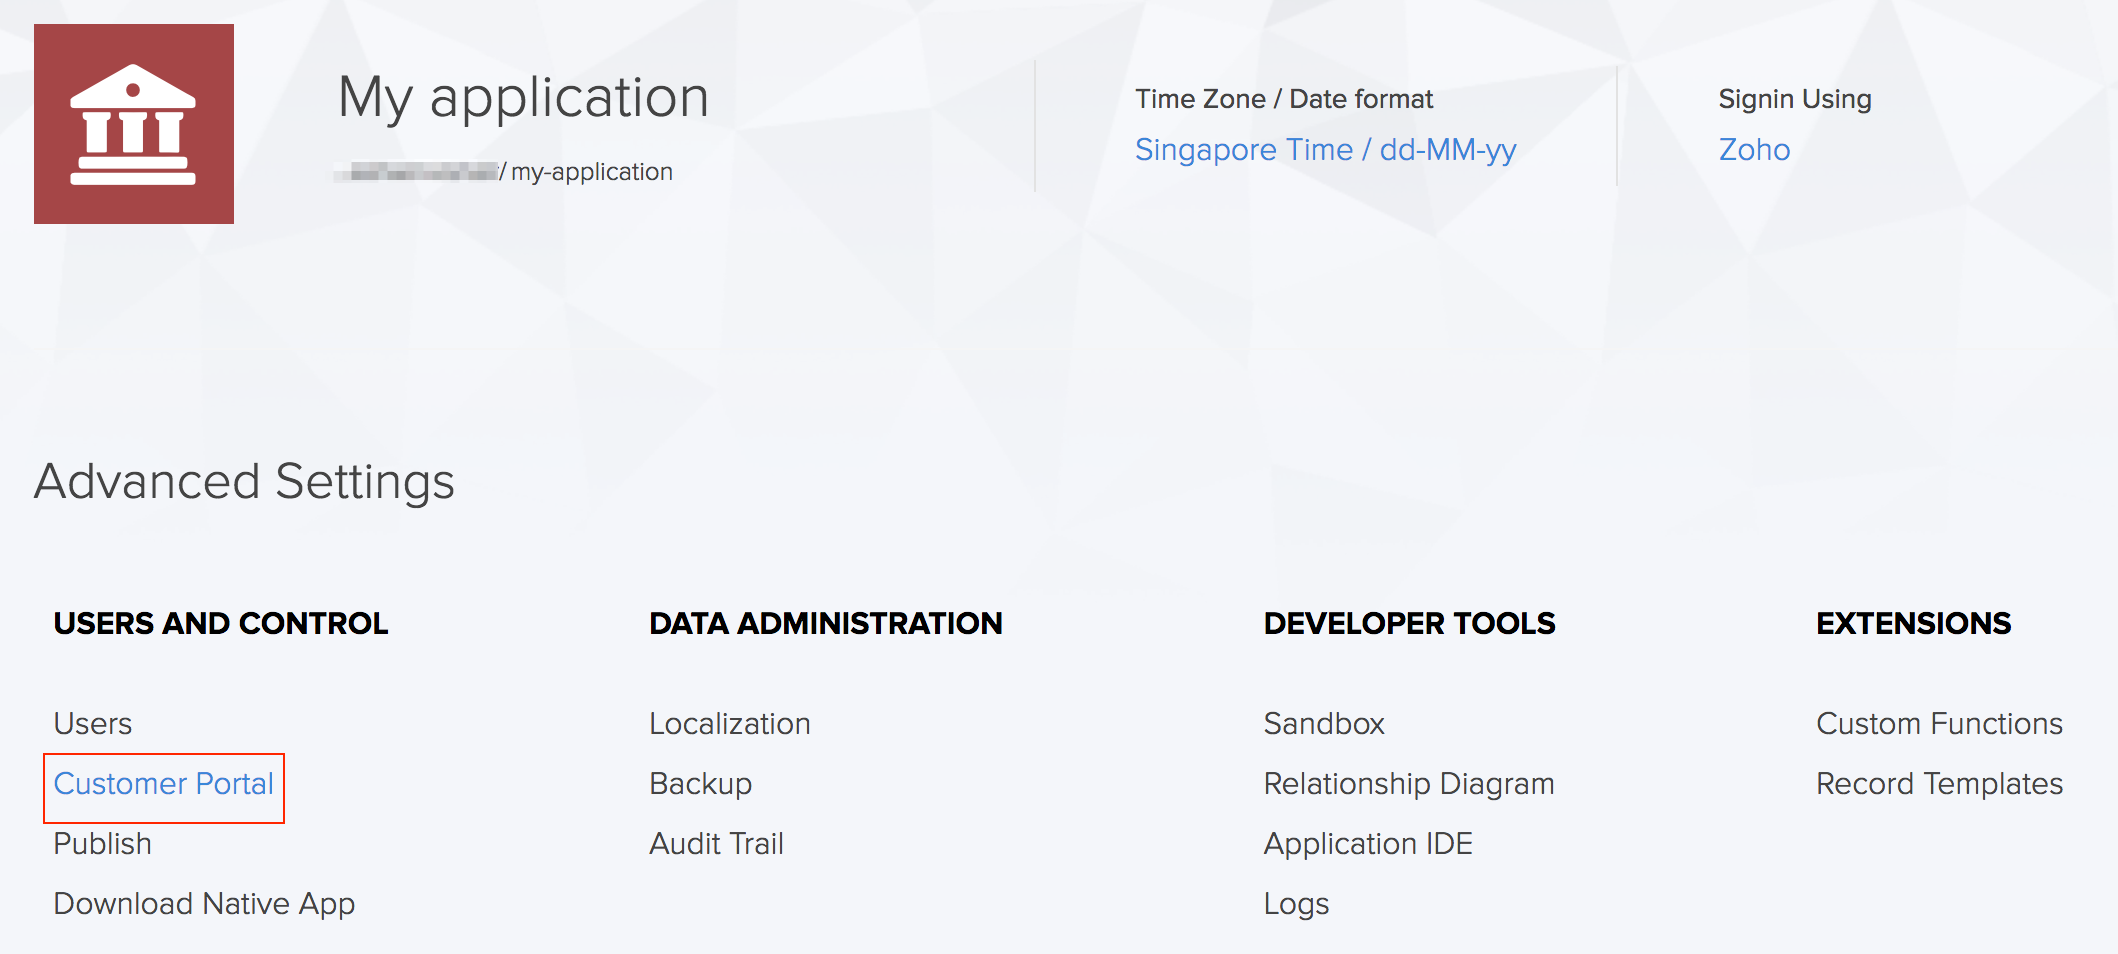
- Navigate to your app's Settings page.
Click Customer Portal under Users and Control section.
Enter a Custom Domain for your portal, as mentioned here. You'll see a message saying that your domain has not yet been verified.

Click the Verify Now button below your domain. The Domain Verification pane will slide in from the right.

Domain verification can be done through three methods:
- Add a CNAME (Canonical Name) record in the custom domain's DNS (Domain Name System), then verify it
- Add a TXT (Text) record in the custom domain's DNS, then verify it
- Add an HTML file in the custom domain's web server, then verify it
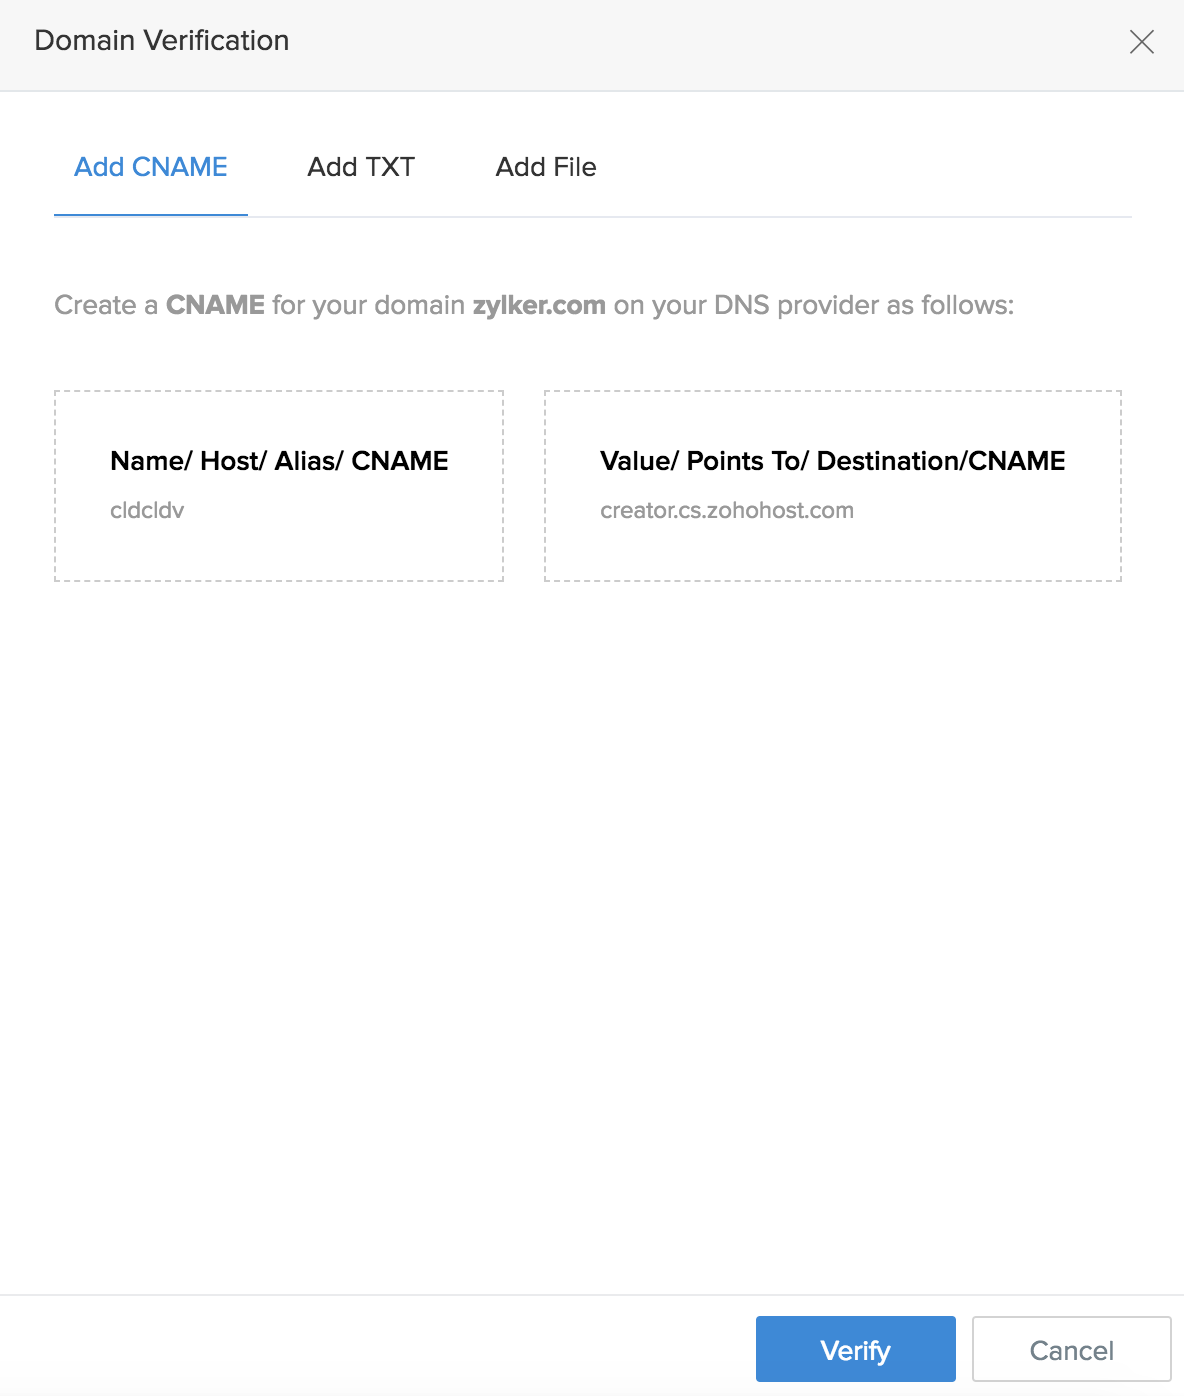


Verify domain via CNAME record
- Select Add CNAME in the Domain Verification pane.
- Access your domain's DNS in a new tab or window of your web browser. DNS records may be present in pages named "DNS Manager", "DNS Control Panel", or "Advanced DNS Editor".
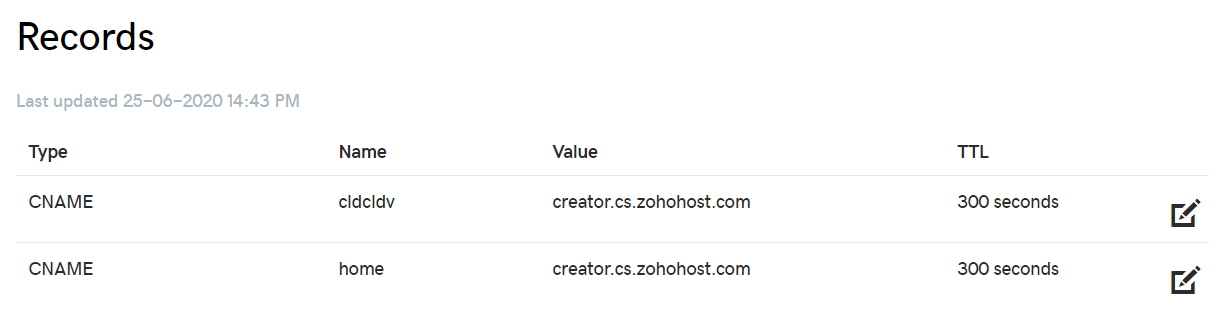
Add a DNS record of type CNAME for the subdomain. For example, assume that the custom domain is home.zylker.com. Now follow the actions given above in Step 9. Then add new CNAME record for the subdomain by giving the host name as Home and then copy paste the value shown under Value / Points To / Destination / CNAME in the Domain Verification pane.
- Next, add a DNS record of type CNAME:
- Copy the value shown under Name / Host / Alias / CNAME in the Domain Verification pane (cldcldv in the above screenshot), then paste it in the CNAME record.
Copy the value shown under Value / Points To / Destination / CNAME in the Domain Verification pane (creator.cs.zohohost.com in the screenshot in Step 6), then paste it in the CNAME record

Another CNAME Record should be added with the host name 'www' and point to creator.cs.zohohost.com.
Note: EU users must point their CNAME Records to creator.cs.zohohost.eu. Similarly, CN, IN, and AU users should use creator.cs.zohohost.com.cn, creator.cs.zohohost.in , and creator.cs.zohohost.com.au respectively.- Optionally, set the TTL (Time to Live) to 300 seconds or the minimum value that your domain registrar recommends
- Ensure that this CNAME is in effect in your domain's DNS.
- Switch back to the Domain Verification pane, then click Verify.


Upon a successful verification, the Domain Verification pane will close and you'll see a pop-up with the message Domain verified successfully.
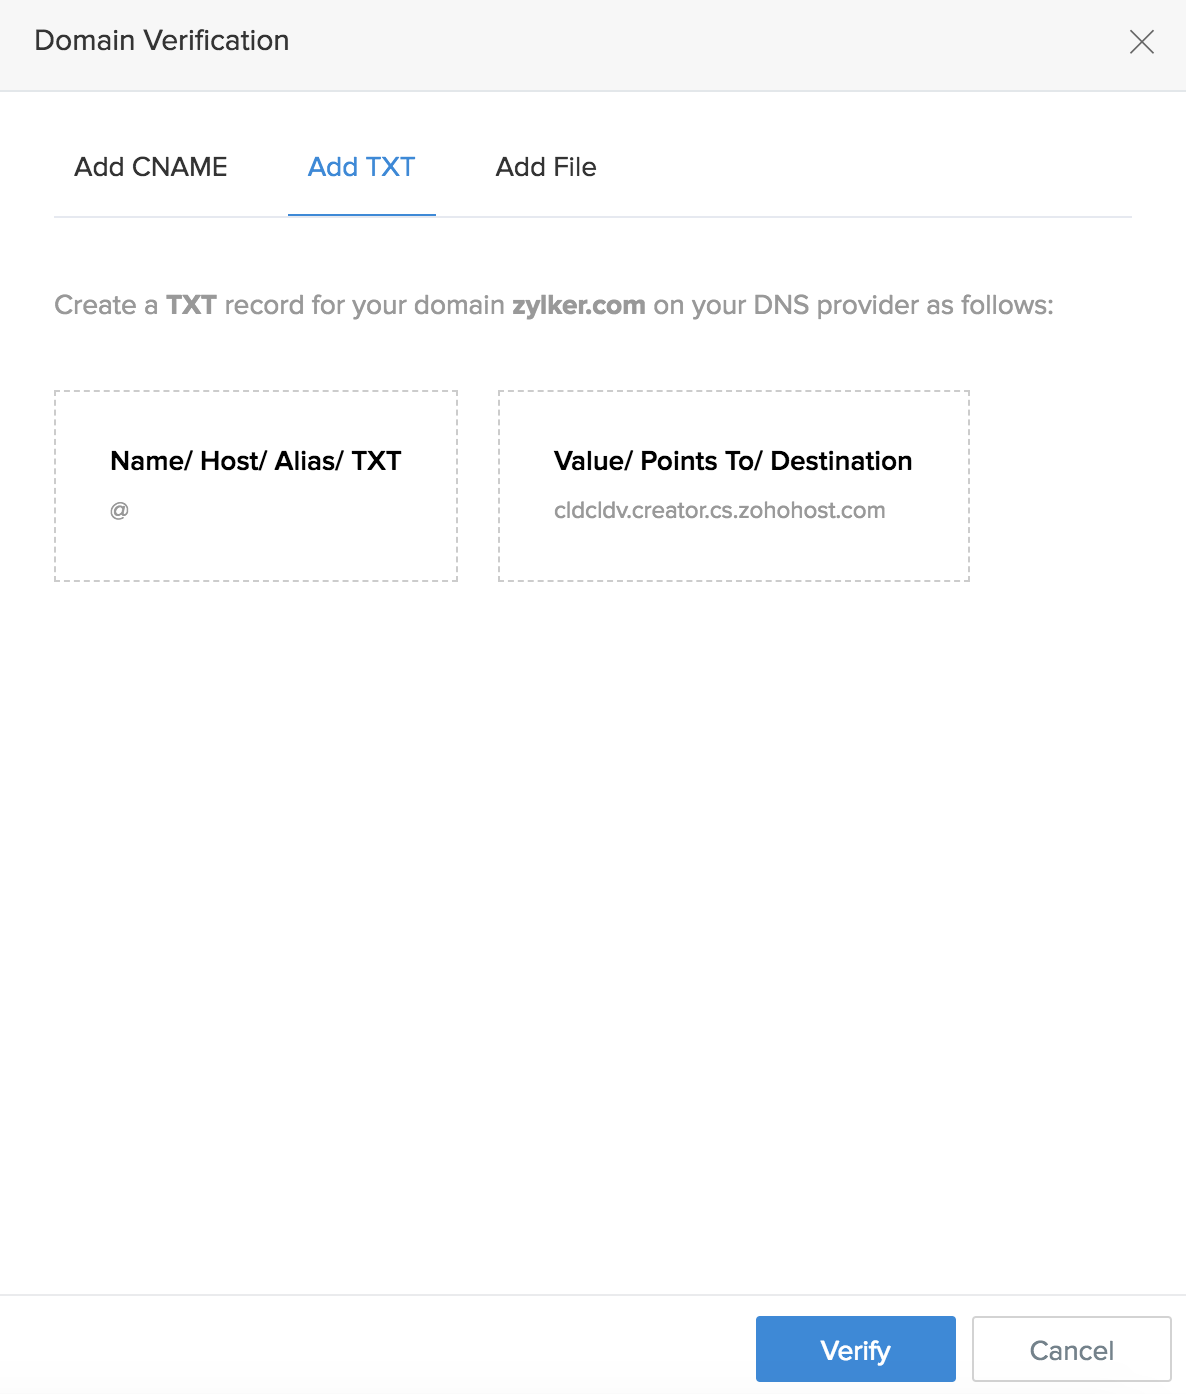
Verify domain via TXT record
- Select Add TXT in the Domain Verification pane.
- Access your domain's DNS in a new tab or window of your web browser. DNS records may be present in pages named "DNS Manager", "DNS Control Panel", or "Advanced DNS Editor".
- Add a DNS record of type TXT for the subdomain. For example, assume that the custom domain is home.zylker.com. Add new TXT record for the subdomain by giving the host name as home and paste the value shown under Value/Points To/Destination/TXT as its value.
Next, add a DNS record of type TXT:
- Copy the value shown under Name / Host / Alias / TXT in the Domain Verification pane (@ in the above screenshot), then paste it in the TXT record.
- Copy the value shown under Value / Points To / Destination in the Domain Verification pane (cldcldv.creator.cs.zohohost.com in the above screenshot), then paste it in the TXT record
- Optionally, set the TTL (Time to Live) to 300 seconds or the minimum value that your domain registrar recommends
- Ensure that this TXT is in effect in your domain's DNS.
- Switch back to the Domain Verification pane, then click Verify.

Upon a successful verification, the Domain Verification pane will close and you'll see a pop-up with the message Domain verified successfully.
Verify domain via HTML file
- Select Add TXT in the Domain Verification pane.
- Download the HTML Verification file by clicking the verifydomain.html. The content of the file will vary for each domain and is usually a unique string of numbers.
- Access your domain's web server in a new tab or window of your web browser.
- Create a folder named zcp in the web server's "root" folder.
- Upload the HTML file (that you downloaded in step 2) in the zcp folder.
- Confirm the HTML file by visiting http://<your_hostname>/zcp/verifydomain.html . You should be able to view the code.
Switch back to the Domain Verification pane, then click Verify.


Upon a successful verification, the Domain Verification pane will close and you'll see a pop-up with the message Domain verified successfully.