CardDAV
If you are someone who actively manages your contacts on a computer or mobile device, you might need “CardDAV.” More importantly, if you wanted your iOS or Windows Contacts to sync with your Zoho Contacts – and were confused when they didn’t– CardDAV is the solution.
Here is a step-by-step guide which will help you through the process of keeping your contacts in sync with your devices using your Zoho ID.
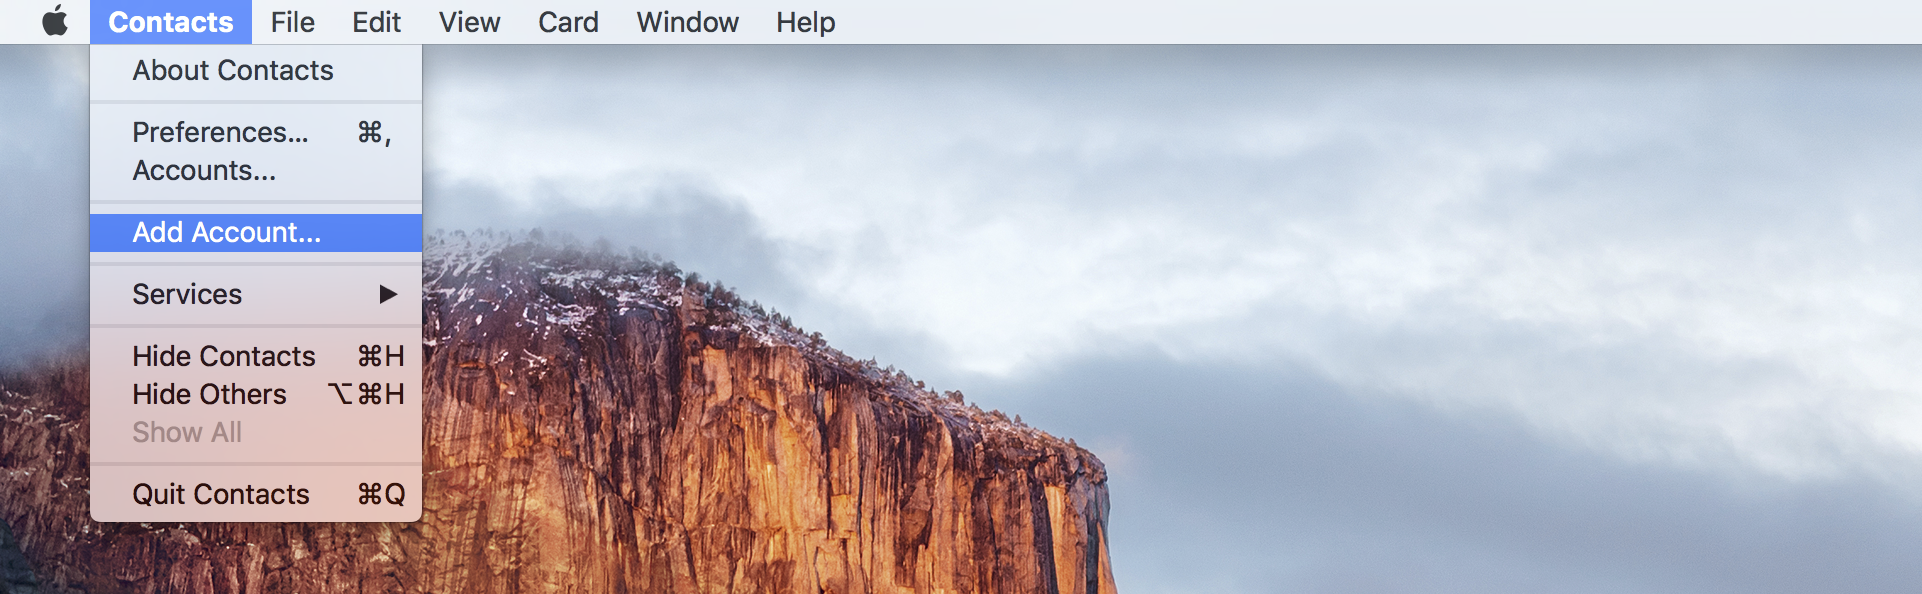
Navigate to the Contacts app from the Launchpad or the Finder.

Now, click on the Contacts link on the top left corner of your screen and then choose Add Account.
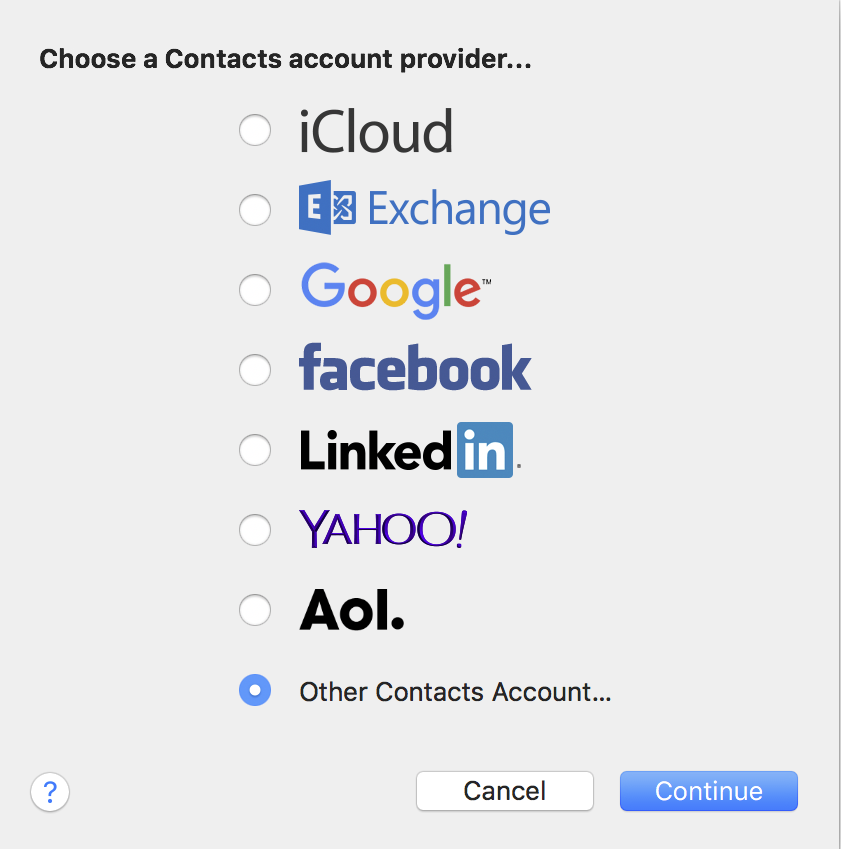
Select the “Other contacts account” option and click on “Continue”.
In the pop up which appears please enter the following details.
Account Type - Manual
Username - Zoho email ID
Password - Your Zoho Password. If TFA is enabled please generate an App specific password. (Learn more)
Server Address - contacts.zoho.com
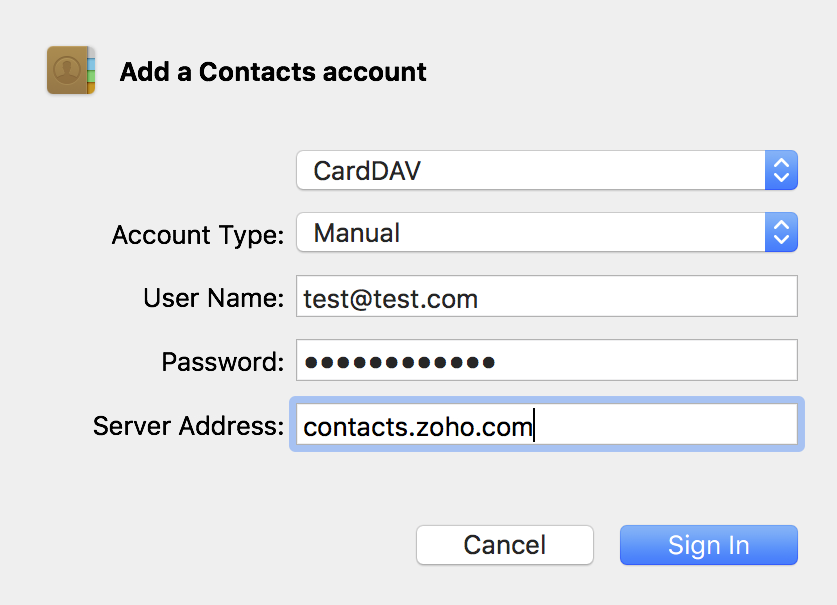
Then click on “Sign In”.
Your Zoho Contacts are now synced with your Mac.


To start using your CardDAV for your Windows device you need to install an email client.
You can use either Mozilla Thunderbird or eMClient.
To actually start using CardDAV on your Windows device, you will need to install the Mozilla Thunderbird software.
Download Mozilla Thunderbird from https://www.mozilla.org/en-US/thunderbird/
Once the file is downloaded, install the software on your device using the installation wizard.
After installation, open the software and configure your account as needed.
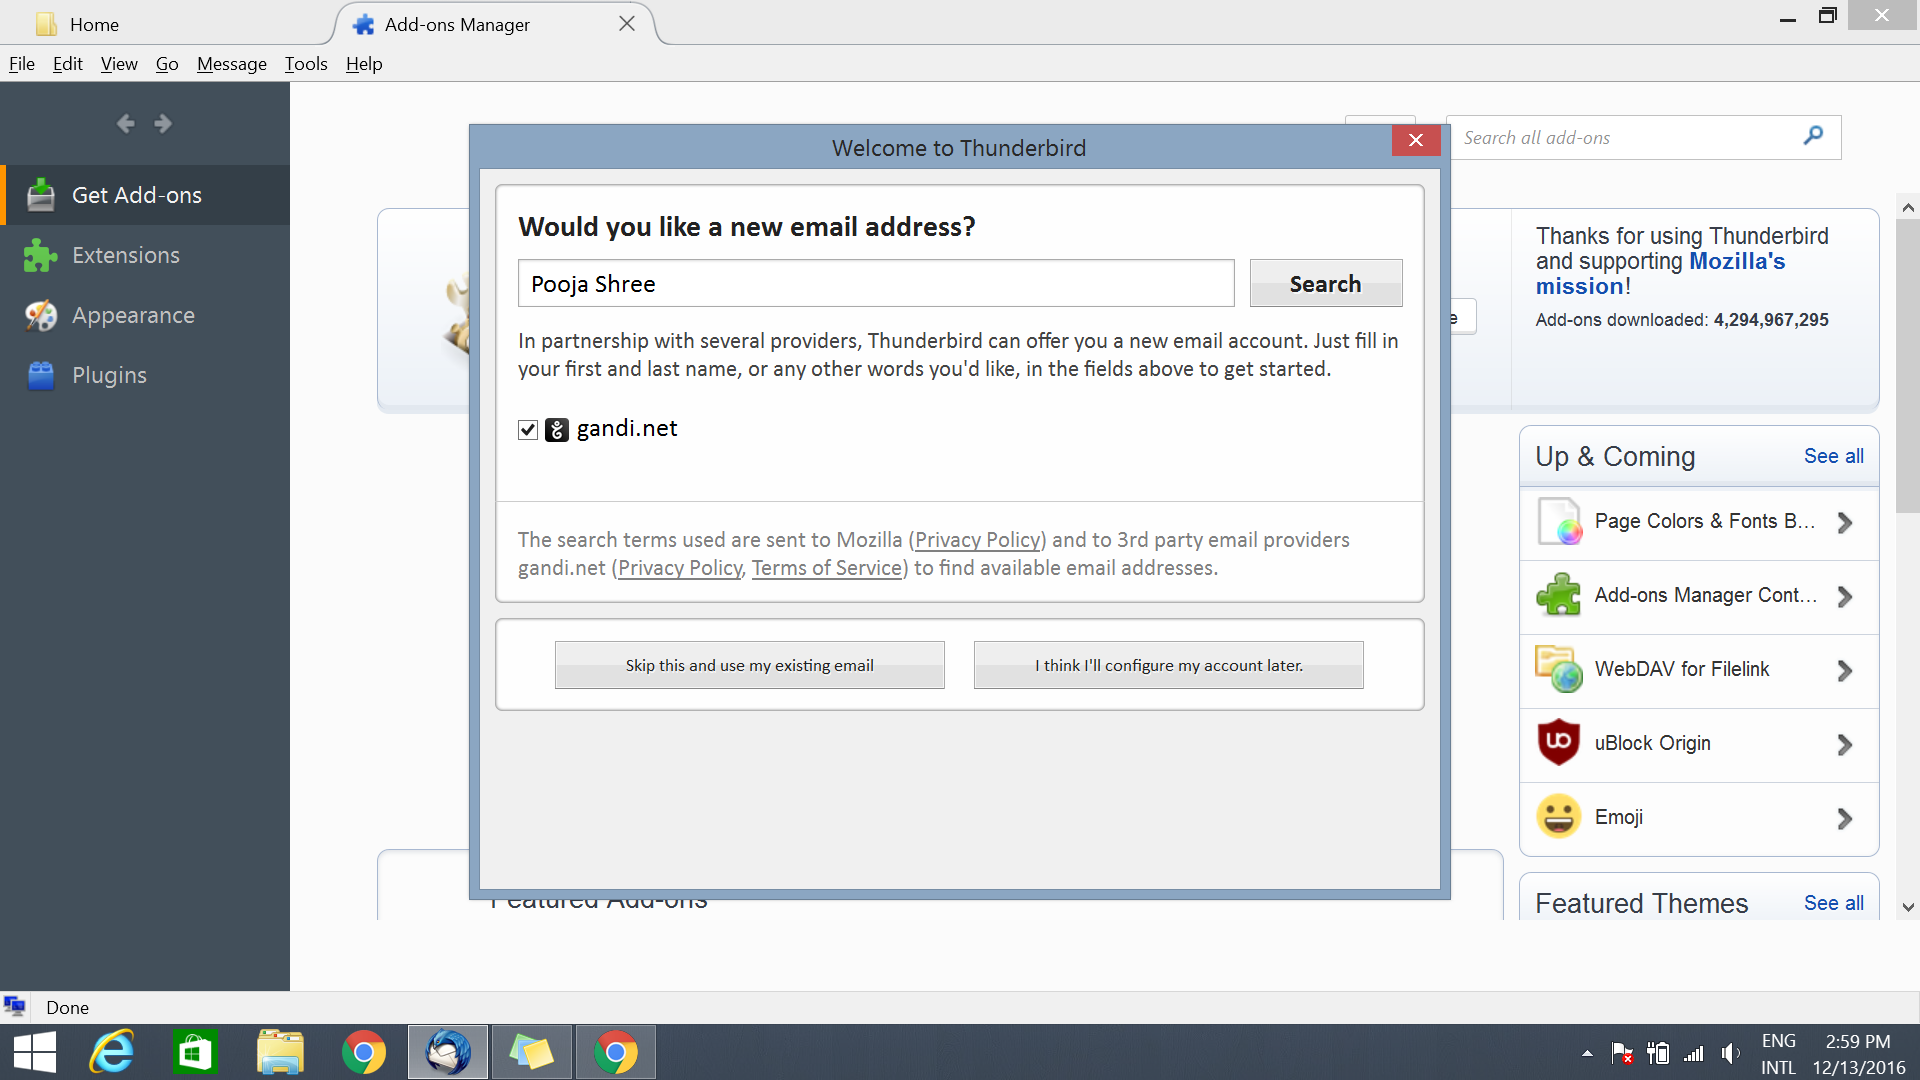
To skip configuration, for now, click on "I think I'll configure my account later" button.
You will need to download an add-on named "Inverse Sogo Connector" for Mozilla Thunderbird. Download from here.
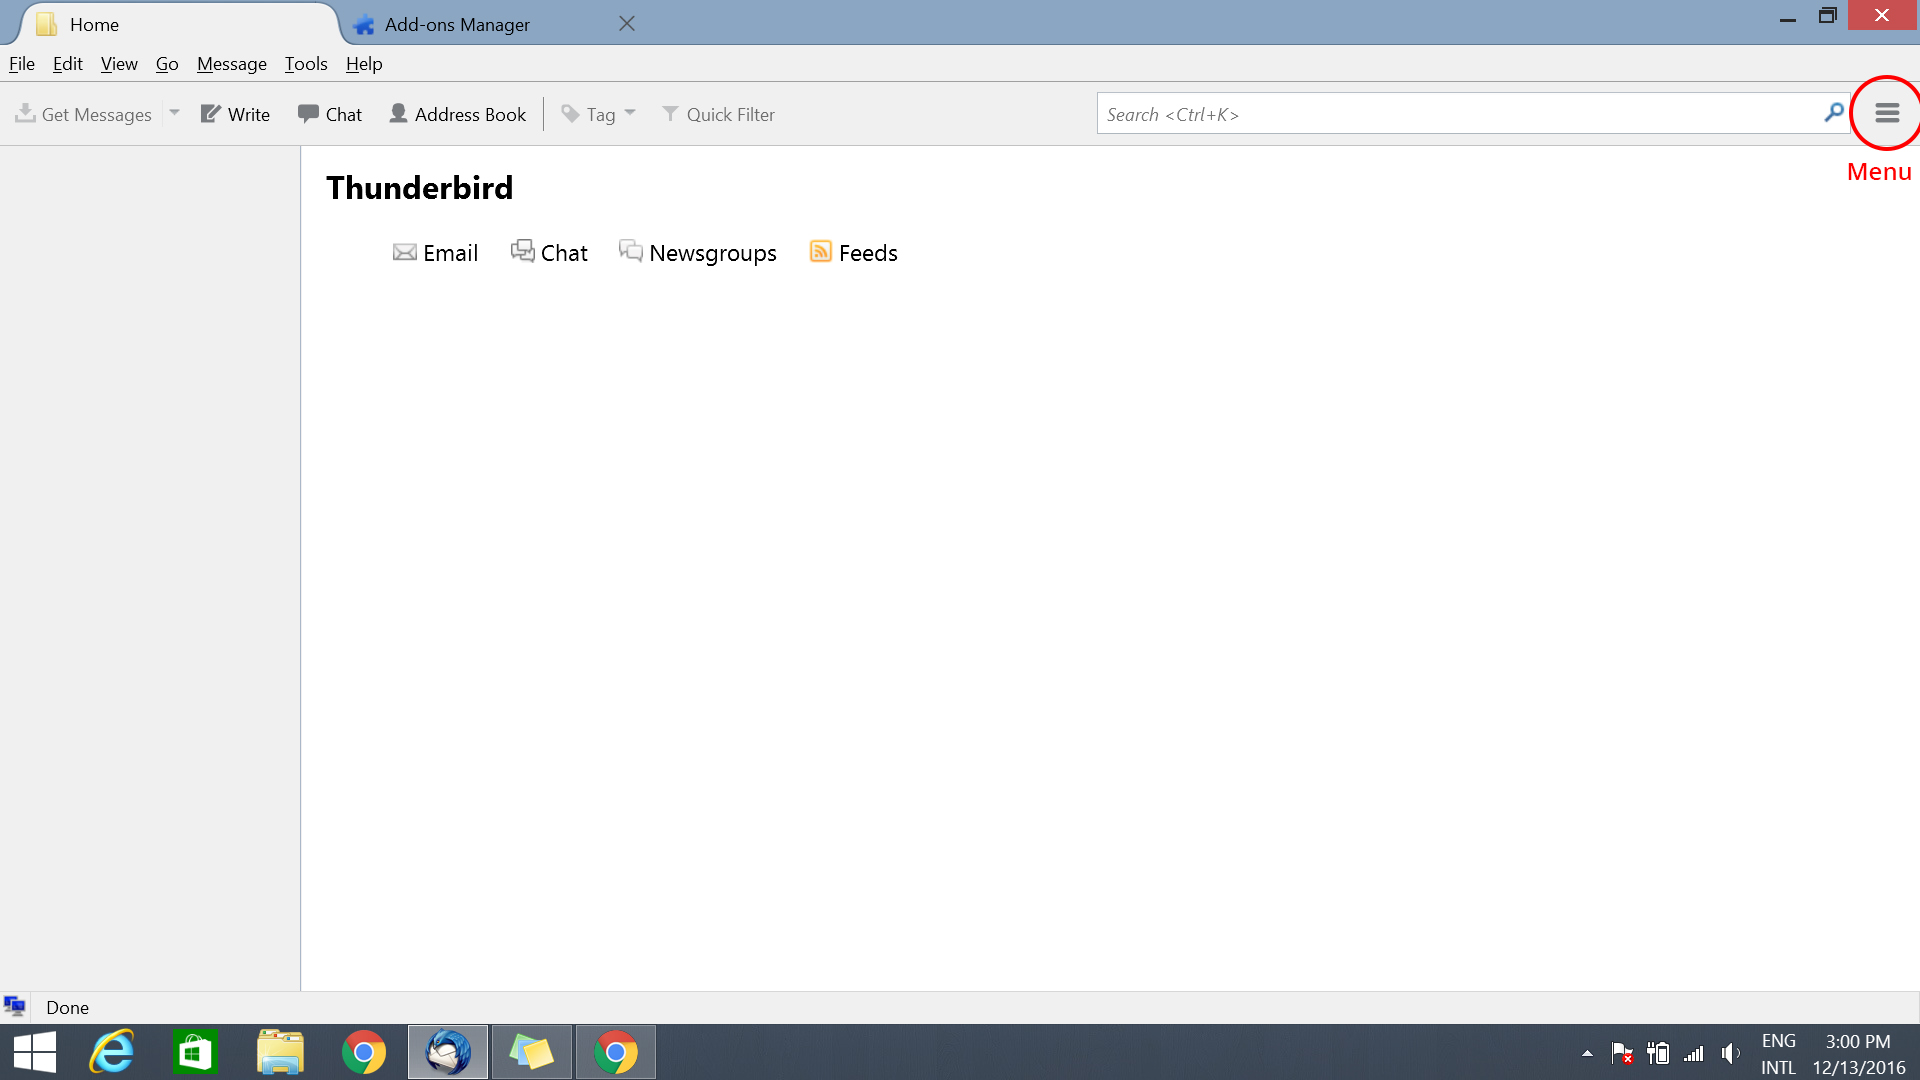
Click on the menu icon shown on the top right corner.
In the options shown, click on Add-ons. A new window will open.
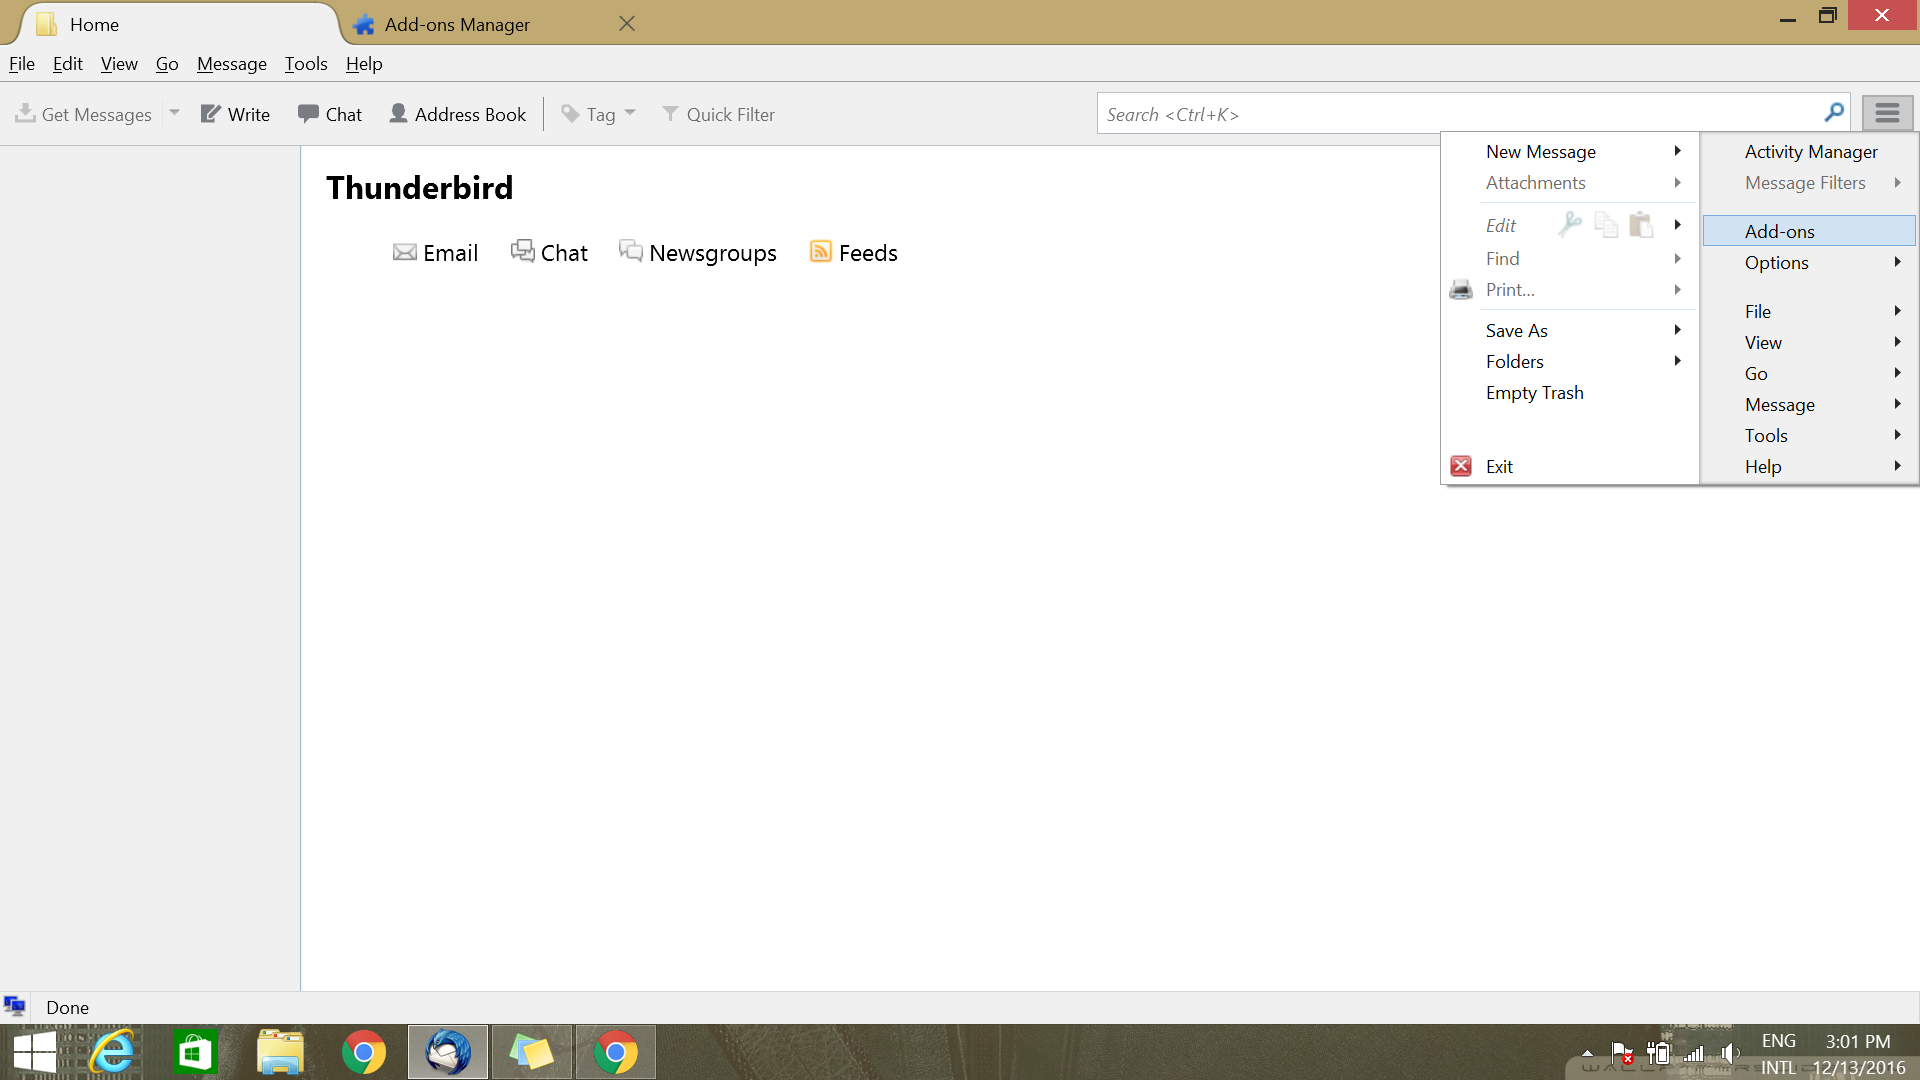
In the Add-ons Manager, click on settings drop down and click on Install Add-on From File.
In the "Select add-on to install" dialog box, choose the downloaded SOGo Connector file.
The Add-on will now be integrated with your Thunderbird client. You will have to restart the client now.
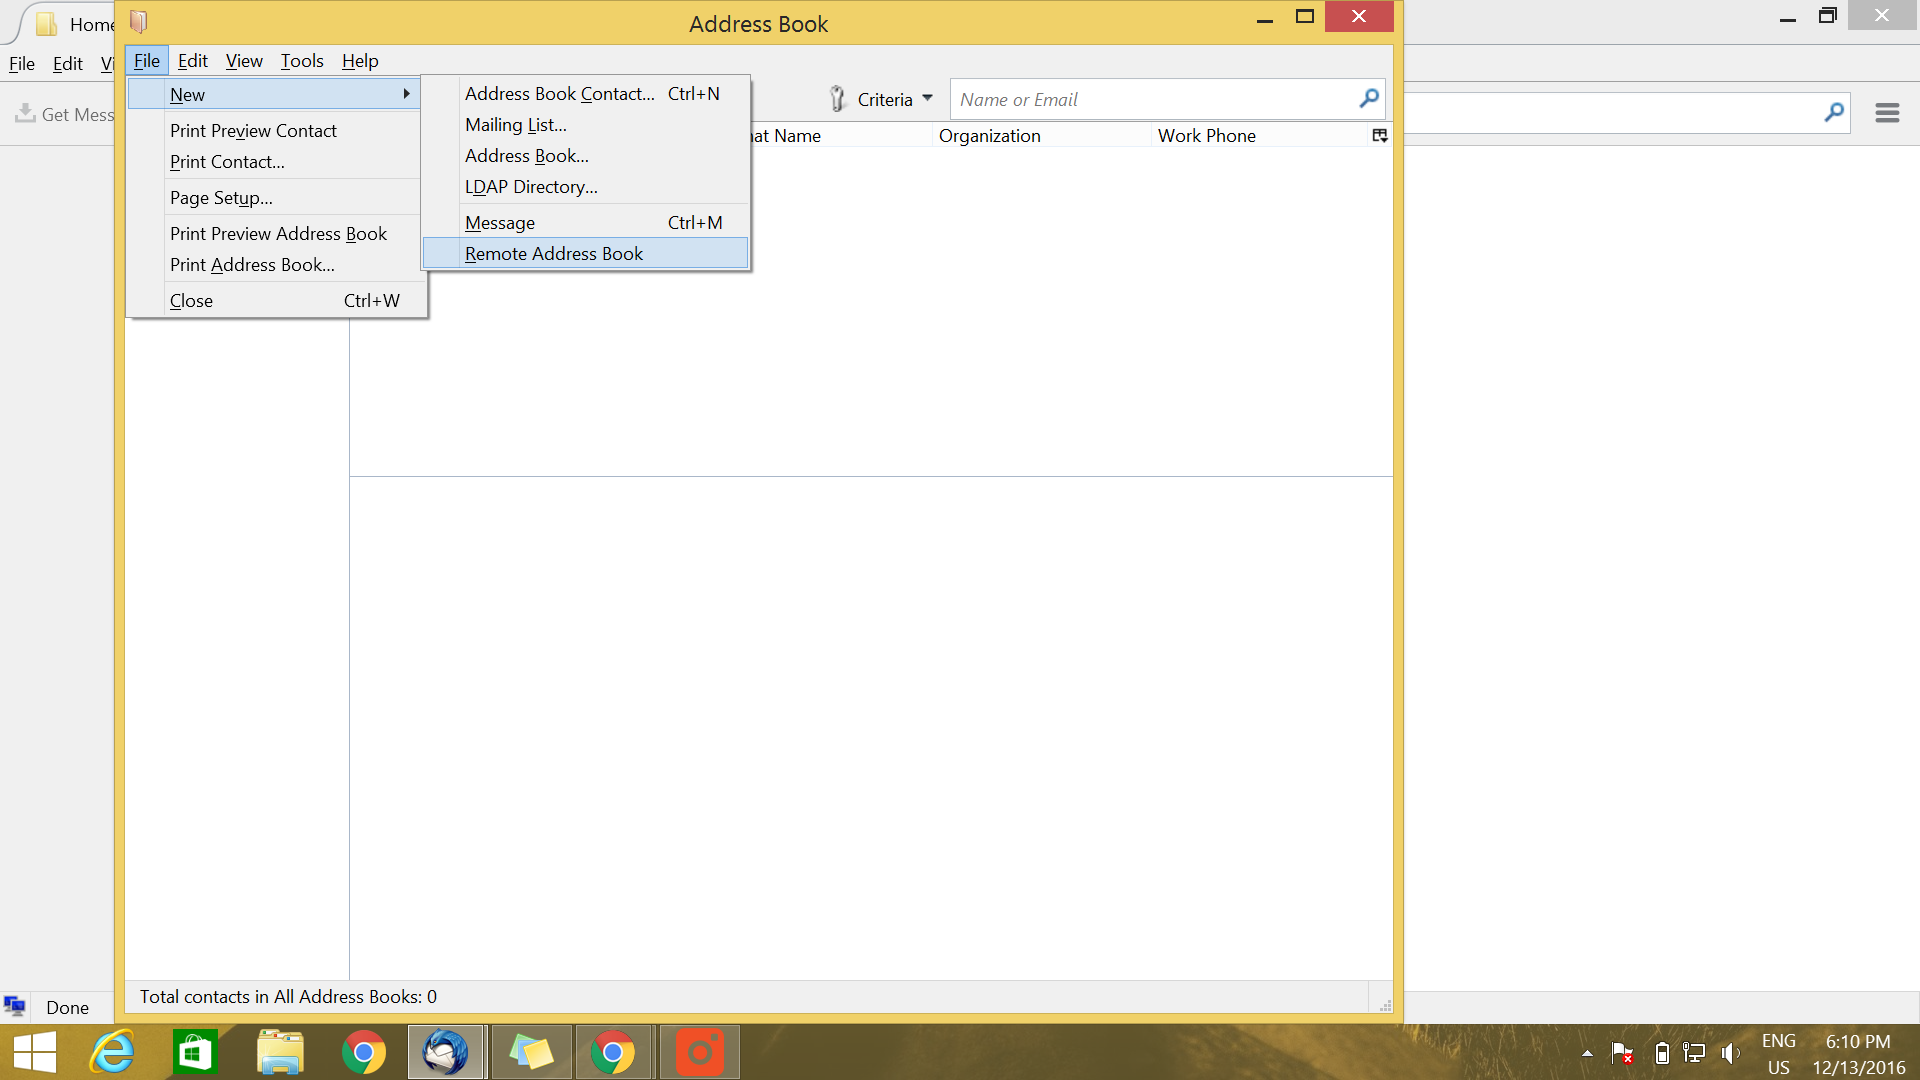
Now open Thunderbird and click on Address Book.

In the new window which opens, Go to File -> New -> Remote Address Book.
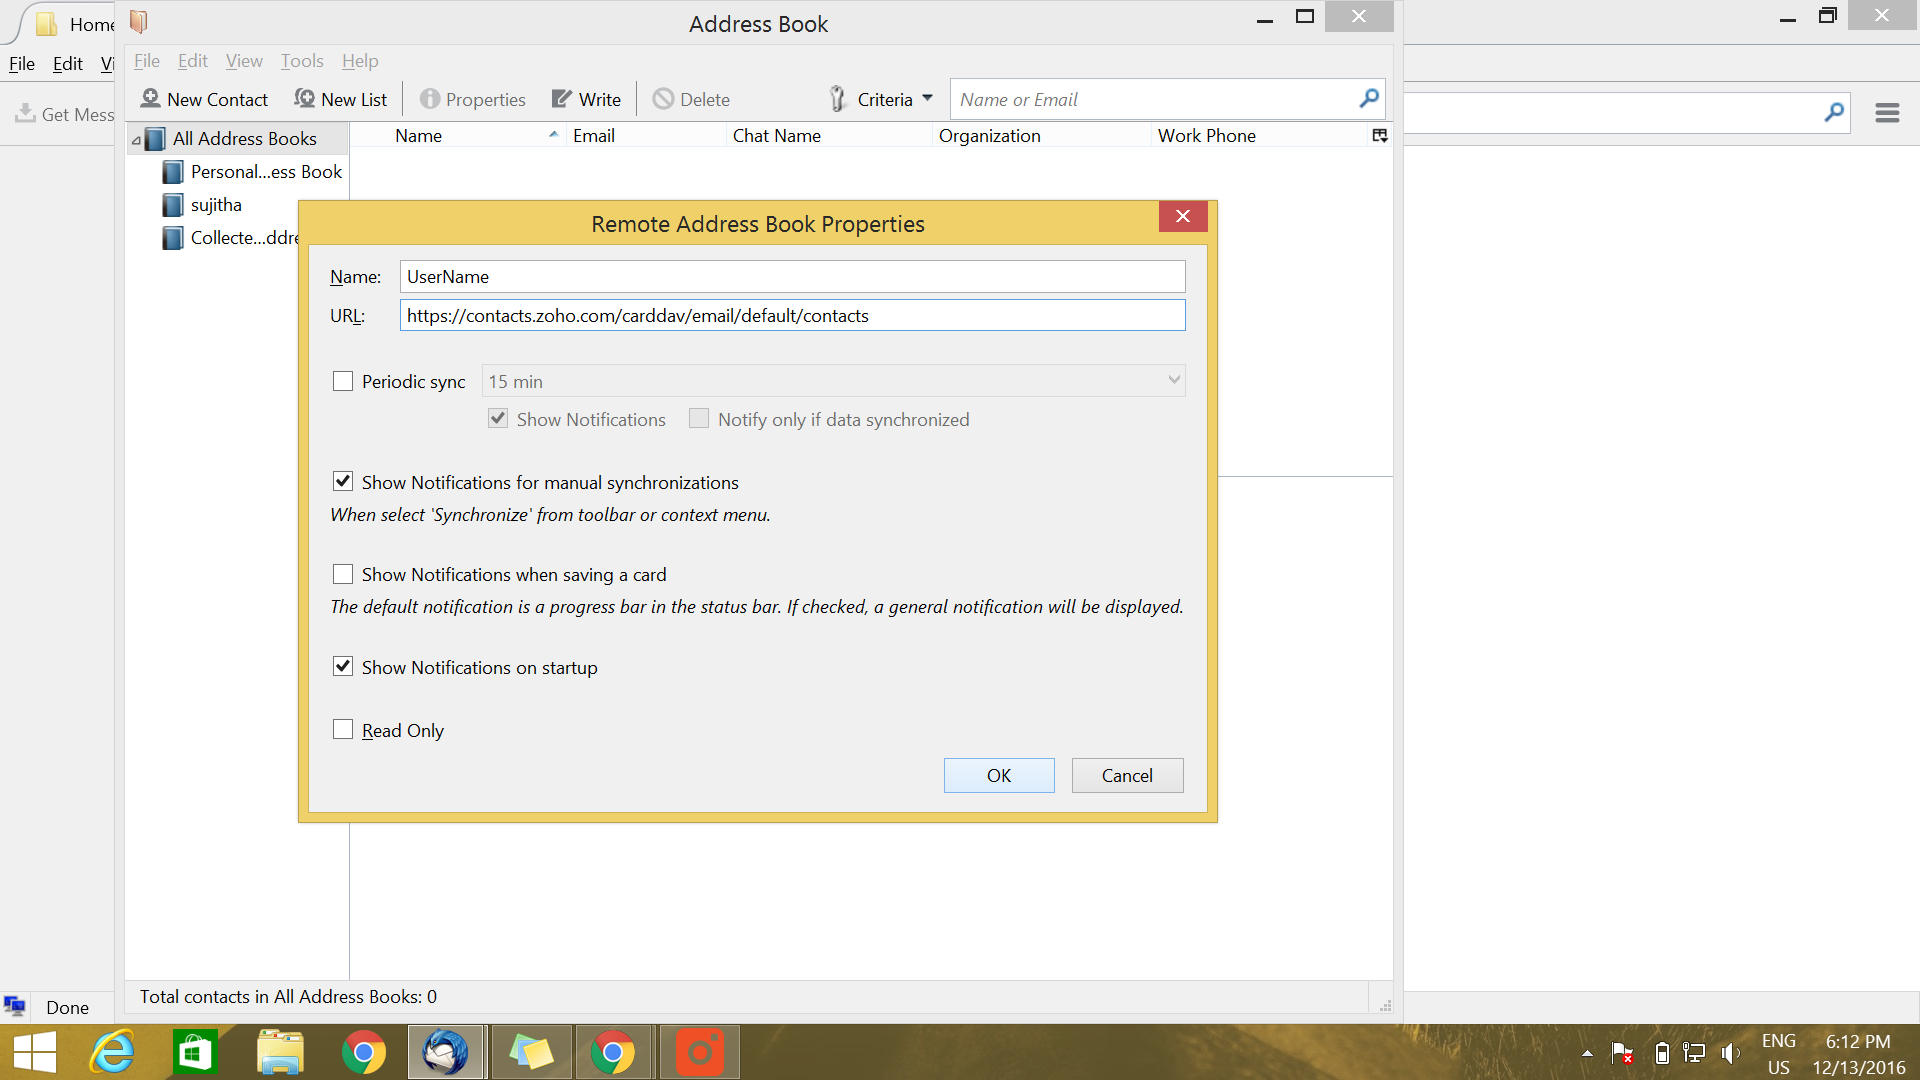
You can now see a window titled “Remote Address Book” properties.
Enter the following details:
Name - Username
URL - https://contacts.zoho.com/carddav/email id/default/contacts
Note - Please replace "email id" with your Zoho email address in the above link.
Click OK.
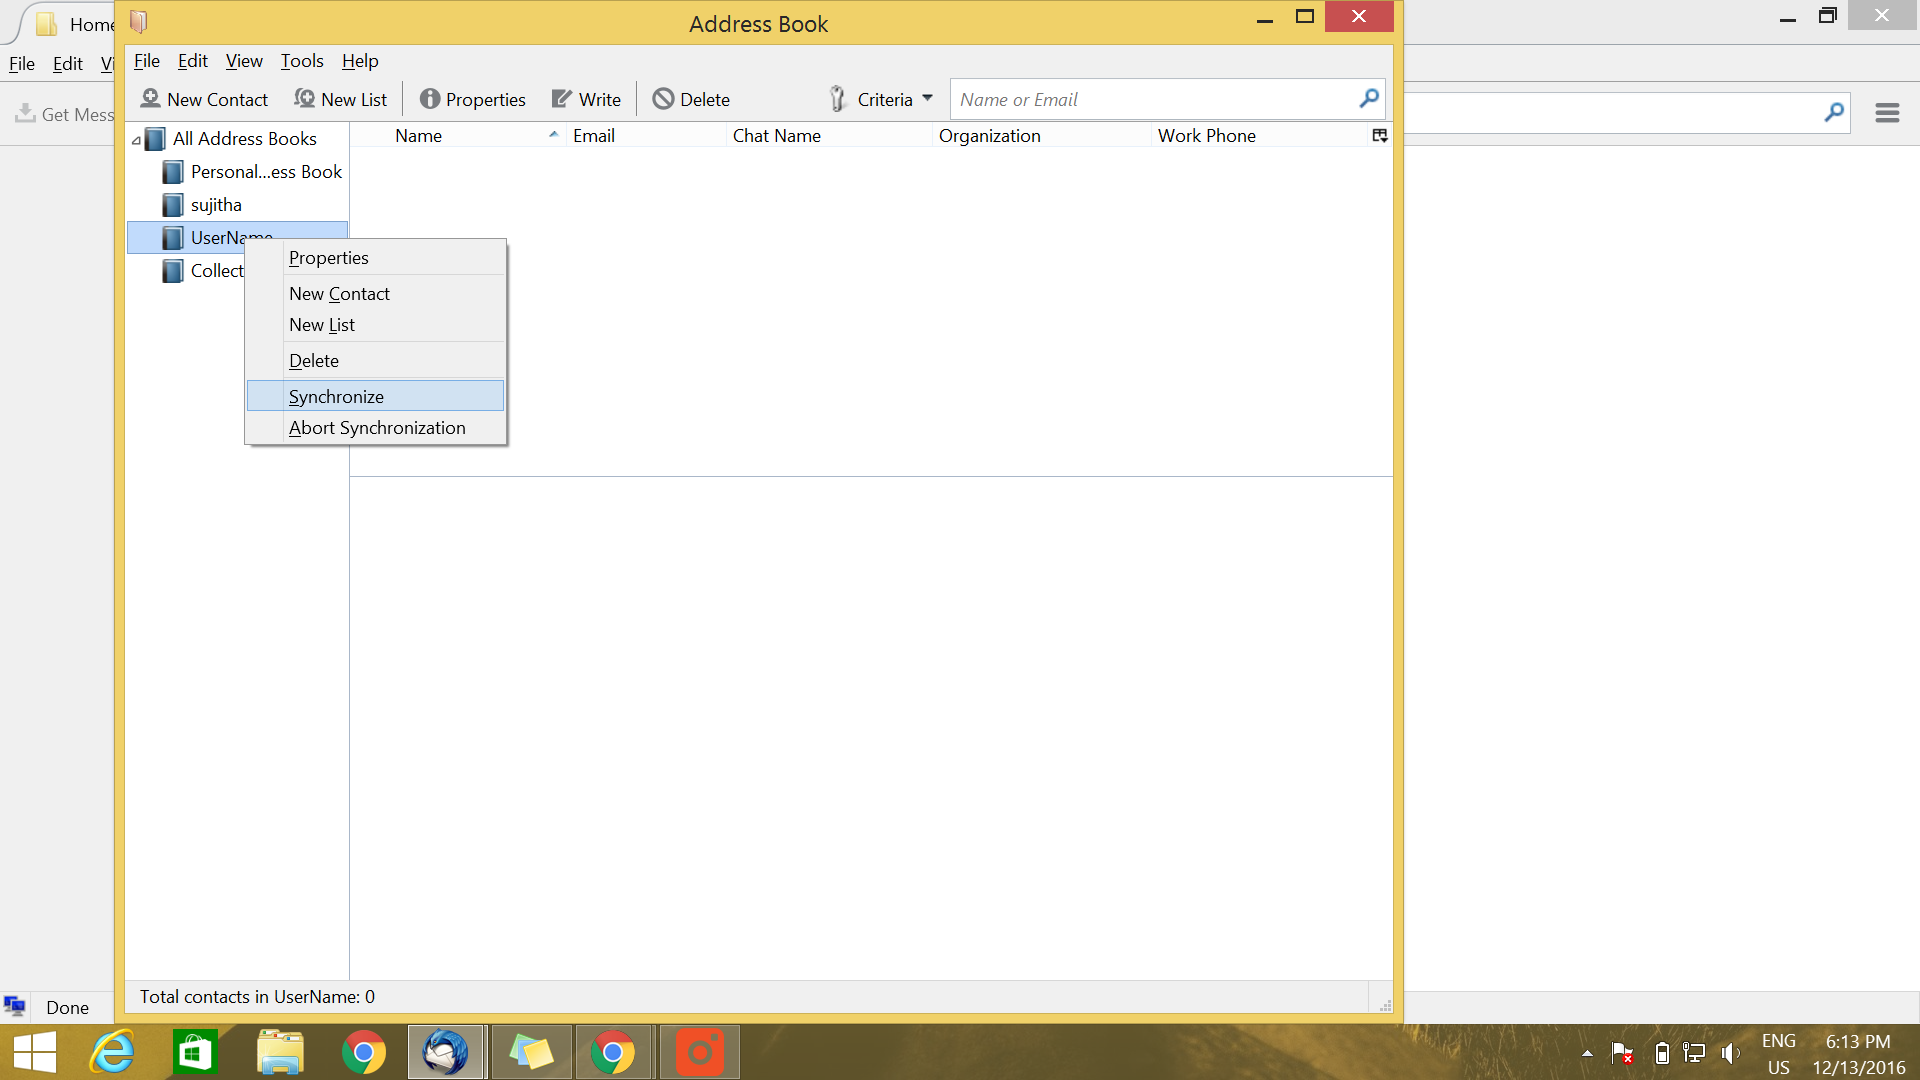
Now, Right click on your username which is mentioned in the left panel
In the options displayed, choose “Synchronize” [You may have to wait some time for the option Synchronize to be clickable]
Enter your Zoho email address and password. If TFA is enabled, then enter your “Application Specific Password” instead of the normal password (Learn More)
Your Zoho Contacts are now synchronized with the Thunderbird Client.


- Download eMClient from http://www.emclient.com/download
- A file named “setup.msi” will be downloaded. Open this file and start running the wizard
- Read the End User Agreement and click on Agree. Then click Install to start the installation of the client
- Once the installation is completed, you can choose a theme of your choice and then setup your account
- In the screen shown below, click on the Contacts tab
- Then click on CardDAV option in the bottom right corner
- You will now have to enter the server information. Copy paste this URL (https://contacts.zoho.com/carddav) in the Accounts URL Text box.
- Then enter your Zoho Username and Password
Note: If you have TFA Setup for your account then you will have to enter an app specific password. (What's that?)
- After this, you can enter your Account Name and then click Finish
- Your Zoho Account Setup with eM Client is now completed
- Now open your client and click on the Contacts Option in the left column
- Your Zoho Contacts will be synced
CardDAV Setup with Android App:
Install the app(https://play.google.com/store/apps/details?id=org.dmfs.carddav.sync) in your android mobile and follow the steps given below for configuring CardDav.
- Open the app named CardDAV-Sync free.
- Choose the CardDAV option.
- Add your Zoho Account details.
- You will now have to enter the server information. Copy paste this URL (https://contacts.zoho.com/carddav) in the Accounts URL Textbox.
- Then enter your Zoho Username and Password.
Note: If you have TFA Setup for your account then you will have to enter an app specific password. (What's that?)
- Click Next and then Finish.
- Now the contacts from your Zoho account will be synced to your mobile device
- Once these steps are completed, you can view your Zoho Contacts in the Android Contacts App and you can call them if the number exists.