

Layout Rules for Custom Modules
With layout rules, you can tailor a custom module form based on the values users enter. You can show or hide fields, enable or disable them, and make fields mandatory so users see only the information relevant to the record they are creating or editing.
Scenario: Zylker uses a custom module called Service Requests to track issues raised by customers after placing orders on its online store. Some requests are about damaged products, while others are about delayed deliveries. For damaged product requests, the support team needs fields such as Product Condition and Replacement Required. For delivery-related requests, they need fields such as Courier Partner and Tracking Number. Bailey, Zylker’s support manager, creates layout rules so the form changes based on the Request Type selected by the user. As a result, the team sees only the fields required for that specific service request and can capture the right information faster.
Note: This feature is available only for certain plans of Zoho Commerce. Visit our pricing page to check if it is available in your current plan.
Create a Layout Rule
You can create a layout rule for a custom module by defining conditions and associating layout actions. Here’s how:
- Go to Settings in the top right corner of the page.
- Select the required custom module under Custom Modules.
- Go to the Rules tab.
- Select Layout Rules.
- Click + New Layout Rule in the top right corner.
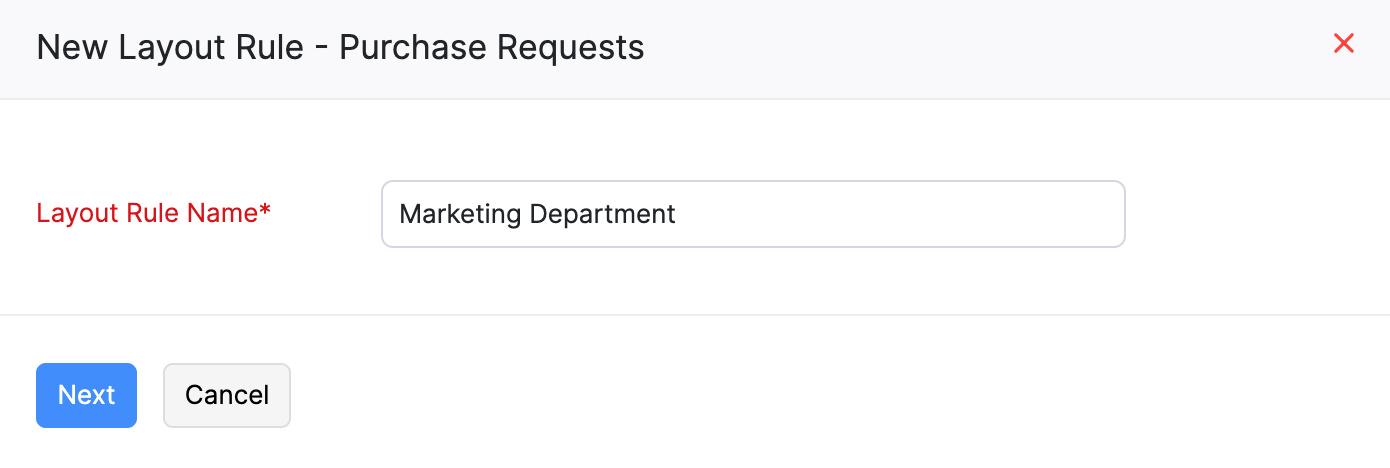
- Enter a Layout Rule Name.
- Click Next.
You will be redirected to the layout rule configuration page where you can define conditions and configure actions.
Define Conditions
A condition determines when layout actions take effect. Each condition consists of one or more criteria based on the fields in your custom module.
- Click New Condition on the layout rule configuration page.
- In the side pane that opens, select a field from the dropdown.
- Select a comparator such as is, isn’t, is empty, or is not empty.
- Select or enter a value for the condition.
- Click Done.
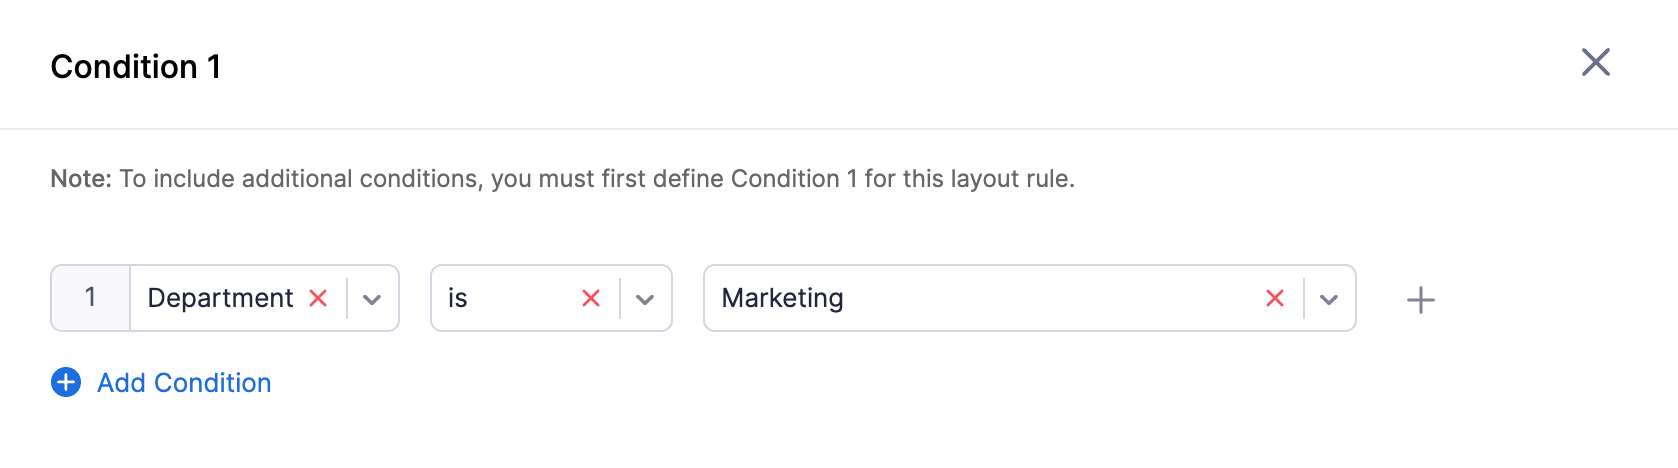
The condition will now appear in the When section of the layout rule.
Note: You must define the first condition before you can add additional conditions.
To add more criteria within the same condition:
- Click Add Criteria in the condition side pane.
- Configure the additional criteria.
To add more conditions for the same layout rule:
- Click New Condition.
- Repeat the same steps.
Configure Layout Actions
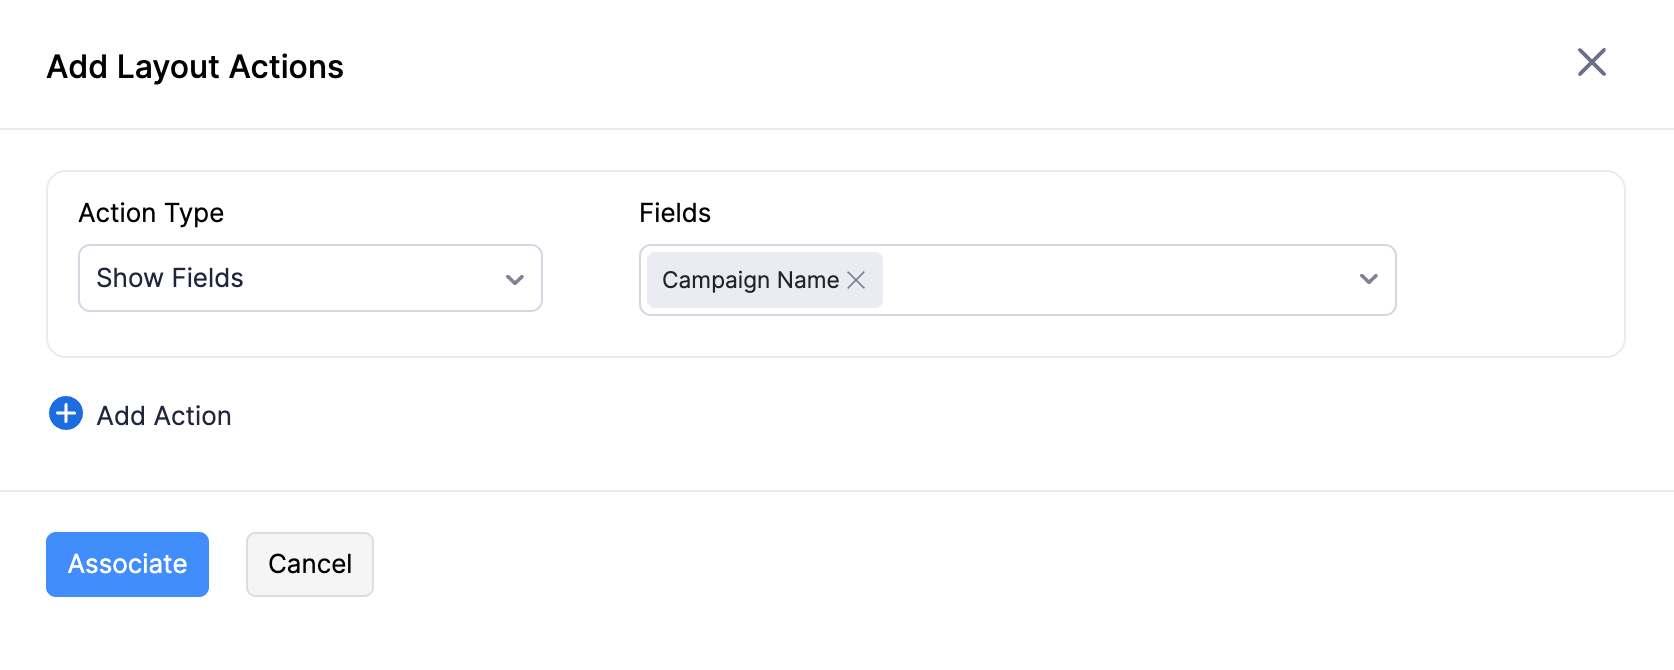
After defining a condition, you can associate layout actions that apply when the condition is met.
- Click Layout Actions next to the True label under the condition.
- In the side pane that opens, select an Action Type from the dropdown.
| Action Type | Description |
|---|---|
| Show Fields | Shows selected fields when the condition is met. If the condition is not met, those fields are hidden. |
| Enable Fields | Enables selected fields when the condition is met so users can edit them. If the condition is not met, those fields stay disabled. |
| Set Field Value | Automatically sets a specific value for a field when the condition is met. |
| Set Field as Mandatory | Makes one or more fields mandatory when the condition is met. |
- Based on the selected action type:
- For Show Fields, Enable Fields, or Set Field as Mandatory, select the required fields from the multi-select Fields dropdown.
- For Set Field Value, select a Field from the dropdown and enter or select the Value to be set.
- To add more actions, click Add Action and repeat the steps above.
- Click Associate.
- Click Save on the layout rule configuration page.
Note: You can associate multiple actions of different types within the same condition. For example, you can show a field and make another field mandatory when the same condition is met.
Edit a Layout Rule
You can modify the conditions and actions of a layout rule. Here’s how:
- Go to Settings in the top right corner of the page.
- Select the required custom module under Custom Modules.
- Go to the Rules tab.
- Select Layout Rules.
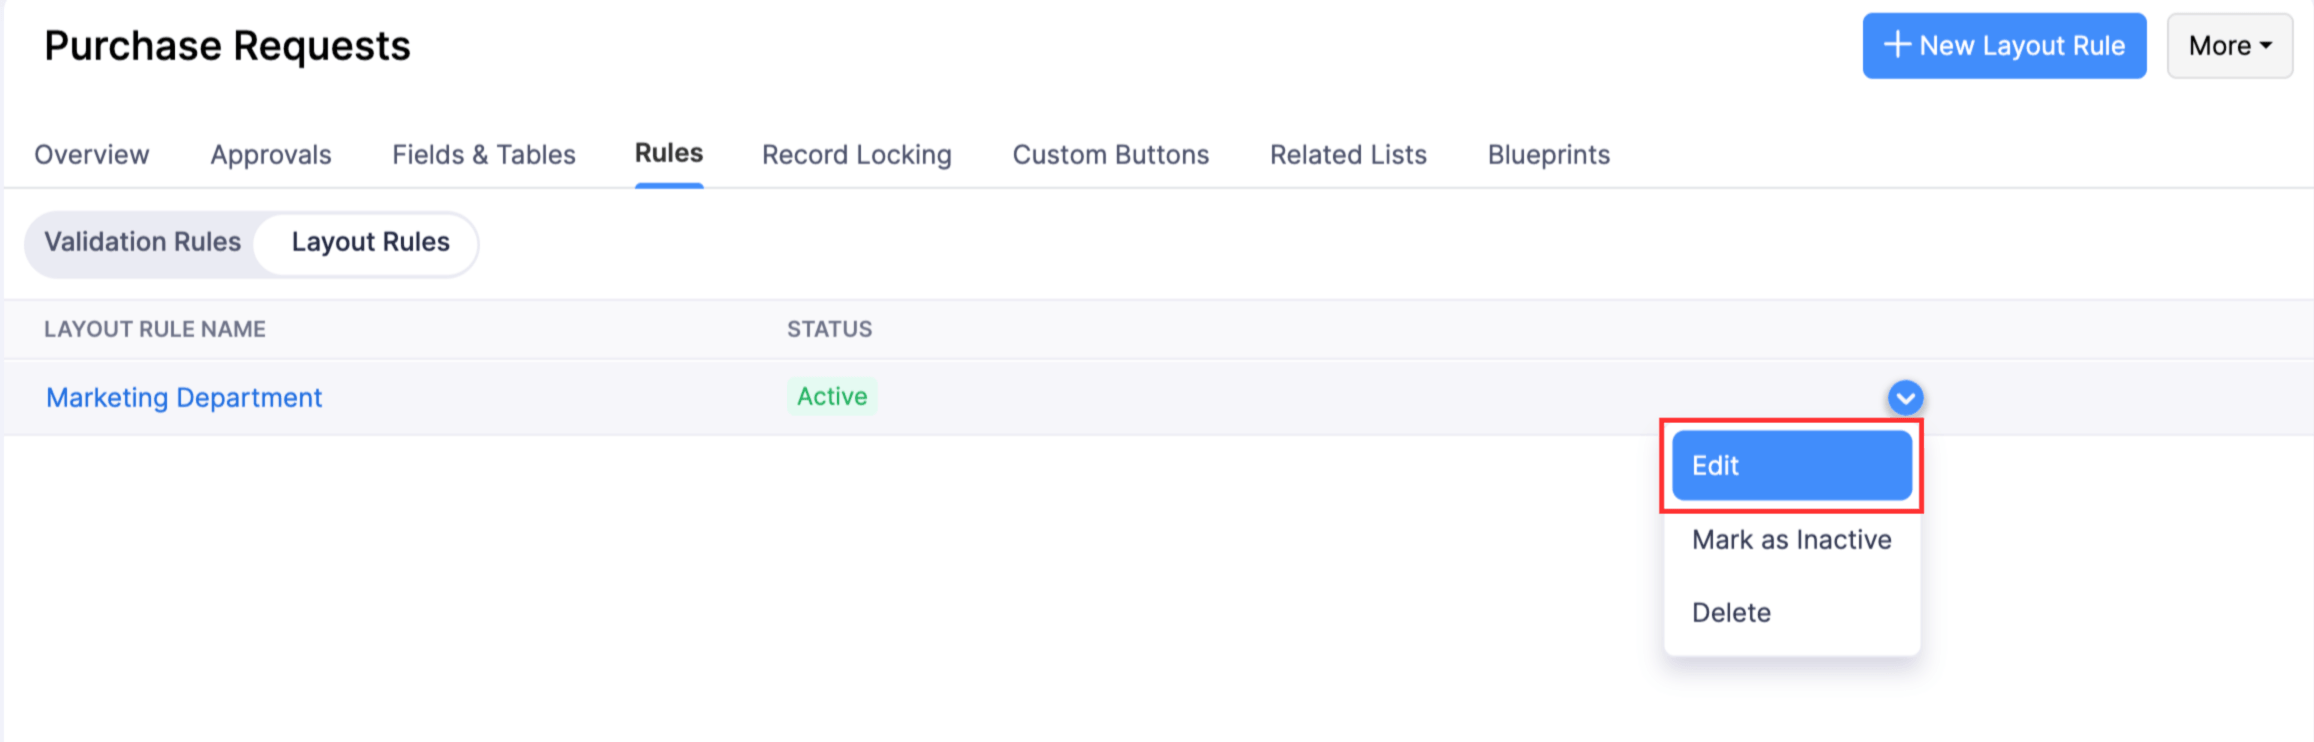
- Click the layout rule name you want to edit. Alternatively, click the More icon next to the rule and select Edit.
- Make the necessary changes to the conditions or actions.
- Click Save.
To rename the layout rule:
- Click Edit Layout Rule Details on the layout rule configuration page.
- Update the Layout Rule Name.
- Click Save.
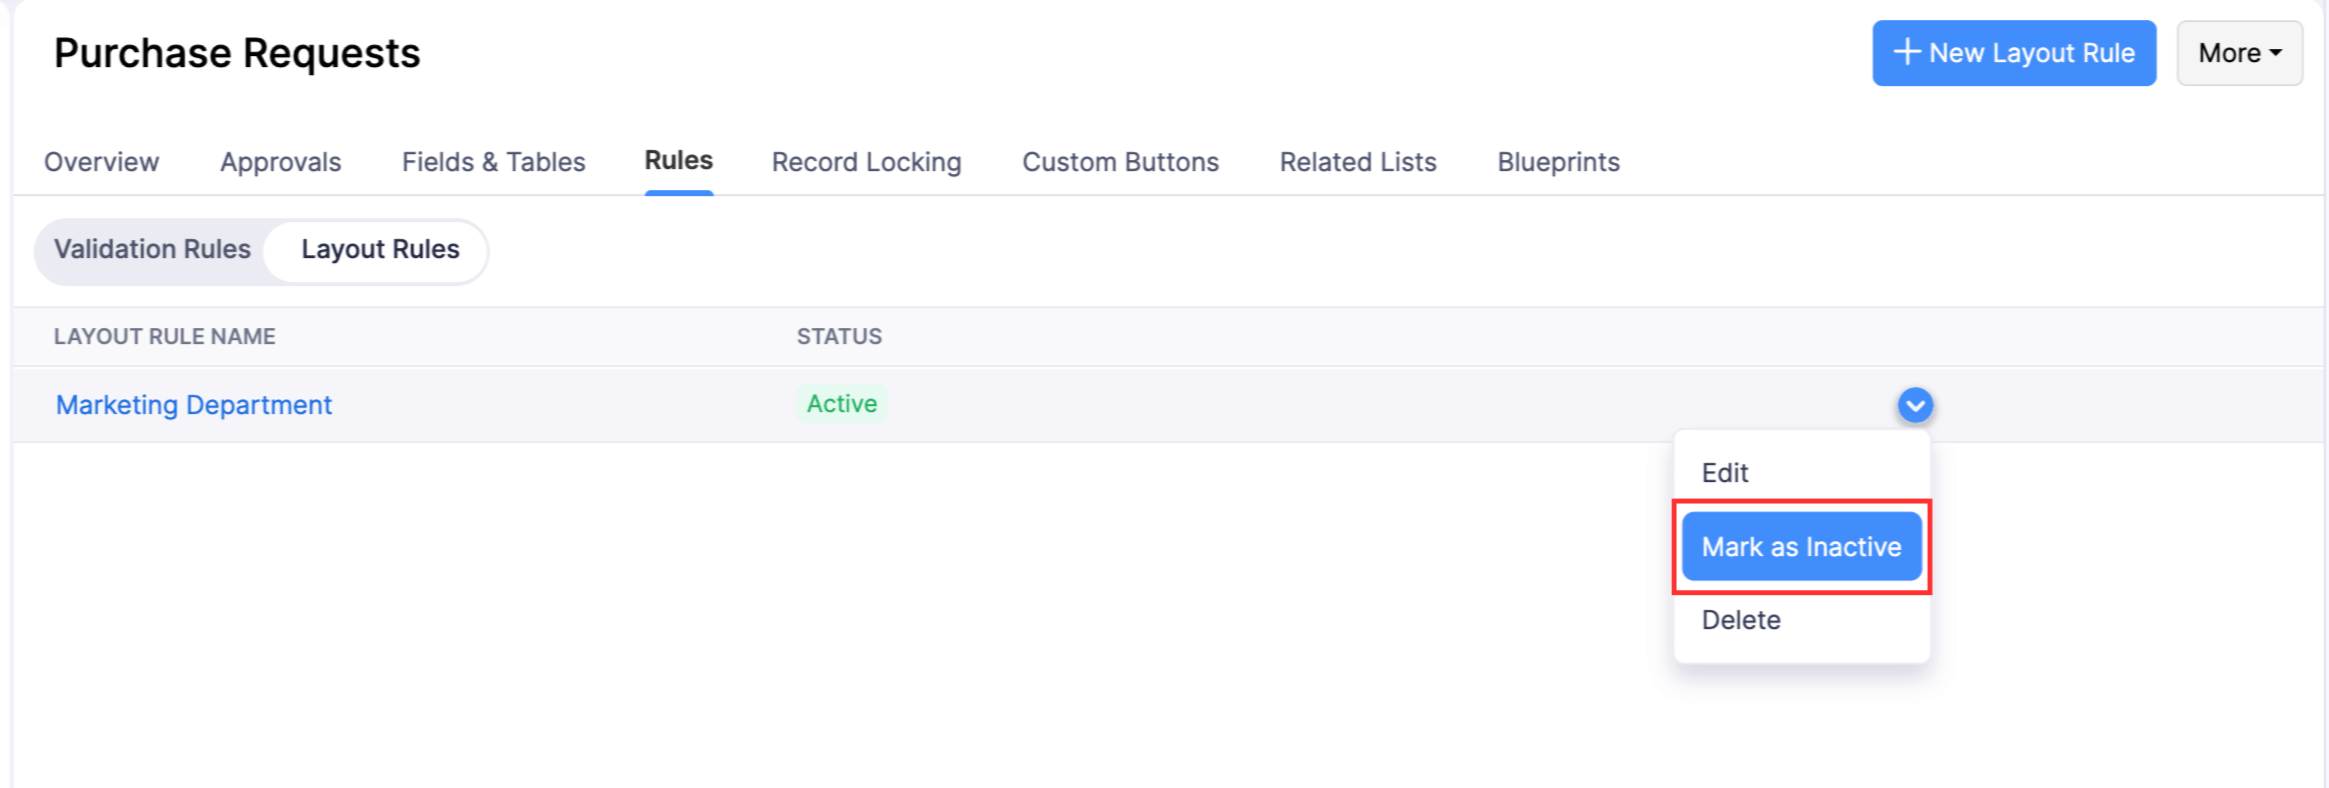
Mark a Layout Rule as Inactive
You can temporarily disable a layout rule by marking it as inactive. An inactive rule will not apply when users create or edit records. Here’s how:
- Go to Settings in the top right corner of the page.
- Select the required custom module under Custom Modules.
- Go to the Rules tab.
- Select Layout Rules.
- Click the More icon next to the layout rule you want to disable.
- Select Mark as Inactive.
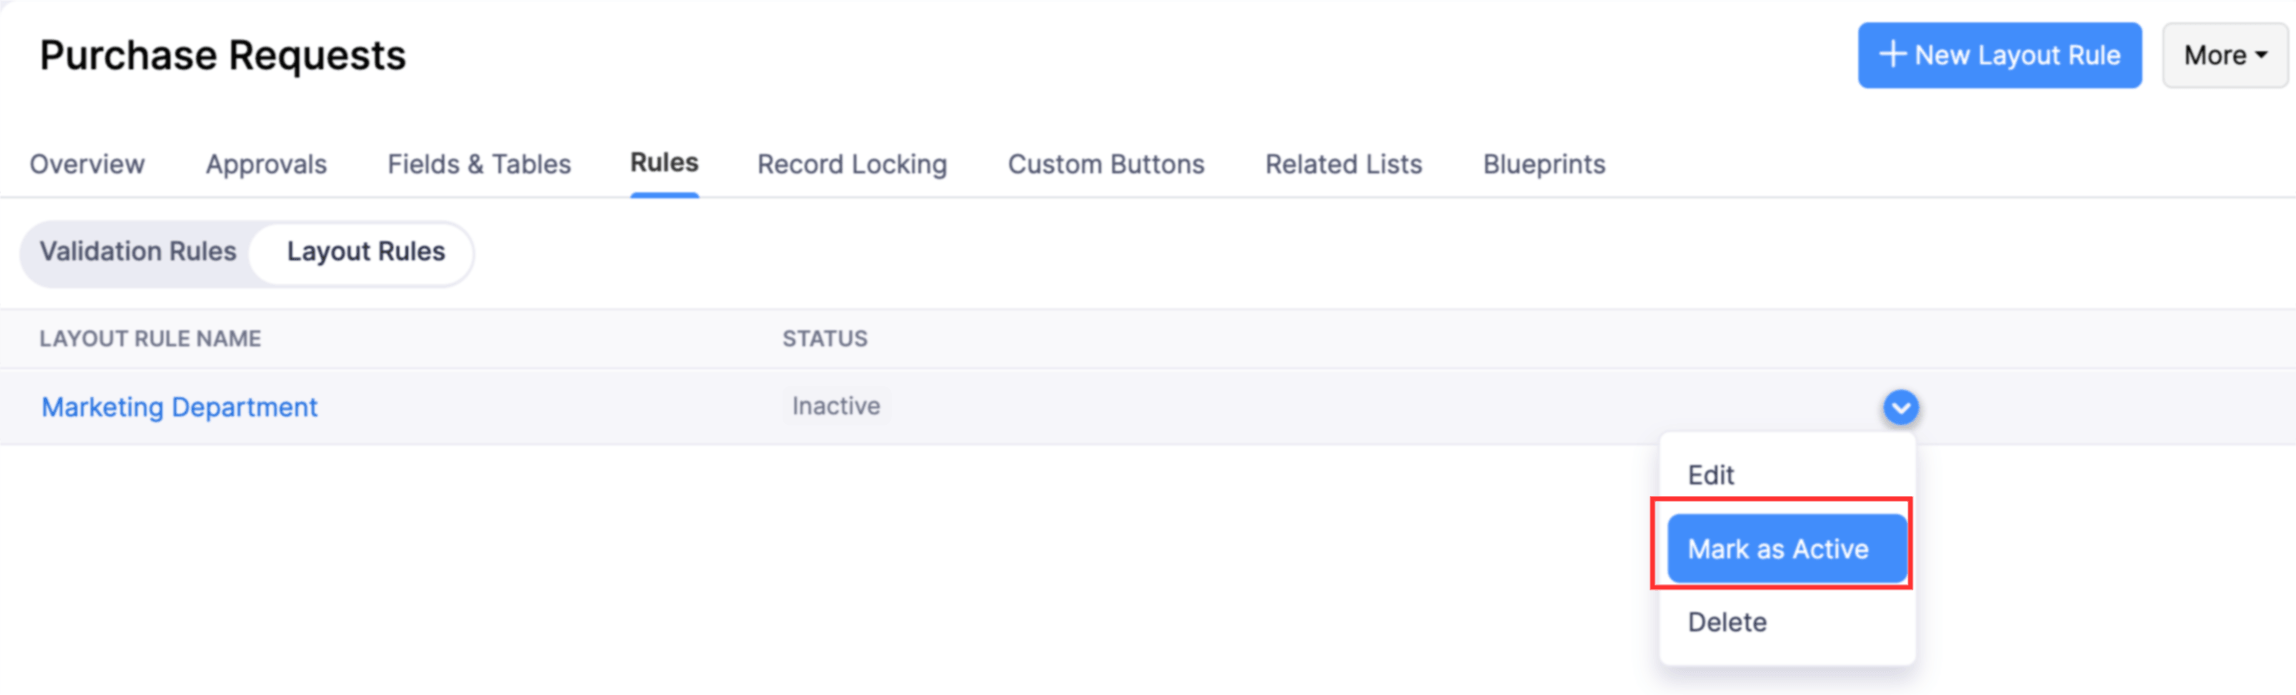
Mark a Layout Rule as Active
You can re-enable an inactive layout rule by marking it as active. Here’s how:
- Go to Settings in the top right corner of the page.
- Select the required custom module under Custom Modules.
- Go to the Rules tab.
- Select Layout Rules.
- Click the More icon next to the inactive layout rule you want to enable.
- Select Mark as Active.
Delete a Layout Rule
You can permanently delete a layout rule that is no longer needed. Here’s how:
- Go to Settings in the top right corner of the page.
- Select the required custom module under Custom Modules.
- Go to the Rules tab.
- Select Layout Rules.
- Click the More icon next to the layout rule you want to delete.
- Select Delete.
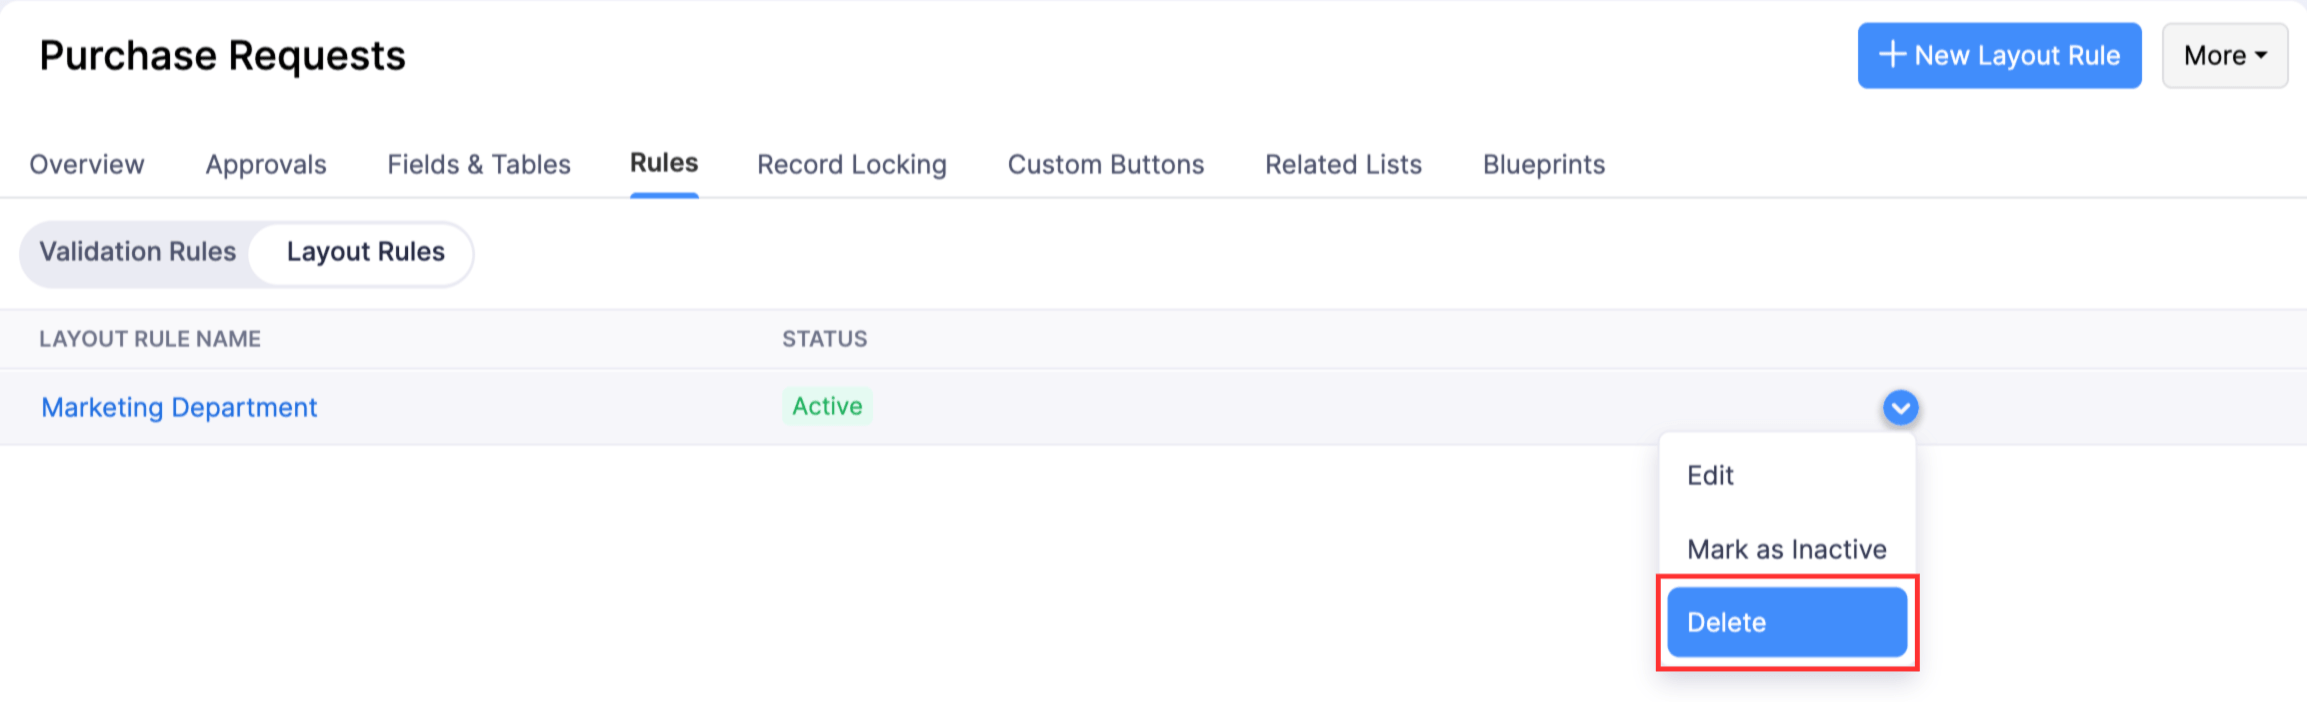
- Click Yes, Delete in the pop-up to confirm your action.