
Schedulers in Zoho Cliq
Imagine automating your routine tasks, freeing up your timely workflows. Cliq schedulers can be triggered to execute at different times. They can also be scheduled for repeated execution, be it daily, weekly, monthly, or yearly.
For example, you can implement a scheduler to summarize the weekly sales performance and leads in a channel, providing team members with automatic updates at the start of the week, or automate server health reports to be delivered at the beginning of each day, ensuring that critical systems are running smoothly without the need for manual checks.
No more missed deadlines. Let's learn how to create, edit, and configure Schedulers in Cliq!
How to Create a Scheduler in Zoho Cliq
Create a scheduler by following the below-given steps:
Click on your profile picture and select Bots and Tools.
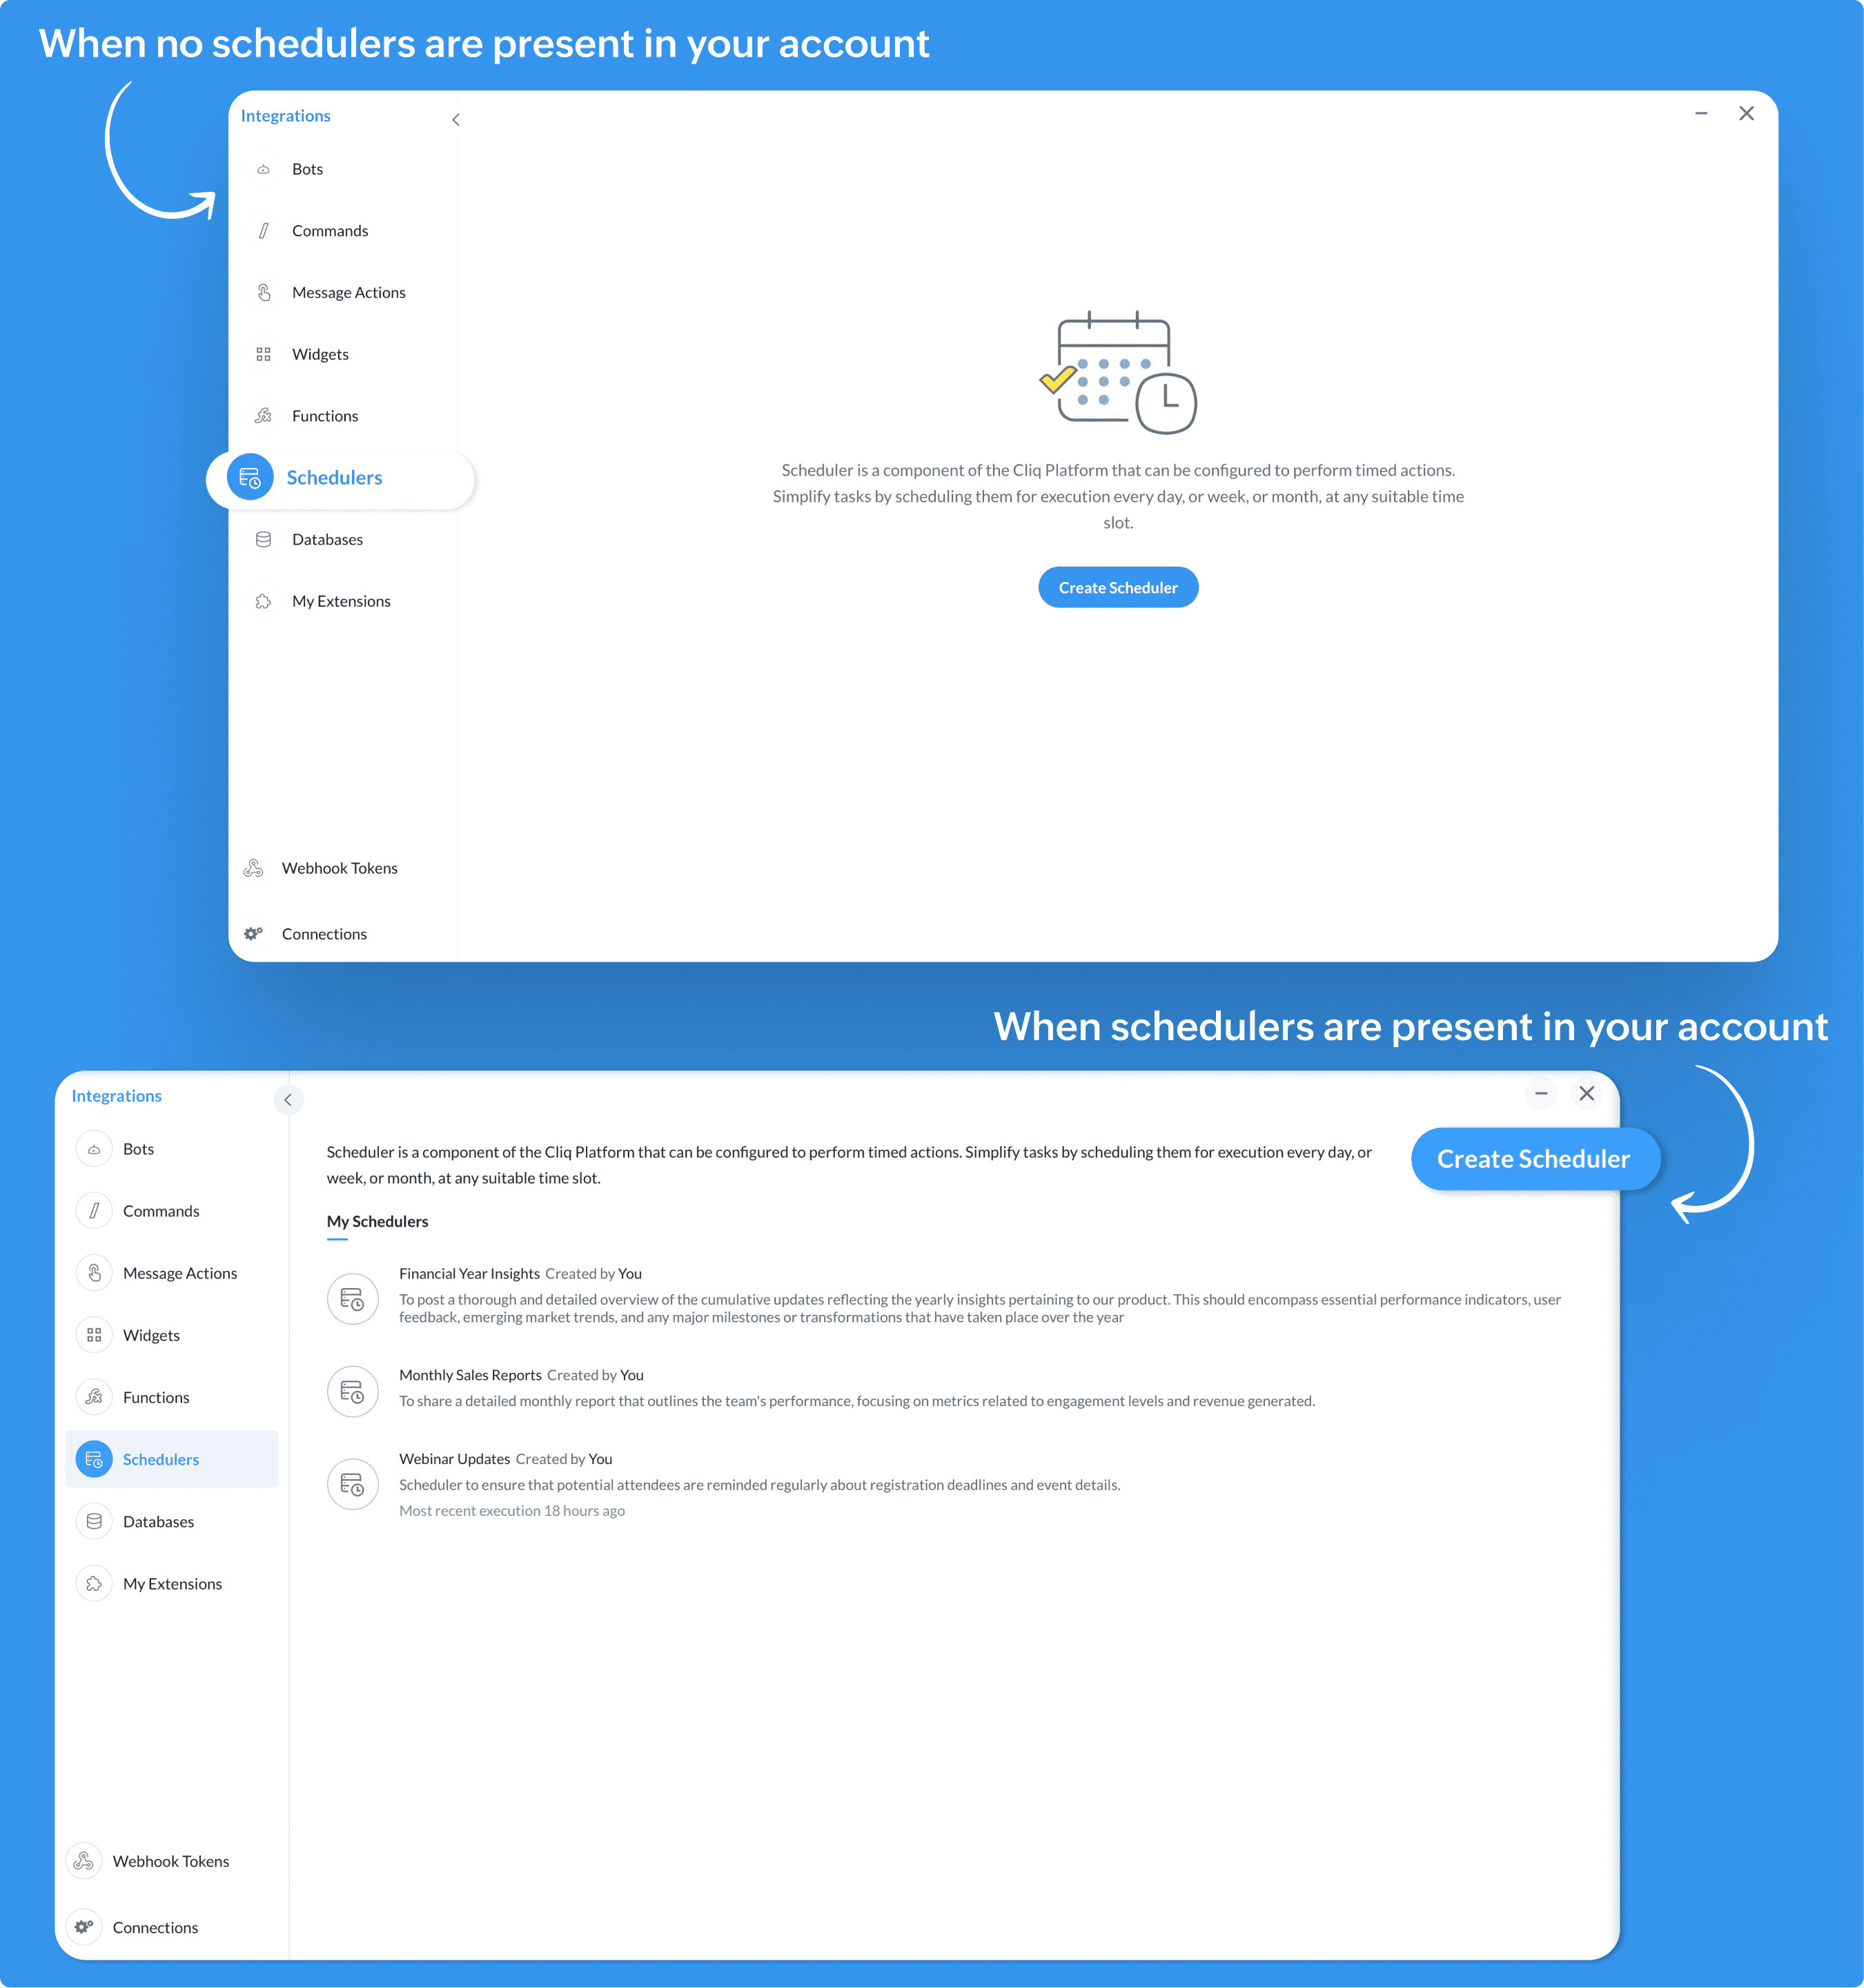
In the left sidebar, under Integrations, click Schedulers.
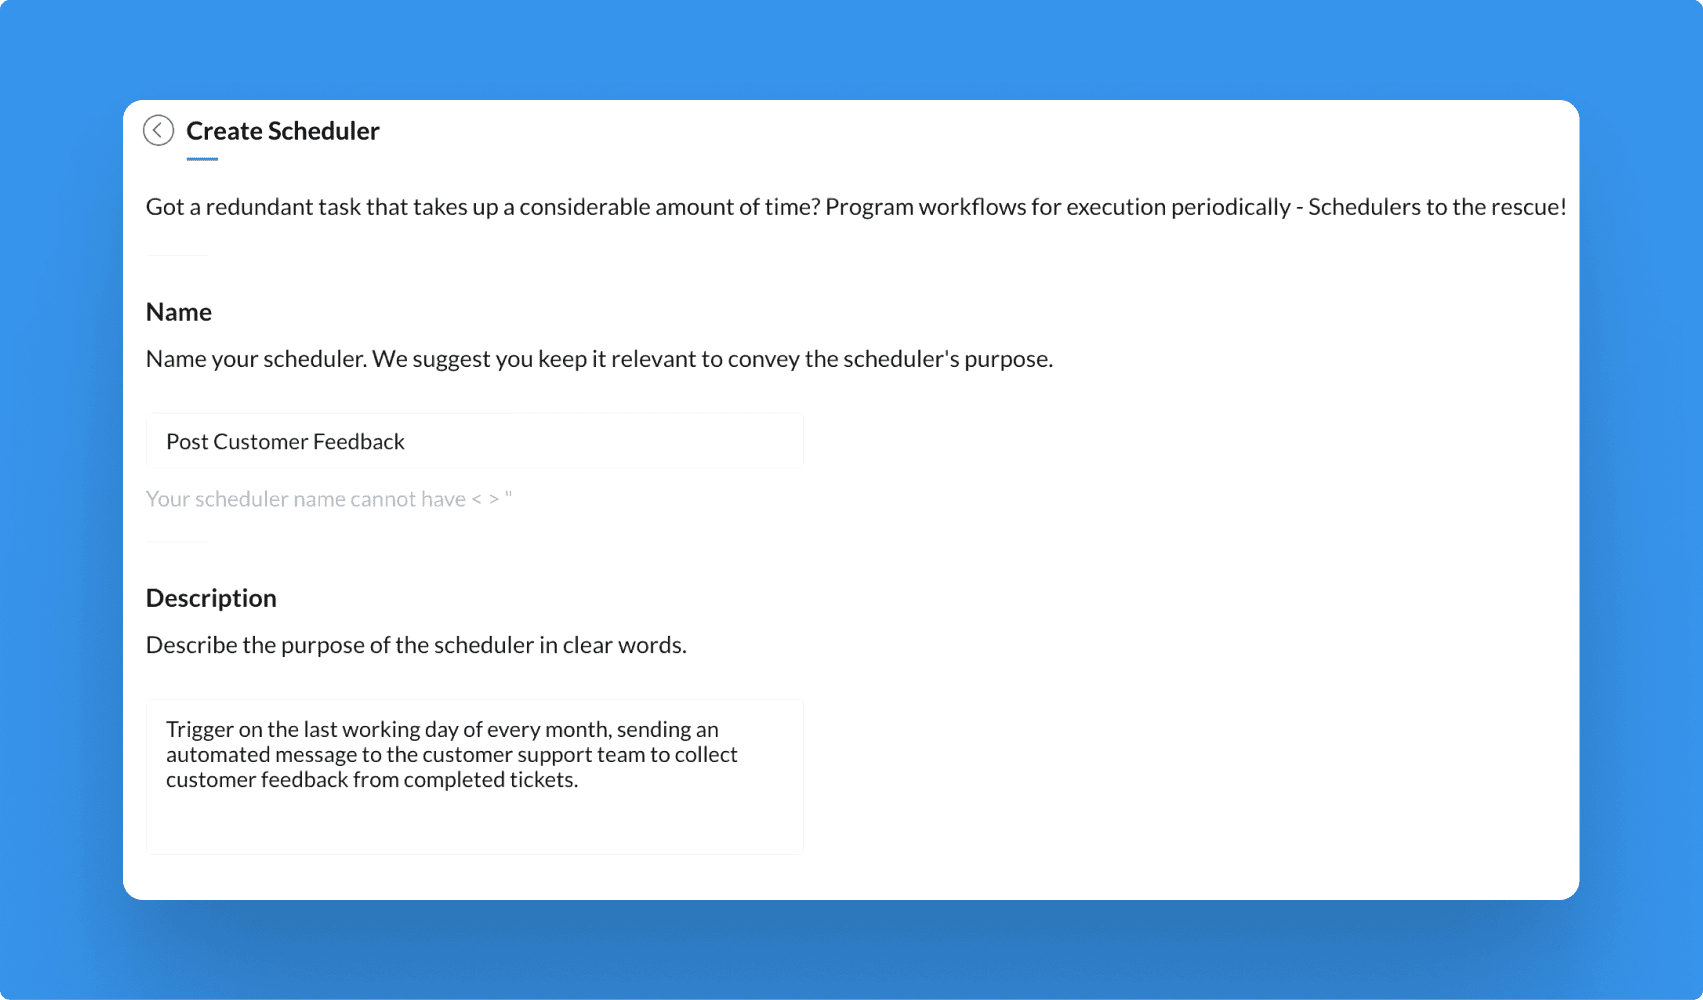
Provide a name for the scheduler and include a brief description.
You can customize your scheduler's recurring period by setting its frequency to daily, weekly, monthly, or yearly.


Recurring Period
The recurring period in a scheduler defines the frequency at which an execution of the scheduler must repeat. We can set specify the daily, weekly, monthly, or yearly rate at which the scheduler will automatically trigger, ensuring consistent execution without manual effort.
Common Attributes :
| Attribute Name | Description |
Time of execution | Allows you to set a specific time and time-zone for the scheduler to run. |
Ends | Allows you to specify when a scheduler should stop running its tasks by setting the criteria for the scheduler to expire.
|
| Summary | Allows you to view a crisp description of the frequency and repetition timing of the scheduler. |
Types of Recurring Period Frequency :
Daily
Select the recurring period as daily if you want the scheduler to run automatically every day.
Unique Attributes :
Repeats every : Allows you to specify the number of days between each execution.
Example :
Consider a scenario where sales representatives need to follow up with new client leads every three days after initial contact, only in May. In this case, a scheduler with a recurring period as daily must be built using the configuration below.

The scheduler will run every three days ( In the above image, the navy-colored dates denote the day of scheduler execution ) and expire on the 31st (the last day of May).
Weekly
Select the recurring period as weekly if you want the scheduler to run automatically every week.
Unique Attributes :
Repeats every : Allows you to specify the number of weeks between each execution.
Select days : Allows you to select specific days of the week on which the scheduler should run.
Example :
Consider a scenario where a report of an ongoing marketing campaign's performance (metrics such as conversion rates and engagement levels) must be shared automatically every Monday and Friday. In this case, a scheduler with a recurring period as weekly with distinct days set as Monday and Friday must be built using the configuration below.

The scheduler will run every week on Mondays and Fridays and will not expire, as no values for the ends attribute are provided.
Monthly
Select the recurring period as monthly if you want the scheduler to run automatically every month.
Unique Attributes :
Repeat every: Allows you to specify the number of months between each execution.
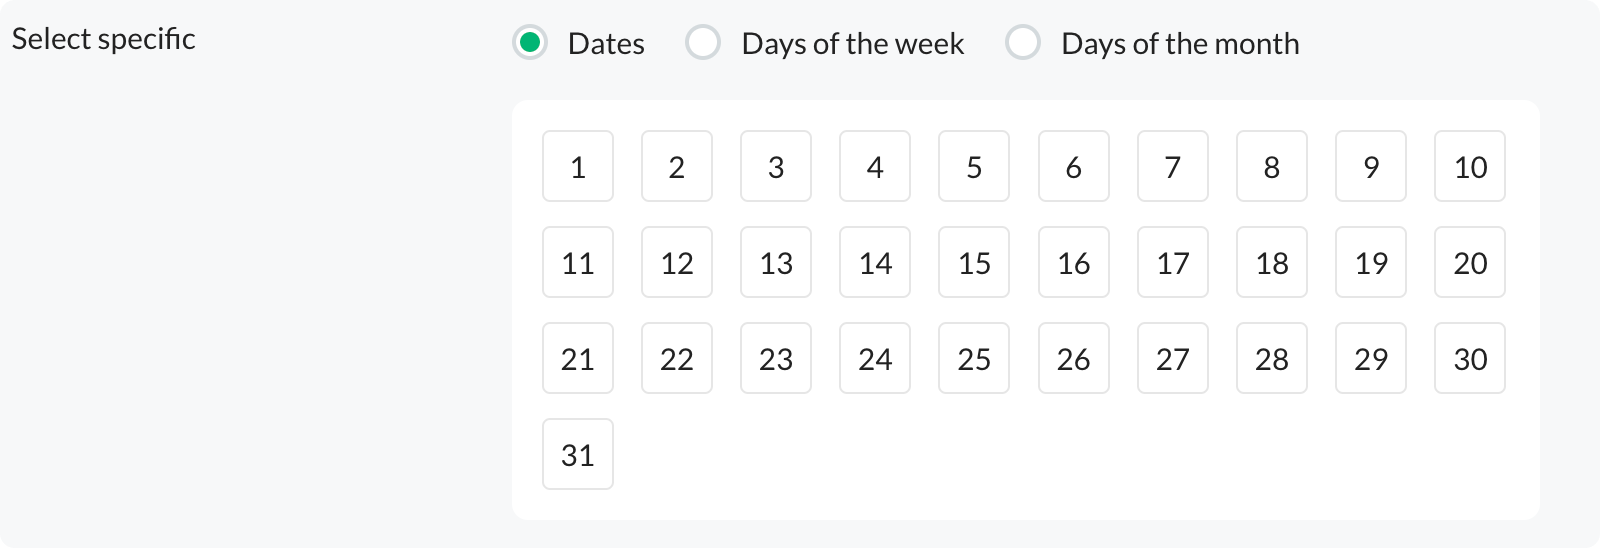
Select specific : Allows you to choose specific dates or days of the week in a month for the scheduler to run.
Dates: Select numerical values for specific calendar dates in a month, such as the 1st to 31st of a month.
- Days of the week: Choose which weeks and days the scheduler should run within a month.
Repeats on: Choose specific days within the selected weeks. For example, set the scheduler to execute every 2nd and 4th week on Tuesdays.

- Days of the month: Configure the scheduler to run relative to the start or end of a month.
- After: Configure the scheduler to run after a certain number of days from the beginning of the month.
- Before: Configure to run for a specified number of days before the month-end.
- On: Choose whether the scheduler should run on the first or last day of the month.


Example :
Consider a scenario where a finance summary, such as income statements, balance sheets, and cash flow summaries of the previous month, must be triggered automatically at the beginning of every month. Here, we need to set a scheduler with the recurring period as monthly along with the configuration below.

The scheduler will run every first day of the month and will not expire, as no values are given for an end attribute.
Yearly
Select the recurring period as yearly if you want the scheduler to run automatically every year.
Unique Attributes :
Repeats every: Allows you to specify the number of years between each execution.
Select specific : Allows you to choose either exact dates within a month or selecting specific days within a month for the scheduler to run every year.
Dates: Configure the scheduler to run for specific dates of a month.
Example: Set the scheduler to execute every 21st and 25th of June.

Days of the Month: Configure the scheduler to run on specific days within a month.
Example: Set the scheduler to execute every 1st Sunday of October.


Example :
Consider a scenario to automate the process of reviewing the past year's budget and posting it on the second Saturday of April every year. Here, we need to set a scheduler with the recurring period as yearly, along with the configuration below.

Scheduler Preview
Clicking on your scheduler name will open a detailed preview of the scheduler. This preview includes the following details:
Recurring Period : Displays the frequency at which the scheduler is set to run (e.g., daily, weekly, monthly or yearly).
Most Recent Execution : Shows the date and time of the most recent execution of the scheduler.
Upcoming Scheduled Execution : Lists the next scheduled execution date and time.
Trial Run: Use the Trial Run button to test the scheduler's functionality and debugging without waiting for the subsequent scheduled execution.
Edit Configurations : Click on the Edit Configurations option to modify settings, such as the recurring period, time of execution, or any other parameters.
Enable/Disable Scheduler : The Enable/Disable button lets you quickly activate or deactivate the scheduler as needed without deleting or losing your configuration.

Note:
The scheduler expires after surpassing the criteria given in the ends attribute. You cannot enable or disable it after expiration.

Editing a Scheduler
Edit Configuration
To edit the details of the created scheduler, you need to edit its configuration. To edit the configuration of a scheduler:
- Click on the preferred scheduler's name, and the scheduler preview will open.
- In the bottom-right corner, select the Edit Configuration option to update your scheduler's details.
Editing the code of a scheduler
- Hover over the scheduler's name to access the Edit Code option.
- Click this option to modify the scheduler's code in the Deluge editor.

Deleting a Scheduler
To delete a scheduler:
- Hover over the icon of the scheduler you want to remove until you see a minus symbol. Click the minus symbol to proceed.
- A confirmation prompt will appear. Click the Delete button to confirm the removal of the scheduler.
Note:
Please note that any actions linked to this scheduler will no longer function. Once deleted, the scheduler cannot be retrieved.
