How do you set up the time zone in your calendar?
One of the important aspects of managing your schedule is setting up the time zone in your Calendar. The time zone may seem like a small detail, but it plays a huge role in keeping your schedule organized and on track.
Why are time zones important in an online calendar?
- Accurate scheduling- Setting up your time zone correctly prevents mix-ups and ensures that you never miss an appointment again.
- Seamless communication and coordination- you're working with people from different parts of the world, and having the right time zone set up facilitates collaboration, regardless of your location.
- Timely reminders- Selecting time zones ensures that you receive event reminders exactly when you need them, keeping you on track and organized.
How to configure your time zone in Zoho Calendar
To set up your primary time zone:
Navigate to your calendar grid and click on the Settings icon located in the top-right corner. From there, select Time Zone.
Note: By default, your primary time zone is updated based on your Zoho account location.
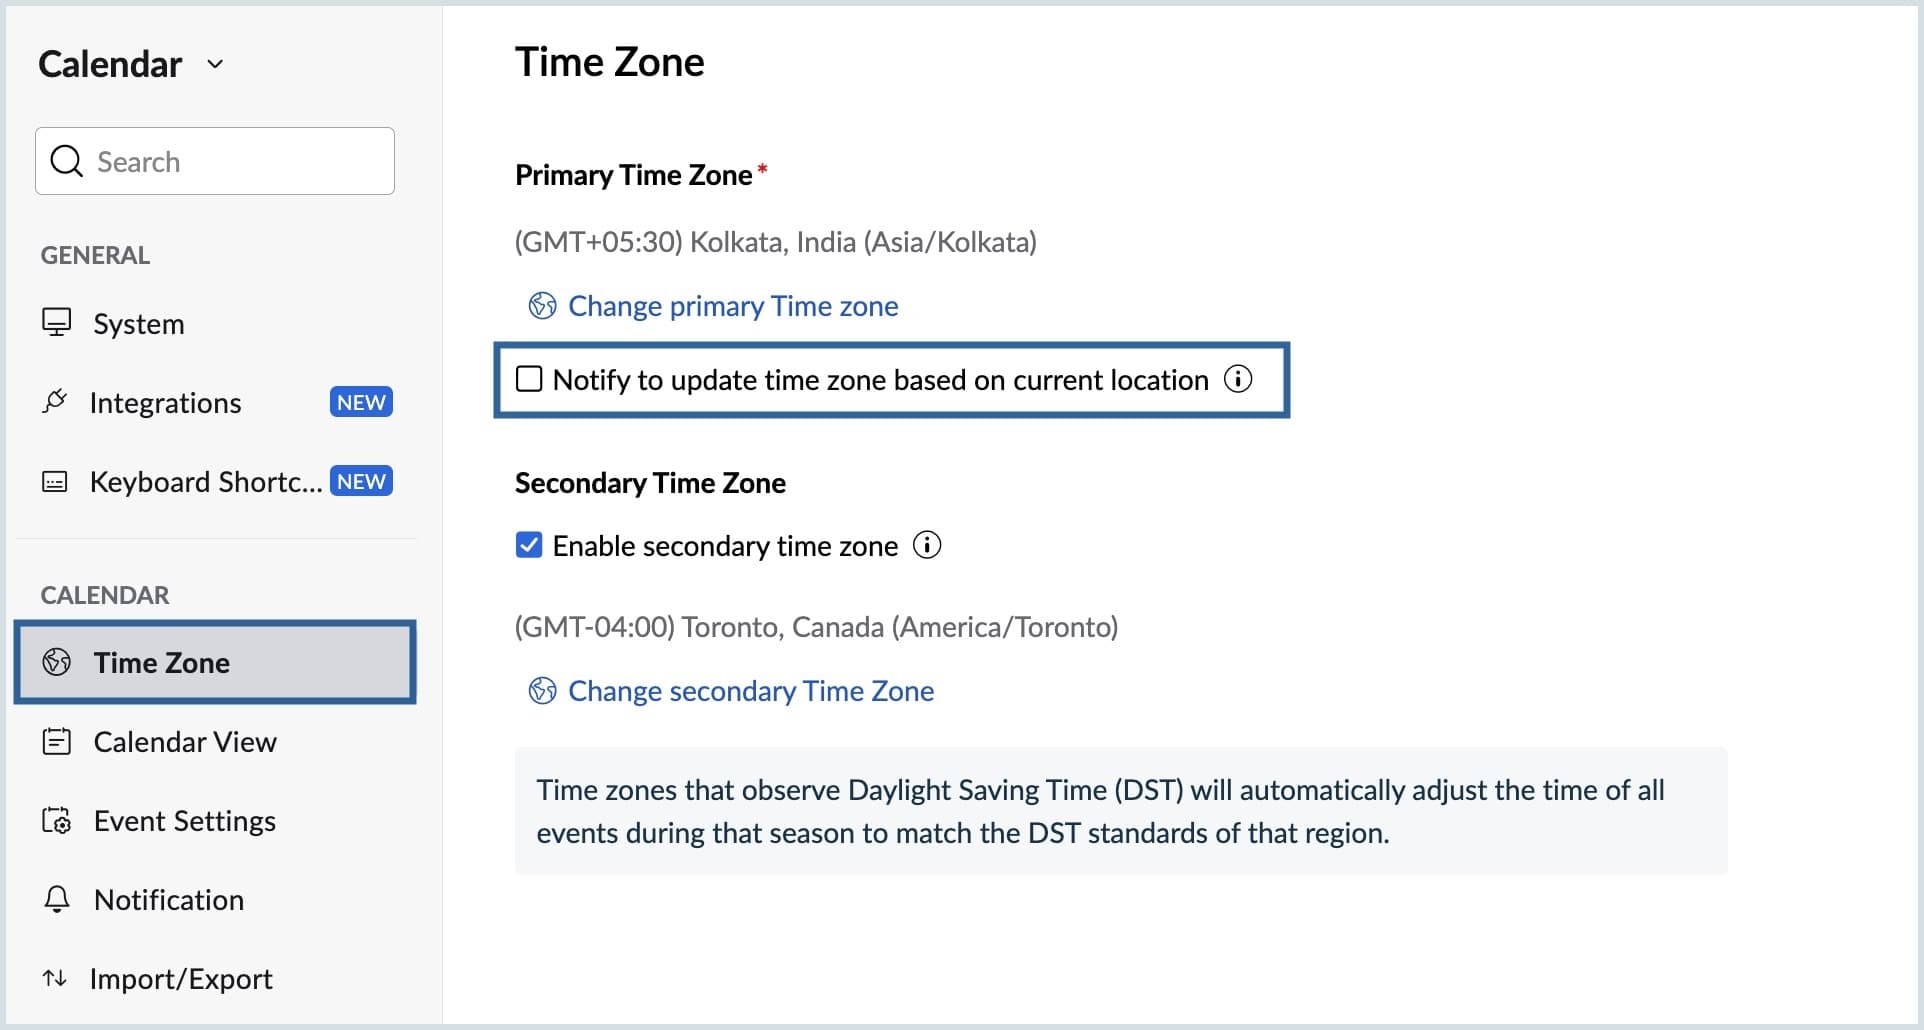
- If you need to make changes, click on Change Primary Time Zone, choose your current time zone from the list, and click Done.
- If you travel frequently, you have the option to receive notifications when you're in a location different from your primary time zone. To enable this, click on the Notify to update time zone based on your current location checkbox.

This ensures that you stay informed and avoid any scheduling conflicts due to time zone changes, because all event reminders will be sent based on the primary time zone in your calendar.
Adding a secondary time zone
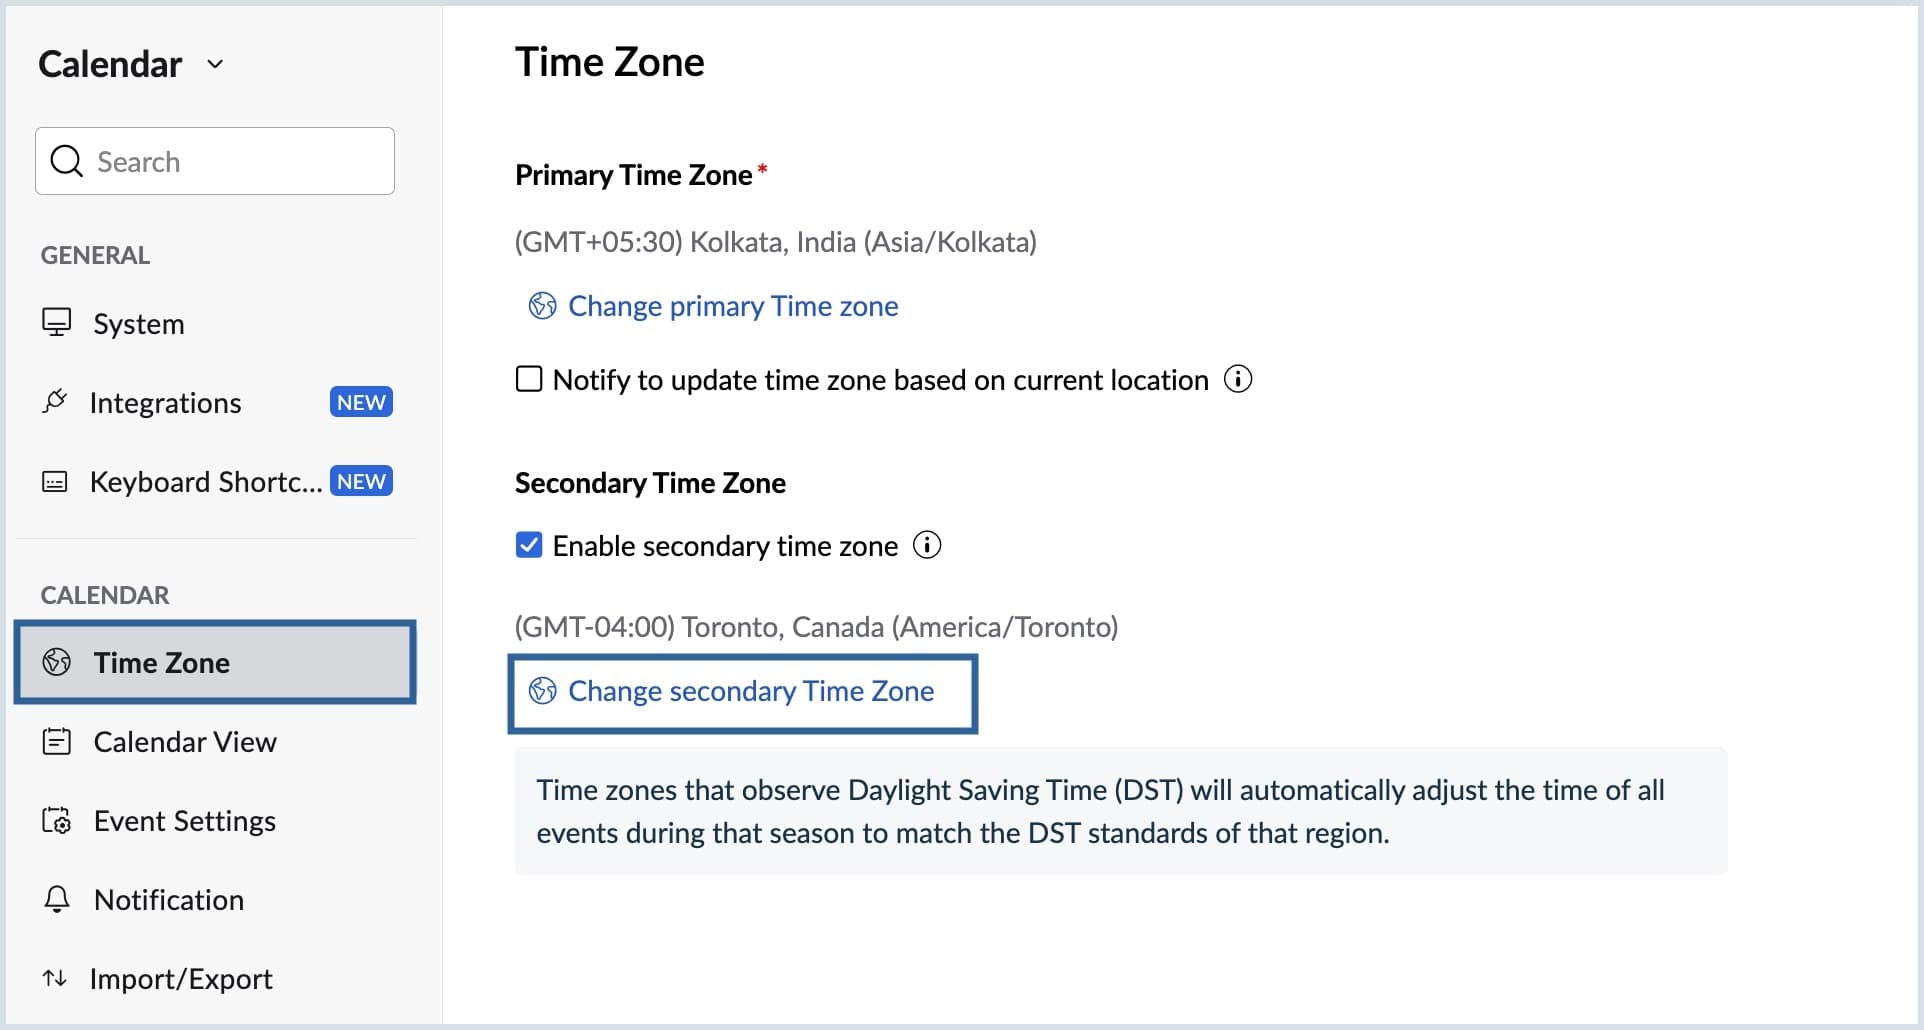
Zoho Calendar offers the flexibility to add an additional time zone to your calendar. Once it’s configured, both your primary and secondary time zones will be visible on your calendar grid.
- To add a secondary time zone, check the Enable secondary time zone box, then select Change secondary time zone.
- Choose the desired time zone from the list and click Done.

With your primary and secondary time zones set up, you can now effectively manage your schedule across different time zones. Also, enable notifications for time zone changes to ensure that you never miss an important event or an appointment.
Top Articles

