RMA or Sales Return
A Return Material Authorization (RMA) or Sales Return is the process of a seller accepting a purchased item back from the consumer. In turn, the customer receives credit, cash refund or a replacement. Some of the common reasons for return include receiving damaged/expired products, wrong delivery, fraudulent orders etc.
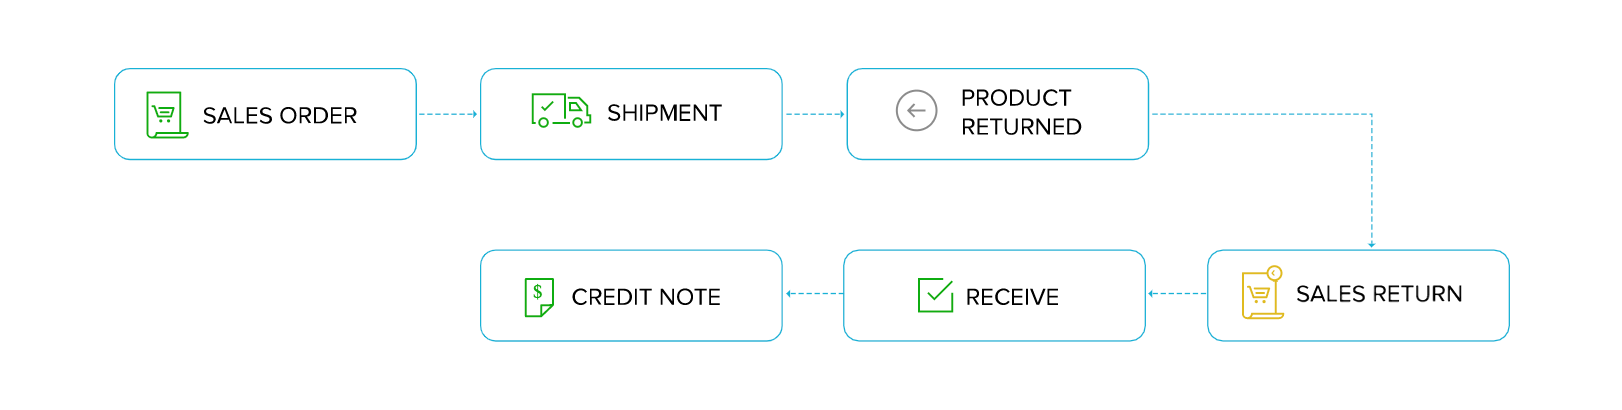
Workflow of a Sales Return
The various stages of processing a sales return in Zoho Inventory.
Qualify Items for Return
Before you begin with sales return, your inventory items must be eligible for return. A sales return can only be initiated for items that you qualify as returnable.
Insight: Service items and items with only purchase information cannot be returned.
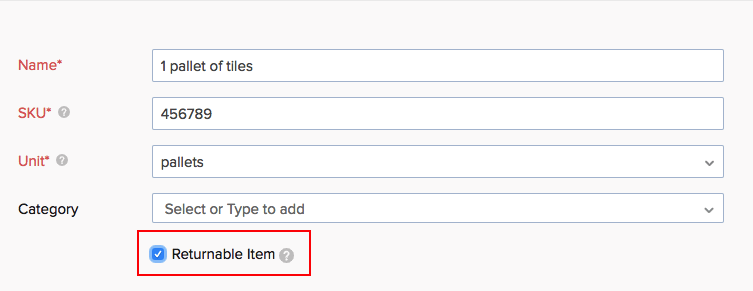
- Navigate to the Items tab in the sidebar.
- Click the +New button to create a new item.
- Enter the basic details.
- Toggle the Returnable Item switch. Switch turns blue to indicate ON.
Insight: If the switch is not turned on, the item will be considered non-returnable and you won’t be able to raise a sales return for it.
- Click Save to create a new returnable item.
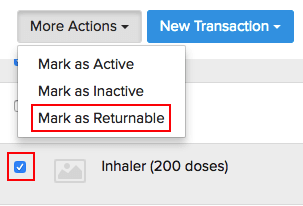
Bulk Action
You can also mark your existing items as returnable in one go. To do so:
- Navigate to the Items tab in the sidebar.
- Open the items list view.
- Mark the checkbox beside the item name to select the item.
- Click on More Actions and select Mark as Returnable. The selected items will be marked as returnable.
Create Sales Return
Scenario: Let us consider a most common business scenario where you initiate a sale, ship the products and get paid for it. After receiving the product, the customer returns it due to unforeseen reasons. To handle this in Zoho Inventory:
1. Create a Sales Return
Insight: You cannot create sales returns for orders that are drop shipped or manually fulfilled.
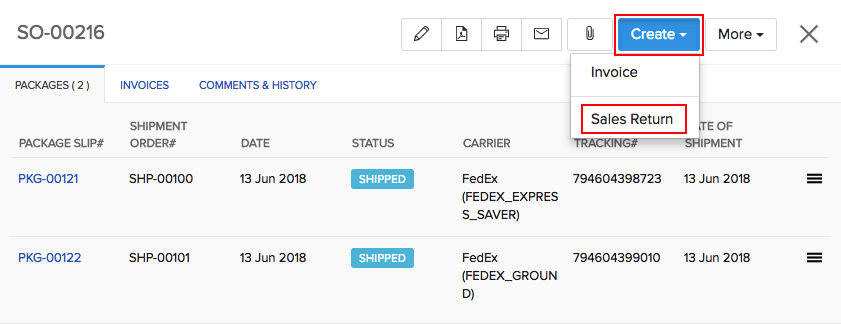
- Click on the sales order tab from the side bar.
- Open the respective sales order.
- Click the Create button.
- Choose Sales Return from the dropdown.
- Enter the sales return details.
- Configure the quantity of the returned items.
- If you want to record damaged/expired stock in the sales return, enable the ‘This sales return contains credit-only goods’ option.
- The Return Details will be split into two sections: Return Quantity and Credit-Only.
- Enter the receivable count in Return Quantity field and the damaged count in the Credit-Only field for the respective items.
Insight: The quantity specified in the Credit-Only field will not be taken into stock.
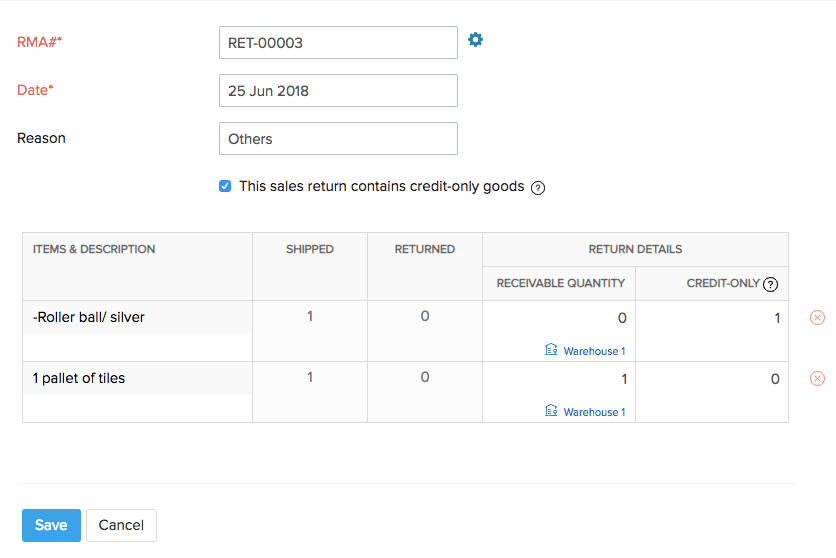
- Click Save to create a sales return.
2. Receive Items in the Sales Return
A sales return is raised only as a proof of items being returned. The stock(physical stock) of the returned item increases only when you receive it in your warehouse. To record a receive:
- Go to the sales return.
- Click on the Receive button.
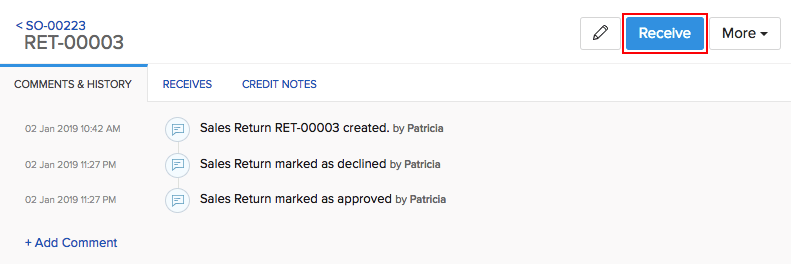
- Configure the items and the quantity that you want to receive.
- If you have enabled advanced inventory tracking in sales return receipts, you can add the serial/batch numbers for the items here.
- Click the Add serial numbers or Add batch numbers option below the quantity.
- Enter the serial or batch details of the received item and click Save.
Insight: To enable tracking in packages, purchase receives and sales return receipts, go to Settings > Preferences > Items. Under Advanced Inventory Tracking, choose Track in packages, purchase receives and return receipts option.
- Click Save to record a receive.
- From the sales return, again click Receive to receive the rest of the returned items.
Insight: If you have specified credit-only goods in the sales return, you will not be able to receive it as it will not be taken into stock.
3. Create Credit Note
To provide a refund or credit for the returned items, you have to create a credit note. Creating a credit note will also increase the accounting stock of the underlying items.
To create a credit note:
- Open the sales return.
- Go to More
- Select Create Credit Note.
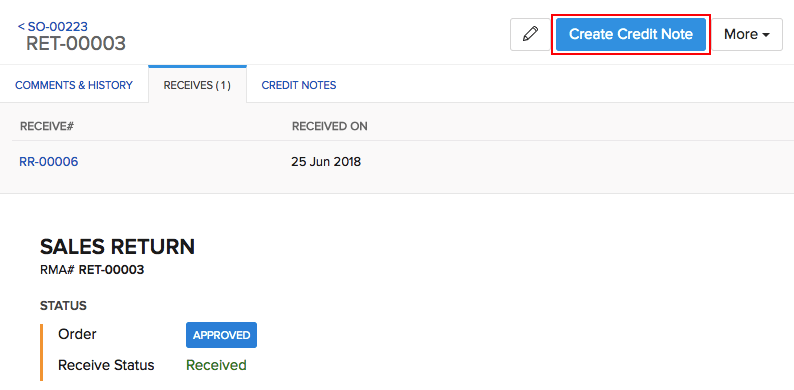
- Configure the items for which you want to create a credit note.
Insight: Learn how you can handle the return of batch tracked or serial number tracked items here.
4. Record a Refund or Apply Credits to Invoices
A sales return process is not usually complete without a refund. To record a refund:
- Open the above credit note.
- Click on More > Refund.
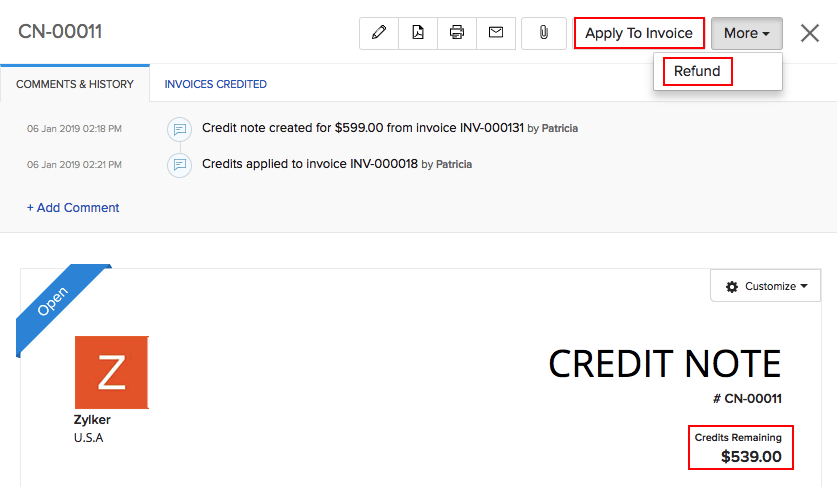
- Enter the refund amount.
- Select the expense account.
- Click Save to record the refund.
If the customer is a regular buyer, then instead of giving cash refunds you can provide credits. These credits can be applied to their pending or future invoices.
To apply credits to invoices:
- On the same credit note page, click the Apply to Invoice button.
- Distribute the credit balance against each invoice.
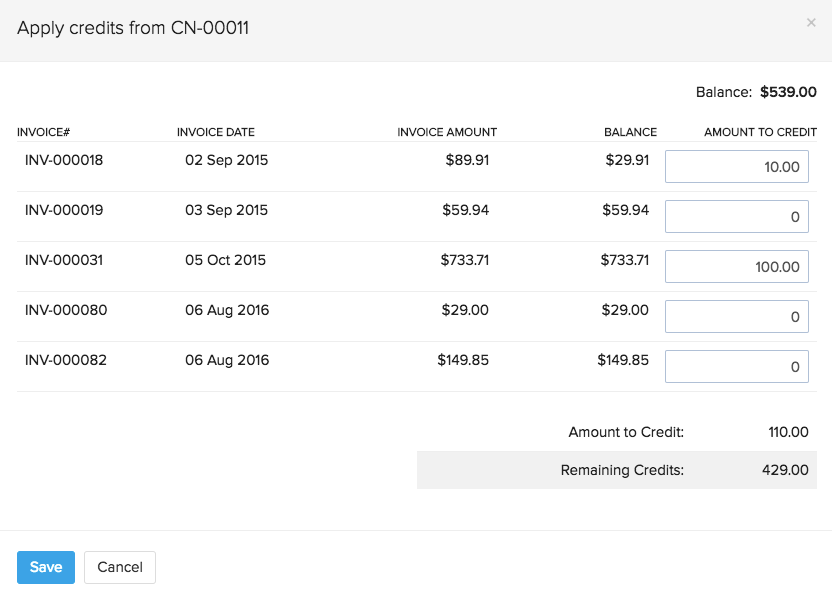
- Click Save to apply the credits. The credit will be deducted from the total invoice amount.
Insight: A credit note created for a customer can only be applied to the invoices created for the same customer.
To learn how you can handle more of such cases of sales return in Zoho Inventory, visit our FAQ section.
Import Credit Notes
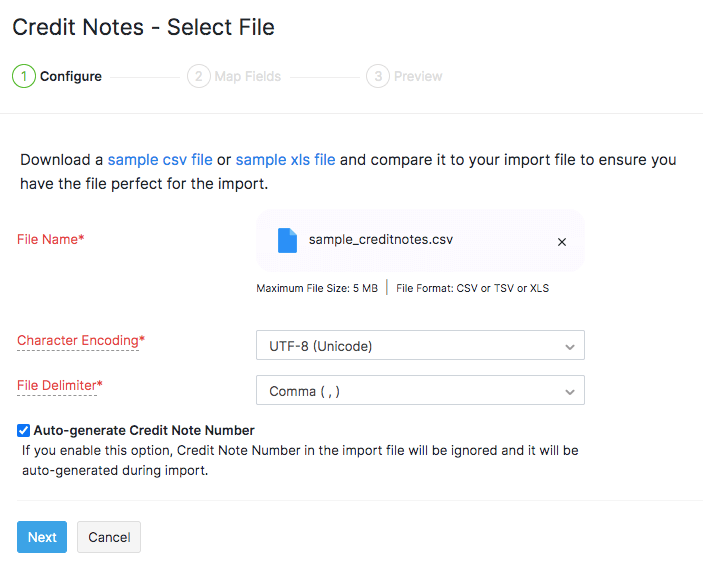
If you already have a list of credits for your customers, you can import them into Zoho Inventory in CSV, TSV or XLS format.
To know the format of the import, i.e. the columns and data to be included in the import file, you can download the sample import file which we’ll be looking at in the steps below.
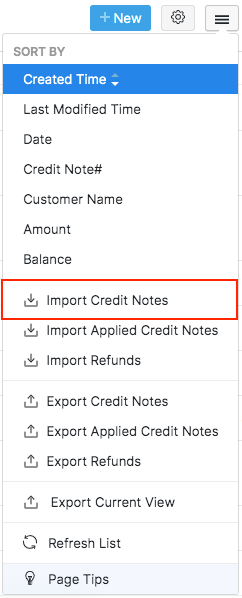
Click the Returns dropdown on the left sidebar and go to the Credit Notes module.
Click the
 icon.
icon.Click the Import Credit Notes option.
Click the Choose File button to browse and upload your import file. You can download the sample CSV or XLS file for your reference.
If you want to auto-generate the credit note numbers, select the Auto-generate Credit Note Number option.
Click Next to proceed to the field mapping page.
Map the columns in Zoho Inventory with the appropriate column in your import file.
Click Next to proceed to the preview section.

Preview the summary of the records that can be imported.
Click Import if you’re ready, or else, click Previous if you need to make any changes.
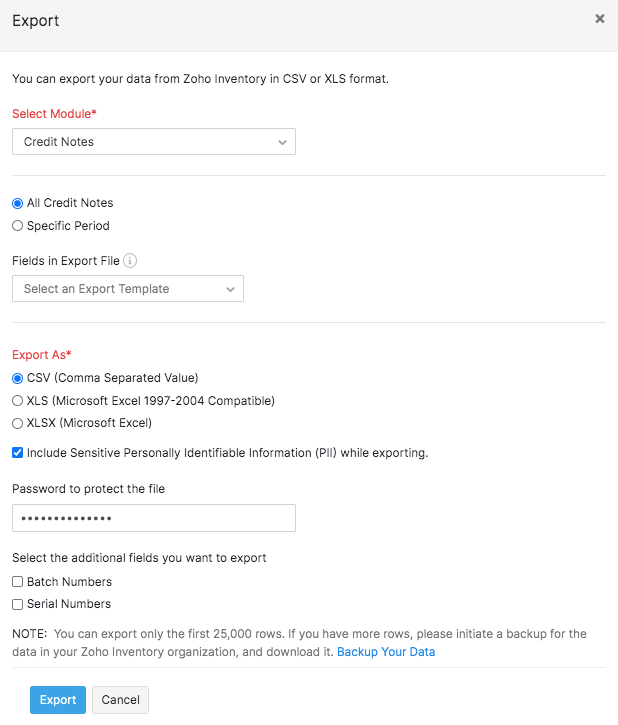
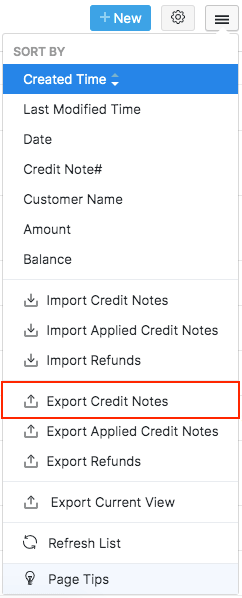
Export Credit Notes
To download the credit note details to your system:
Click the Returns dropdown on the left sidebar and go to the Credit Notes module.
Click the
icon.Click the Export Credit Notes option.
If you want to only export credits from a specific period, select the period.
Select an export template (optional). Learn how you can create an export template.
Choose the export format.
Enter a password to protect your file (optional).
Click Export.