Custom Modules
In Zoho Expense, the predefined modules on the left sidebar — such as Trips, Reports, Expenses, and Advances — help you track and manage your organization’s travel and expense data. When these modules do not cover a specific business requirement, you can create a custom module to record, track, and categorize additional data.
Scenario: Zylker Inc requires employees to submit feedback forms after every offsite visit. Since the predefined modules are not designed for tracking feedback, the admin creates a custom module called Feedback Forms to record, organize, and review employee feedback centrally.
Once you create a custom module, you can add fields to capture the specific data you need and create custom views to filter and group records based on criteria you define. You can also configure module permissions to control which user roles can access the module and what actions they can perform.
Prerequisite: You must be an Admin to create, edit, or delete custom modules and their fields.
Create a Custom Module
To create a custom module:
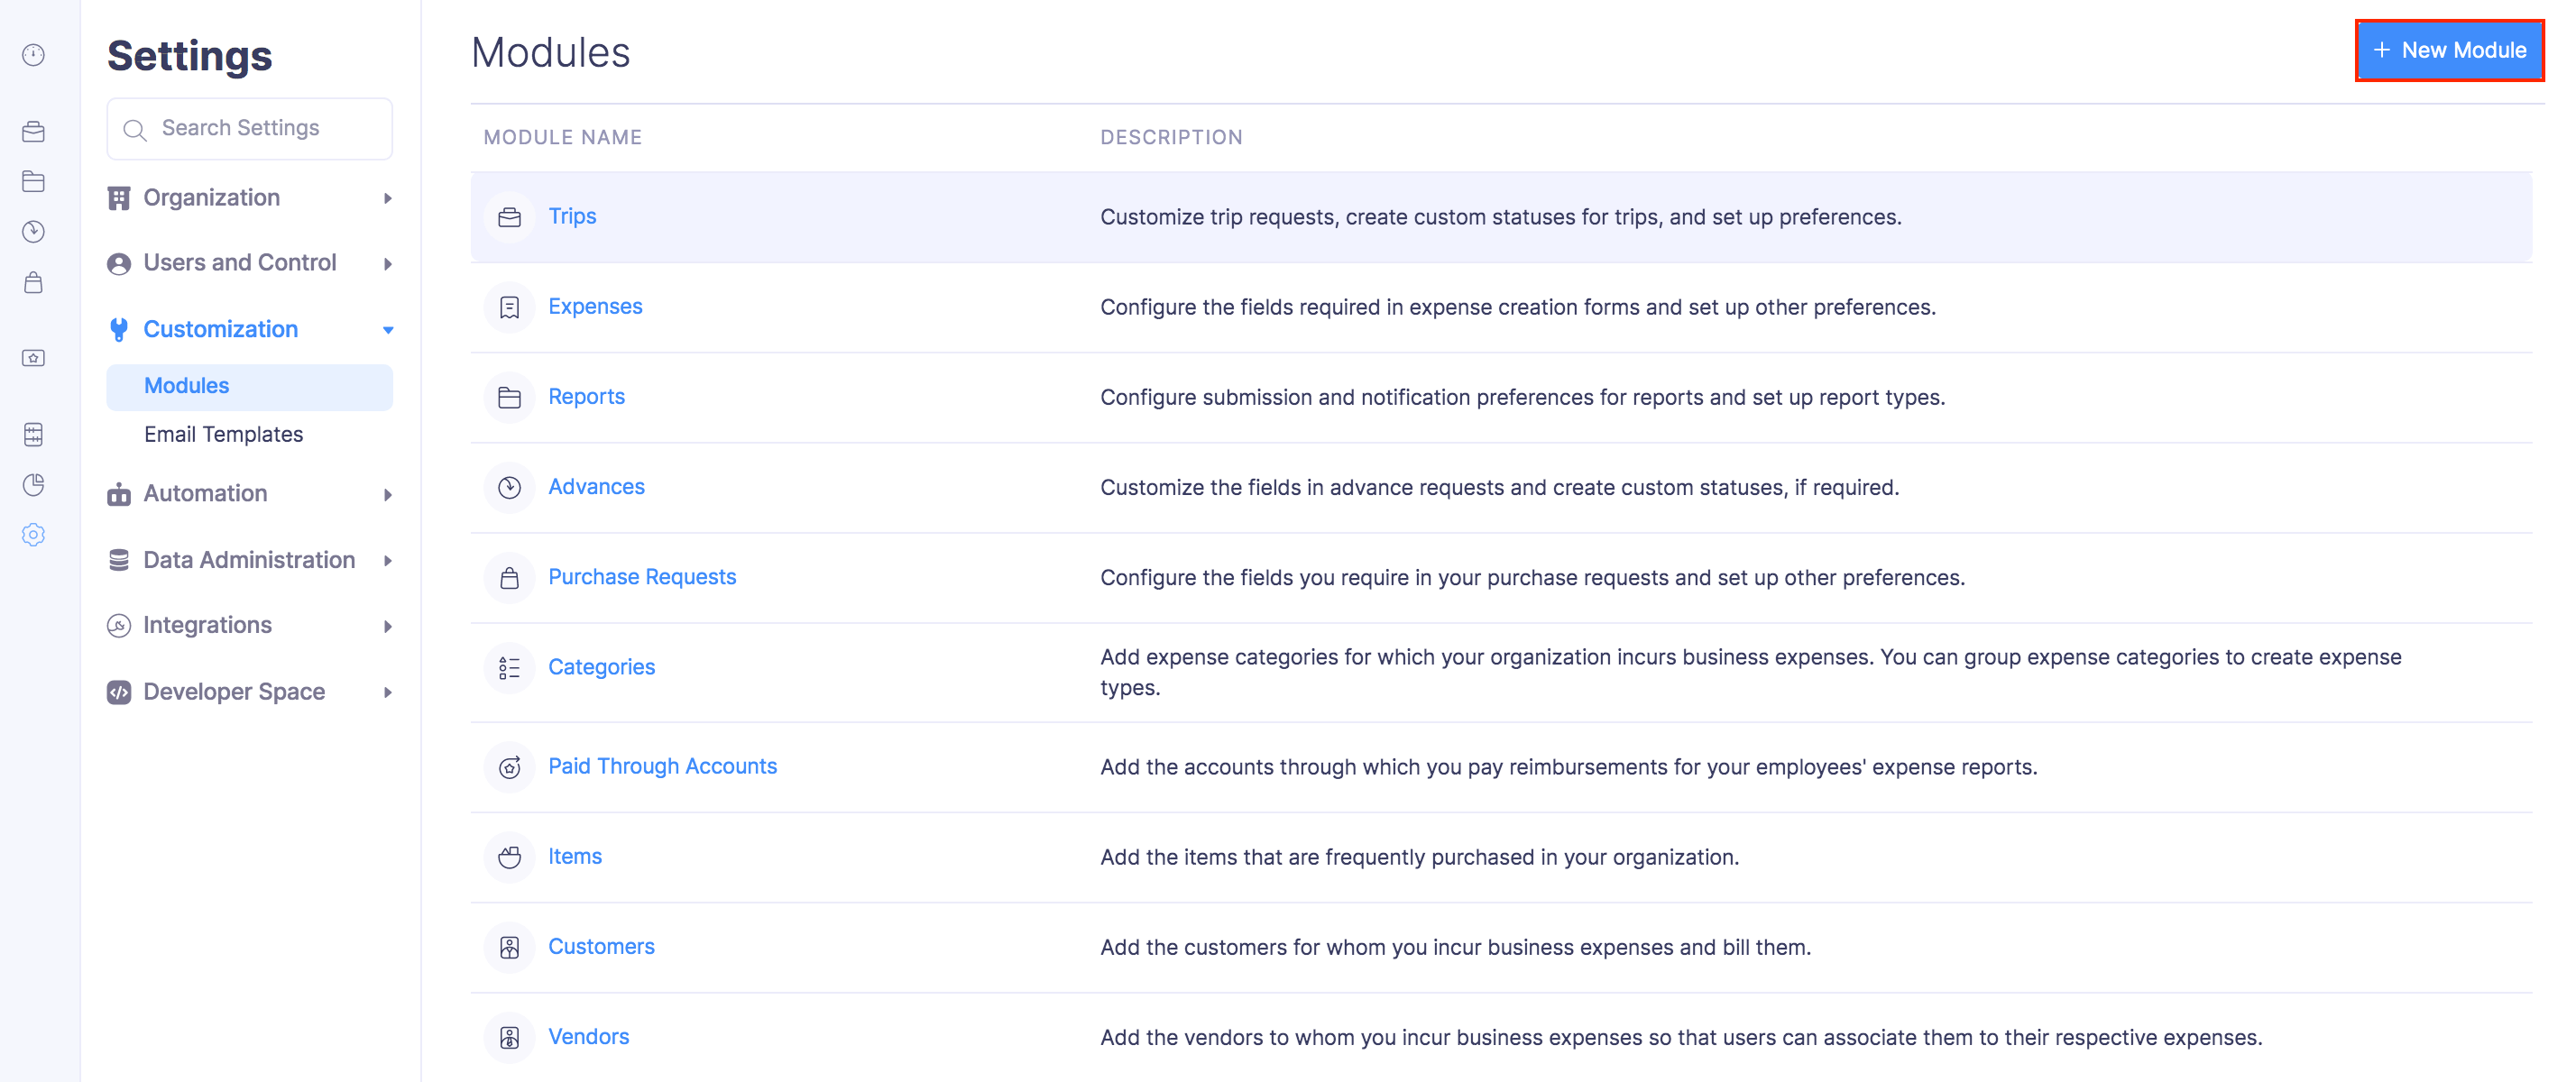
- Click Admin View on the left sidebar.
- Go to Settings on the left sidebar.
(OR)
Click Settings in the top right corner of the page. - Select Overview under Custom Modules.
- Click + New Module in the top right corner.
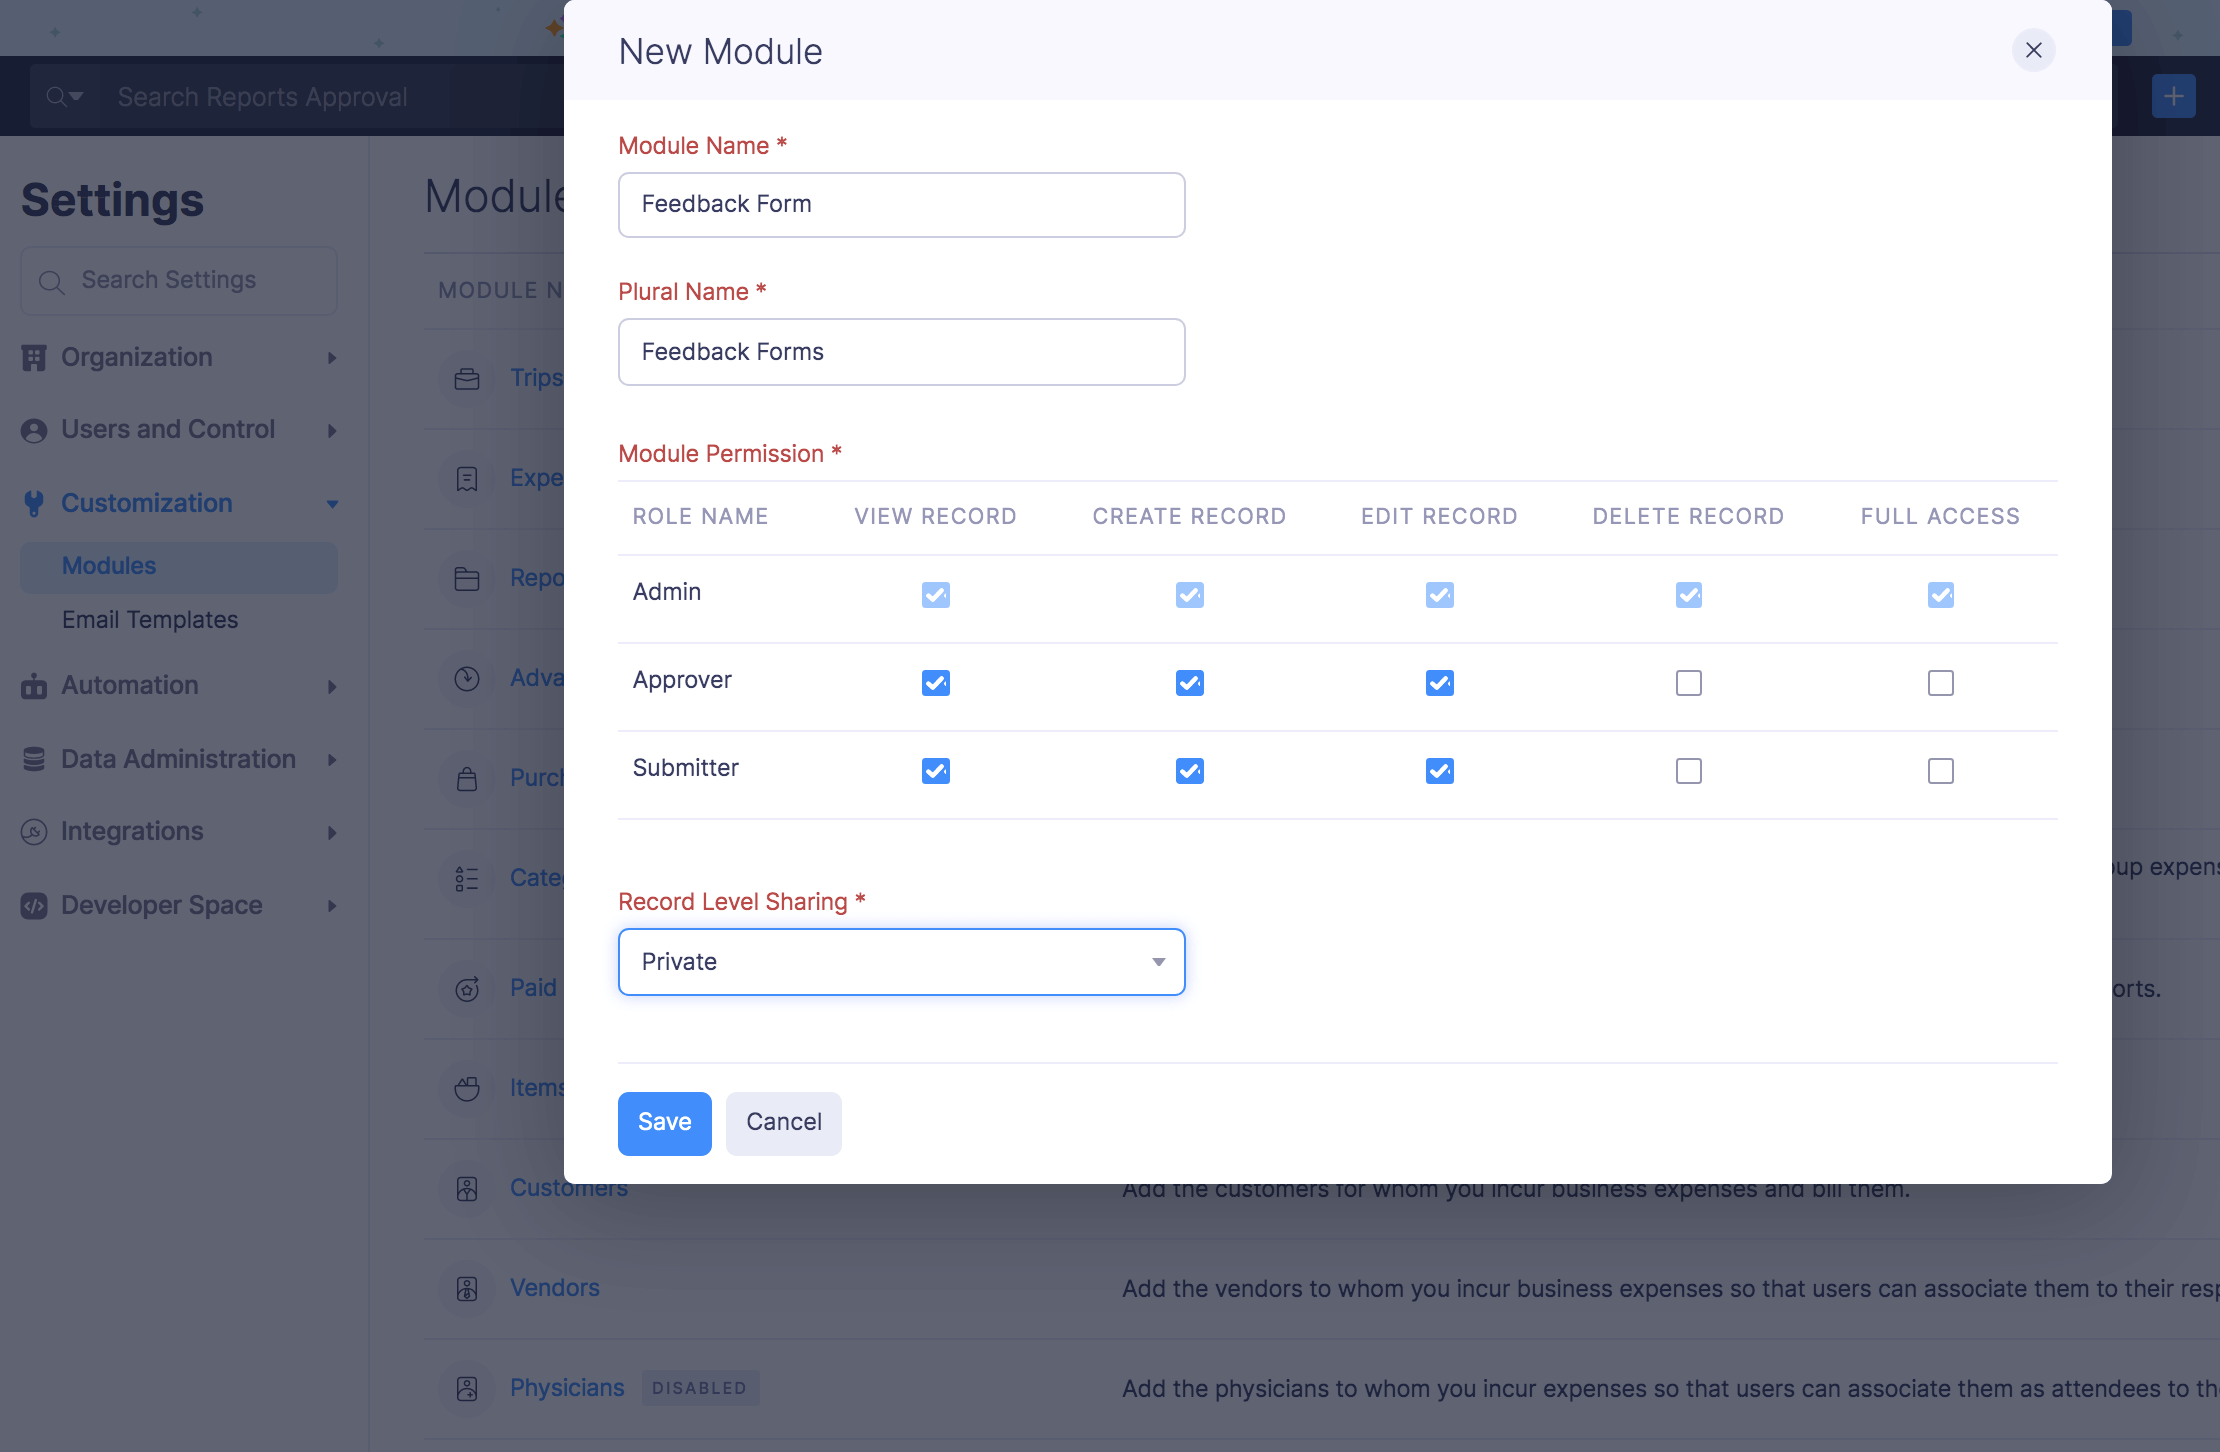
- Fill in the following details:
| Field | Description |
|---|---|
| Module Name | Enter a name to identify your custom module. |
| Module Name in Plural | Enter the plural form of the module name. This is used wherever the module name appears in plural context across the application. |
| Description | Enter a brief description of the module’s purpose. |
- Under Module Permission, select the actions each user role can perform on records in this module.
| Permission | Description |
|---|---|
| View Record | View records in the custom module. |
| Create Record | Create new records in the custom module. |
| Edit Record | Edit existing records in the custom module. |
| Delete Record | Delete records from the custom module. |
| Full Access | View, create, edit, and delete records in the custom module. |
Insight: The Admin role has full access to all custom modules by default. You can configure permissions for the Approver and Submitter roles. Selecting Full Access for a role automatically enables all other permissions.
- Select a Record Level Sharing option from the dropdown:
| Option | Description |
|---|---|
| Private | Only the user who creates the records can view them. However, they can choose to share the records with other users. |
| Read Only | All users can view the records created under this module. |
| Read and Write | All users can create, view, edit, and delete the records created under this module. |
- Click Save.
Note: A default field called Name is automatically created for every custom module. You can add more fields by creating fields.
Edit a Custom Module
To edit a custom module:
- Click Admin View on the left sidebar.
- Go to Settings on the left sidebar.
(OR)
Click Settings in the top right corner of the page. - Select Overview under Custom Modules.
- Hover over the custom module you want to edit and click the More icon.
- Click Edit.
- Make the necessary changes and click Save.

Delete a Custom Module
Deleting a custom module permanently removes it along with all its records, fields, and views.
Warning: Deleting a custom module is irreversible. All records, fields, and views associated with the module are permanently deleted.
To delete a custom module:
- Click Admin View on the left sidebar.
- Go to Settings on the left sidebar.
(OR)
Click Settings in the top right corner of the page. - Select Overview under Custom Modules.
- Hover over the custom module you want to delete and click the More icon.
- Click Delete.
- In the pop-up that appears, click Delete to confirm.
Fields
Once you create a custom module, you can add fields to capture data specific to your requirements. Each custom module comes with a default Name field that cannot be deleted.
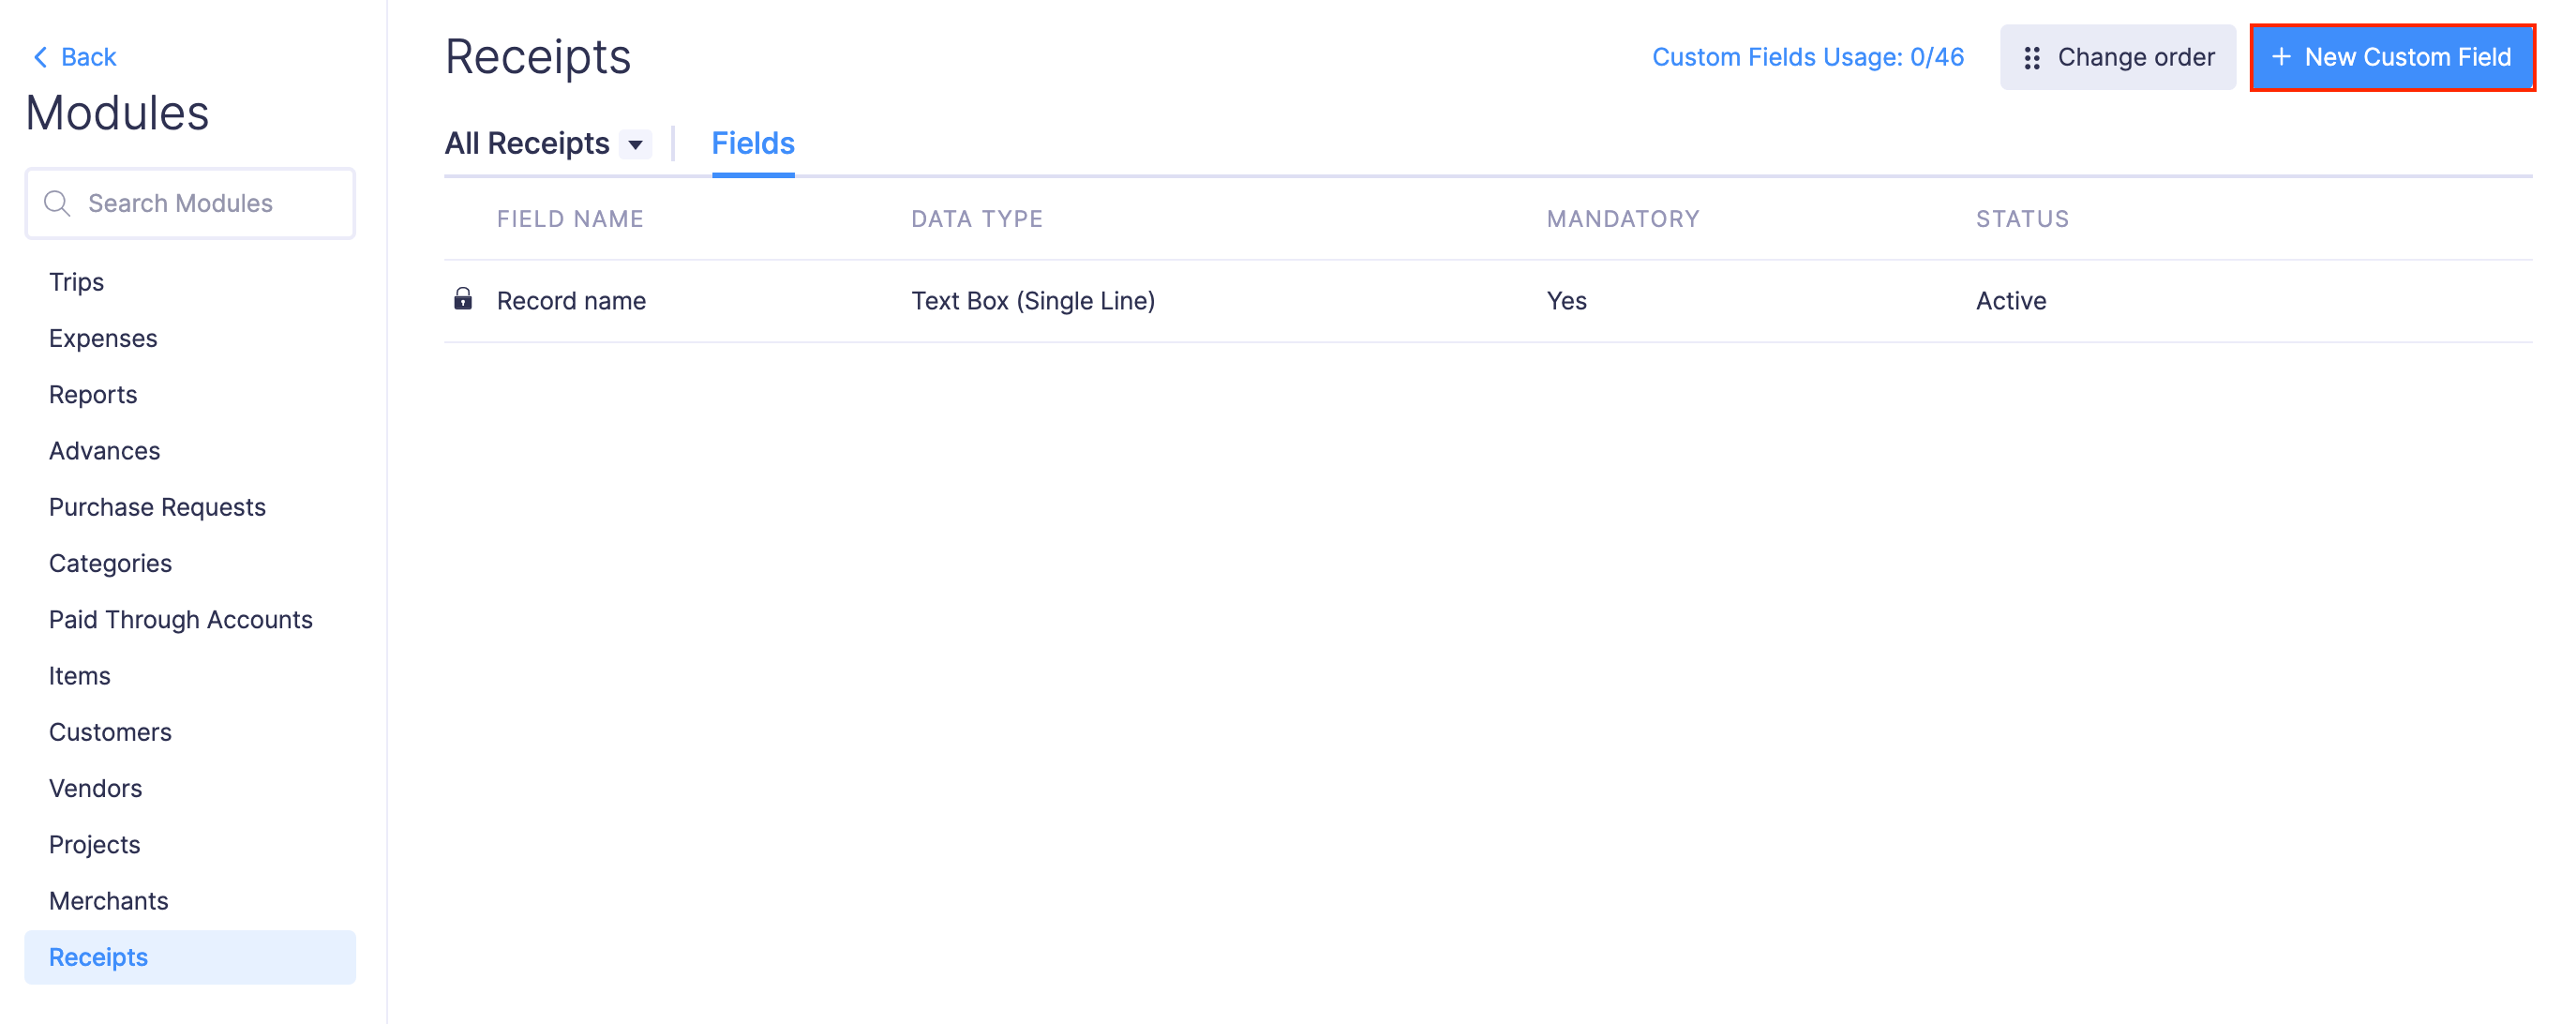
Create a Field
To create a field for a custom module:
- Click Admin View on the left sidebar.
- Go to Settings on the left sidebar.
(OR)
Click Settings in the top right corner of the page. - Select the custom module under Custom Modules.
- Go to the Fields tab.
- Click + New Custom Field in the top right corner.
- Enter a Label Name for the field.
- Select a Data Type for the field. A preview of the field is displayed based on the selected data type.
| Data Type | Description |
|---|---|
| Attachments | Attach PDFs, images, and documents to the record. |
| Auto-generate | Automatically generate a sequence of numbers each time a new record is created. |
| External Lookup | Link modules from other apps such as Zoho CRM, Zoho Creator, and Zoho Desk. |
- If the data in this field can be used to identify a person, select a Personally Identifiable Information (PII) option to protect the privacy of users:
| PII Option | Description |
|---|---|
| Yes, it’s PII. Encrypt and store it. | The data is encrypted and stored. Only users with PII access permission can view it. Advanced search is not available for this field. |
| Yes, it’s PII but not sensitive. Store it without encryption. | The data is stored without encryption. Only users with PII access permission can view and perform advanced search using this field. |
| No, it’s not PII. | The data is stored without encryption. All users can view and perform advanced search using this field. |
- Enter a Default Value if you want a pre-filled value to appear when creating new records for this module.
- Select Is Mandatory if the field must be filled before saving a record.
- Click Save.

Insight: You can rearrange the order of fields by clicking Change Order in the top right corner. Drag and drop the fields to reorder them, then click Save Reorder. The default Name field cannot be rearranged.
To learn more about editing, deleting, and managing fields, see Custom Fields.
Custom Views
All records in a custom module are displayed in a list view by default. You can create custom views to filter and display records based on specific criteria.
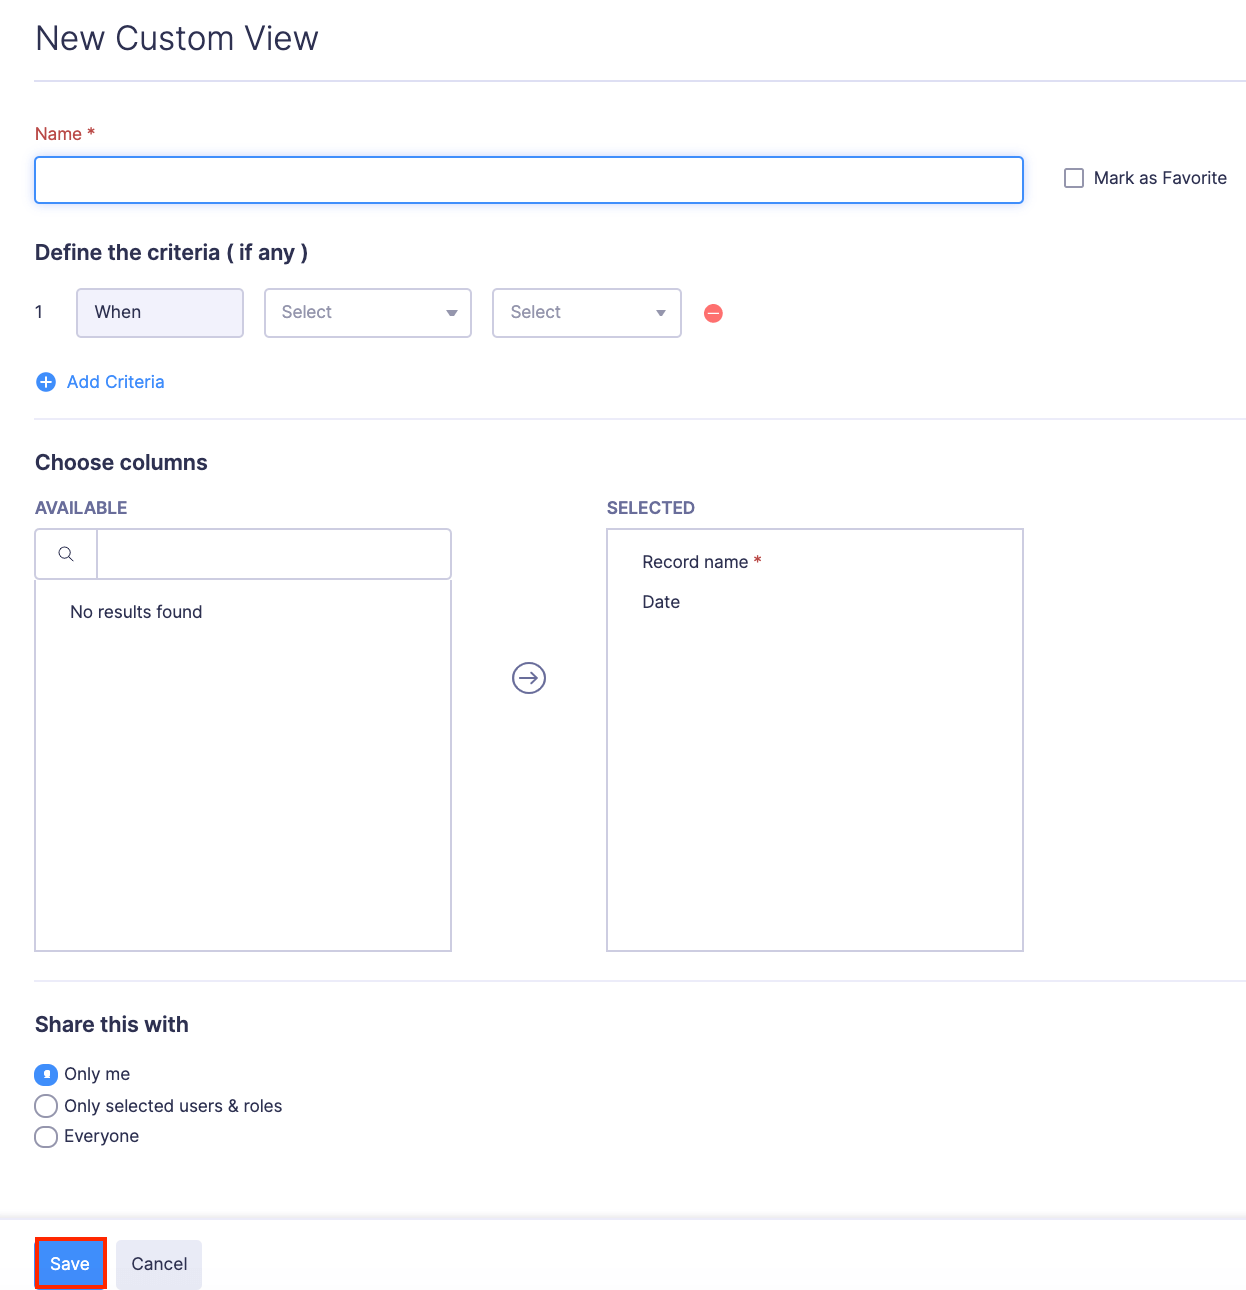
To create a custom view:
- Click Admin View on the left sidebar.
- Go to Settings on the left sidebar.
(OR)
Click Settings in the top right corner of the page. - Select the custom module under Custom Modules.
- Click the view dropdown at the top of the page (for example, All Feedback Forms).
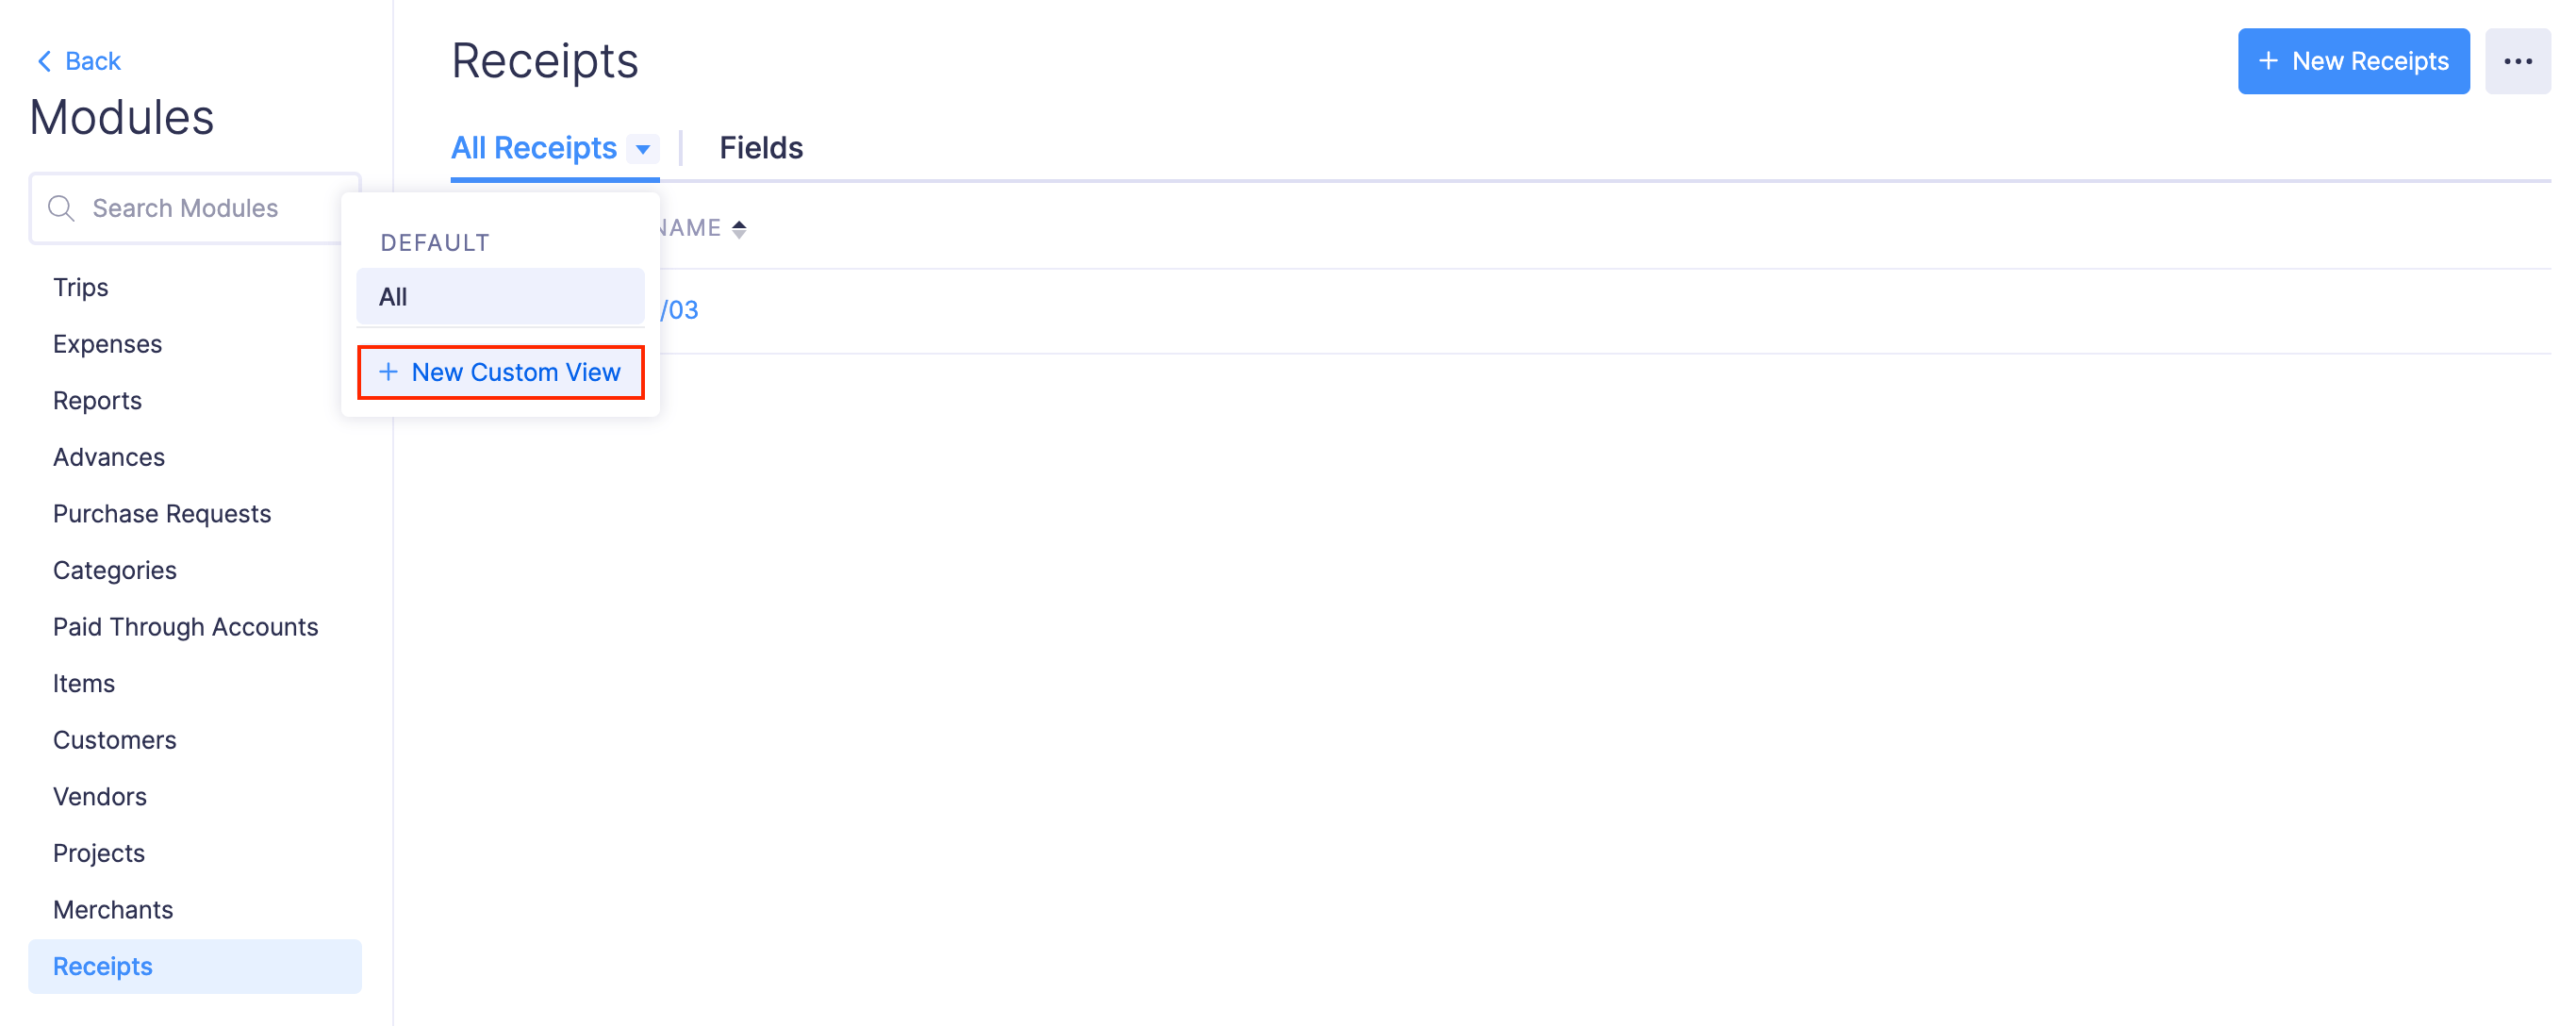
- Click + New Custom View.
- Fill in the following details:
| Field | Description |
|---|---|
| Name | Enter a name for the custom view. Select Mark as Favourite to quickly access this view. |
| Criteria | Set filter criteria based on the fields in the module. Click + Add Criteria to add multiple conditions. |
| Choose Columns | Select the fields to display in the custom view. Move fields from the Available list to the Selected list by clicking the + icon. |
| Share This With | Choose who can access this custom view. Only admins can share custom views. |
- Click Save.