Basic Functions in Retainer Invoice
In this section, let us explore how to enable the Retainer Invoices module, create retainer invoices, record payments for retainer invoices, and track the retainer payments received.
IN THIS PAGE
Enable Retainer Invoices
In order to use the Retainer Invoices module in Zoho Books, you must first enable it in Settings. Here’s how:
1. Go to Settings by clicking the Gear icon in the top right corner.
2. Click General under Preferences.
3. Check the box Retainer Invoices.
Insight: As the retainer amount you receive from your customers is a liability in general, it will be recorded in the Unearned Revenue account by default. If you want, you can change it in the Default account for receiving Retainer Payments dropdown.
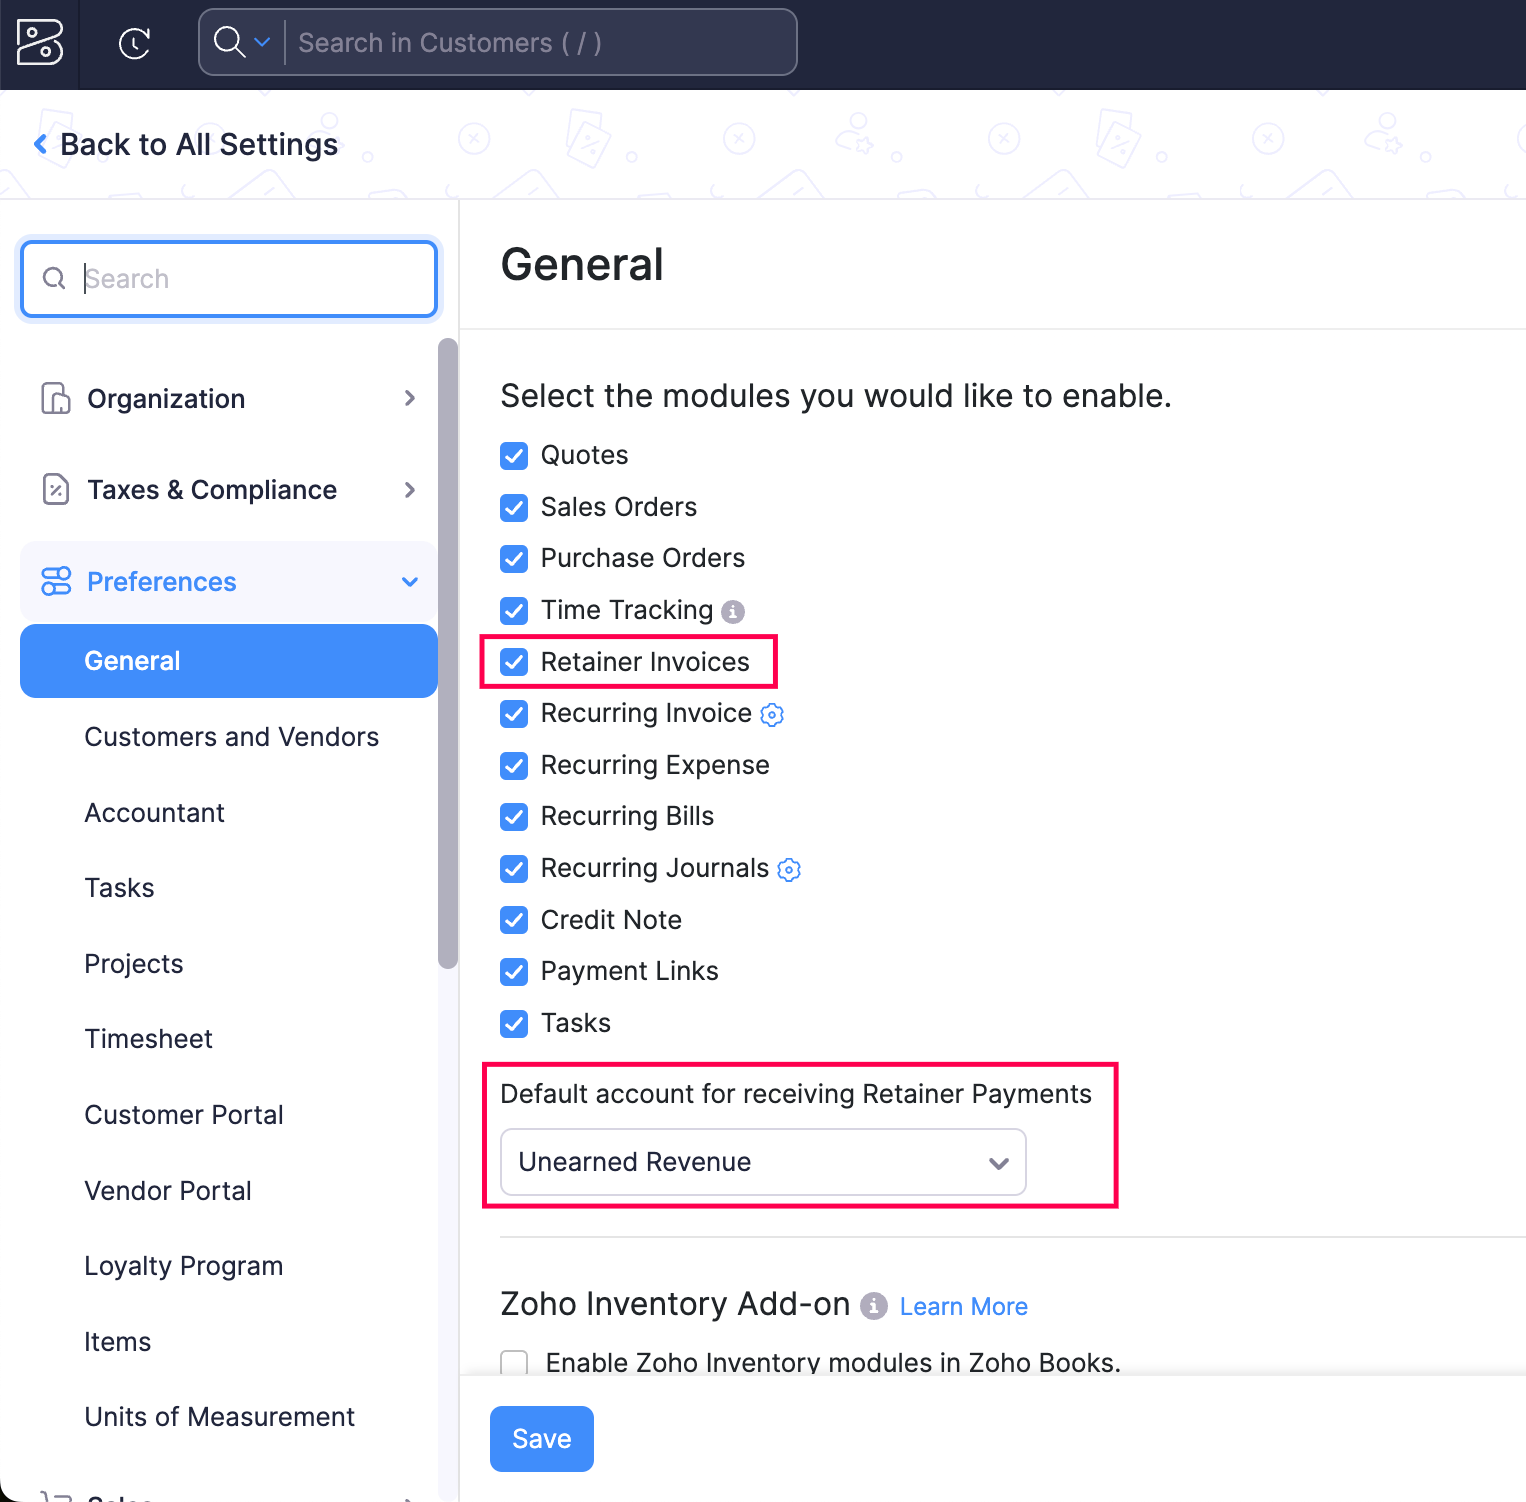
4. Click Save.
Create Retainer Invoices
After enabling the Retainer Invoices module, you will be able to create retainer invoices. Here’s how:
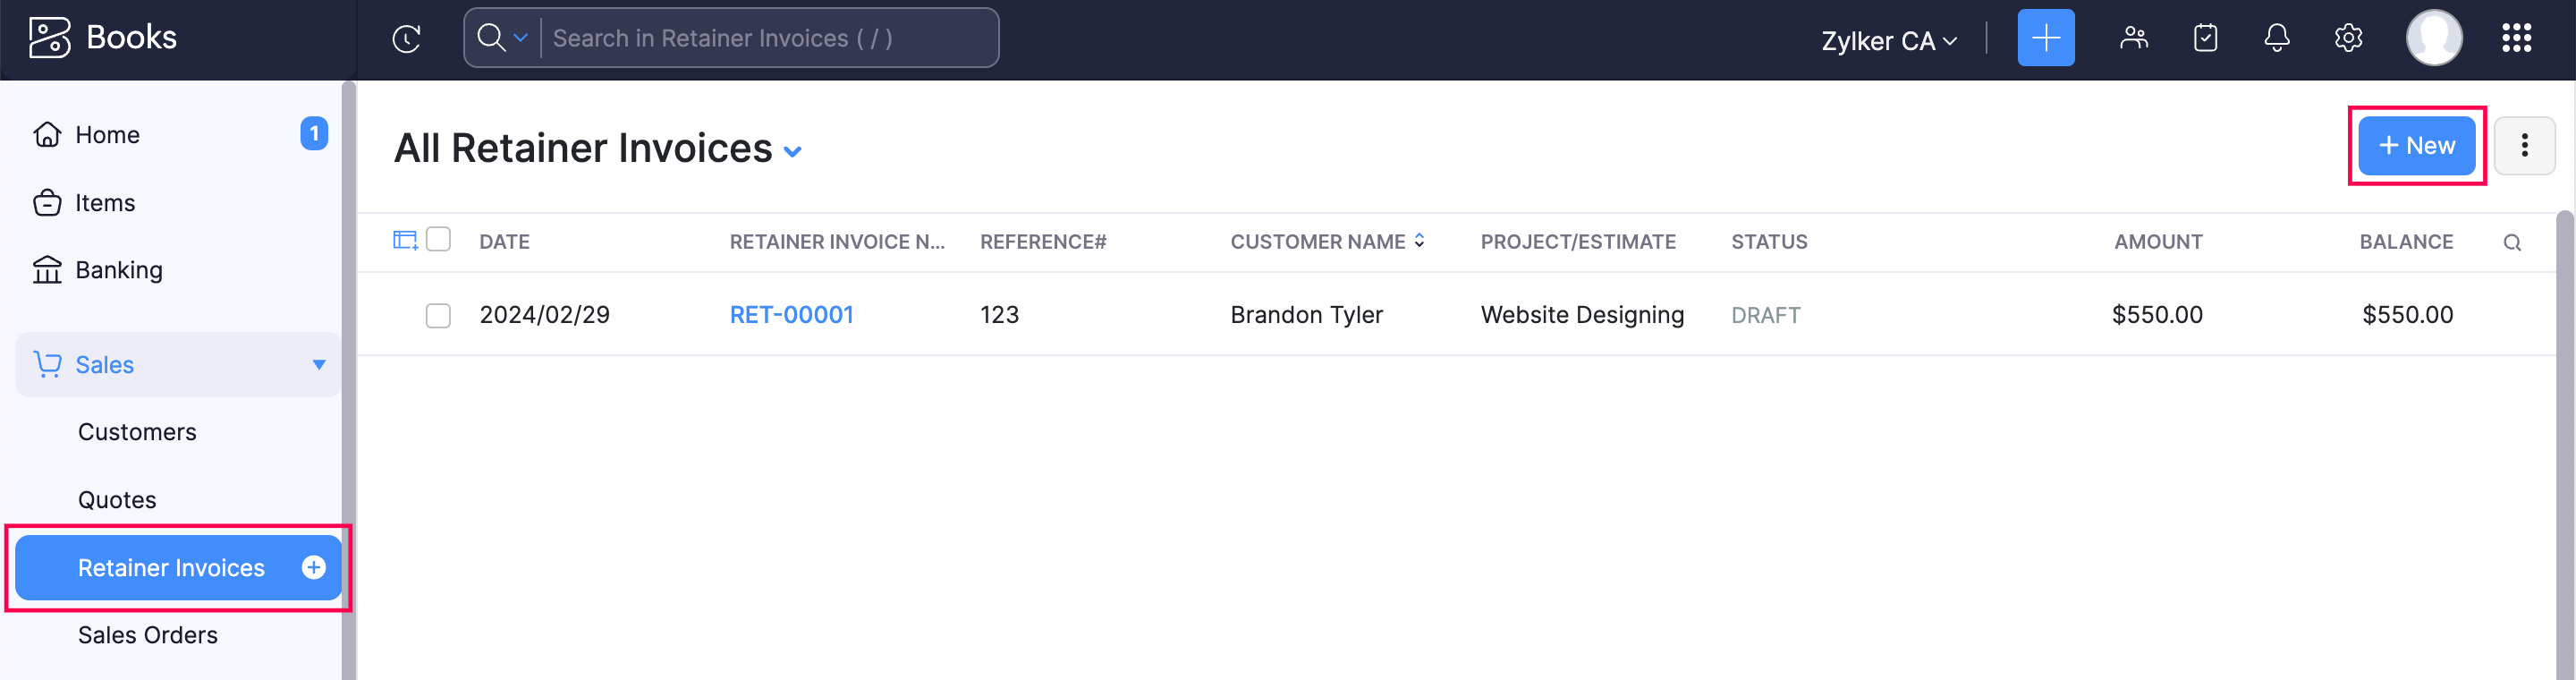
1. Click Retainer Invoices under Sales in the left sidebar.
2. Click the + icon next to Retainer Invoices in the left sidebar or + New on the top right corner of the retainer invoices list page.
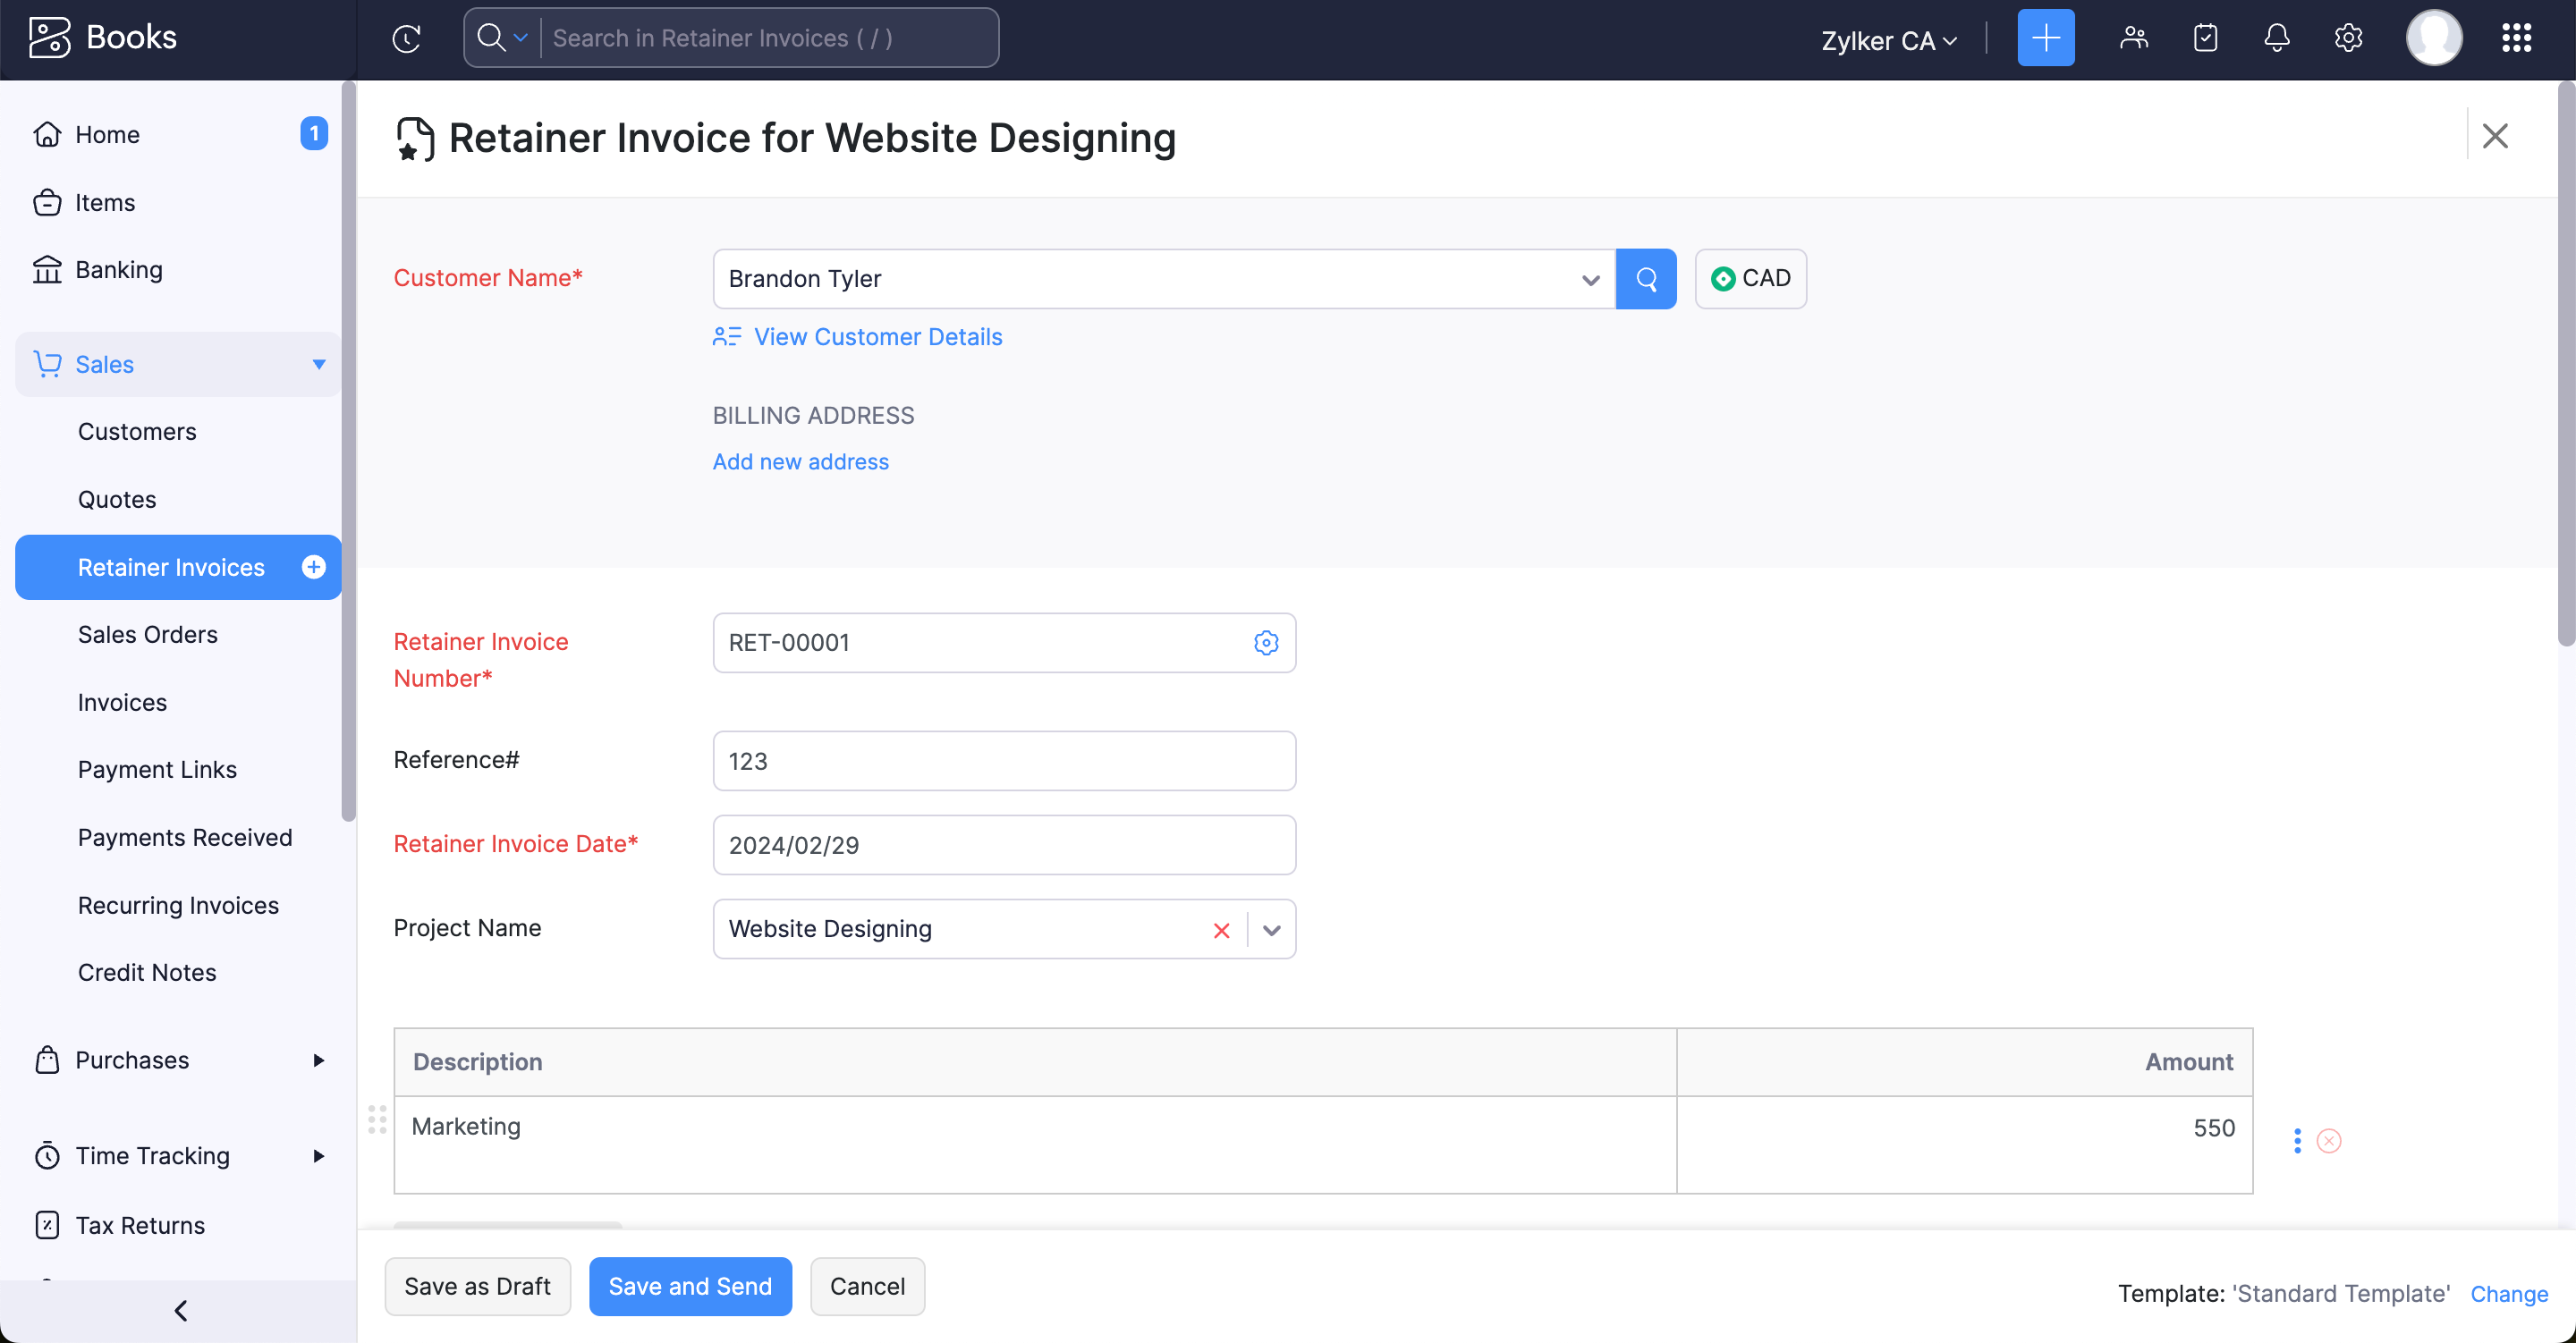
3. Fill in the following details:
| Fields | Description |
|---|---|
| Customer Name | Select the customer for whom you want to create the retainer invoice. |
| Retainer Invoice Number | The retainer invoice number will be auto-generated. However, you can also enter a unique number by clicking the Gear icon. |
| Retainer Invoice Date | Select the date on which the retainer invoice is created. |
| Reference# | Enter a reference number for the retainer invoice if required. |
4. Click Save as Draft or Save and Send.
Now, a retainer invoice will be created in the Draft or Sent state.
Record Payment for Retainer Invoices
After creating a retainer invoice, you can record payment for it when your customers pay you. There are two ways in which you can record payments:
a. Offline Payments
b. Charge Customer
a. Offline Payments
If your customer pays you the retainer (advance amount) in person, you can record it manually. Here’s how:
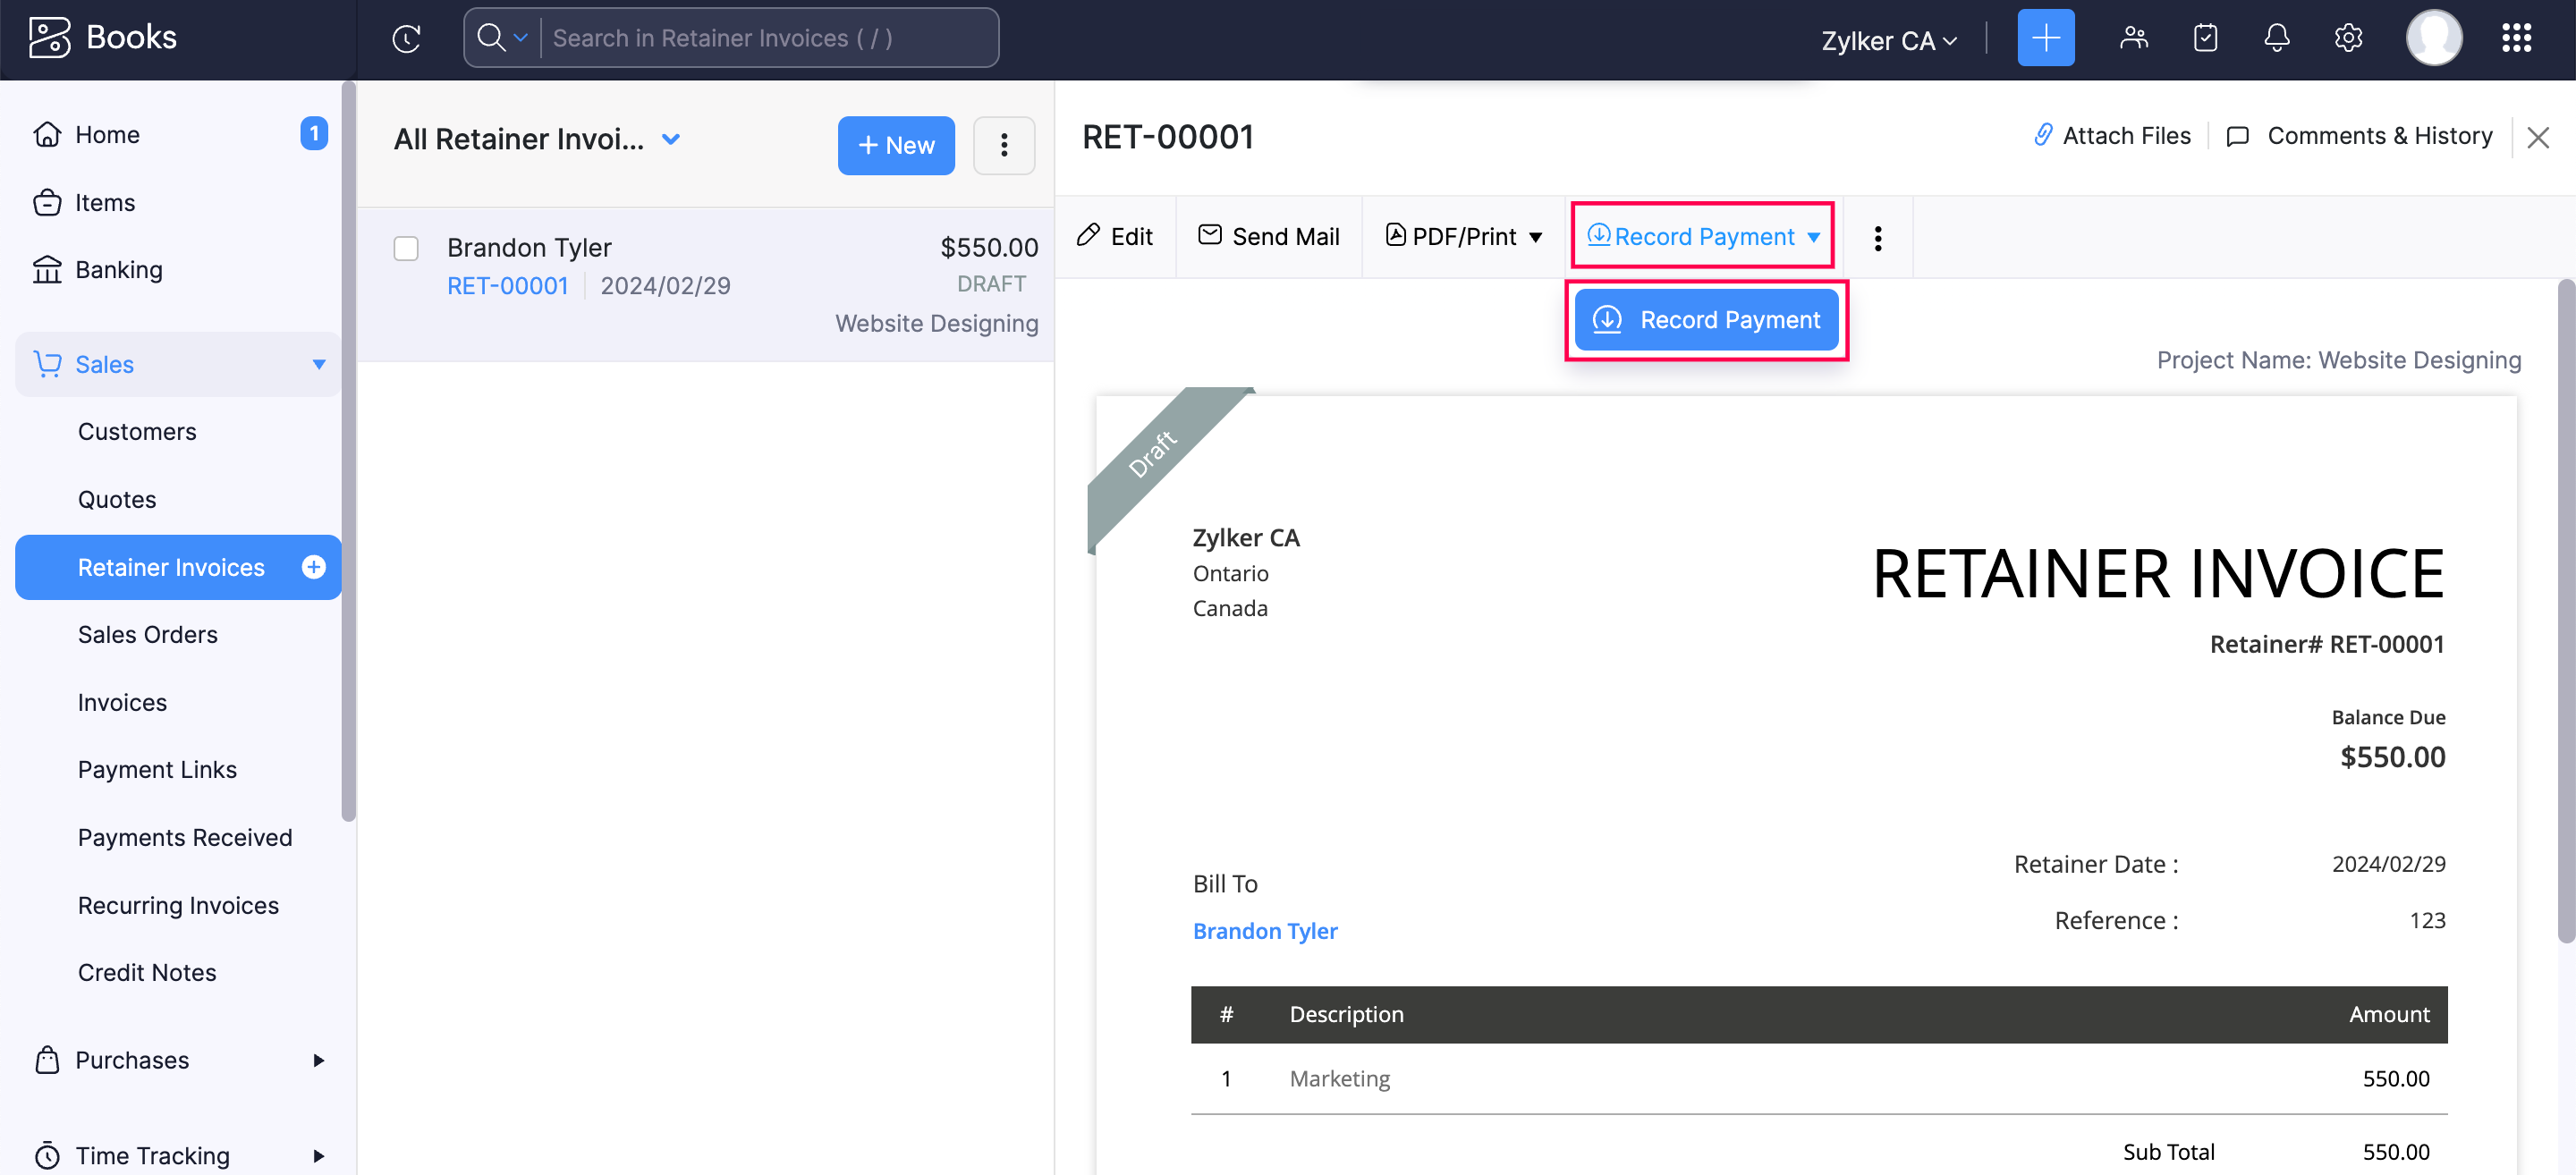
1. Click Retainer Invoices under Sales in the left sidebar.
2. Select the retainer invoice for which you wish to record the payment.
3. Click the Record Payment dropdown and select Record Payment.
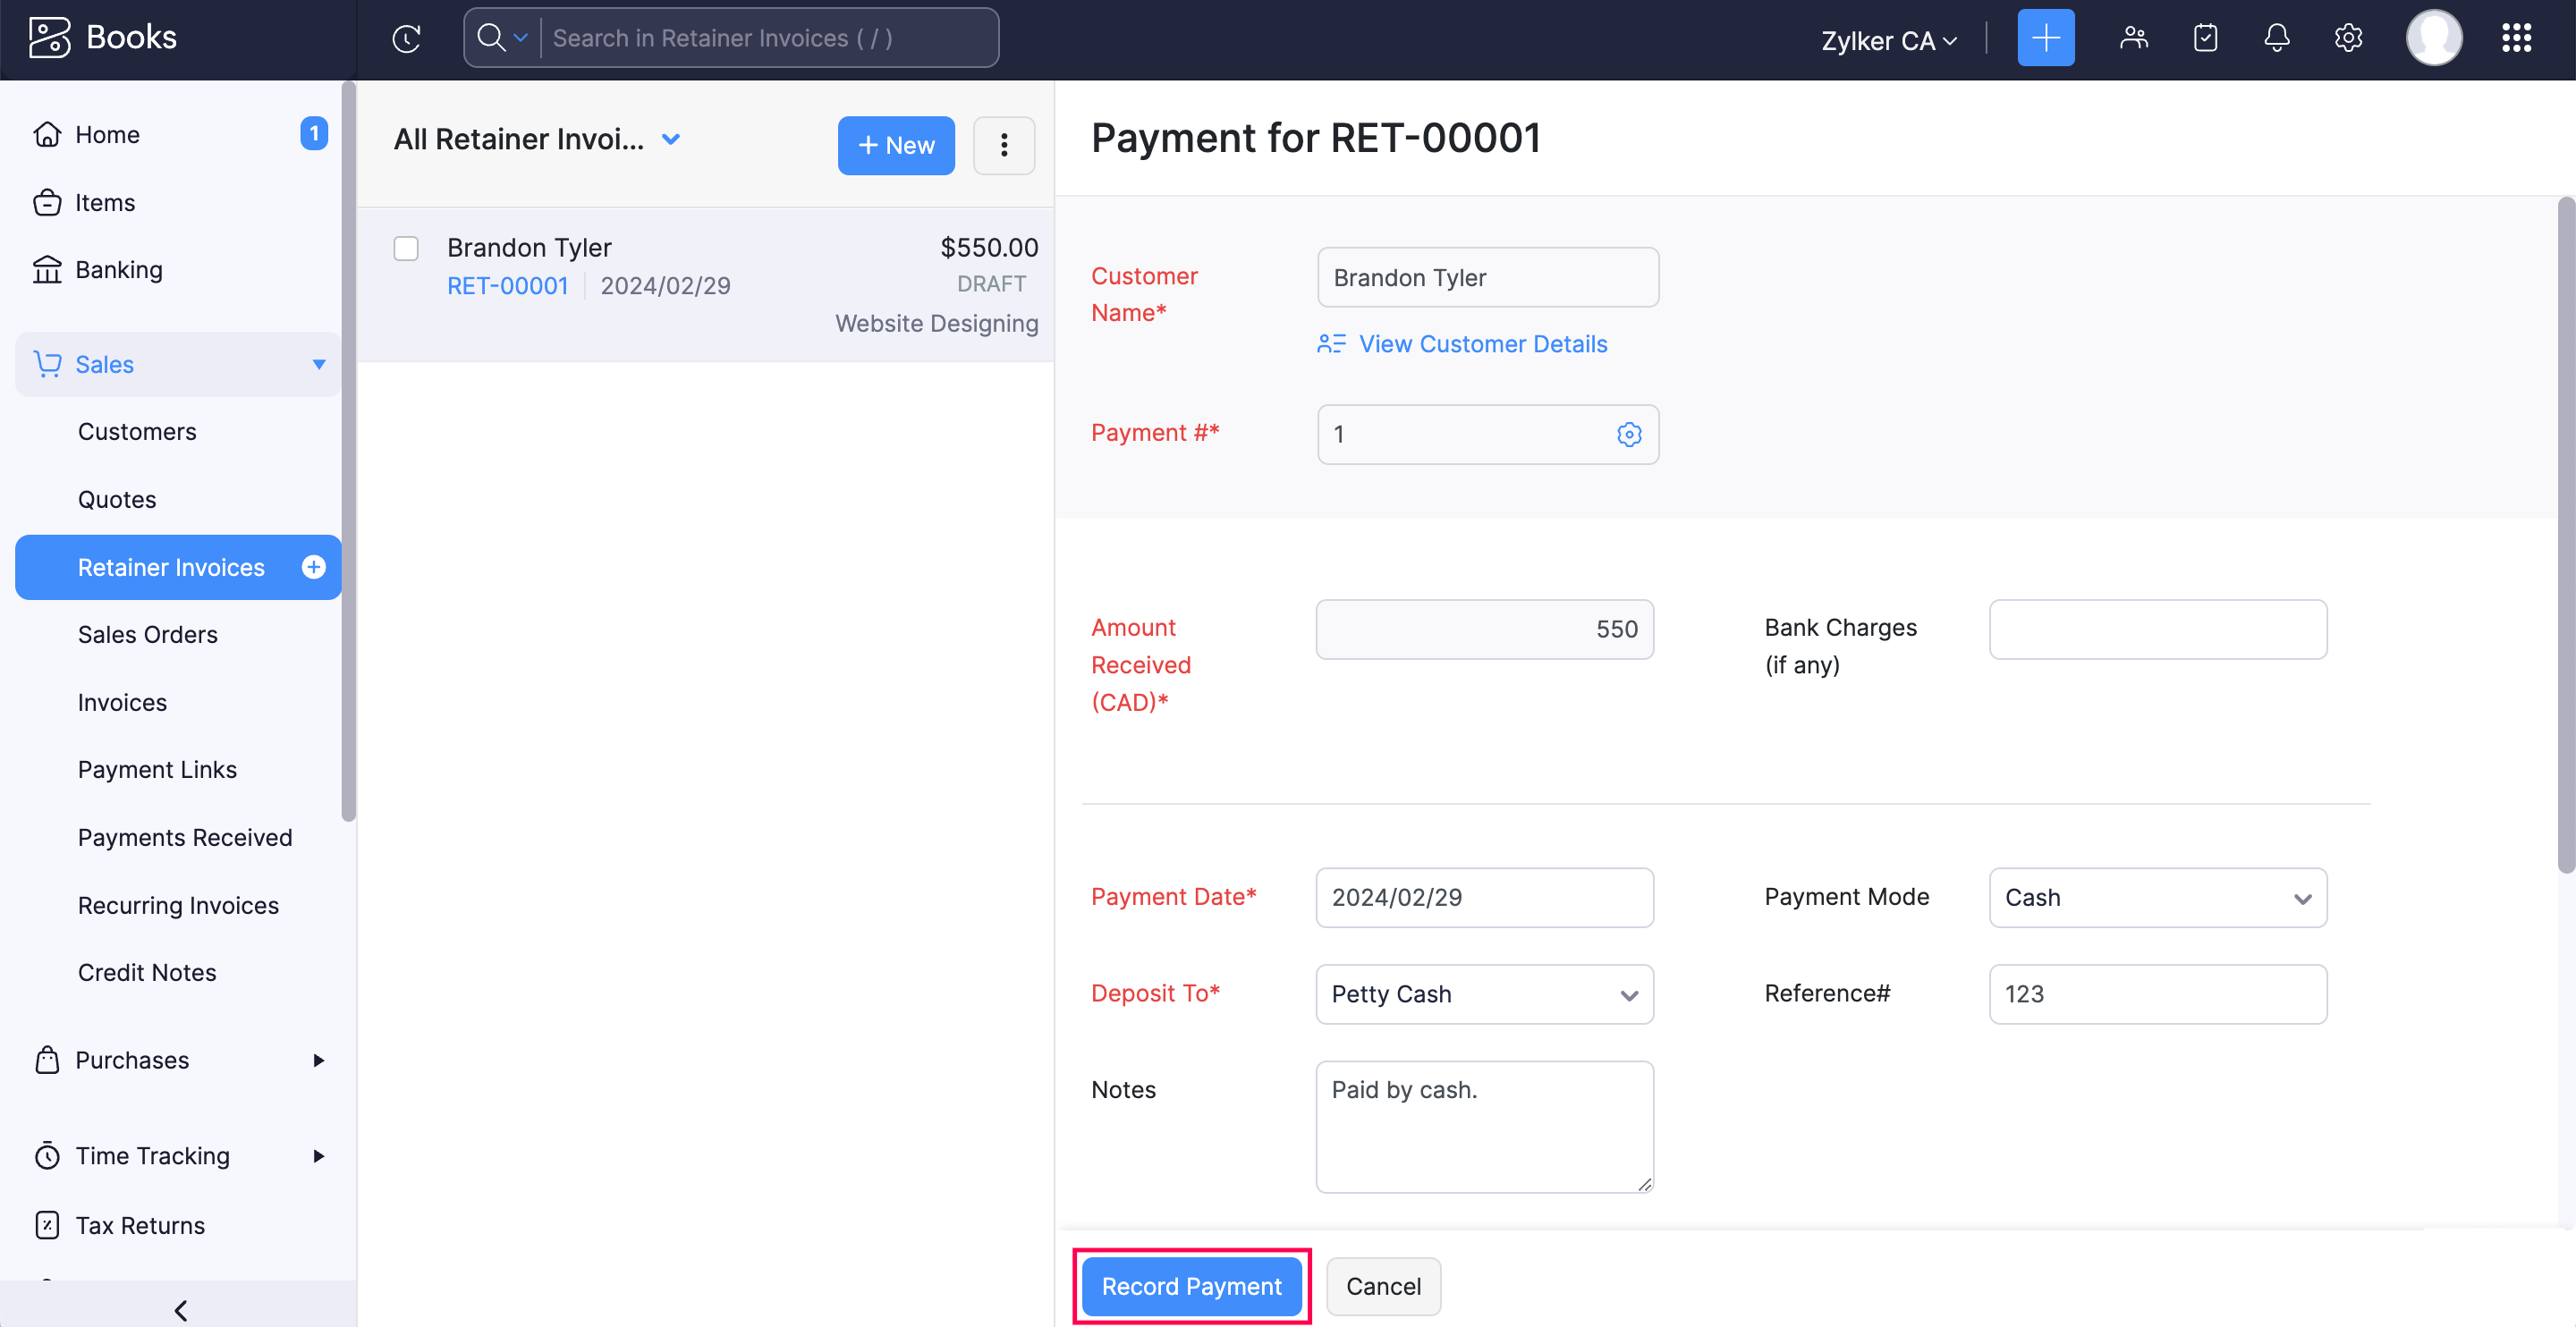
4. Fill in the required details and click Record Payment.
b. Charge Customer
If you have added the bank details or credit card information of your customer, you can charge them from within Zoho Books.
To charge your customer:
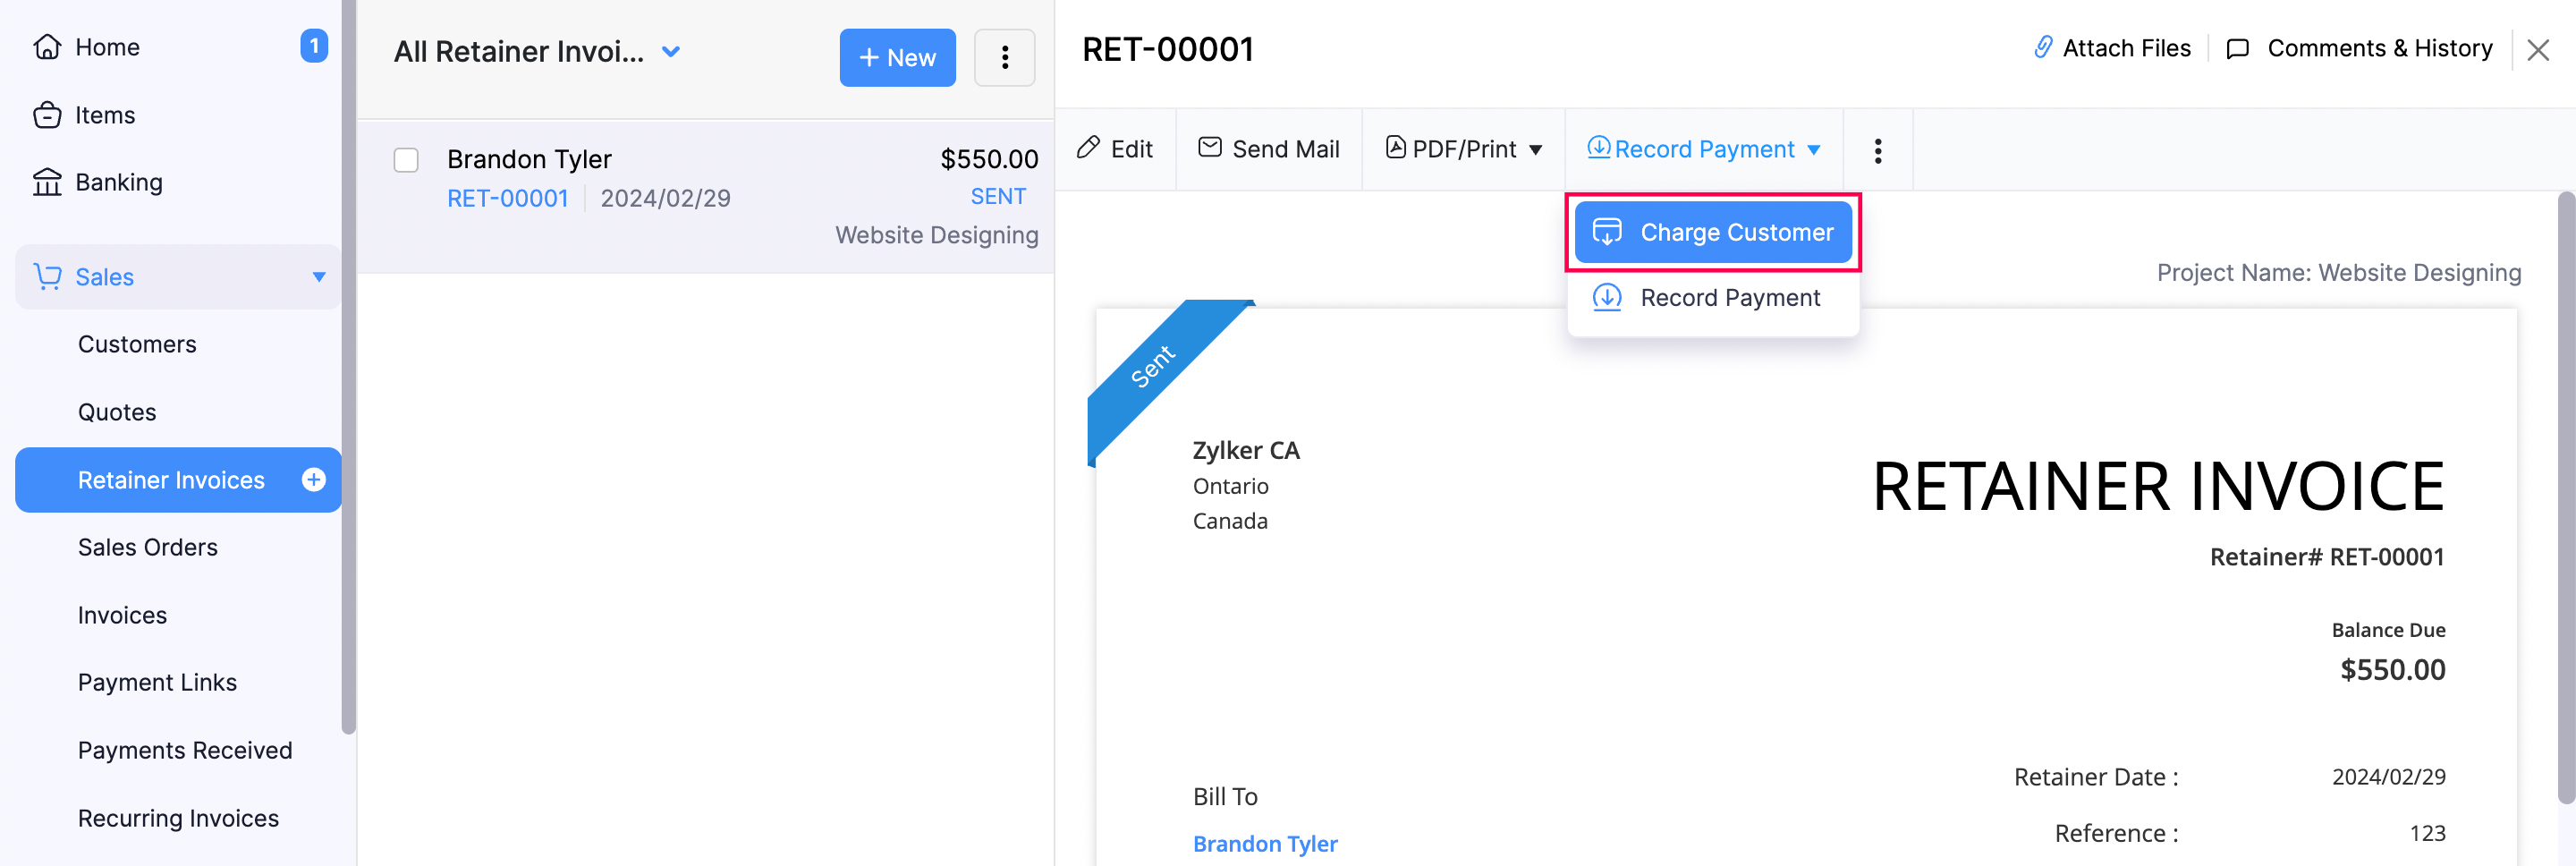
1. Click Retainer Invoices under Sales in the left sidebar.
2. Click on the retainer invoice for which you want to charge your customer.
3. Click the Record Payment dropdown and select Charge Customer.
4. Select the credit card or bank account to which you are charging the customer.
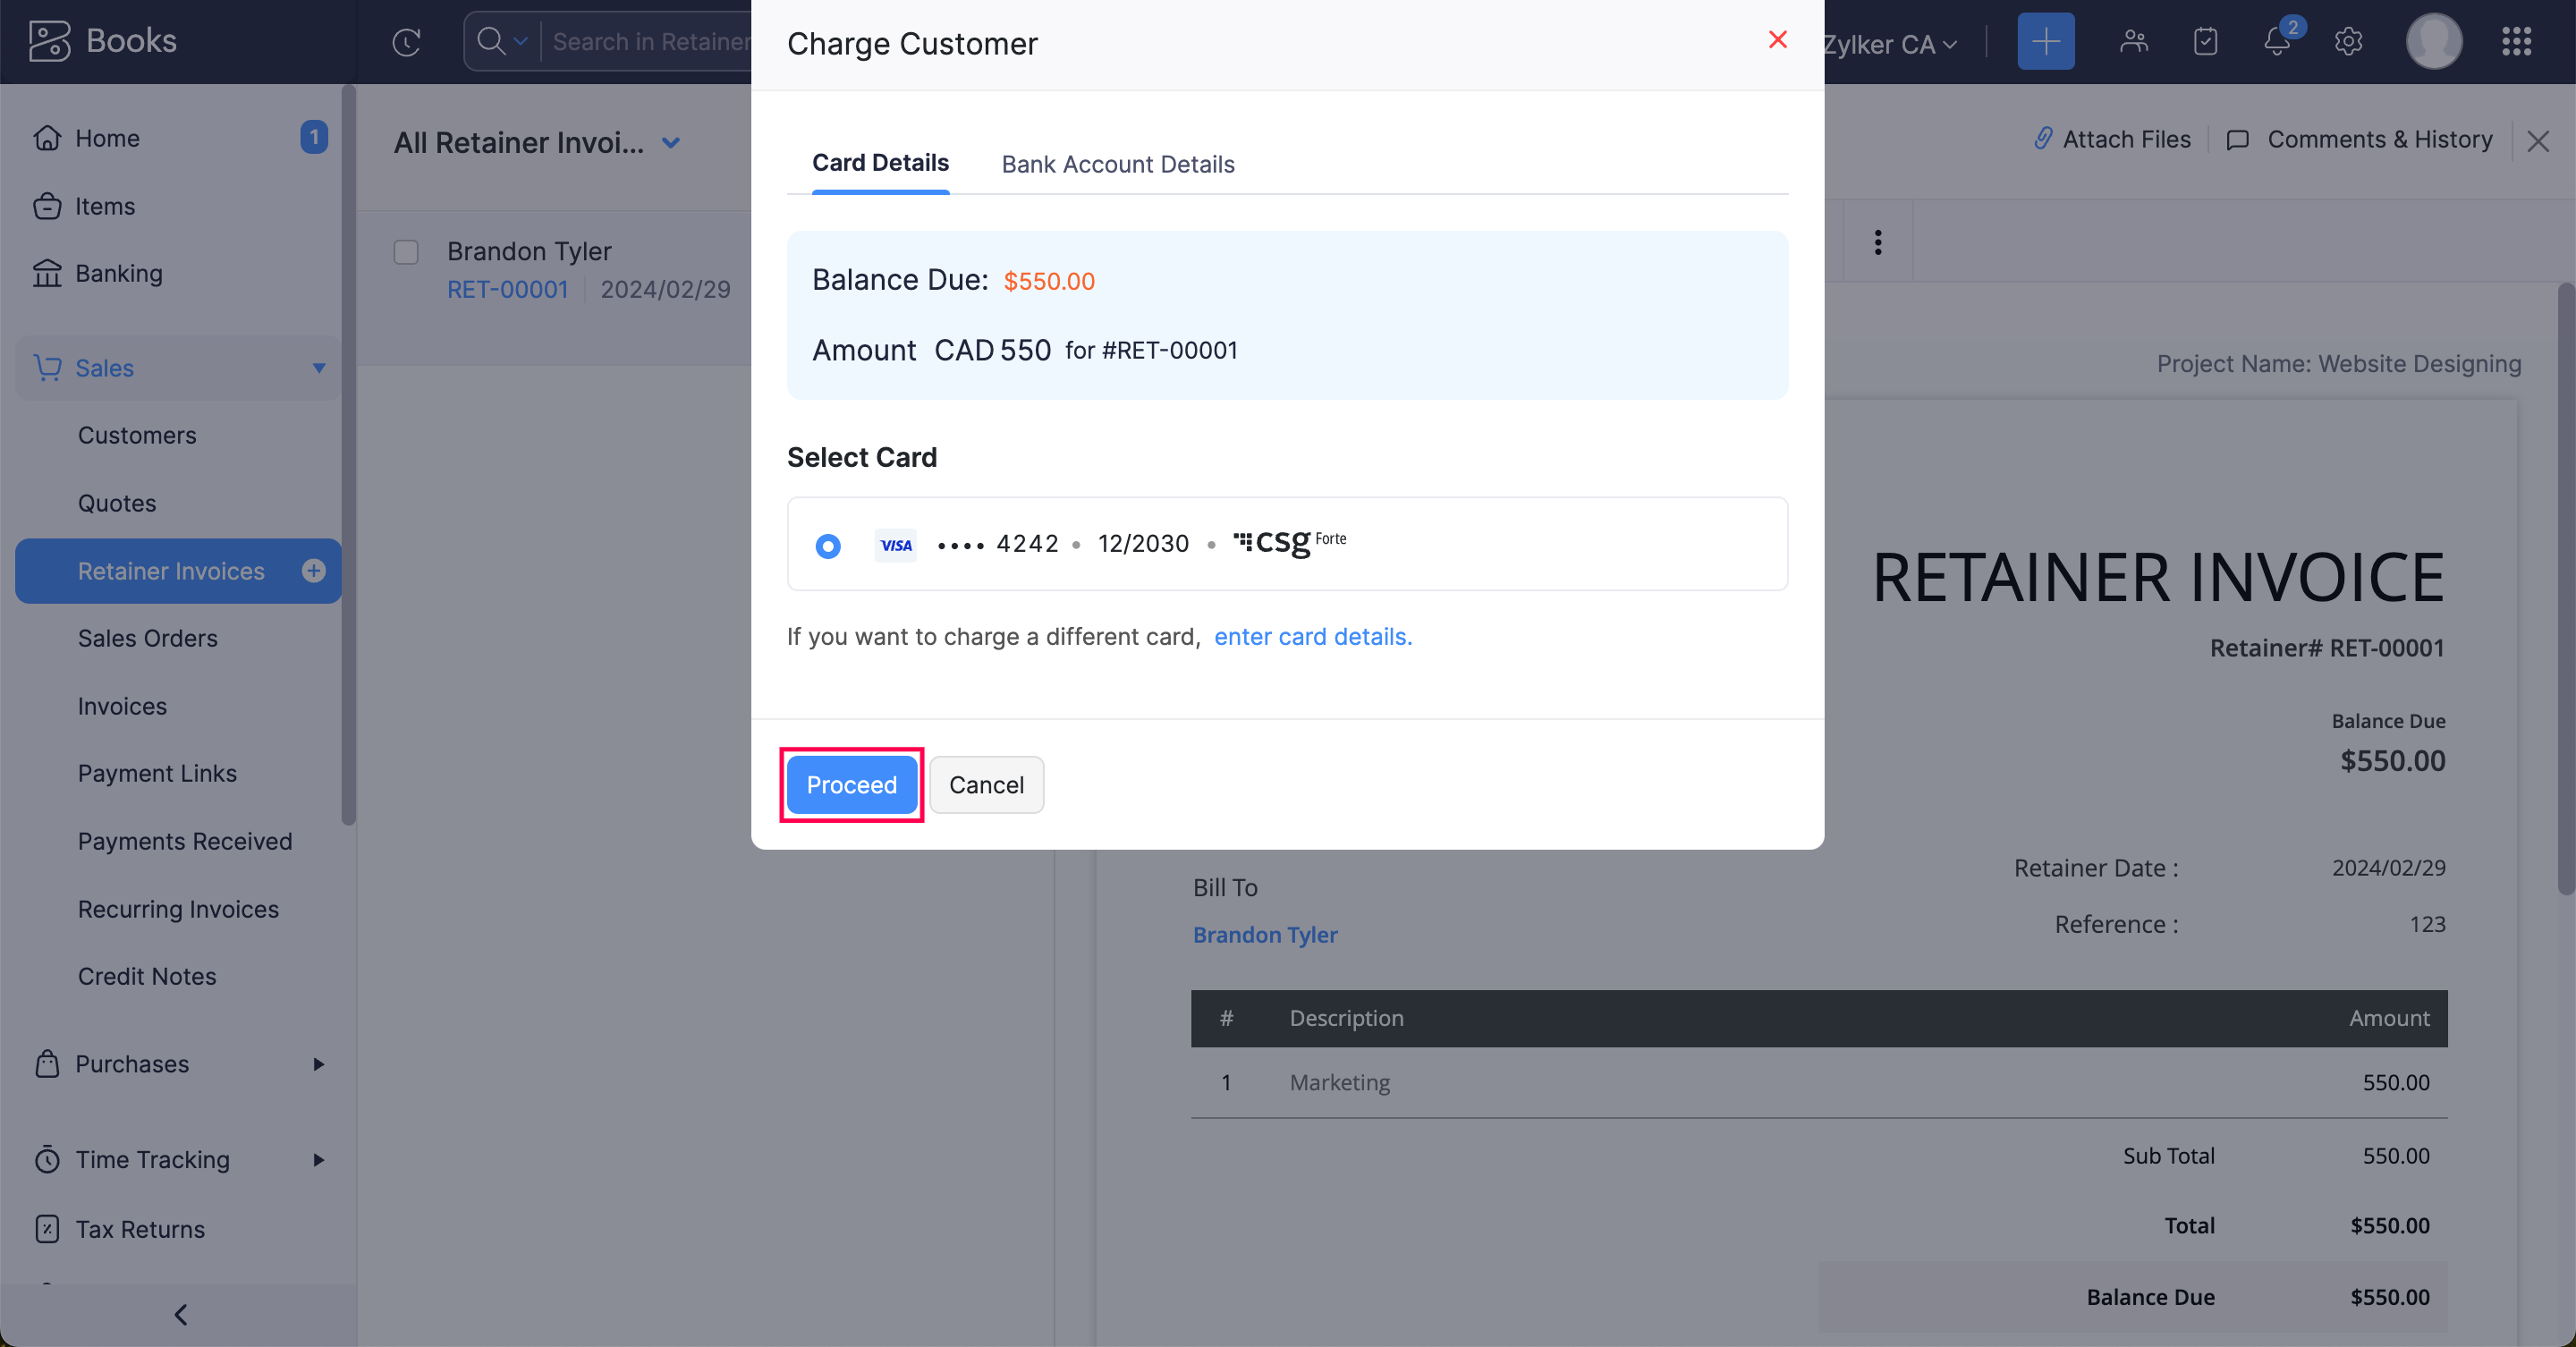
5. Click Proceed.
Once charged, the retainer invoice will be marked as Paid.
Track Payments Received for Retainer Invoices
If you have recorded payments for retainer invoices, you can view them in:
a. Payments Received Section Within a Retainer Invoice
b. Payments Received Module Under Sales
c. Payments Received Report for Retainer Invoices
a. Payments Received Section Within a Retainer Invoice
1. Click Retainer Invoices under Sales in the left sidebar.
2. Click on the retainer invoice for which you want to check if payment has been recorded.
3. Click Payments Received.
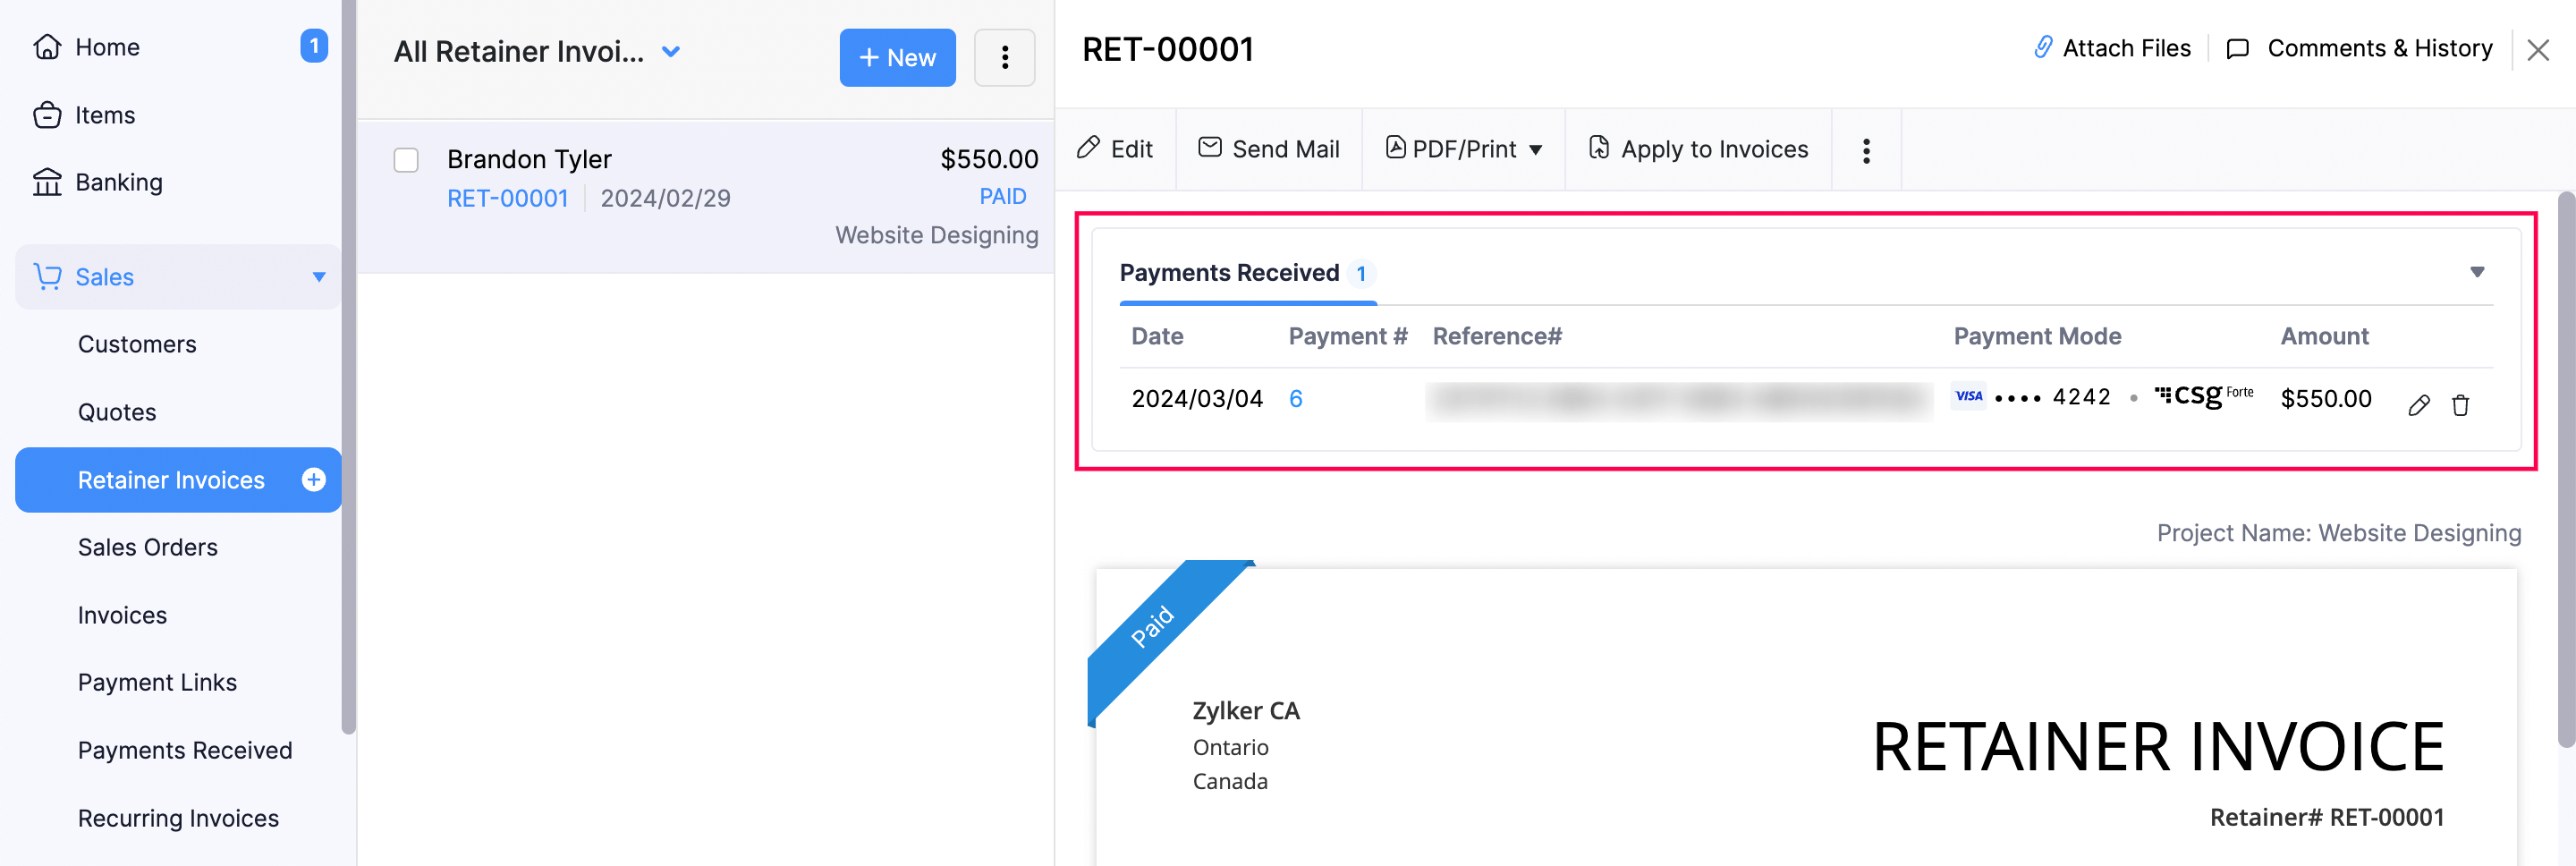
This section will list all the payments recorded for a particular retainer invoice.
If you do not see the Payment Received section, it means that you haven’t recorded any payment for this retainer invoice.
b. Payments Received Module Under Sales
1. Click Payments Received under Sales in the left sidebar.
2. Click All Payments Received at the top and select Retainer Payments.
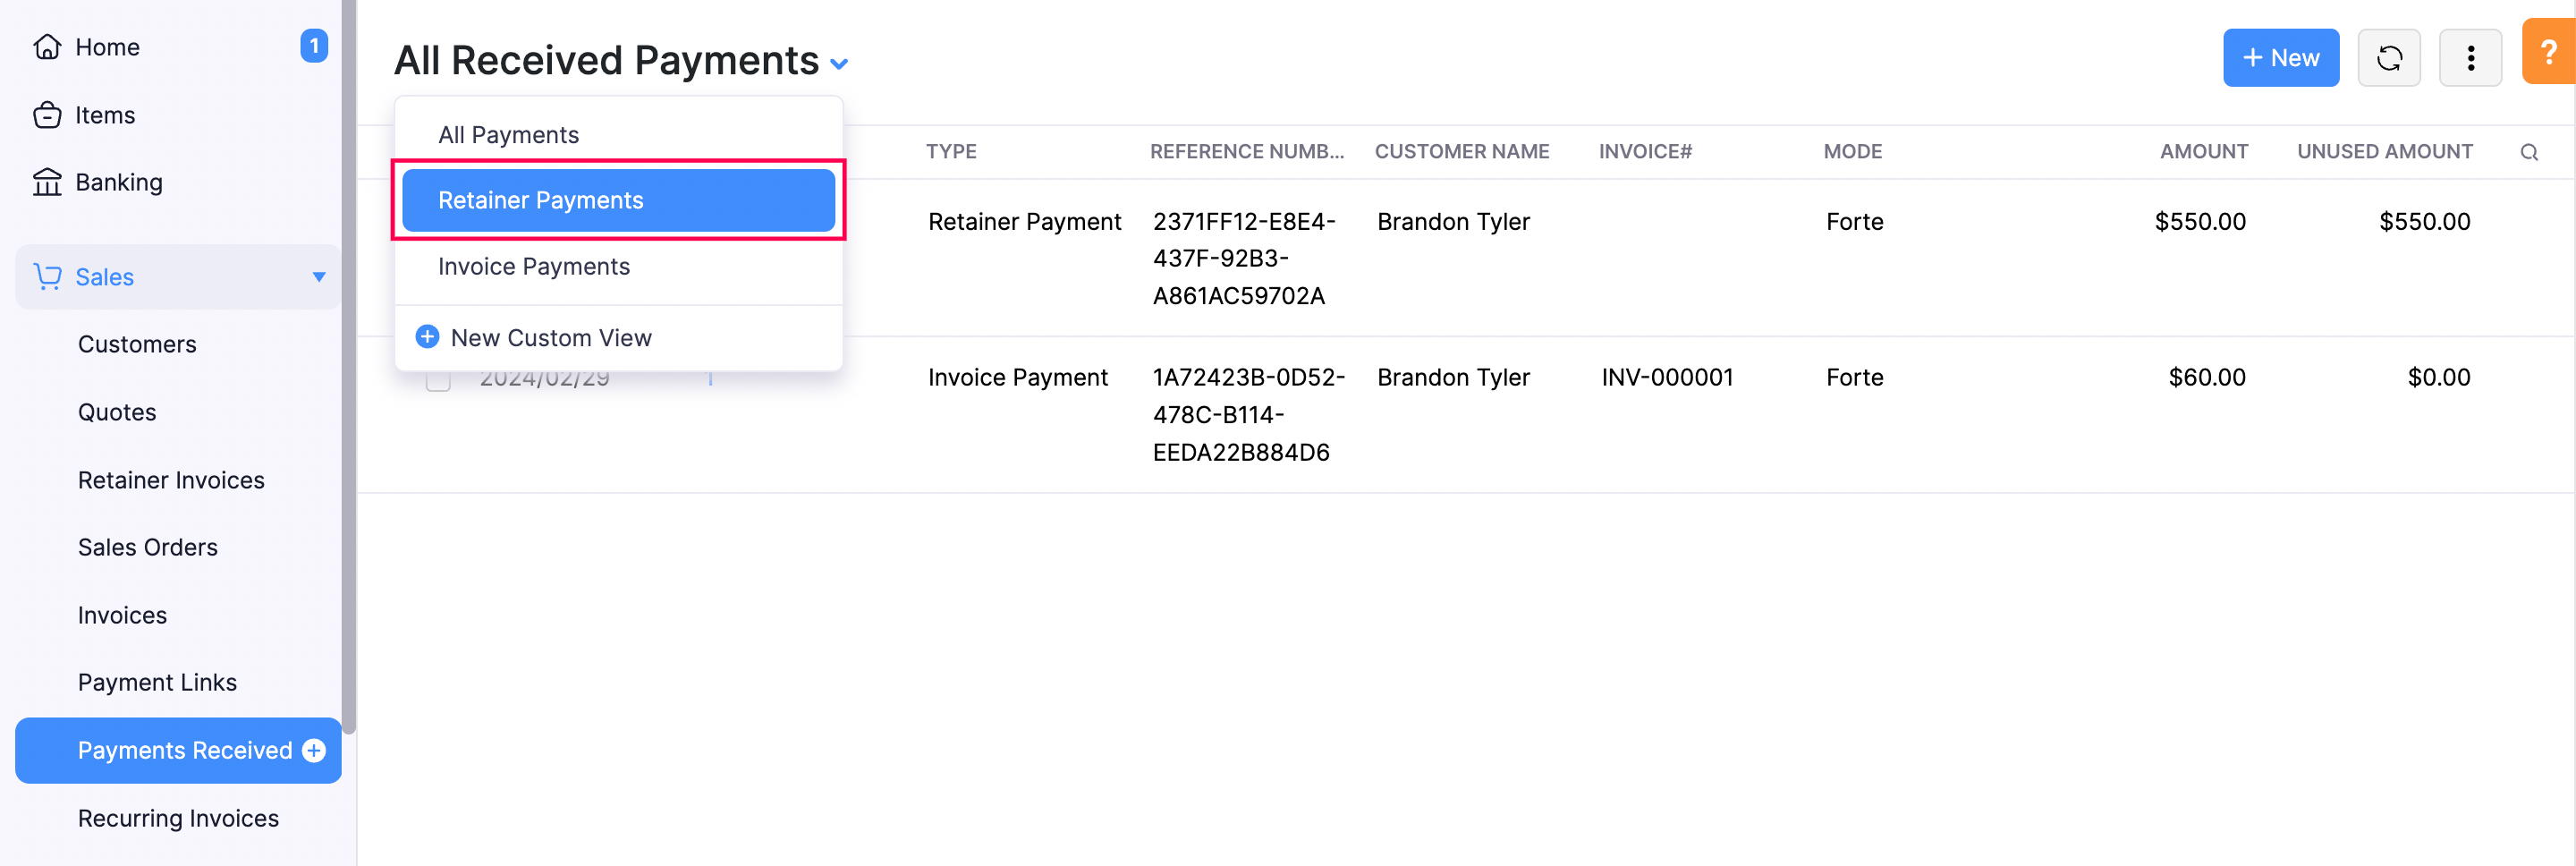
All the payments recorded for retainer invoices will be listed here.
c. Payments Received Report for Retainer Invoices
You can generate a report showing a summary of the retainer payments received from your customers.
1. Click Reports on the left sidebar.
2. Click Payments Received under Payments Received.
3. Click Customize Report.
4. Select Retainer Payment in the Transaction Type dropdown.
5. Click Run Report to view the report temporarily. You can also save this report for future use by clicking Save as Custom Report.
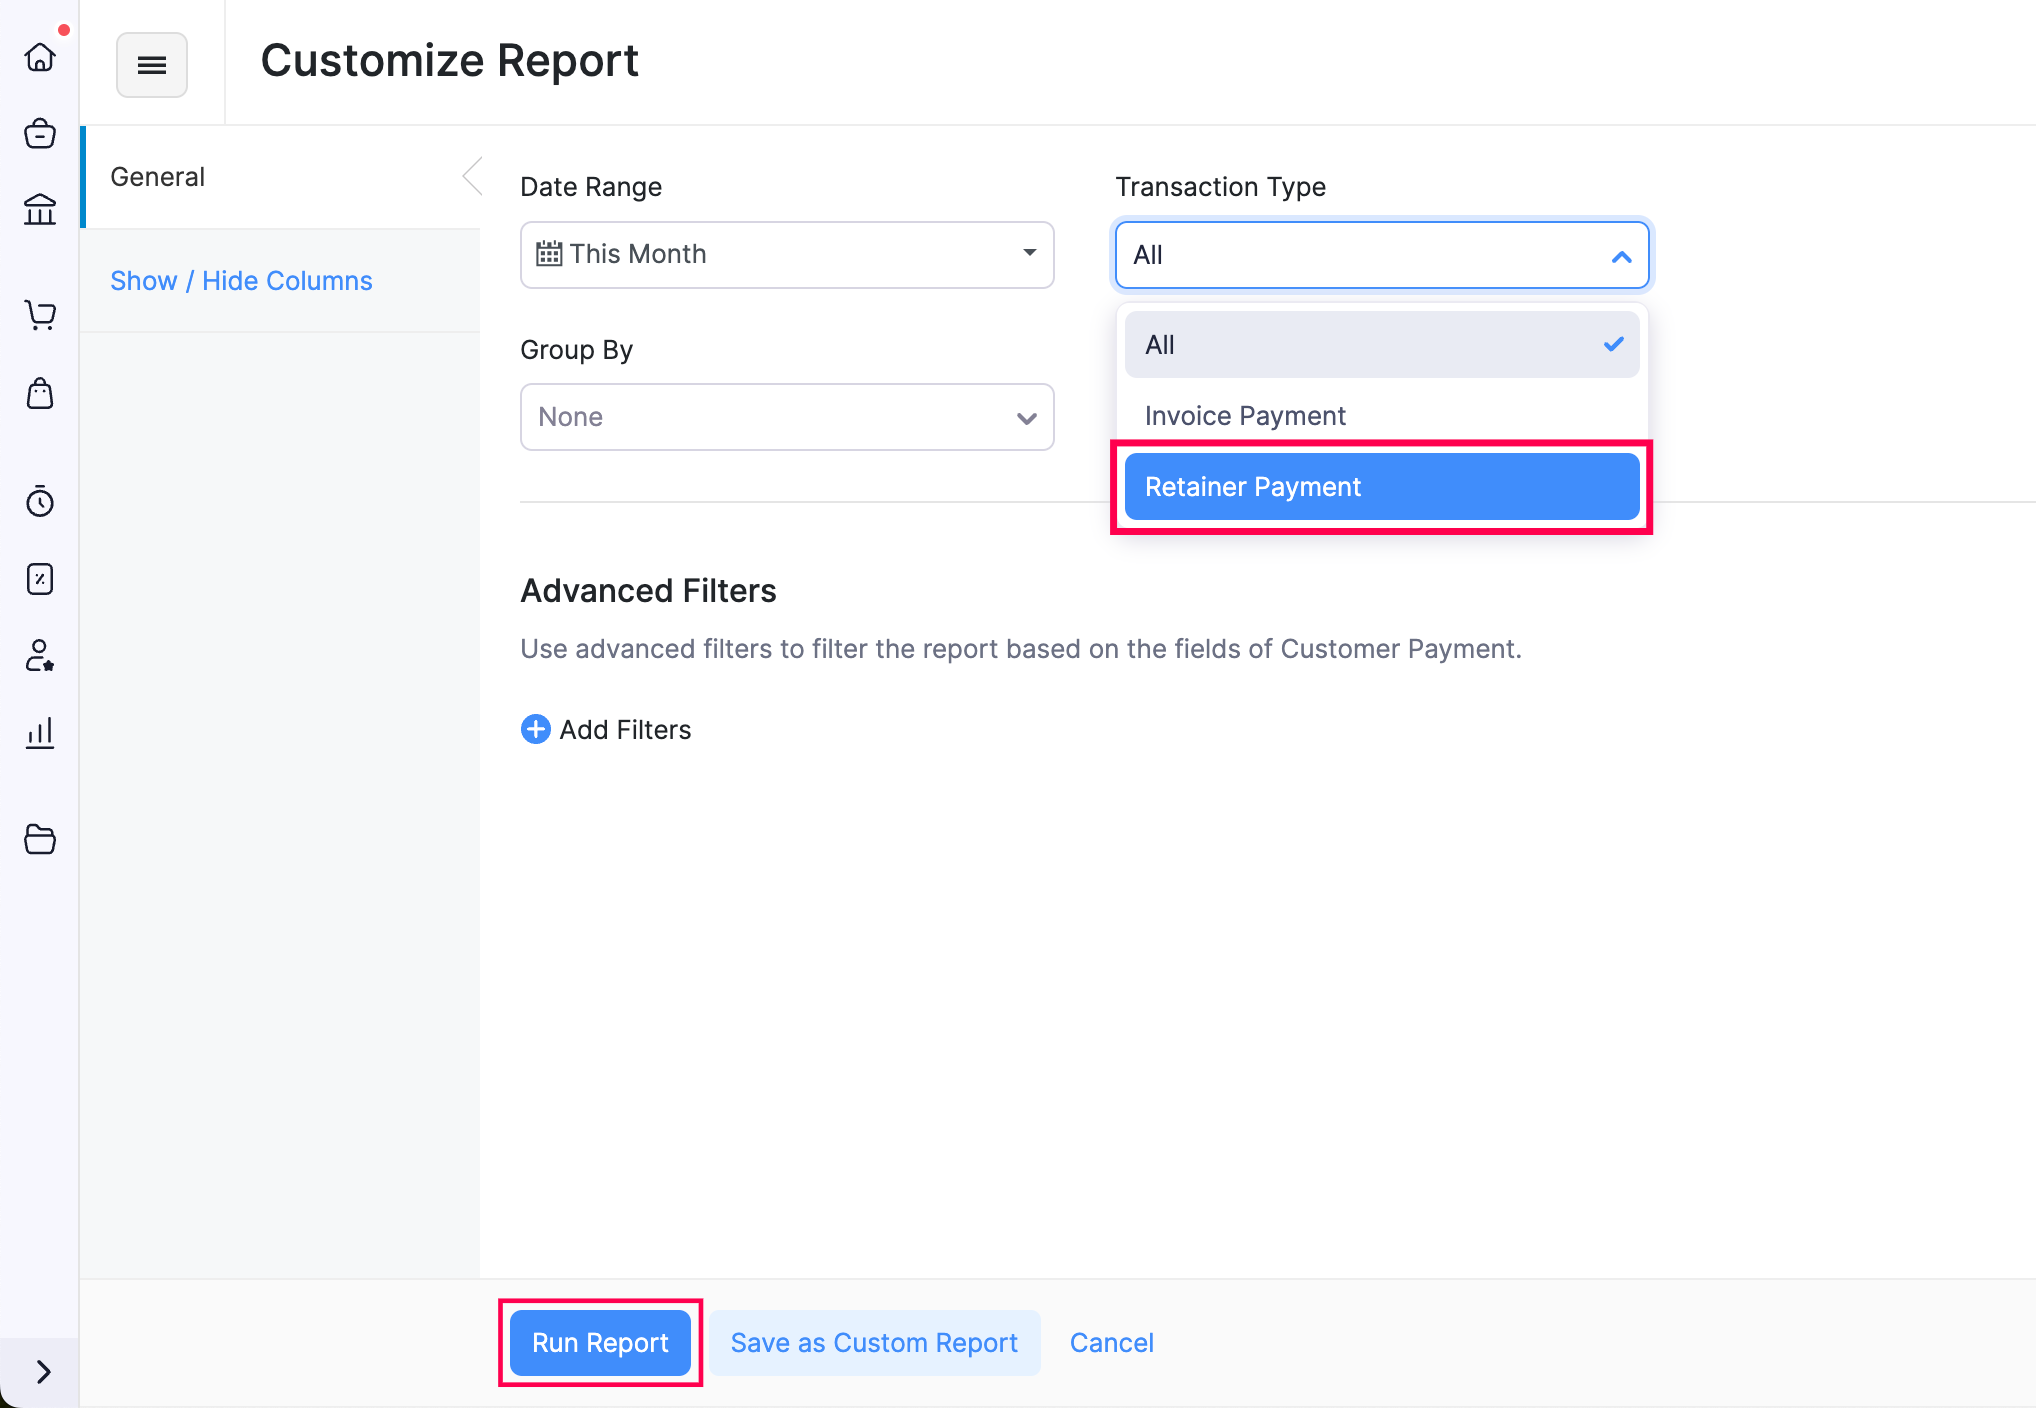
Once you generate the report, details such as the customer name, total amount received, and payment mode will be displayed.
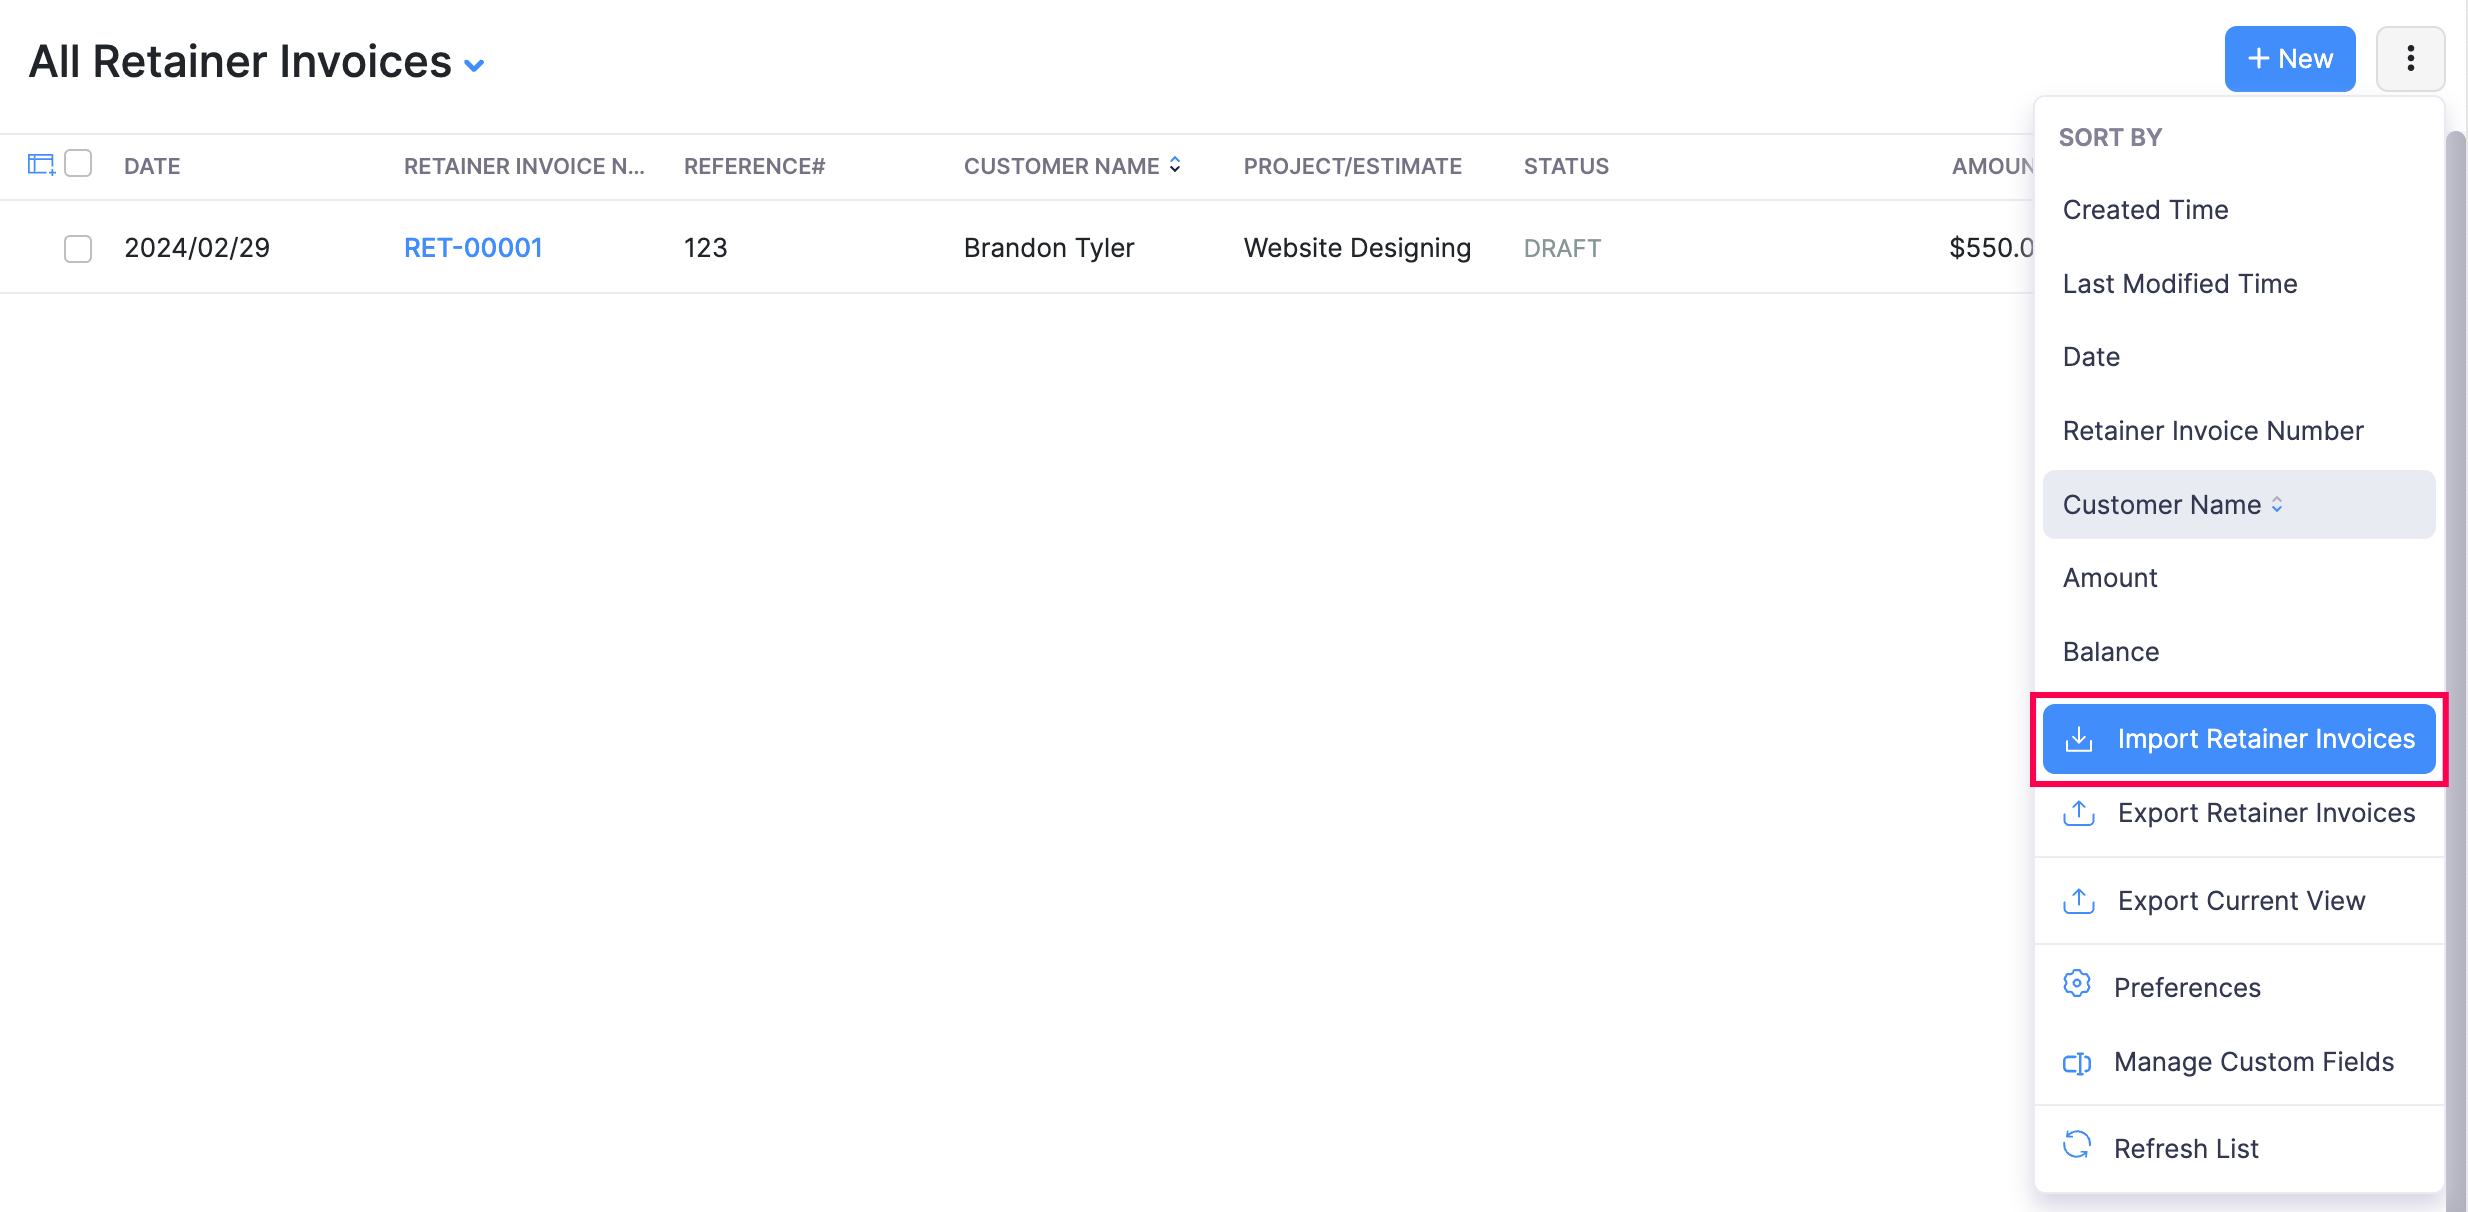
Import Retainer Invoices
If you have a list of retainer invoices in a spreadsheet, you can import them into Zoho Books.
To import retainer invoices:
1. Click Retainer Invoices under Sales in the left sidebar.
2. Click the More icon in the top right corner.
3. Select Import Retainer Invoices.
4. Click Choose File to upload your file. You can also download a sample csv file or sample xls file and compare it with your file to ensure you have the file perfect for import.
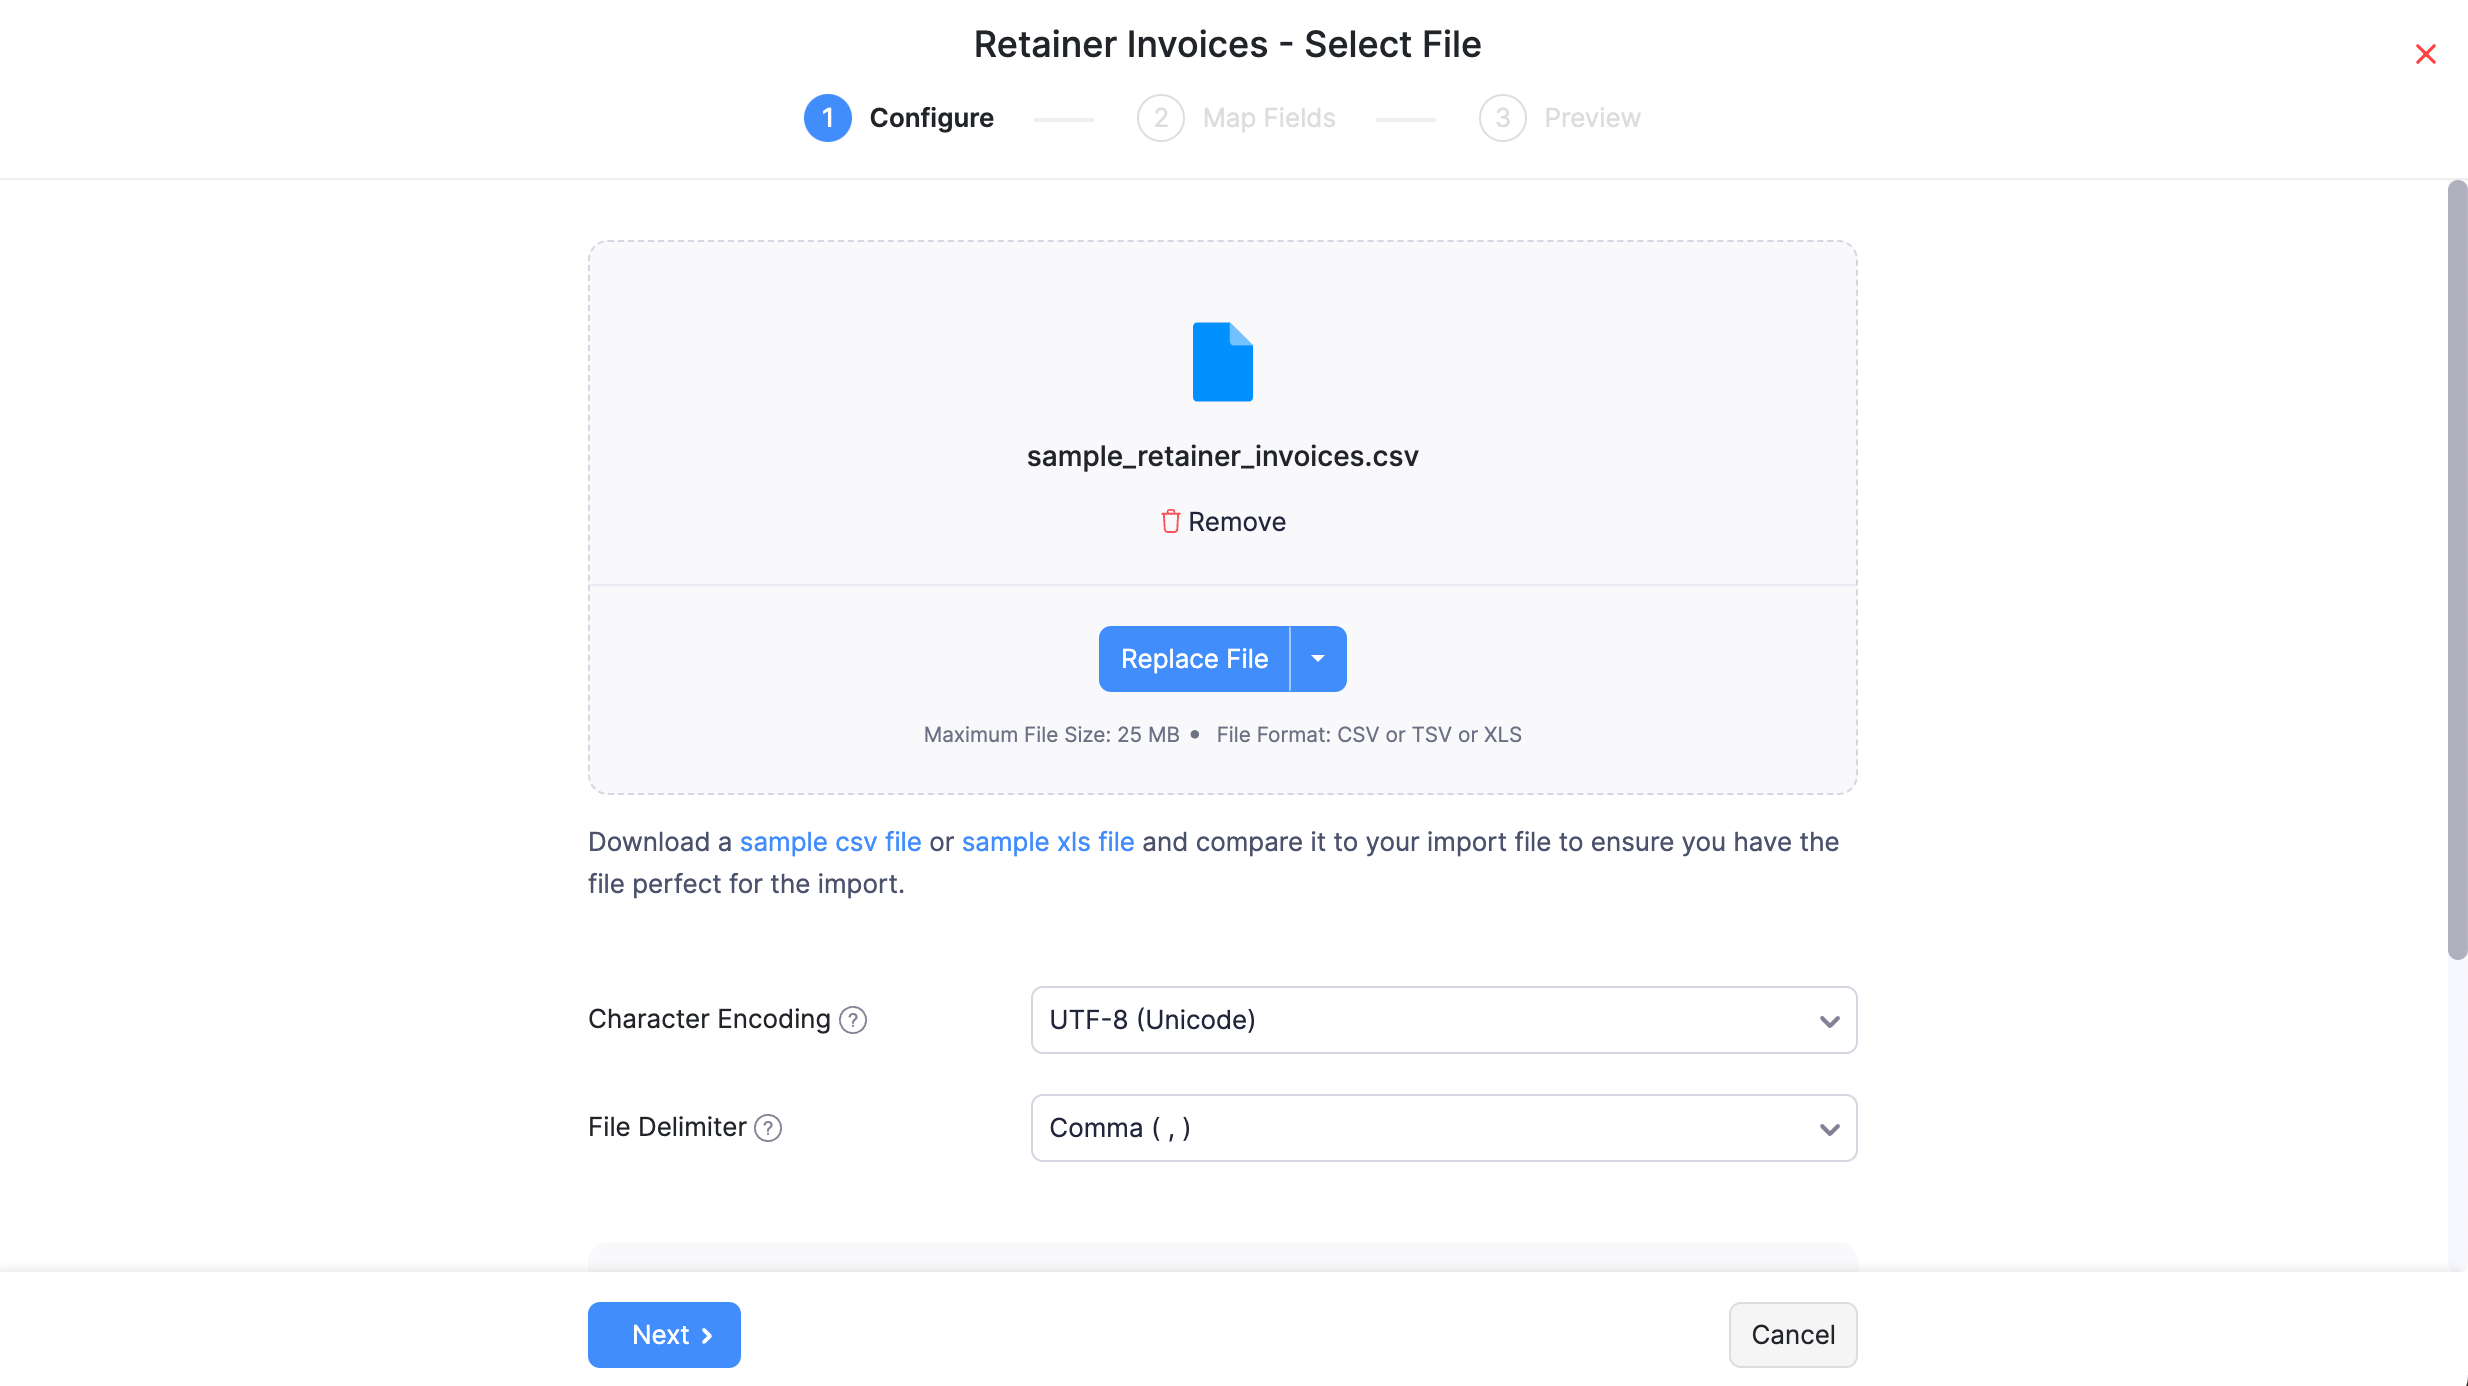
Insight:
- Maximum file size: 25 MB
- Supported file formats: CSV, TSV, and XLS
5. Choose the Character Encoding and File Delimiter for your file.
6. Click Next.
7. Ensure all fields are mapped correctly in the Map Fields page.
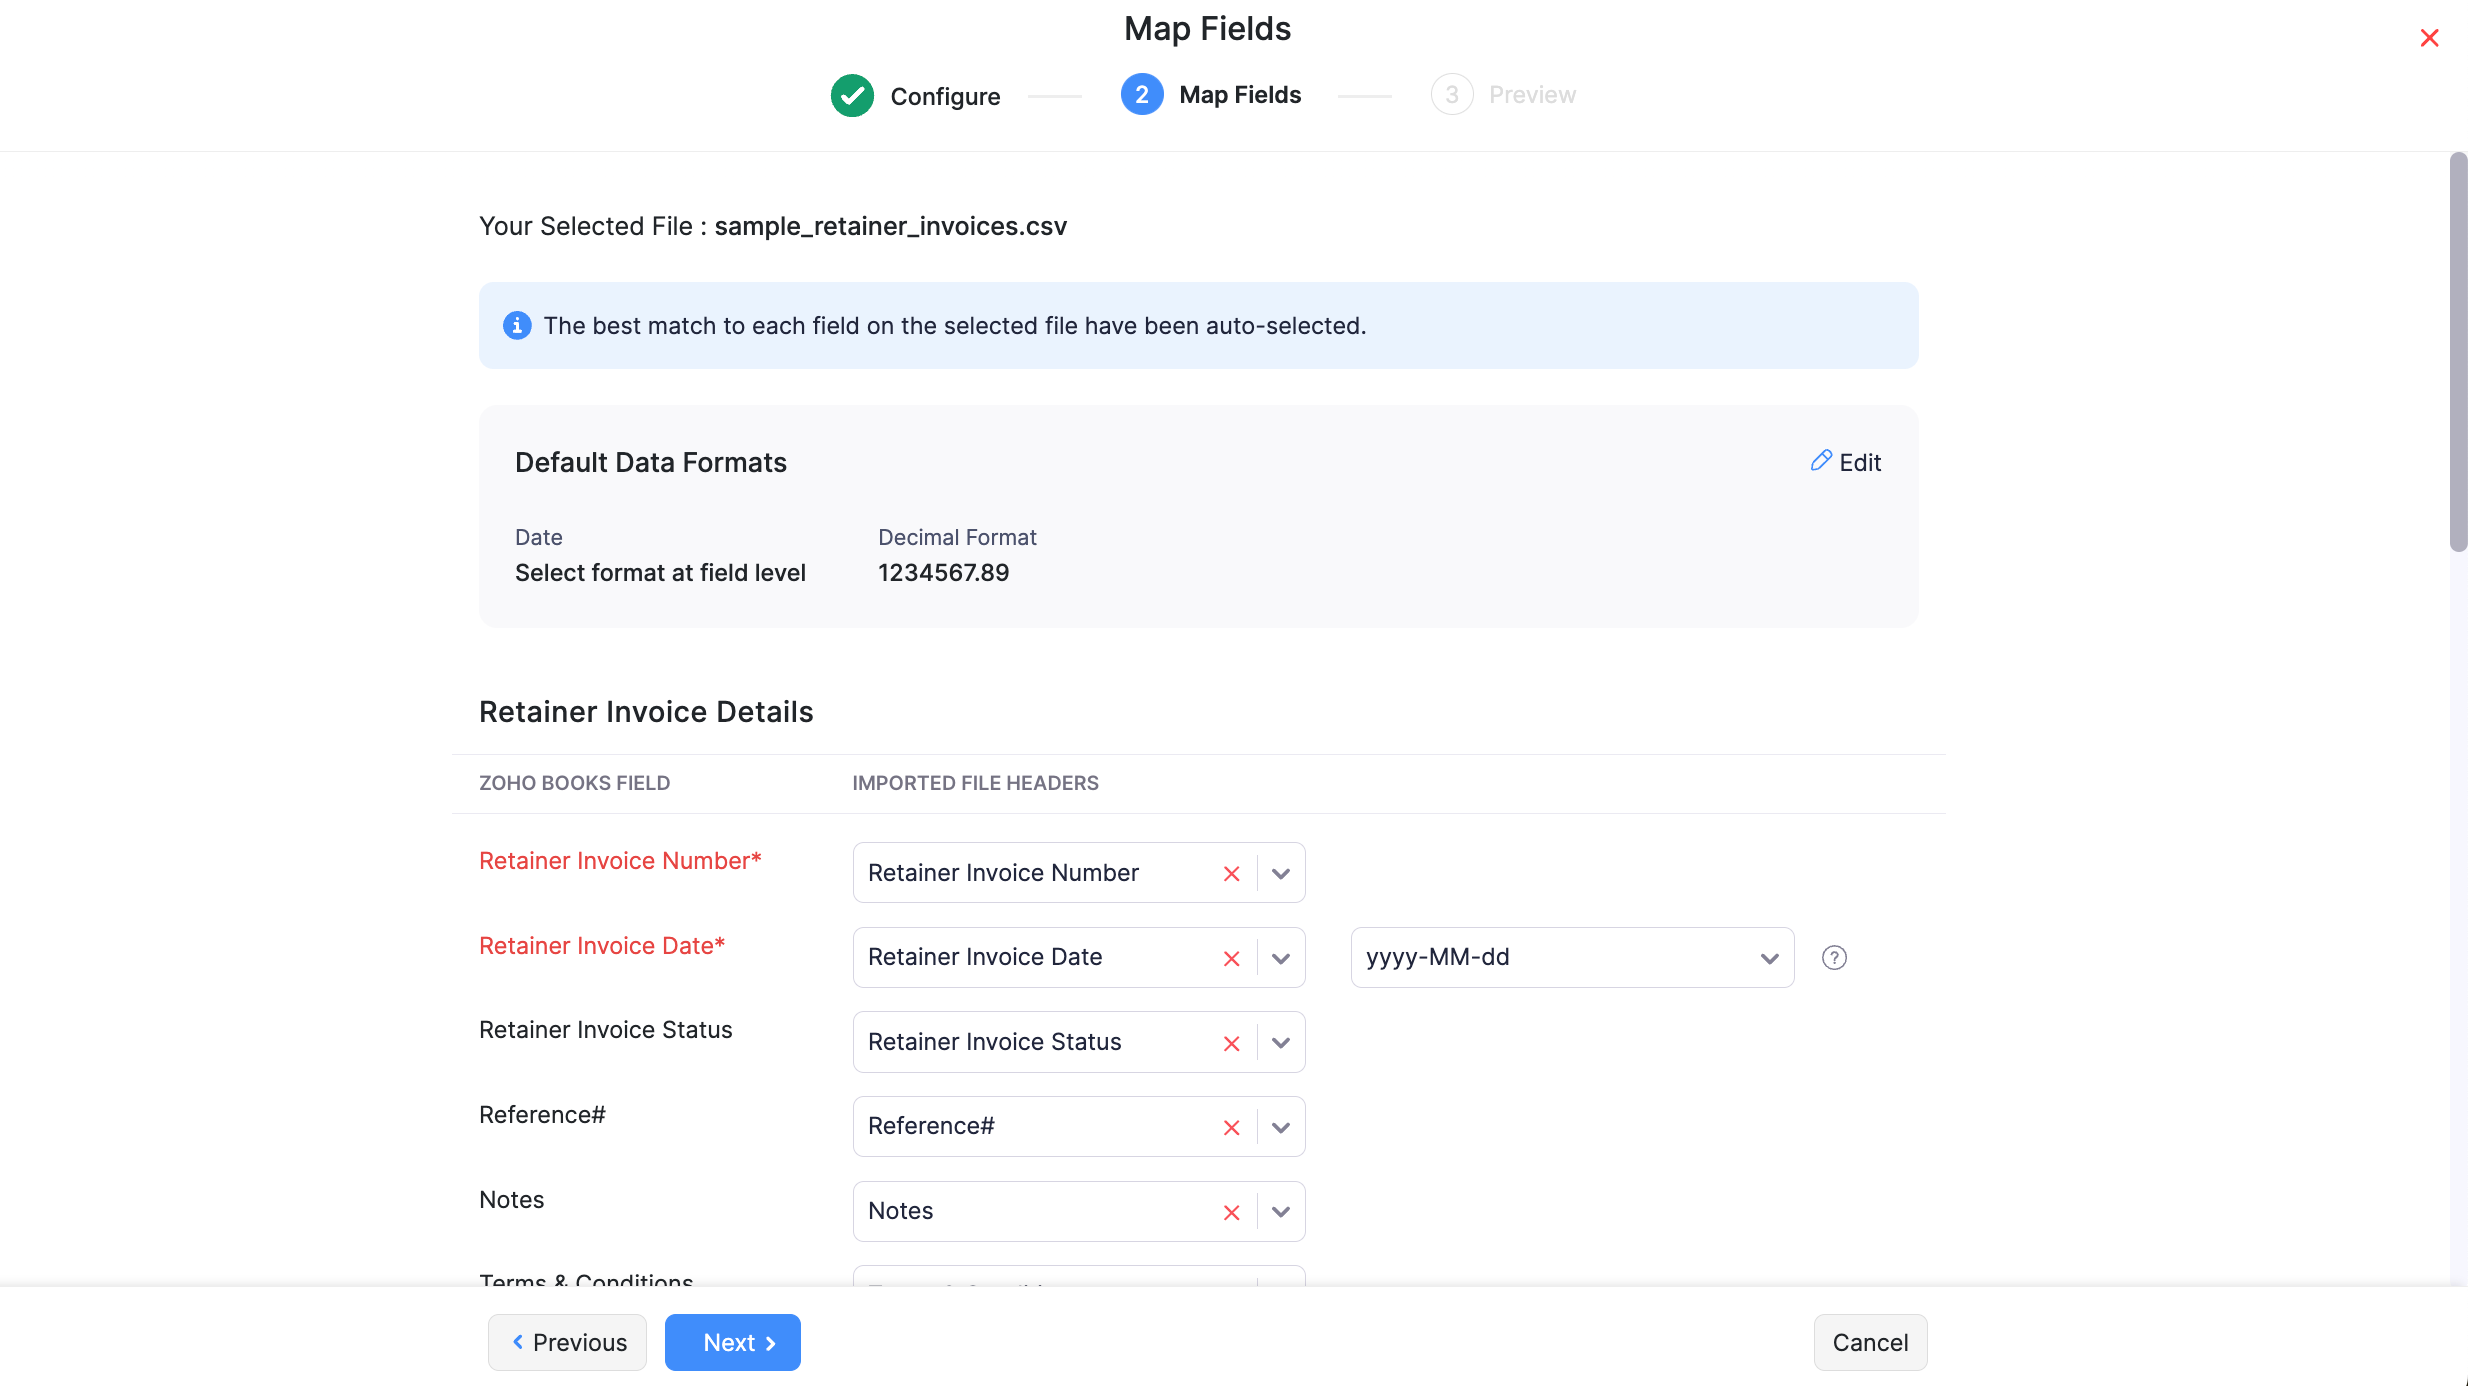
Pro Tip: If you want to save these preferences and use a similar import format next time, check the box Save these selections for use during future imports.
8. Click Next.
9. Click Import in the Preview page.
Insight: Zoho Books will auto-match the file headers of the imported file to the closest matching field in Zoho Books. You can manually edit each field to match the headers and save these preferences. On proceeding, Zoho Books shows you any unmapped field you may have left out or could not match. You can map these by adding new fields with matching headers and importing the file again.
 Yes
No
Yes
No
 Thank you for your feedback!